Electronic Proof of Delivery
- For the logistics industry and any company with delivery system, documents like the Proof of delivery (POD) are critical. A POD functions very much like a receipt except that it is to prove that a delivery has been completed
- Electronic Proof of delivery (or e-POD for short) is the digital form of the paper POD, which still retains every details of the its traditional form, including the signatures of the parties participating in the delivery
- In this article, we will be showing you how to set up and use the e-POD feature within Abivin vRoute
Activate the Send Email feature
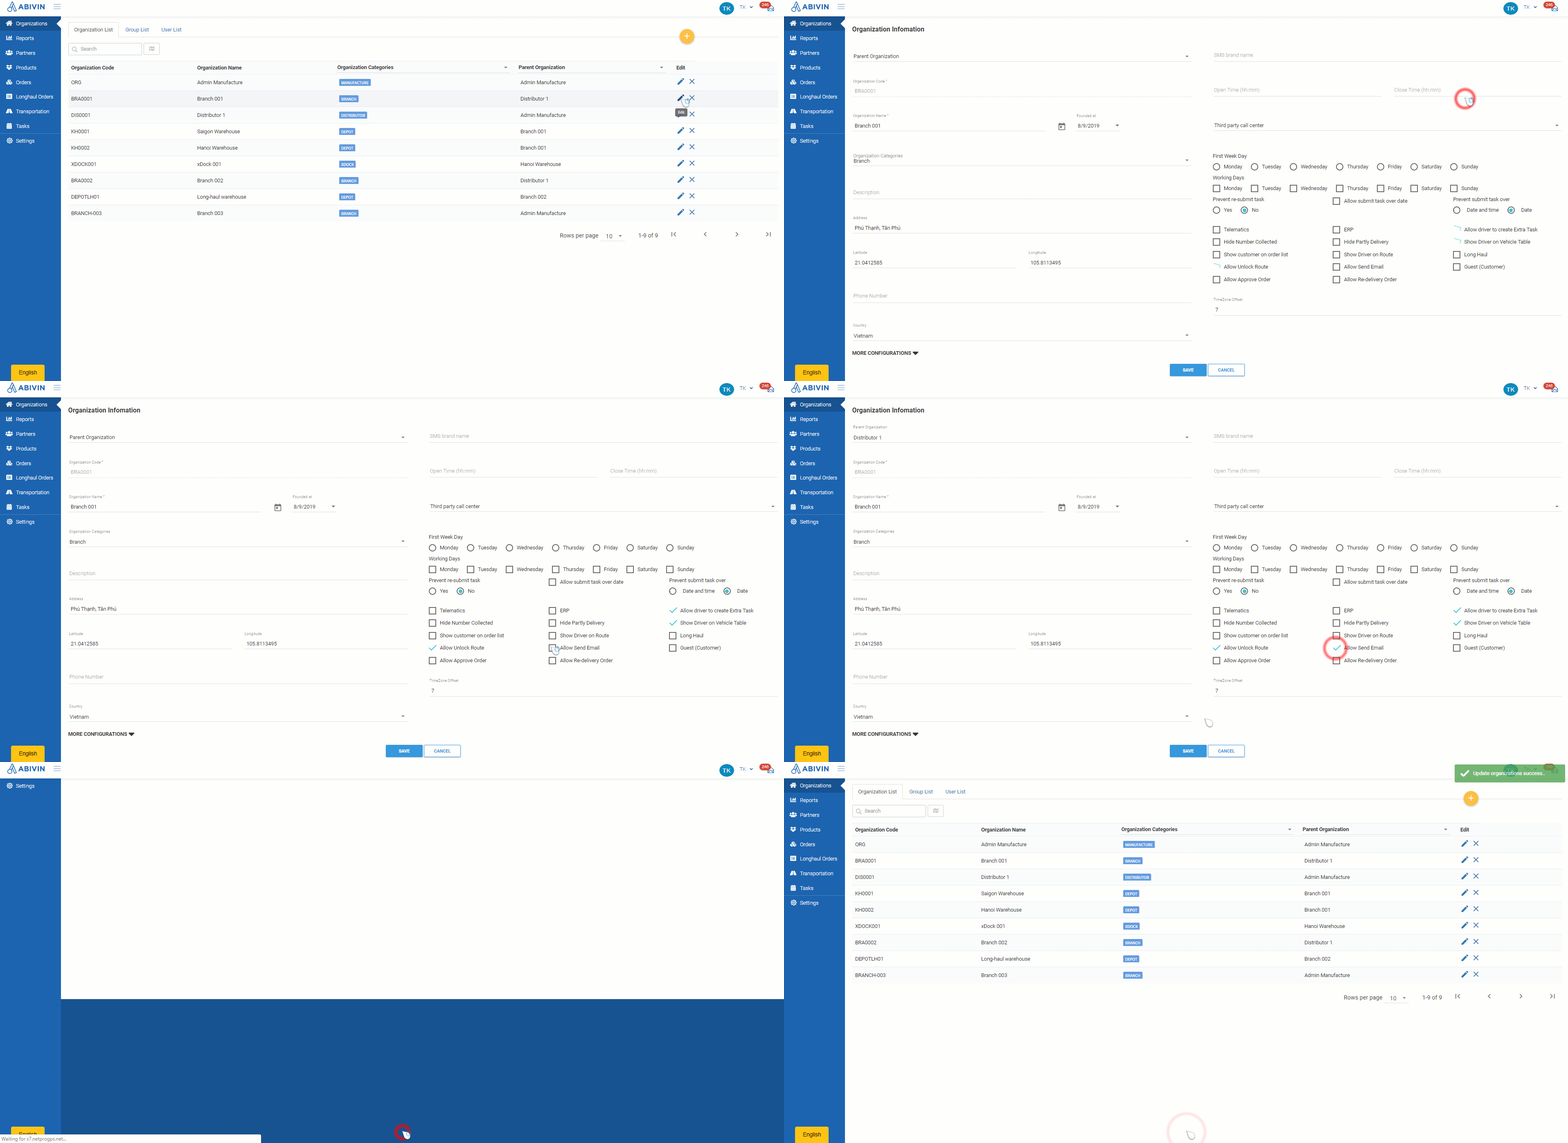
- Navigate to Organizations > Organization List tab
- With the Branch you wish to enable the send email feature, click on Edit icon
- In the Organization Information window, tick the check box next to Allow Send Email. When the check box turns into a check mark symbol , it means the Email sending feature has been activated
- Click on Save button at the end of the screen to confirm the change
- From now on, you will be able to send emails to customers, to which the e-PODs can be attached
- If you no longer want to send emails to customers, revert the steps above
Add email addresses to the recipient list
Next step, you need to add email addresses to the recipient list, so that they can receive delivery note emails once the delivery orders are completed
- Navigate to Partners > Customer List tab
- On the rows of customers who want to receive emails, click on Edit icon
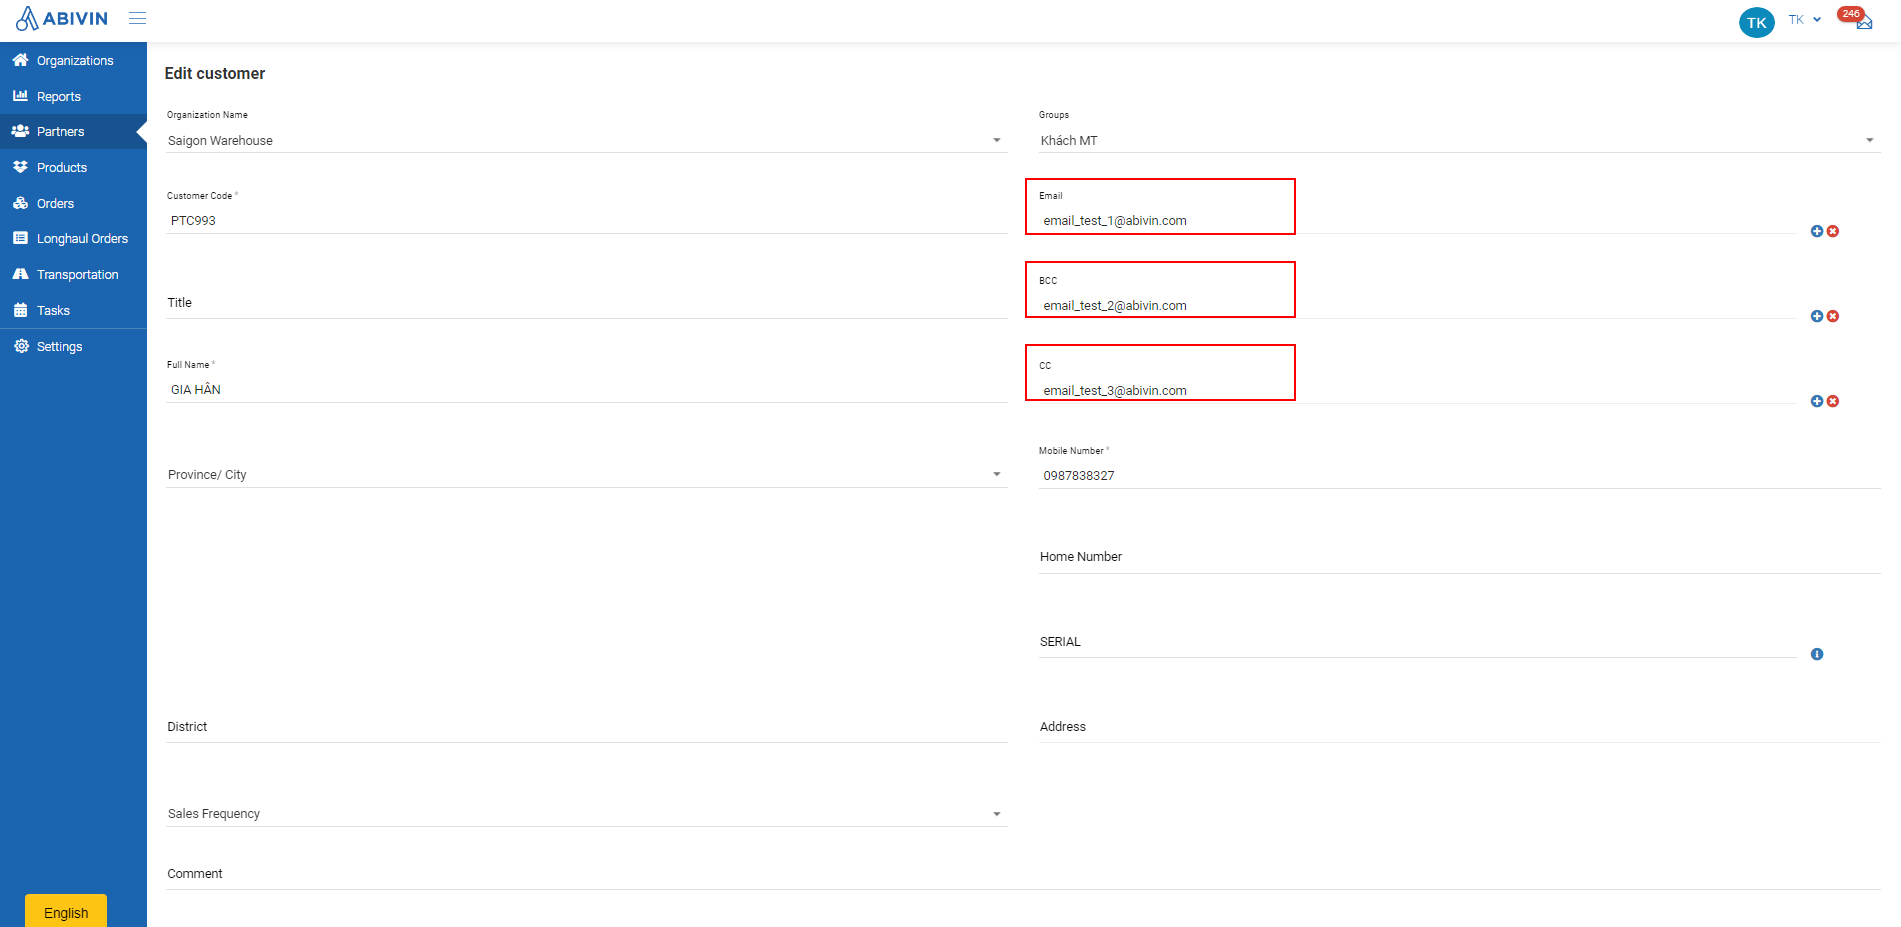
- On the Edit customer screen, type into these 3 fields the email addresses of whom the customer requires the delivery note emails sent to:
- Email: Type into this field the main receiver address of the emails
- CC: Type into this field the email address of the person/organization who will also receive copies of the emails sent to the main receiver
- BCC: Type into this field the email address of the person/organization who will also receive copies of the emails sent to the main receiver, but remain hidden to other receivers
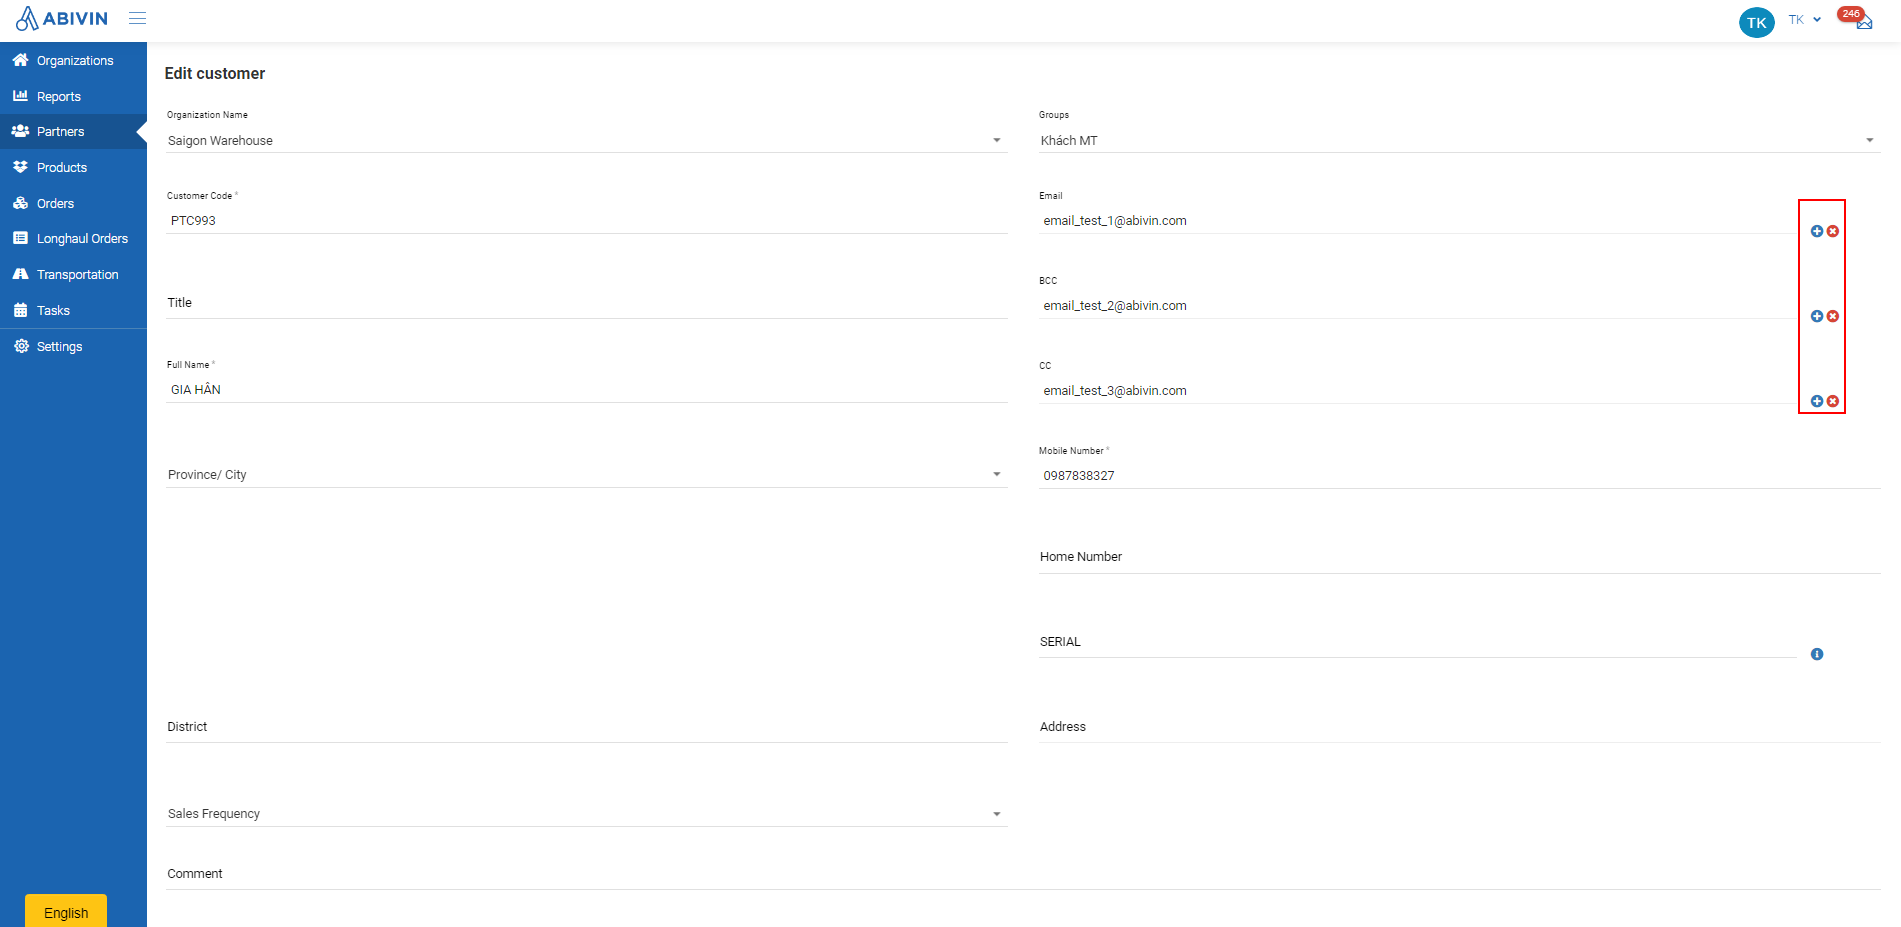
- Each of the fields can contain only one email address. However, you can add additional email addresses for each of the fields above by clicking on Add new email icon, then input new email addresses like above
- To delete certain email addresses from the receiving list, simply click on the Remove icon next to those email addresses
Integrate e-POD form to the Mobile app task actions
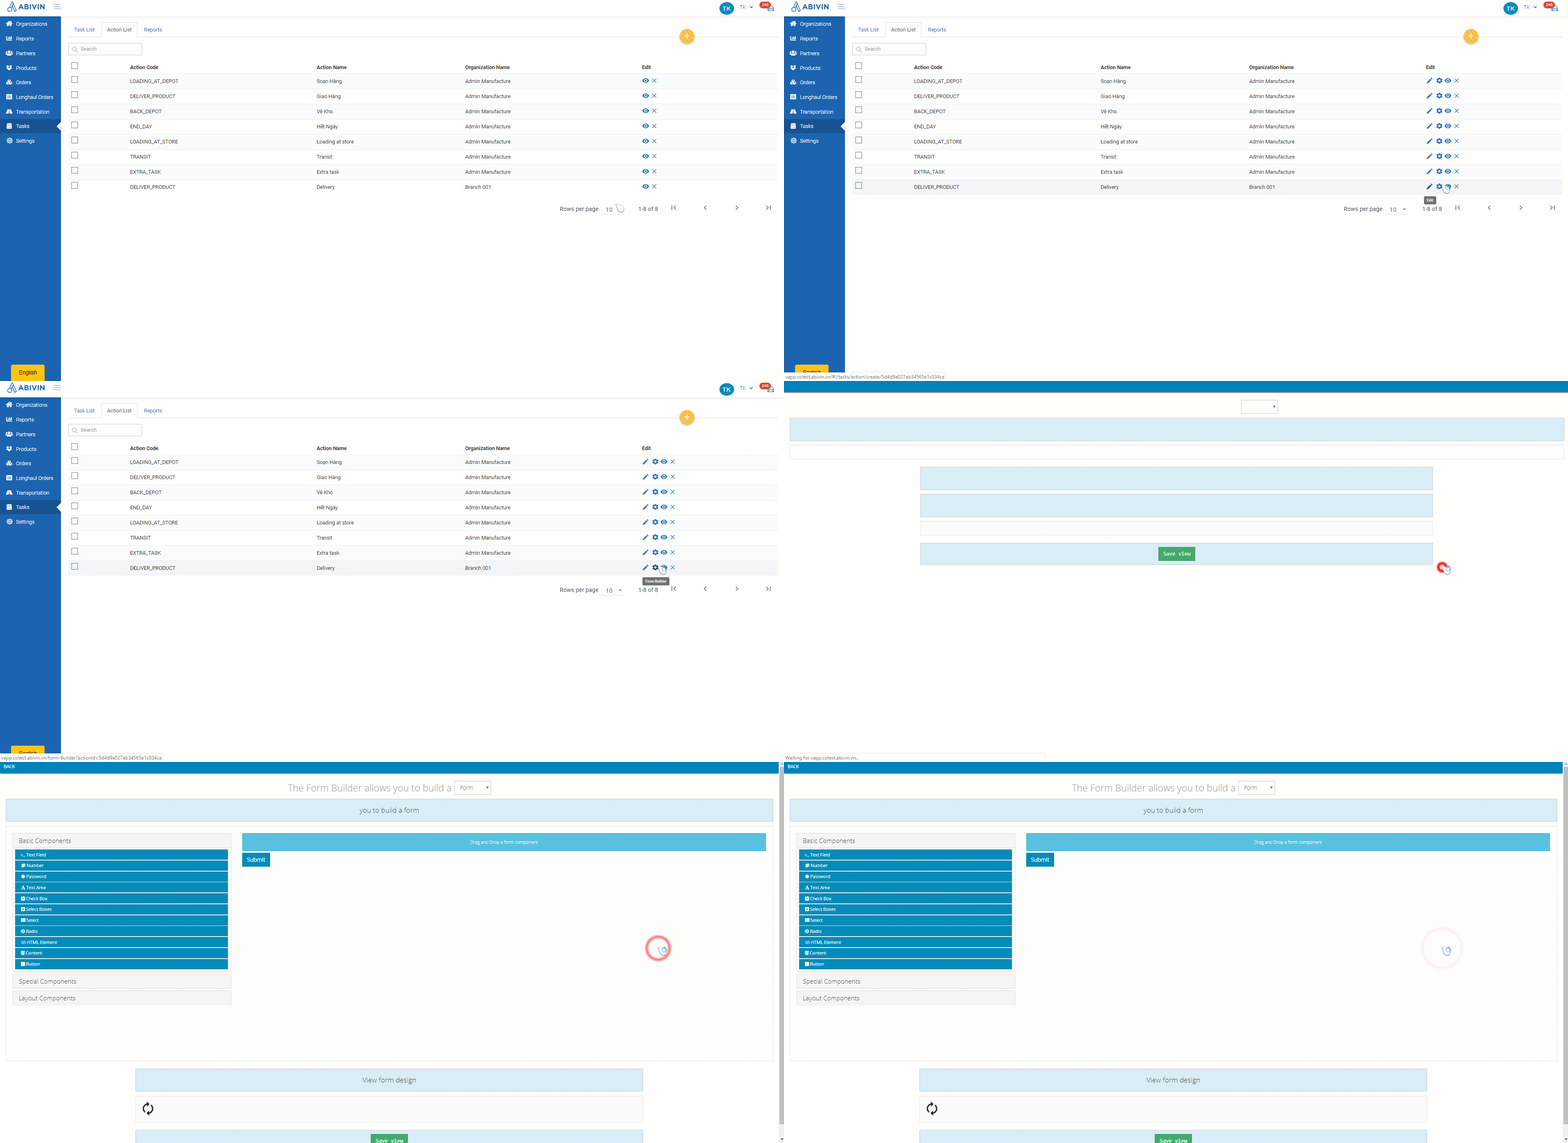
- Navigate to Tasks > Action List tab
- On the Action list, click on Form Builder icon on the rows of the actions you want to integrate the e-POD form, on which the drivers, depot dispatchers, customers or any involving parties can write signature digitally
- You will be directed to the Form Builder screen
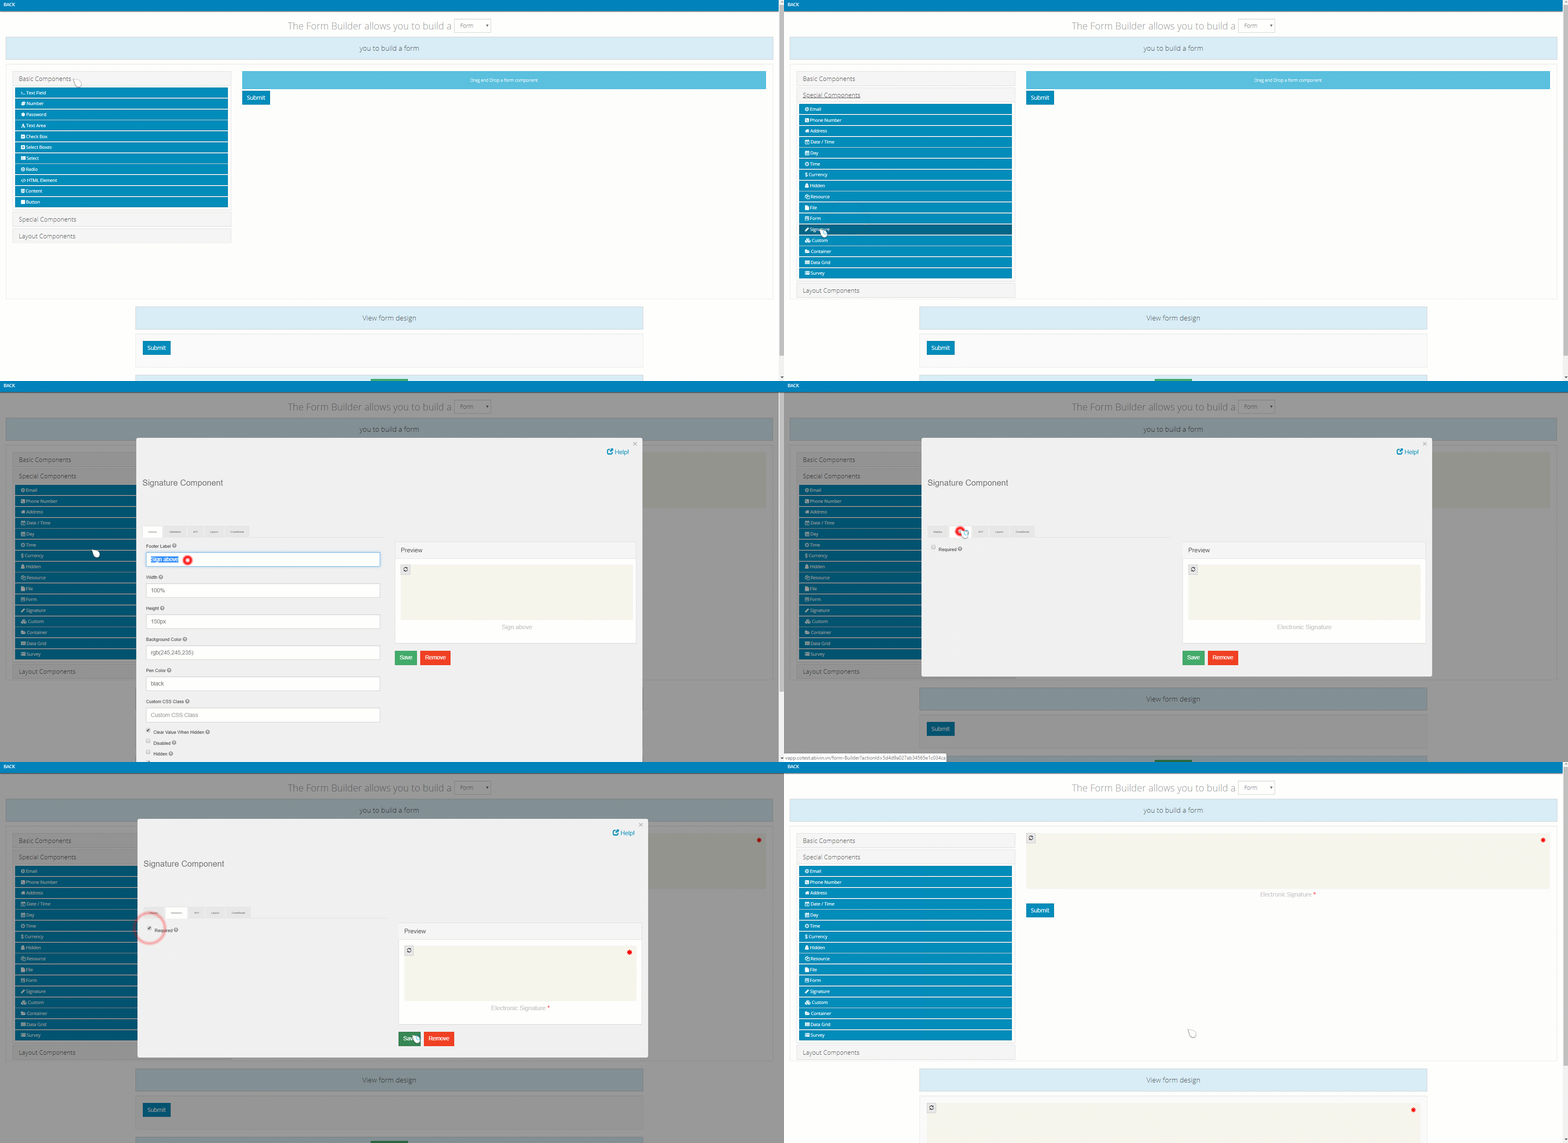
- Click on Special Components panel on the left side, then drag the Signature component from the drop down menu onto the space right side of the screen
- You will be directed to the Signature Component setup screen
- Here, on the Display tab, type the desired name of the signature component into the Footer Label field. For example, if you type Electronic Signature, then on Abivin vRoute Mobile app, the signature area will display as Electronic Signature on Mobile app screen
- Next, click on Validation tab. If you click on the Required check box, signature will be compulsory to be able to submit the mobile task. If this checkbox is not ticked, then the signature is optional, the mobile task can still be submitted without having signature
- Click Save to confirm creating the signature component
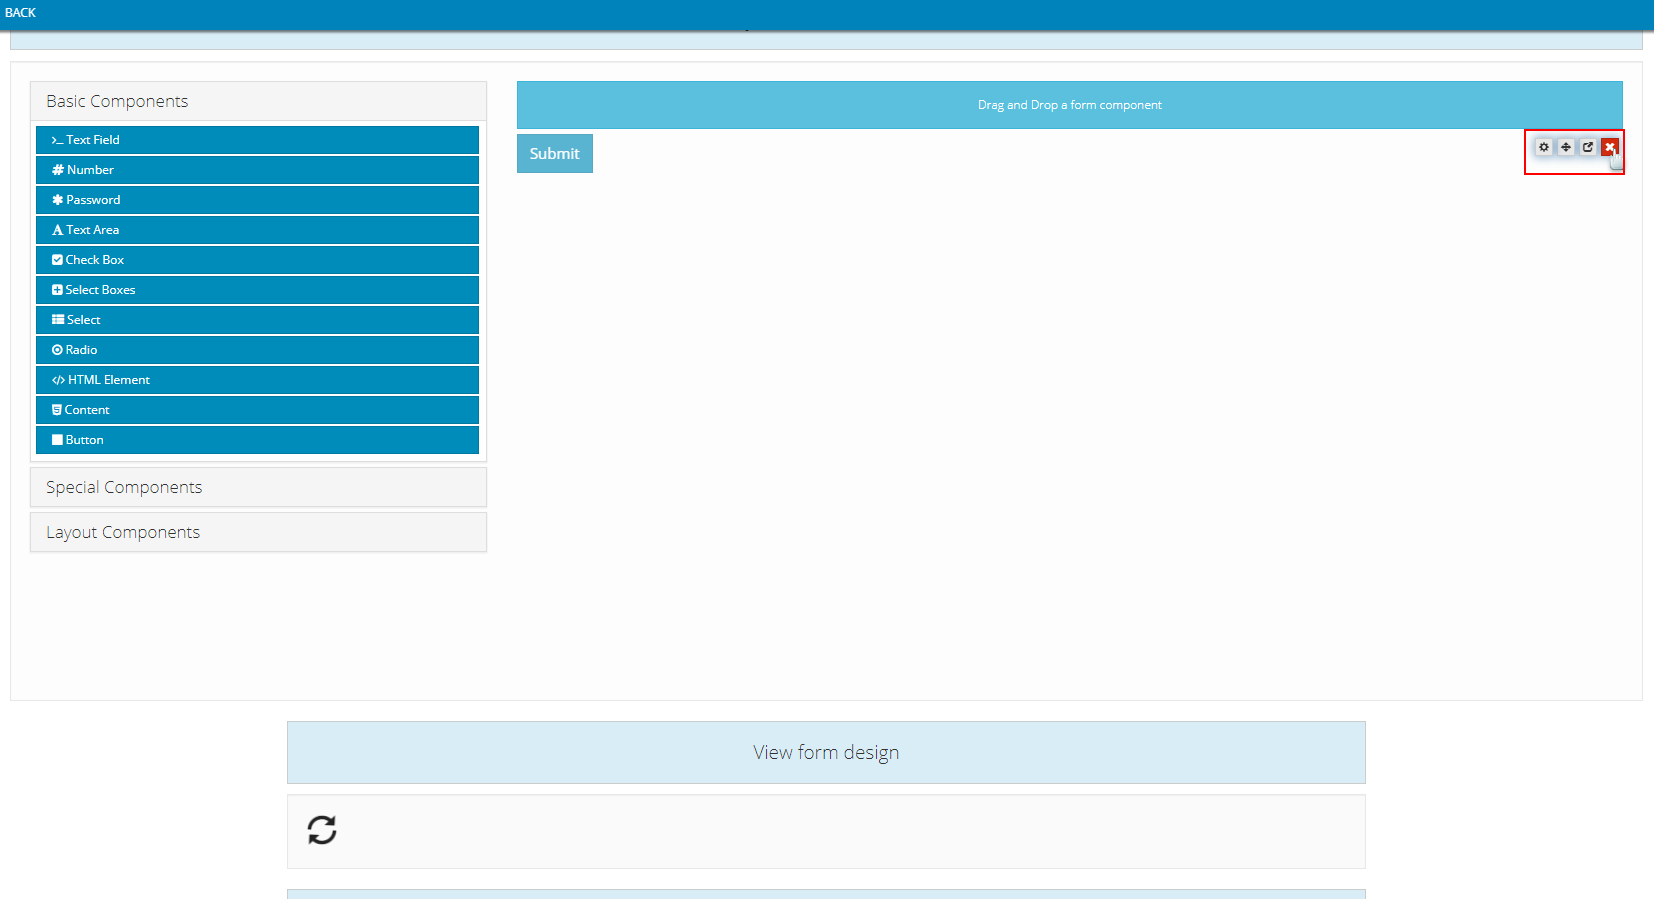
- You will see a blue Submit button below the signature component. Remove it by hovering on its, then clicking on the icon (This step is important, if you don't do it, you will not be able to submit tasks on mobile app later on)
- Scroll down the Form Builder screen, then click Save View to finish integrating the e-POD form to the action on the Mobile app
- The drivers can now perform e-POD task on their mobile apps
Automatically send delivery note emails
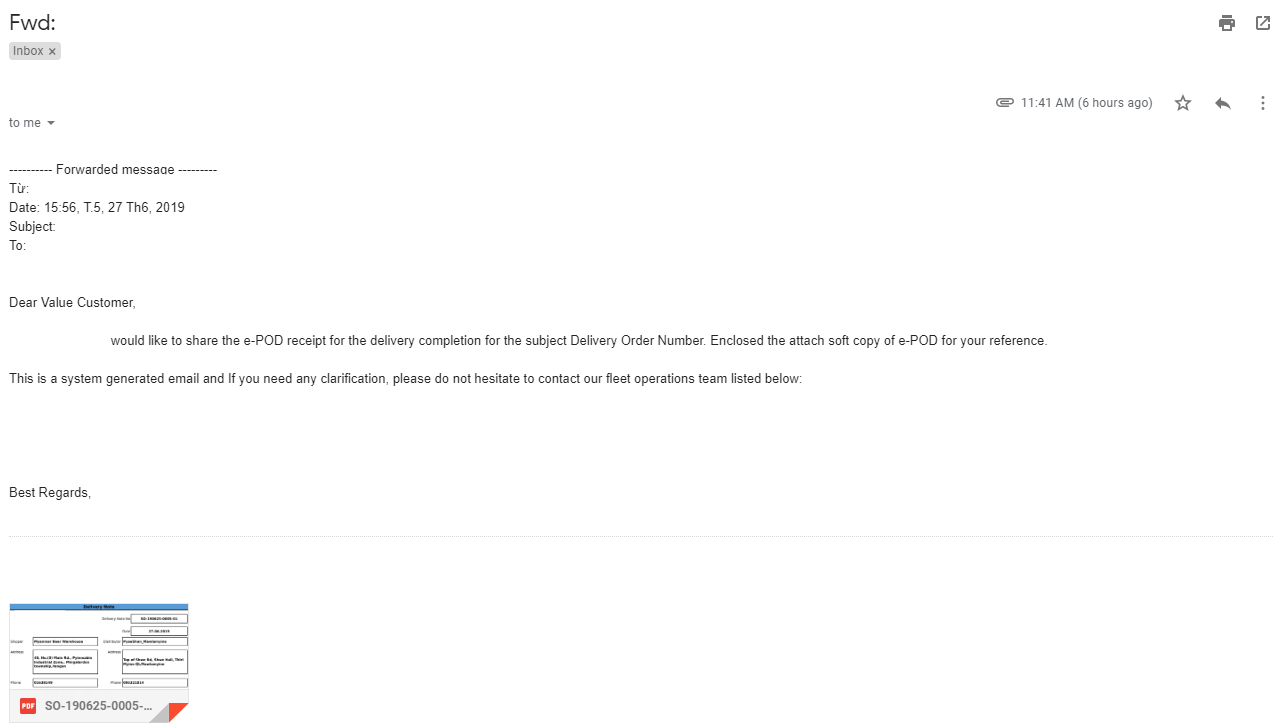
- After each time the delivery man successfully submits the mobile task with digital signature feature enabled, in which the customer has also digitally signed, an automatic email will be generated and sent to the recipient list set up above
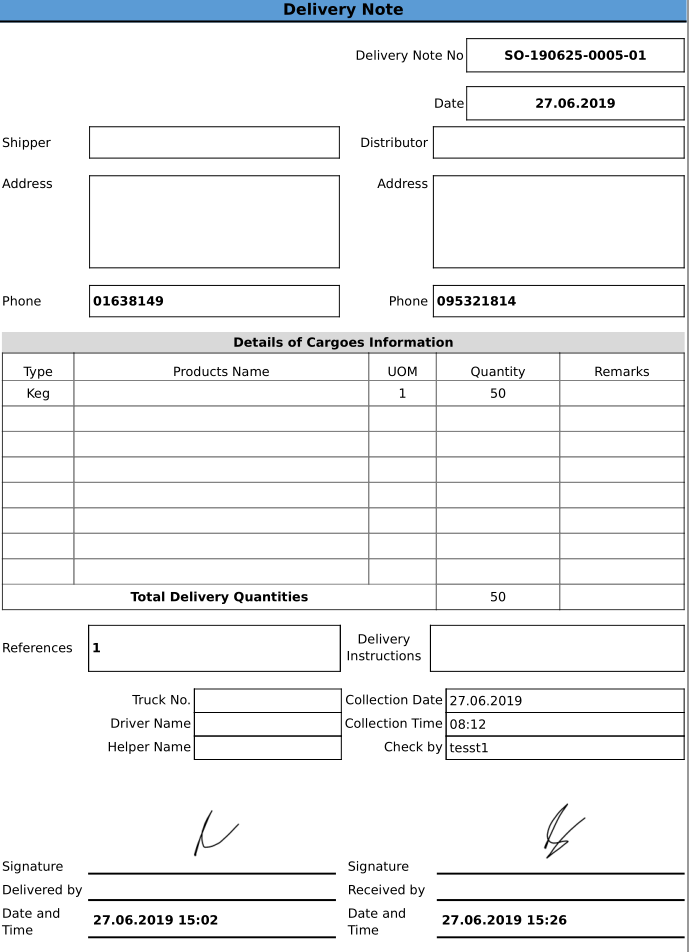
- In the email, the e-POD will be attached in the form of a downloadable PDF delivery note. Inside the delivery note, the information of the order, along with the signatures of the involved parties will be present
If the customer doesn't sign upon receiving the products, the automatic delivery note email will not be generated and sent
The content of the automatic email can be freely customized to your requirements
Manually send delivery note emails
- There might be scenarios when the internet connection is not stable at the time the delivery orders are completed, which lead to the automatic delivery note emails might not be able to be generated and sent. In such cases, the warehouse manager can manually send emails to the recipient list to make sure they receive the delivery notes
- Navigate to Tasks > Task List tab
- Filter out the completed orders, and the delivery tasks of those orders, by clicking on Status column, choose Completed, then proceed to click on Action column, choose Delivery
- The warehouse managers can check the signatures by clicking on icon under Edit tab. They can download the PDF delivery note file by clicking on Download PDF button under the signatures
- Click on Resend email icon under Edit tab. This action will send the delivery note emails to the recipient list
Generate Proof of Delivery When Creating Orders
- During the Order creation process, you can also generate and download a copy of the Order's Proof of Delivery in the form of a PDF file (Without customer signature, since the Order has yet to be delivered)
- First, you need to enable the Allow Download Delivery Note configuration at the Branch (Located in the More Configuration > System section)

- After that, you can proceed to create Sales Orders as usual
- If you create Sales Orders using Webform, then after you have input the necessary information of the Order (Depot, Customer, Products, Order Date), hover your mouse over the Create button. A menu will pop out showing two options: Create and download delivery note and Create
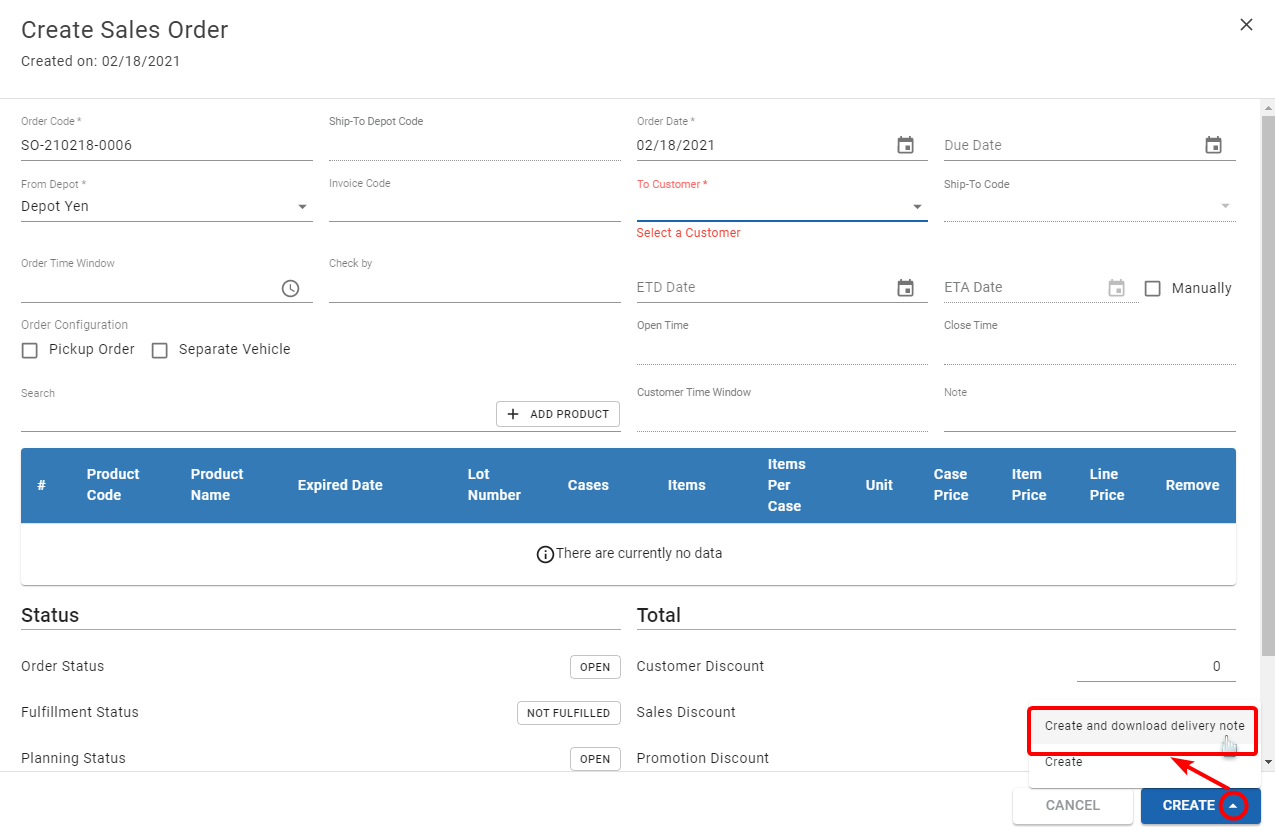
Illustration (English)
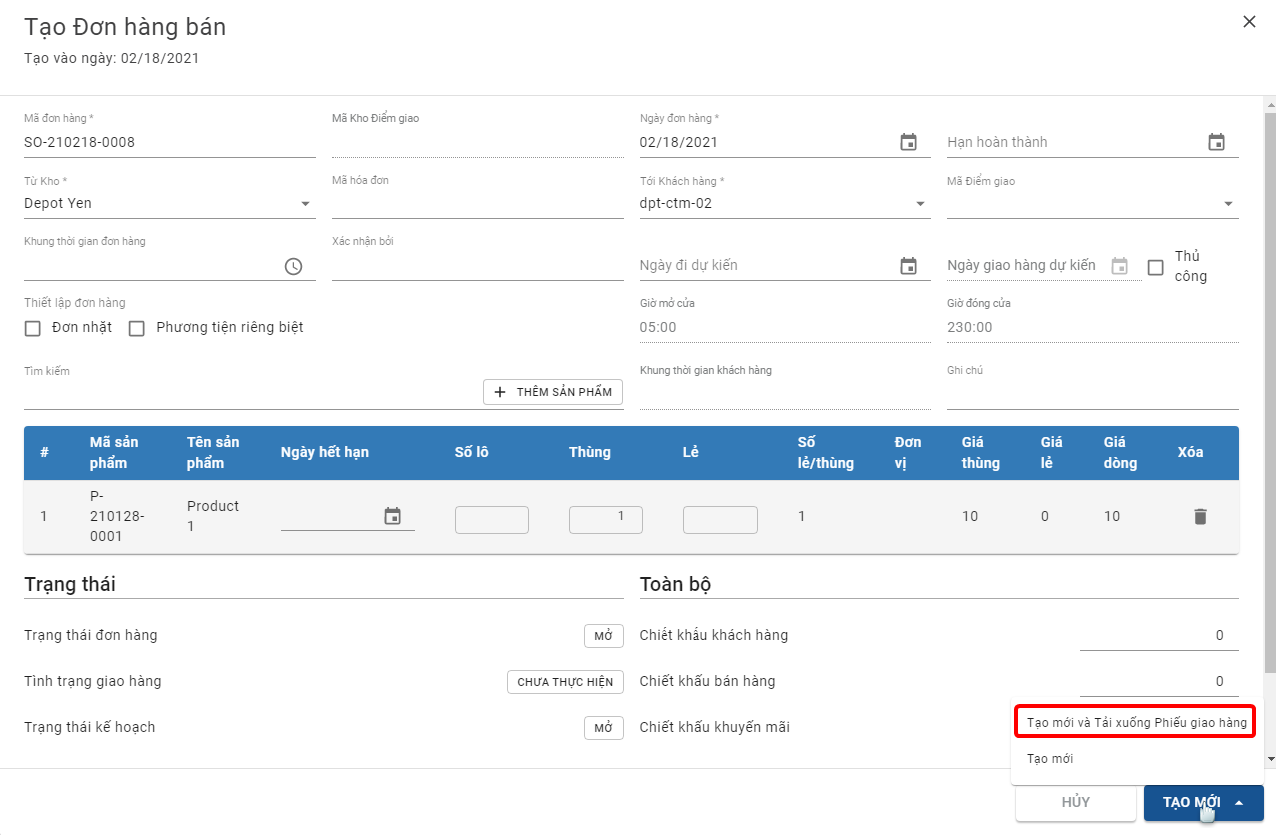
Illustration (Vietnamese)
- If you import Orders using the Excel file, you can also generate the Delivery Note PDF file by clicking the Edit button of the Order, then, on the update form, hover over the Update button. The system will pop out a menu showing two options: Update and download delivery note and Update
- If you select the first option, then aside from creating the Order, the system will also generate a PDF copy of the Delivery Note which you can view offline
- Note: The Delivery Note content is currently either in Vietnamese if you select the Web App interface language to be Vietnamese and English for the other languages
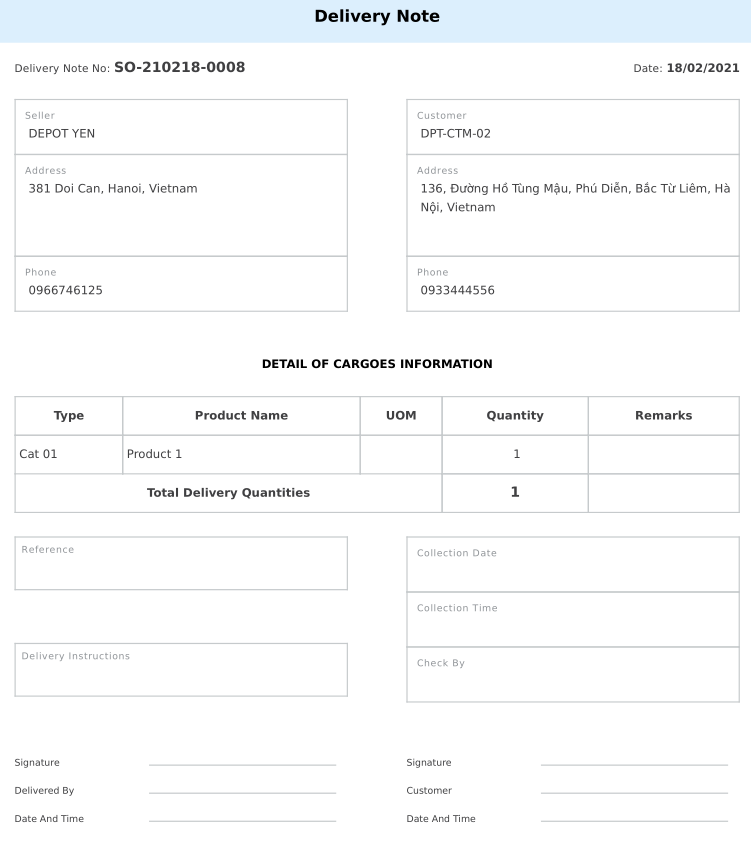
Illustration (English)
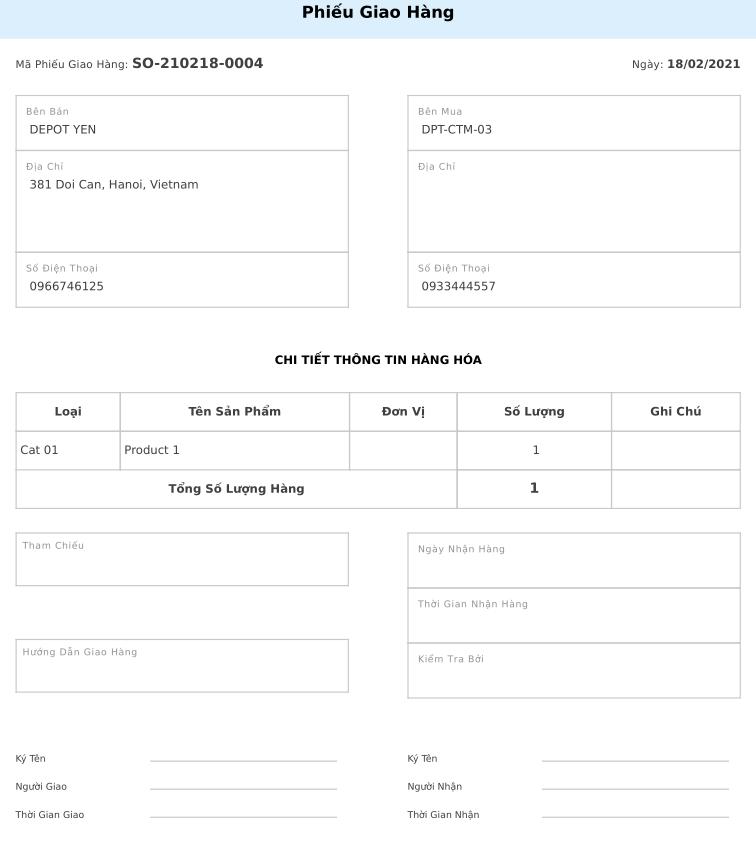
Illustration (Vietnamese)
Updated about 1 month ago
