Route Plan Optimization (Map View)
- After you have created the Sales Orders, the next step is to perform the Route Plan optimization process for those Orders
- In this model, the basic route optimization process is divided into three phases:
- Phase 1: Select the Branch and the Route Plan Date
- Phase 2: Generate the optimized Delivery Routes
- Phase 3: Lock the optimized Delivery Routes and create the delivery tasks
- We will now go into the details of each phase
Phase 1: Select The Branch And The Route Plan Date
- Navigate to the Transportation > Vehicles tab
- Click on the View Map button on the toolbar
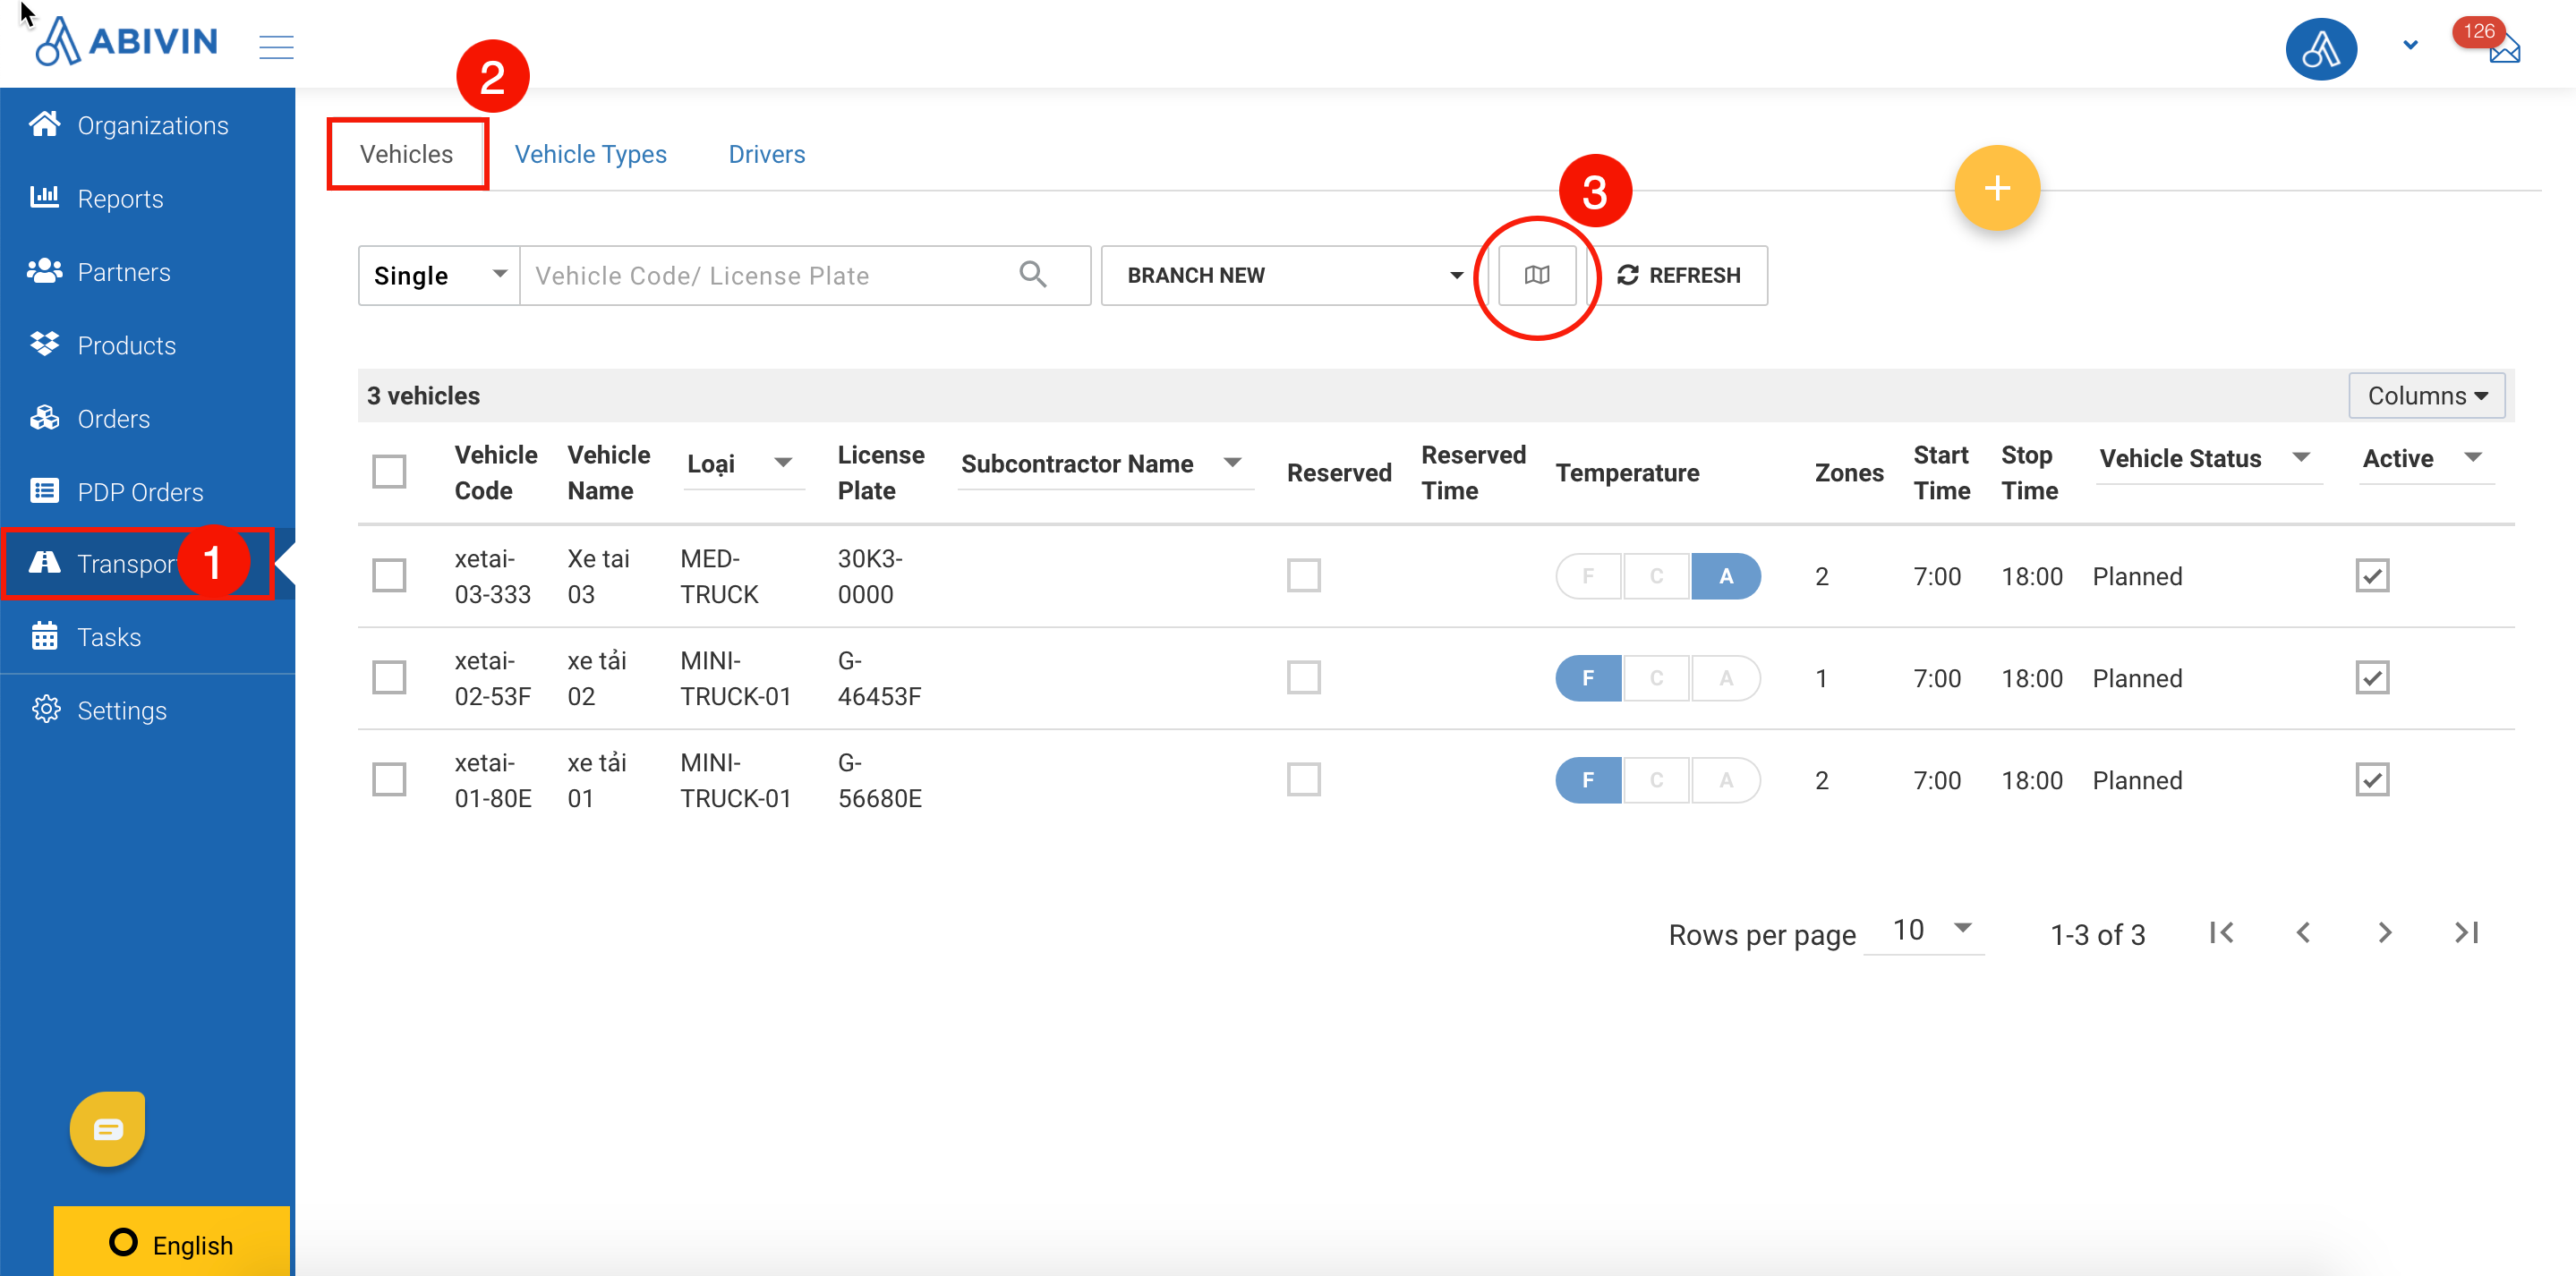
Illustration (English)
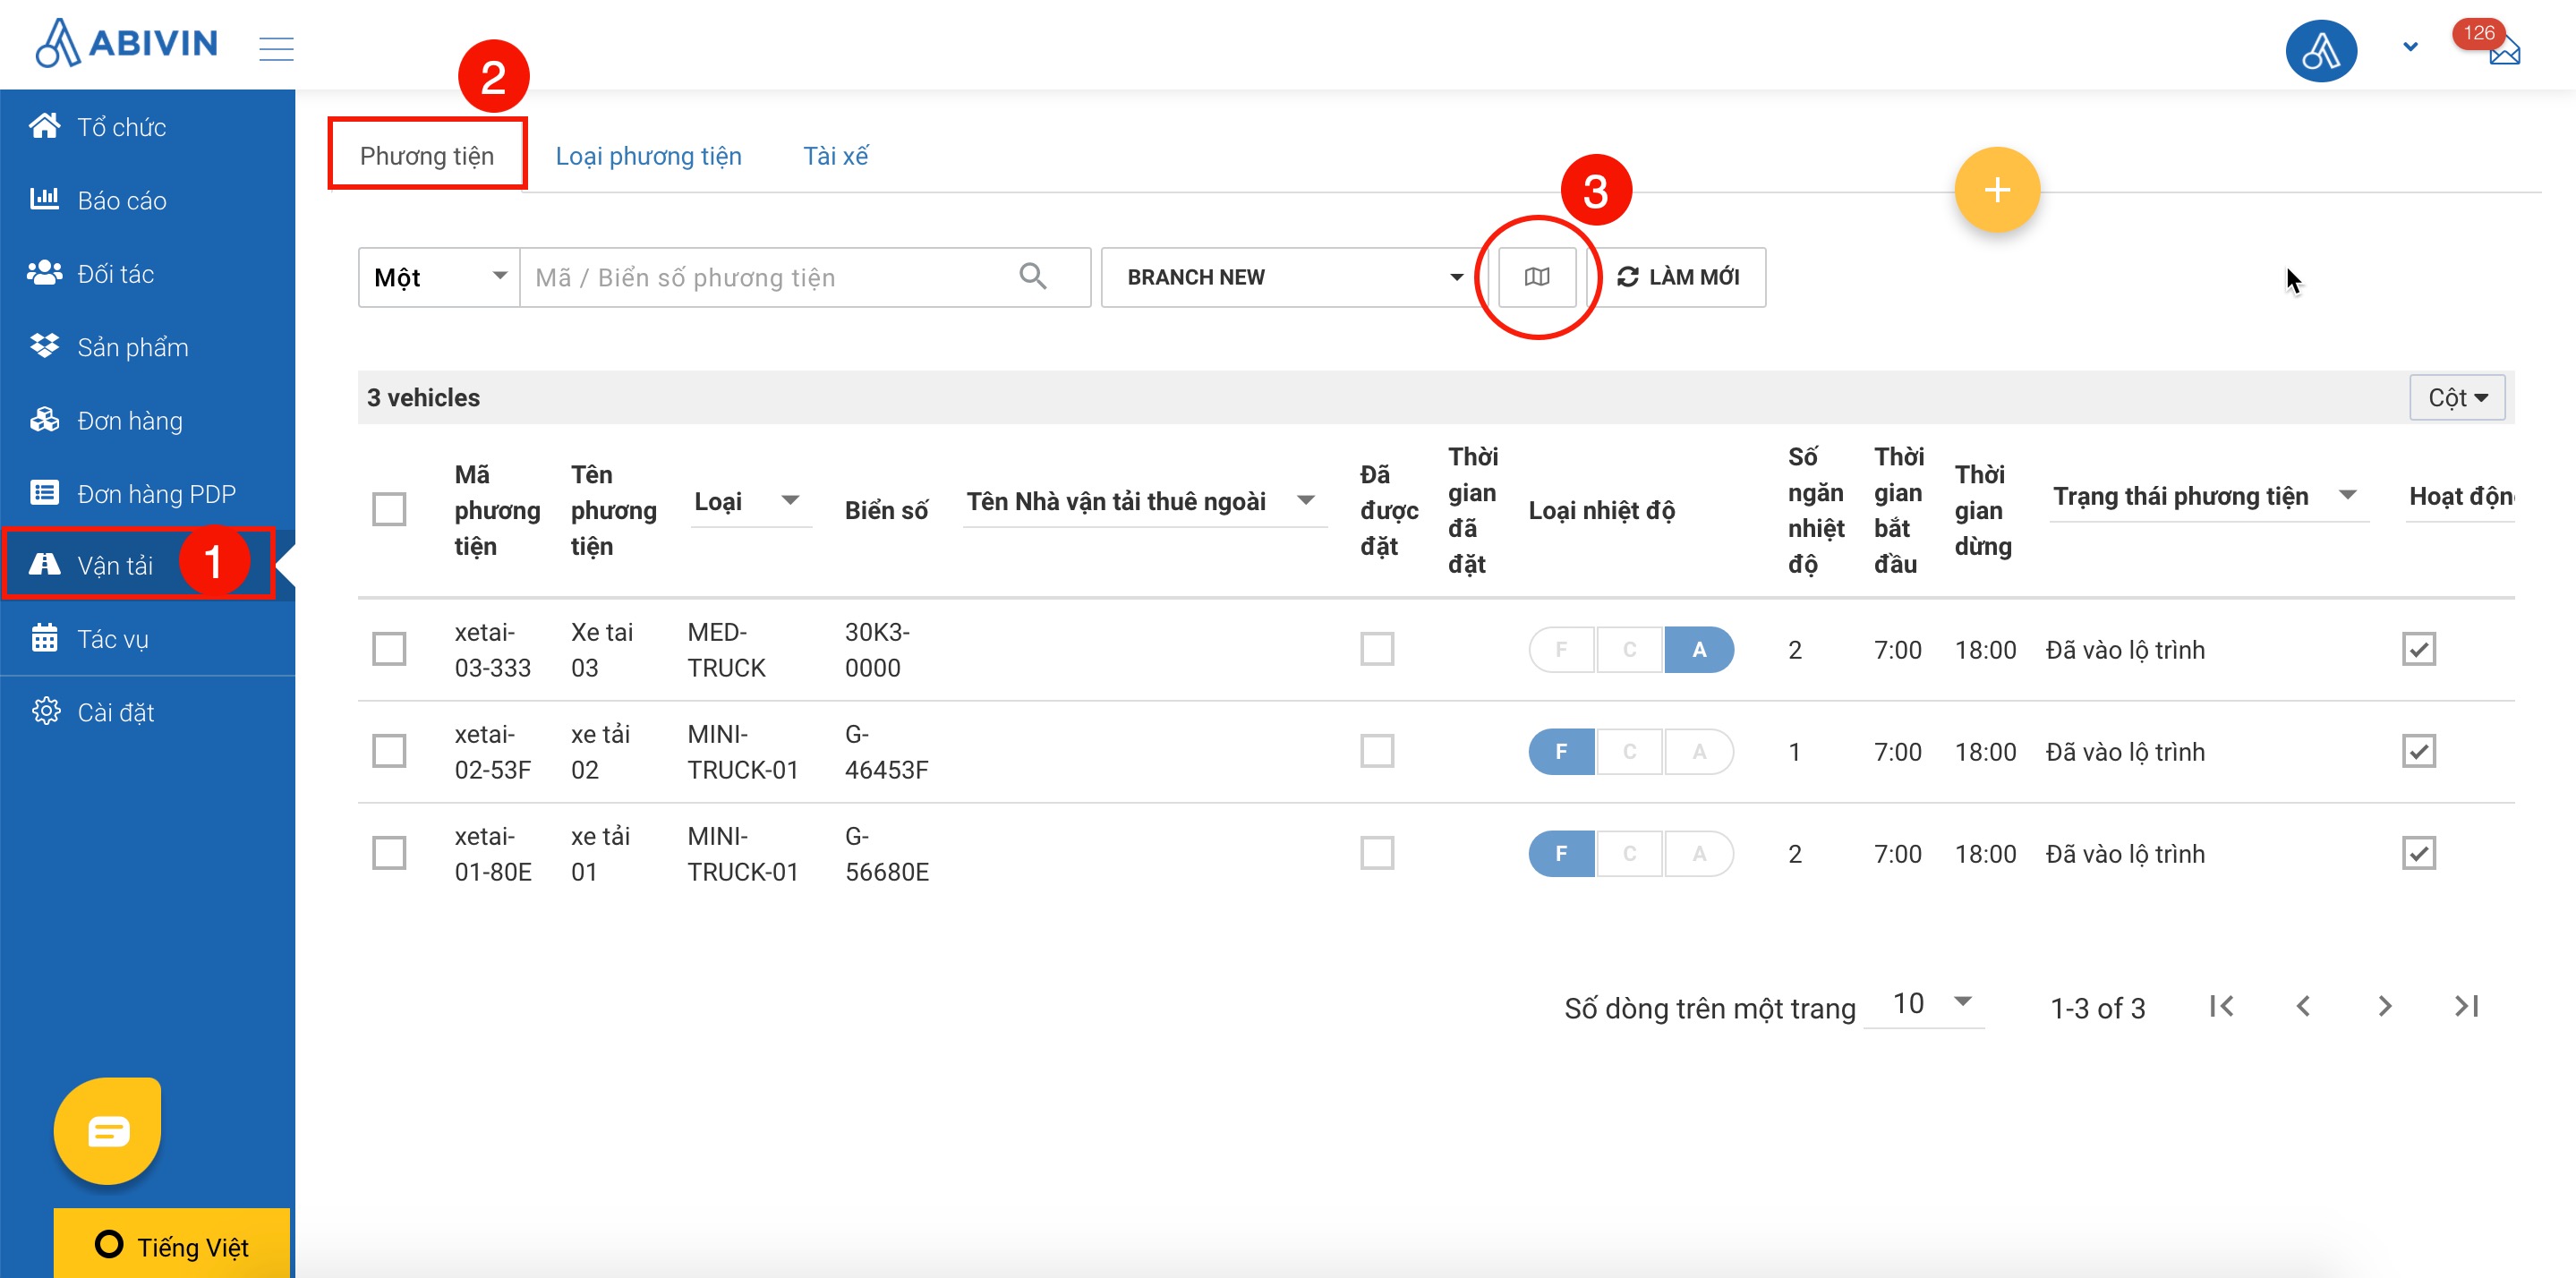
Illustration (Vietnamese)
- You will be navigated to the Map screen. On this screen, a form will appear. On this form, you need to select the Branch and the Route Plan Date to optimize the Route Plan
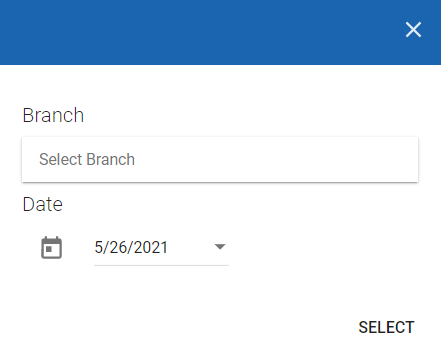
Illustration (English)
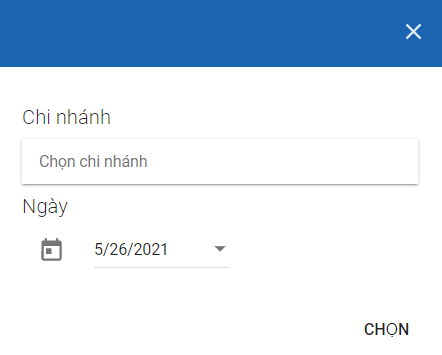
Illustration (Vietnamese)
- To select the Branch, click on the Branch field and select the appropriate Branch from the drop-down list. Alternatively, you can input the Organization Name of the wanted Branch into the search bar to filter it out faster
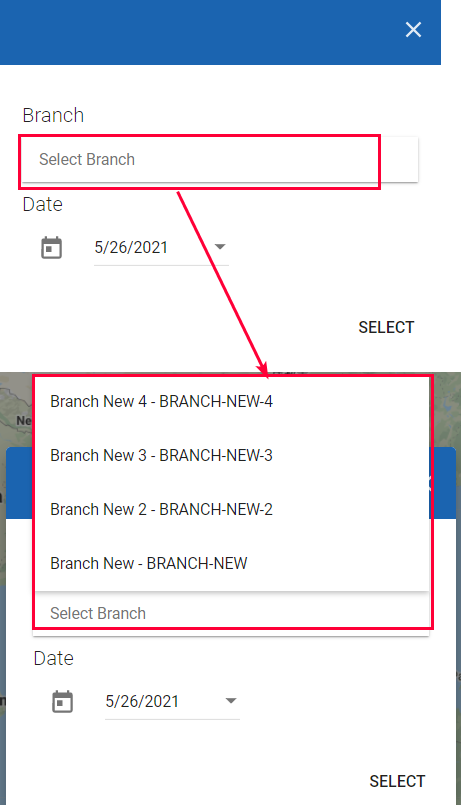
Illustration (English)
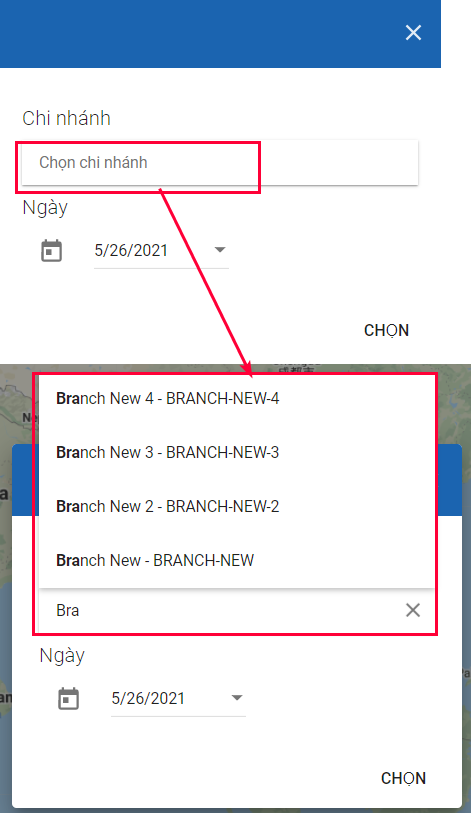
Illustration (Vietnamese)
- The Route Plan Date equals the Date attribute of the Orders. Note that you can only select the current date on your computer. You cannot select a past date nor a future date
- After selecting the Branch and the Route Plan date, click SELECT
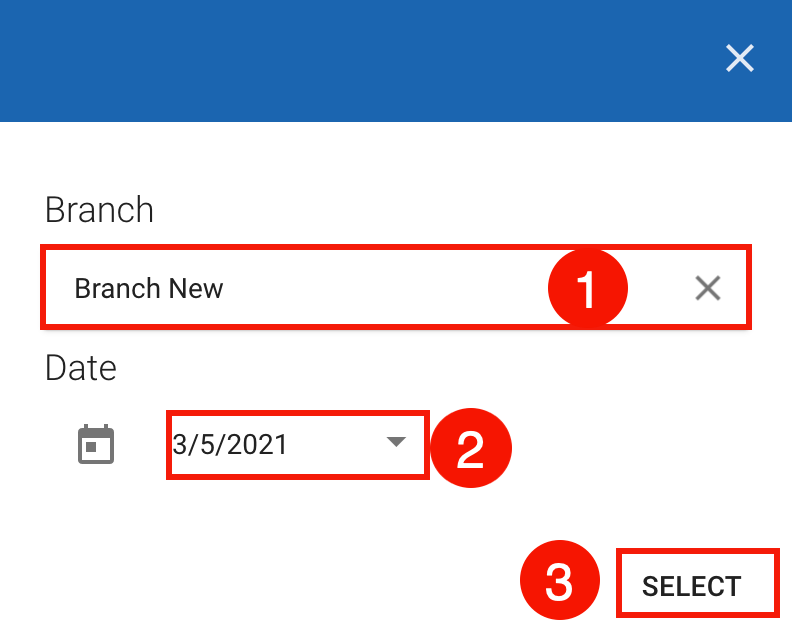
Illustration (English)
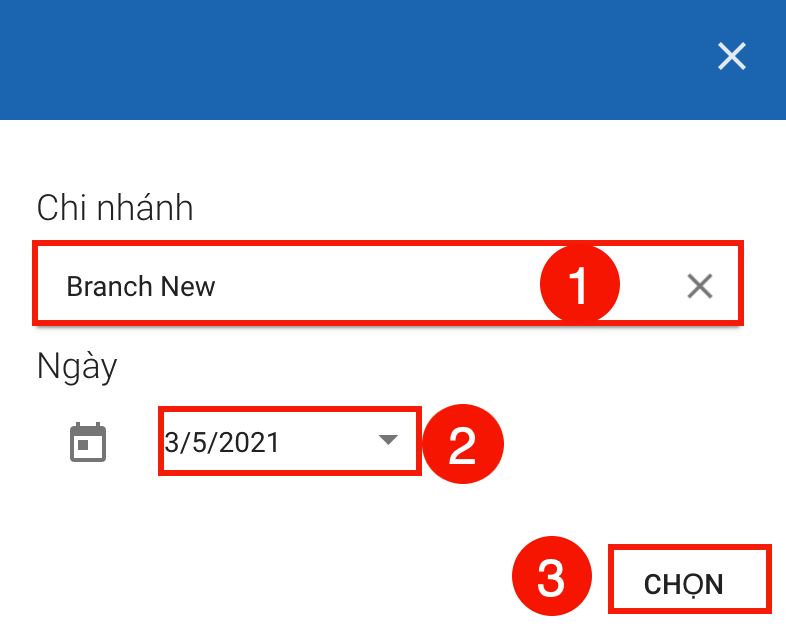
Illustration (Vietnamese)
Phase 2: Generate Optimized Delivery Routes
- After you have clicked Select, another form will appear
- On this form, you have to input the Cut-off Time. The Cut-off Time is a time period that is used to determine the Shift Start Time, the time point when the Vehicles will start their Delivery Shifts
- The Shift Start Time is calculated using the following formula: Shift Start Time = Current Time + Cut-off Time
- The Cut-off Time value can be a positive integer or decimal number. For example, 0.5 means half an hour
- For example: The Current Time on your computer is 09:45. The Cut-off Time is 5.5. The Shift Start Time therefore will be 09:45 + 5.5 = 15:15 (03:15 P.M)
- If you want to plan the Shift Start Time right at the current time point, input the Cut-off Time value as 0
- After you have input the Cut-off Time, click OPTIMIZE
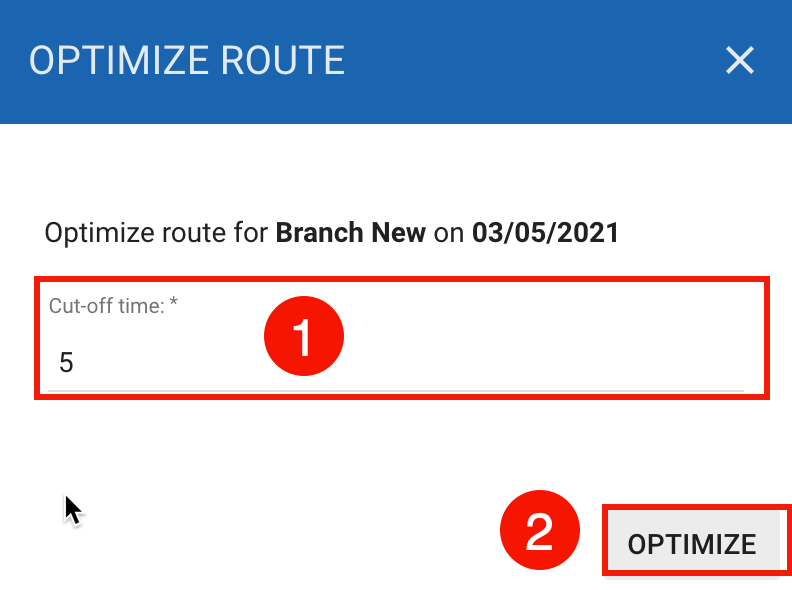
Illustration (English)
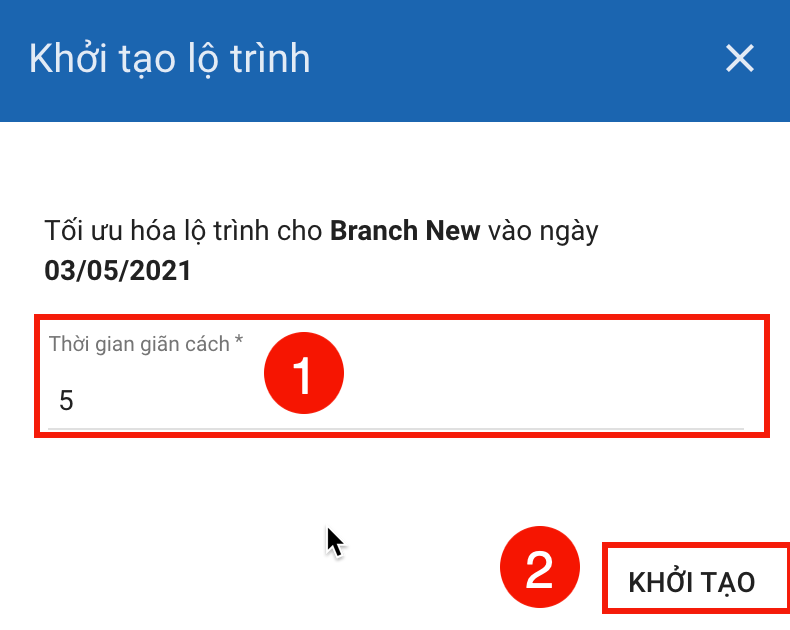
Illustration (Vietnamese)
- The system will start gathering all Orders under the selected Branch of which the Date attribute contains the selected Route Plan date, selecting the Vehicles, generating the optimized Delivery Shifts for the Vehicles, and displaying the optimized Delivery Shifts on the Timeline panel
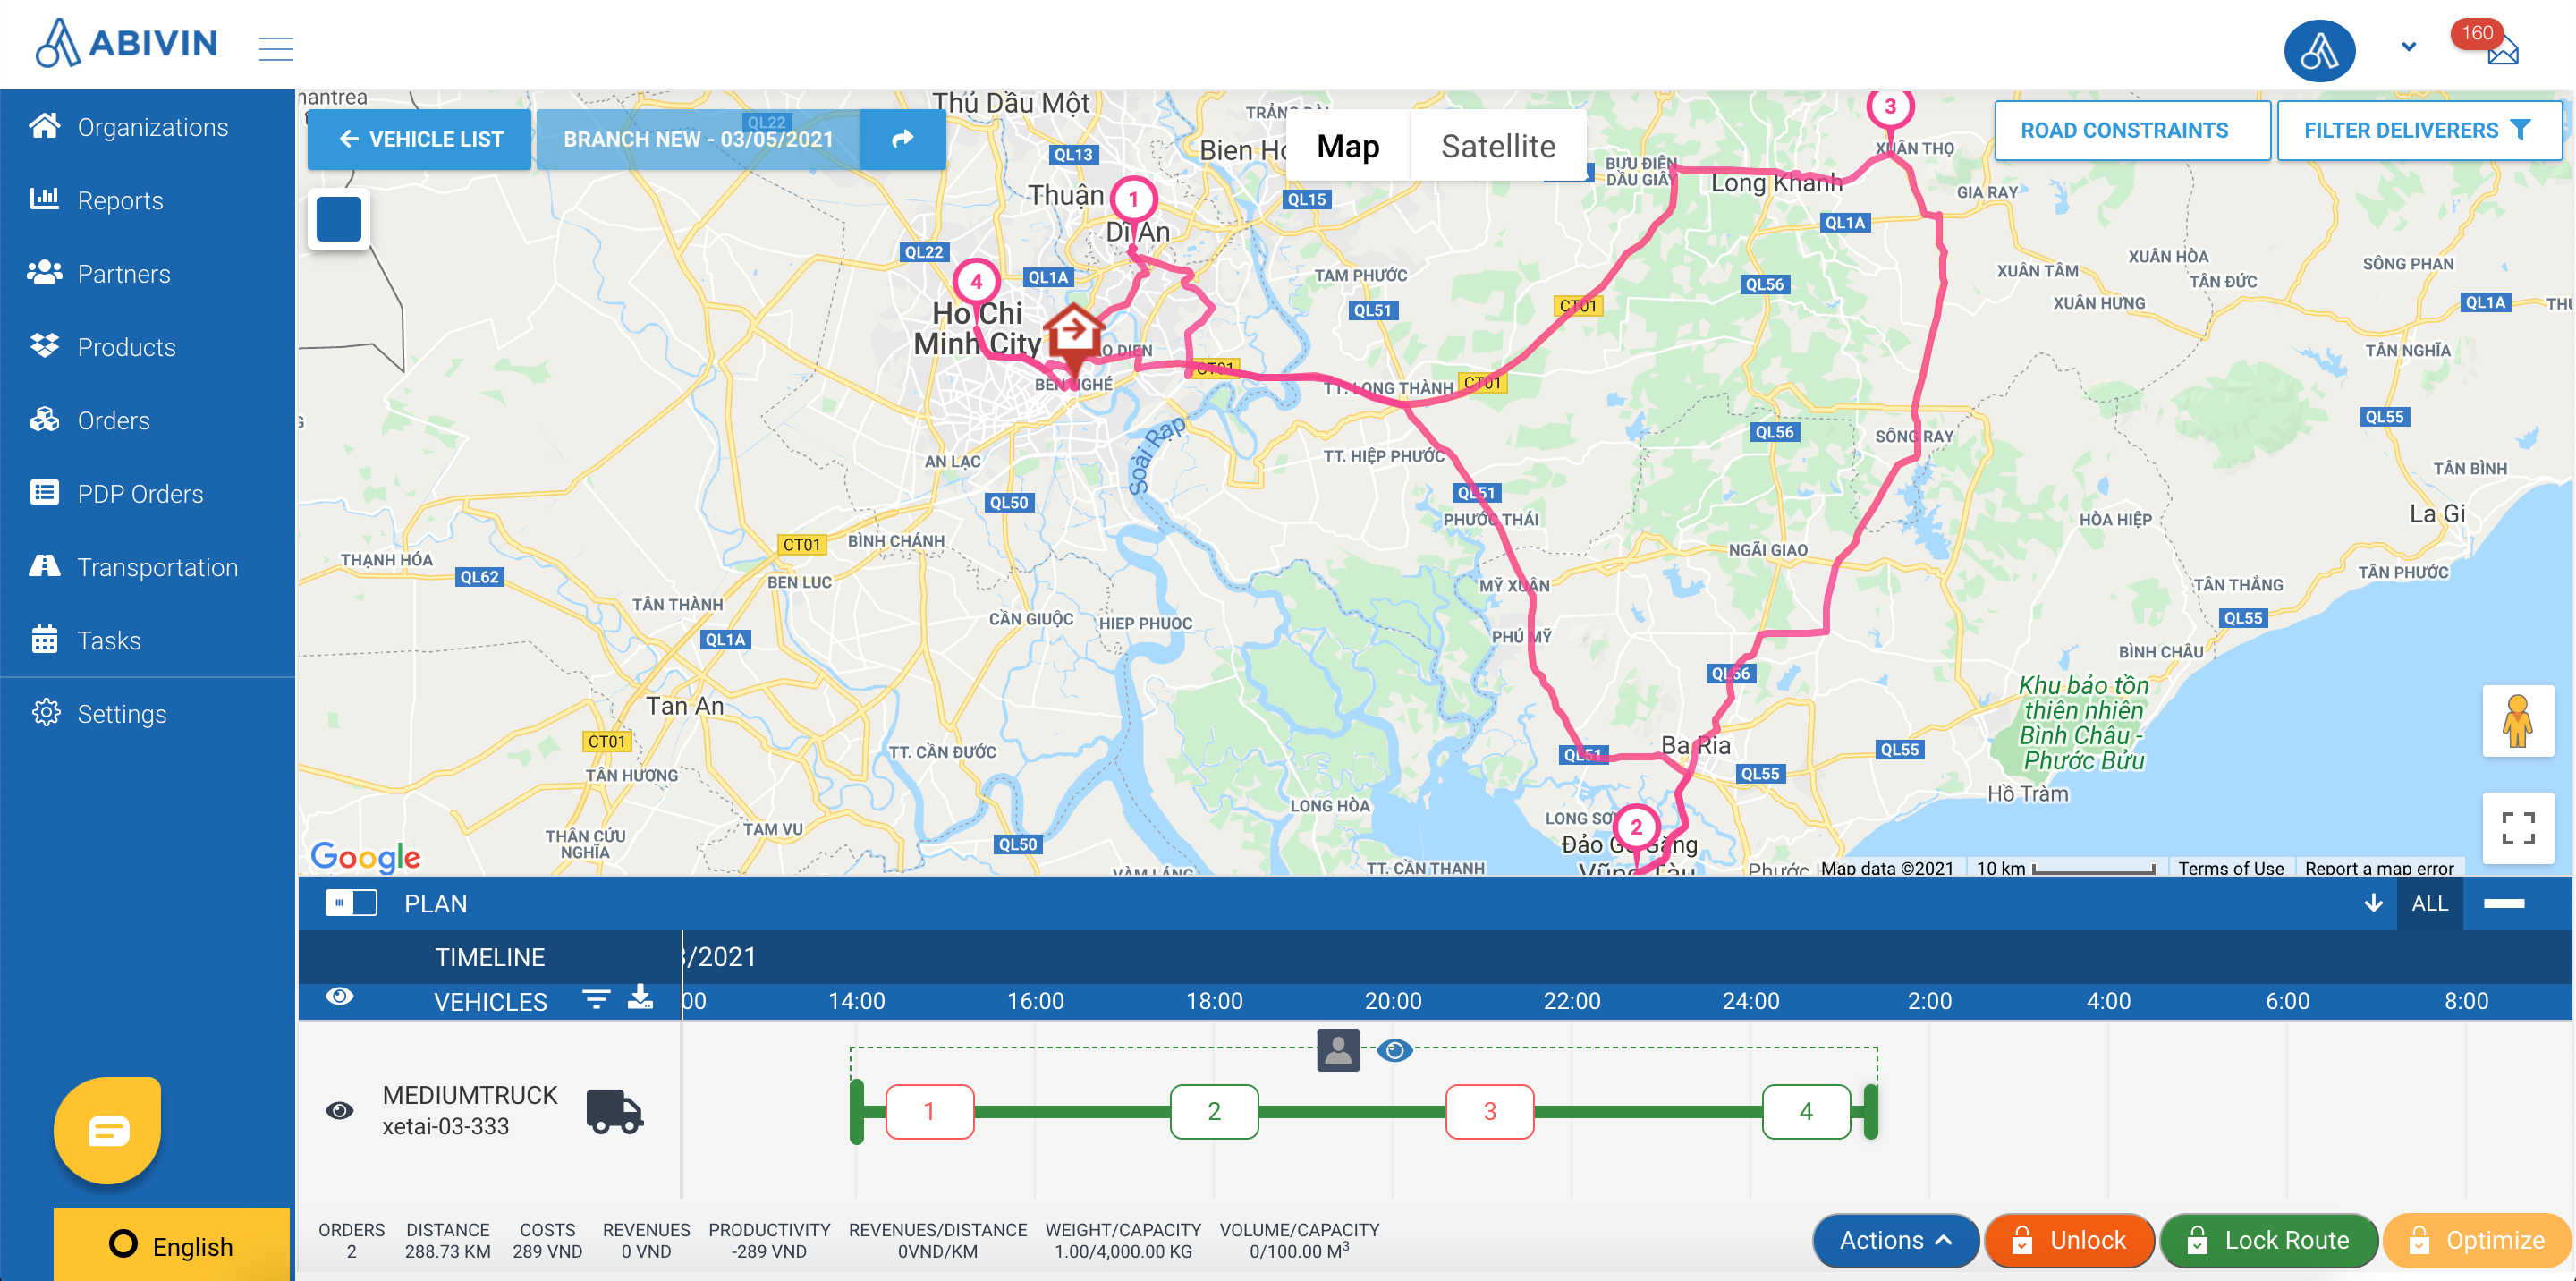
Illustration (English)
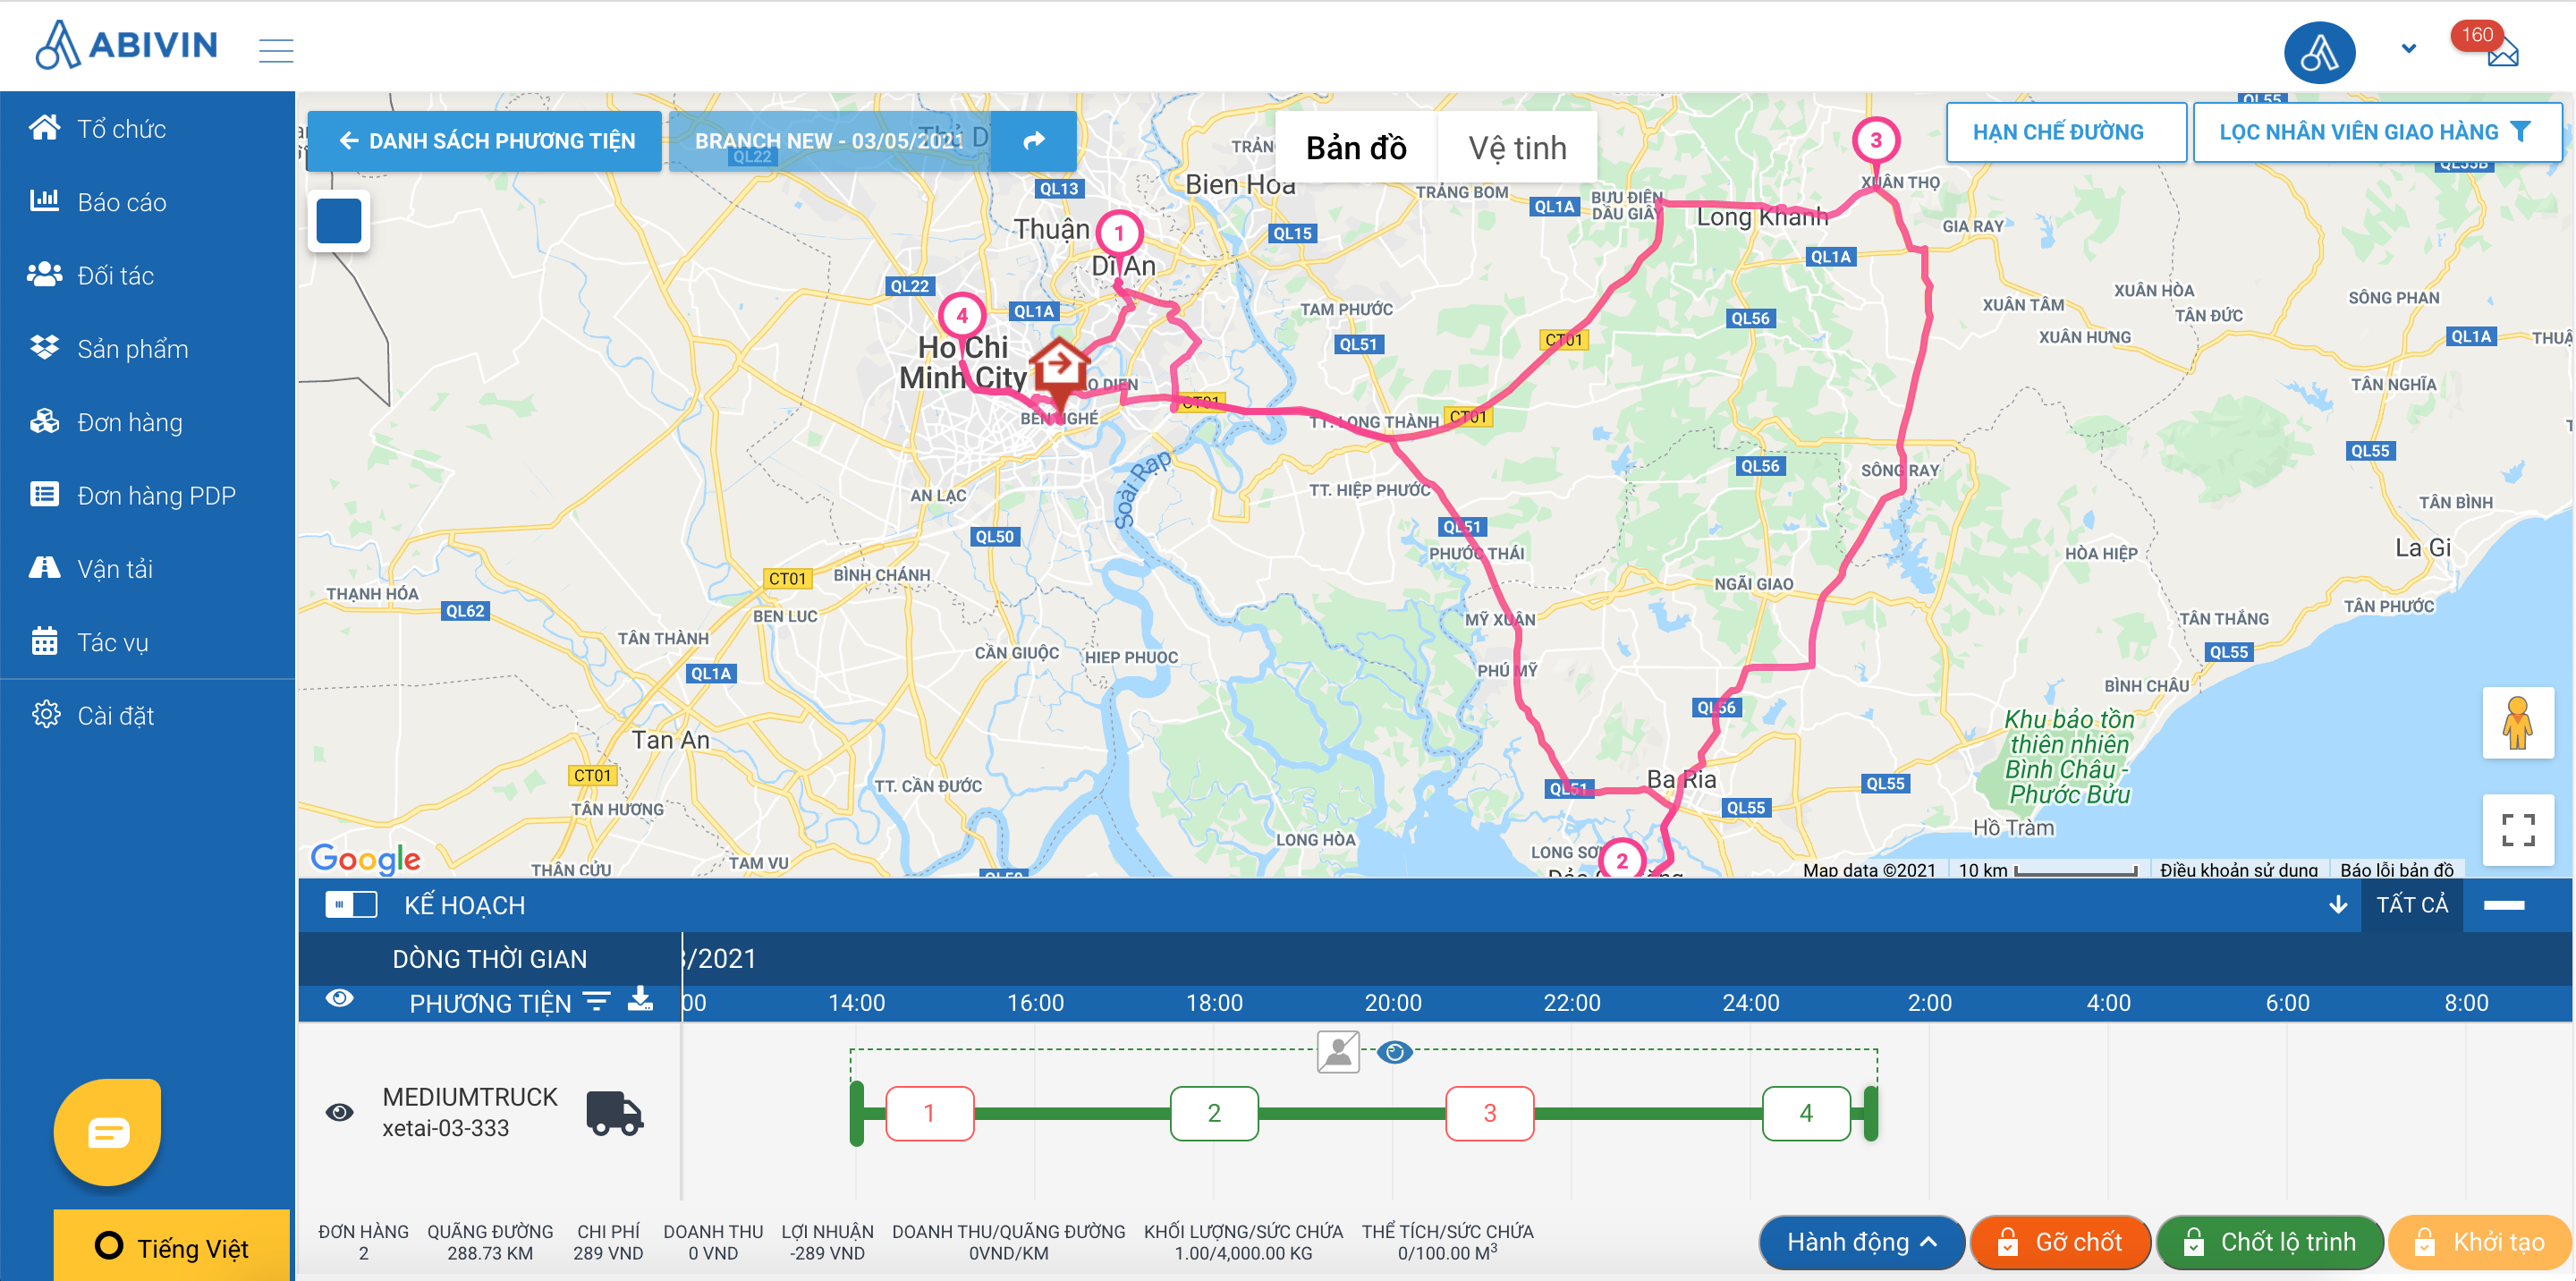
Illustration (Vietnamese)
- Please refer to the Route Plan Description section to learn about the details of the Route Plan
Phase 3: Lock The Optimized Delivery Routes And Create The Delivery Tasks
- After generating optimized routes for the vehicles, you can proceed to lock the routes and generate delivery tasks on the Mobile app of the drivers who operate the vehicles
- Similar to when you generate optimized routes, you can select one single vehicle; several vehicles or all vehicles prior to locking routes by clicking on the icon
- After selecting the vehicles, click on the Lock route button at the bottom of the Timeline panel, to the left of the Optimize button
- A confirmation form will appear. Click on the OK button to confirm
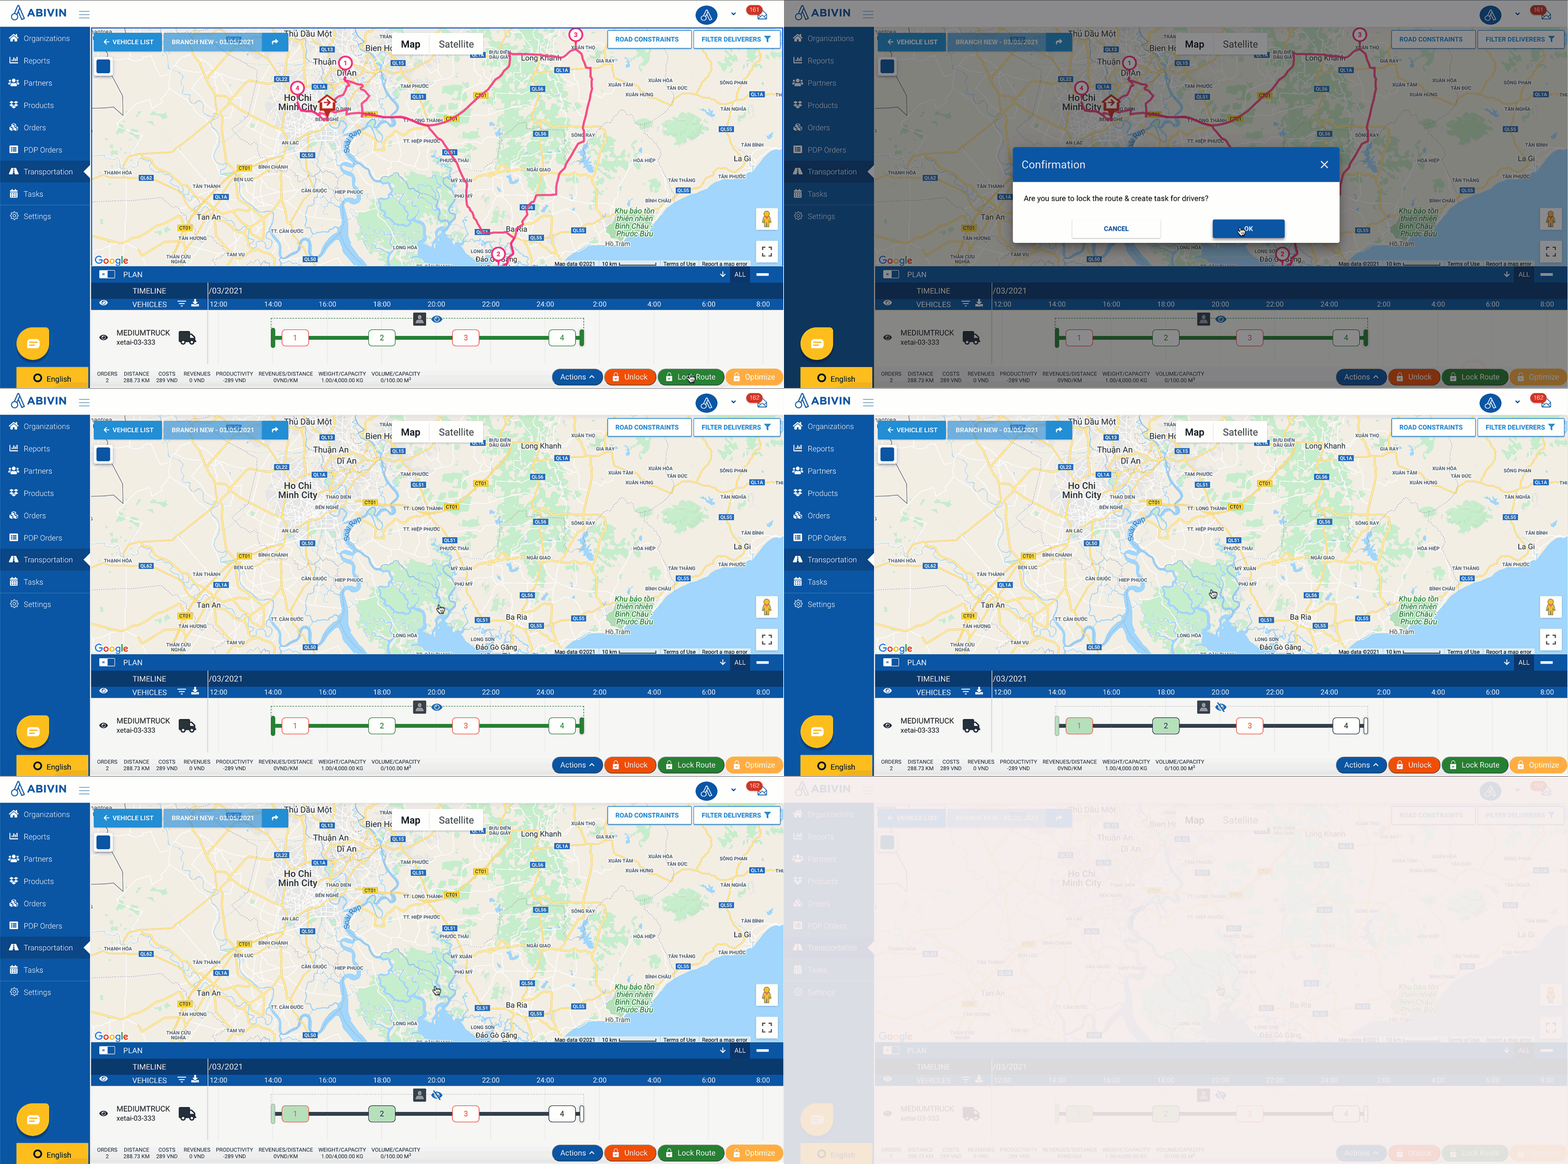
Illustration (English)
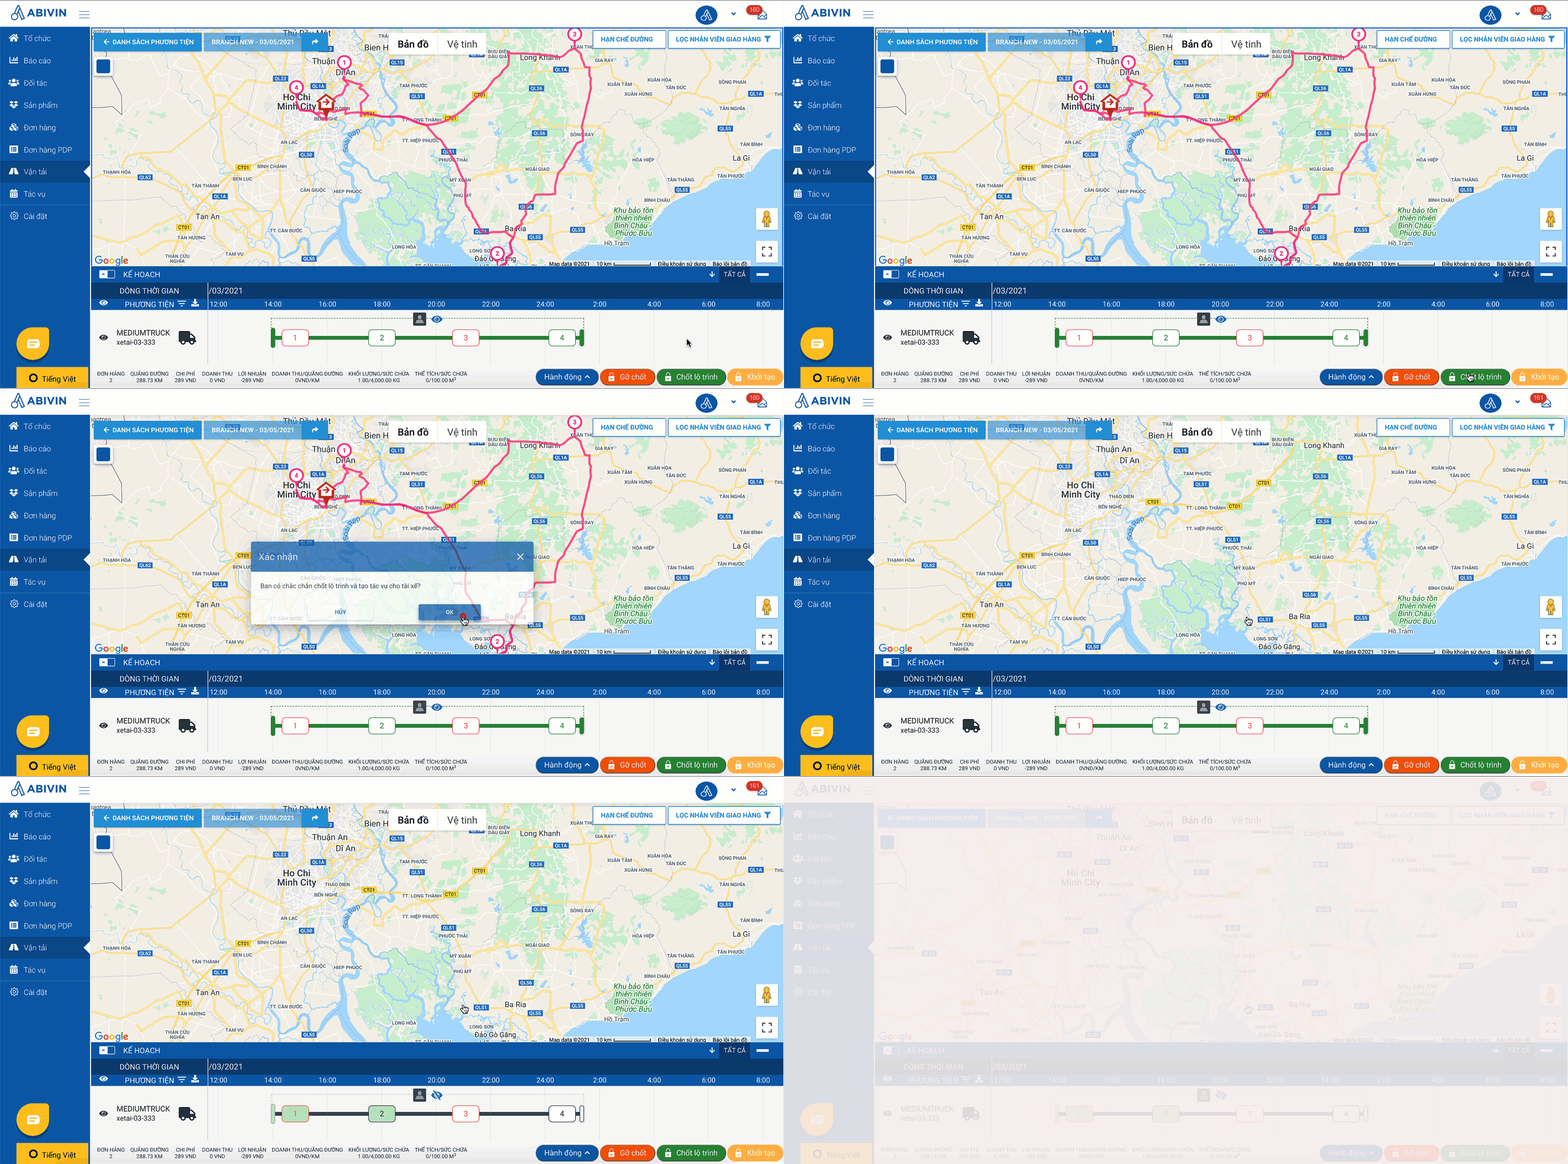
Illustration (Vietnamese)
- Note: In this model, if the Delivery Shift of a Vehicle consists of multiple Orders, then you can only lock route for only one order each time you click on Lock route button. Therefore, if the delivery route of a vehicle consists of multiple orders, you have to click on the Lock route button multiple times to lock routes for all orders delivered by that vehicle. The number of times you have to click on this button equals to the number of orders assigned to the vehicle
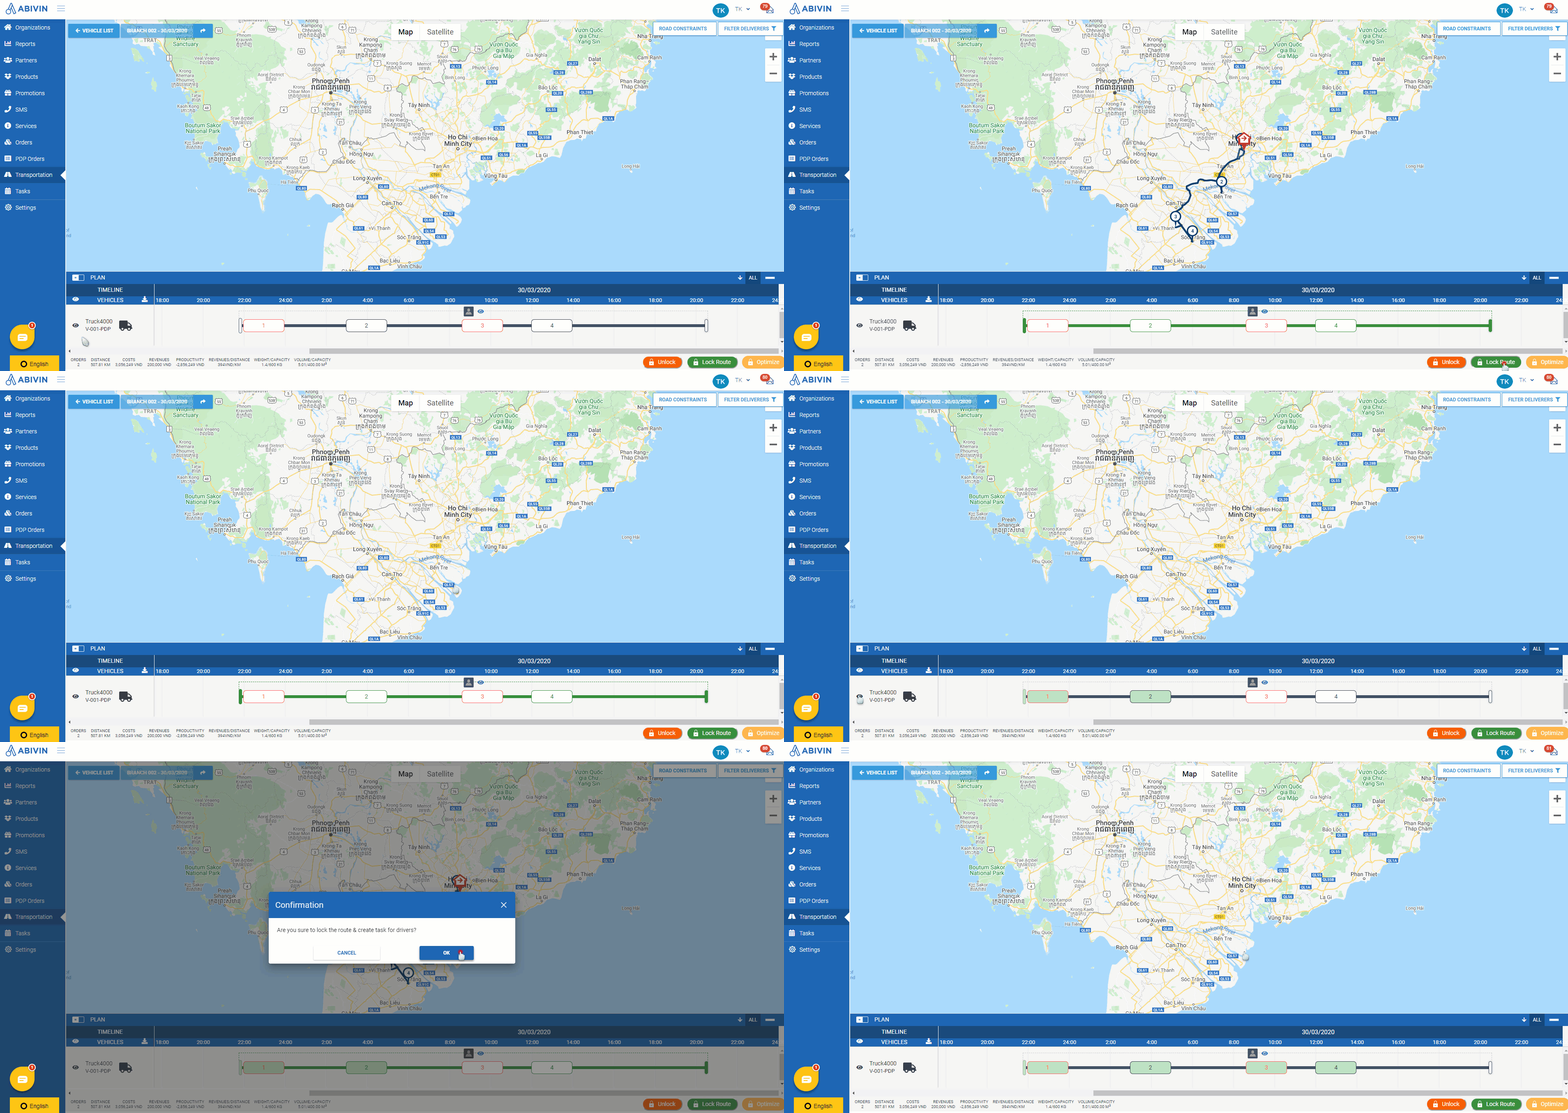
- As you lock route for an order, notice the inner color of the time blocks of that order will change to a mild green color

Illustration
- Repeat the steps above to lock routes for the remaining orders. Note that after each time you lock route, the selected vehicles will become unselected. You have to select them again
- Below is an illustration of this process
- However, if the Route Plan consists of Origin Customer time blocks which are all on one side and Destination Customer time blocks are on the other side, you will only have to lock that route a single time
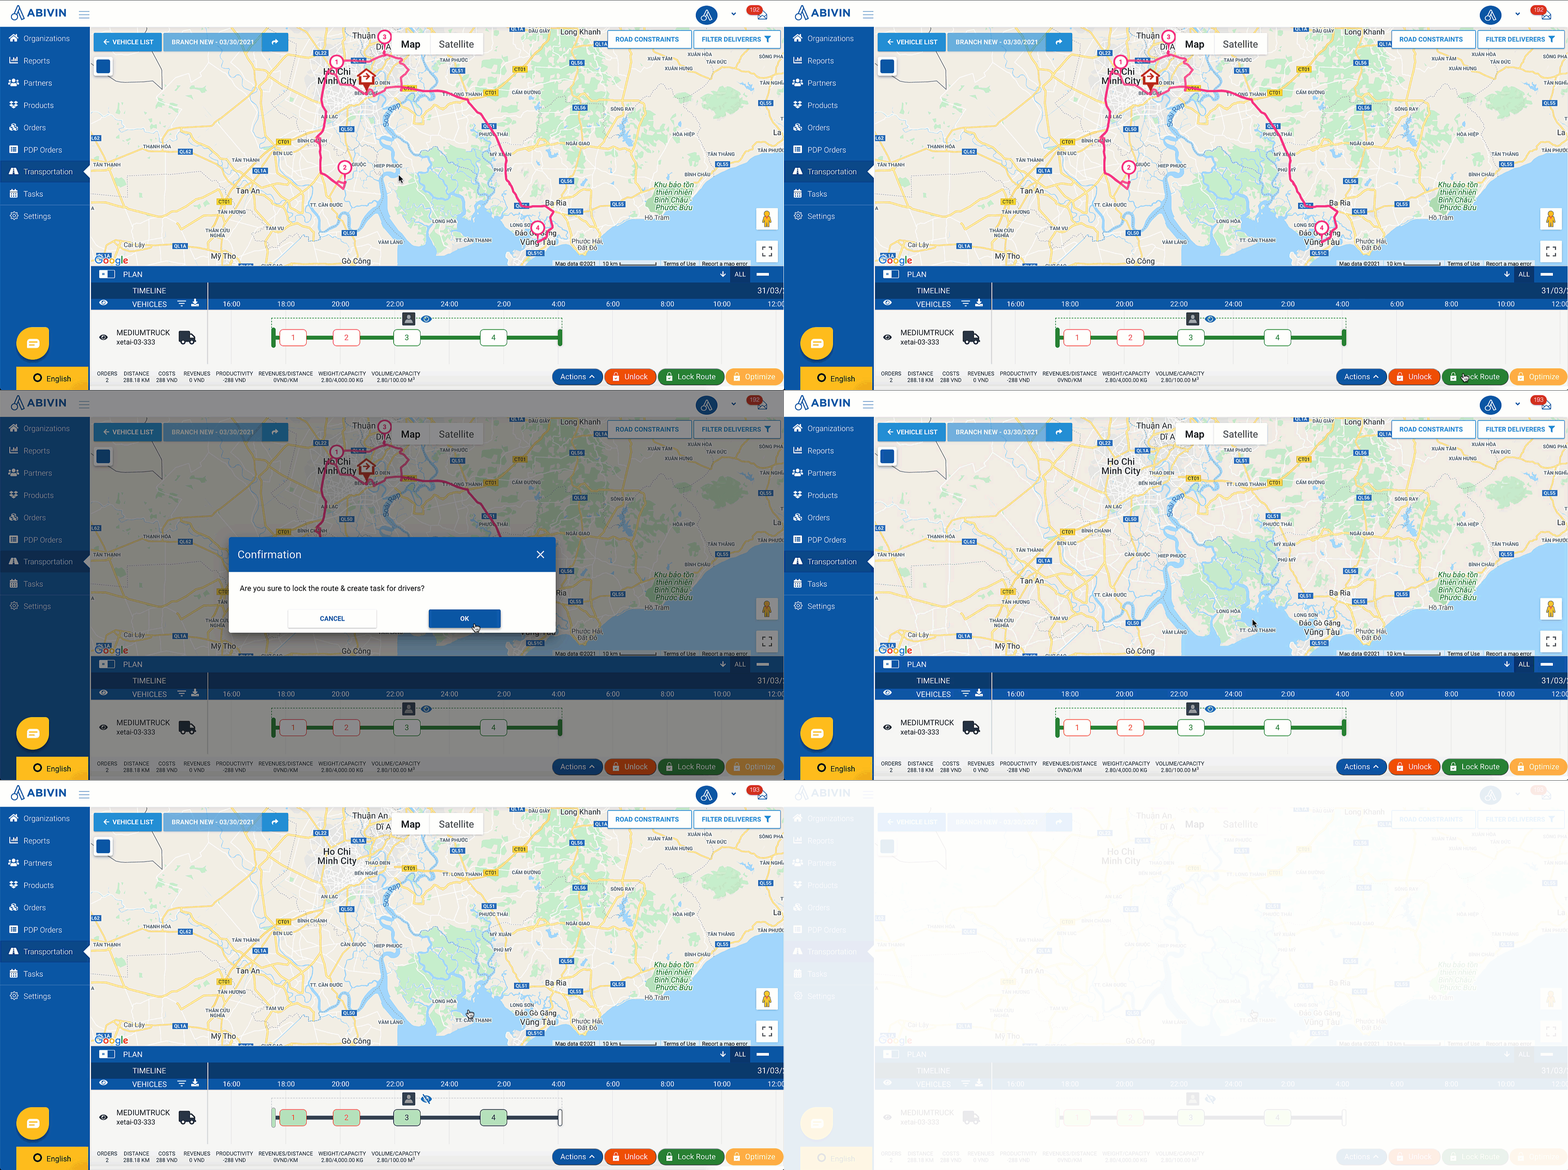
Illustration (English)
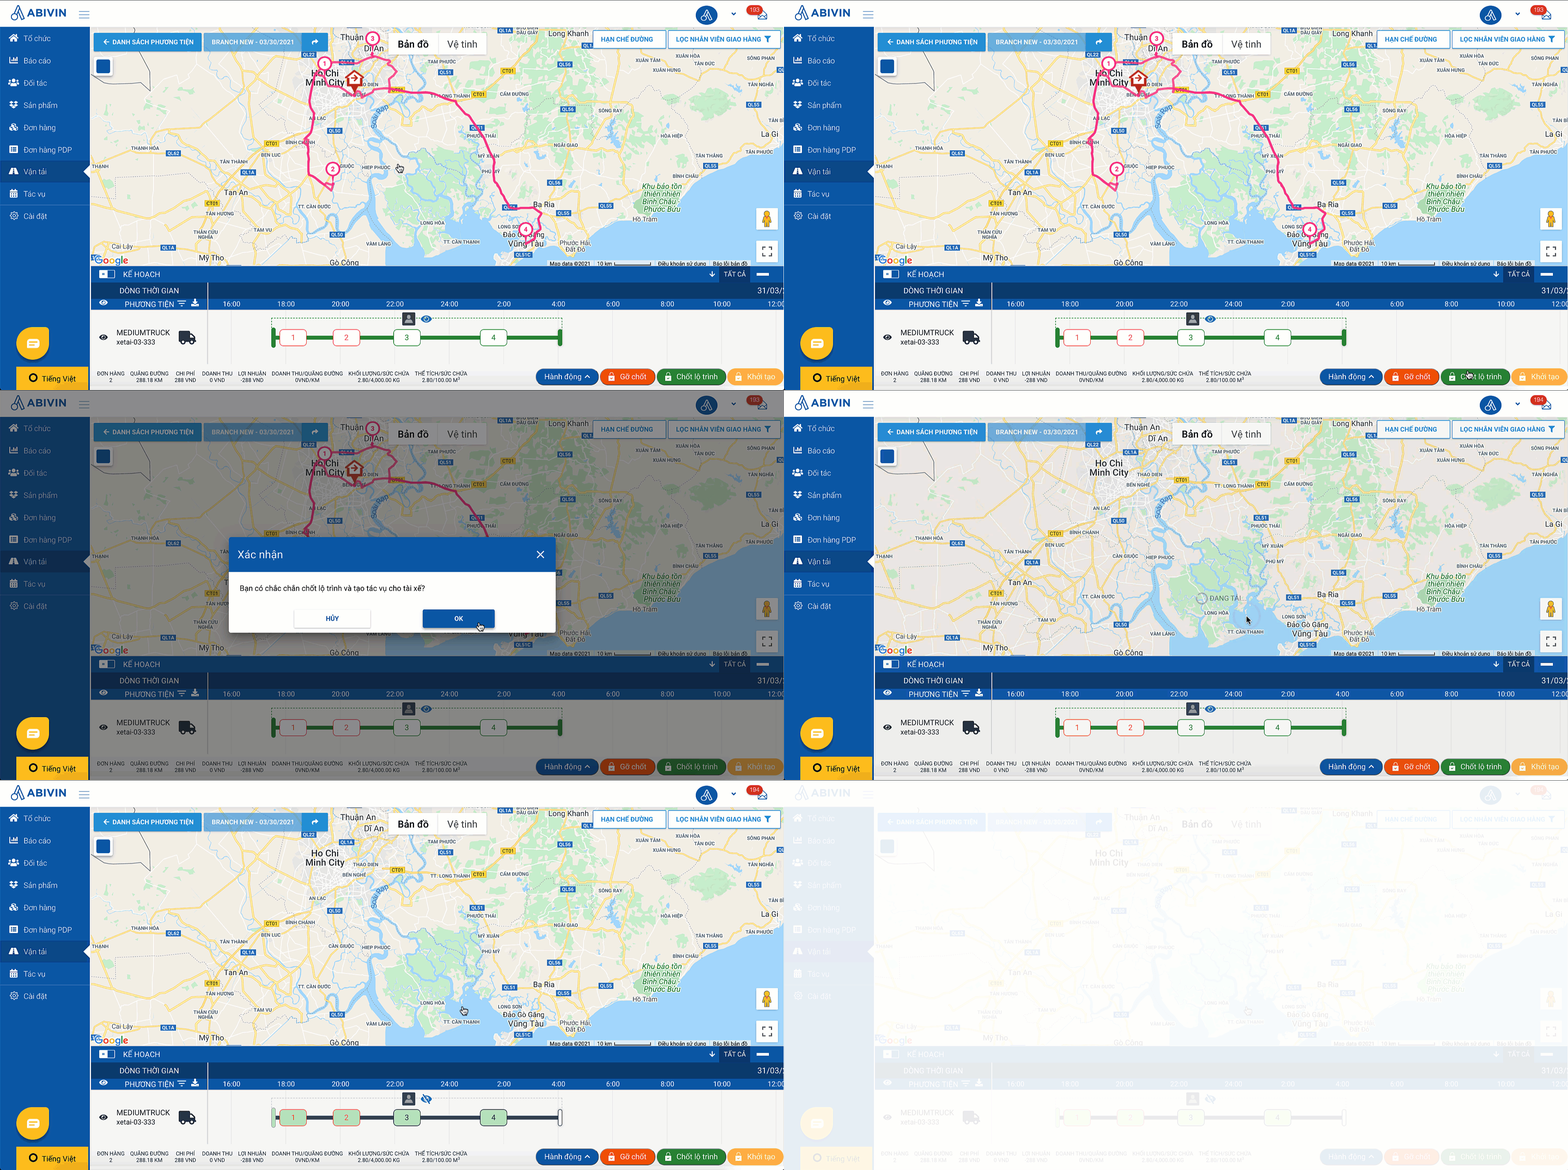
Illustration (Vietnamese)
- When you have locked routes for all orders of a vehicle, you have two options on what the vehicle will do after performing all delivery tasks
- Option 1. Make a Closed route - Let the vehicle travel back to the Depot and ends its delivery route; or
- Option 2. Make an Open route - Let the vehicle temporarily stop at the last Destination customer without returning to the Depot
Option 1. Make a Closed route
- If you want to let the vehicle travel back to the Depot after delivering all orders, simply select that vehicle then click on Lock route button one more time
- The system will generate a journey for the vehicle from the last Destination customer to the Depot
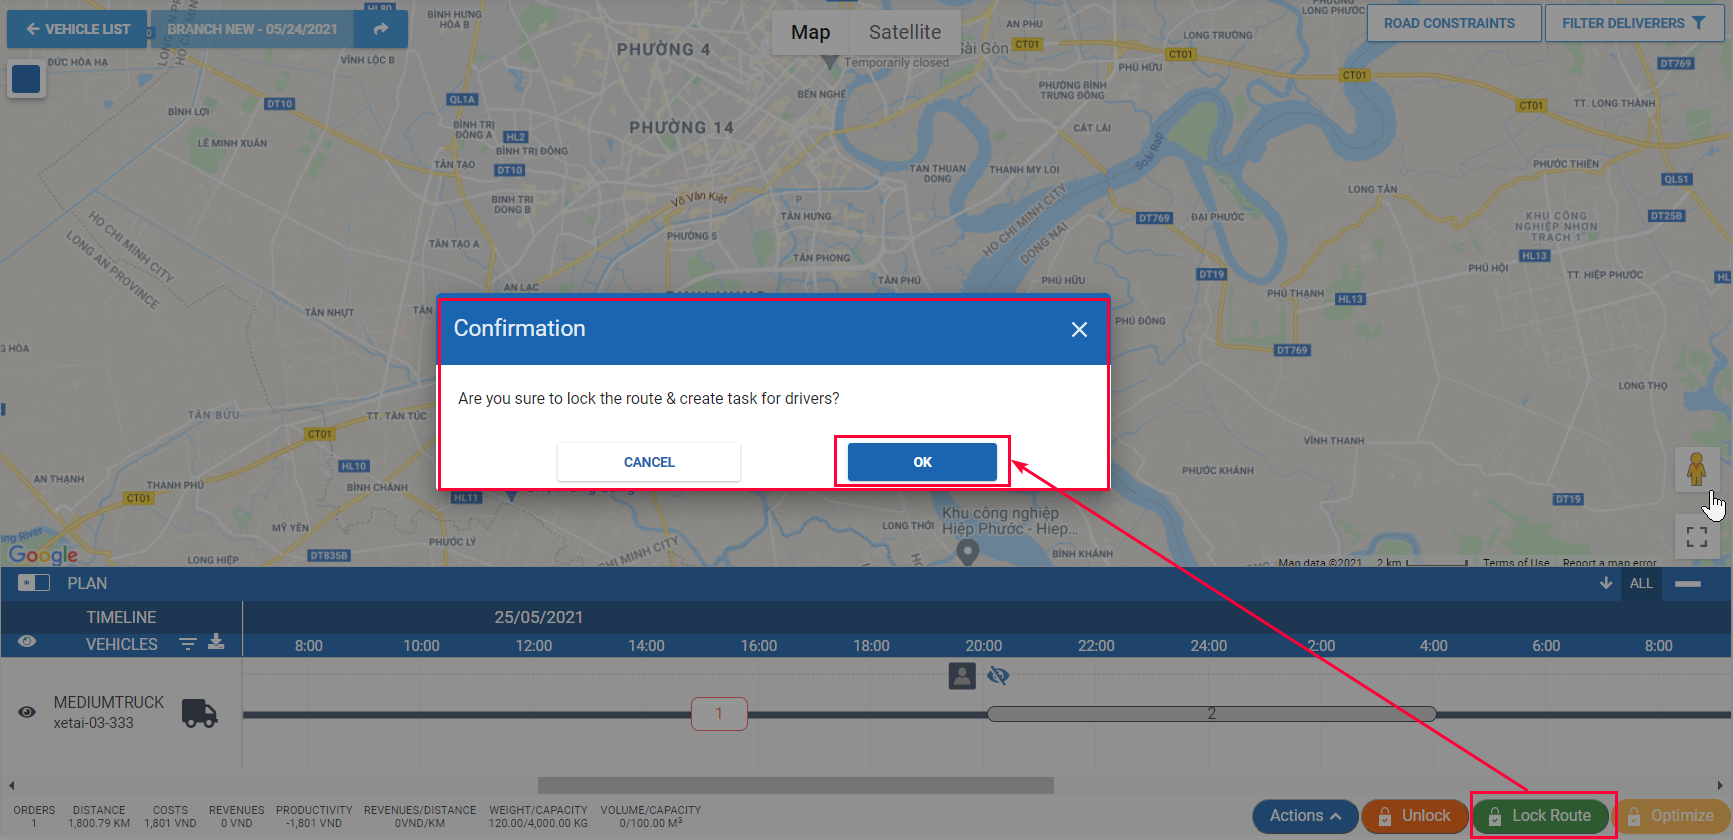
Illustration (English)
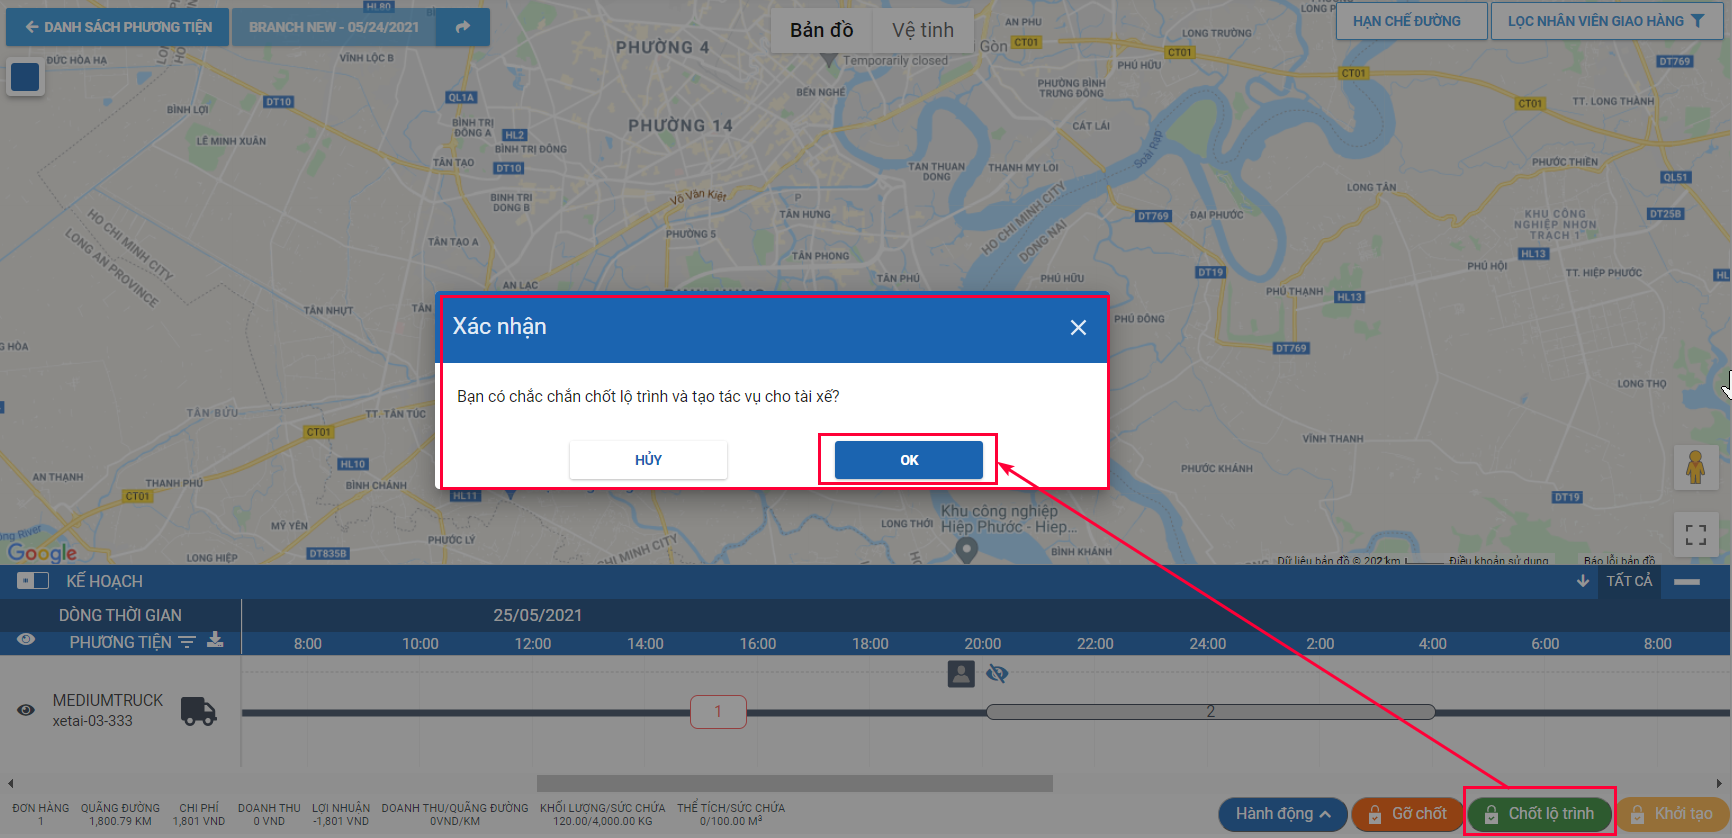
Illustration (Vietnamese)
Option 2. Make an Open route
- If you want to let the vehicle temporarily stop at the last Destination customer without returning to the Depot, click on Optimize button. Continue to click on Optimize button on the form that appears
- The system will put the the stop time block to the right of the last Destination customer's time block, indicating that the vehicle will temporarily stop at the last Destination customer
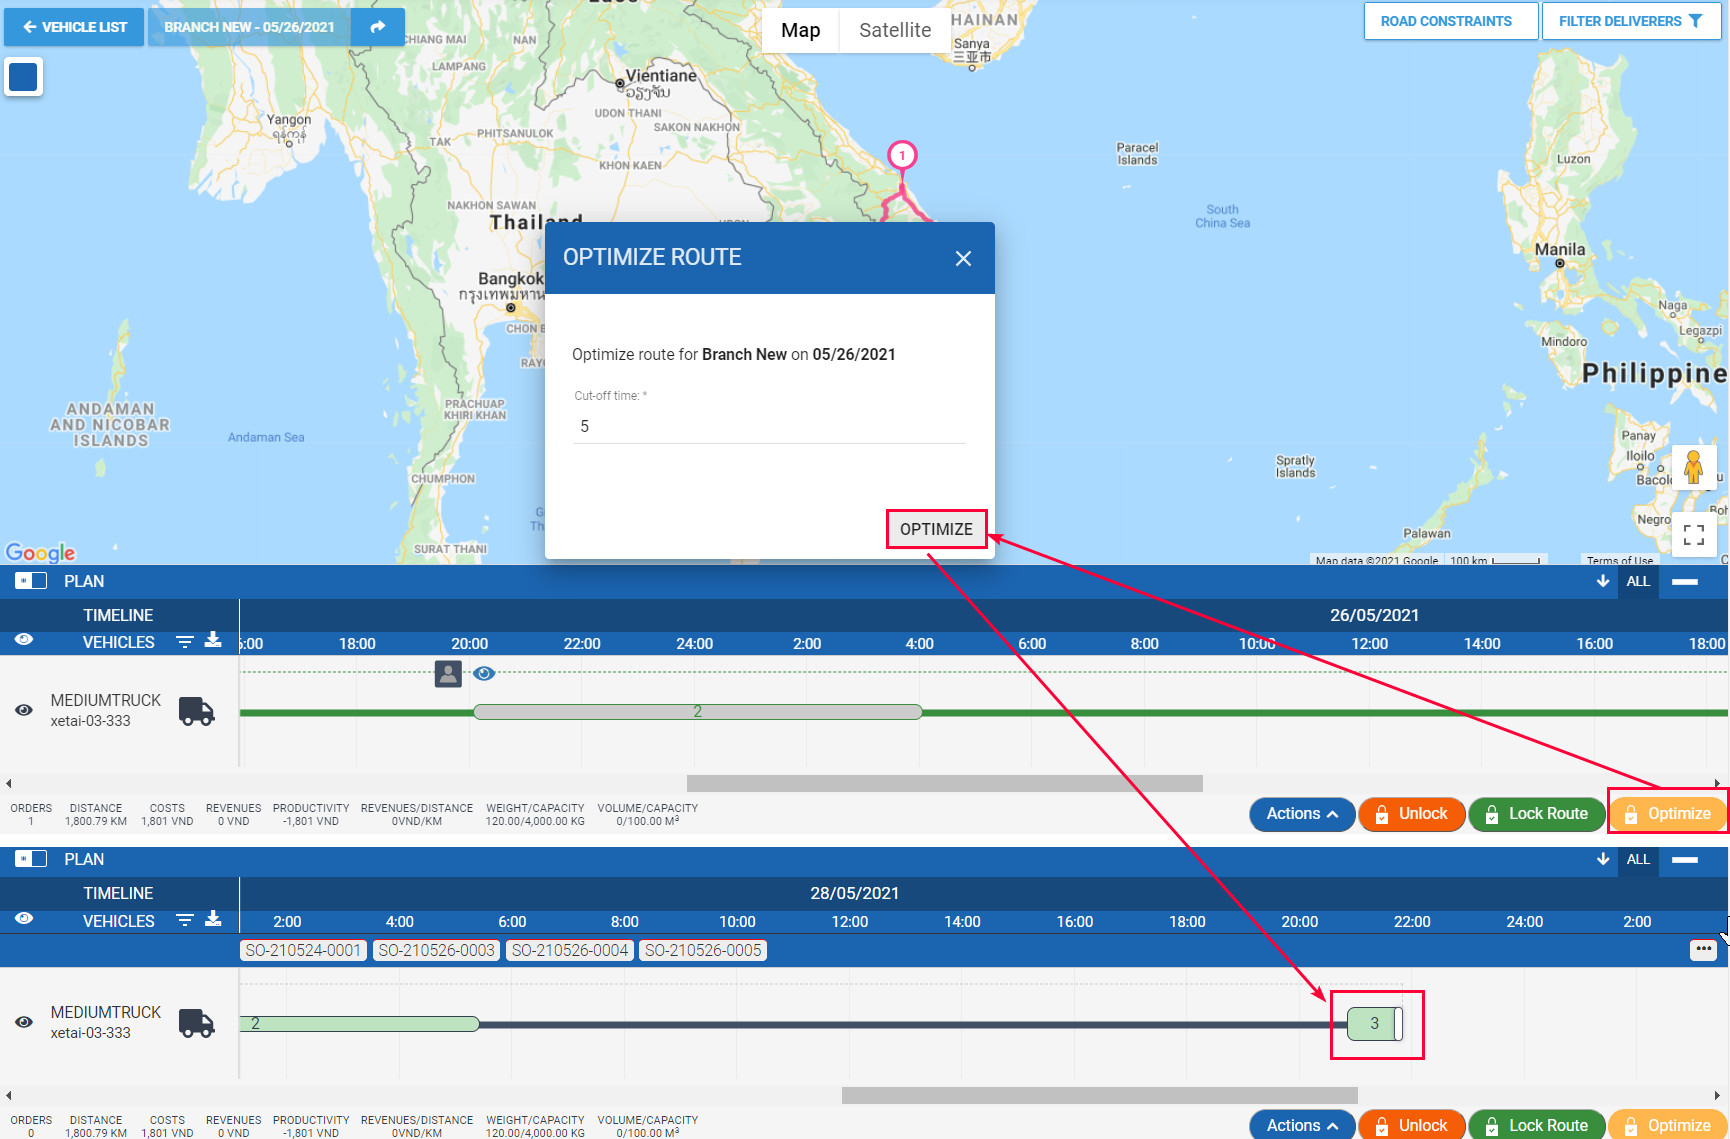
Illustration (English)
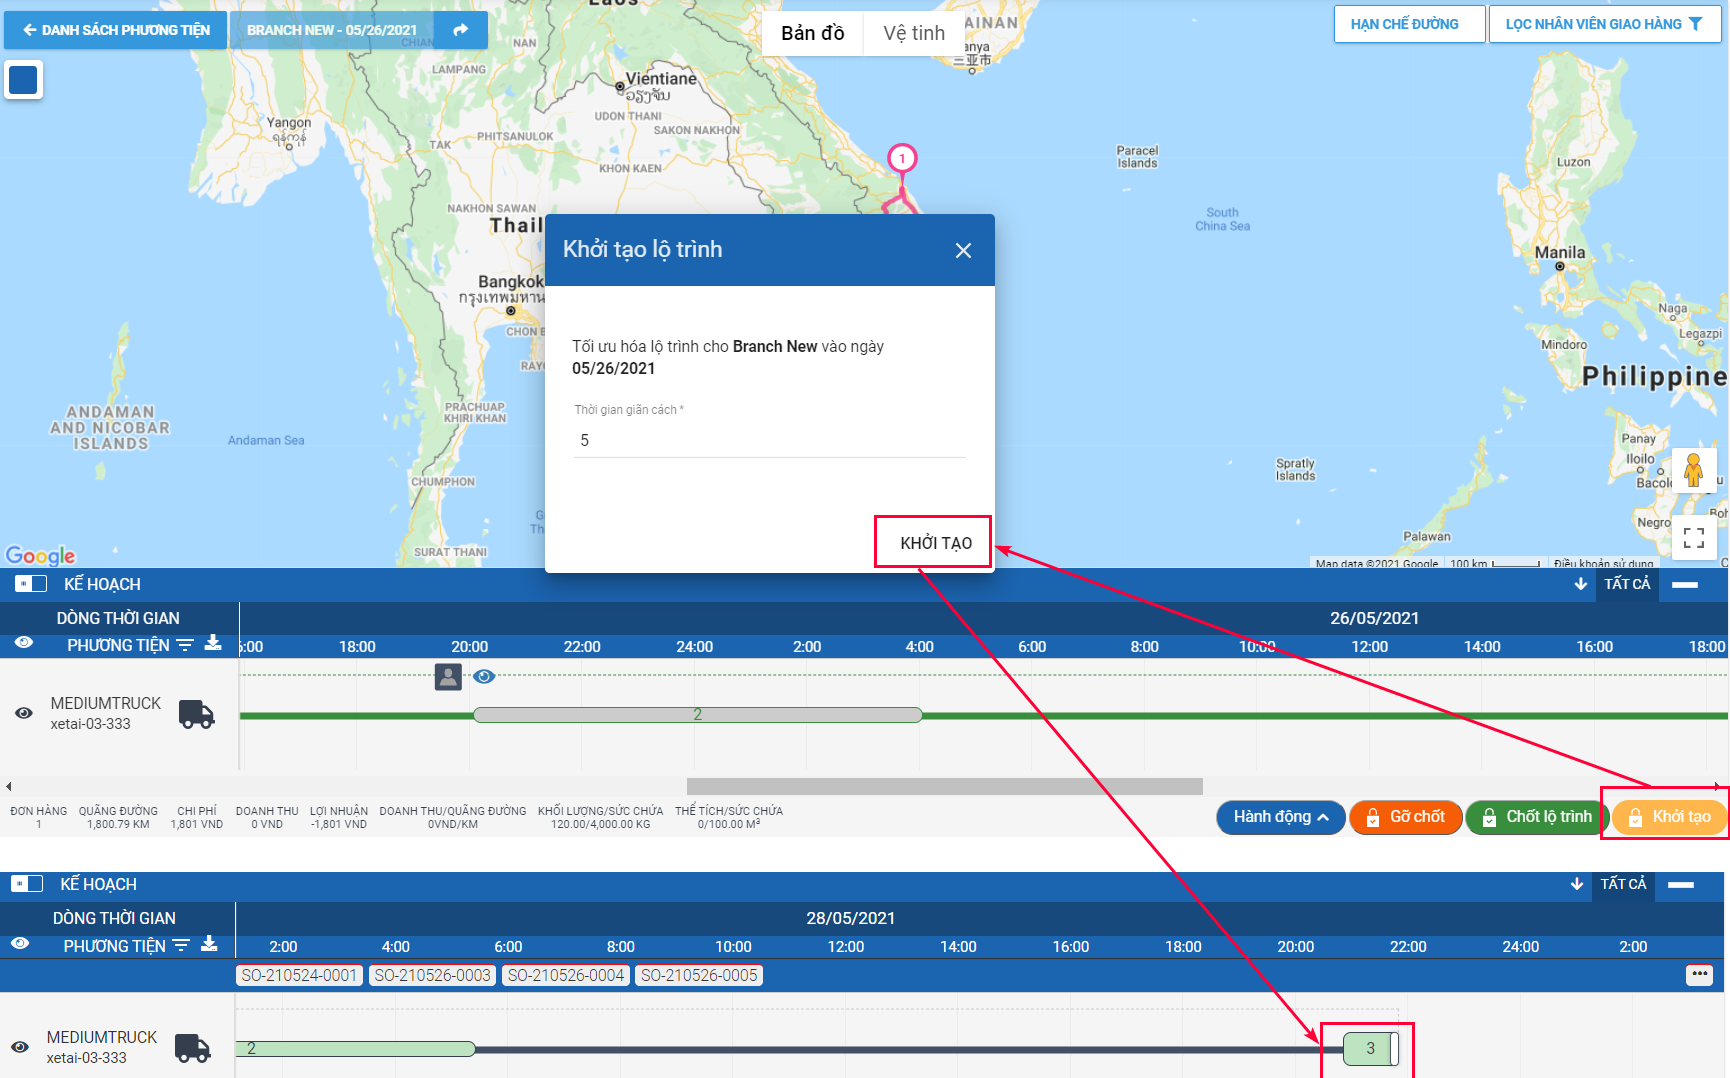
Illustration (Vietnamese)
Route extending
- After you have locked route of all orders, you could navigate back to PDP Orders > Current Order tab to create new orders, then navigate to Transportation > Vehicle List tab to optimize route for the new orders. This operation is defined as Route extending
- During the route optimization process, as you click on Optimize button, the form to select Cut-off time will appear again. However, this time the Cut-off time will act as the temporary stop time period (In hours) between the Planned finish time of the previous locked Delivery route and the Planned start time of the new Delivery route
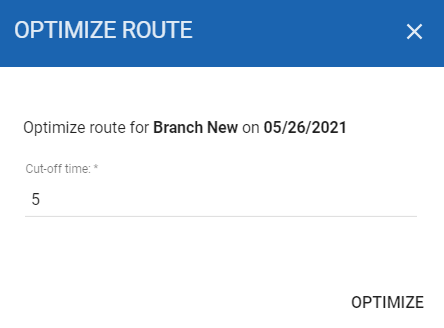
Illustration (English)
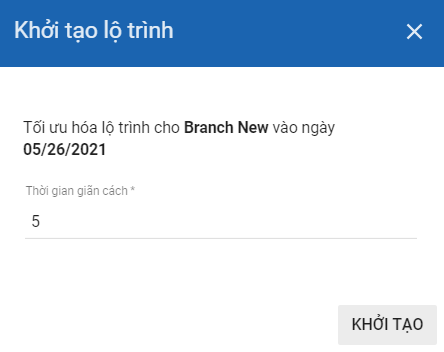
Illustration (Vietnamese)
Extend a Closed route
- Closed route - The Route in which the Vehicle travels back to the Depot and ends its delivery route.
- To make a Closed Route, click here Closed Route
- If you perform route extending with a Closed route, the Delivery route of the vehicle will be separated into two Delivery shifts. The first Delivery shift is for the previous orders, while the second Delivery shift will be for the next orders. The Planned finish time of the first Delivery shift and the Planned start time of the second Delivery shift are separated by the Cut-off time you have selected above

Extend an Open route
- Open route - The Route in which the Vehicle temporarily stops at the last Destination customer without returning to the Depot
- To make a Open Route, click here Open Route
- If you perform route extending with an Open route, after you have perform route optimization for the new orders, the Delivery route for the new orders will be merged right to the previous Open route with no Cut-off time, which means the driver will immediately travel from the last Destination customer of the previous orders to the first Origin customer of the next orders

Illustration (English)

Illustration (Vietnamese)
Route unlocking
- If for some reasons, the routing plan has some changes, you can still make changes to the routes that have been locked by using the Route unlocking function
- First, select the vehicle of which locked routes will need to be changed
- Click on the Unlock button at the bottom of the Timeline panel, next to the Lock Route button
- Similar to when you lock routes, you can select one single vehicle, several vehicles or all vehicles. Also, similar to the route locking process, only one order of each selected vehicle's Delivery route could be unlocked each time you click on Unlock button
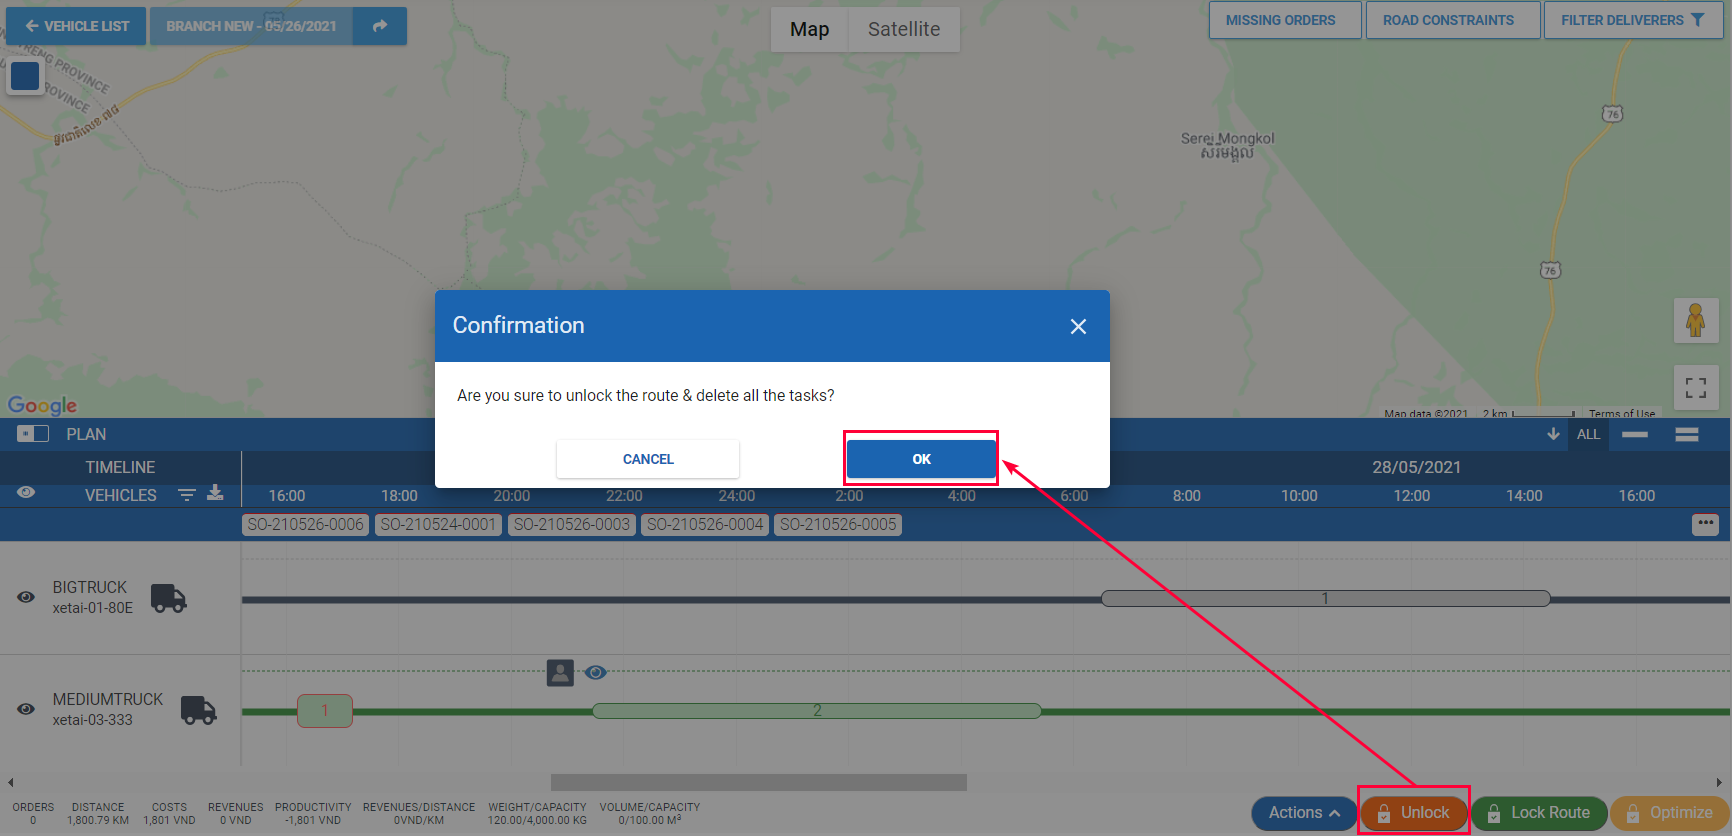
Illustration (English)
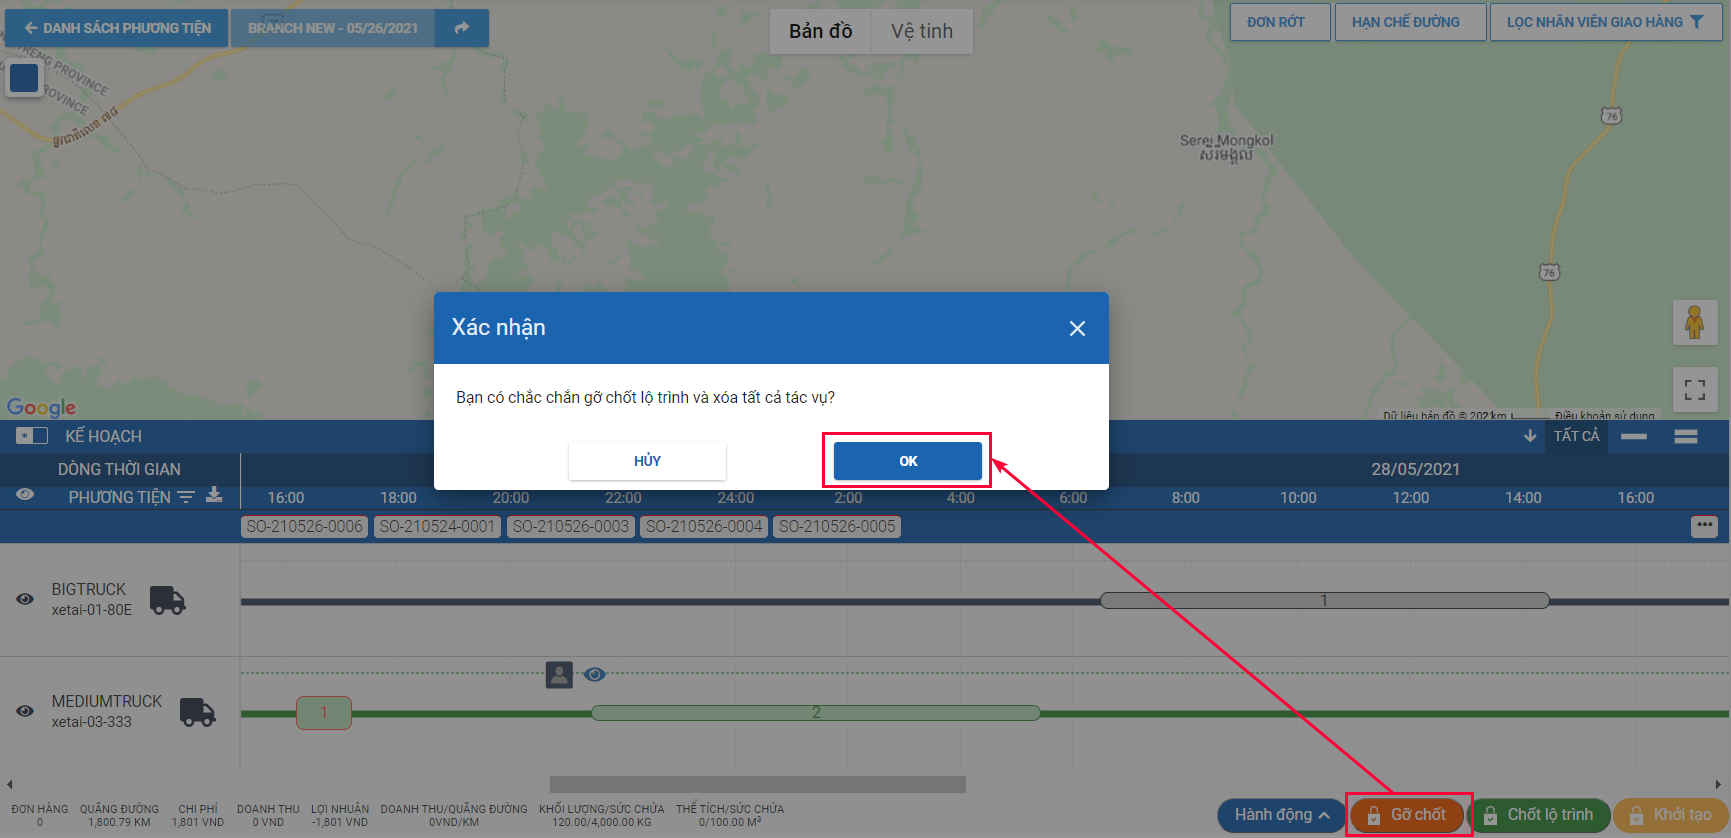
Illustration (Vietnamese)
BE CAREFUL WHEN USING THIS FUNCTION!Even if the drivers have already performed some tasks and submitted them on their Mobile app, you can still unlock the routes, thus erasing all the drivers' submitted tasks. Therefore, be extra careful when using this function
Route Plan Description
- Here is a sample Delivery Shift of a Vehicle. We will describe each component of this Delivery Shift below

- The thin time blocks with the solid inner color at the beginning and the end of the Delivery Shift represent the time period that the Vehicle spend at the parking lot/garage

- The time blocks with red outer border color and white inner color represent the time period that the Vehicle spends at an Origin Customer to pick up products

- The time blocks with green outer border color and white inner color represent the time period that the Vehicle spends at a Destination Customer to deliver products

- The length of the Origin and Destination Customer time blocks of an Order is determined depending on whether the Order is set up to use pallets or not, details as follows:
- If the Order is not set to use pallets, then the length of the Origin and Destination Customer time blocks of that Order will equal the Non-Palletized Time attribute of the Vehicle Type assigned to deliver that Order
- For example, an Order is not set to use pallets (The Palletized checkbox of that Order is not ticked)

- The Vehicle Type assigned to deliver that Order has the Non-Palletized Time attribute to be 60 minutes
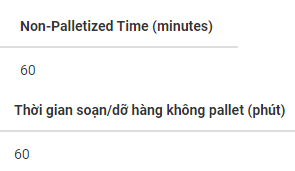
- During the Route Plan optimization process, the length of the Origin Customer time block and Destination time blocks of each Order will be 60 minutes
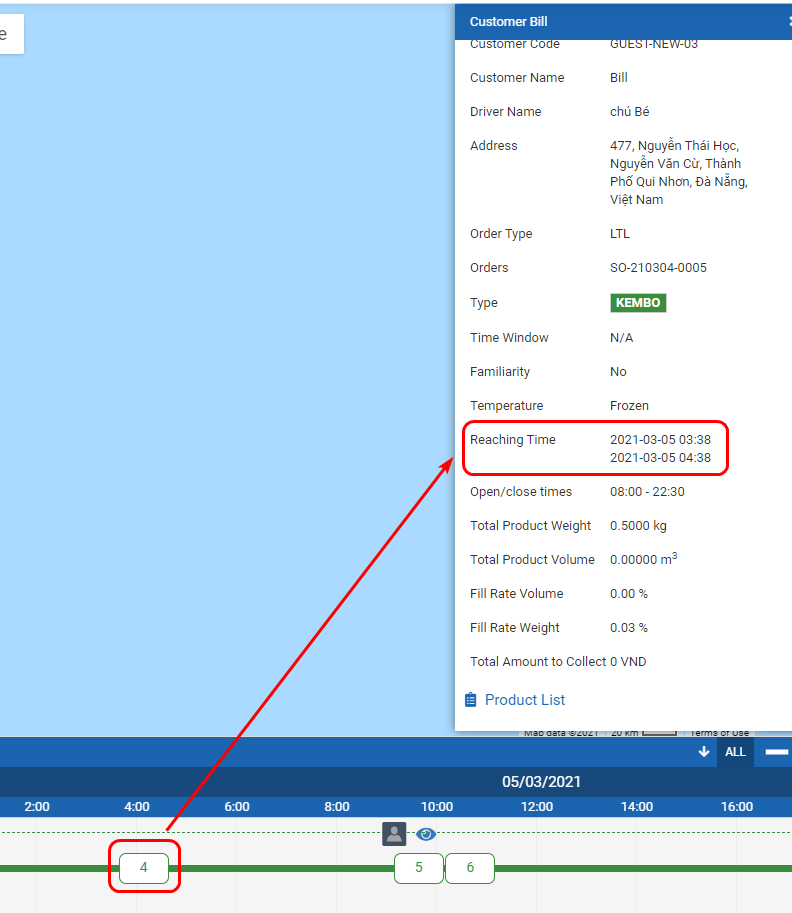
Illustration (English)
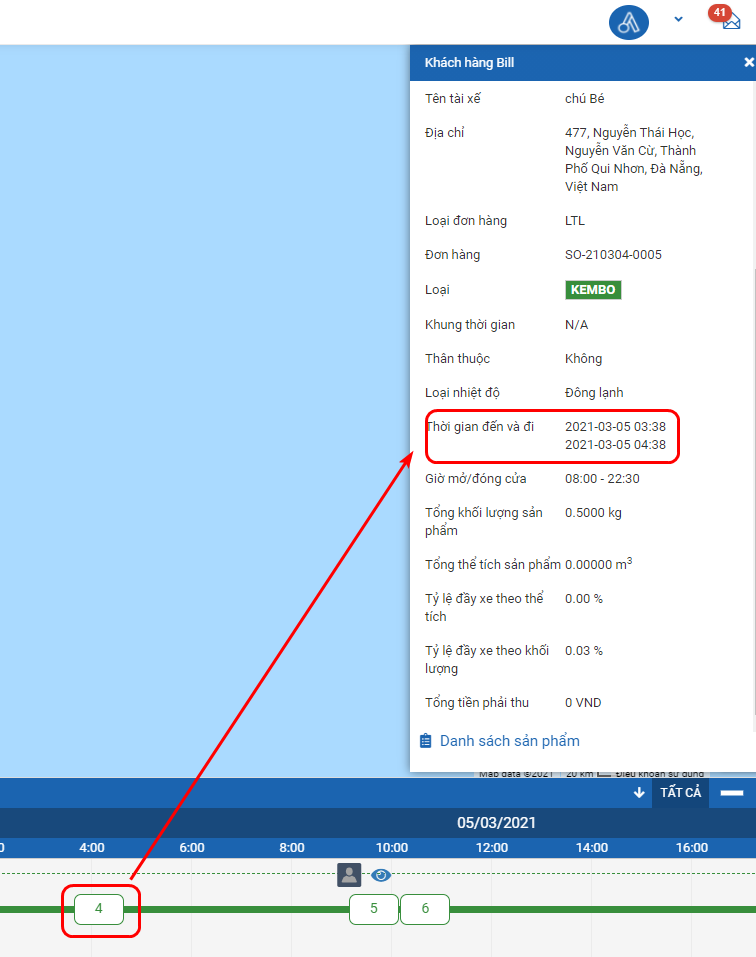
Illustration (Vietnamese)
- On the other hand, if an Order is set to use pallets, then the length of the Origin and Destination Customer time blocks of that Order will equal the Palletized Time attribute of the Vehicle Type assigned to deliver that Order
- Occasionally, there will appear some time blocks with inner gray color. These time blocks represent either the Waiting Time or the Resting Time

- Waiting Time is the time period between the time point when the Vehicle arrives at a Customer location and the time point when the Customer will be available to hand over or receive products. The Waiting Time will always be positioned right to the left of a Customer time block. There will be no gap between these two time blocks

Illustration (English)

Illustration (Vietnamese)
- Resting Time is the time period that the driver takes to rest after every 24 hours of working (Excluding the driving time and the time periods spent at customer locations). Currently, the resting time is fixed at eight (8) hours. Normally there will be no Customer time block next to the Resting time block

Origin and Destination Customer Time Block Placement
- If there are multiple Orders on the Vehicle's Delivery Shift, the system can place the Origin and the Destination Customer time blocks in two ways by considering the Order Type and the value inputted into the Province/City of the Customers
Origin and Destination Customer Time Blocks Are Placed Alternately
- If the Order Type is FTL (Full Truckload), the Origin and Destination Customer time blocks will be placed alternately without taking into account the Customers' Province/City attributes
- For example, you have 3 orders of which the Order Types are all FTL, containing 3 Origin Customers and 3 Destination Customers
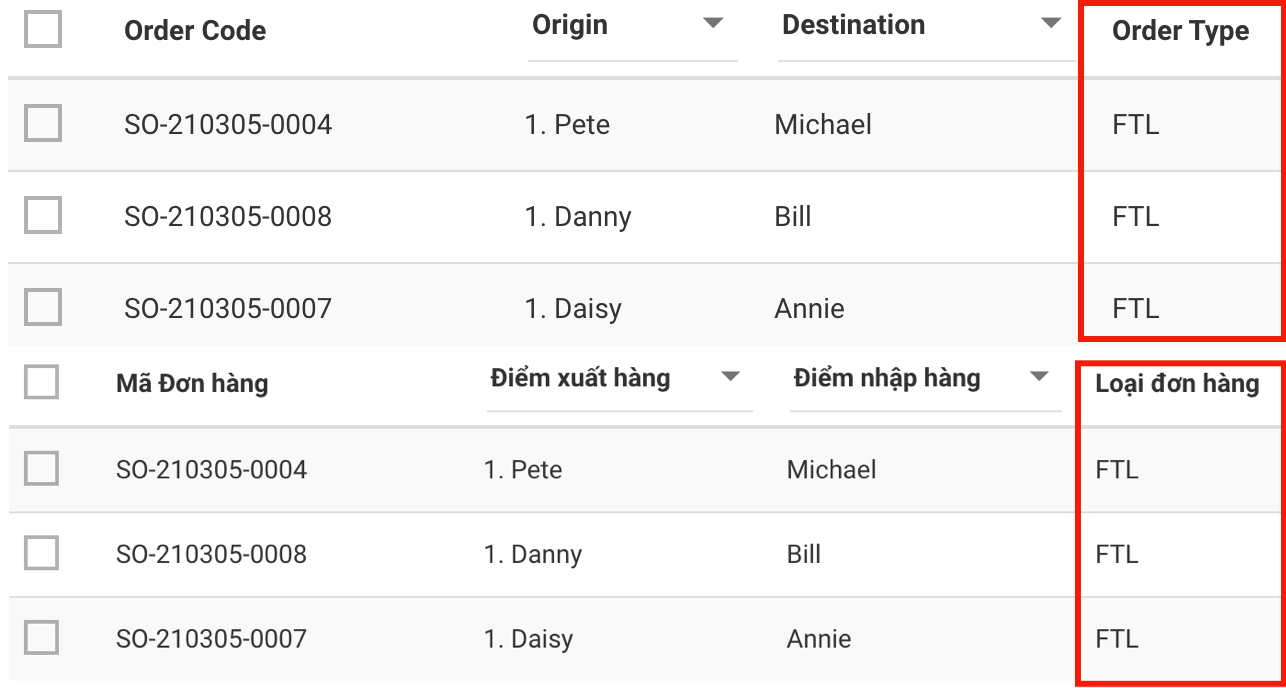
Order Types
- In this case, the Origin and Destination Customer Time Blocks are placed alternately as below:

- If the Order Type is LTL (Less than Truckload) and the Origin and Destination Customers' addresses are in different provinces or cities, the Origin and Destination Customer time blocks will be placed alternately
- For example, you have 2 orders of which the Order Types are both LTL, containing 2 Origin Customers and 2 Destination Customers:
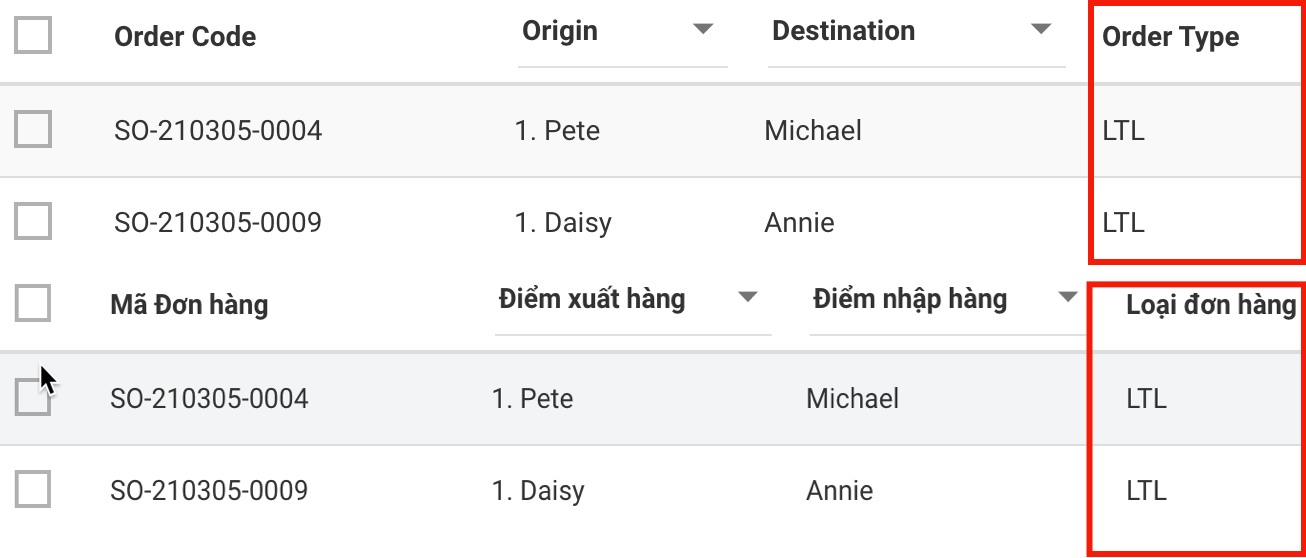
Order Type
- Furthermore, all the Customers' Province/City attributes have different values:
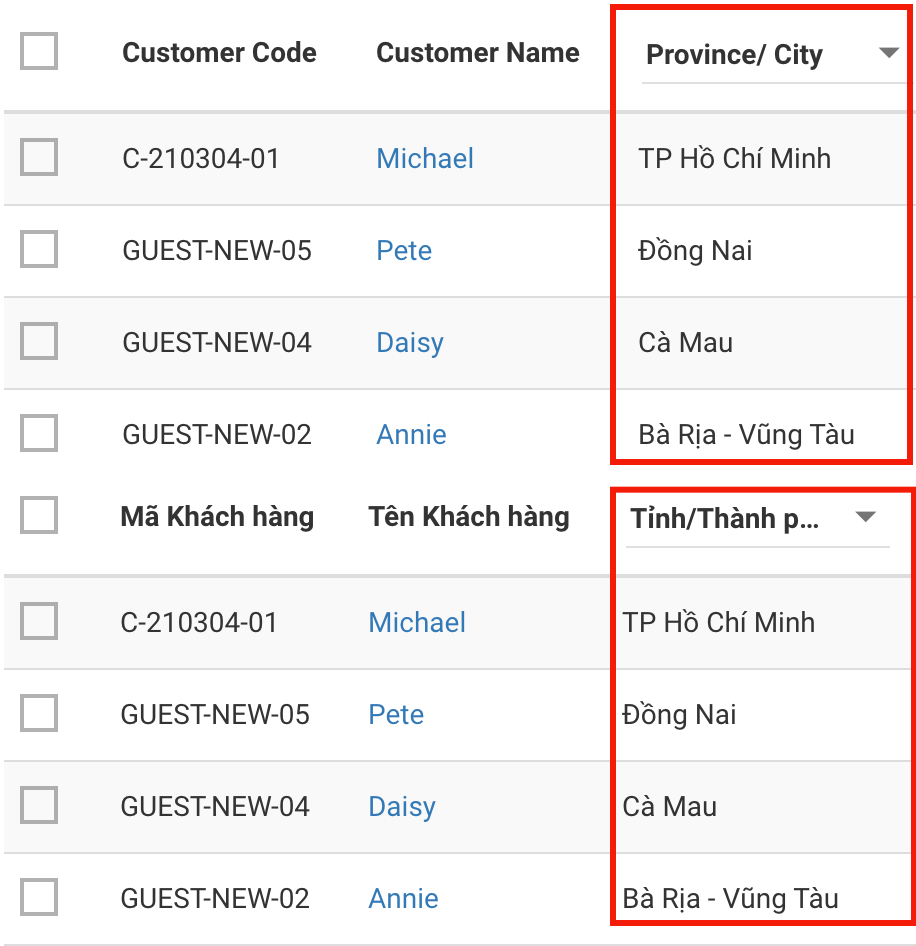
Province/City
- In this case, the Origin and Destination Customer Time Blocks are placed alternately as below:

All/Some Origin Customer Time Blocks Are Placed On The Same Side, While All/Some Destination Customer Time Blocks Are Placed On The Other Side
- If the Order Type is LTL, the Origin Customers' addresses are in the same Province/City, and the Destination Customers' addresses are in the same Province/City, all Origin Customer time blocks will be placed on one side, and all Destination Customer time blocks will be placed on the other side
- Take the previous example to illustrate this. You still have 2 LTL orders with 2 Origin Customers and 2 Destination Customers:
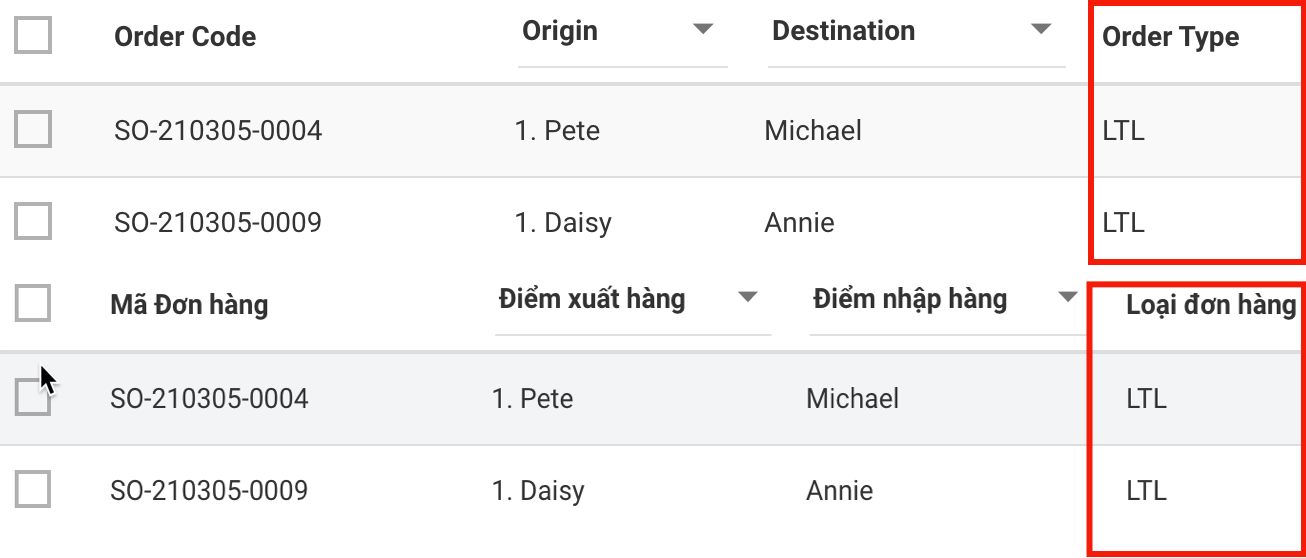
Order Type
- However, this time, adjust the Province/City attributes of the Origin Customers similar to each other, then do the same for the Destination Customers:
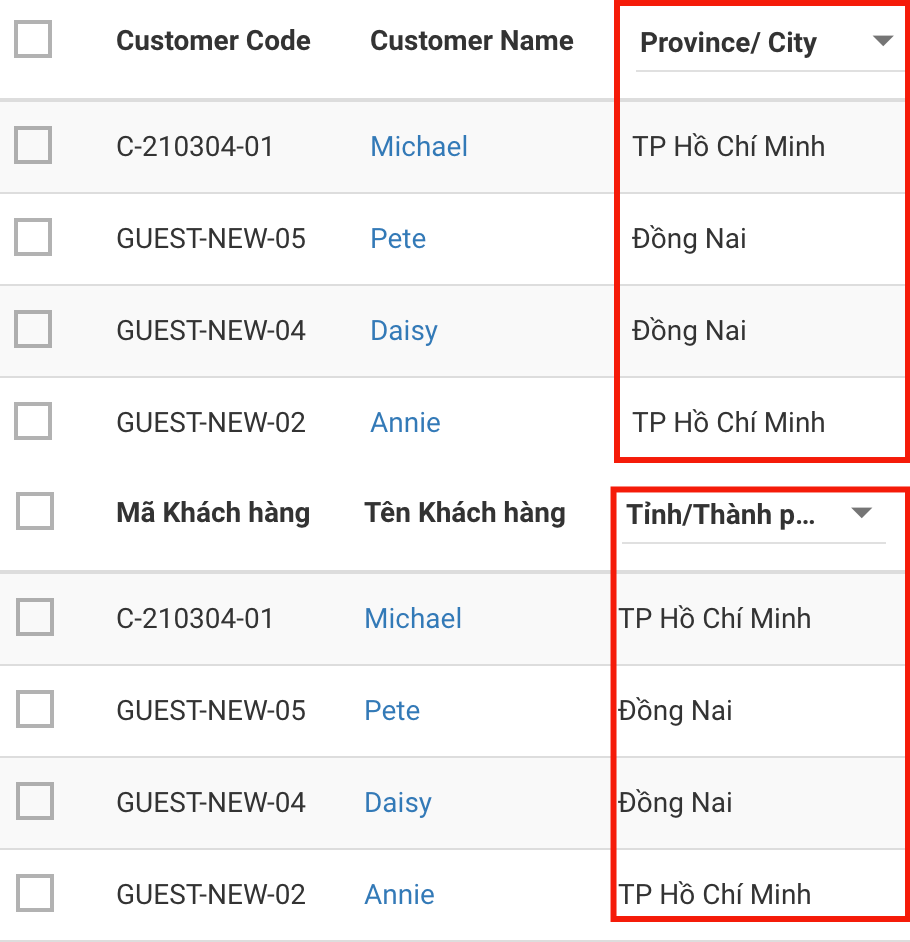
Province/City
- In this case, the Origin Customers time blocks are placed on one side and the Destination Customers are placed on the other side as below:

- Note:
- Any order which is of the FTL type will not be applied to this case
- This case applies for the Customers (both Origin and Destination) who have the same Province/City attribute
- You can manually adjust the values inputted into the Province/City attribute of the Customers for this case to happen even though they are not their actual addresses:
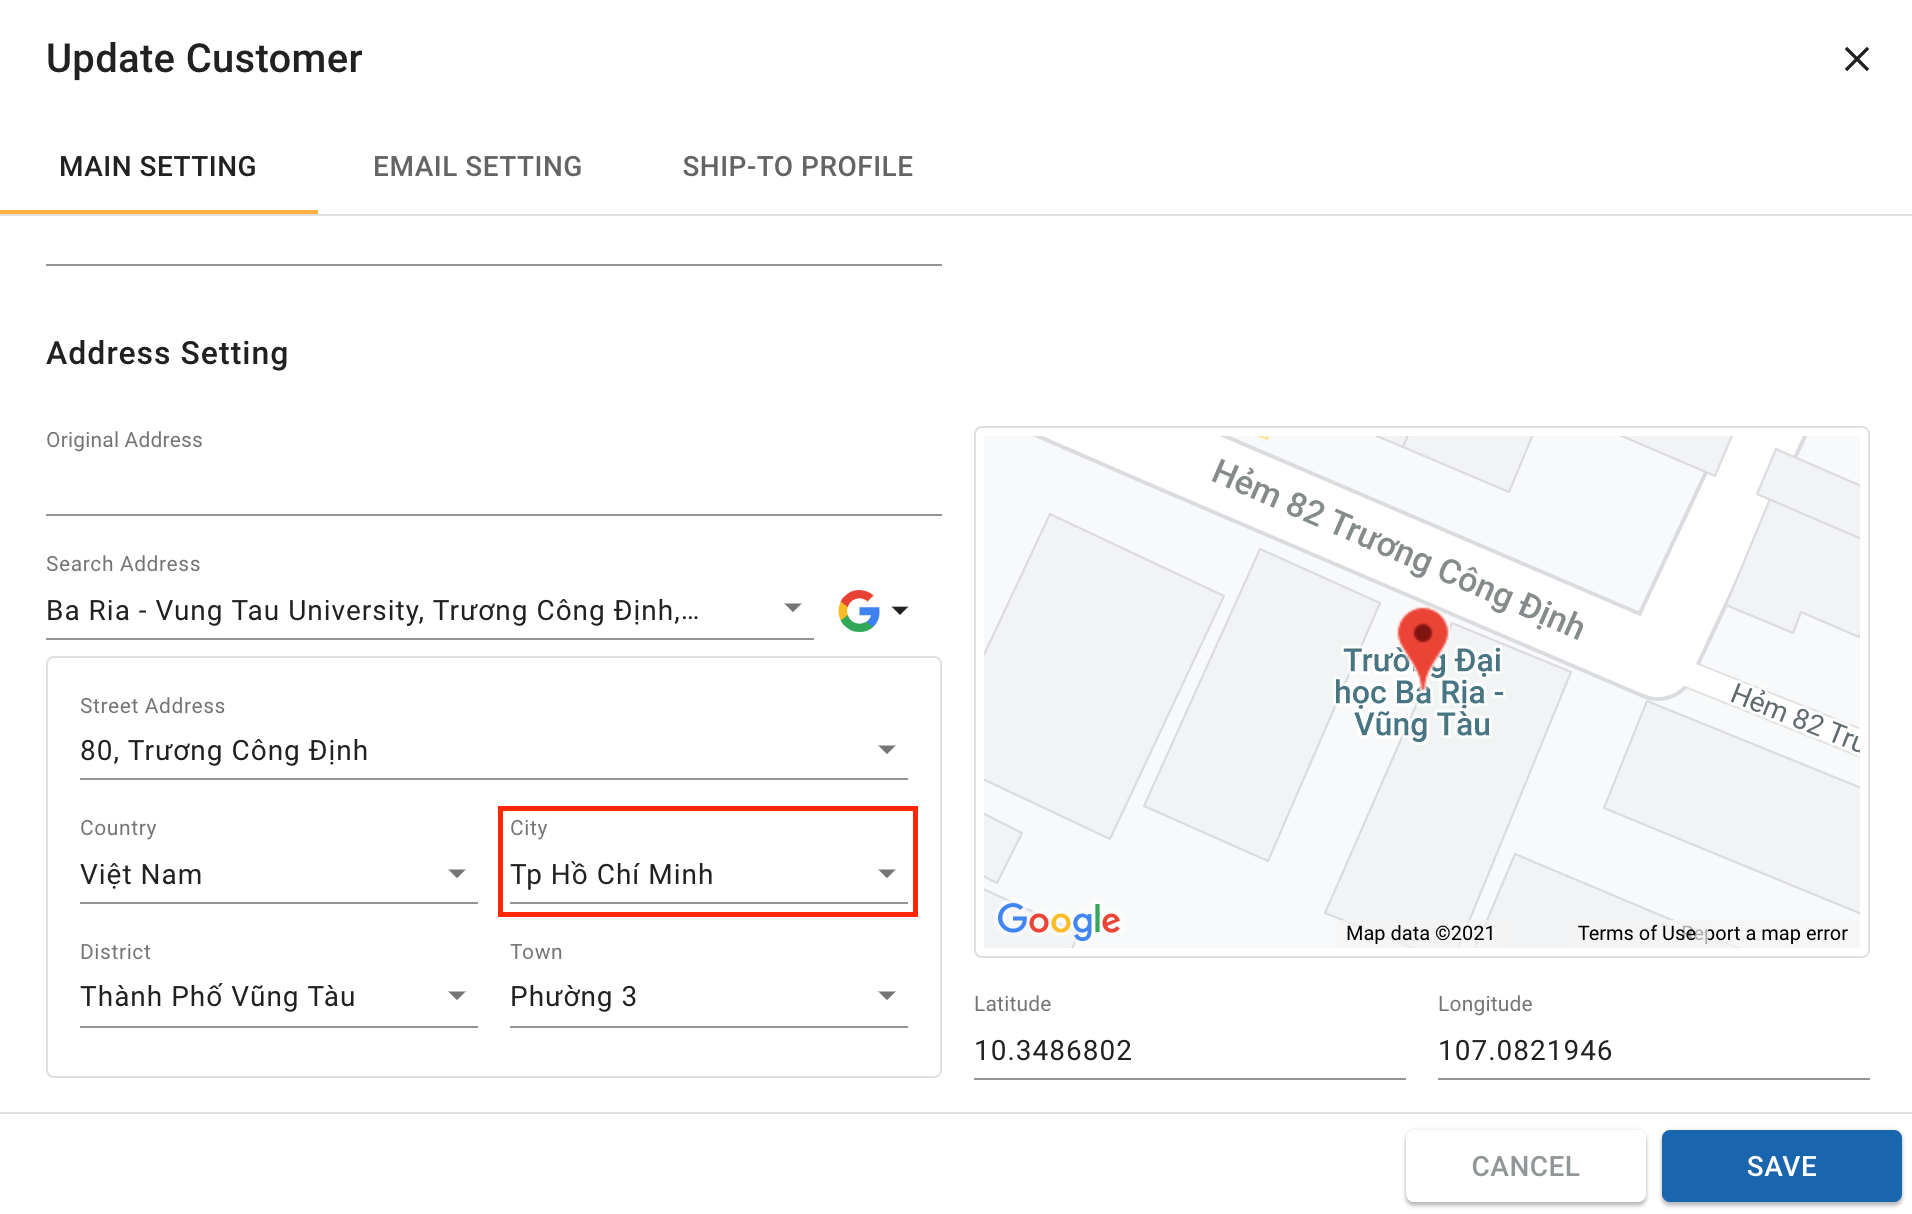
Illustration (English)
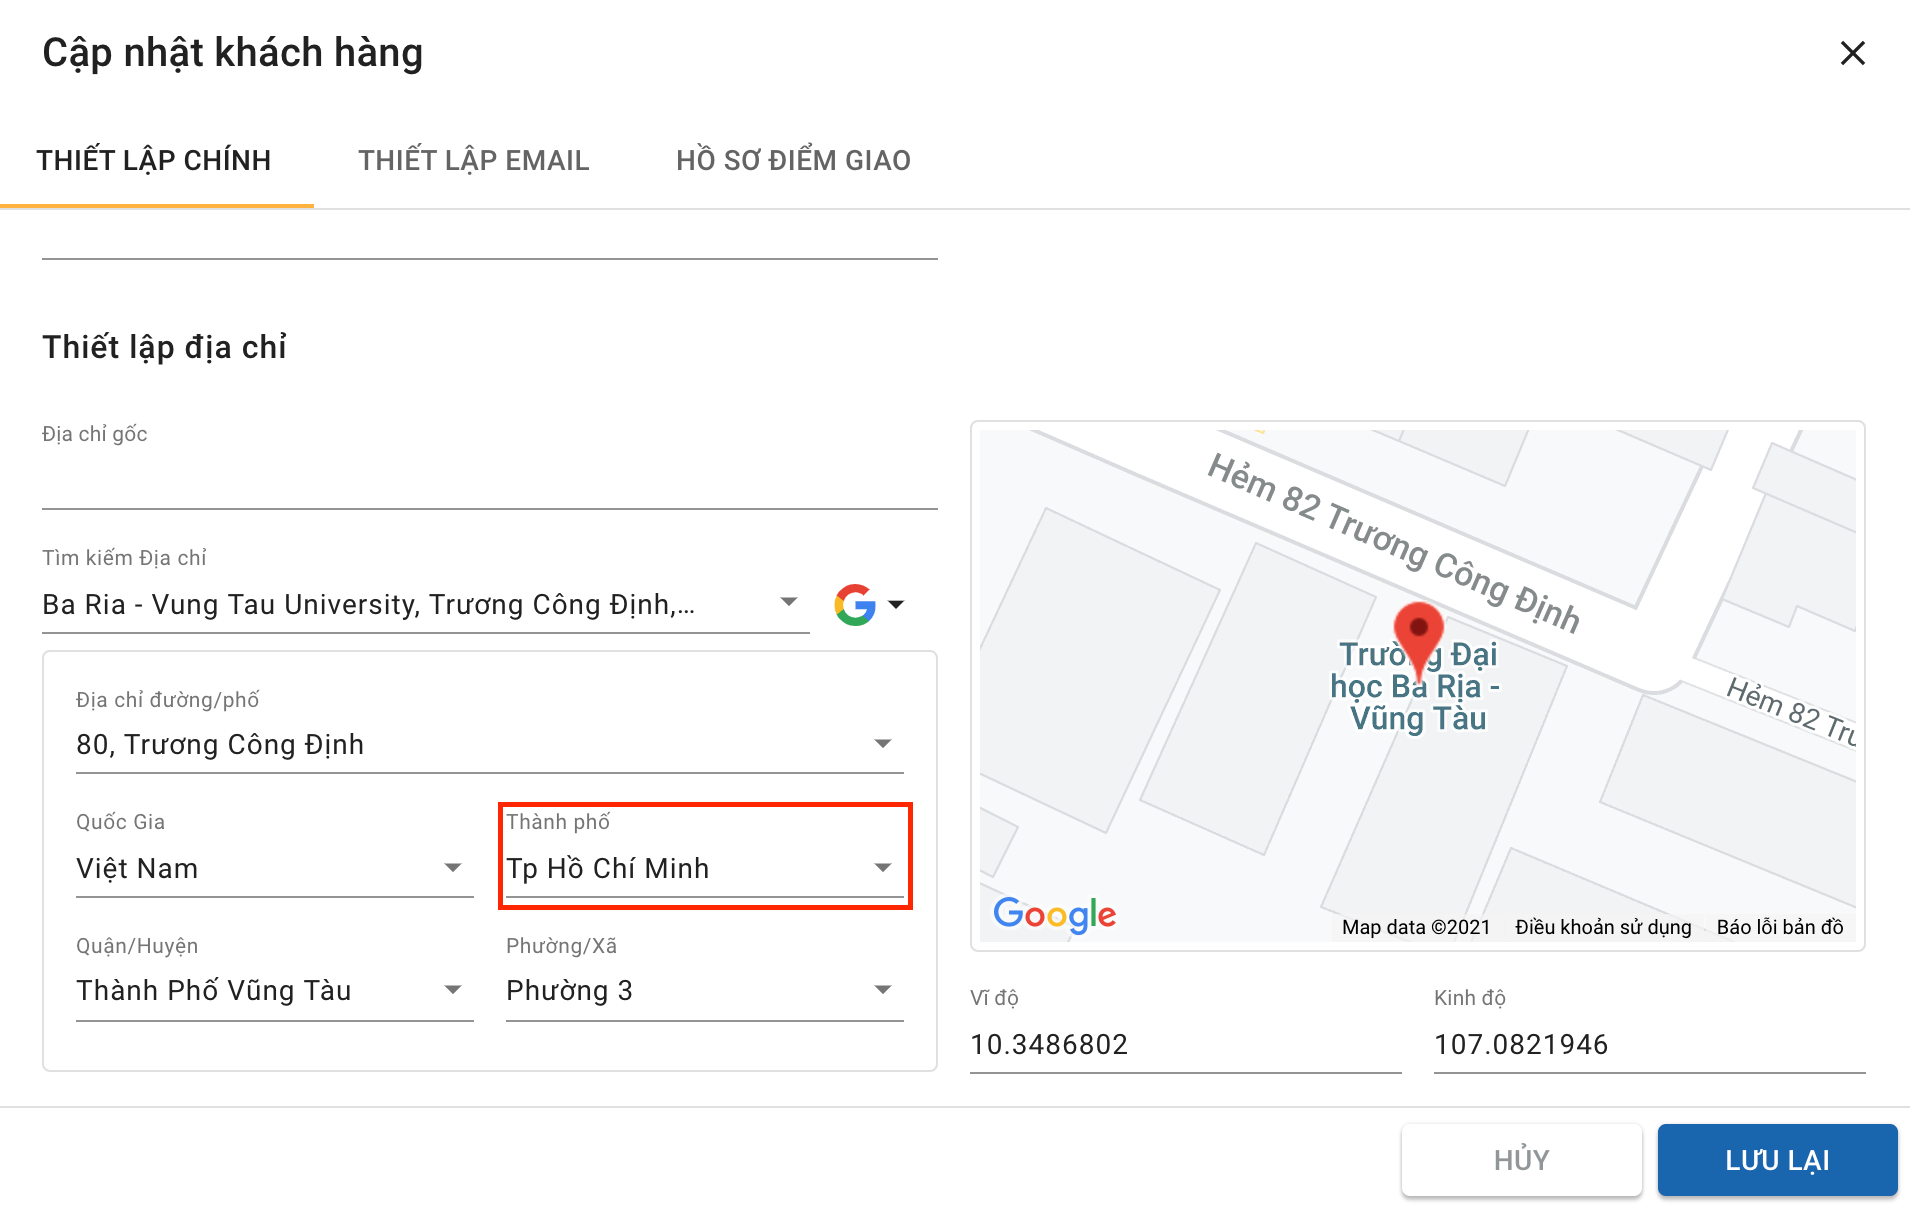
Illustration (Vietnamese)
Updated about 1 month ago
