Manage Sales Orders
PDP Order Types
- In this model, there are two PDP Order Types:
- Less than Truckload (LTL): This Order Type is used when a single Vehicle will pickup Products at multiple locations (Defined as the Origin Customer) then deliver to one or more locations (Defined as the Destination Customer)
- Full Truckload (FTL): This Order Type is used when a single Vehicle will pickup Products at only one Origin Customer then deliver to only one Destination Customer
Locate PDP Order List
- The PDP Orders can be classified into two groups based on their active status. The active status of a PDP Order is determined by comparing the current date on your computer with the Date attribute of that PDP Order. If the current date on your computer lies within the Date range of the PDP Order, that PDP Order is deemed as Active. On the other hand, if the current date on your computer is in the past in comparison with the Date range of the PDP Order, that PDP Order is deemed as Inactive
- The Active PDP Orders are listed on the PDP Orders > Current Orders tab
- This tab is where you can also create new PDP Orders
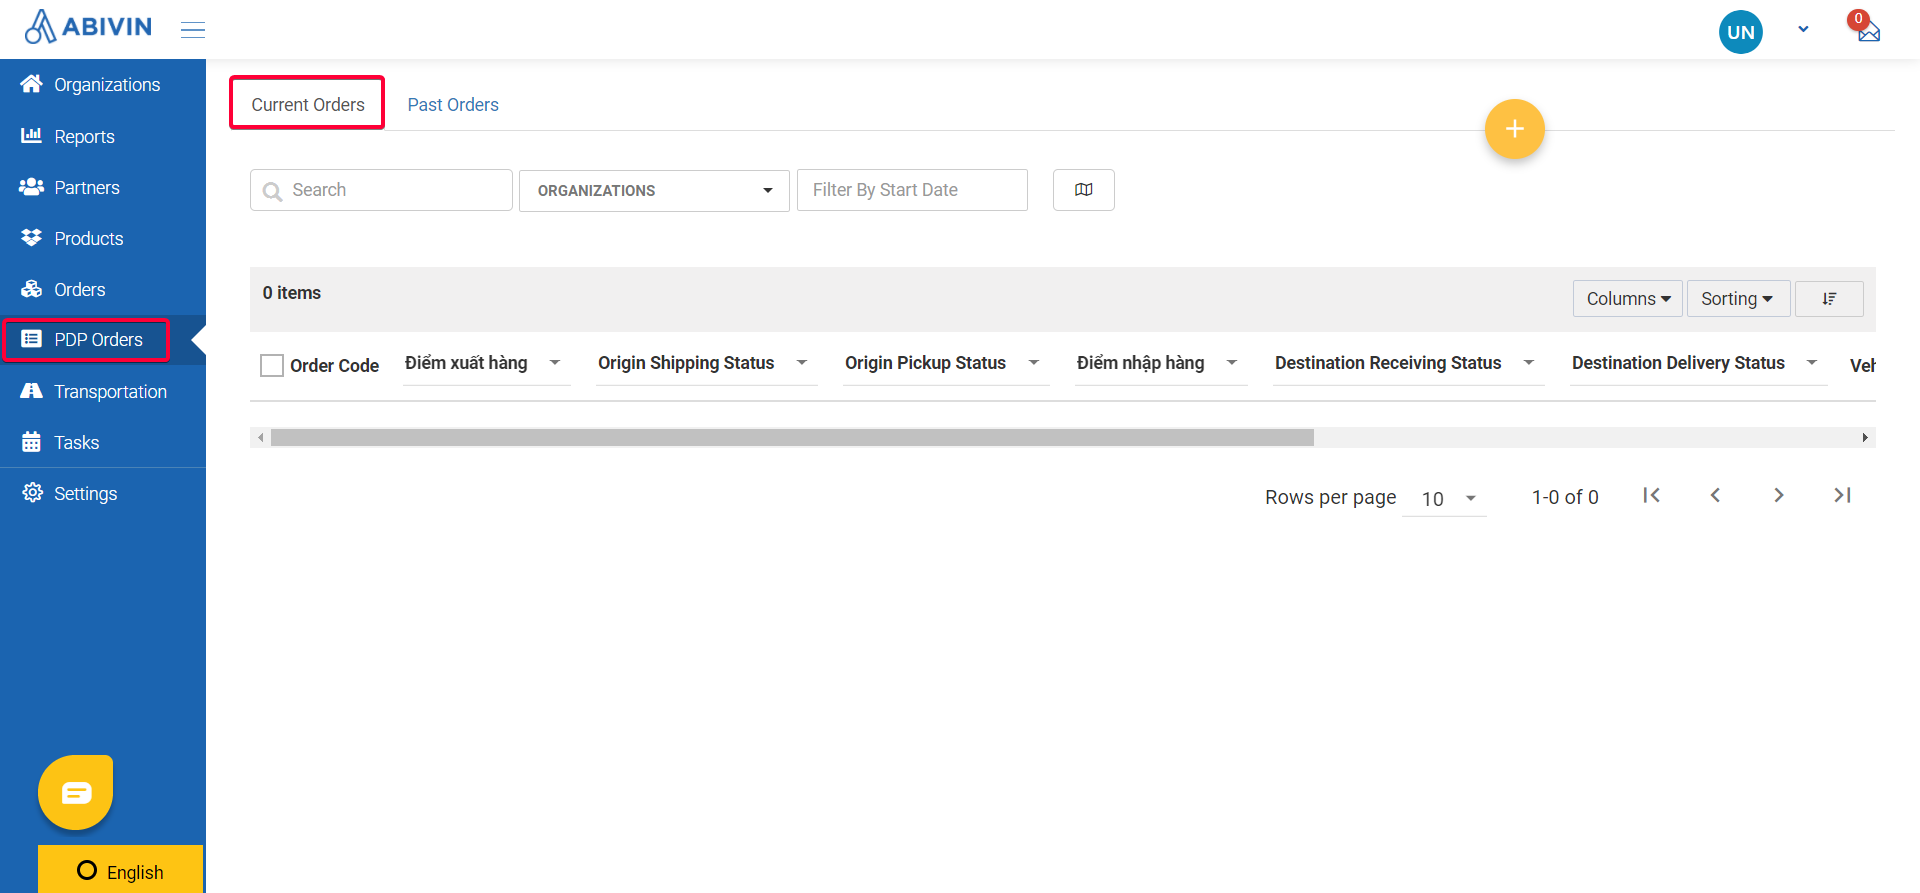
Illustration (English)
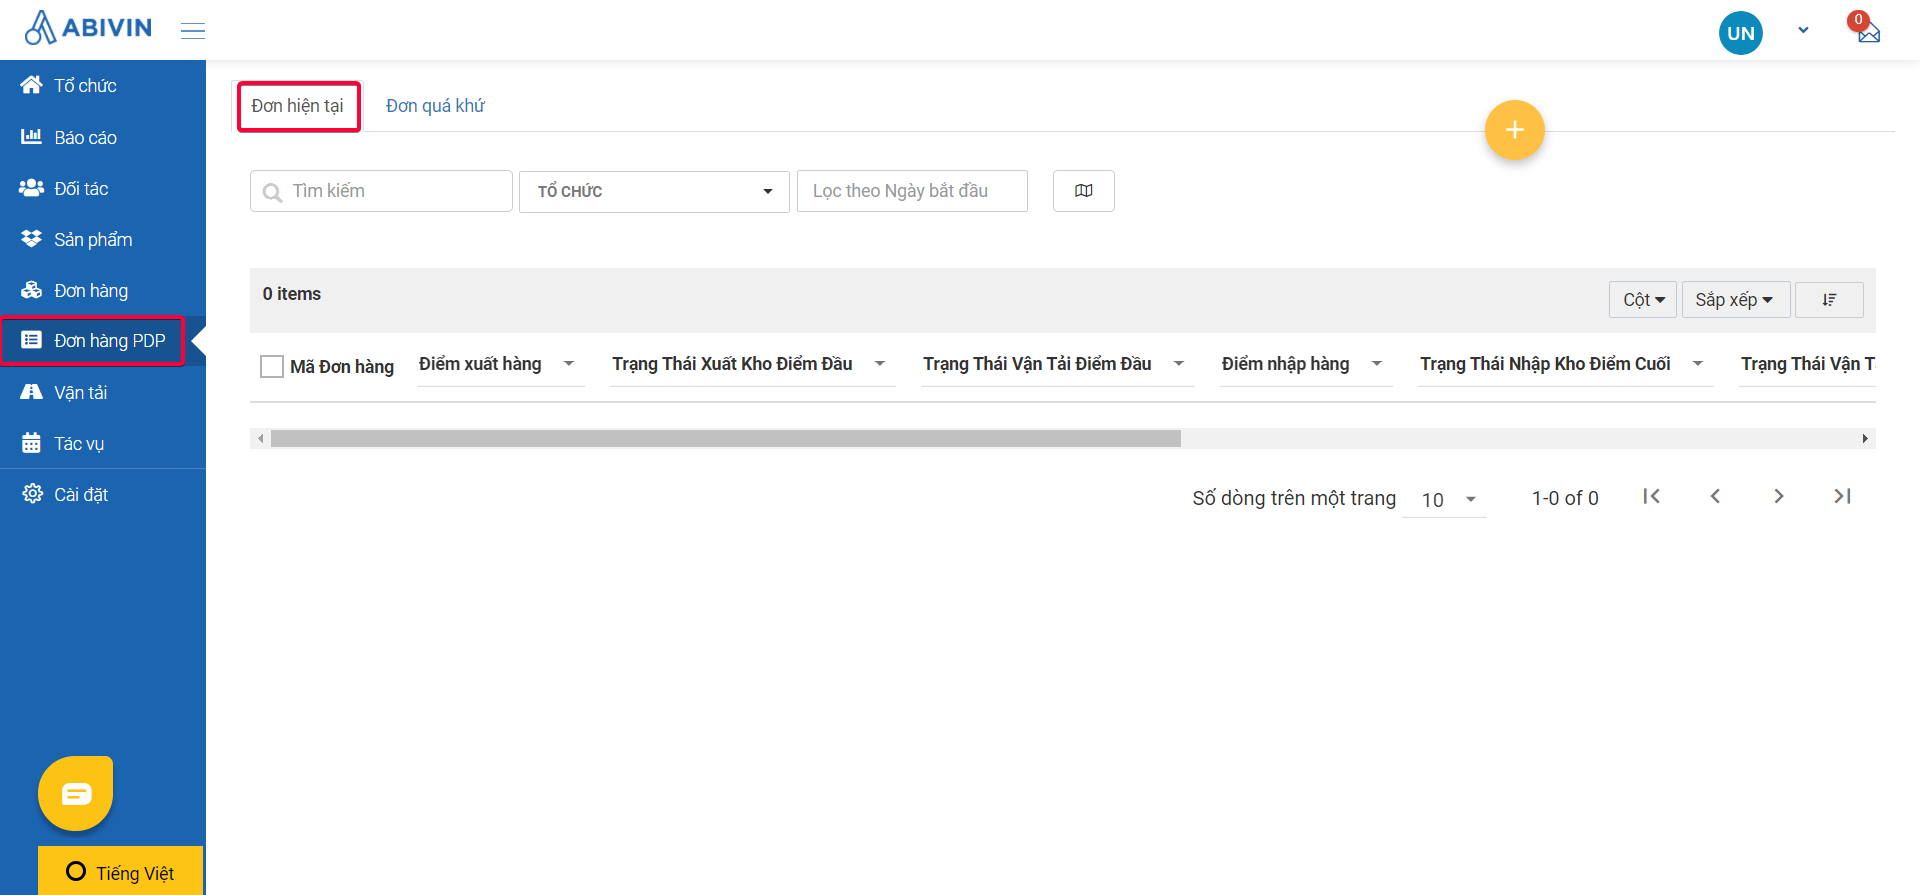
Illustration (Vietnamese)
- The past, inactive PDP Orders are listed on the PDP Orders > Past Orders tab
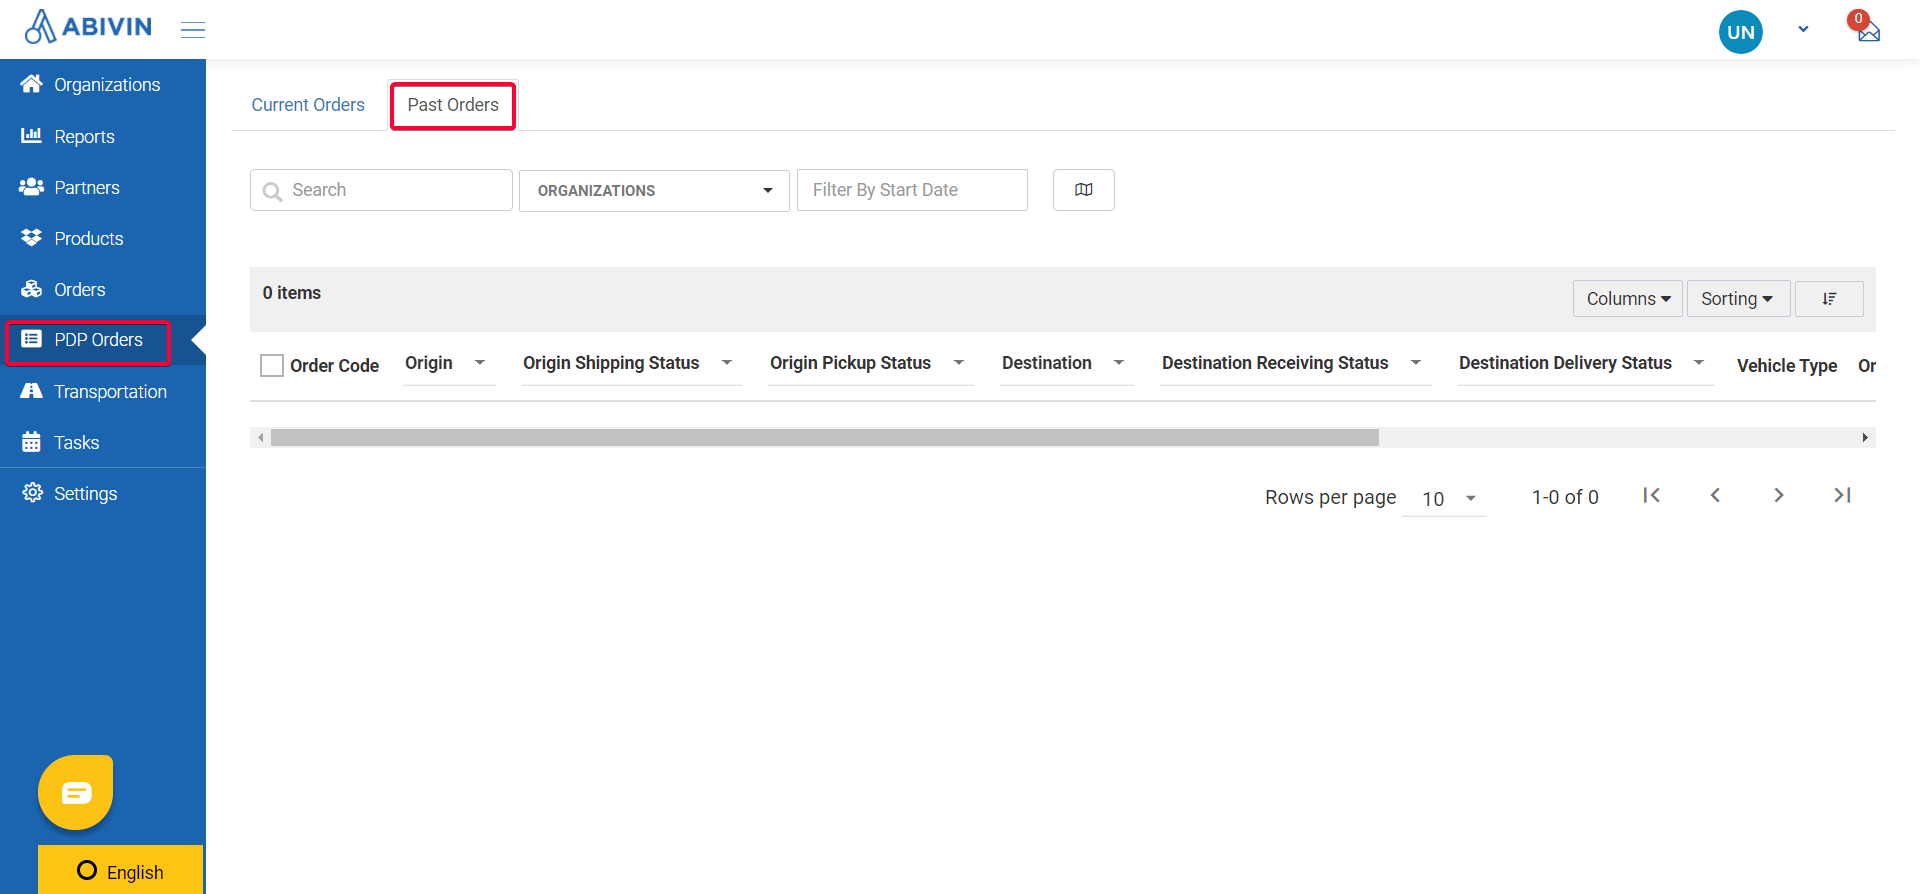
Illustration (English)
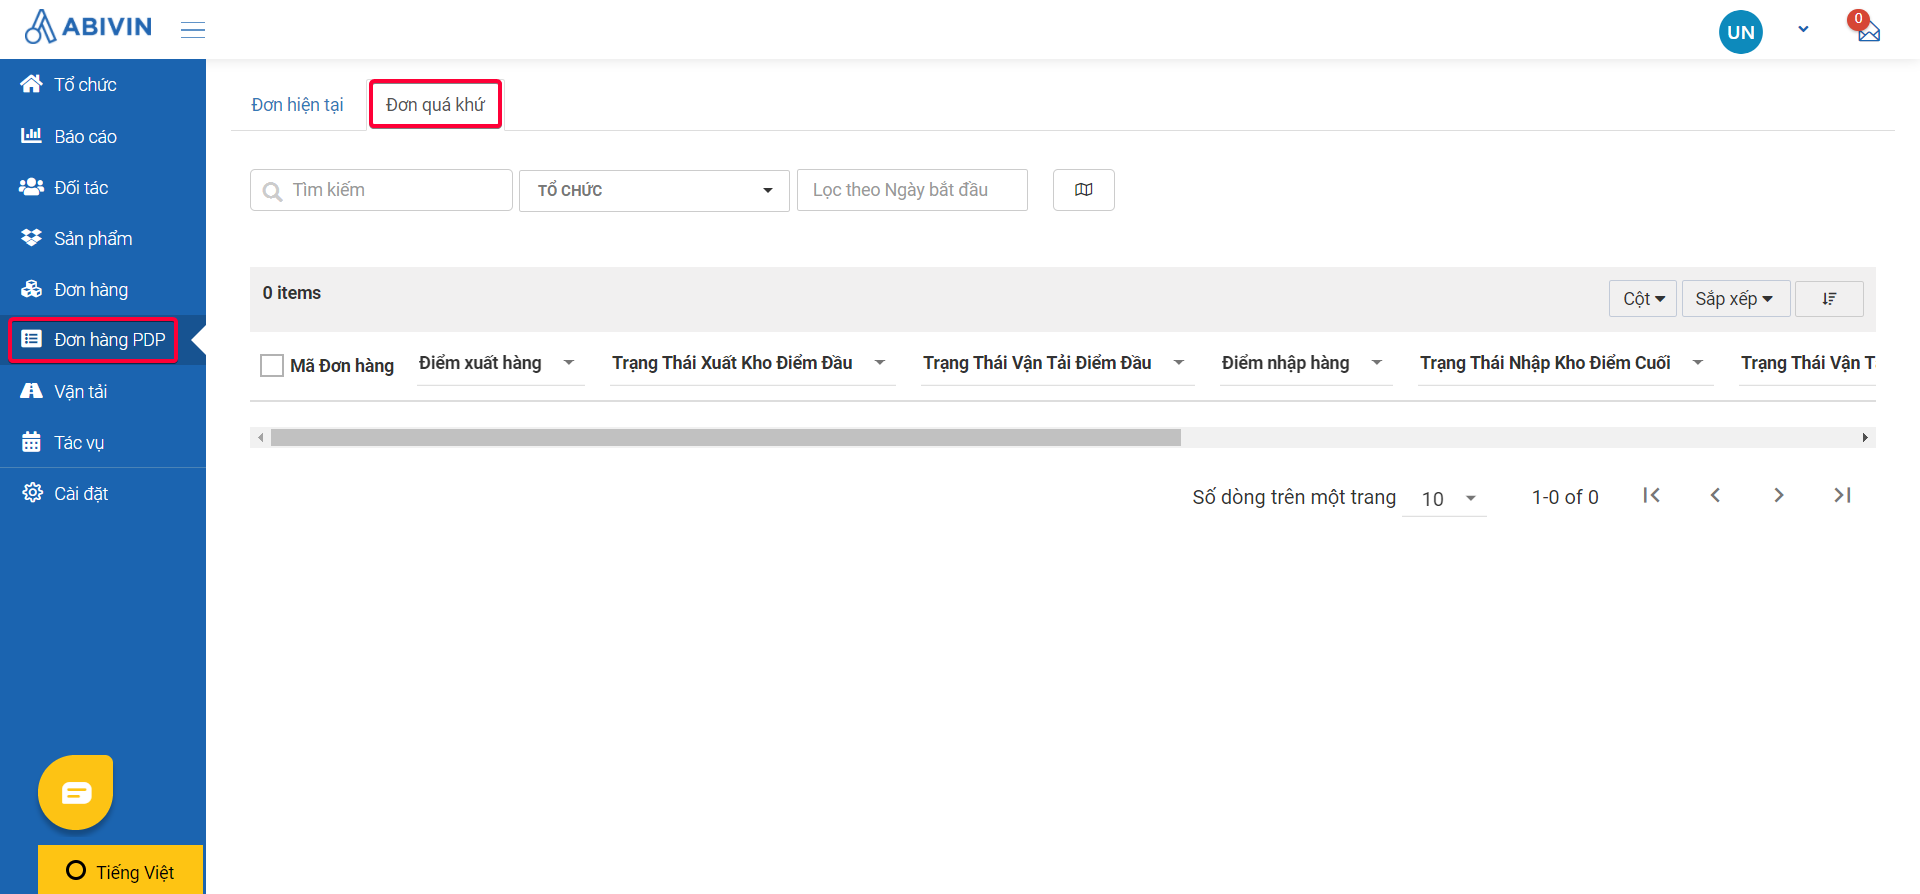
Illustration (Vietnamese)
Create PDP orders
PDP Order Information Fields
- Below is the list of all information fields of a PDP Order
Information field | Description |
|---|---|
Organization (Webform) (Required) | The Depot that directly manages the PDP Order being created. It is actually the parking garage of the Vehicles. The Vehicles will start their very first Delivery Shifts in a day at the parking garage |
Order Code | The management code assigned to the PDP Order being created |
Order Type | The Order Type of the PDP Order being created |
Date | The date or date range during which the PDP Order being created can be performed |
Start Date; End Date | Start Date: The first date of the date range during which the order being created can be performed |
Origin Customer (Webform); Origin Pickup Code (Excel import file) | The Customer(s) where the Vehicles will travel to and pick up Products |
Destination Customer (Webform); Destination Delivery Code (Excel import file) | The Customer(s) where the Vehicles will travel to and deliver Products |
Origin Time Window | The time window during which the Vehicles can pick up Products at the Origin Customer location |
Destination Time Window | The time window during which the Vehicles can deliver Products at the Destination Customer location |
Type of Vehicle (Webform); Vehicle Type (Excel import file) | The Vehicle Type chosen to perform the PDP Order being created |
Sub-contractor (Webform); Use Subcontractor (Excel import file) | This field specifies whether the PDP Order being created might/will be performed by the Vehicles of the sub-contractors or not
|
Sub-contractor Name | Name of the sub-contractor whose Vehicles might/will perform the PDP Order being created |
Palletized | Specify whether the Products in the PDP Order being created will be placed on the pallets or not |
Product (Webform); Product Code (Excel import file) | The Product(s) in the PDP Order being created |
Expired Date | The date on which the Product in the PDP Order being created is deemed expired, no longer suitable for delivery |
Lot Number | The number of the Product Lot from where the whole cases/single items of the Product in the PDP Order being created are picked up |
Total Weight (kg) | The total weight value of the PDP Order being created, in kilogram (kg) |
Total Volume | The total volume value of the PDP Order being created, in cubic meter (m3) |
Self-calculated Stats | Let the system automatically calculate the Total Weight, Total Volume, and Total Price attributes of the PDP Order instead of having the users manually input those values |
Pallet (Webform); Number Of Pallets (Excel import file) | The number of pallets of a specific Product in the PDP Order being created |
Number Of Cases | The number of whole cases of a specific Product in the PDP Order being created |
Number Of Items | The number of single items of a specific Product in the PDP Order being created |
Total Pallet | The total number of Product pallets in the PDP Order being created |
Total Price | The total price of the PDP Order being created |
Customer Reference Number | The reference phone number of the Destination Customer location |
Check by | The name of the staff who checks the accuracy of the PDP Order being created |
Create PDP Orders Using The Webform
- When you use the Webform to create the PDP Orders, you ought to input the below information fields first to ensure there are no mistakes:
- Organization
- Order Code
- Order Type
- Date
- Origin Customer; Origin Time Window
- Destination Customer; Destination Time Window
- Below we will guide you on how to input each of the information fields on the Webform
1.1. Organization
- Click on this field. Input the Organization Code/Organization Name of the desired Depot into the search bar then select it from the drop-down menu

Illustration
1.2. Order Code
- The Order Code of the PDP Order is automatically generated in the following format: SO-yymmdd-xxxxx, in which:
- SO is the acronym for Sales Order
- yy is the last two digits of the current year. For example, if the current year is 2021 then the yy value would be 21
- mm is the current month. For example, if the current month is May then the mm value would be 05
- dd is the current date. For example, if the current date is Fifth then the dd value would be 05
- xxxxx is the numerical order of the PDP Order being created. This numerical order will automatically increase each time you open the Create New Order screen. For example, 00001; 00002; 00003, and so on
- You can also change the Order Code to the format that you normally use. However, please note that the Order Code must not contain spaces
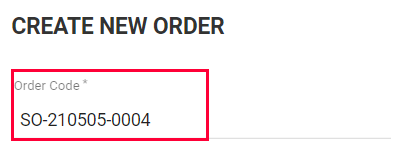
Illustration (English)
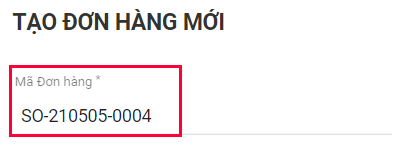
Illustration (Vietnamese)
1.3. Order Type
- Click on this field. Select the appropriate Order Type from the drop-down menu
- FTL (Full Truckload): Select this Order Type if you wish to generate the Route Plans in which:
- 1 - Each Order will have only one Origin Customer and only one Destination Customer
- 2 - If a Vehicle is assigned multiple FTL Orders, that Vehicle will perform the Orders in a sequential manner
- For example, a Vehicle is assigned a Delivery Shift which consists of three FTL Orders, Order A, Order B, and Order C. In this scenario, the stop sequence on the Delivery Shift of the Vehicle might look like so:
- Stop 1: Order A's Origin Customer
- Stop 2: Order A's Destination Customer
- Stop 3: Order B's Origin Customer
- Stop 4: Order B's Destination Customer
- Stop 5: Order C's Origin Customer
- Stop 6: Order C's Destination Customer
- LTL (Less than Truckload): Select this Order Type if you wish to generate the Route Plans in which:
- 1 - One Order can have more than one Origin Customer.
- 2 - If a Vehicle is assigned multiple LTL Orders, that Vehicle might travel to all the Origin Customer locations of the Orders to pick up Products first then deliver to all the Destination Customer locations
- Note: Notice that we say might instead of always because, in order to attain this, you need to set up the Origin and Destination Customers of those LTL Orders so that the Origin Customers share the same City/Province attribute, and so do the Destination Customers
- For example, a Vehicle is assigned a Delivery Shift which consists of three LTL Orders, Order A, Order B, and Order C. The Origin Customers of these three Orders are set up to have the same City/Province, and so do the Destination Customers. In this scenario, the stop sequence on the Delivery Shift of the Vehicle will look like so:
- Stop 1: Order A's Origin Customer
- Stop 2: Order B's Origin Customer
- Stop 3: Order C's Origin Customer
- Stop 4: Order A's Destination Customer
- Stop 5: Order B's Destination Customer
- Stop 6: Order C's Destination Customer
1.4. Date
- Click on this field. Select the Start Date and End Date from the drop-down calendar then click the Apply button to finish creating the date range
- If the Origin and Destination Customer locations of the Order being created are located far away from each other, you should select a long date range that spans across several days to ensure the Order has enough time to be performed
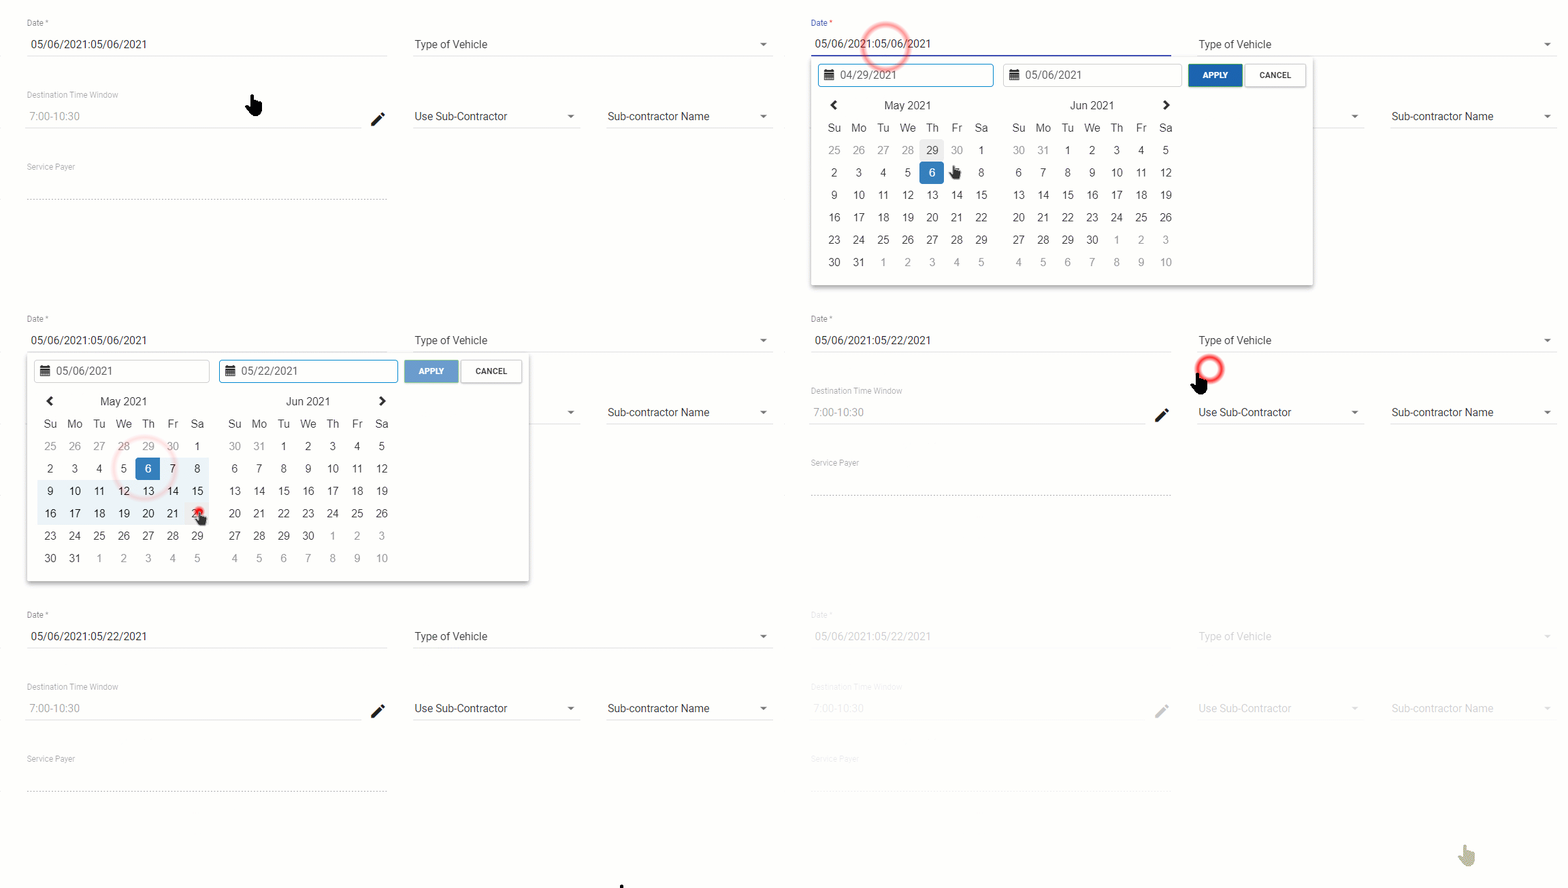
Illustration (English)
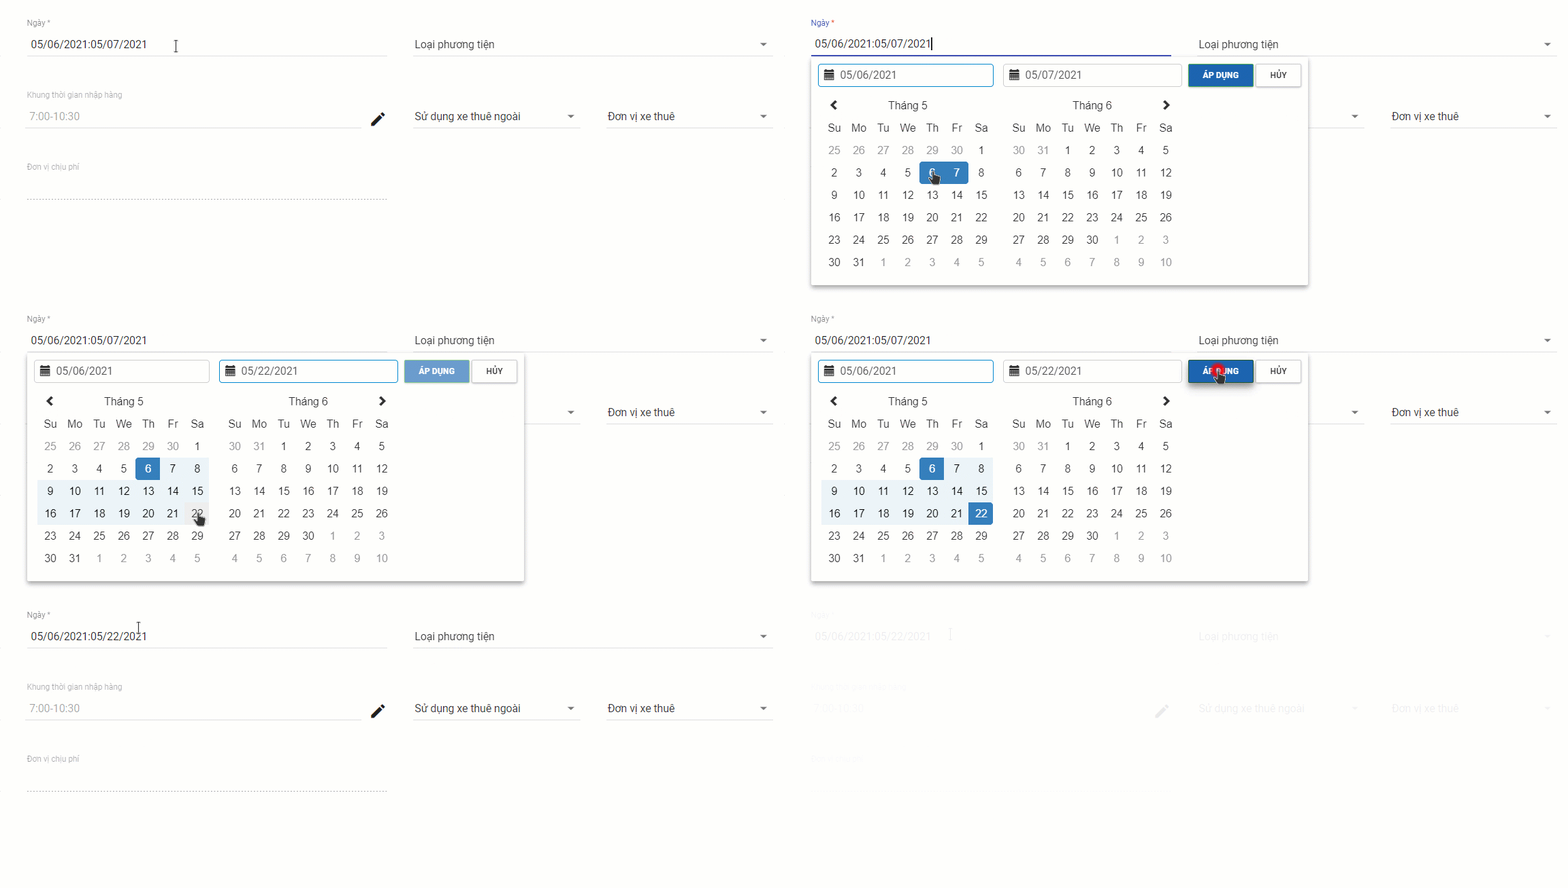
Illustration (Vietnamese)
1.5. Origin Customer & Destination Customer
- To select the Origin Customer, click on that field. Scroll the drop-down menu down until you see the desired Customer and select it. Alternatively, you can input the Customer Name/Customer Code into the search bar then select the returned result
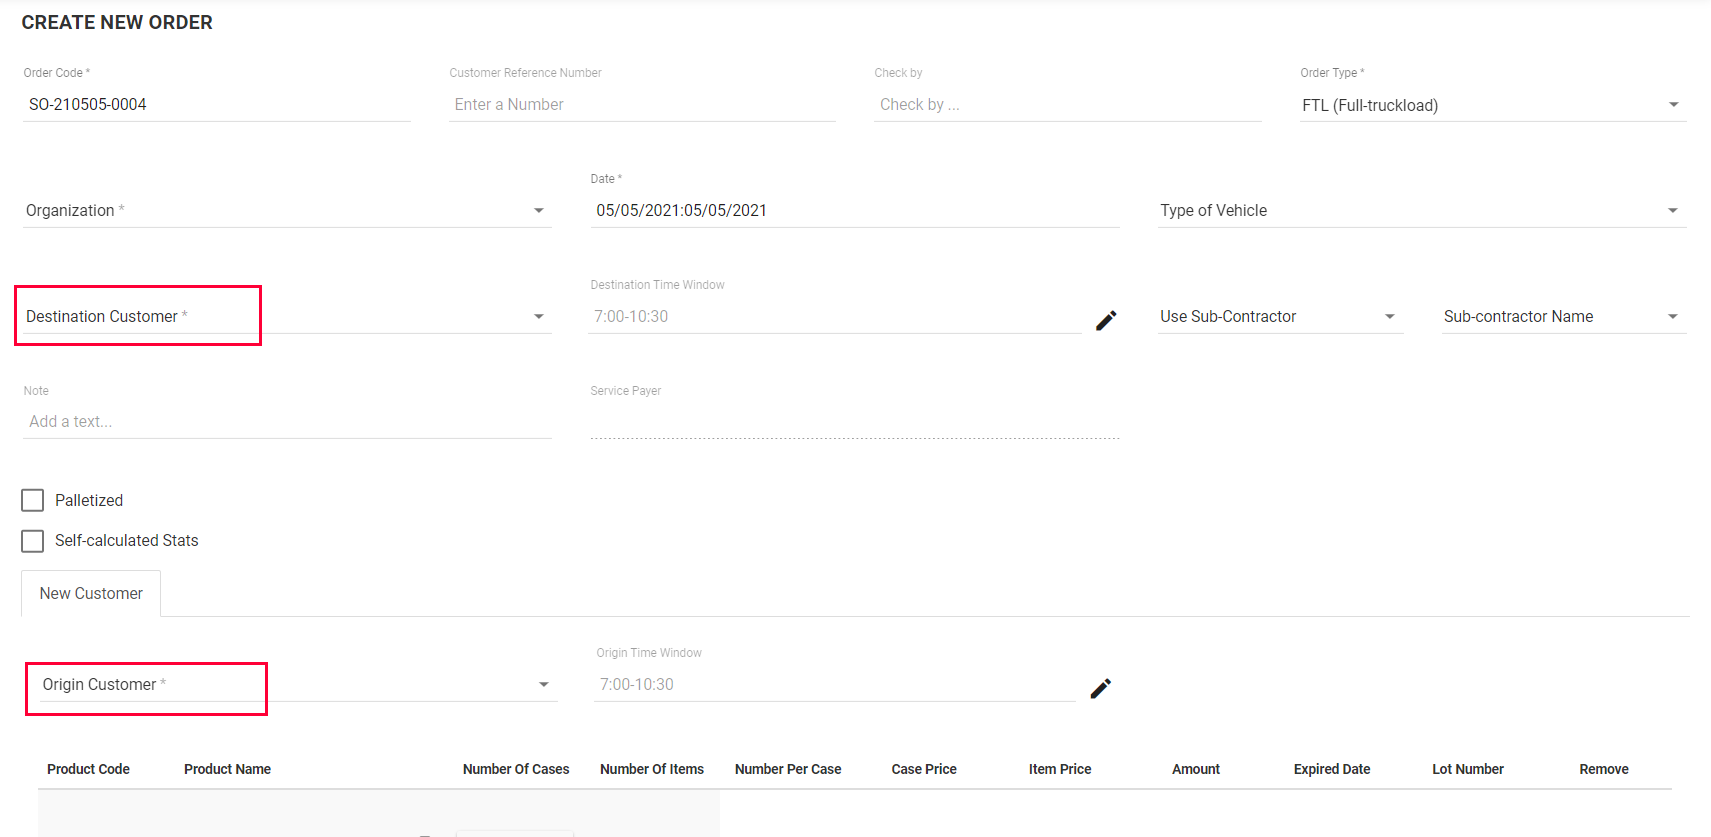
Illustration (English)
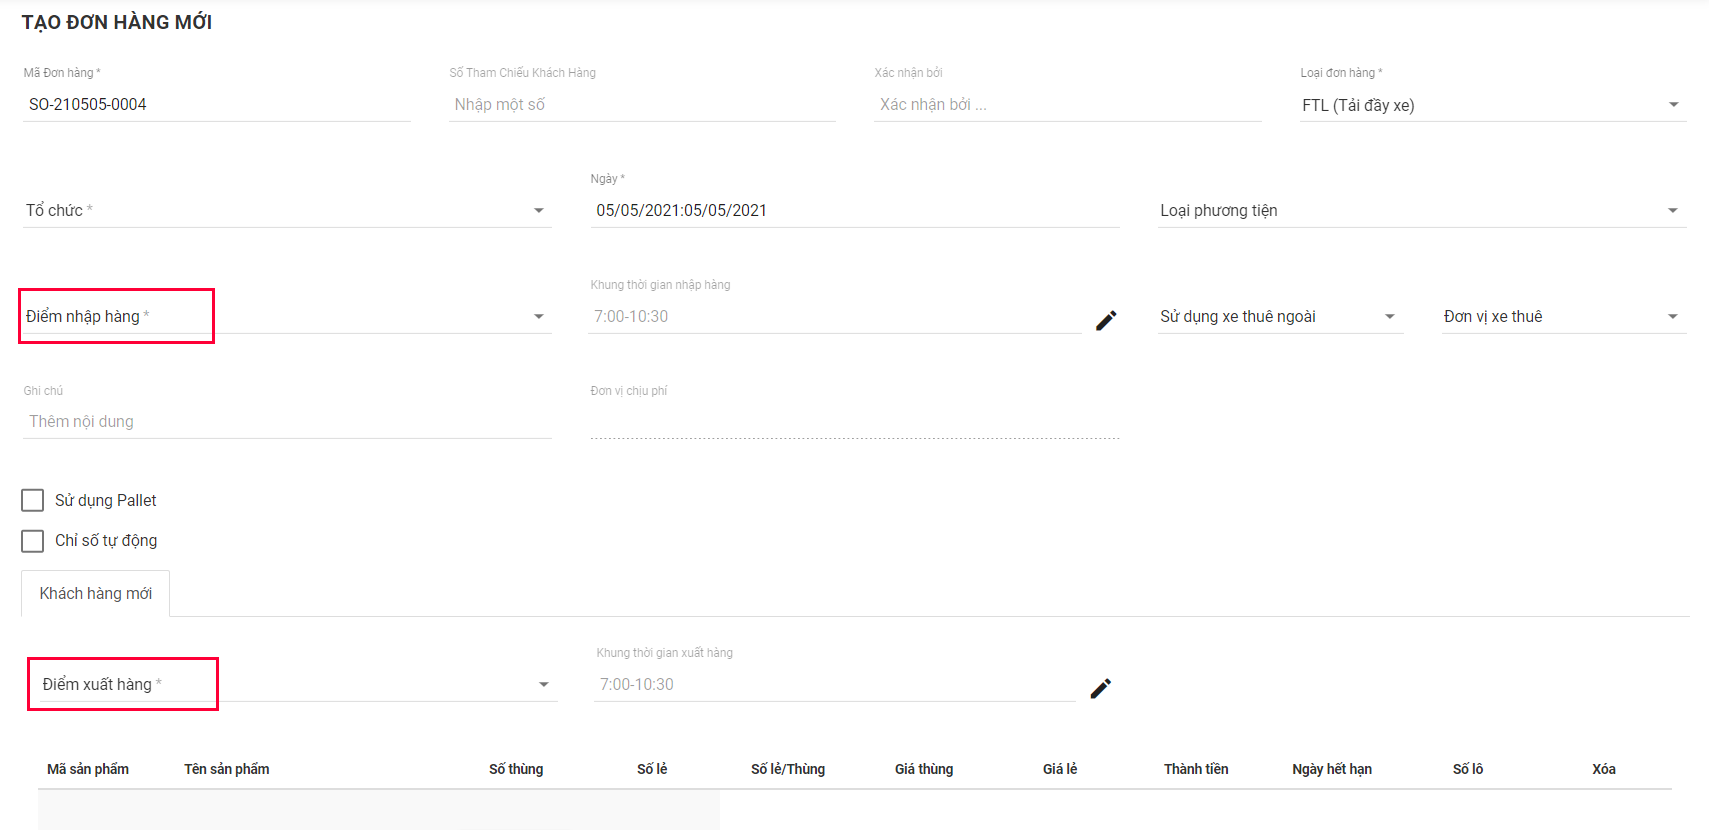
Illustration (Vietnamese)
- Note: If the Order Type is LTL then you can add multiple Origin Customers. To do that, click on the plus icon to the right of the New Customer tab. Each time you click the plus icon, a new tab will appear. Each tab will allow you to select an Origin Customer as well as the Products to be picked up at that Origin Customer's location
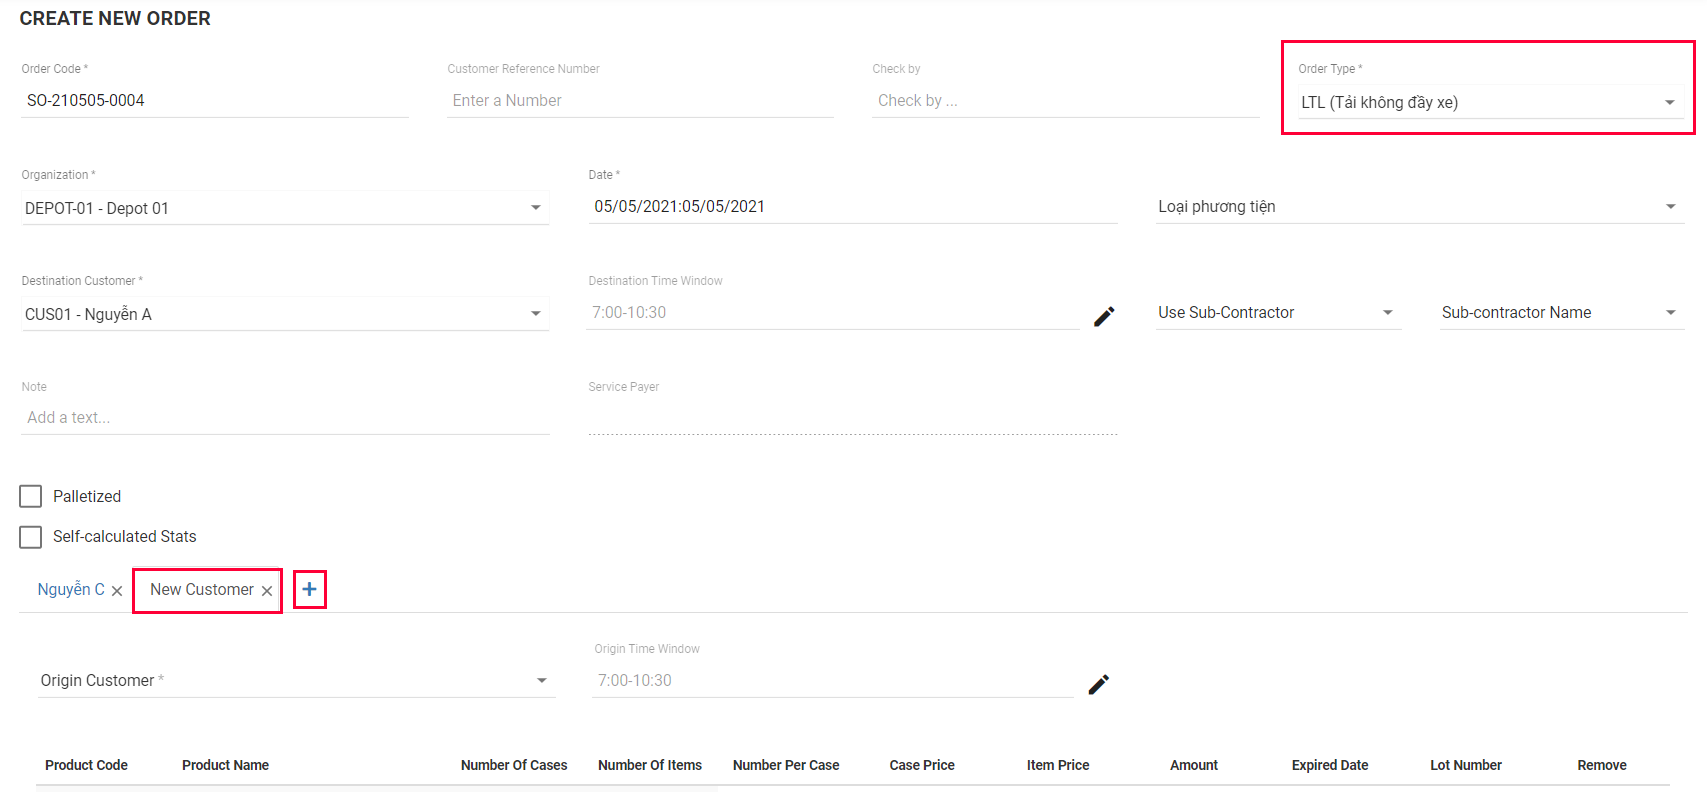
Illustration (English)
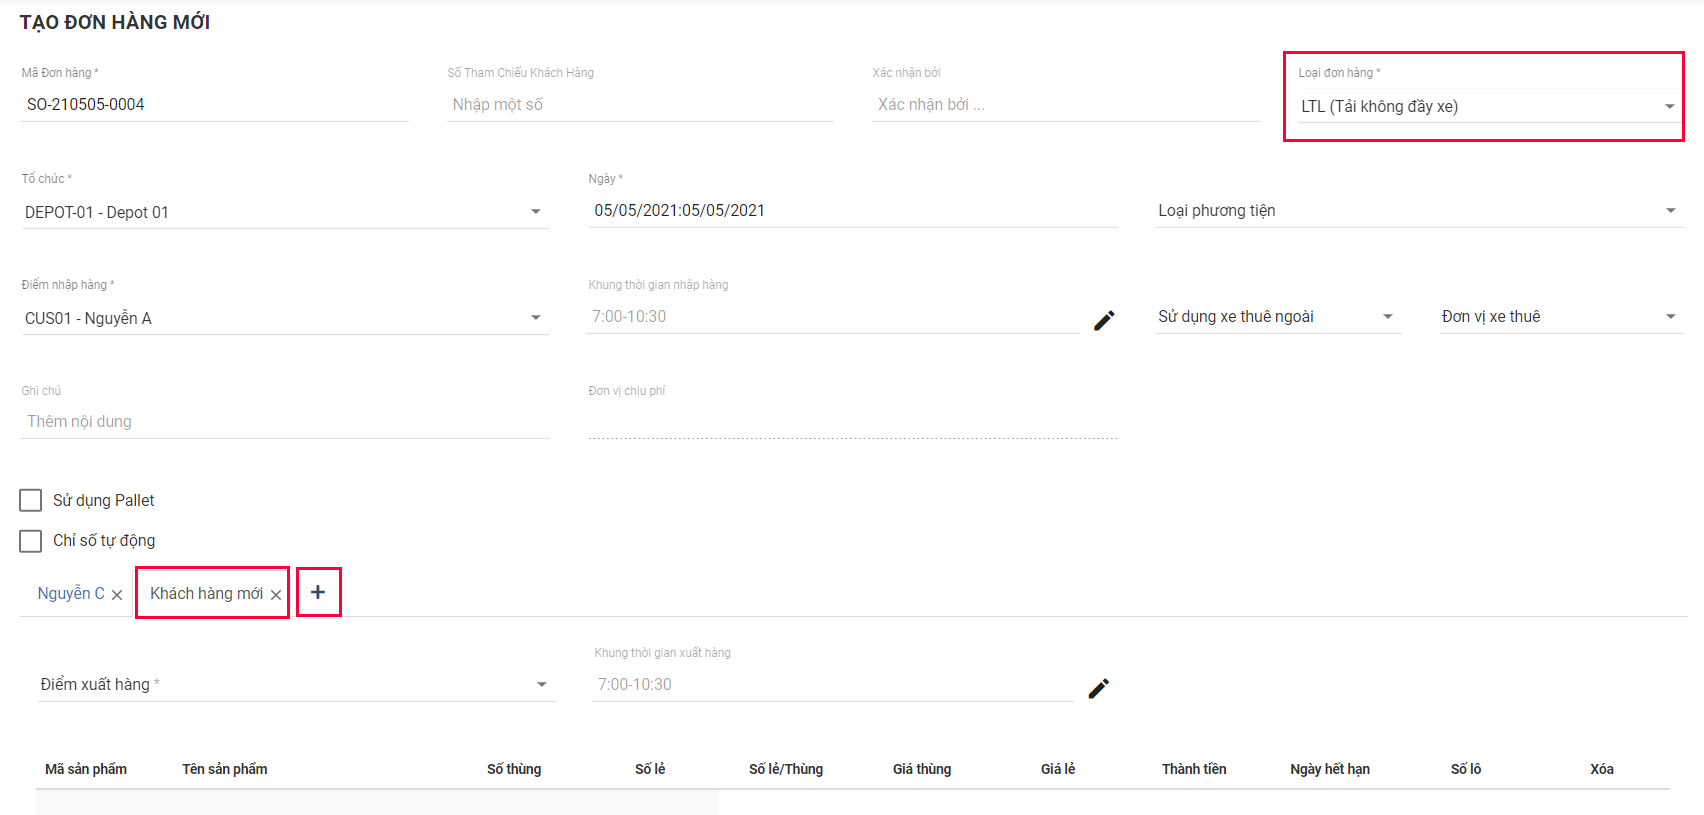
Illustration (Vietnamese)
- To select the Destination Customer, click on that field then follow the exact steps above
1.6. Origin Time Window & Destination Time Window
These attributes will only be effective if the following configuration is enabled at the Branch: Hard Time Windows
- Input the time window exactly in the hh:mm-hh:mm format. For example, 08:00-12:30
- If none of the Customers in the Order being created has time windows, leave these fields blank
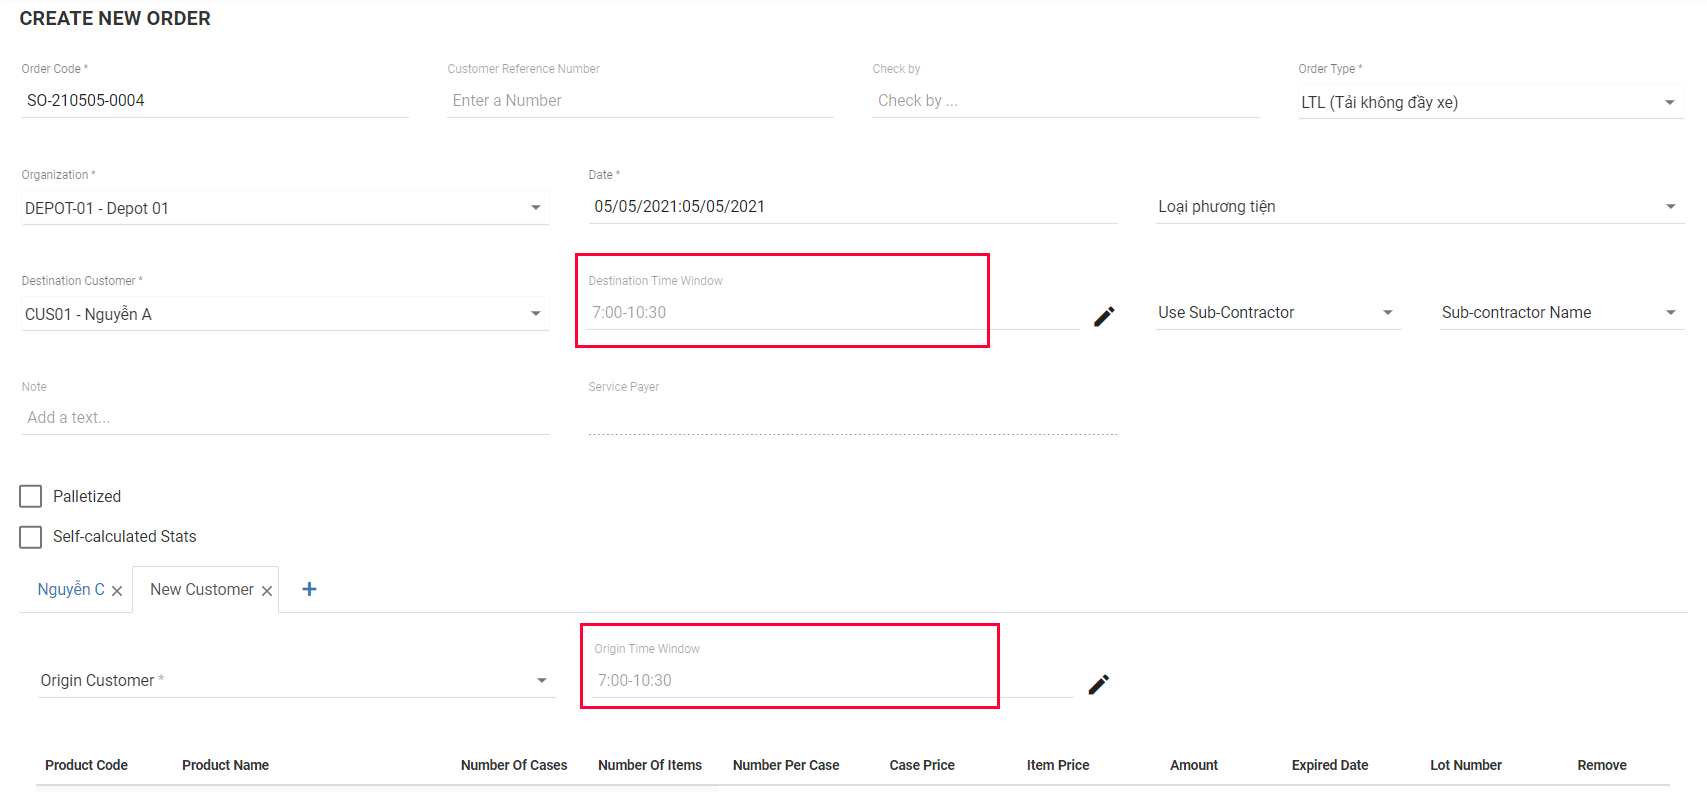
Illustration (English)
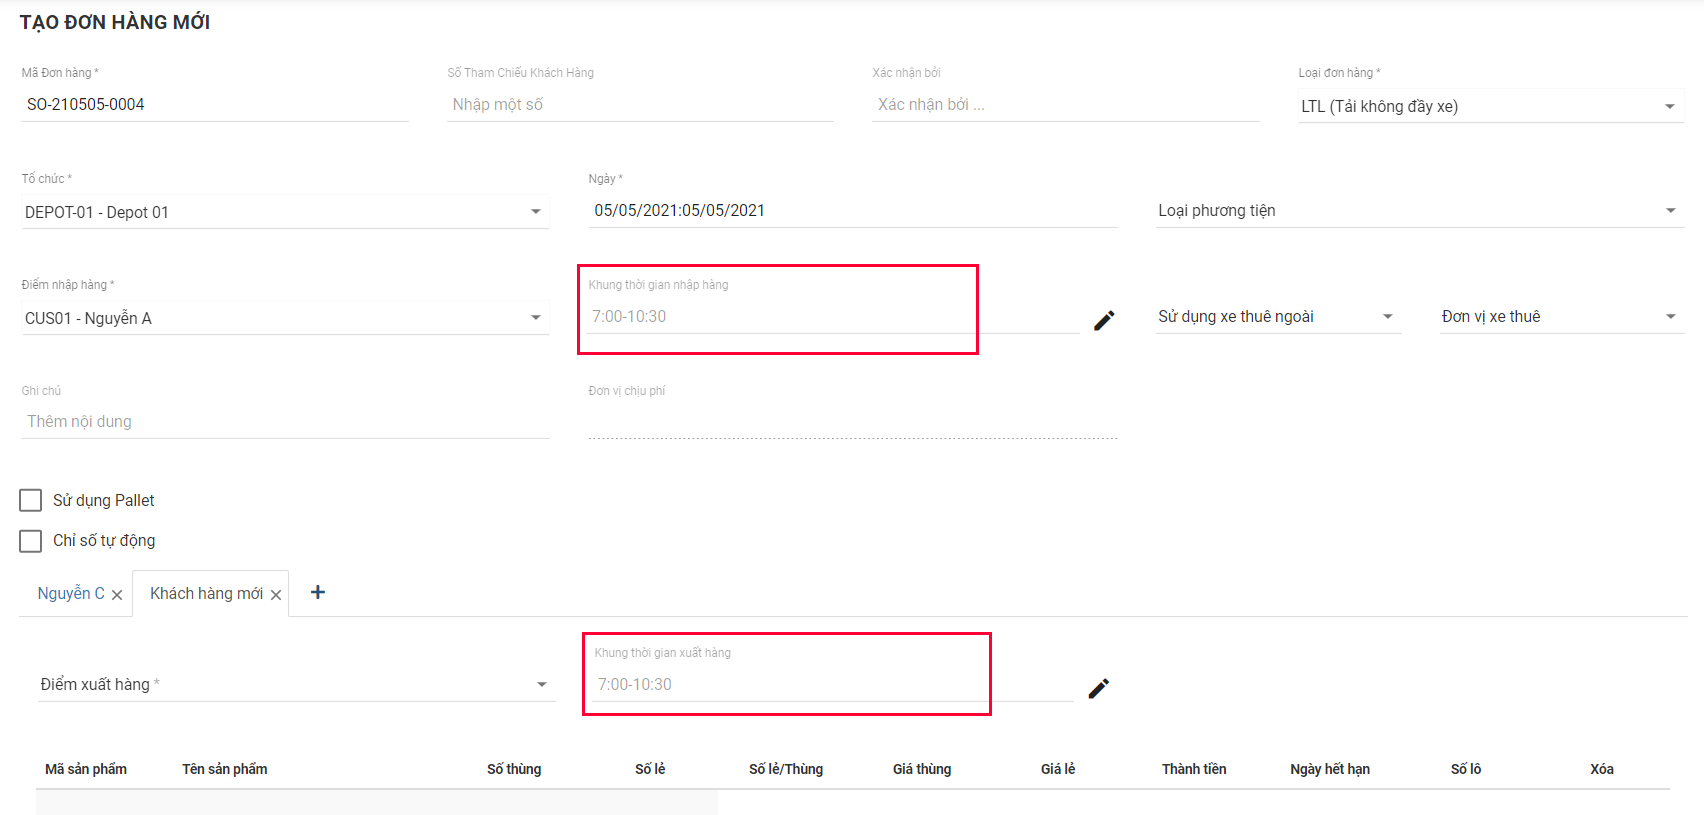
Illustration (Vietnamese)
1.7. Type of Vehicle
- Click on this field. Select the appropriate Vehicle Type from the drop-down menu. Alternatively, you can input the Vehicle Type Code/Vehicle Type Name of the desired Vehicle Type into the search bar to filter out the result faster
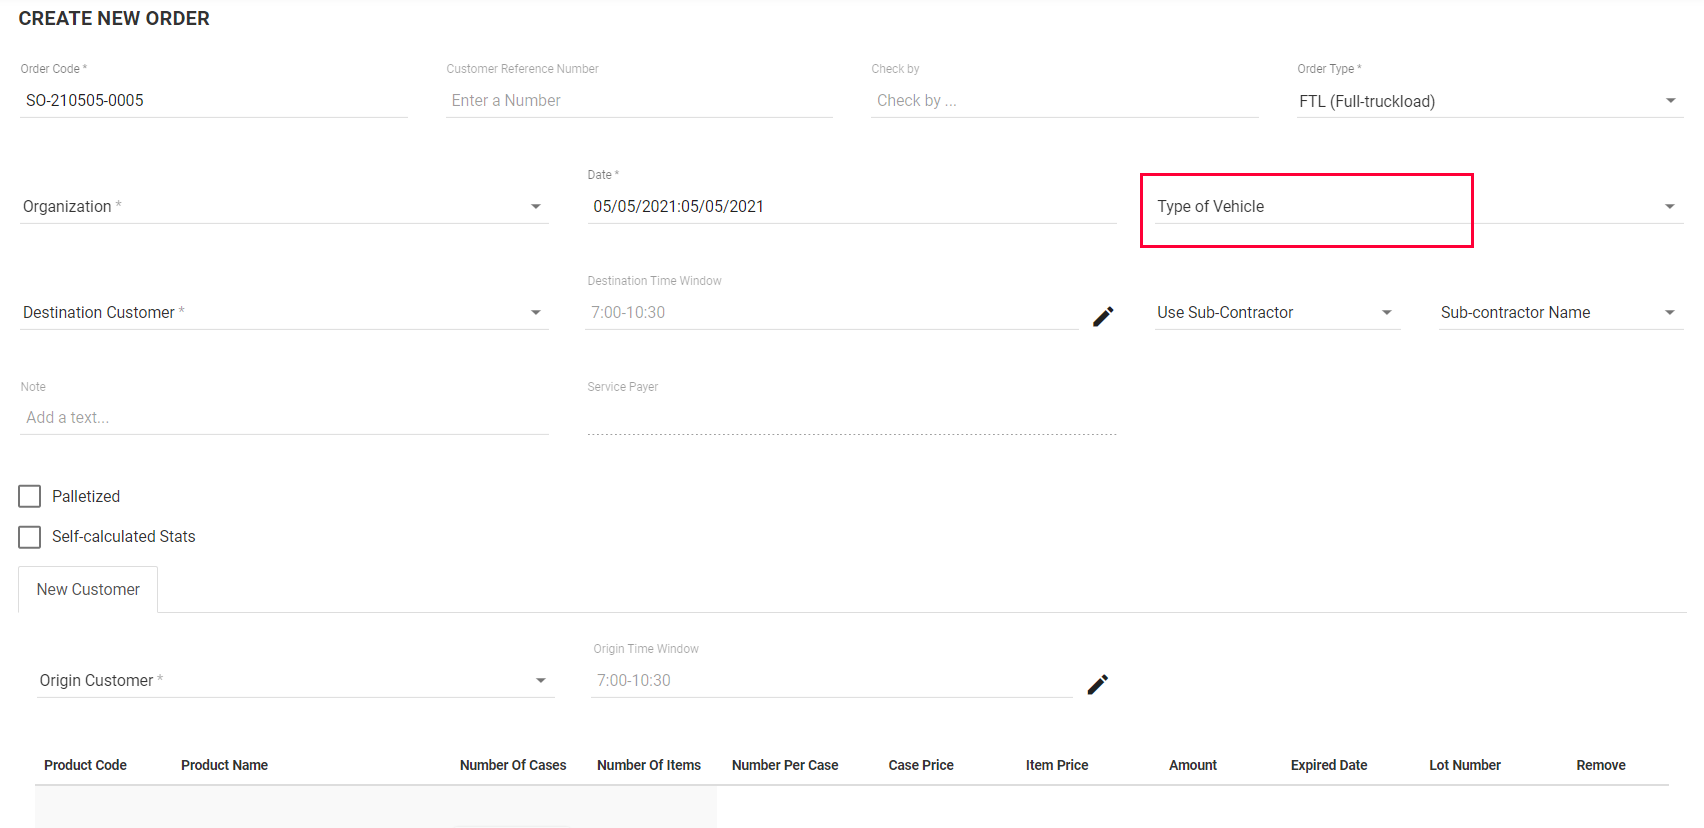
Illustration (English)
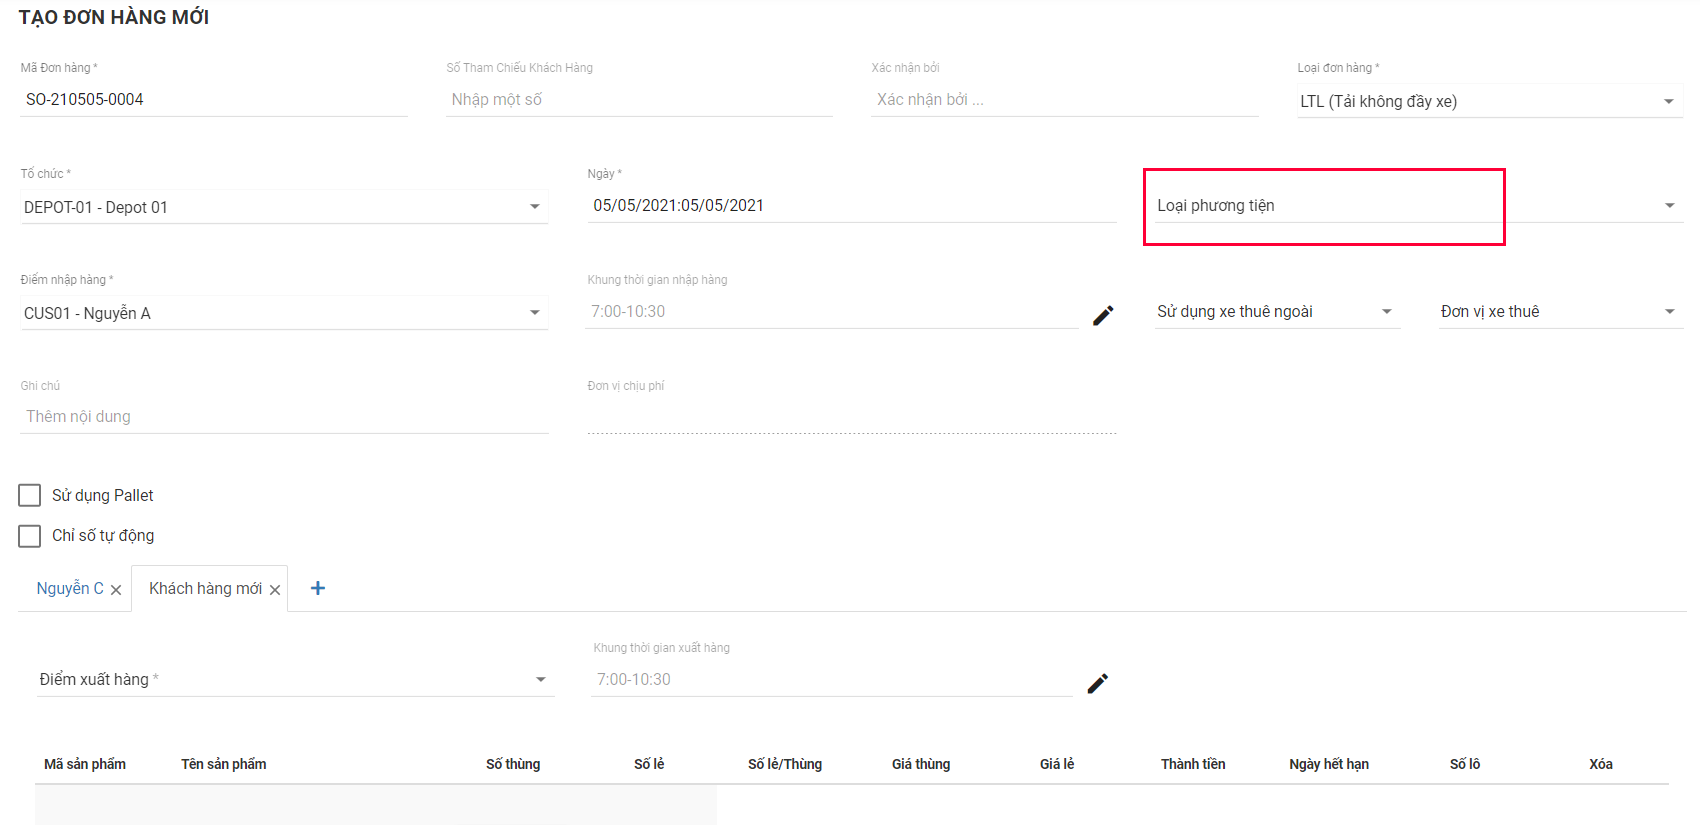
Illustration (Vietnamese)
1.8. Use Sub-contractor & Sub-contractor Name
- Click on this field. On the drop-down menu, select the appropriate option from the following three options: Always; Use if Needed; No
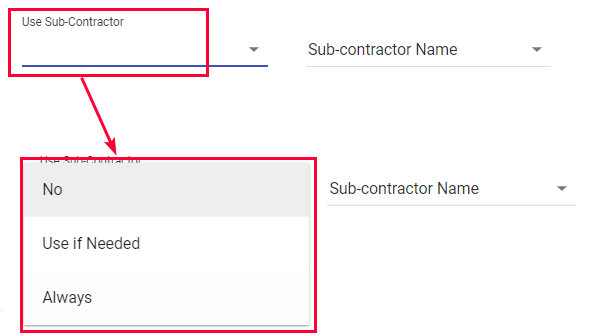
Illustration (English)
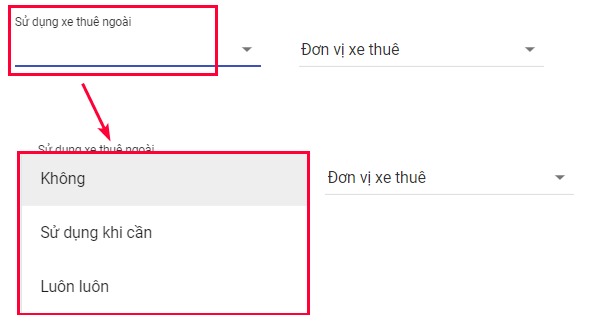
Illustration (Vietnamese)
- If you select the Use if Needed or Always option, you have to specify the sub-contractor whose Vehicles might/will perform the Order being created. To do that, click on the Sub-contractor Name field then select the appropriate sub-contractor from the drop-down menu

Illustration (English)

Illustration (Vietnamese)
- Note: Prior to this, you need to set up the Vehicles as Sub-contractor Vehicles. Please refer to the main article for instruction: Manage Vehicles
1.9. Product
- Click on this field. Input the Product Name/Product Code of the desired Product into the search bar then select it from the drop-down menu. Next, click the Add button to add that Product to the Order being created. The selected Product will appear on the Product table

Illustration (English)

Illustration (Vietnamese)
- You can select multiple Products by repeating these steps
- If you accidentally added the wrong Product, click the Remove icon of that Product to remove it from the Product table

Illustration (English)

Illustration (Vietnamese)
- After you have added the Products, you need to specify whether the Products will be placed on pallets or not
1.9.1. Products Are Not Placed On Pallets
- Input the number of whole cases/single items of each Product into the corresponding Number Of Cases/Number Of Items fields
- Product in the If there are zero single items of a specific Product in the Order being created, you must input the value 0 into the Number Of Items field of that Product

Illustration (English)

Illustration (Vietnamese)
- Similarly, If there are zero whole cases of a specific Product in the Order being created, you must input the value 0 into the Number Of Cases field
1.9.2. Products Are Placed On Pallets
- If the Products will be placed on pallets, click the Palletized check box then input the number of pallets of each Product into its corresponding Pallet field
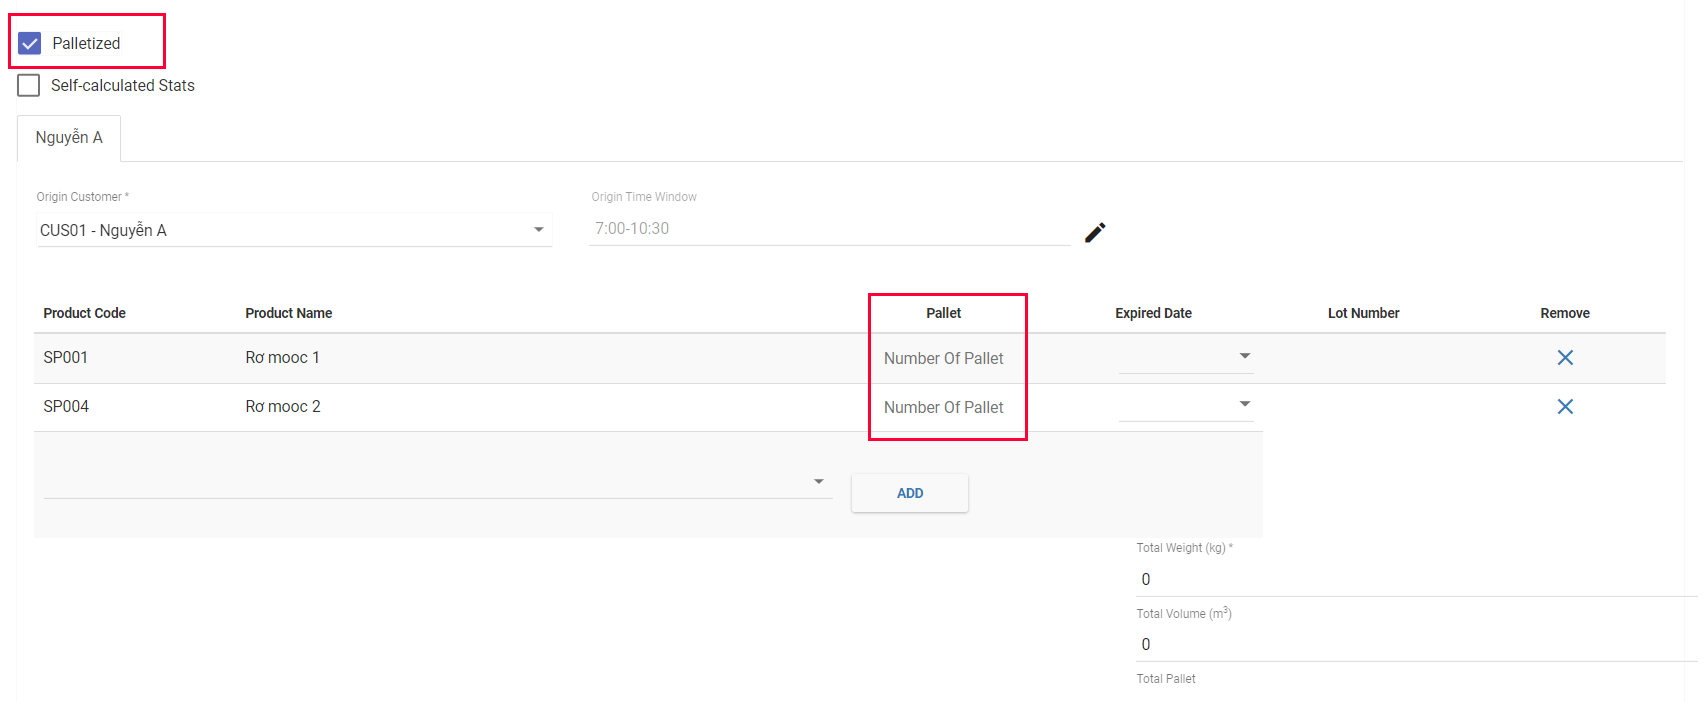
Illustration (English)
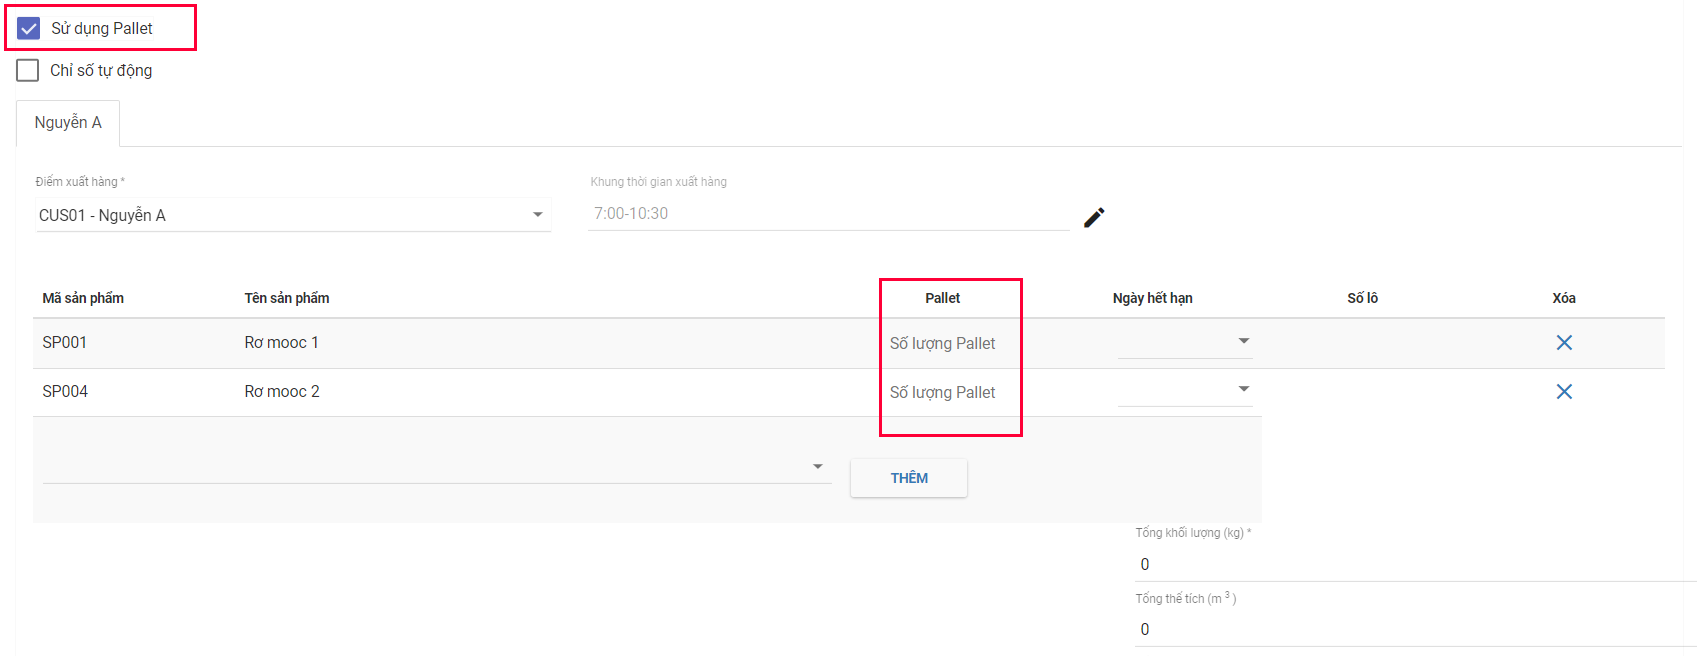
Illustration (Vietnamese)
1.9.3. Product Lot Number; Product Expired Date
- The Expired date and Lot Number fields are optional. If you don't have the information, you can safely leave these fields blank
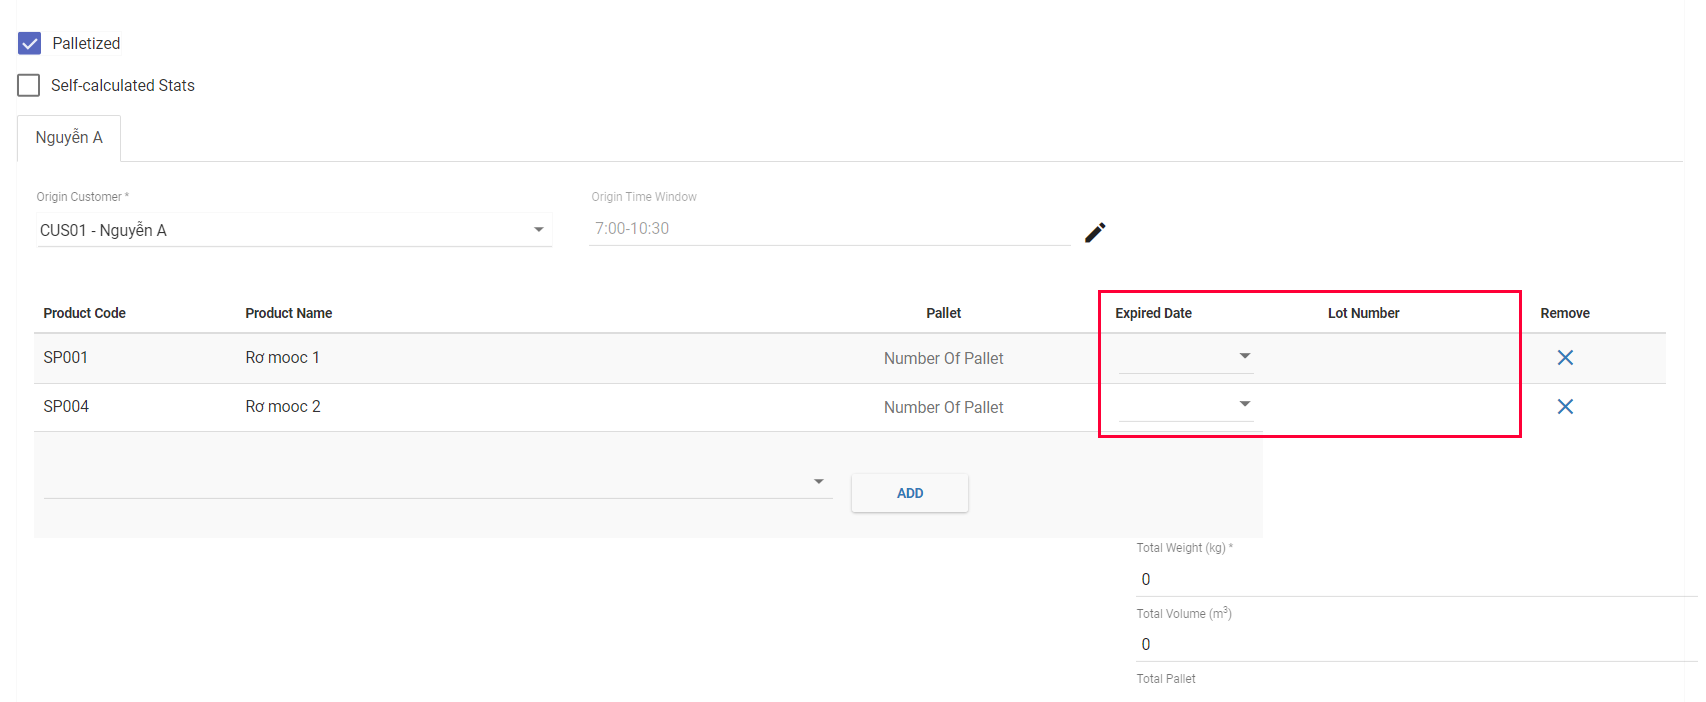
Illustration (English)
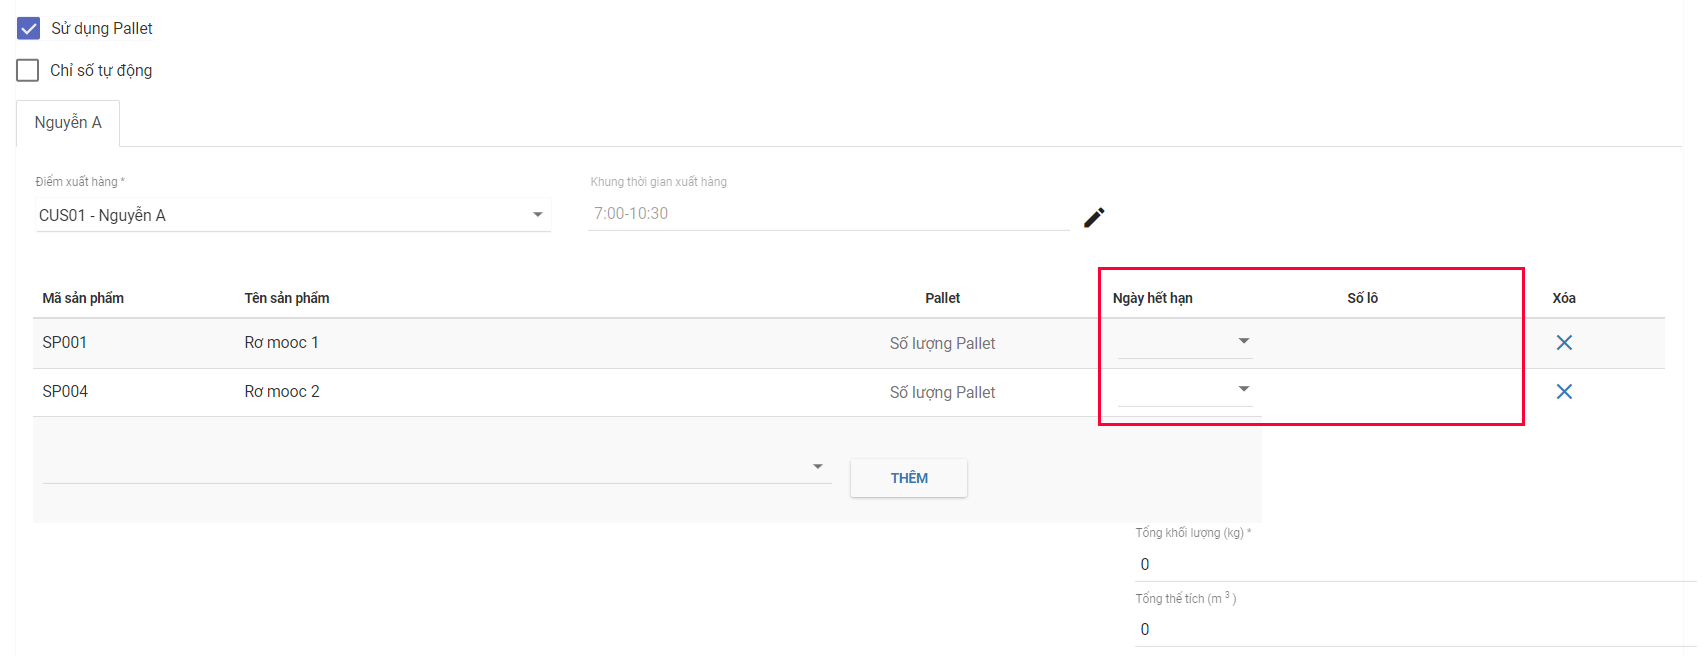
Illustration (Vietnamese)
1.10. Total Weight; Total Volume and Total Price
1.10.1. Manually Input Total Weight, Total Volume, And Total Price
- By default, these information fields must be input manually
- Only input the value (in number), do not input the unit
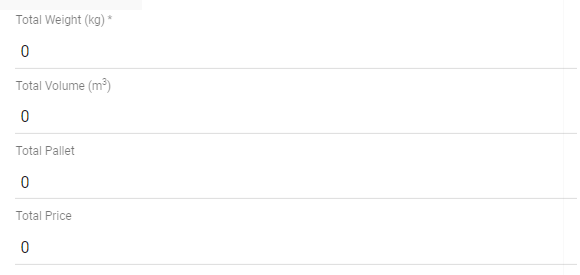
Illustration (English)
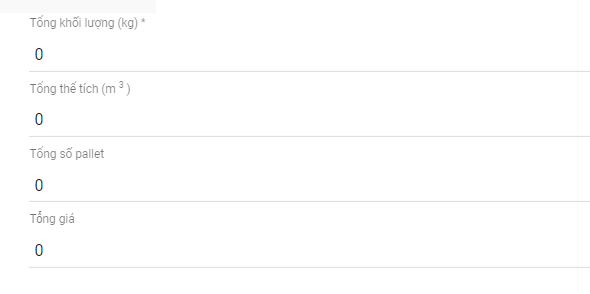
Illustration (Vietnamese)
1.10.2. Automatically Calculate Total Weight; Total Volume And Total Price
- If you wish to let the system automatically calculate this information, tick the Self-calculated Stats checkbox. These fields will be greyed out

Illustration (English)

Illustration (Vietnamese)
1.11. Other optional information (Customer Reference Number; Check By)
- These information fields are optional. If you don't have information, just leave these fields blank
- After you have input all the necessary information, click on the blue Save button to finish creating the Order
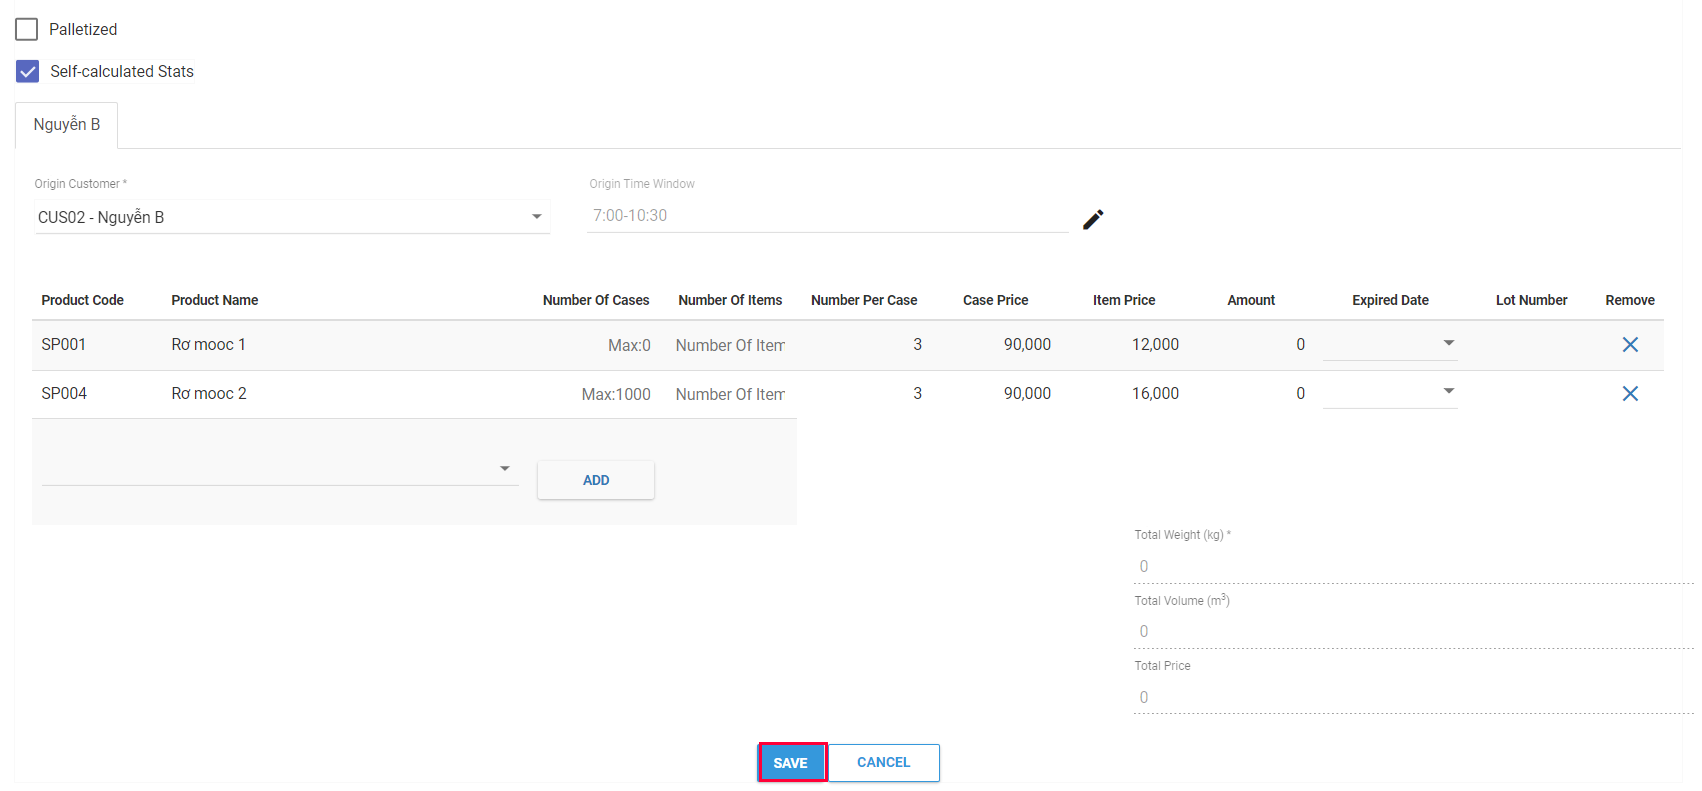
Illustration (English)
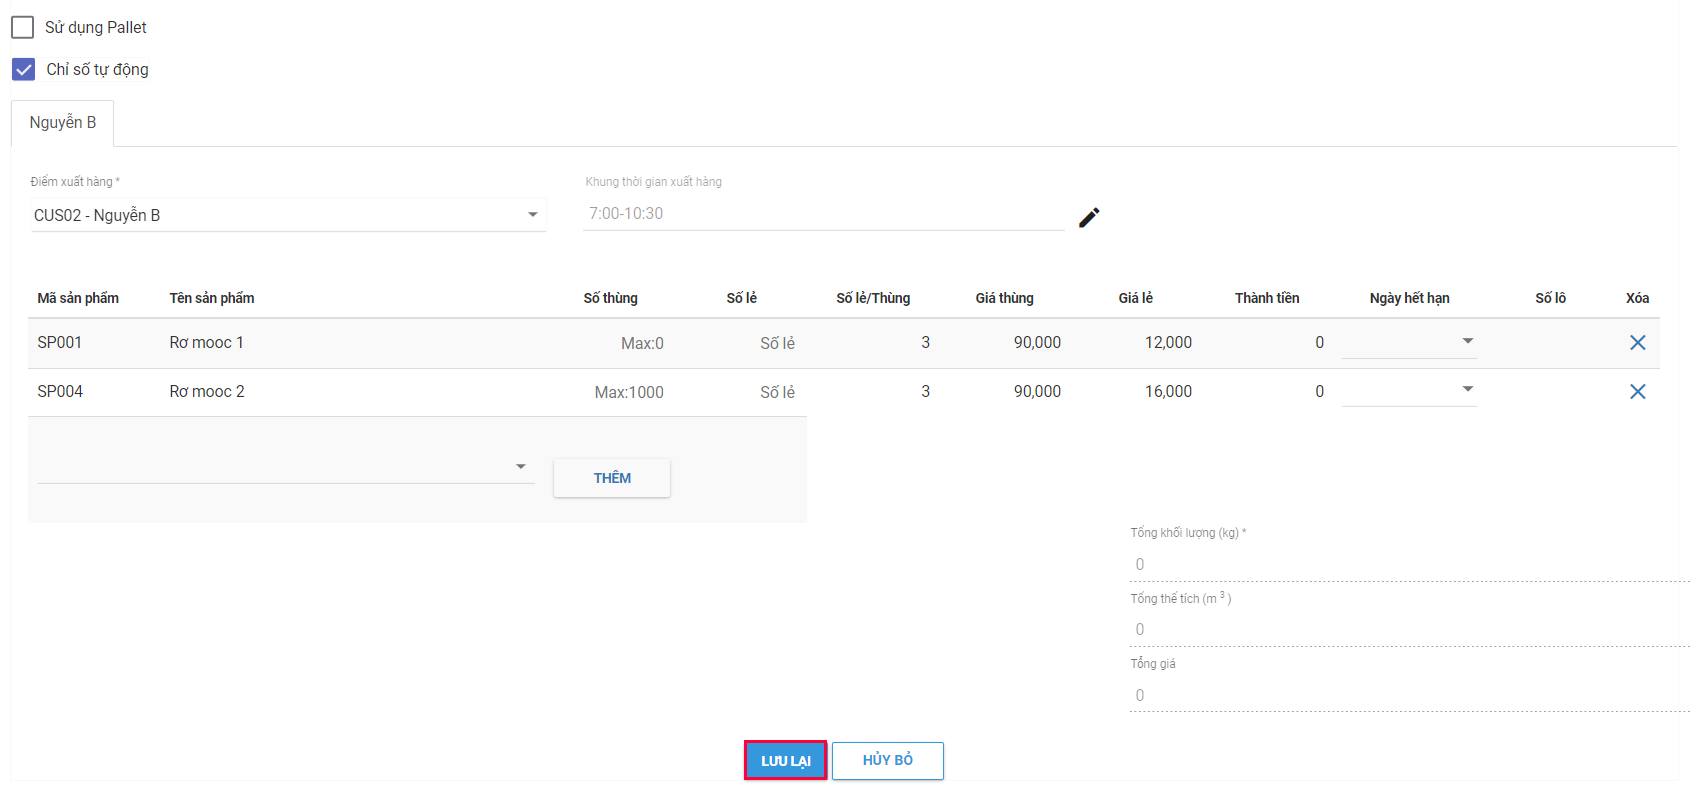
Illustration (Vietnamese)
Create PDP Orders Using The Excel Import File
- Below is the instruction to input in the information fields of the Excel import file
2.1. Start Date; End Date
- Input in either the dd/mm/yyyy or mm/dd/yyyy format based on the current Date format of your computer
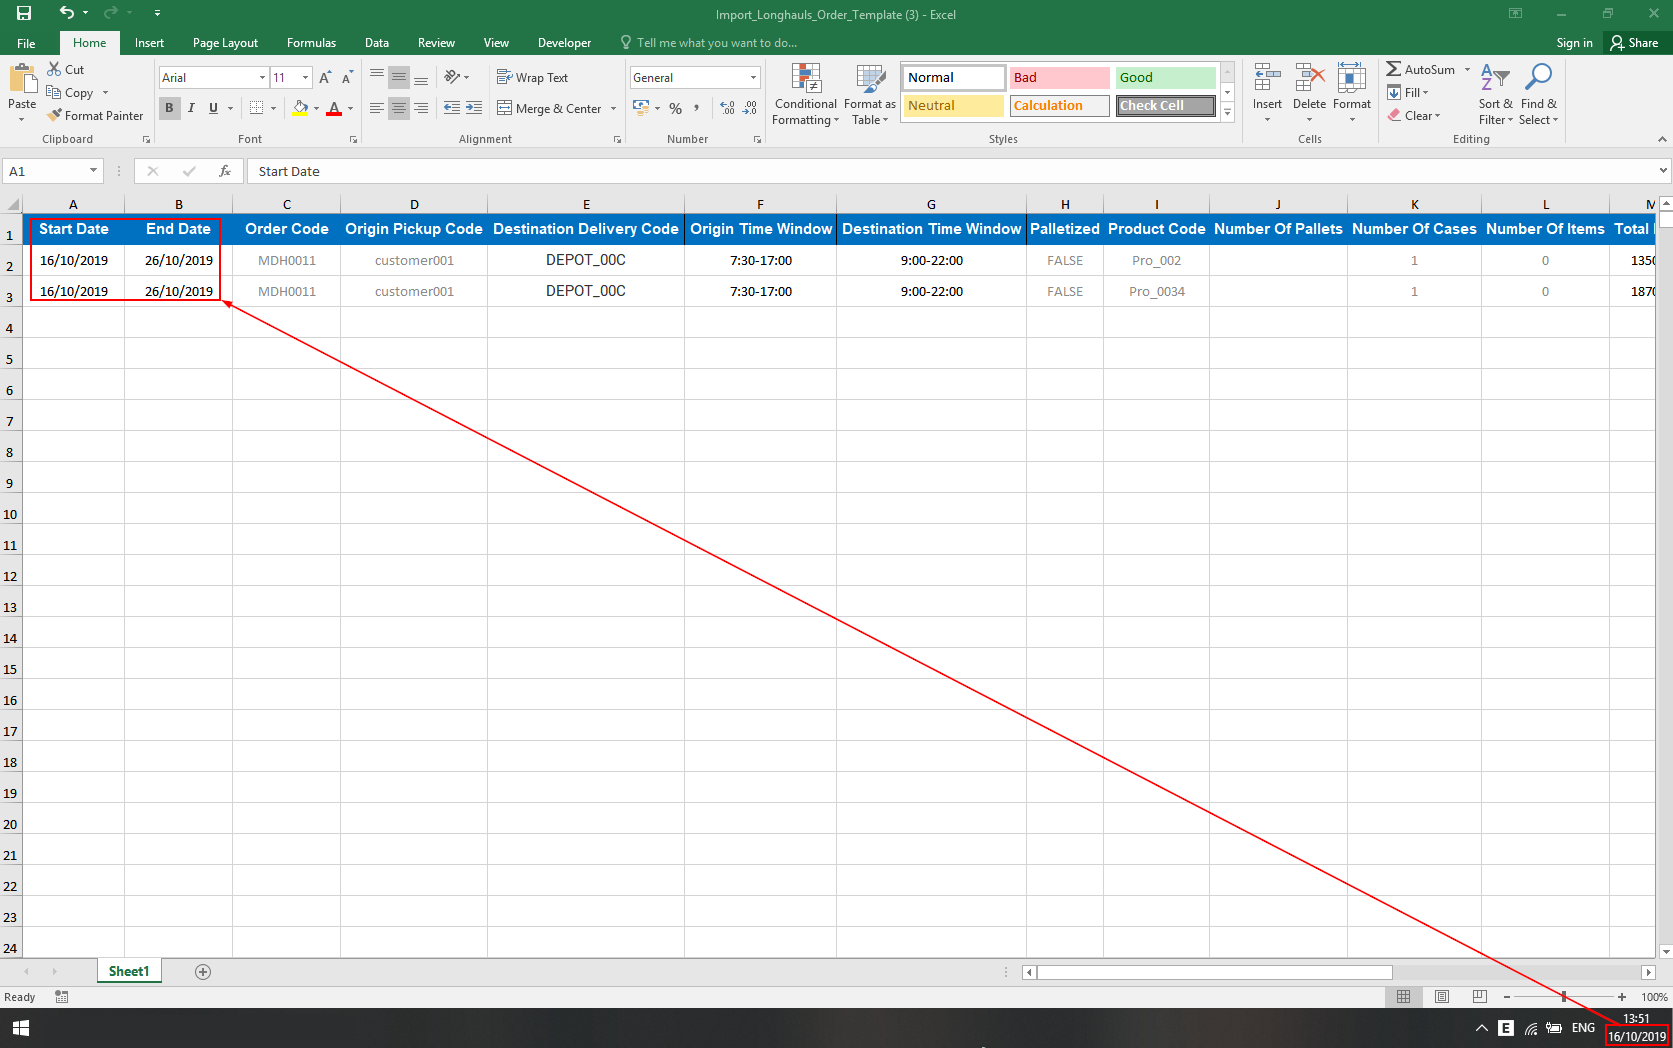
Illustration (English)
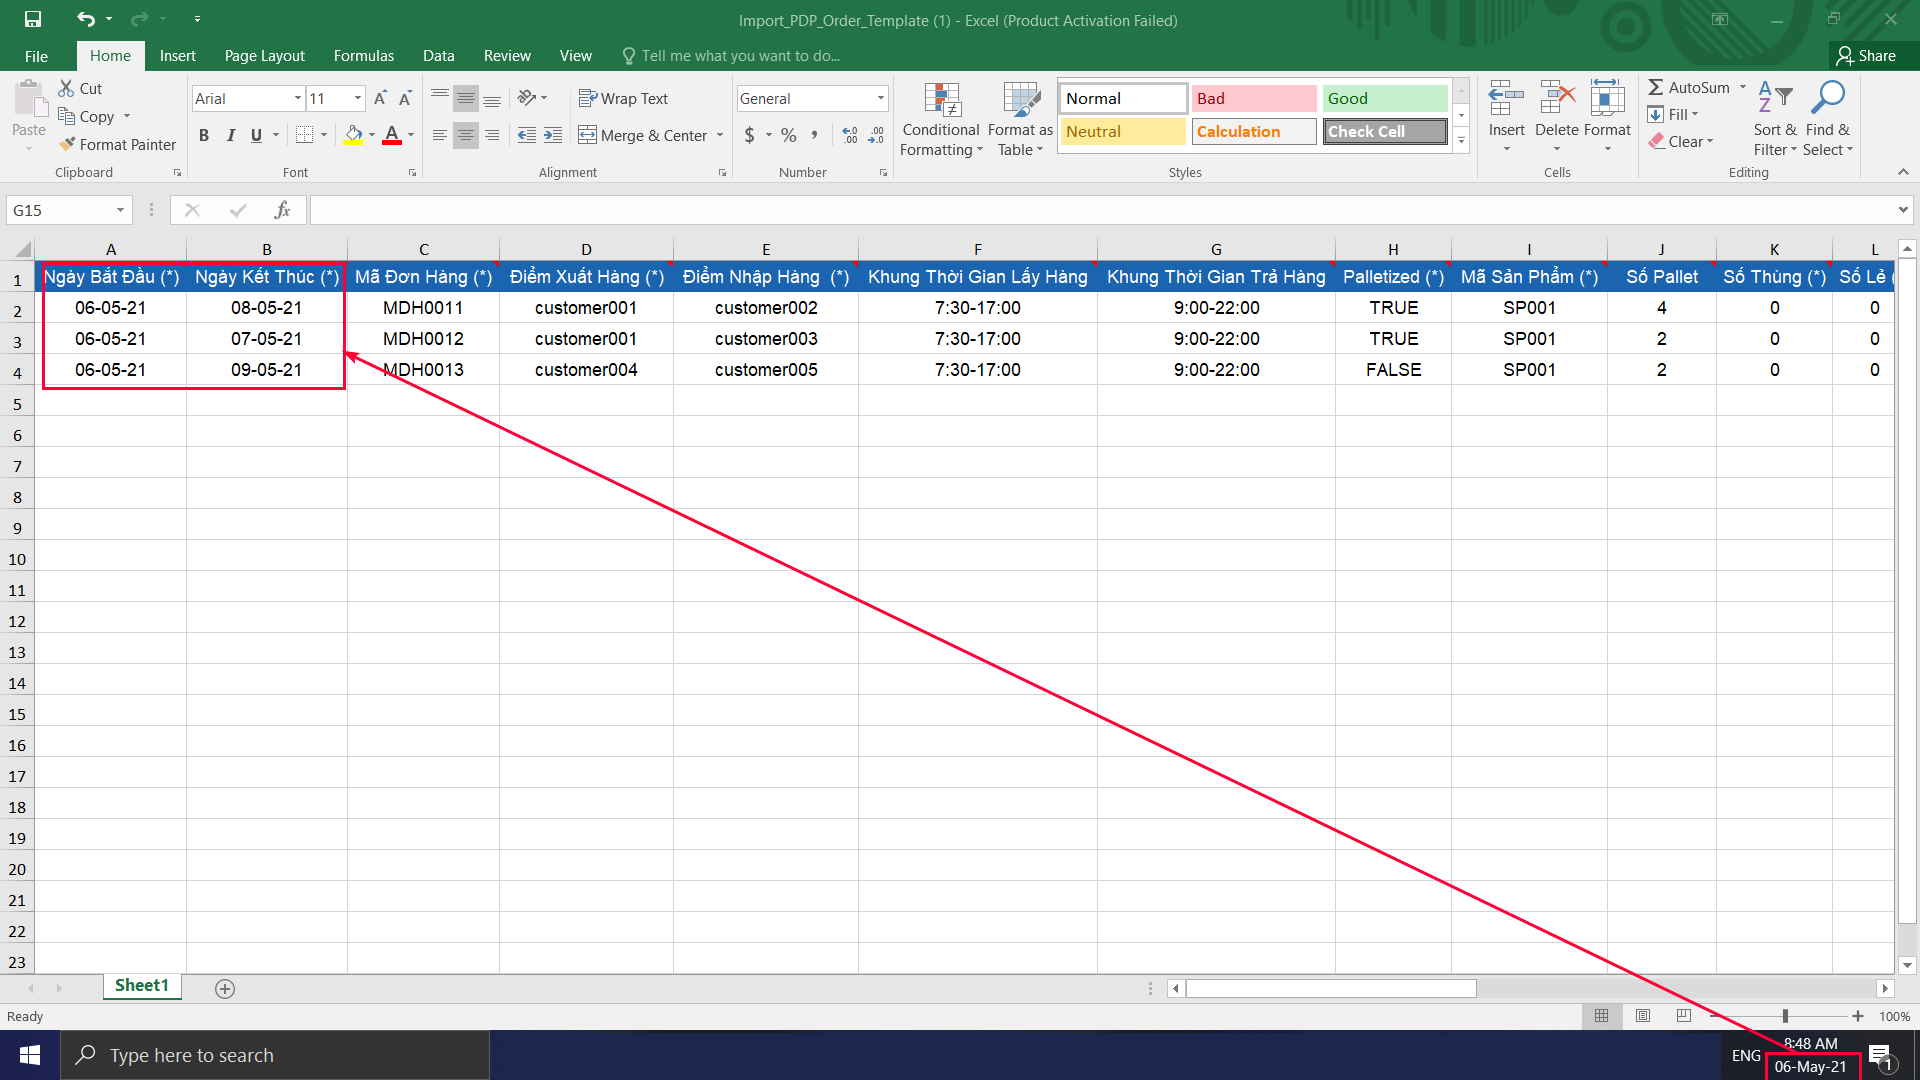
Illustration (Vietnamese)
2.2. Order Code
- As mentioned above, the Order Code must not contain spaces

Illustration (English)

Illustration (Vietnamese)
2.3. Order Type
- If the order being created is of Full Truckload type, input the following value into this cell: FTL
- If the order being created is of Less than Truckload type, input the following value into this cell: LTL

Illustration (English)

Illustration (Vietnamese)
2.4. Origin Pickup Code & Destination Delivery Code
- Copy the Customer Codes of the desired Origin and Destination Customers on the Web app then paste them into the suitable cells in the Excel import file
- The Customer Codes can be found under the Customer Code column in the Partners > Customers tab
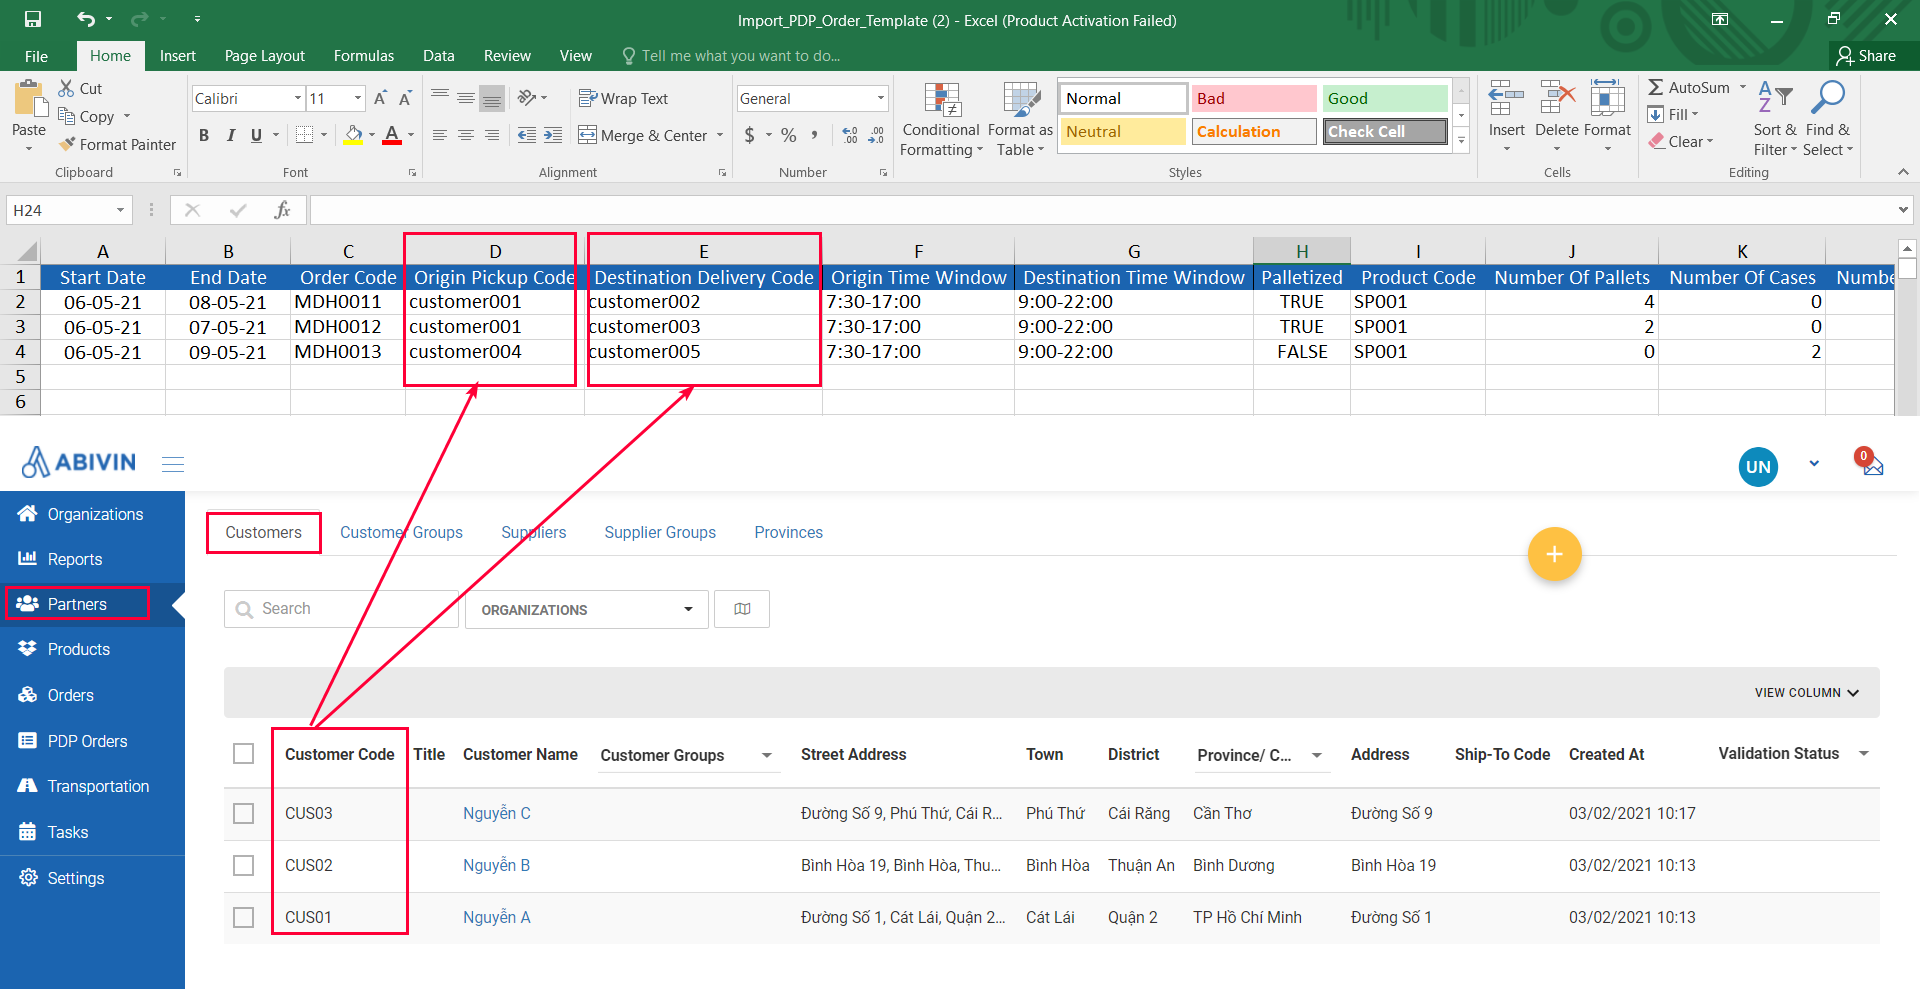
Illustration (English)
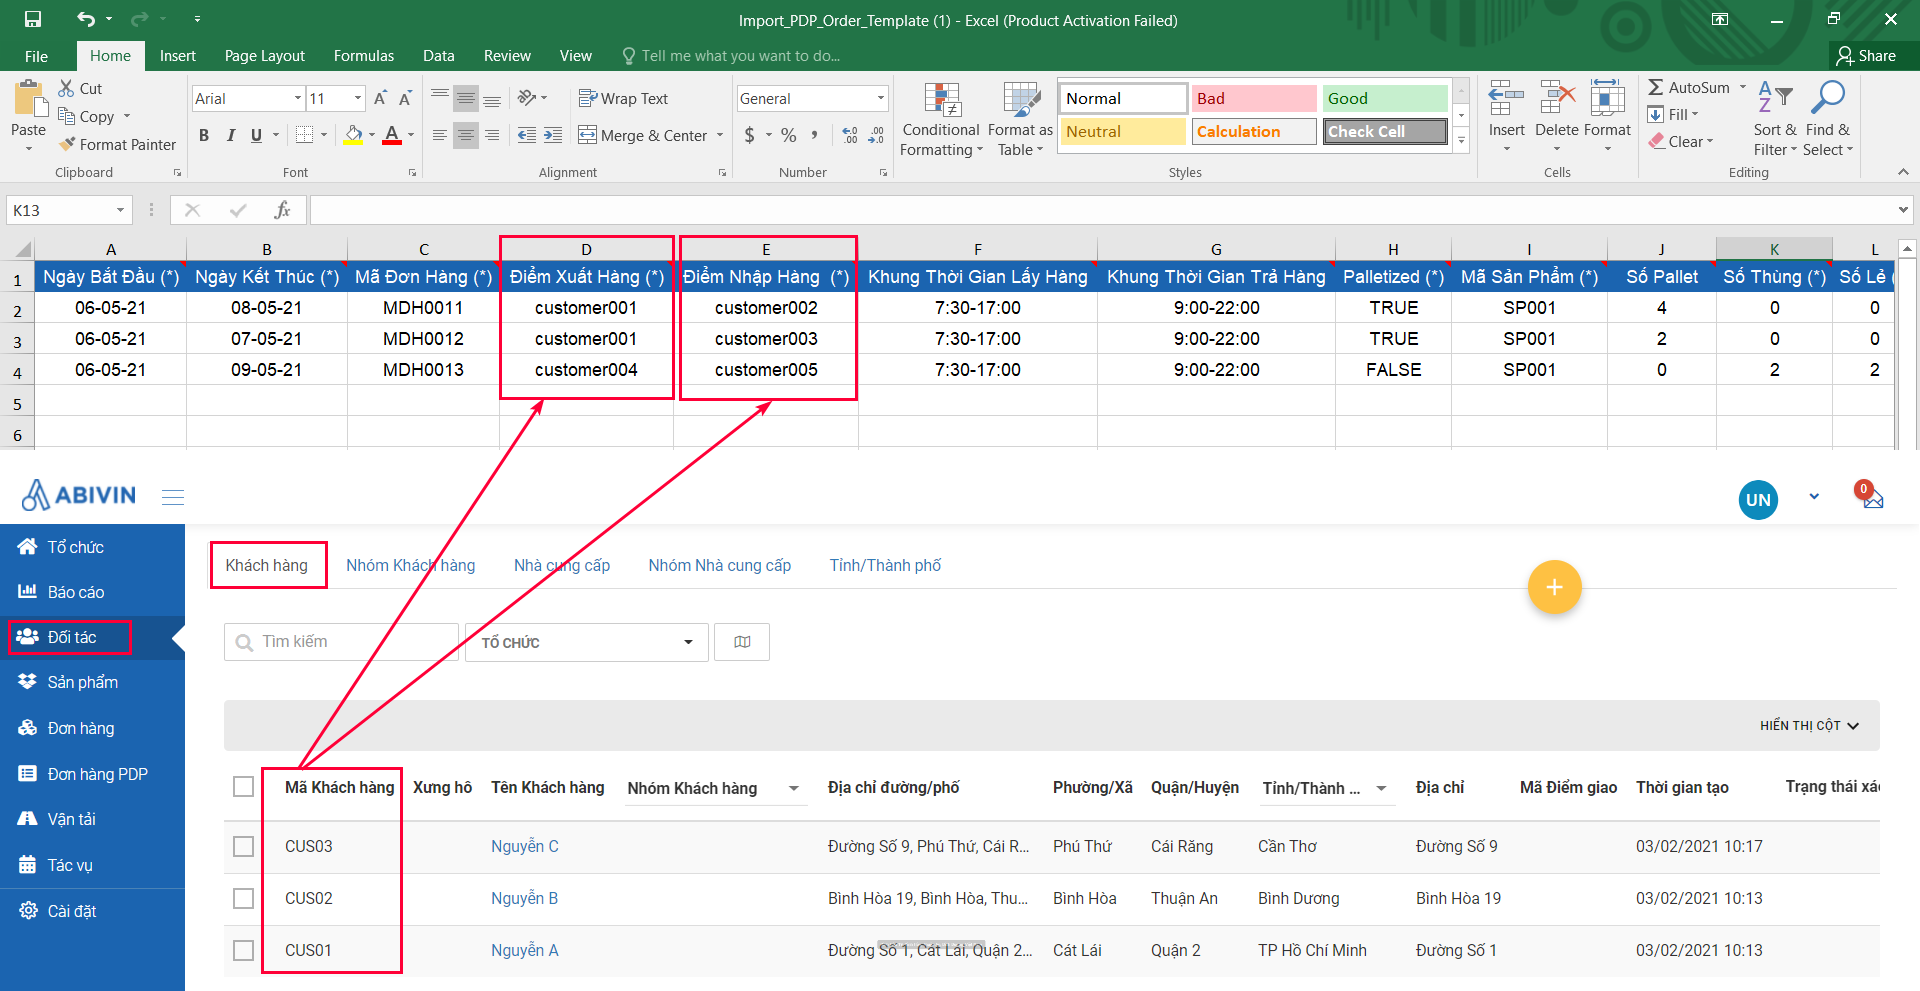
Illustration (Vietnamese)
- If the Order being created is an LTL Order which has multiple Origin Customers and one Destination Customer, be sure to copy and paste the Customer Code of the Destination Customer into the Destination Delivery Code cells of each Origin Customer row
2.5. Origin Time Window & Destination Time Window
- The time window format must be hh:mm-hh:mm. Note that the timepoint must not exceed 23:59

Illustration (English)

Illustration (Vietnamese)
- If the Order being created is an LTL Order which has multiple Origin Customers and one Destination Customer, be sure to copy and paste the Time Window of the Destination Customer into the respective Destination Time Window cells of all Origin Customer rows
2.6. Product
2.6.1. Product Code
- Copy the Product Code of the appropriate product on the Web app, then paste it into this cell
- The Product Code can be found under the Product Code column in the Products > Products tab

Illustration (English)

Illustration (Vietnamese)
- If the Order being created has multiple Products, put each Product on a separate row. Note that you also have to copy and paste all the common information of the Order on each Product row
- Next, you need to specify whether the Products of an Order will be placed on pallets or not. An important thing to note is that in an Order, all Products can only be either placed on pallets or without pallets. You CANNOT mix these two product placement methods in one Order
2.6.2. Products Are Not Placed On Pallets
- If the Products will not be placed on pallets, input the following value into all the Palletized cells of all Product rows: FALSE
- Next, input the number of whole cases and/or single items of each Product into their respective Number of Cases and Number of Items cells. Don't forget to leave the Number of Pallets cells blank

Illustration (English)

Illustration (Vietnamese)
- 0** into that If the Order being created contains zero whole cases of a particular Product, input the value 0 into that Product's Number of Cases cell. Similarly, if the Order being created contains zero single items of a particular Product, input the value 0 into that Product's Number of Items cell. DO NOT leave these cells blank

Illustration (English)

Illustration (Vietnamese)
2.6.3. Products Are Placed On Pallets
- If the Products will be placed on pallets, input the following value into all the Palletized cells of all the Product rows: TRUE
- Next, input the number of pallets of each Product into its corresponding Number Of Pallets cells. Do not forget to leave the Number of Cases and Number of Items cells of that Product blank

Illustration (English)

Illustration (Vietnamese)
2.6.4. Lot Number; Expired Date
- Input the lot number and expiry date of the product into these cells
- These information fields are optional. You can safely leave them blank

Illustration (English)

Illustration (Vietnamese)
2.7. Total Price; Total Weight; Total Volume
- In the Excel import file, the Total Price. Total Weight. Total Volume values are of the whole Order, not of each separate Product. Therefore if the Order contains multiple Products, make sure to input the same Total Weight, Total Volume, Total Price values of the Order into all the respective cells of all Product rows

Illustration (English)

Illustration (Vietnamese)
- If a value is a decimal number, the separator between the whole part and the decimal part can either be a dot (.) or a comma (,) based on the setting of your computer and the Excel software. Do check to see what is the correct input method
2.8. Use Subcontractor; Subcontractor Name
- If the Order being created will not be performed by the Sub-contractor Vehicles, input the following value into the Use Subcontractor cell: NO
- If the Order being created might be performed by the Sub-contractor Vehicles (In case your organization doesn't have any Vehicle left that can perform this Order), input the following value into the Use Subcontractor cell: USEIFNEEDED
- If the order being created will be performed by the Sub-contractor Vehicles, input the following value into the Use Subcontractor cell: ALWAYS
- If the Use Subcontractor cell value is either USEIFNEEDED or ALWAYS, input the Sub-contractor name in the Subcontractor Name cell

Illustration (English)

Illustration (Vietnamese)
- Note that you need to set up some of the available Vehicles to belong to the Sub-contractors first. After the Vehicles have been set up as Sub-contractor Vehicles, you can copy the name of the Sub-contractor in the Vehicle information on Web app then paste that value into the Subcontractor Name cell of the Order being created
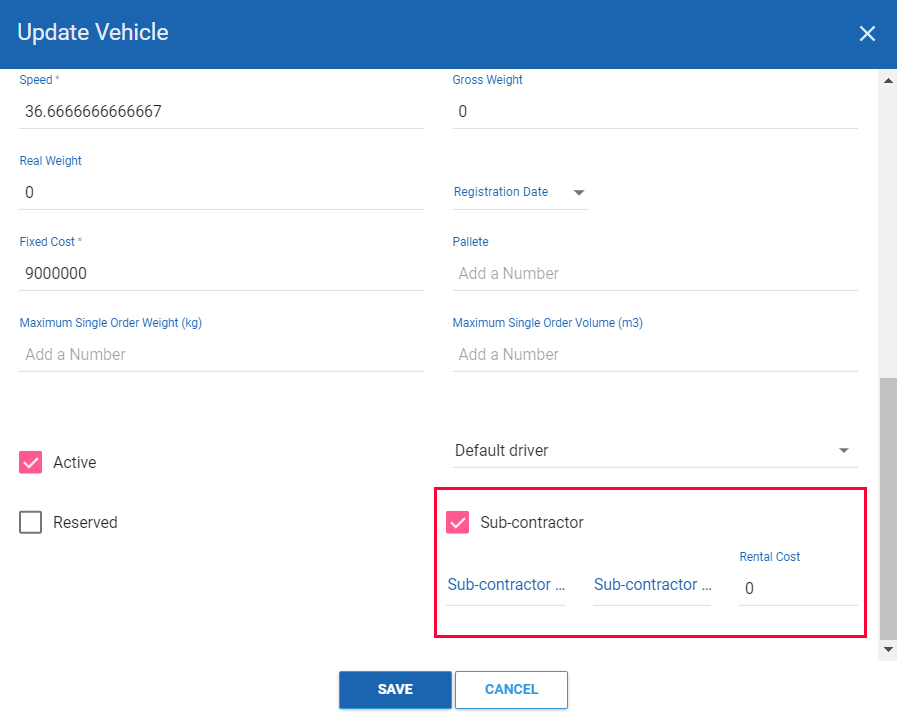
Illustration (English)
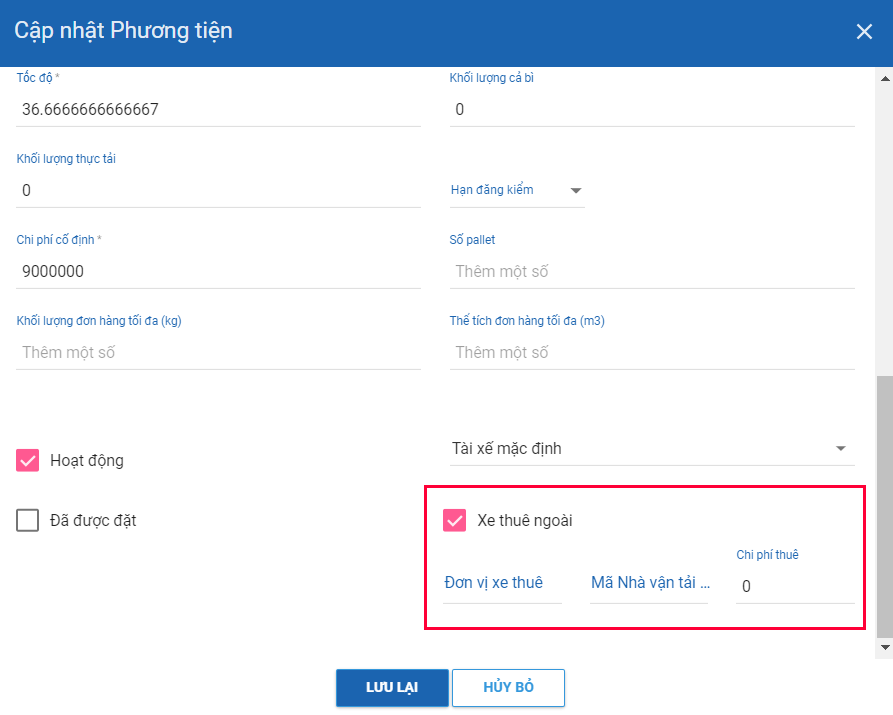
Illustration (Vietnamese)
2.9. Vehicle Type
- Copy the Vehicle Type Code of the desired Vehicle Type which will perform the Order being created on the Web app then paste it into this cell
- Vehicle Type Code can be found under the Type Code column in the Transportation > Vehicle Type tab
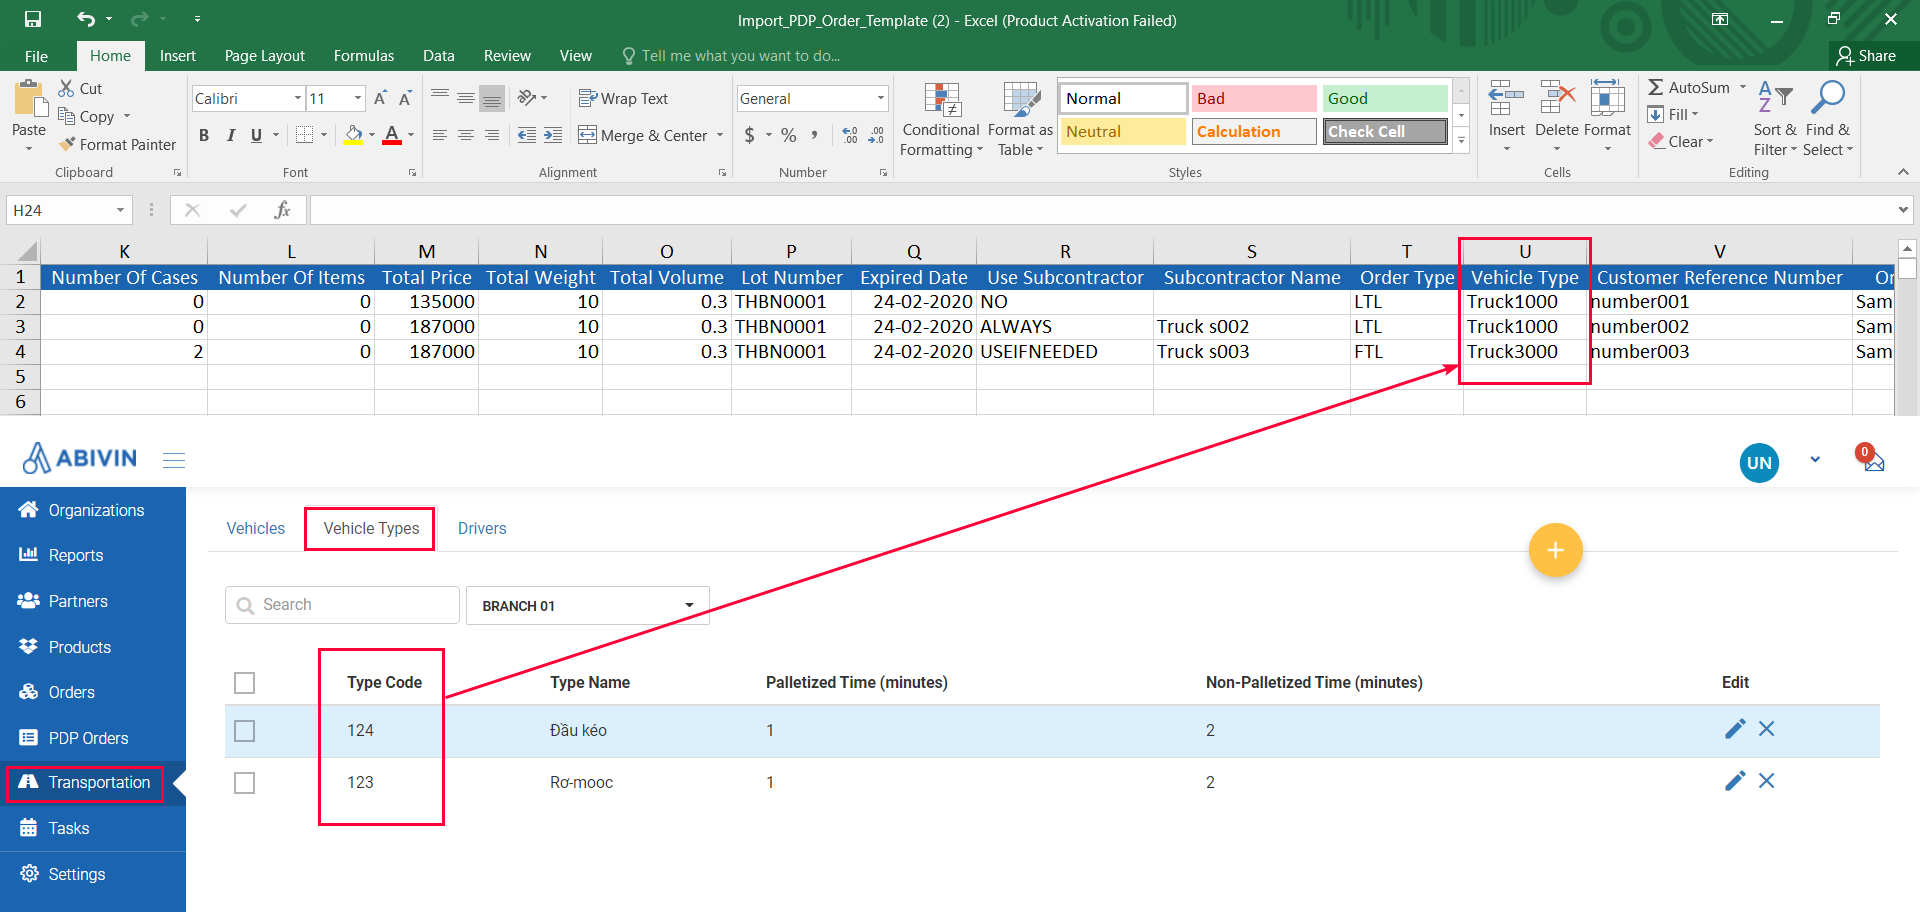
Illustration (English)
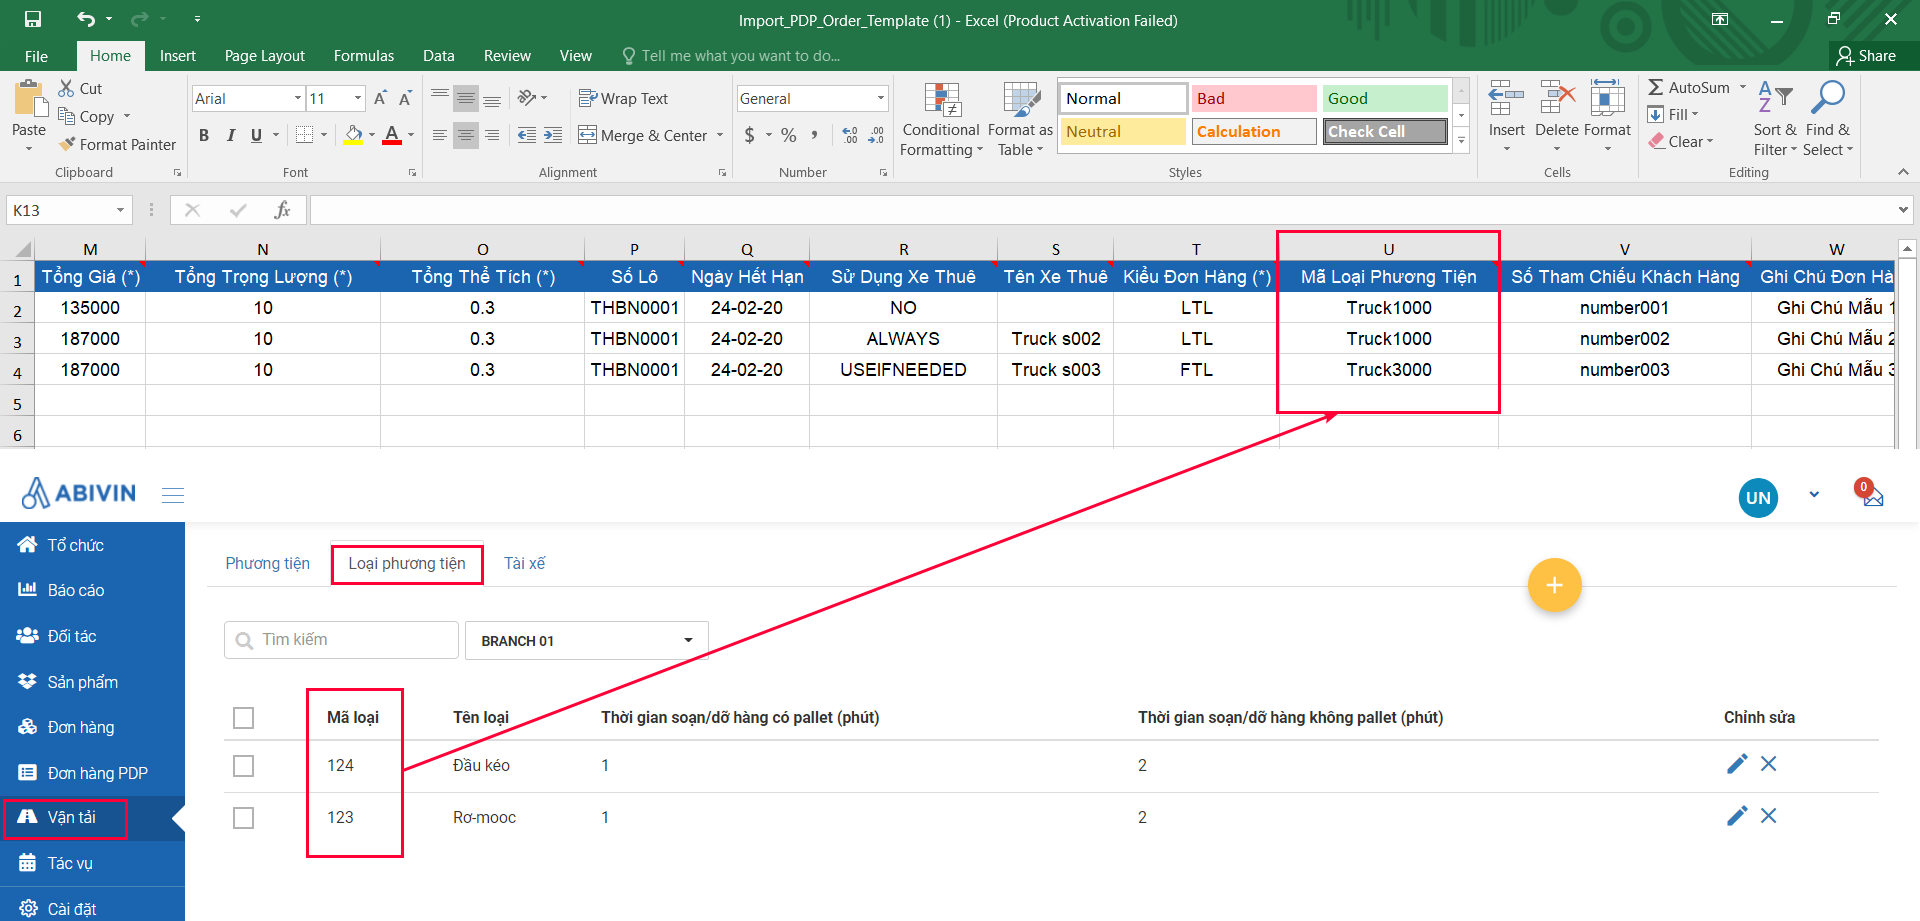
Illustration (Vietnamese)
2.10. Customer Reference Number; Order Note
- These information fields are optional. If you don't have information, you can safely leave these cells blank

Illustration (English)

Illustration (Vietnamese)
Updated about 1 month ago
