Shipper
- In logistics activities, Shipper is a term that refers to the person or company who is usually the supplier or owner of commodities
- If you are a third-party transport service provider (Carrier) or a product distributor (Distributor), chances are you will have business relationships with many Shippers. This article will help you set up your account to manage the Shippers on your Abivin vRoute account
- Note: This article is targeted at the users who set up their accounts as Carrier/Distributor-oriented
Create Shipper
- As mentioned in the Manage Organizations article, the Shipper is an Organization Type, therefore the basic creation process of the Shipper is similar to other Organization Types. You can create the Shippers using two methods: Webform and Excel import file
Shipper Information Fields
- When creating the Shippers, you only need to input into the following information fields:
Information Field | Description & Input Rules |
|---|---|
Organization Code (Webform + Excel import file) | 1. Description: |
Organization Name | 1. Description: |
Parent Organization (Webform); Parent Organization Code (Excel import file) | 1. Description: |
Organization Category (Webform); Organization Category Code (Excel import file) | 1. Description: |
Shipper Permissions
- After an Organization of Shipper type is created, the system will also automatically create the Administrator User Group of that Shipper over at the Organizations > User Groups tab
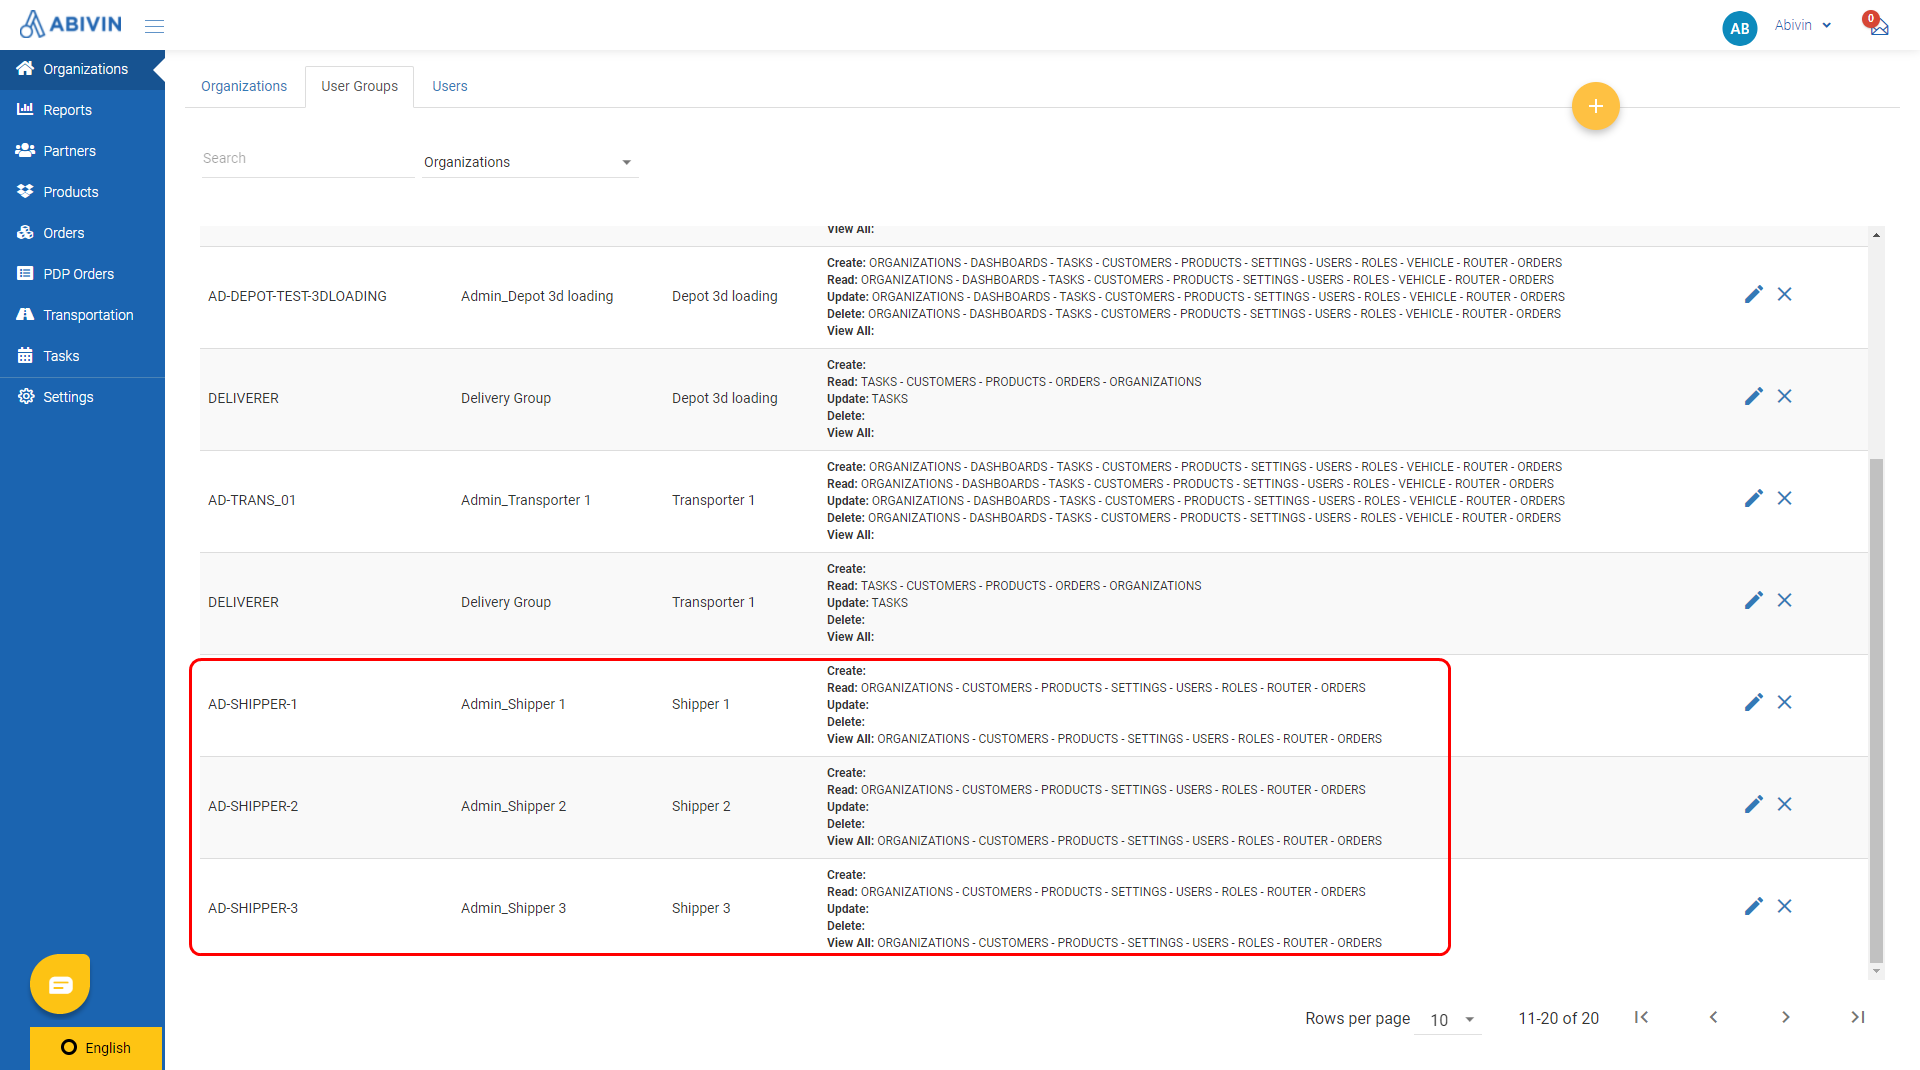
Illustration (English)
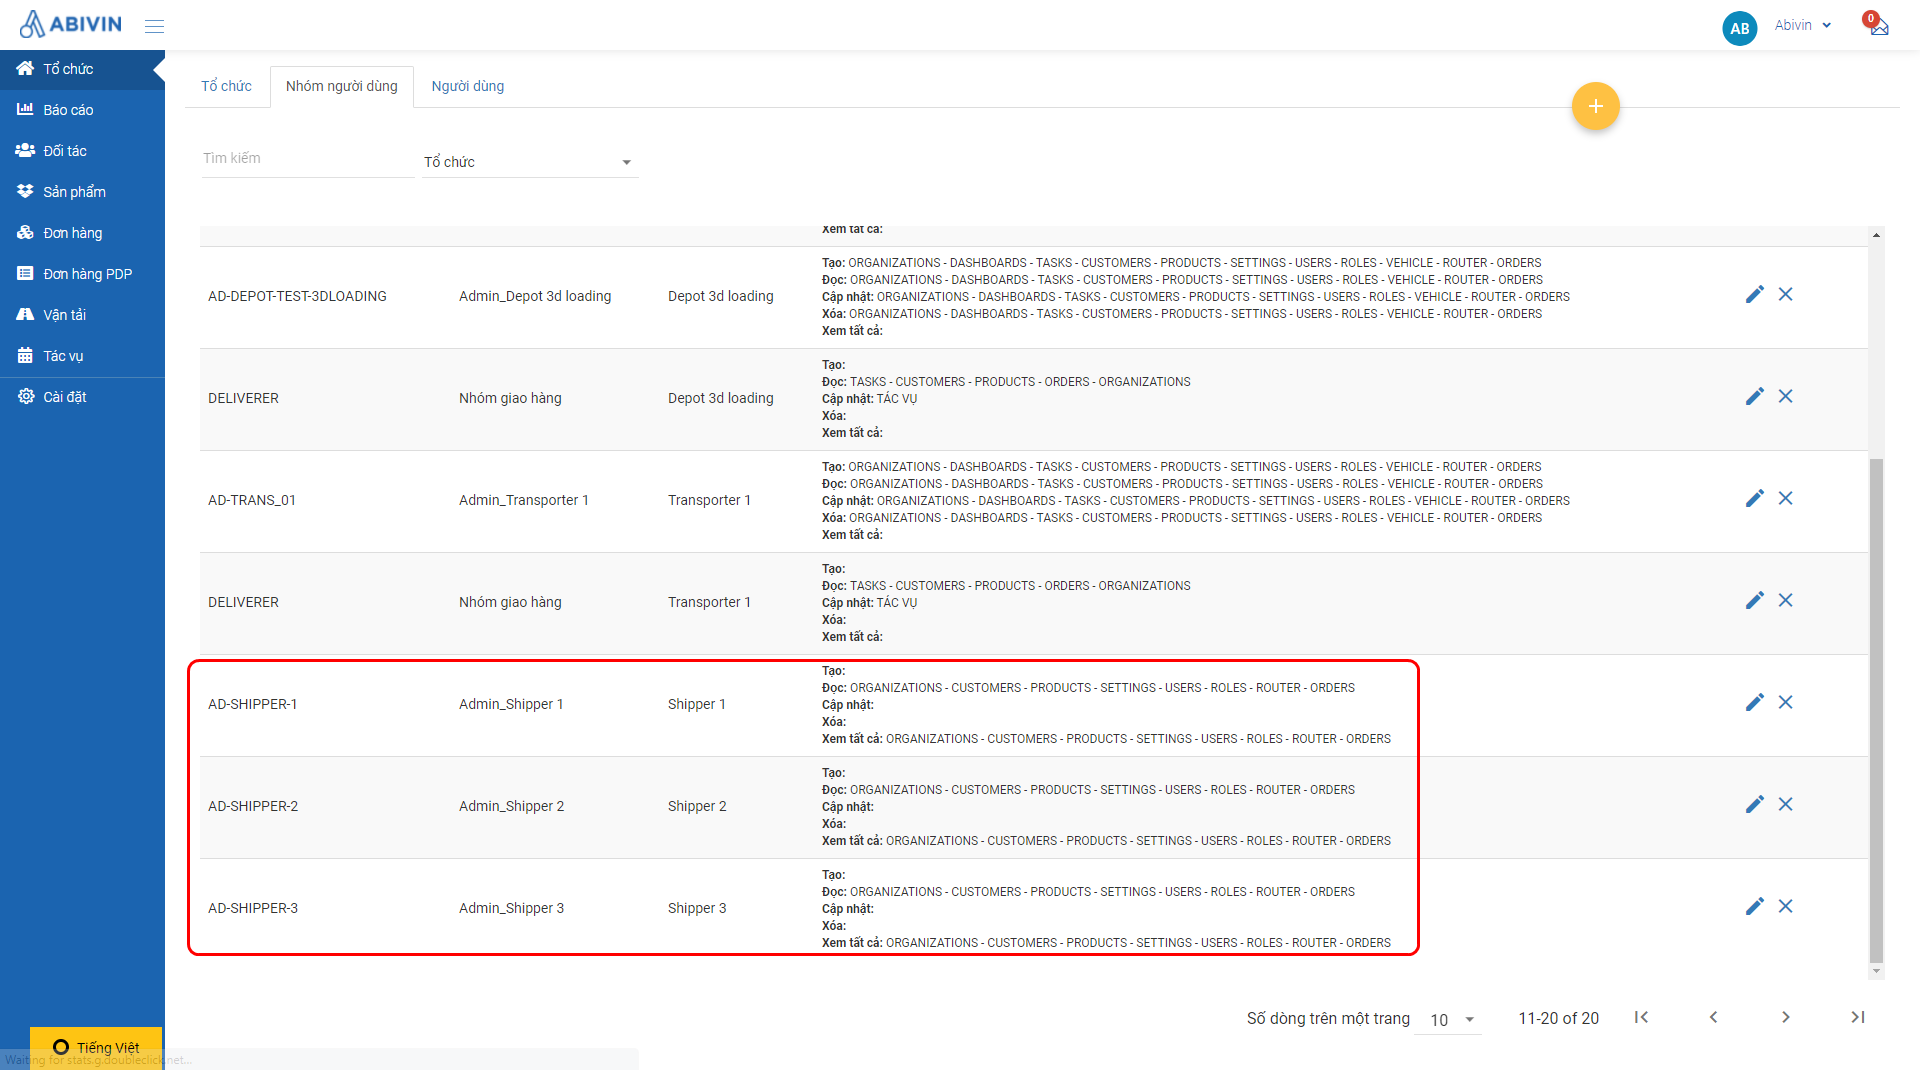
Illustration (Vietnamese)
- By default, the Shipper's Administrator User Group will have access to the following modules and the corresponding permission in the below table
Module | Module Permissions |
|---|---|
Organizations | Read |
Roles | Read |
Users | Read |
Customers | Read |
Products | Read |
Orders | Read |
- By granting the above permissions, if you create the accounts that belong in the Shipper Administrator User Groups, they will be able to view the Customers, Products, and Orders associated with that Shipper
Associate Shippers With Customers
- The Customers, the receiving end of the delivery activities, can receive Products from multiple Shippers
- For a Shipper, the receiving locations of a Customer are defined as the Ship-to locations. In the same manner, the record that contains the necessary information of a Ship-to, such as the Ship-to management code, delivery time window, delivery lead time, etc. is defined as the Ship-to Profile
- In Abivin vRoute system, for Carrier-oriented user accounts, the resource Customer will also have a dedicated section to manage the Ship-to Profiles of the Shippers
- For example, Customer A receives Products from three Shippers, X, Y, and Z, therefore, on Abivin vRoute system, you need to create three Ship-to Profiles for Customer A
Associate Customers With Shippers Using The Webform
- To associate a new Customer or an existing Customer with the Shippers using the Webform, follow the steps below:
- Step 1: Navigate to the Partners > Customers tab
- Step 2.1 (For the new Customer): Open the Customer creation Webform and input the basic information of the new Customer
- Step 2.2 (For the existing Customer): Click the Edit icon of the Customer that you want to associate with the Shippers
- Step 3: On the Create/Update Customer form, after you have input the basic information of the Customer over at the Main Setting tab, navigate to the Ship-to Profile tab. In this tab, you need to input the information of the Ship-to Profiles for the Shippers associated with the Customer
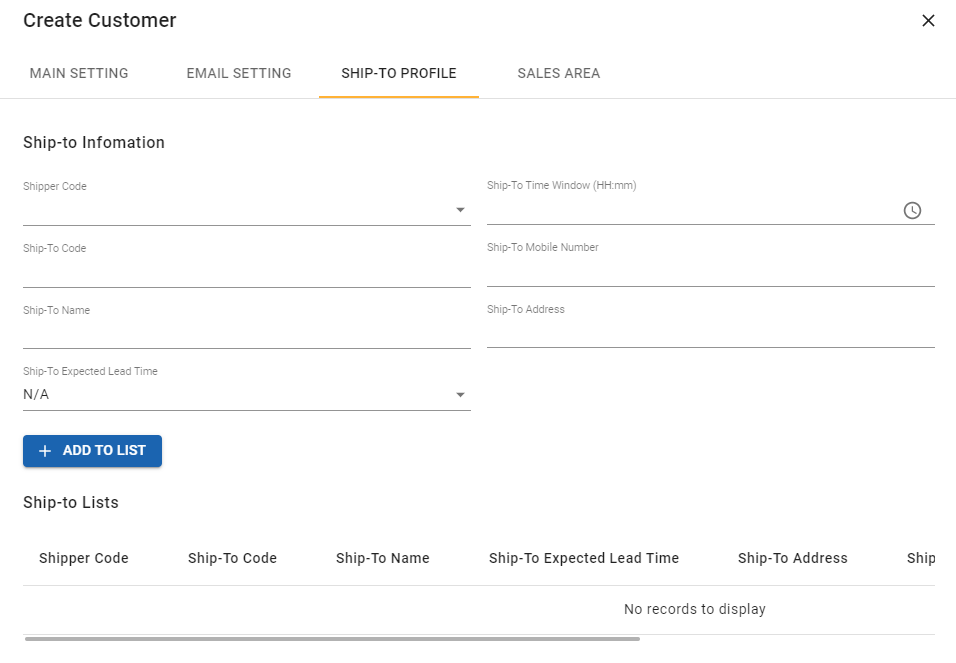
Illustration (English)
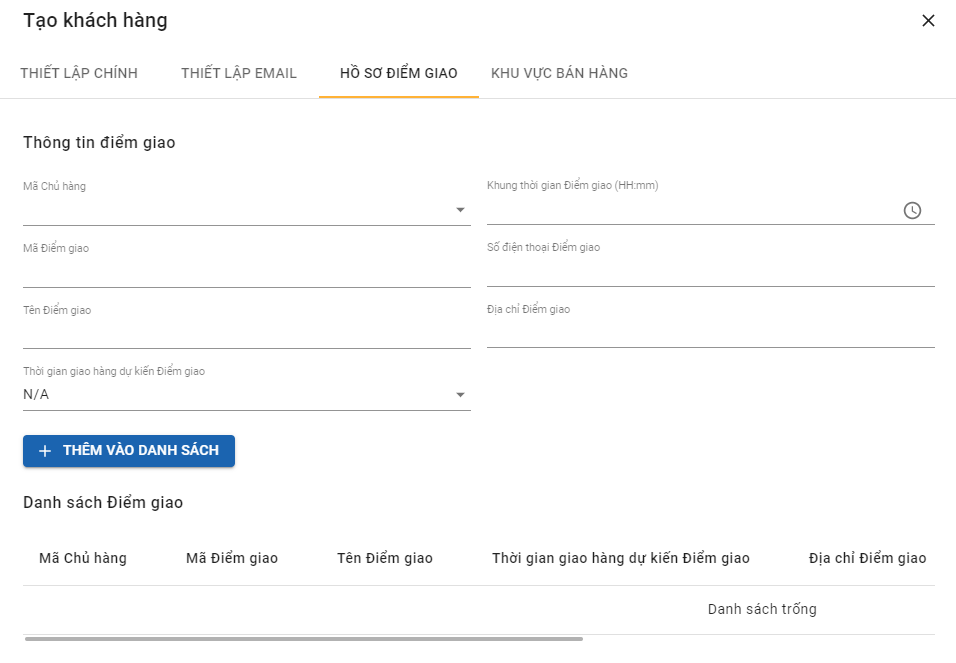
Illustration (Vietnamese)
- The input rules are presented in the below table
Information Field | Description & Input Rules |
|---|---|
Shipper Code (Webform + Excel import file) | 1. Description: |
Ship-To Code | 1. Description: |
Ship-To Name | 1. Description: |
Ship-To Address | 1. Description: |
Ship-To Expected Lead Time | 1. Description: |
Ship-To Time Window (HH:mm) (Webform); Ship-To Time Windows (Excel import file) | 1. Description: |
Ship-To Mobile Number | 1. Description: |
Ship-To Address | 1. Description: |
- After you have finished inputting the information of a Ship-to Profile, click the Add to List button. The newly created Ship-to Profile will appear in the Ship-to Lists table below
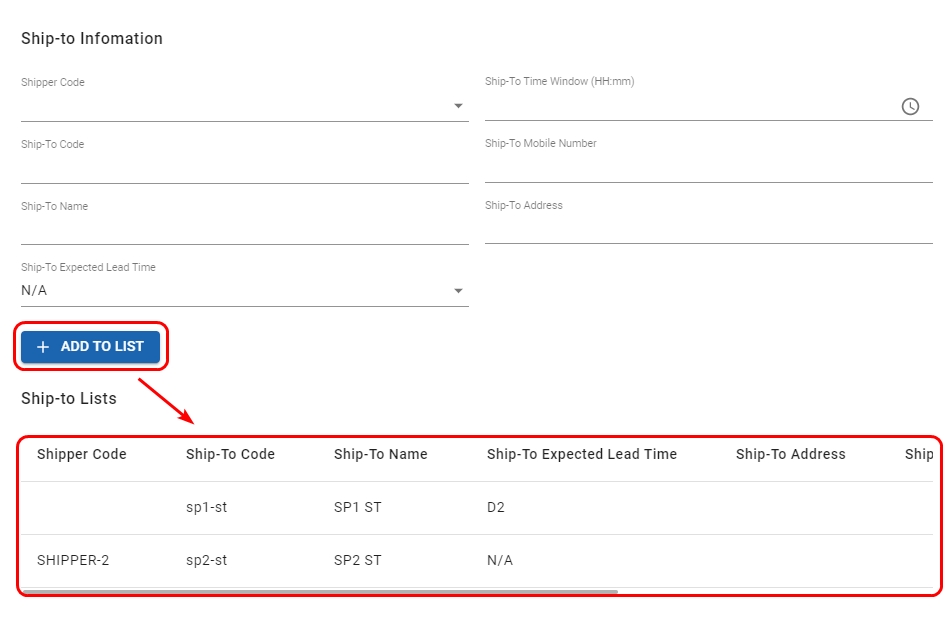
Illustration (English)
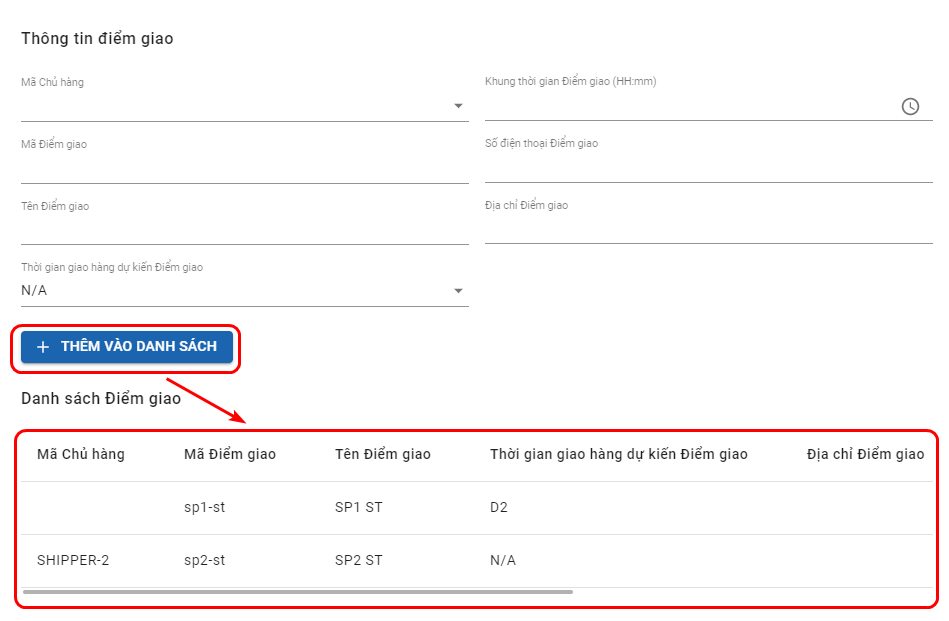
Illustration (Vietnamese)
- Repeat the steps above to create the Ship-to Profiles for other Shippers with which the Customer being created/edited have associations with
- To edit a Ship-to Profile, scroll the Ship-to Lists table to the far right until you see the Actions column. Click the corresponding Edit icon of the wanted Ship-to Profile. Upon clicking, certain information fields of the Ship-to Profile (Ship-to Name; Ship-to Expected Lead Time; Ship-to Address; Ship-to Time Window; Ship-to Mobile Number) will become editable
- After you have edited the necessary information fields, click the Save icon to save the changes, else click the Cancel icon to discard the changes

Illustration (English)

Illustration (Vietnamese)
- To remove a Ship-to Profile, click its Delete icon then click the Save icon to confirm the deletion, else click the Cancel icon to discard the deletion

Illustration (English)

Illustration (Vietnamese)
- After you have finished creating all the Ship-to Profiles, don't forget to click the blue Save button to save the newly created Ship-to Profiles
Ship-To Expected Lead Time
- Ship-To Expected Lead Time is a time period (In days) that the Customer's receiving location specifies for each of the Shippers associated with that Customer
- The system will use the Ship-To Expected Lead Time value to determine the delivery date range of the Orders containing the Shippers' Products to the Customer's receiving locations. The Vehicles of the Carriers/Distributors must deliver the Orders within the delivery date range. Refer to the following section to understand how this information field is used: Create Sales Orders Involving Shippers
- Below is the list of the Expected Lead Time values:
Ship-To Expected Lead Time | Description |
|---|---|
N/A | The Customer's receiving location doesn't specify any Expected Lead Time for the Shipper |
D0 | The Expected Lead Time that the Customer's receiving location specifies for the Shipper is zero-day |
D1 | The Expected Lead Time that the Customer's receiving location specifies for the Shipper is one day |
D2 | The Expected Lead Time that the Customer's receiving location specifies for the Shipper is two days |
D3 | The Expected Lead Time that the Customer's receiving location specifies for the Shipper is three days |
D4 | The Expected Lead Time that the Customer's receiving location specifies for the Shipper is four days |
D5 | The Expected Lead Time that the Customer's receiving location specifies for the Shipper is five days |
D6 | The Expected Lead Time that the Customer's receiving location specifies for the Shipper is six days |
D7 | The Expected Lead Time that the Customer's receiving location specifies for the Shipper is seven days |
D8 | The Expected Lead Time that the Customer's receiving location specifies for the Shipper is eight days |
Associate Depots With Shippers
- If your Depot stores Products for multiple Shippers, you need to associate that Depot with those Shippers
- You can associate the Depots with the Shippers using either the Webform or the Organization Excel import file
Associate Depots With Shippers Using The Webform
- To associate a Depot with one or more Shippers using the Webform, follow the steps below:
- Step 1: Navigate to the Organizations > Organizations tab
- Step 2: Click the Edit icon of the wanted Depot
- Step 3: On the Update Organization form, click the Shipper field. On the drop-down list, tick the checkbox icon of the Shipper(s) which you want to associate with the Depot
- Step 4: Click Save to confirm the association
Associate Depots With Shippers Using The Excel Import File
- When you create new Depots, to associate a Depot with one or more existing Shippers, follow the steps below:
- Step 1: Copy the Organization Code of the appropriate Shipper on the Web app
- Step 2: Open the Organization Excel import file. Paste the copied value into the Shipper Code cell of the Depot being created
- If the Depot being created is associated with multiple Shippers, separate two adjacent Shipper Codes using only a semicolon (;), for example, Shiper_01;Shipper_02
- If the Depot being created is not associated with any Shipper, leave this cell blank
- You can also create the Shippers and the Depots at the same time without having to create the Shippers in advance. Make sure to copy the Shipper Codes of the Shippers from their Organization Code cells and paste into the Shipper Code cells of the Depots associated with those Shippers

Create Products Of Shippers
- Each Shipper will have their own Products, therefore it is necessary to specify which Products in the Depot belong to which Shippers
- You can create the Products of the Shippers using two methods: The Webform and the Product Excel import file
Create Shipper Products Using The Webform
- When using the Webform to create the Shippers' Products, make sure you follow these steps:
- Step 1: Click on the Organization field. On the drop-down list, select the Depot which has been associated with the Shippers (1)
- Step 2: Click on the Shipper Code field. The drop-down list will show the Shippers that the selected Depot has been associated with. Select the Shipper that is the owner of the Product being created (2)
- For the remaining information fields, please follow the instruction laid out in the main article: Manage Products
Create Shipper Products Using The Excel Import File
- If you use the Excel import file to create the Products of the Shippers, you need to take note of the number of Depots on your master account and then prepare the same number of Product import files
- In the Product Excel import file of each Depot, make sure to input the Organization Code of the Shippers which are the owner of the Products into the Shipper Code cells of each Product
- After you have finished preparing the Excel files, follow the instruction below to correctly import them onto the Abivin vRoute system:
- On the Upload Data form, click on the Organization field located at the bottom left of the form. On the search bar, input the Organization Code/Organization Name of the Depot that directly manages the Products being imported then select the returned result. Finally, click Start Upload to start importing the file onto the system
Create Sales Orders Involving Shippers
Create Sales Orders Involving Shippers Using The Webform
- When you create the Sales Orders using the Webform, make sure you input the information of the Order in the following sequence:
- 1 - From Depot: Select the Depot which you have created the associations with the Shippers
- 2 - To Customer: Select the Customer of which you have created the Shippers' Ship-to Profiles
- 3 - Ship-To Code: Click on this field and select the appropriate Ship-to Profile on the drop-down list
- As you select the Ship-To Code, the Shipper Code field will automatically update and show the Shipper that directly manages the selected Ship-to Profile

Illustration (English)

Illustration (Vietnamese)
- 4 - Products: When you click on this field, the drop-down list will only show the Products which are 1. associated with the selected Shipper, and 2. are not associated with any Shipper. The system will not display the Products that are associated with other Shippers
- Note: If you change the Ship-to Profile from one Shipper to another, the Products of the previous Shipper will disappear from the Product table
- For the remaining information fields, the input steps are unchanged compared to the main article Manage Sales Order
Create Sales Orders Involving Shippers Using The Excel Import File
- When you create the Sales Orders that involve the Shippers using the Excel import file, follow the instruction below to correctly input the Shipper's Ship-to and Product information:
- First, navigate to the Partners > Customers tab, click the Edit icon of the desired Customer. On the Update Customer form, navigate to the Ship-to Profile sub-tab. Scroll the form down until you see the Ship-to Lists section where the Ship-to Profiles are listed. Copy the desired Ship-to Code from the column of the same title then paste it into the Ship-to Code cell of the corresponding Order in the Excel import file
- If the Order being created spans multiple rows, you must paste the Ship-to Code value on all of that Order's rows. DO NOT input more than one Ship-to Code value on the rows of one Order, or input the Ship-to Code only one some rows of the Order and leave the remaining rows blank. You will not be able to import the Excel file onto the system in those scenarios
- Next, navigate to the Products > Inventory tab. Copy the Product Codes of the Products that are associated with the Shipper from the column of the same title then paste them into the Product Code cells in the Excel import file
- For the remaining information fields, the input steps are unchanged compared to the main article Manage Sales Order
Create Sales Orders Involving Shippers Using Custom Import Tool
- Abivin vRoute system also allows you to use your own Sales Order (Or Delivery Order) format and import them directly onto the Web app via the assistance of a built-in tool called Custom Import. Read more about this tool in the following article: Custom Import
Route Plan Optimization Process
Updated about 1 month ago
