Manage Products
- The products will be managed in two tabs:
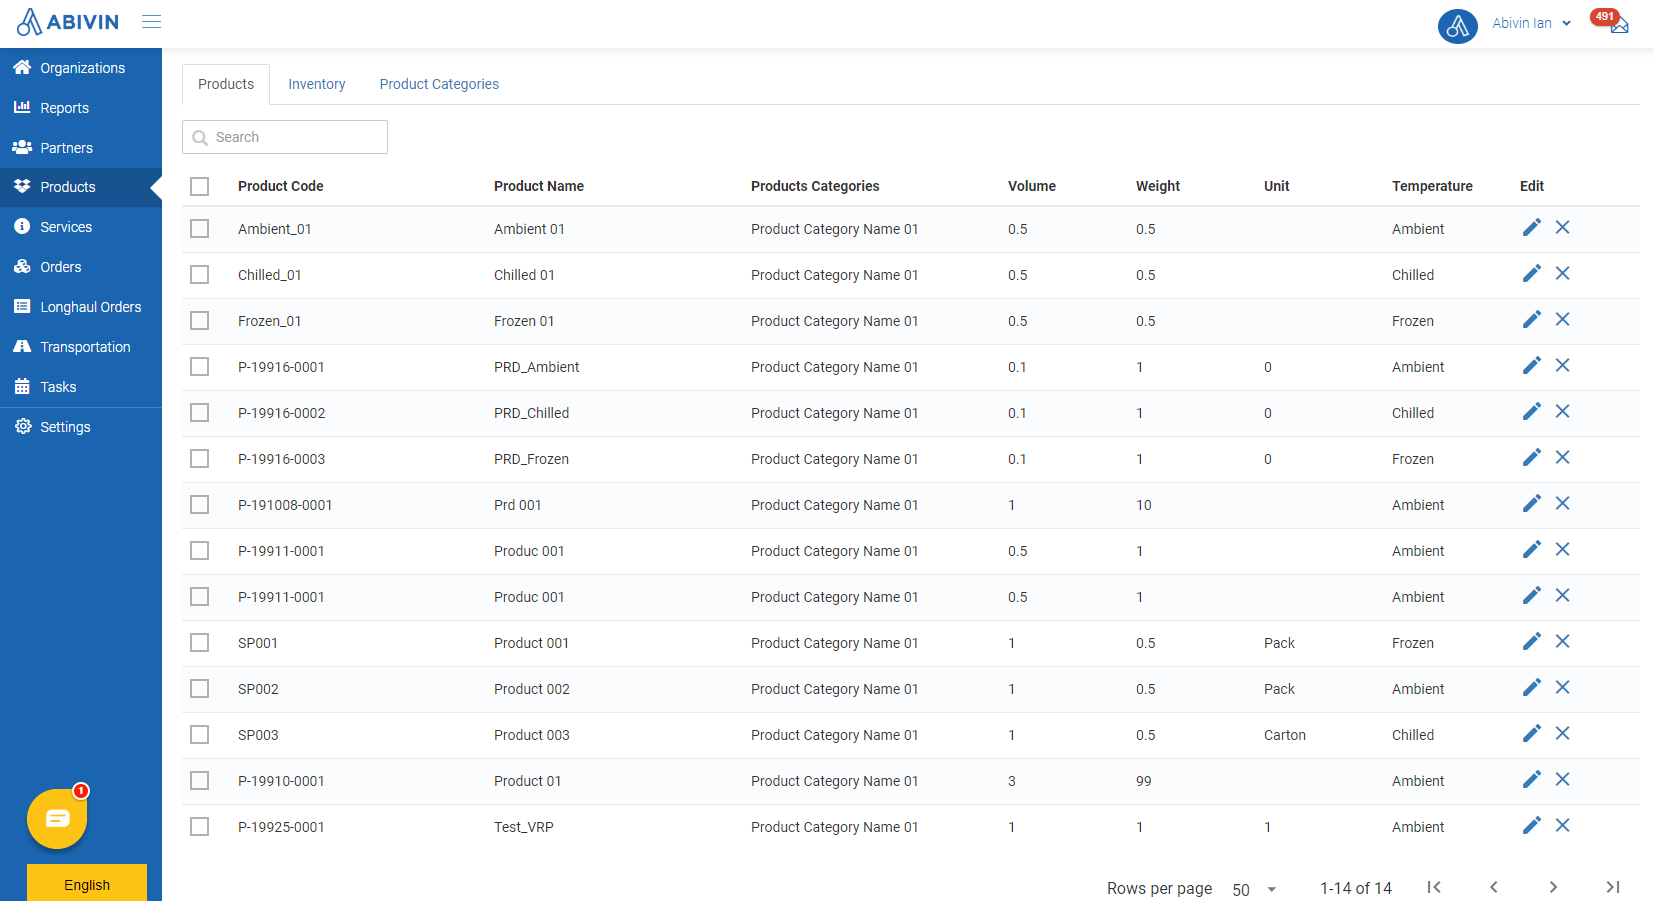
- Products > Products: This tab stores all the general information of the products managed by the organization
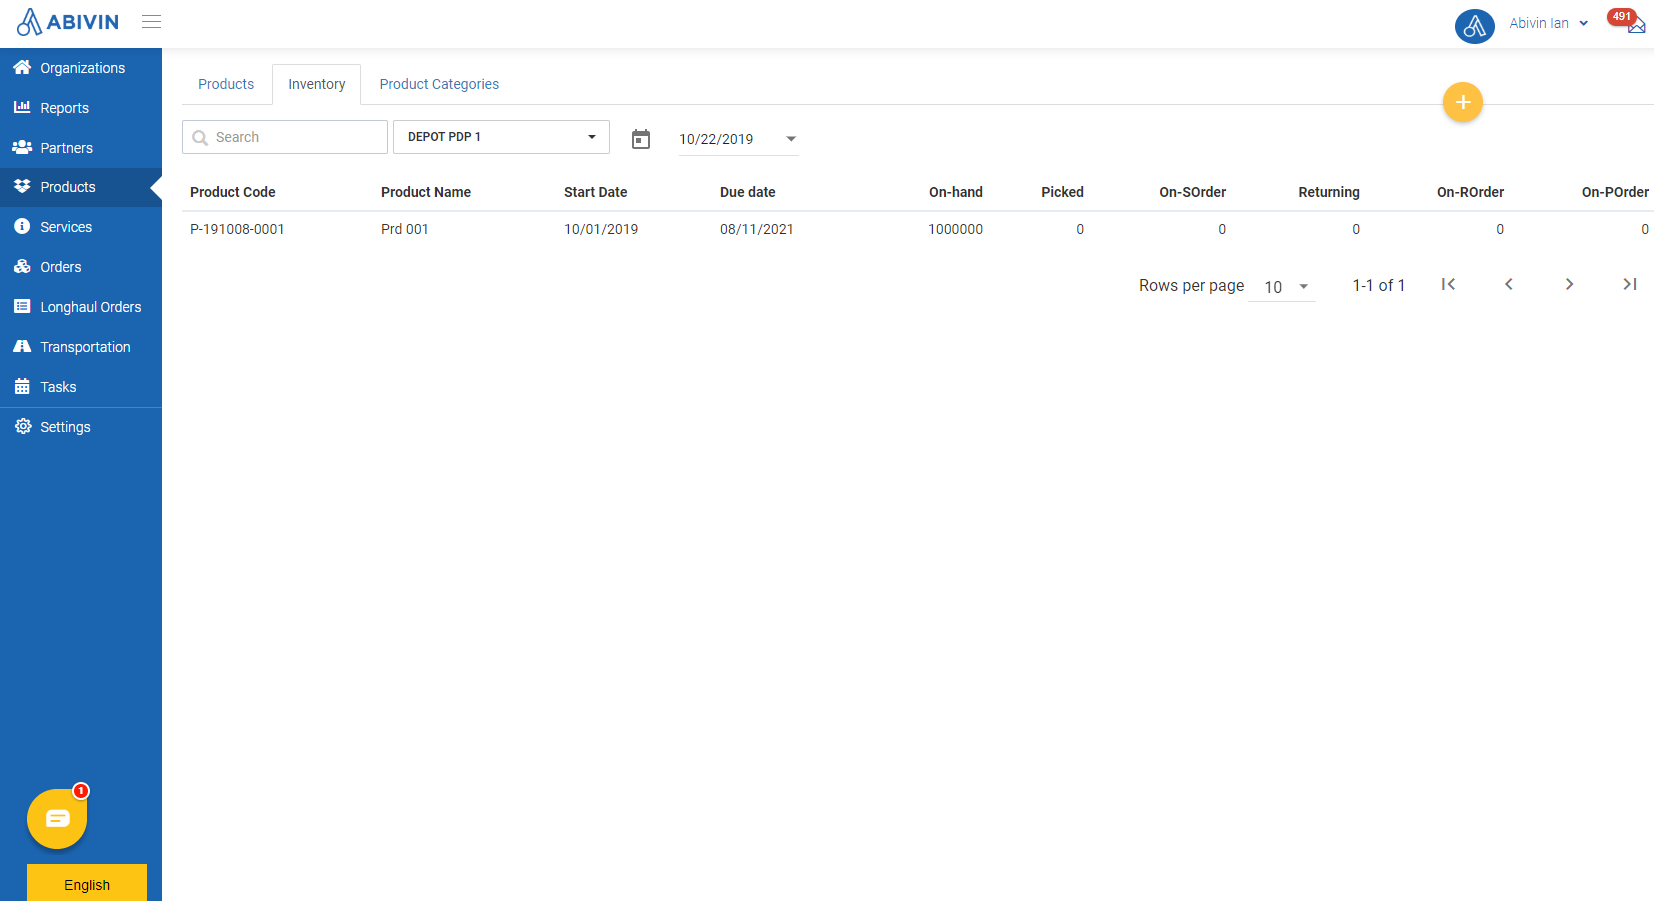
- Products > Inventory: This tab serves as a ledger to track the changes of product quantity in the Depot shelves throughout the manufacturing and sales processes
- The product can be Single item:

A beer bottle
- Or they can come in a Case, each case consists of multiple single items:
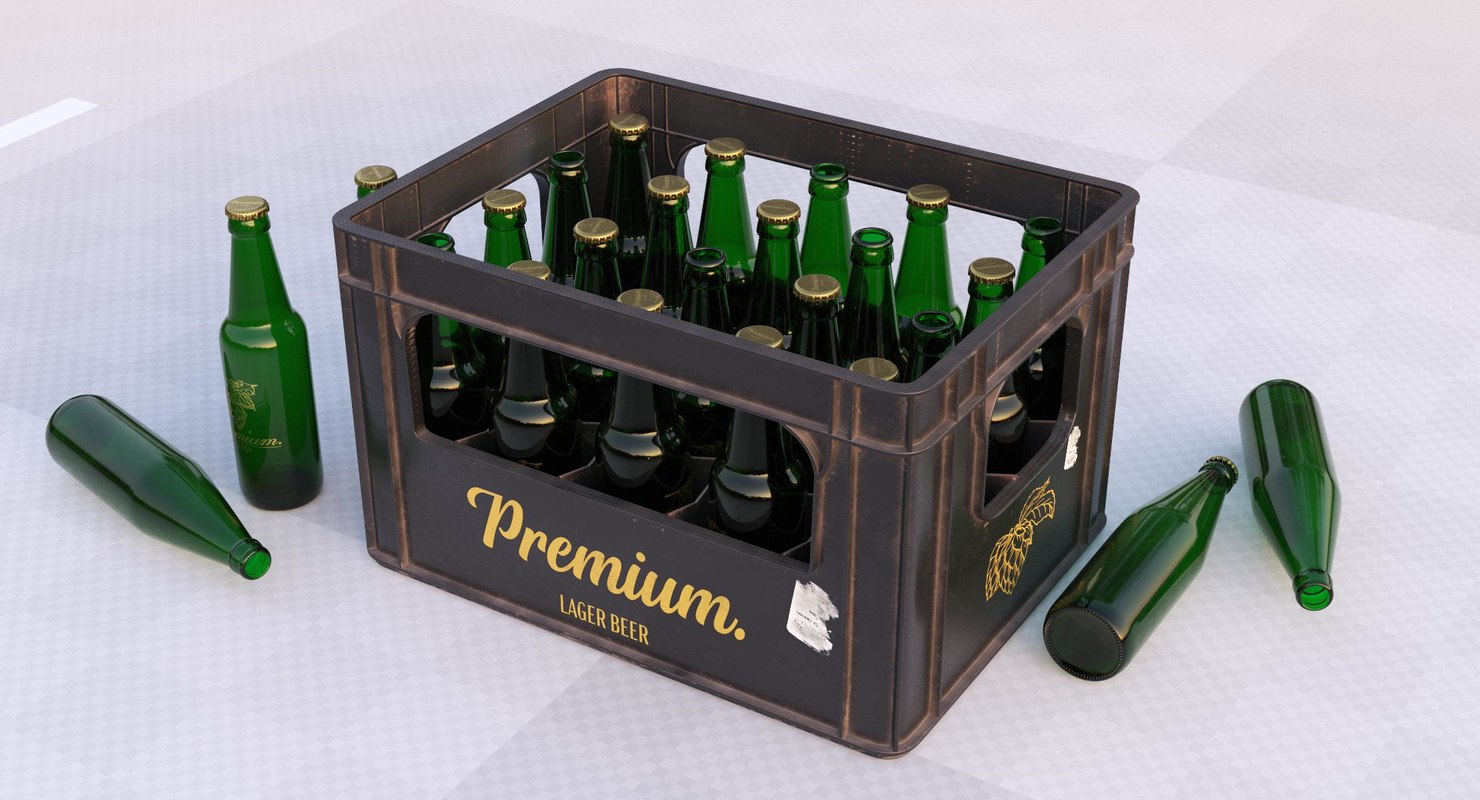
A beer crate, carrying 20 units of beer bottles
- In this model, each product case is considered a Stock Keeping Unit (SKU)
Locate the Products and Inventory tab
- Product general information: Navigate to Products > Products tab
- Product Inventory: Navigate to Products > Inventory tab
Create products
- To create new products, you have to navigate to Products > Inventory tab
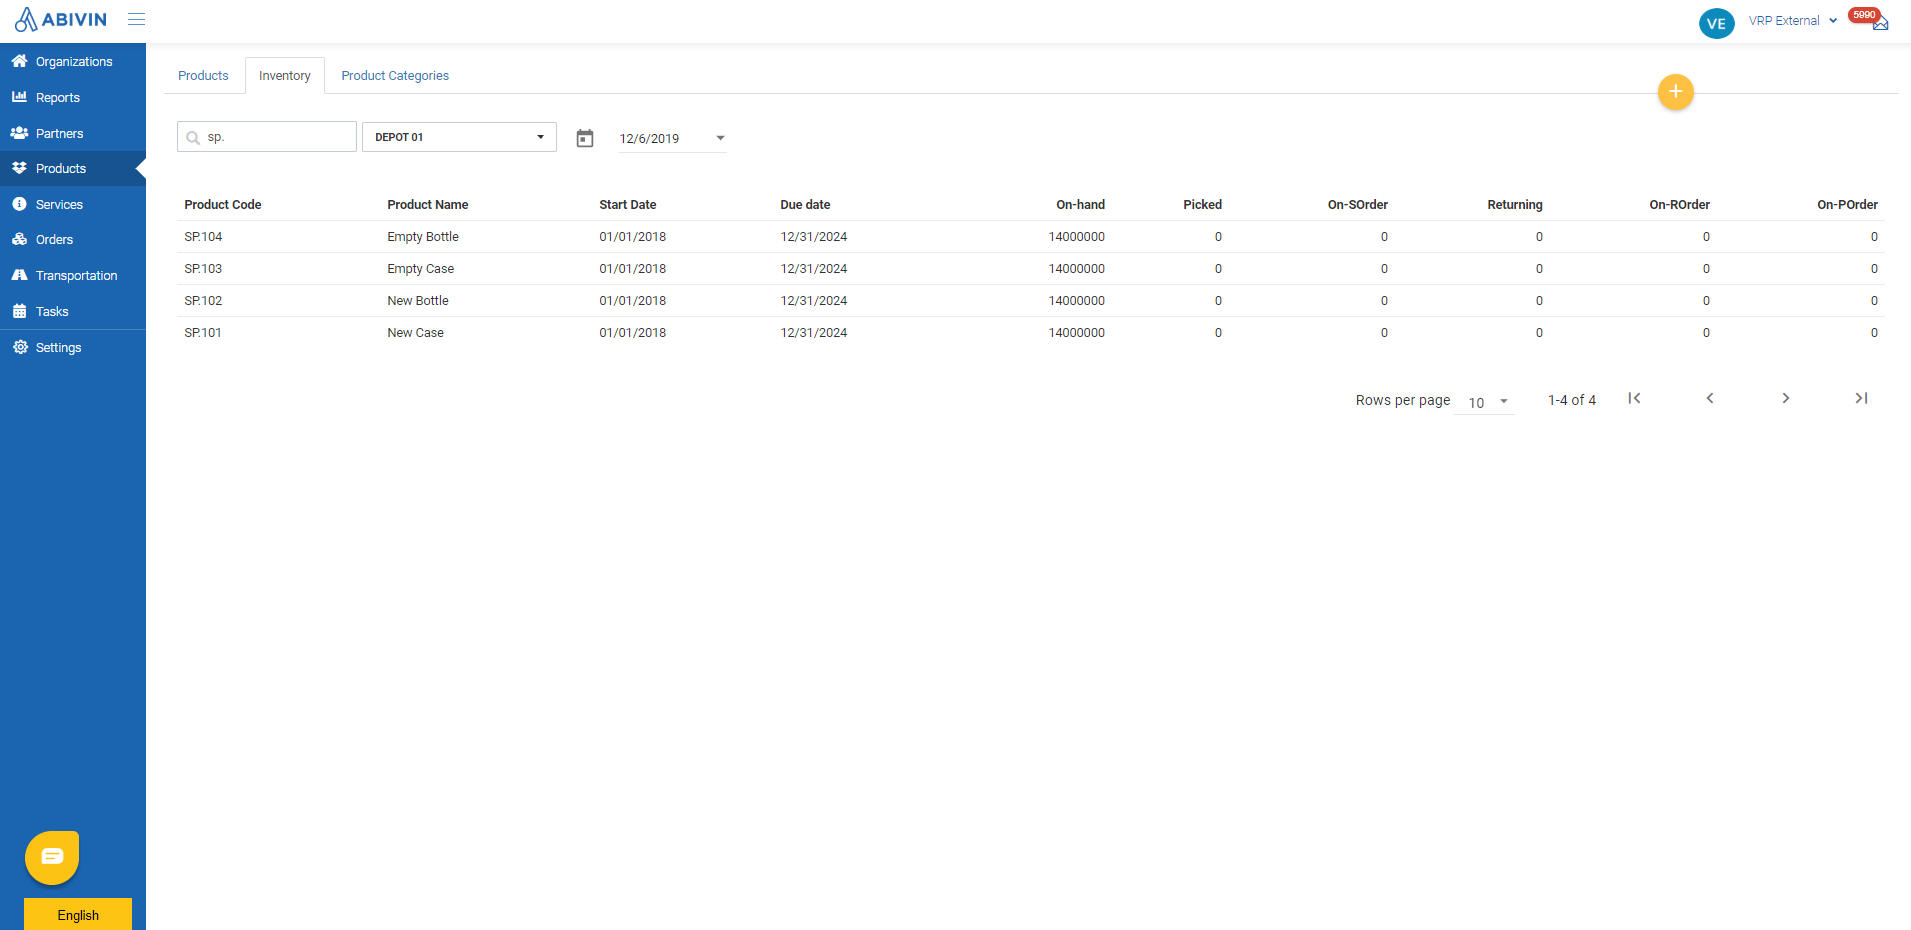
Product information fields
Basic product information fields
Information field | Description & Input |
|---|---|
Organization (Web form) (Required) | On Web form: Product Detail tab |
Product Category (Web form); Product Category Code (Excel template) | On Web form: Product Detail tab |
Product Code | On Web form: Product Detail tab |
Parent Product Code | On Web form: Product Detail tab |
Product Name | On Web form: Product Detail tab |
Number Per Case | On Web form: Product Detail tab |
Case Price | On Web form: Product Detail tab |
Item Price | On Web form: Product Detail tab |
Product Discount | On Web form: Product Detail tab |
Weight (kg) | On Web form: Product Detail tab |
Volume (m3) | On Web form: Product Detail tab |
Quantity | On Web form: Product Detail tab |
Form/Unit (Web form); Unit (Excel template) | On Web form: Product Detail tab |
Conversion Unit | On Web form: Product Detail tab |
Start Date | On Web form: Product Detail tab |
End Date | On Web form: Product Detail tab |
Temperature (Web form); Temperature Level (Excel template) | On Web form: Product Detail tab |
Properties (Web form); Variant Property (Excel template) | On Web form: Product Detail tab
|
Product Serial | On Web form: Product Detail tab |
Tracking By | On Web form: Product Detail tab |
Information fields of products tracked by Lot number
Information field | Description |
|---|---|
Organization Code (Excel template) (Required) | On Excel template: Import_LotNumber_Template |
Product Code | On Excel template: Import_LotNumber_Template |
Lot Number | On Web form: Lot Number tab |
QC Number | On Web form: Lot Number tab |
On-hand Quantity | On Web form: Lot Number tab |
Create product using Web form
- Please refer to the CRUD functions article to know the general steps about creating single object using web form
Create product that is not tracked by Product Lot/Serial Number
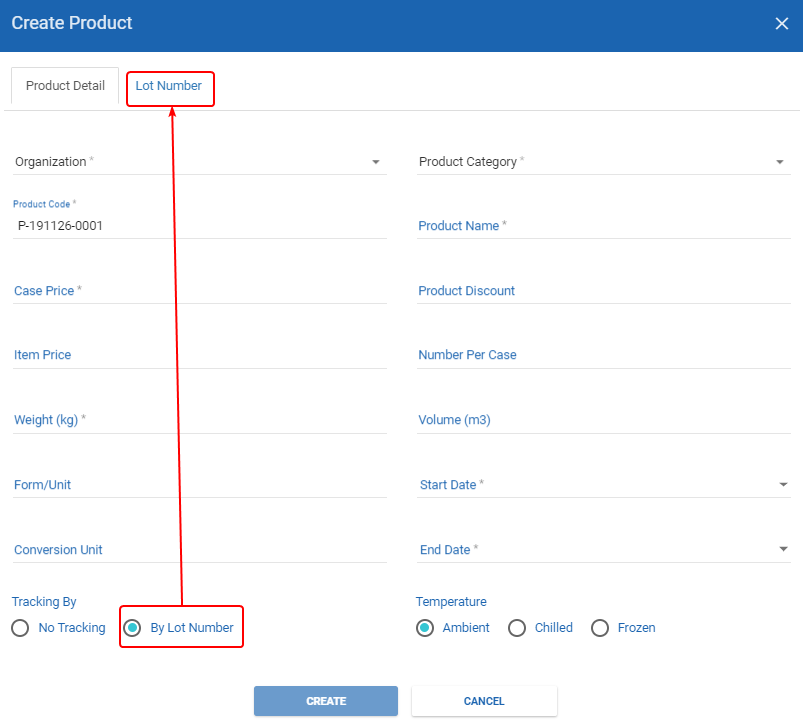
- If the product being created is not tracked by Product Lot/Serial Number, click on No tracking radio box on in Tracking by field of Product Detail tab
Create product that is tracked by Lot number
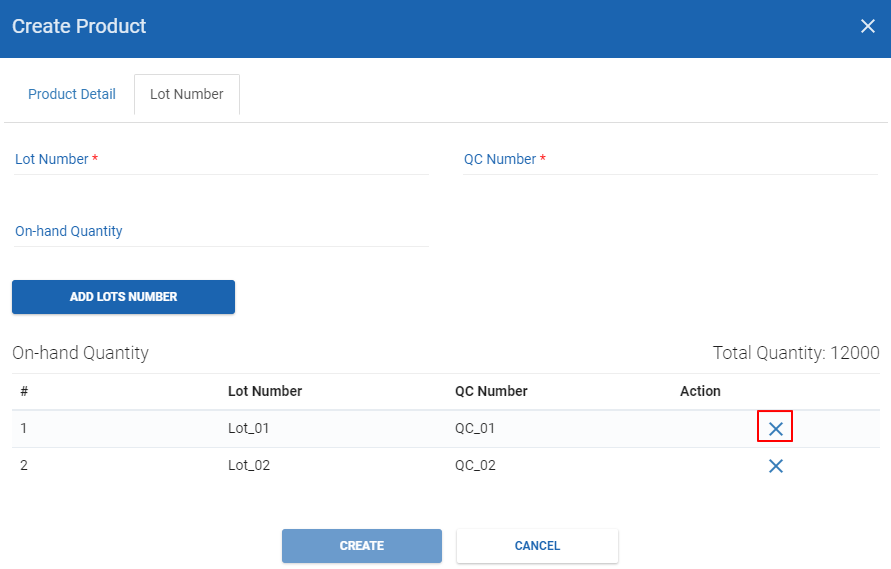
- If the product being created is tracked by Lot number, you have to click on By lot number radio box on in Tracking by field of Product Detail tab. After that, input other information fields on Lot Number tab
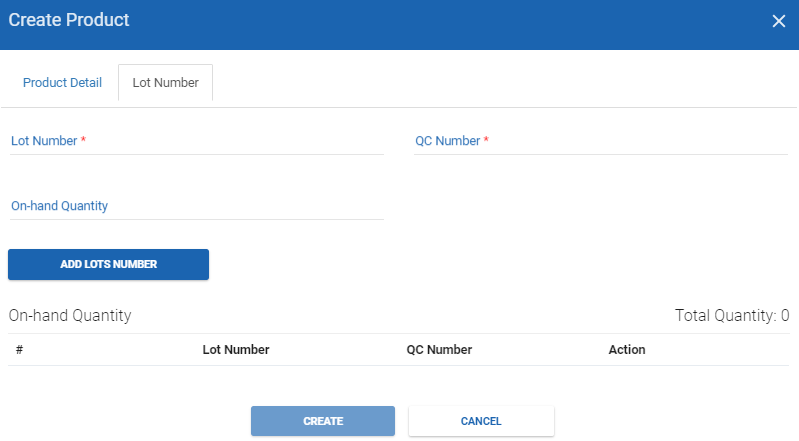
- On Lot Number tab, after you have input information into all three fields of a product lot: Lot Number; QC Number; On-hand Quantity, click on Add Lot Number to confirm creating that product lot. The recently created product lot will appear under the On-hand Quantity table below
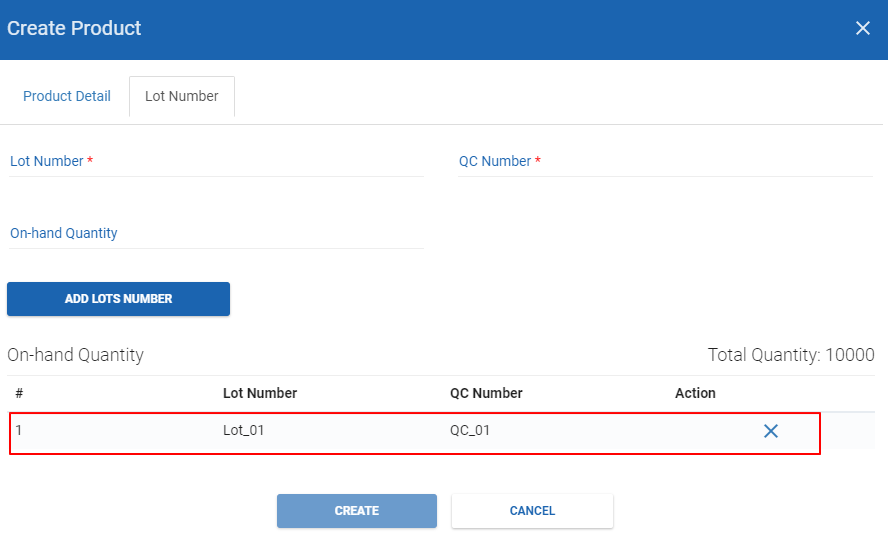
- You can continue to input information for other product lots following the steps above
- The total quantity of all product lots will be automatically calculated and displayed in the Total Quantity field
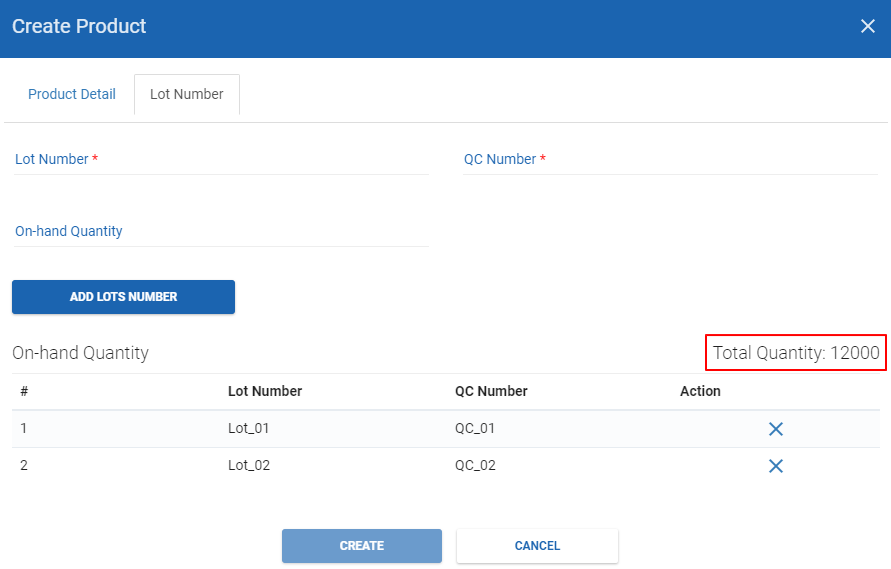
- If you incorrectly input information for a product lot, you can click on the icon of that product lot to remove it
Create products using Excel template
- Please refer to the CRUD functions article to know the general steps about creating multiple objects using Excel template
Create products that are not tracked by Product Lot/Serial Number
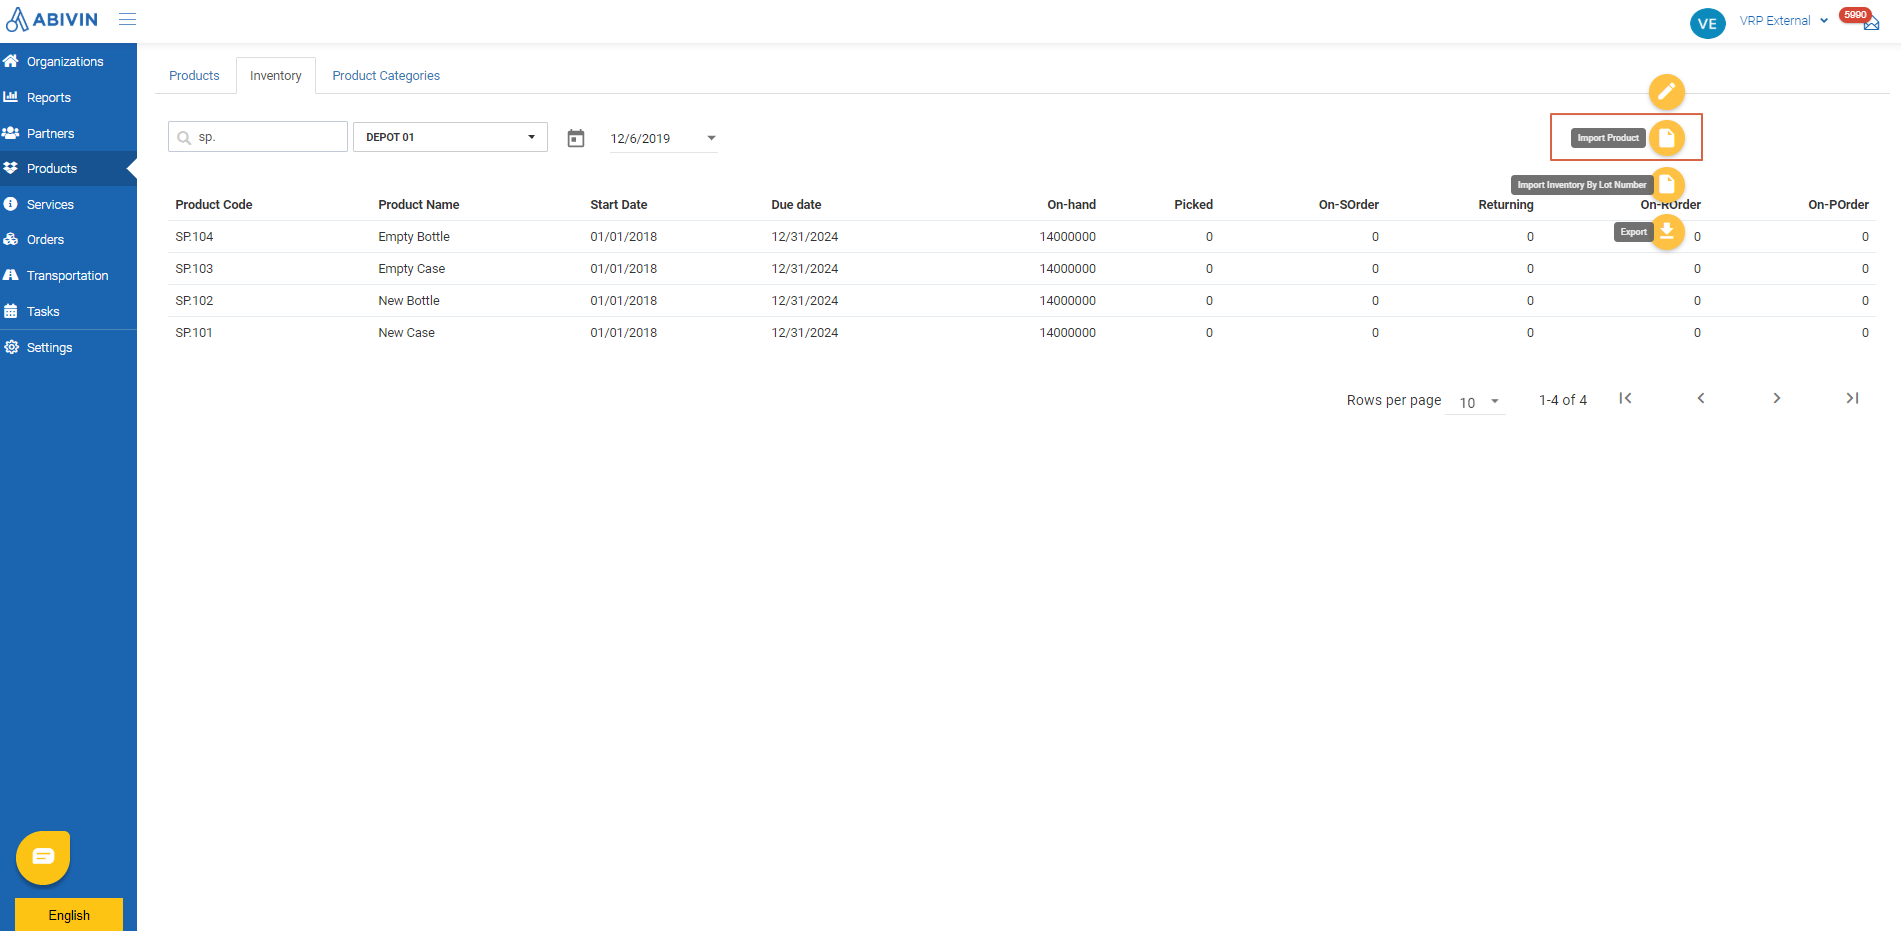
- You need to click on Import Product icon to download the correct Excel template Import_Product_Template.xlsx
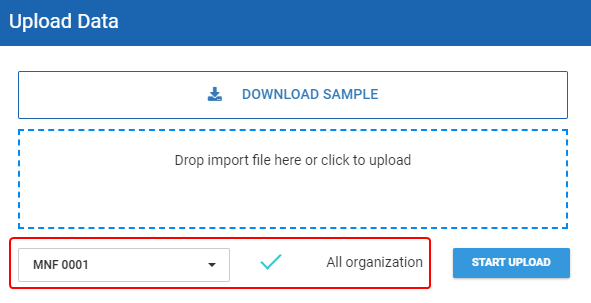
- You will notice in the Excel template Import_Product_Template, there is no Organization field. Therefore, you also have to choose the management organization for the products being uploaded. On the Upload Data form, you need to click on the Organizations field, input the Organization Code of the Manufacturer into the search bar, select from the drop down menu. Next, click on the All organization check box. Then, click on Start Upload. The products being uploaded will show up in the inventory of all Depots under the Manufacturer
Create products that are tracked by Lot number
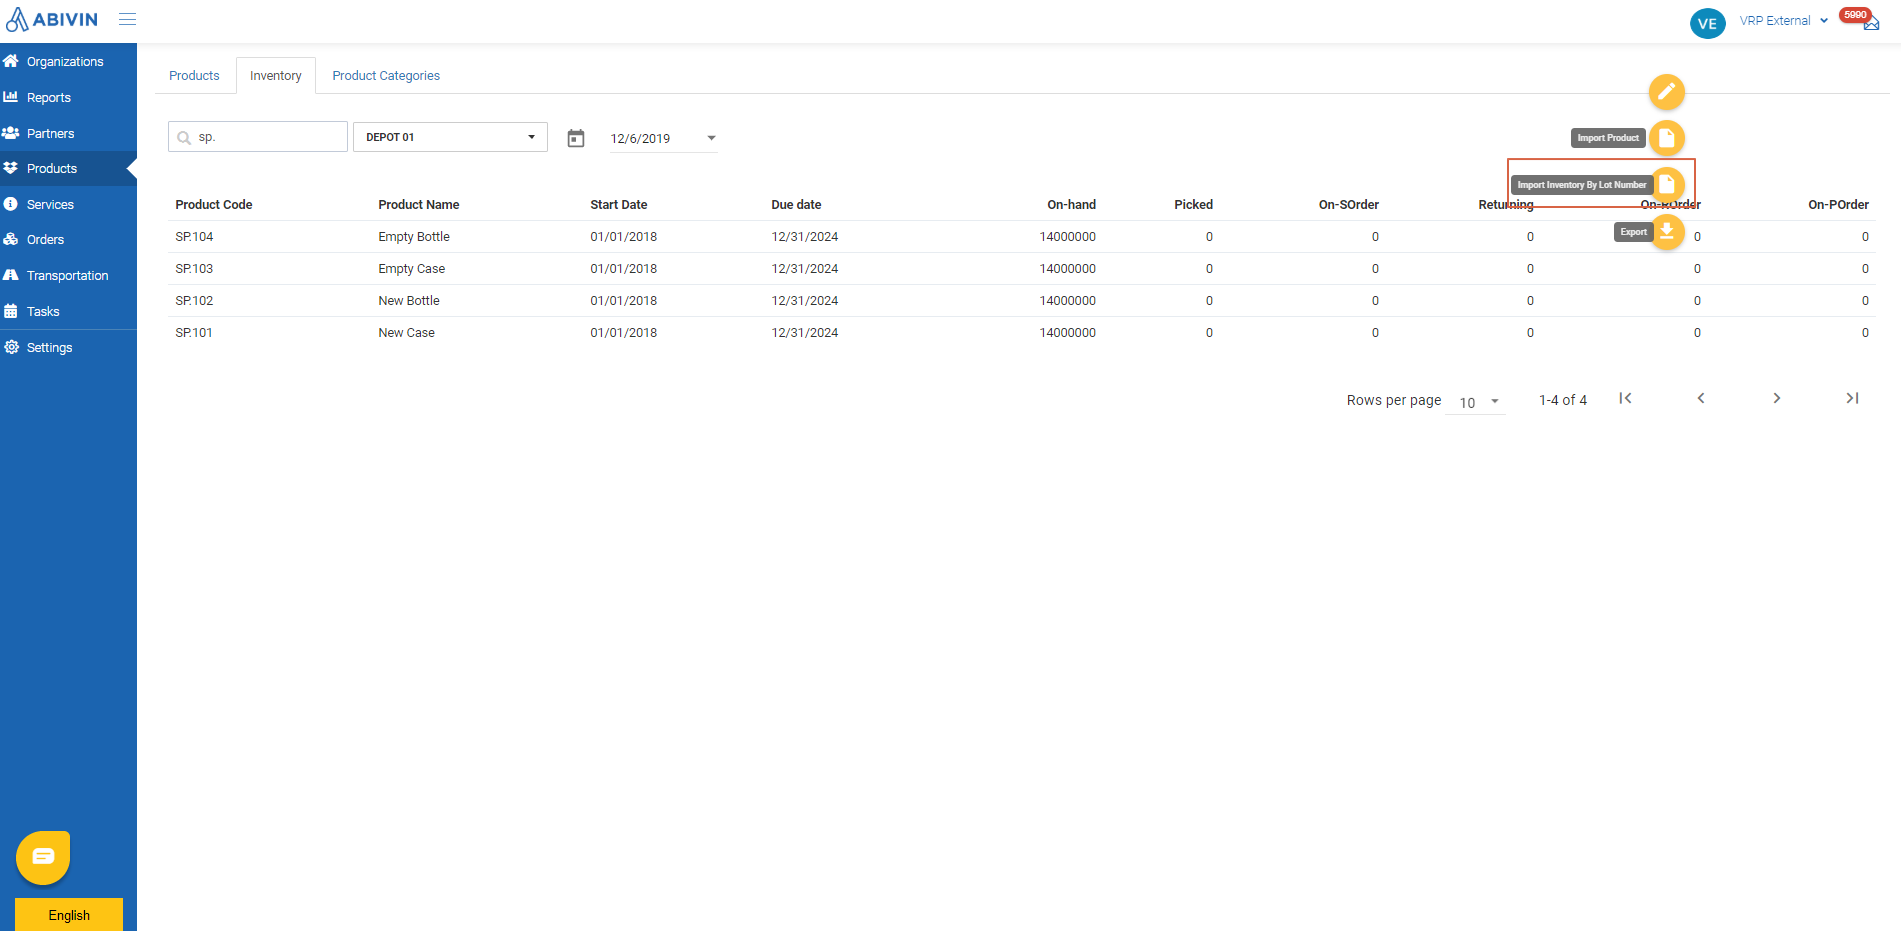
- First, you need to click on Import Product icon to download the Excel template Import_Product_Template.xlsx
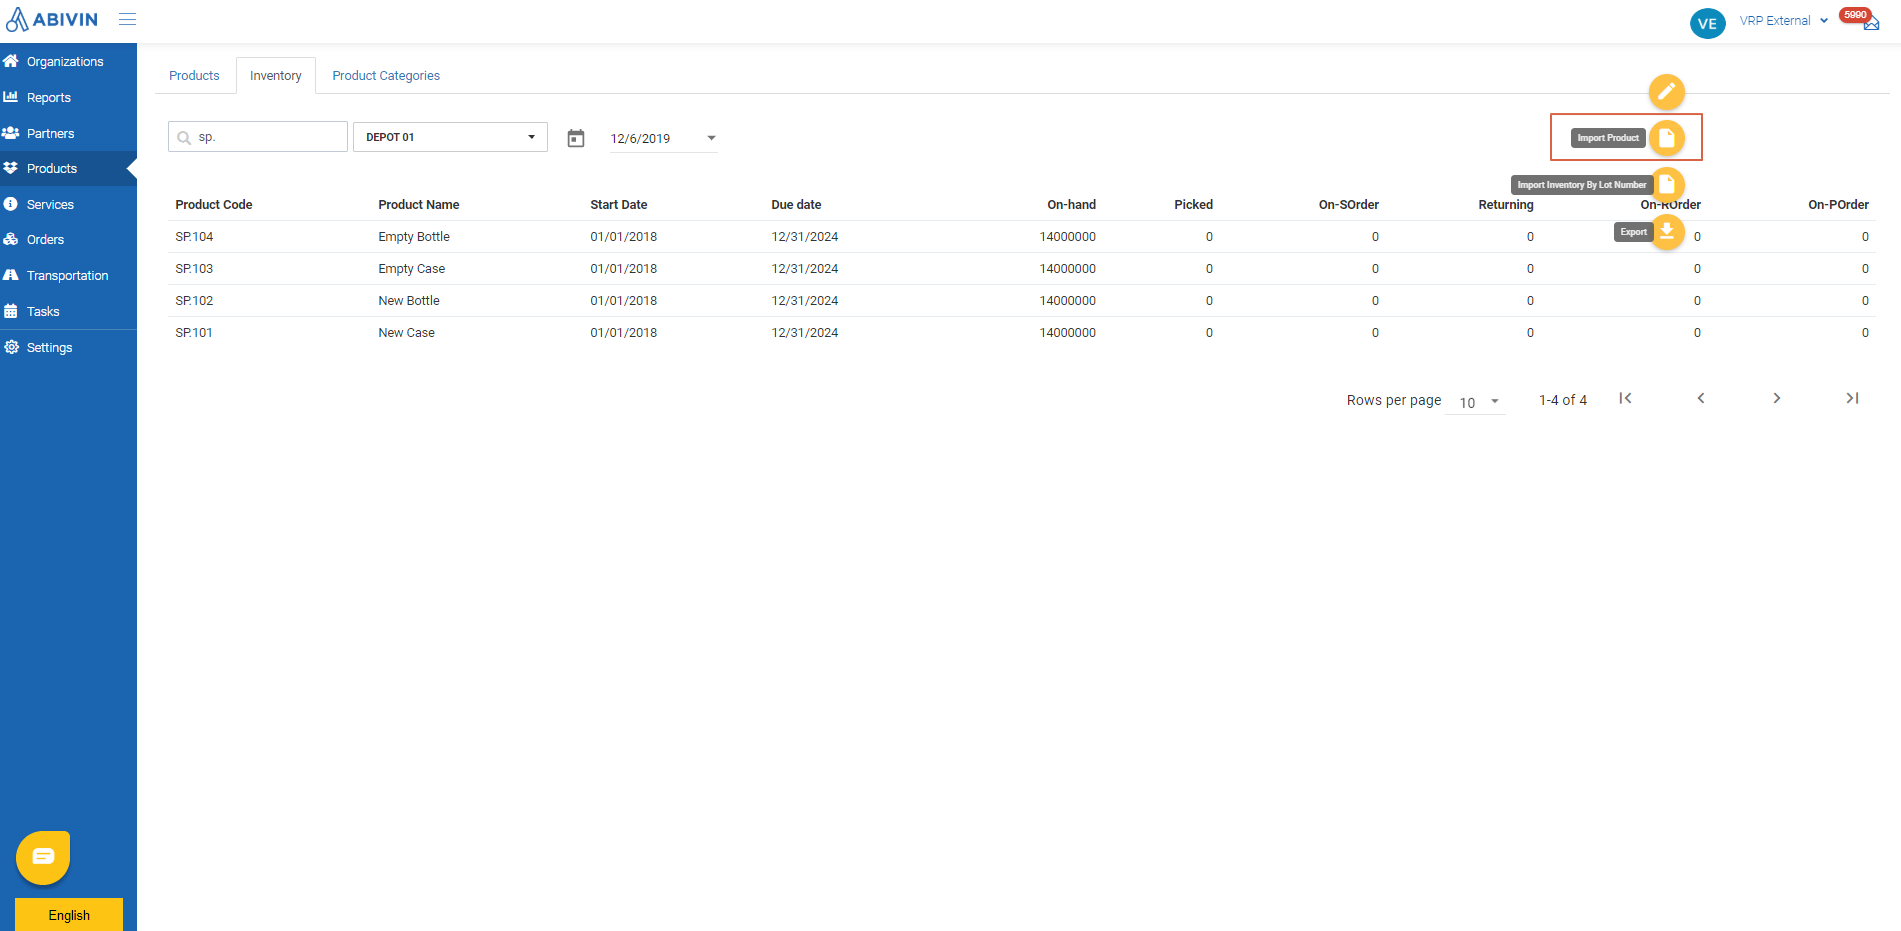
- If the products being created are tracked by Lot number, aside from using the Excel template Import_Product_Template.xlsx, you will also have to click on Import Inventory By Lot Number, download the Excel template Import_LotNumber_template.xlsx, input information fields into that Excel template then upload onto the system
- Note:
- In the Excel template Import_LotNumber_template.xlsx, if a product has multiple product lots, input the information for each product lot on a separate row
- If some products and their product lot number already exist on the system, then after you have uploaded the Excel template onto the system, the information input in the QC number and On-hand quantity fields of the Excel template will replace the existing information on the system for those products
Update product information
- Navigate to Products > Products tab
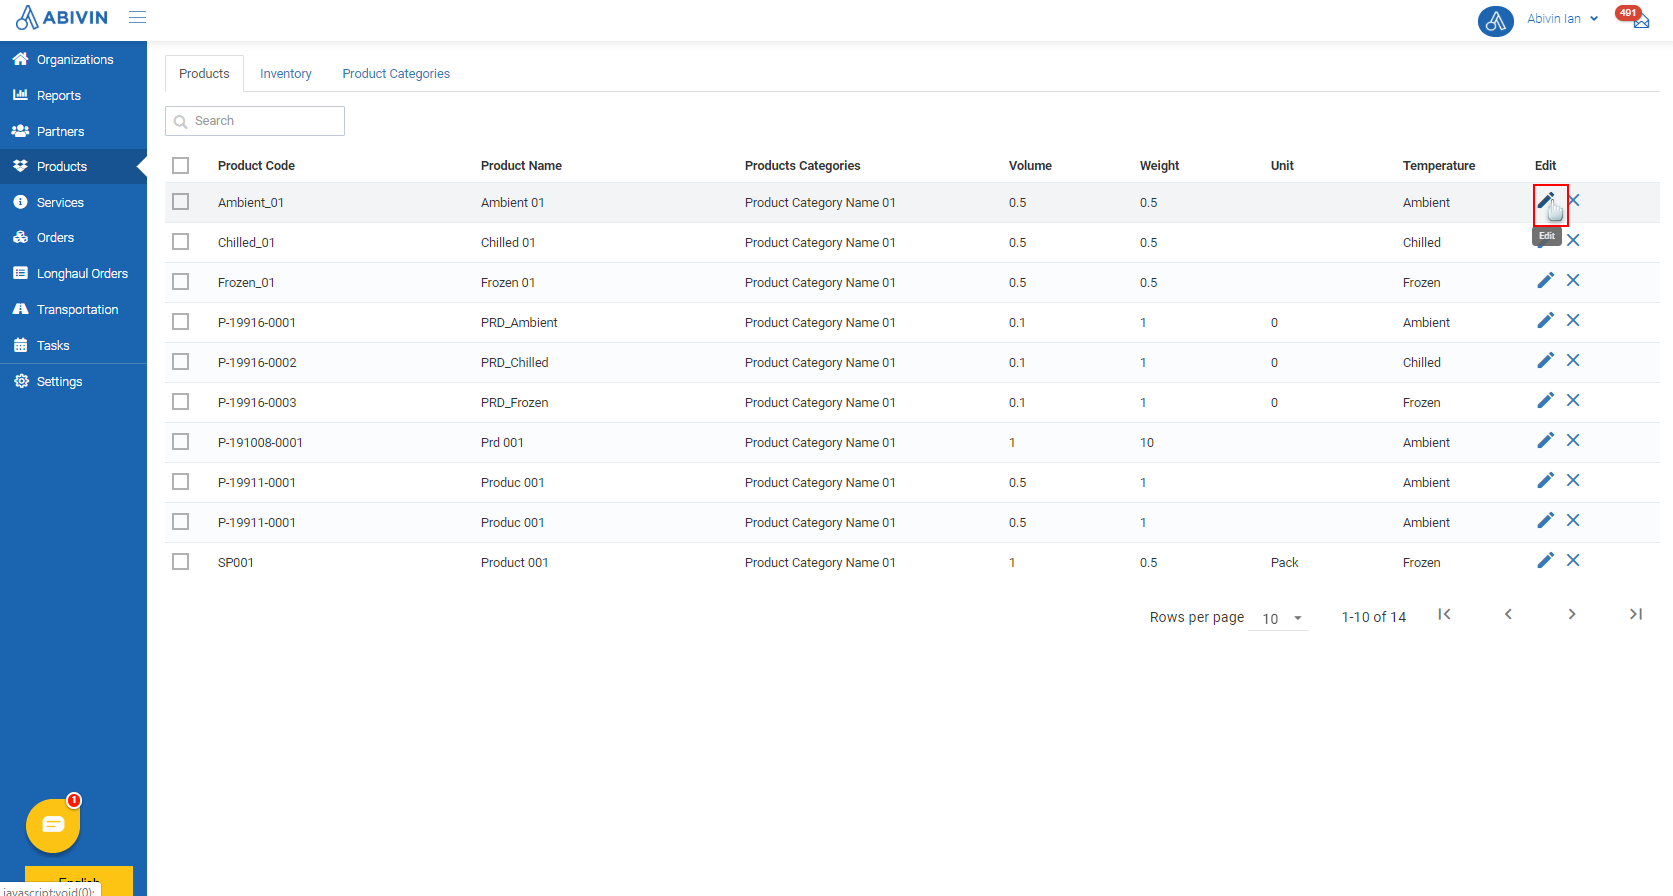
- Please refer to the CRUD functions article to know the general steps about updating objects in Abivin vRoute
You will only be able to update product information in this tab. To update product quantity, please navigate to Products > Inventory tab and follow the instruction in this article: Manage Product Inventory
Delete product
- Navigate to Products > Products tab
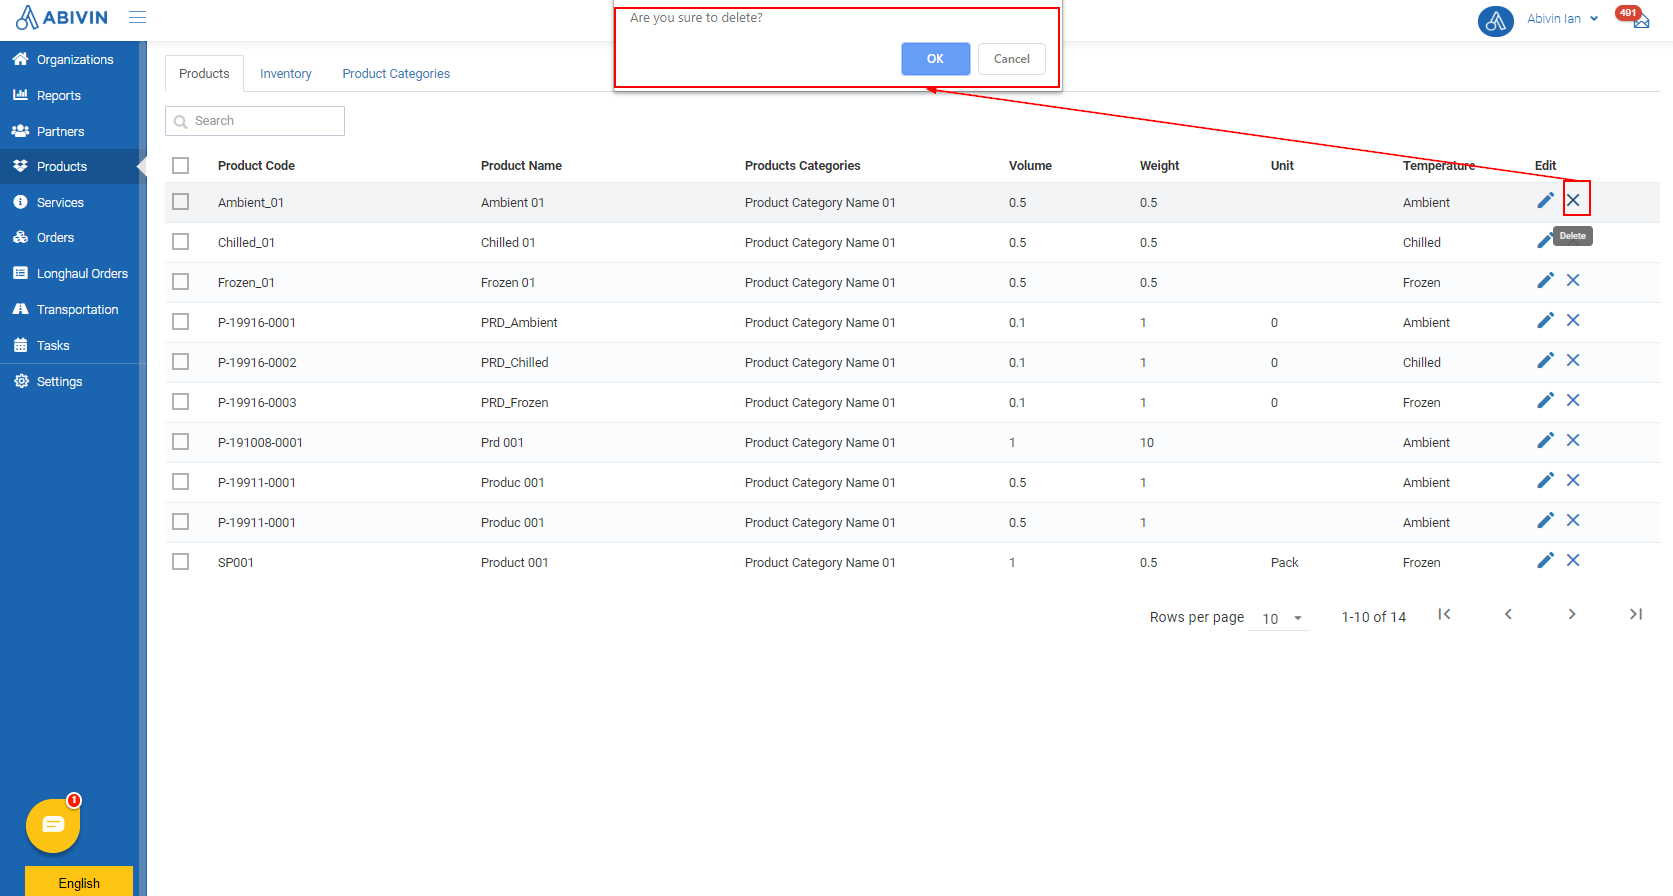
- Please refer to the CRUD functions article to know the general steps about deleting objects in Abivin vRoute
Search product
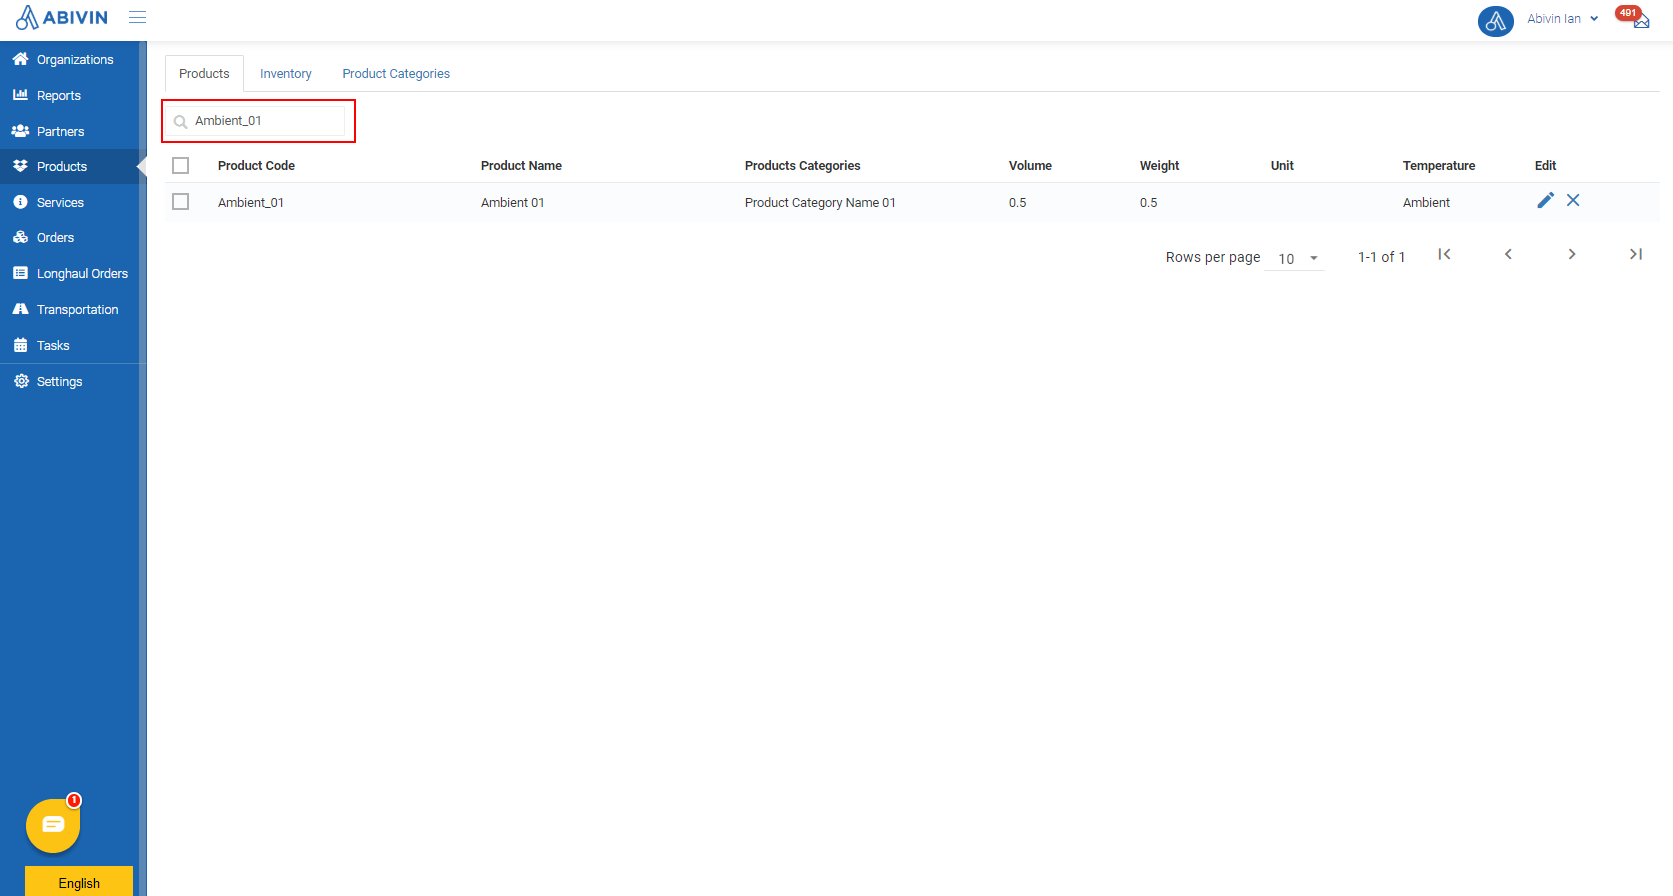
- Users can search for a specific product by inputing either the Product Code or Product Name of that product into the search field on both the Products and Inventory tabs
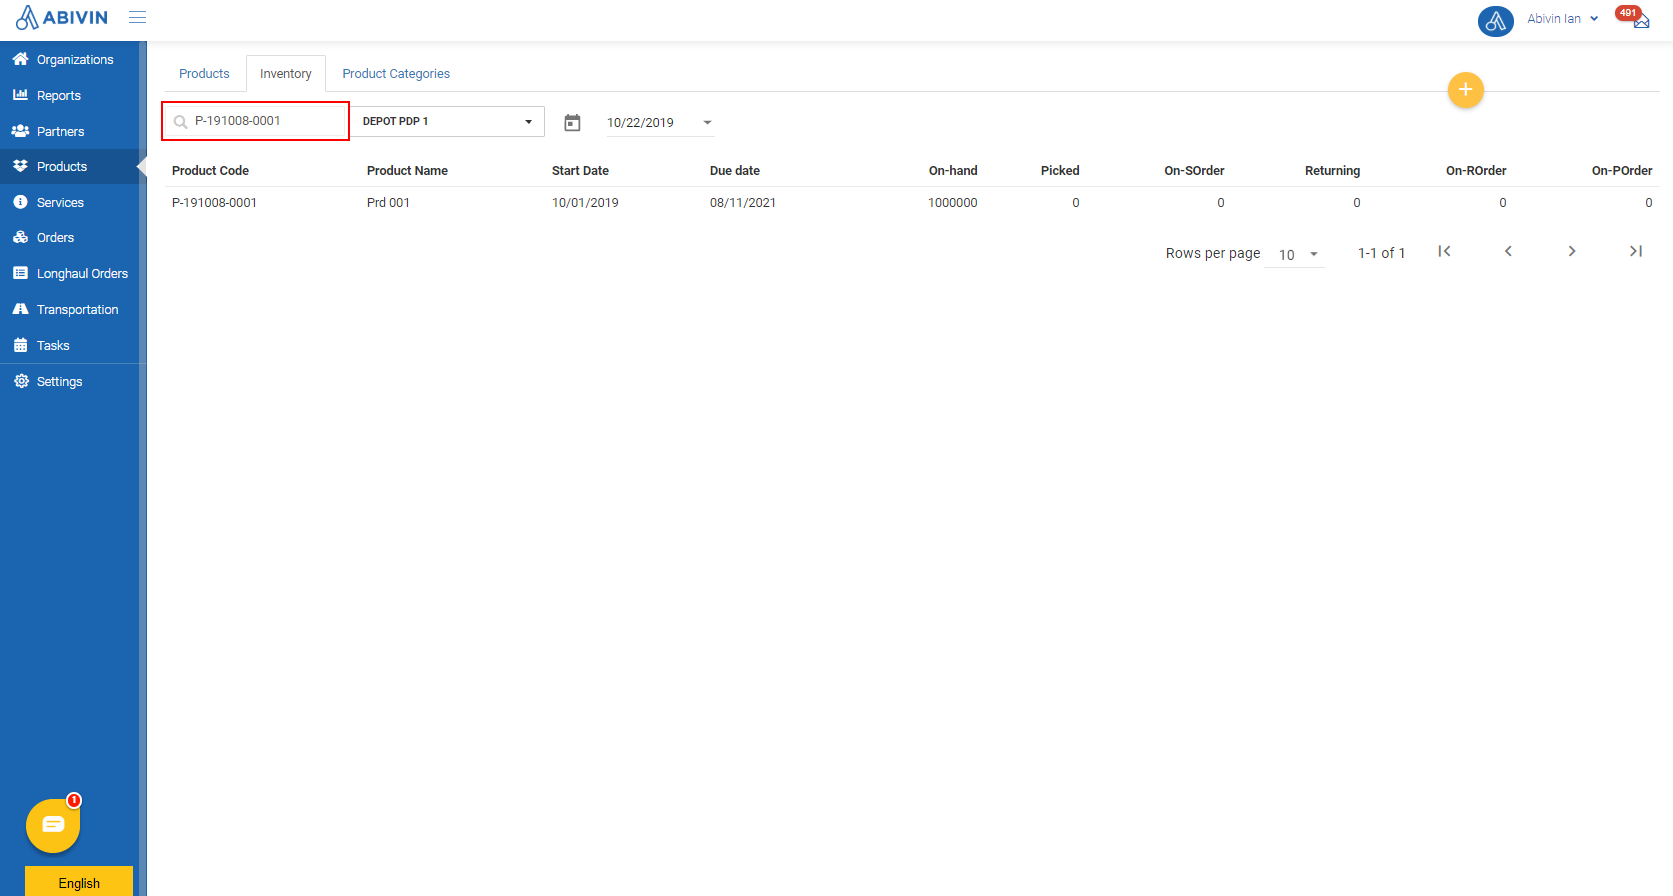
Track product inventory changes
- As we have introduced at the beginning of the article, the Products > Inventory tab is where you can track the change of product inventory during the delivery process
- Below are the information fields that help you keep track of the inventory change of a particular product:
Information field | Description |
|---|---|
On-hand | The total SKU quantity that are physically located in the warehouse at the current time |
Picked | The SKU quantity in the Depart way of all on-going sales orders that have actually been picked up from the warehouse onto the delivery vehicles |
On-SOrder | The total SKU quantity in the Depart way of all on-going Sales orders |
Returning | The SKU quantity in the Return way of all on-going sales orders that have actually been picked up from the customers onto the delivery vehicles |
On-ROrder | The total SKU quantity in the Return way of all on-going Sales orders |
On-POrder | The total SKU quantity of all on-going Purchase orders |
- The product inventory will change as the orders are performed. The mechanism for inventory chang is explained below
For new product cases/items issued in Depart Way
When the order was first created
- The value under On-SOrder column will increase by the amount shown under Number Of Cases column of the order
- The values under Picked and On-hand column will not change yet, because the products are still stored in the Depot, not yet loaded onto the delivery vehicle
When the Corporation Administrator specifies the actual quantity of cases/items to be issued
- The value under On-SOrder column will remain the same as when the order was first created
- The values under Picked and On-hand columns will not change yet, because the products are still stored in the Depot, not yet loaded onto the delivery vehicle
When the Depot manager updates status of Depart Way from "Open" to "Picked & Packed"
- The value under On-hand column will decrease by the amount shown under Number Of Cases (Actual) column of the order, to reflect the actual quantity of cases that has been taken from the Depot to the delivery vehicle
- The value under Picked column will increase by the amount shown under Number Of Cases (Actual) column of the order
- If the product is tracked by product lot, then the On-hand value of each product lot will decrease by the amount shown in the corresponding Number of Cases of that product lot in the order screen

- The value under On-SOrder column will still remain the same as when the Corporation Administrator specifies the actual quantity of cases/items to be issued
When the status of Depart Way is updated from "Picked & Packed" to "Shipped"
- The value under On-hand column will increase by the difference between: 1. the amount shown under Number Of Cases (Actual) column, and 2. the amount shown under Number Of Case Delivered column of the order, to reflect the number of cases that the customer didn't receive and were handed back to your Depot
- If the product is tracked by product lot, then similarly, the On-hand value of each product lot will increase by the difference between these two fields of that product lot: 1. the amount shown under Number Of Cases (Actual) field , and 2. the amount shown under Number Of Case Delivered field
- The values under Picked and On-SOrder columns will shrink to the values before the order was created
For empty product cases/items imported in Returned Way
When the order was first created
- The value under On-ROrder column will increase by the exact value shown under Number Of Cases (Actual) column of the order
- The values under Returning and On-hand columns will not change yet, because the products are still stored in the Depot, not yet loaded onto the delivery vehicle
Synchronize product inventory
Manually synchronize
- To synchronize product inventory between the external resource planning system and Abivin vRoute, follow the steps below:
- Navigate to Products > Inventory tab
- Hover your mouse over the icon , then click on the Fetch inventory from SAP icon
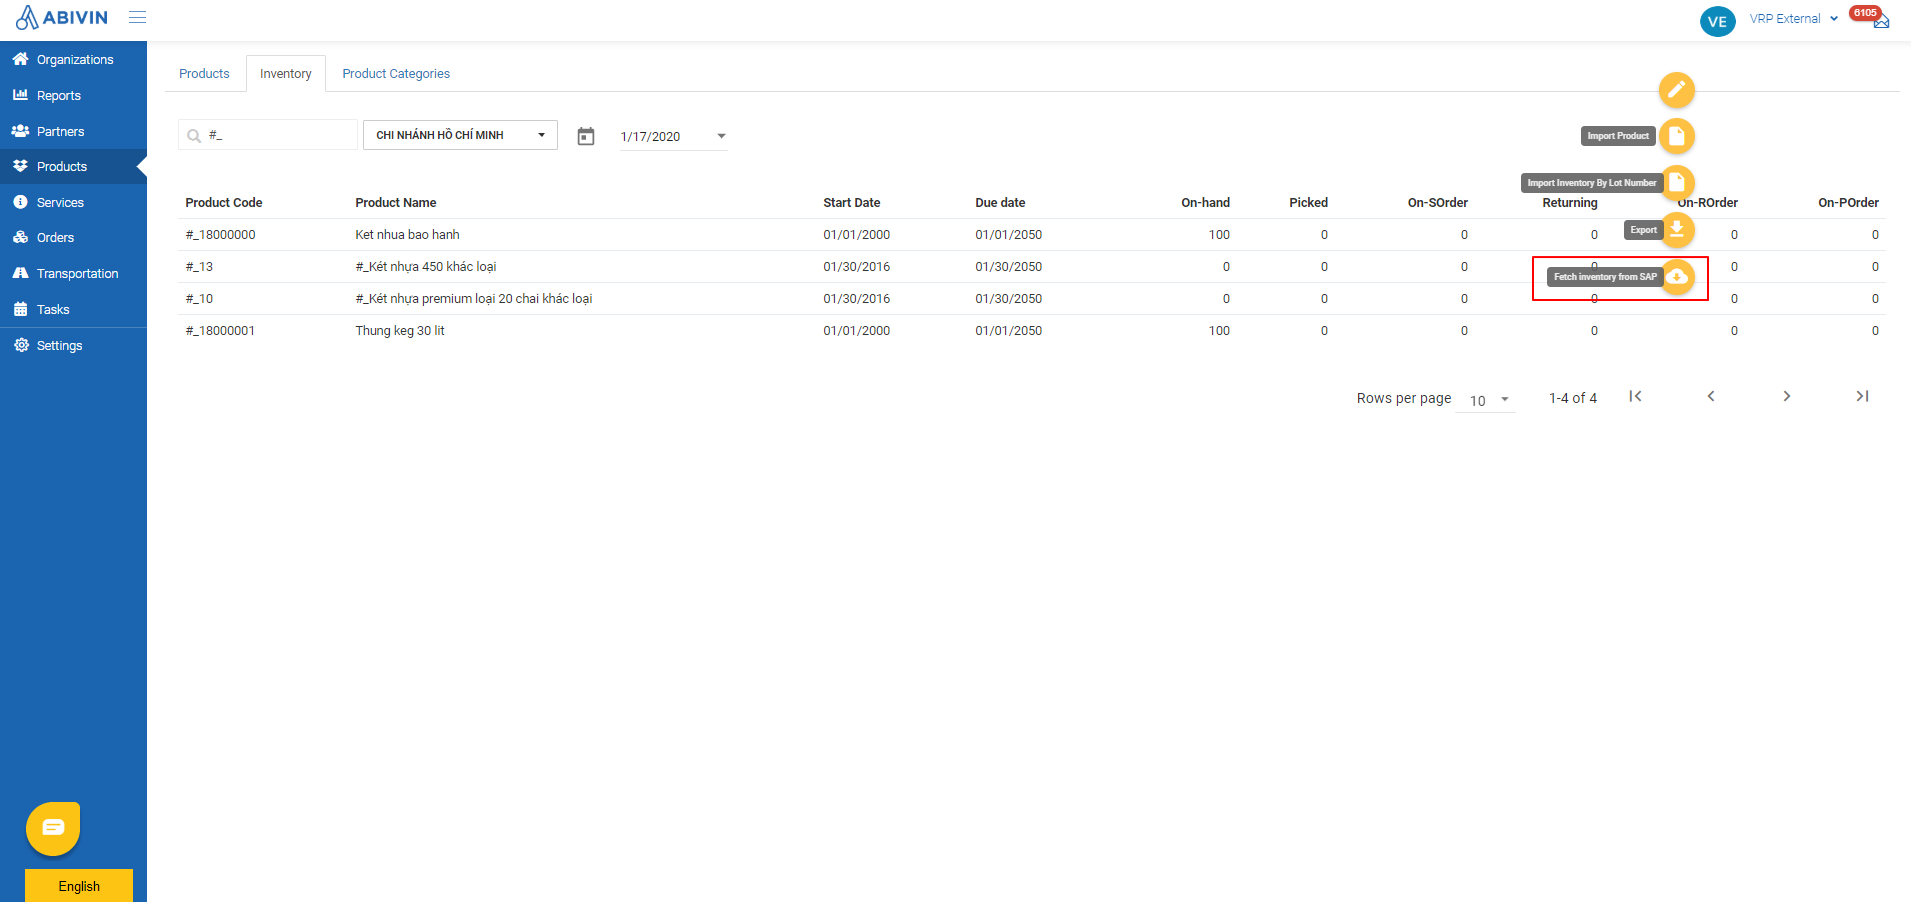
- The Fetch inventory from SAP form will appear. Here you will need to select the Depot which you want to synchronize the inventory status, by clicking on Organization field, then input the Organization Name/Organization Code of the appropriate Depot into the search bar, then select from the drop down menu
- Note: If you are the manage of a particular Depot, then the drop down menu will only show your Depot
- After selecting the Depot, click on Fetch button
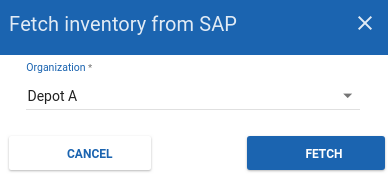
- The system will start synchronizing the inventory from the external resource planning system. After the synchronize process has completed, there will be a popup that reads Fetch data successfully... Waiting to process

- Below is how this function synchronizes the inventory status of a particular product between the External resource planning system and Abivin vRoute, upon fetching the data from the External resource planning system
Possible scenario | Data fetched from the External resource planning system | Abivin vRoute | Synchronization result |
|---|---|---|---|
1 | Product lots exist, quantity is larger than zero | Product lots don't exist yet | Create the product lots on Abivin vRoute, with the same quantity as on the data |
2 | Product lots exist, quantity is larger than zero | Product lots exist, quantity not the same as on the data | Update the quantity of the product lots on Abivin vRoute to be the same as on the data |
3 | Product lots don't exist | Product lots exist, quantity is larger than zero | Update the quantity of the product lots on Abivin vRoute to be zero |
Automatically synchronize
- Abivin vRoute will automatically synchronize the inventory status to the External resource planning system at the following time points: 07:00; 12:00 and 18:00
Updated about 1 month ago
