Manage Actions
Action Definition
- In the actual operation, the Terminal Tractor Drivers need to perform many manual tasks during the Shipment delivery process, such as lifting containers, stuffing goods into the containers, attaching and detaching trailers, etc. In the Abivin vRoute system, Actions is a feature to help the dispatcher digitize and track the delivery task results of the Terminal Tractor Drivers right on the Web app
Locate Action Code List
- The Action Codes are listed on the Tasks > Actions tab
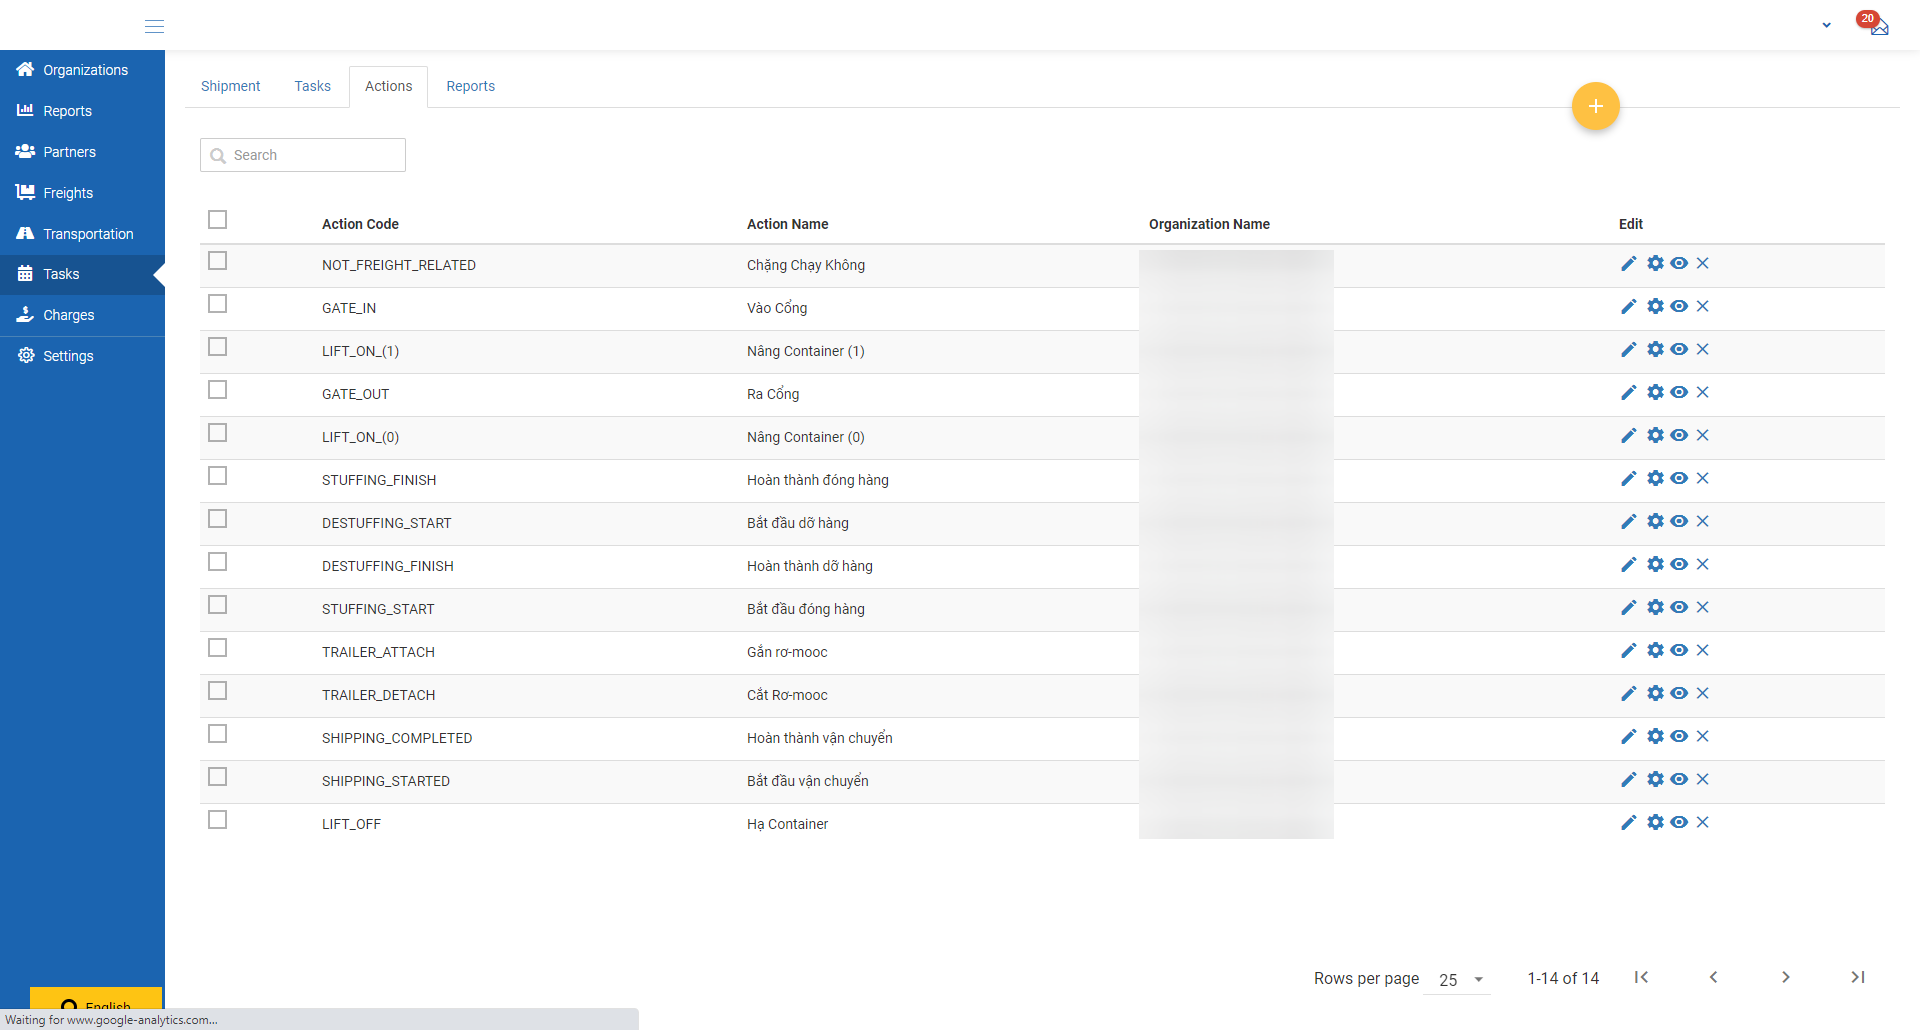
Illustration (English)
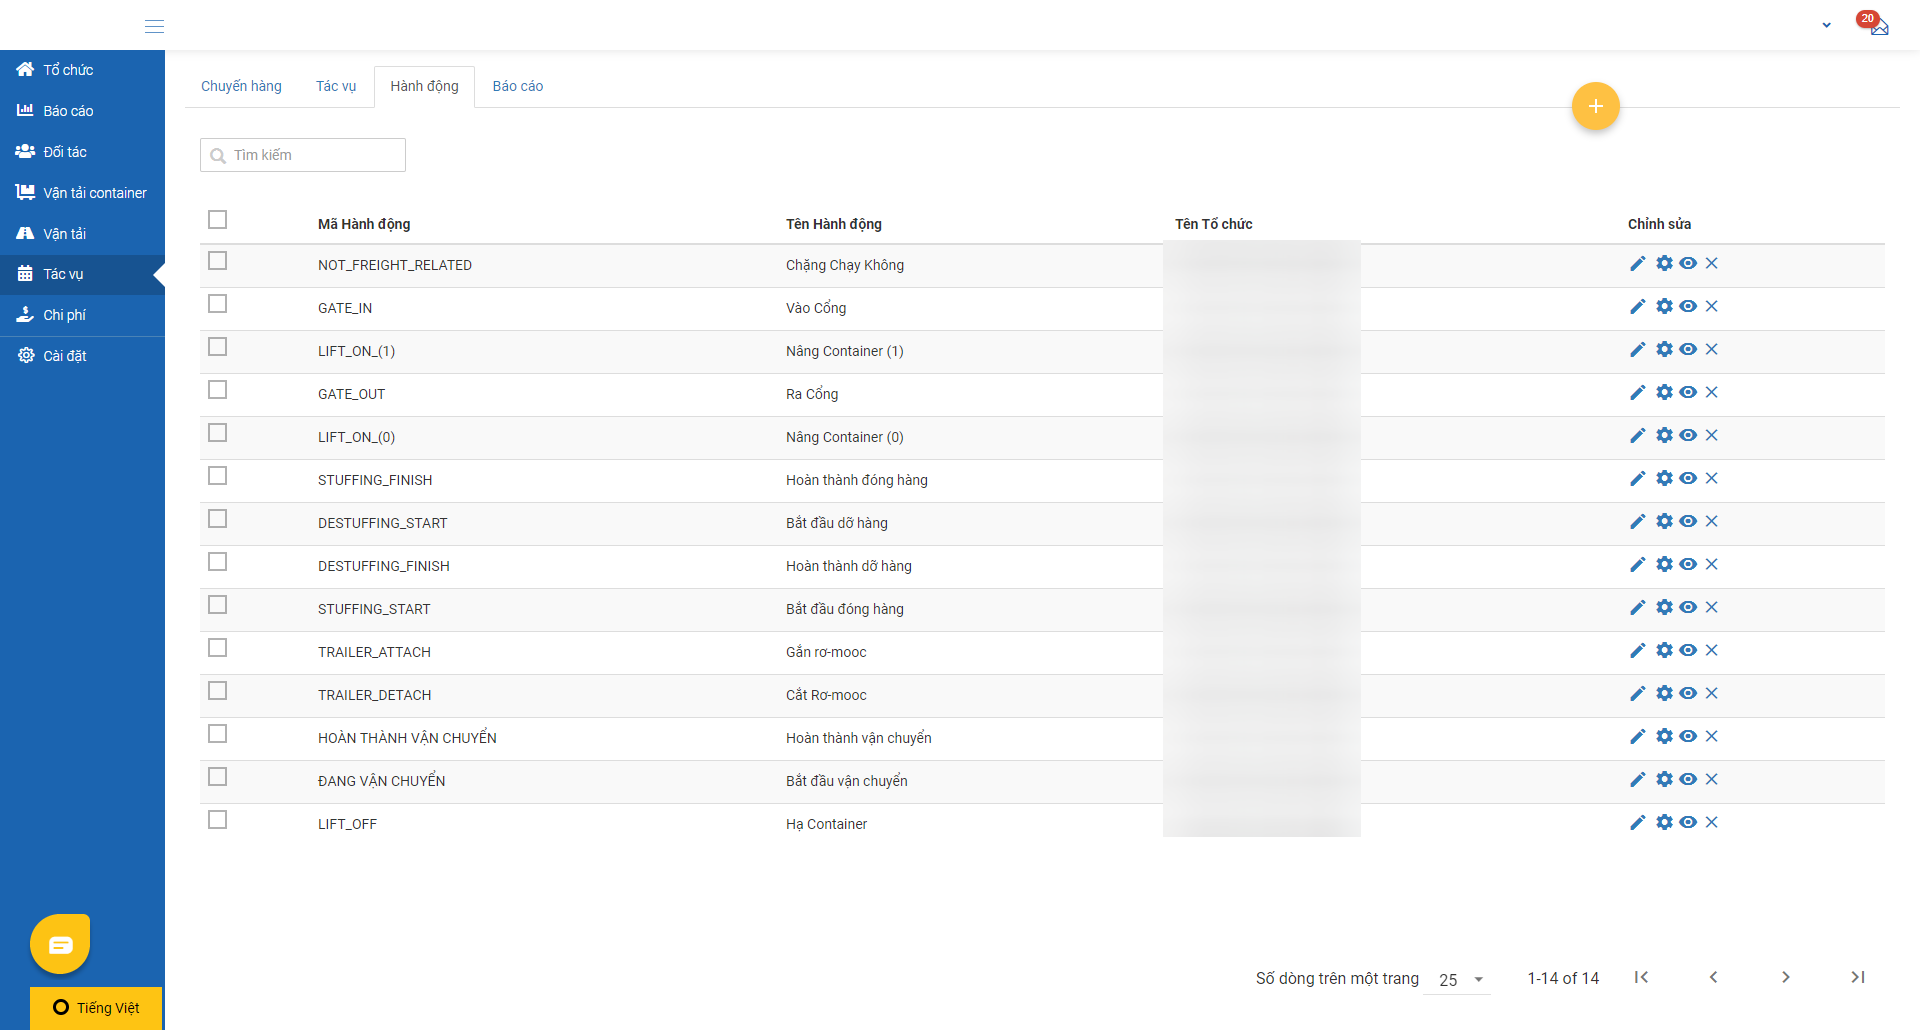
Illustration (Vietnamese)
Create Action Codes
Delete Pre-generated Action Codes
- You will see that there are some pre-generated Action Codes when navigating to the Tasks > Actions tab. These are the Action Codes of the VRP/DC Model, which are automatically generated right after the Manufacturer was created. You have to delete these pre-generated Action Codes first and then create the correct set of Action Codes of this model
- To remove all the pre-generated Action Codes, click the checkbox icon on the title bar of the Action Code table to select all the Action Codes then click the Delete All button above the top right corner of the Action Code list
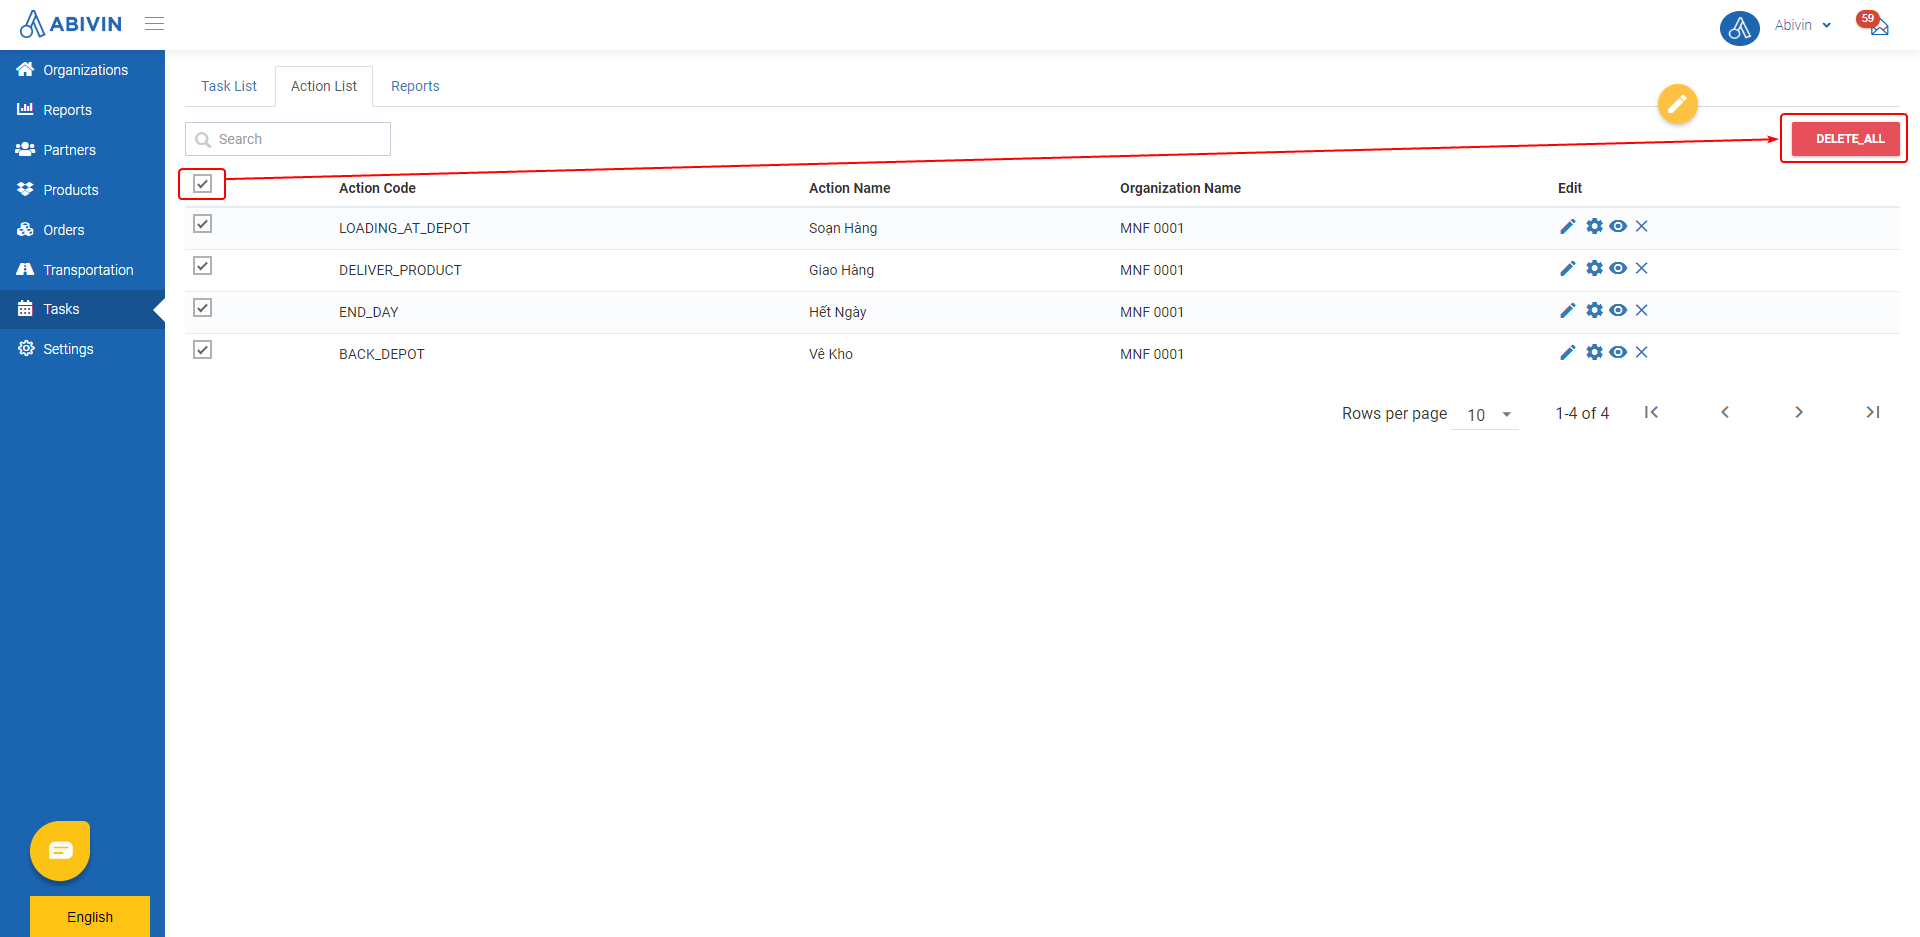
Illustration (English)
- A confirmation dialog will appear. Click Ok to confirm removing the Action Codes

Illustration (English)
Create New Action Codes
- After you have removed the pre-generated Action Codes, you can proceed to create the correct Action Codes of this model. Please note that you can only use the Excel import file to create the Action Codes
- In the Excel file, you must input the Organization Code of the top Organization - The Manufacturer, into the Organization Code cells of all the Action Codes
- The Organization Code can be found under the Organization Code column in the Organizations > Organizations tab
- Below is the list of all the Action Codes of this model
Note when using the Excel import fileYou must delete the quotation marks around the Action Code values in the table below when inputting them in the Excel import file. See the illustration images below the table for reference
The Action Name values can be changed freely, not necessarily need to be the same as in the table
Action Code | Action Name (Can be changed) | Description |
|---|---|---|
"SHIPPING_STARTED" | Shipment Starts | The Terminal Tractor Driver starts the Shipment |
"SHIPPING_COMPLETED" | Shipment Completes | The Terminal Tractor Driver completes the Shipment |
"GATE_IN" | Gate In | The Terminal Tractor Driver checks in at a port |
"GATE_OUT" | Gate Out | The Terminal Tractor Driver checks out of a port |
"LIFTON(1)" | Lift On 1 | The Terminal Tractor Driver lifts a non-empty container onto the attrached trailer |
"LIFTON(0)" | Lift On 0 | The Terminal Tractor Driver lifts an empty container onto the attached trailer |
"LIFT_OFF " | Lift Off | The Terminal Tractor Driver lifts a container off the attached trailer |
"STUFFING_START" | Stuffing Start | The Terminal Tractor Driver starts stuffing goods into a container |
"STUFFING_FINISH" | Stuffing Finish | The Terminal Tractor Driver finishes stuffing goods into a container |
"DESTUFFING_START" | Destuffing Start | The Terminal Tractor Driver starts taking goods out of a container |
"DESTUFFING_FINISH" | Destuffing Finish | The Terminal Tractor Driver finishes taking goods out of a container |
"NOT_FREIGHT_RELATED" | Non-freight Related | The Terminal Tractor Driver checks in at a Stop that does not belong to the Shipment being operated |
"TRAILER_ATTACH" | Attach Trailer | The Terminal Tractor Driver attaches a trailer to the terminal tractor |
"TRAILER_DETACH" | Detach Trailer | The Terminal Tractor Driver detaches a trailer from the terminal tractor |
- Below are the screenshot of the Action codes in the Excel template
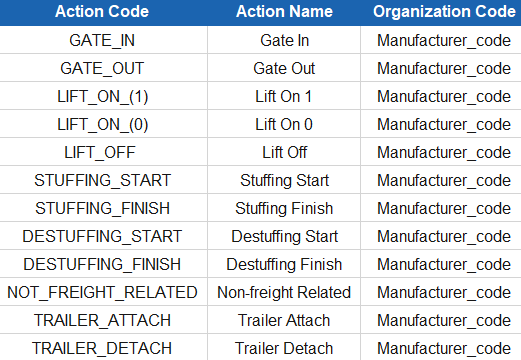
Illustration (English)
Create forms for actions
- The action codes recently created above have defined the tasks of this model. However, they have not went in details what information will be gathered in each task, such as: When lifting container, what are the container numbers, is the container full or empty, etc. Forms will help flexibly define the detailed information for each action
General steps to create forms for actions
- Below are the general steps to create form for a particular action
- Hover on the Action code for which you want to create form, then click on Form Builder icon
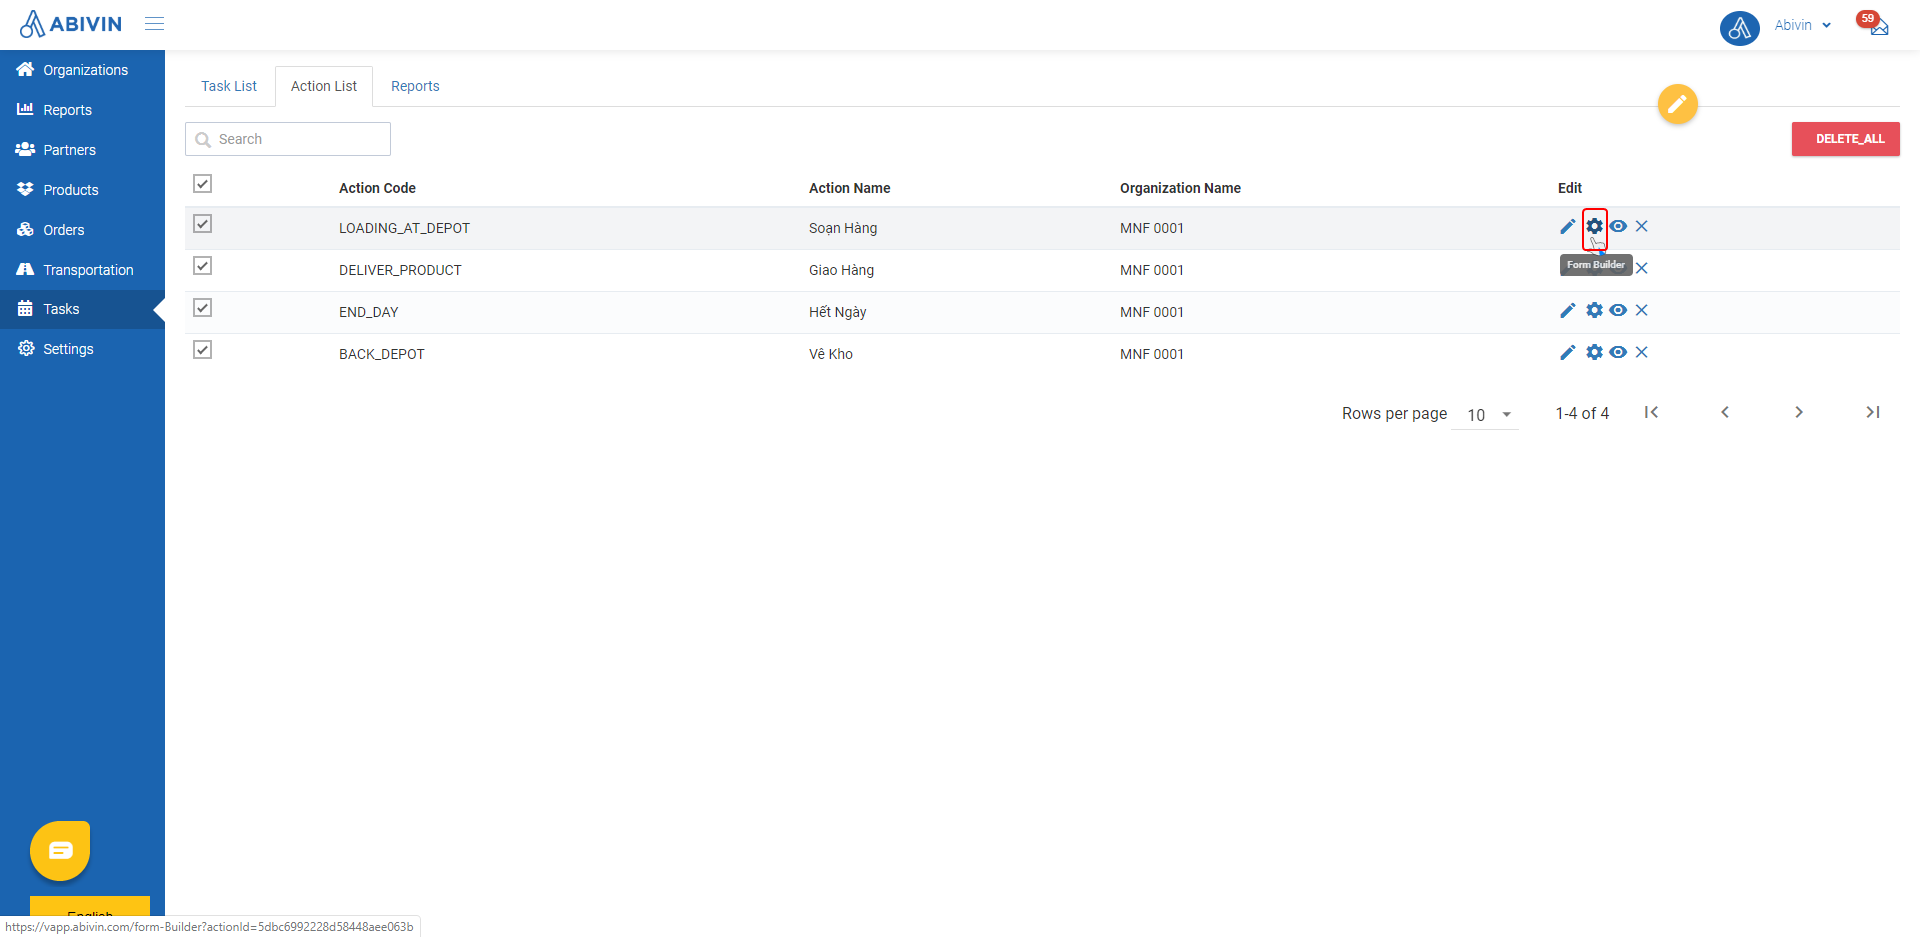
- You will be directed to the Form Builder screen, where you can start creating form for that Action code
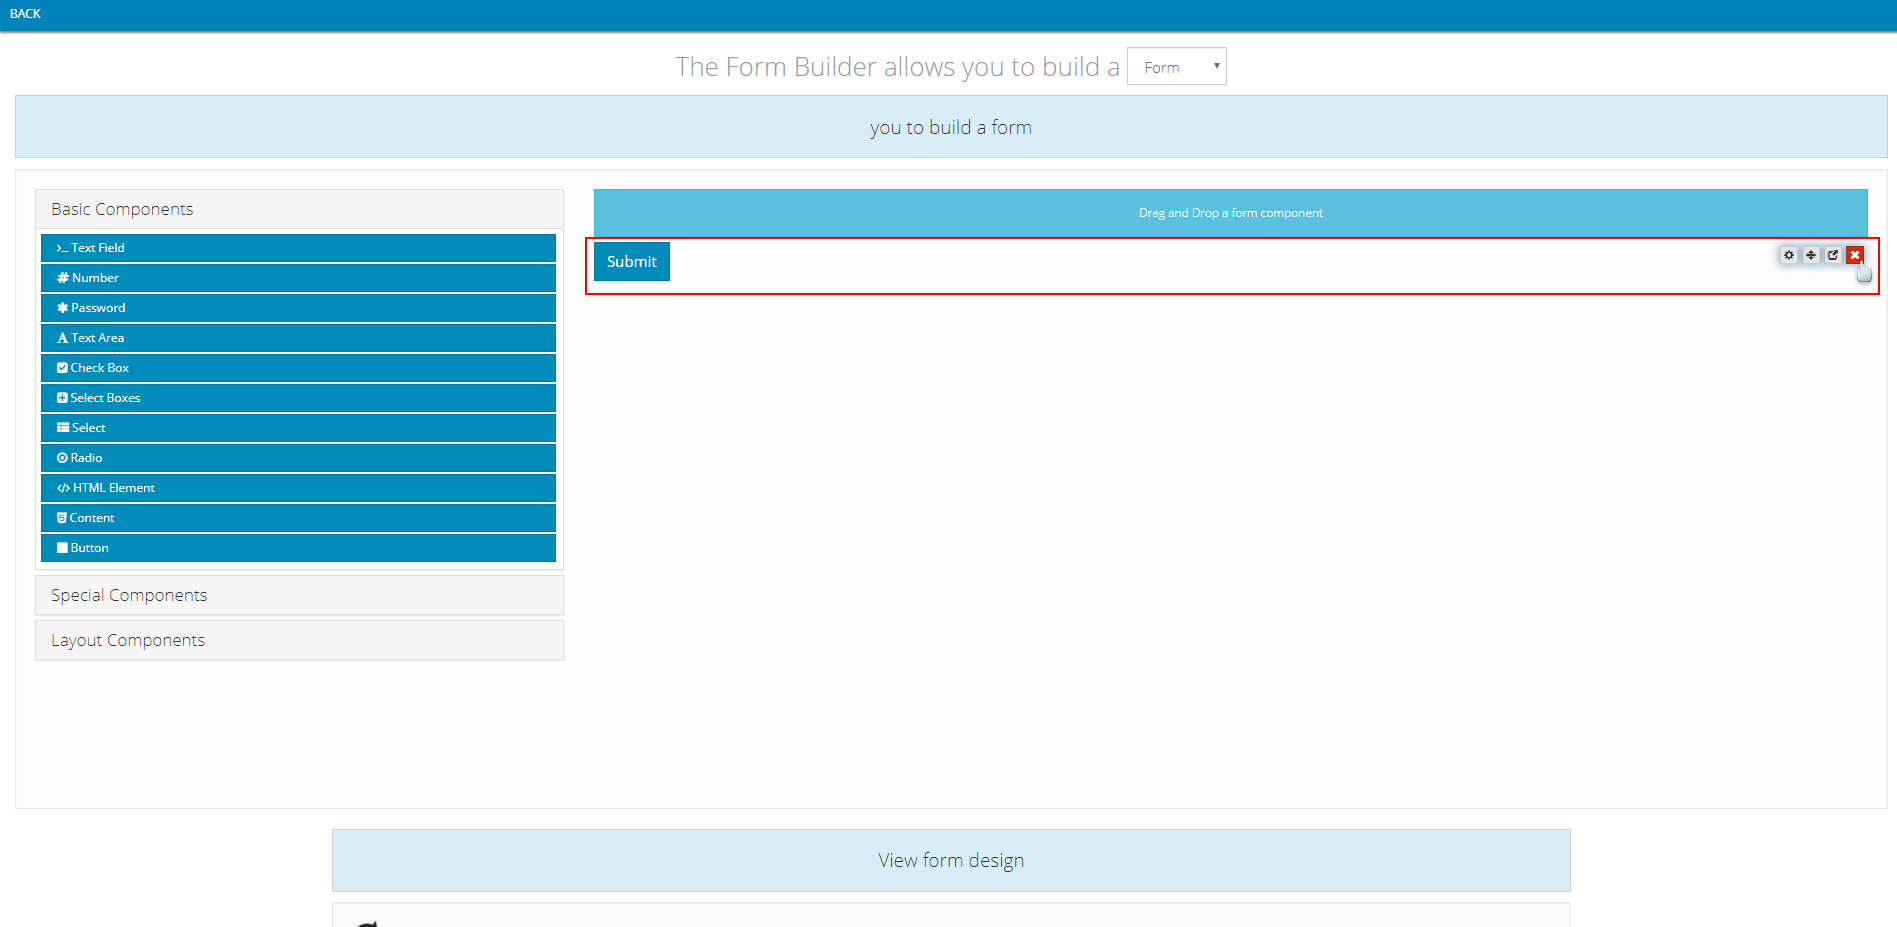
- You will see a blue Submit button. You need to remove it by hovering your mouse over it, then click on the red icon at the far right
- Now you can begin to create form for the Action code, by dragging the appropriate component on the left side to the right side
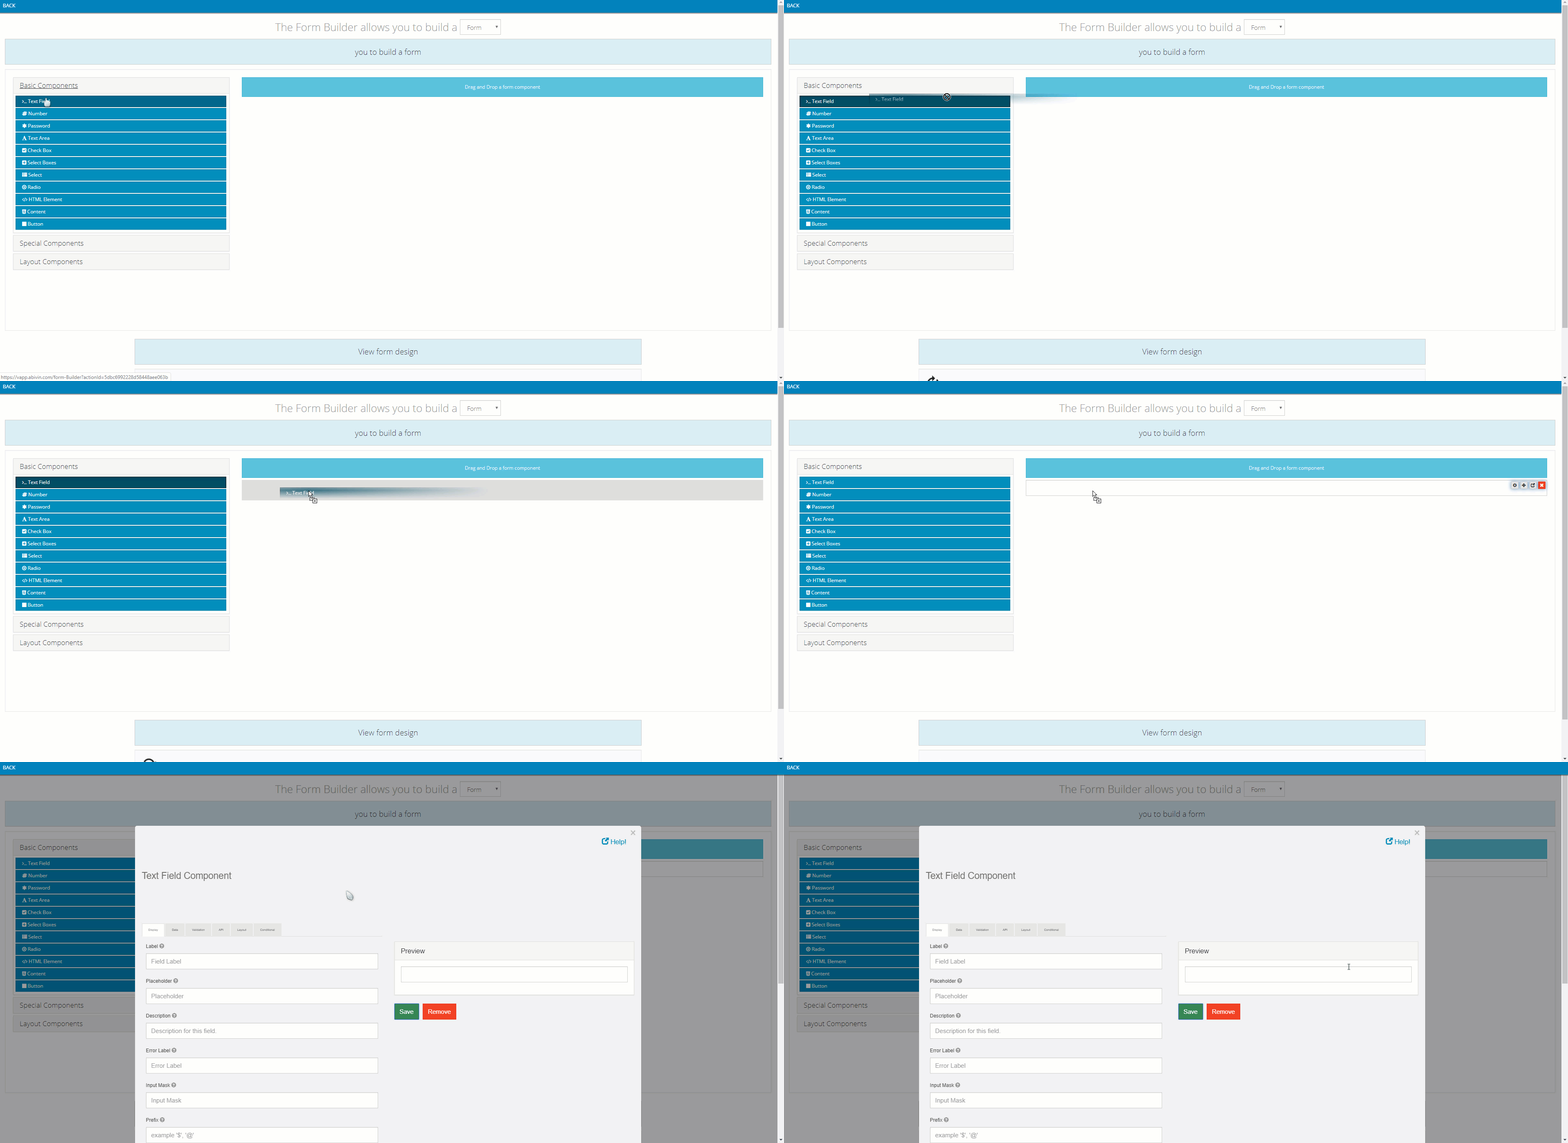
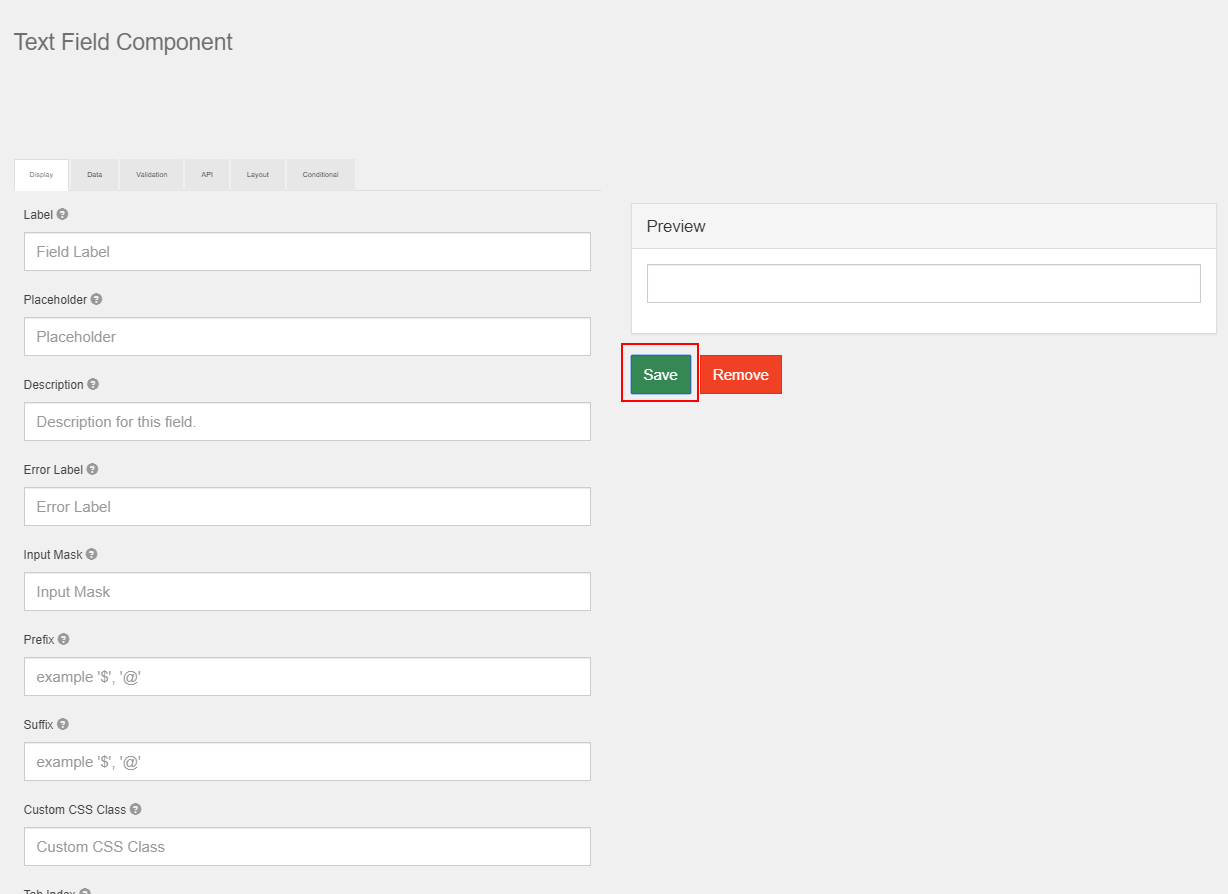
- The set up form of the component will appear. Input data into that form, then click Save
- We will specify the detail for each component below
- Note: For some special components, you can drag other components inside them
- After you have finished configuring all components, scroll down the Form Builder screen, then click on Save View to finish creating the form for the Action code
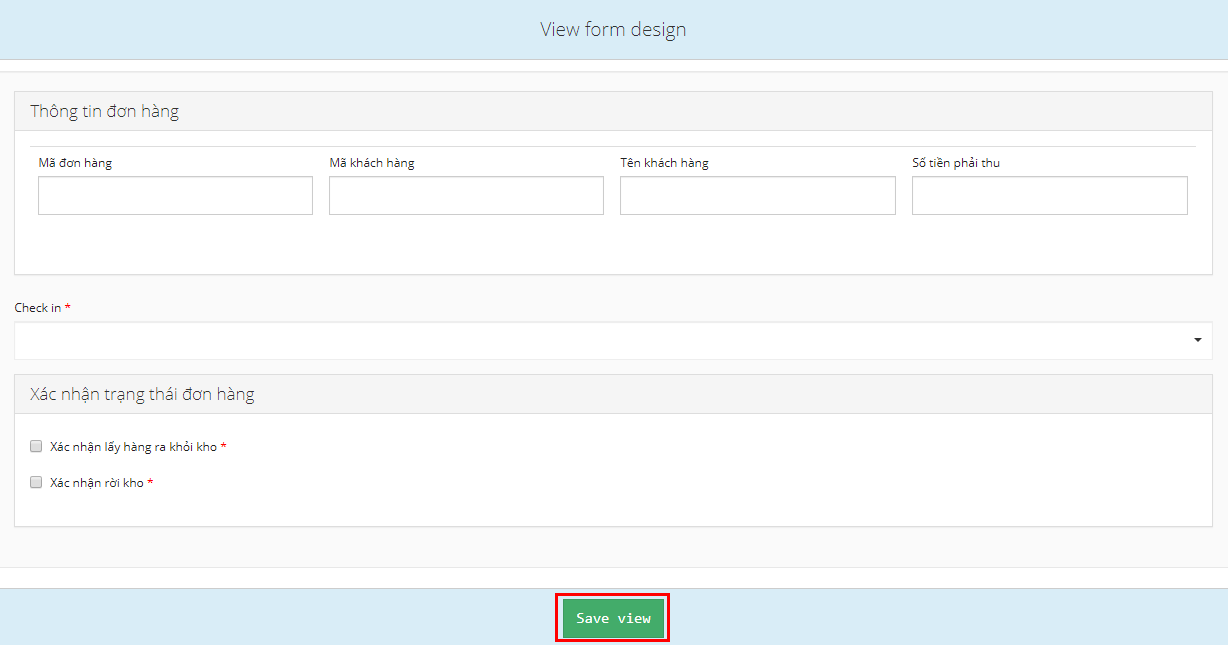
- A pop up will appear to let you know you have succeeded creating the form

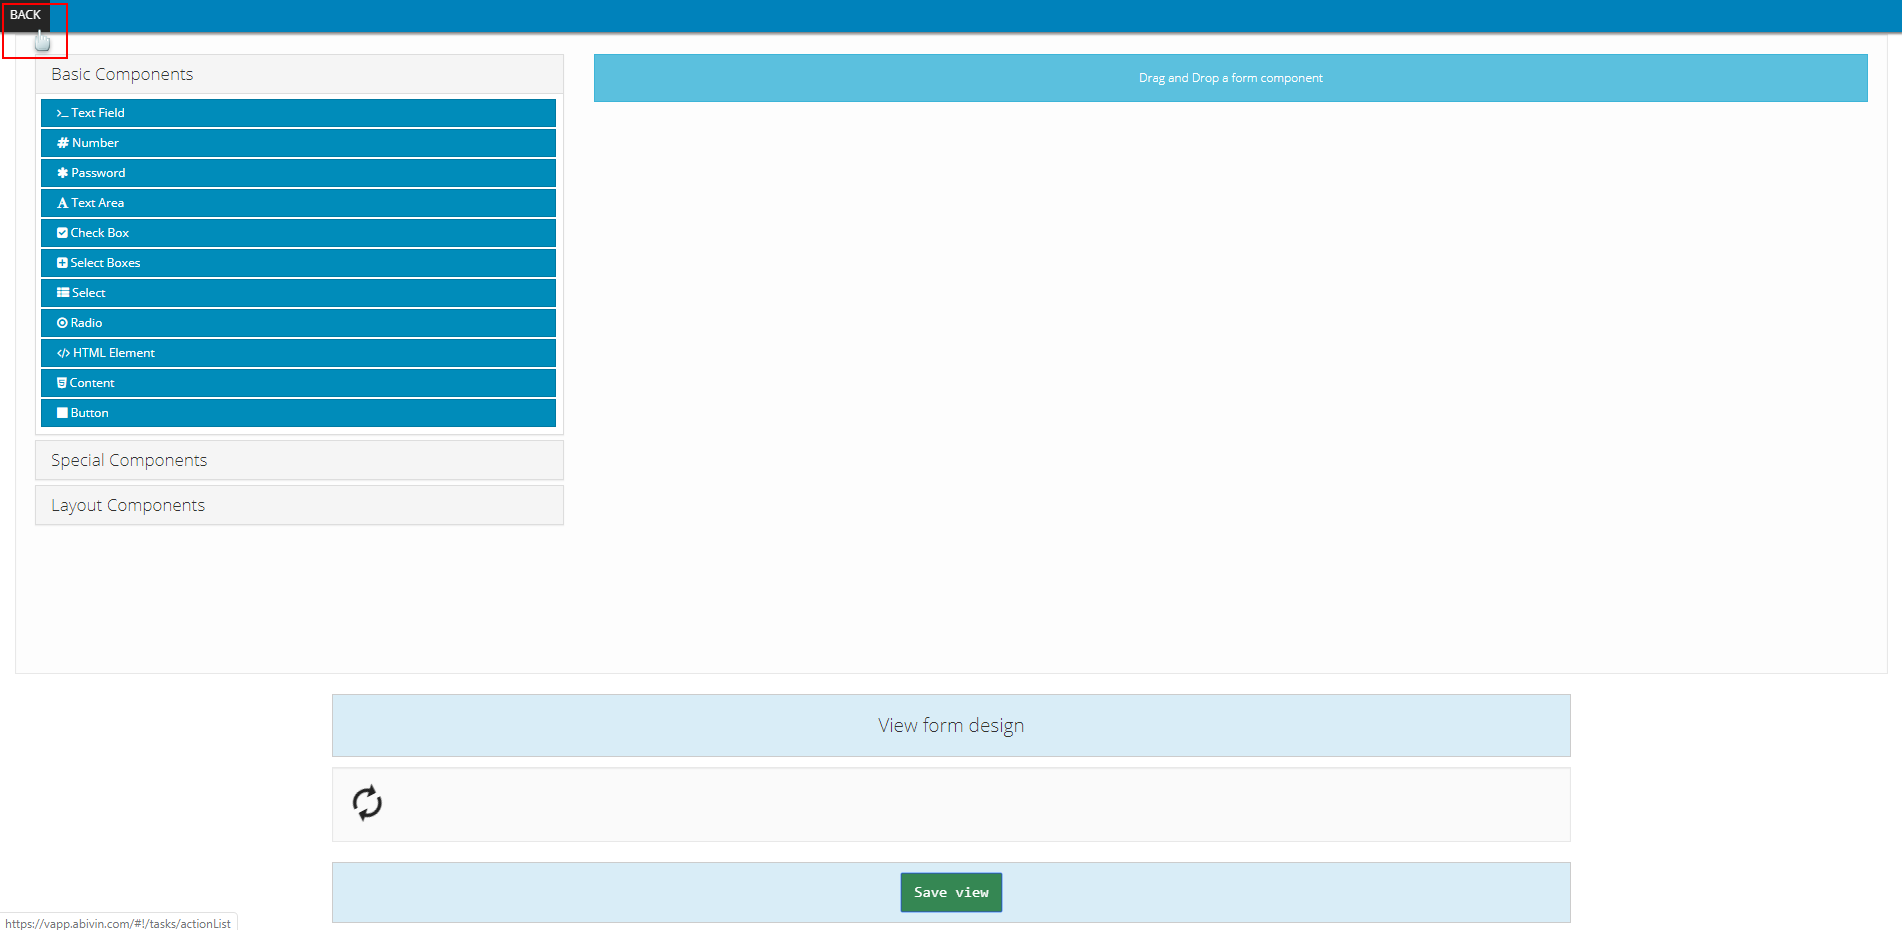
- Click on Back to get back to the Action list tab. You can continue to create forms for other Action codes
- Now we will move on to create form for each action code
GATE_IN; GATE_OUT; LIFTON(0); LIFT_OFF; STUFFING_START; STUFFING_FINISH; DESTUFFING_START; DESTUFFING_FINISH; NOT_FREIGHT_RELATED Action codes
1.1 Check In Panel
- Component used: Special Components > File
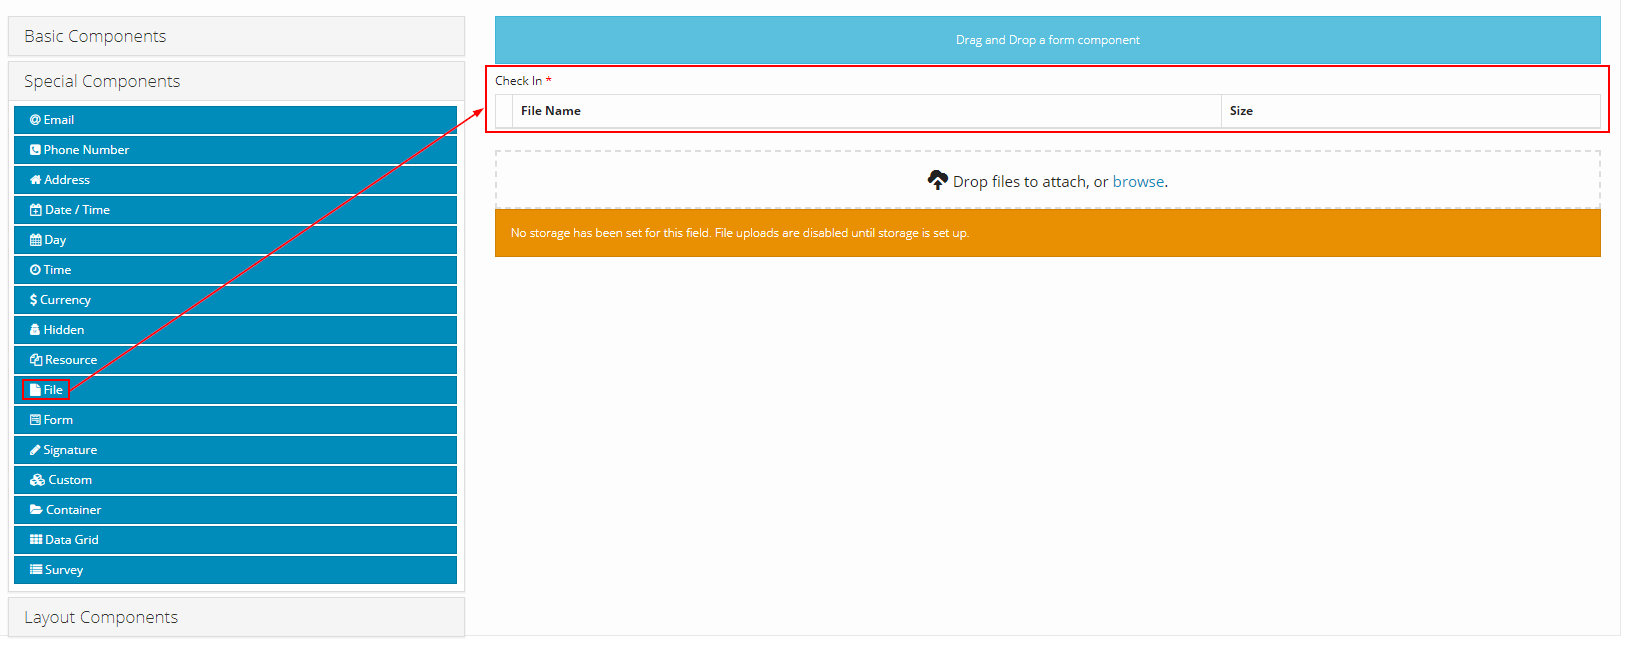
- Component content:
- Note: The value input into Label field can be changed freely


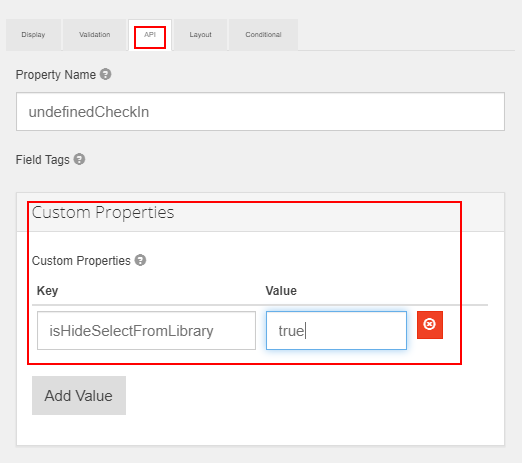
LIFTON(1) Action code
2.1 Container Panel
- Component used: Layout Components > Panel
- Position: On top
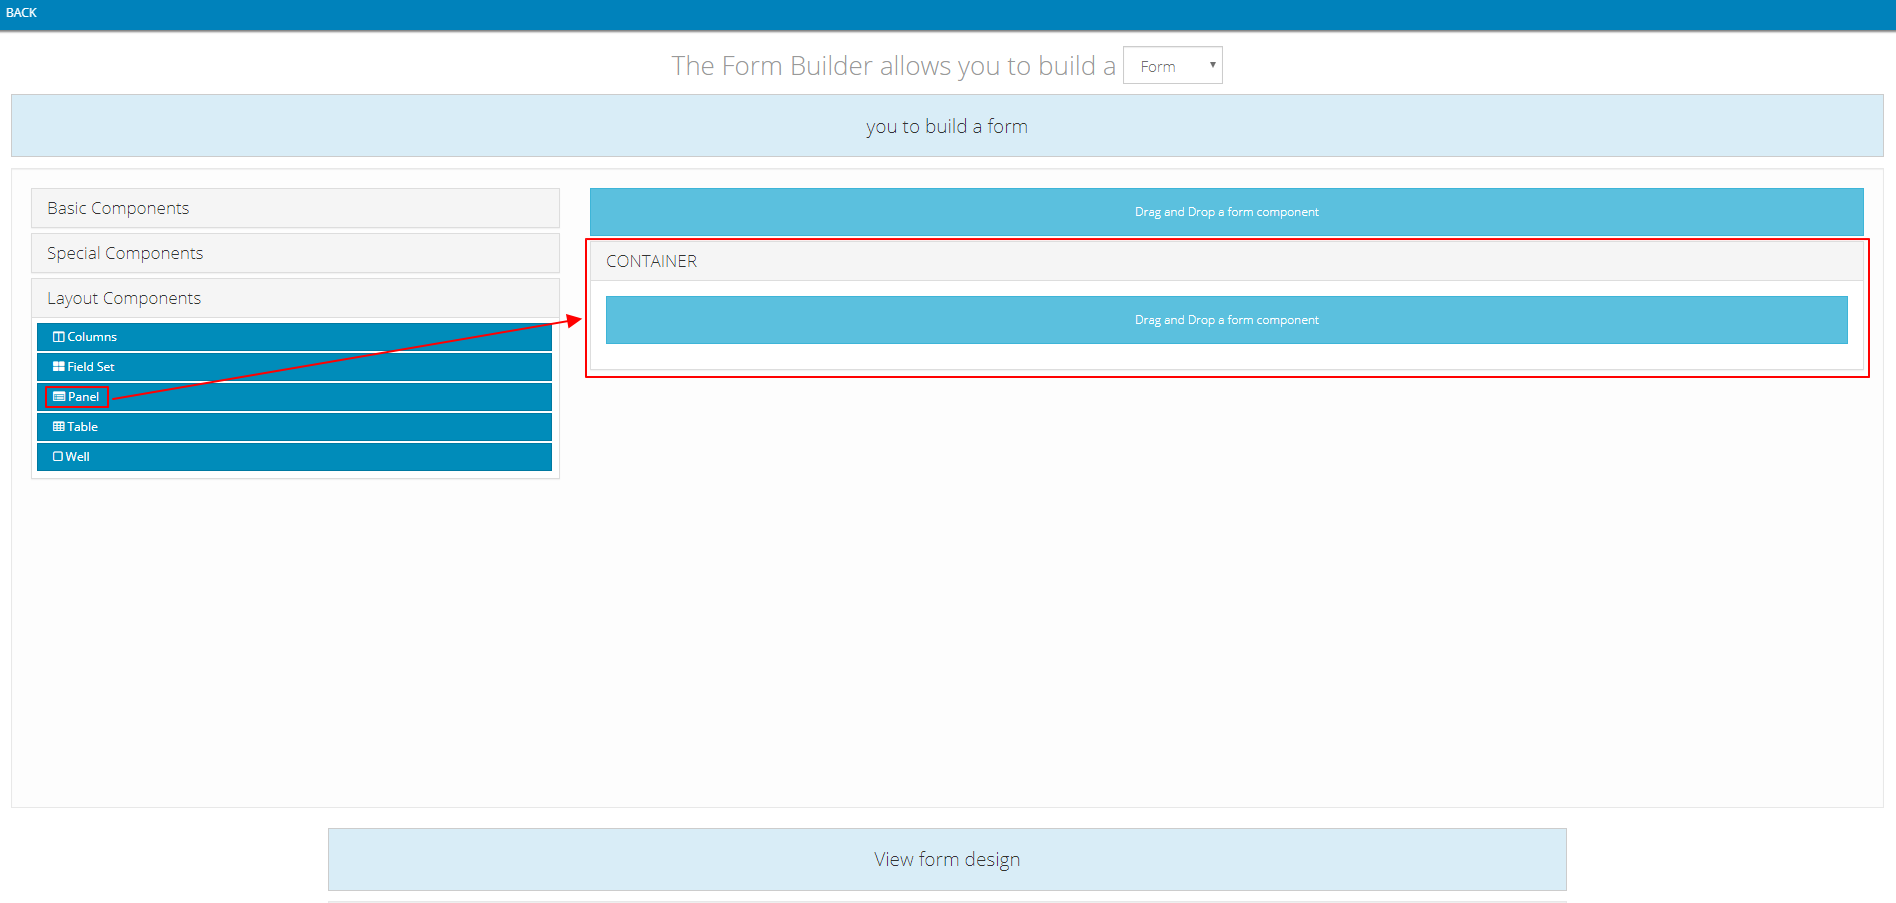
- Component content:
- Note: The value input into Title field can be changed freely

2.2 Container Number field
- Component used: Basic Components > Text Field
- Position: Inside Container Panel
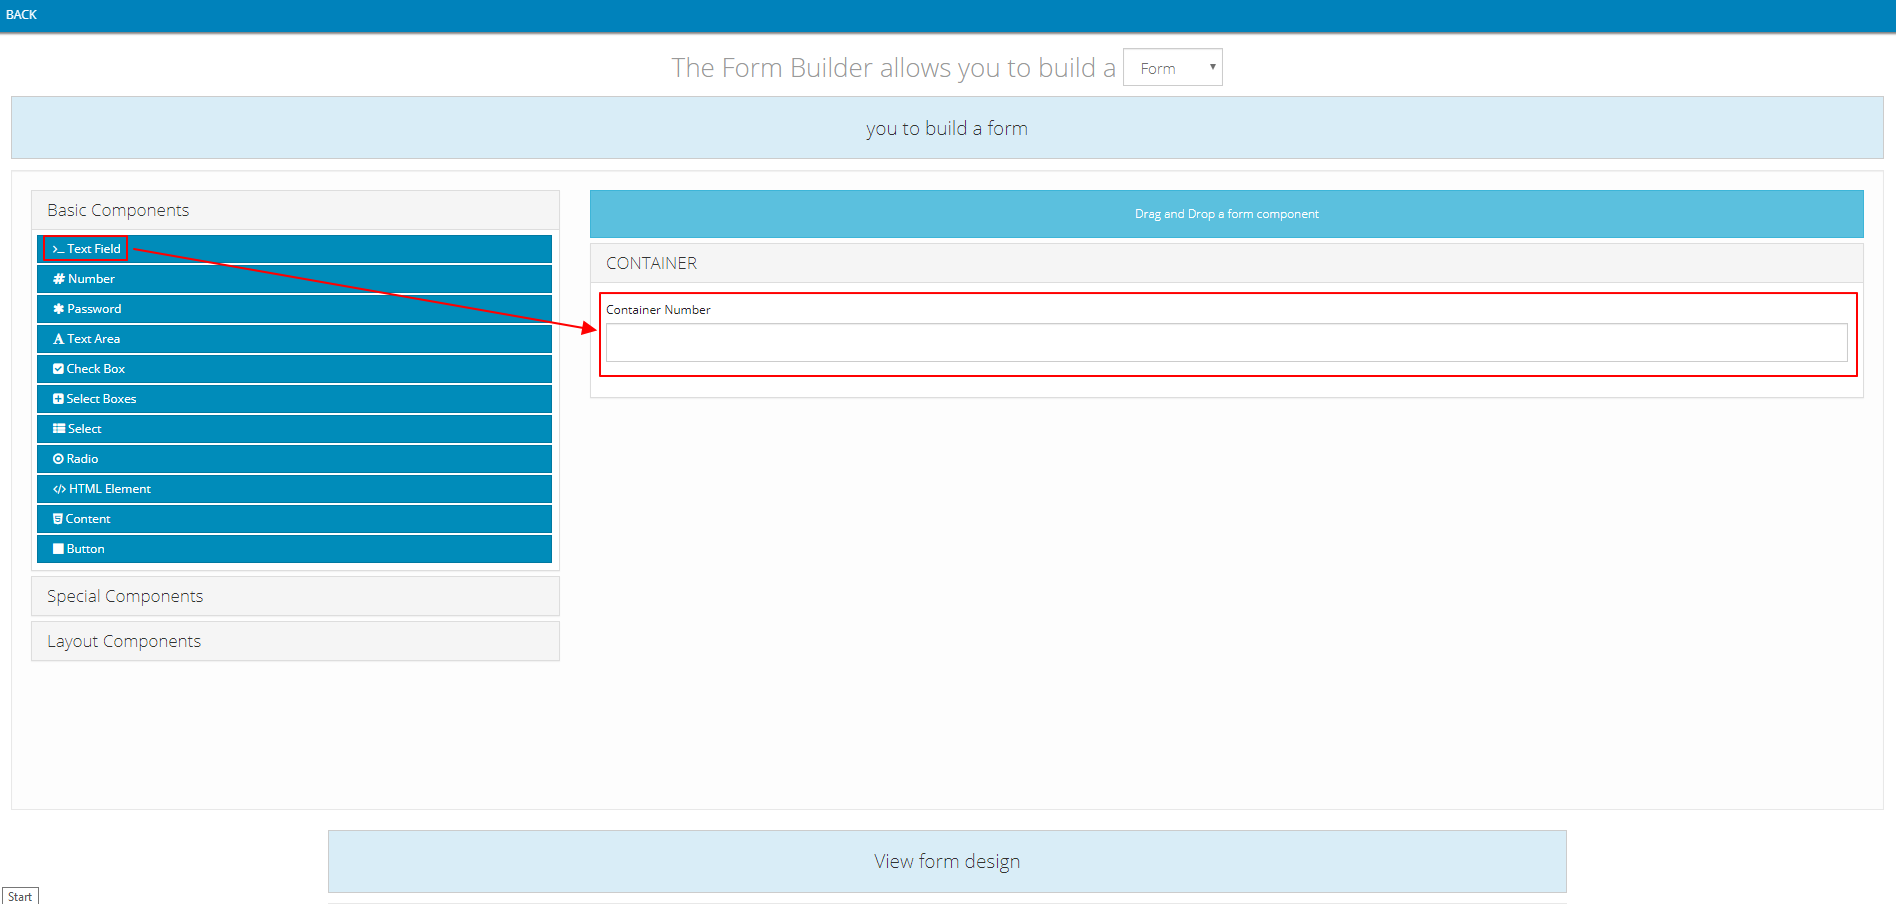
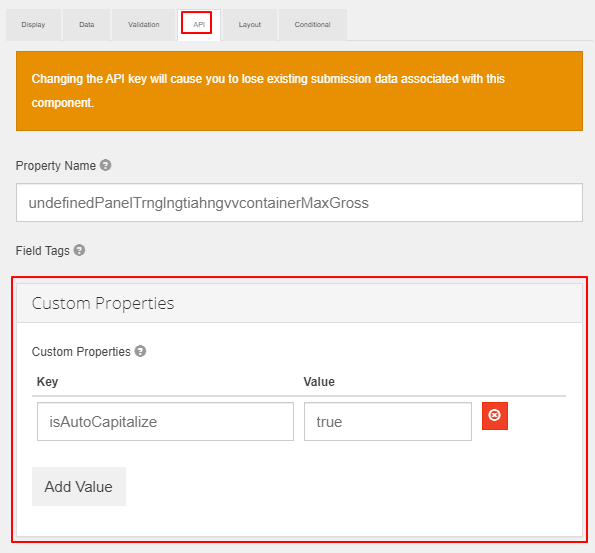
- Component content:
- Note: The value input into Label field can be changed freely


- Note: To add more custom properties, click on Add Value
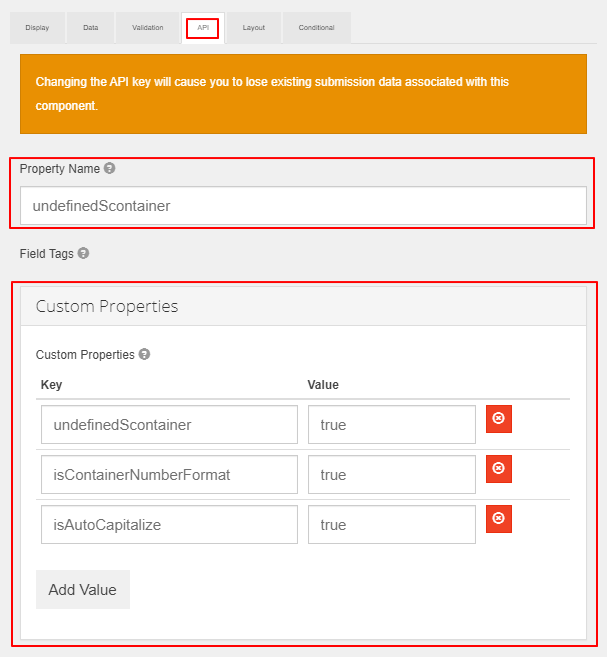
2.3 Seal Number field
- Component used: Basic Components > Text Field
- Position: Inside Container Panel, below Container Number field
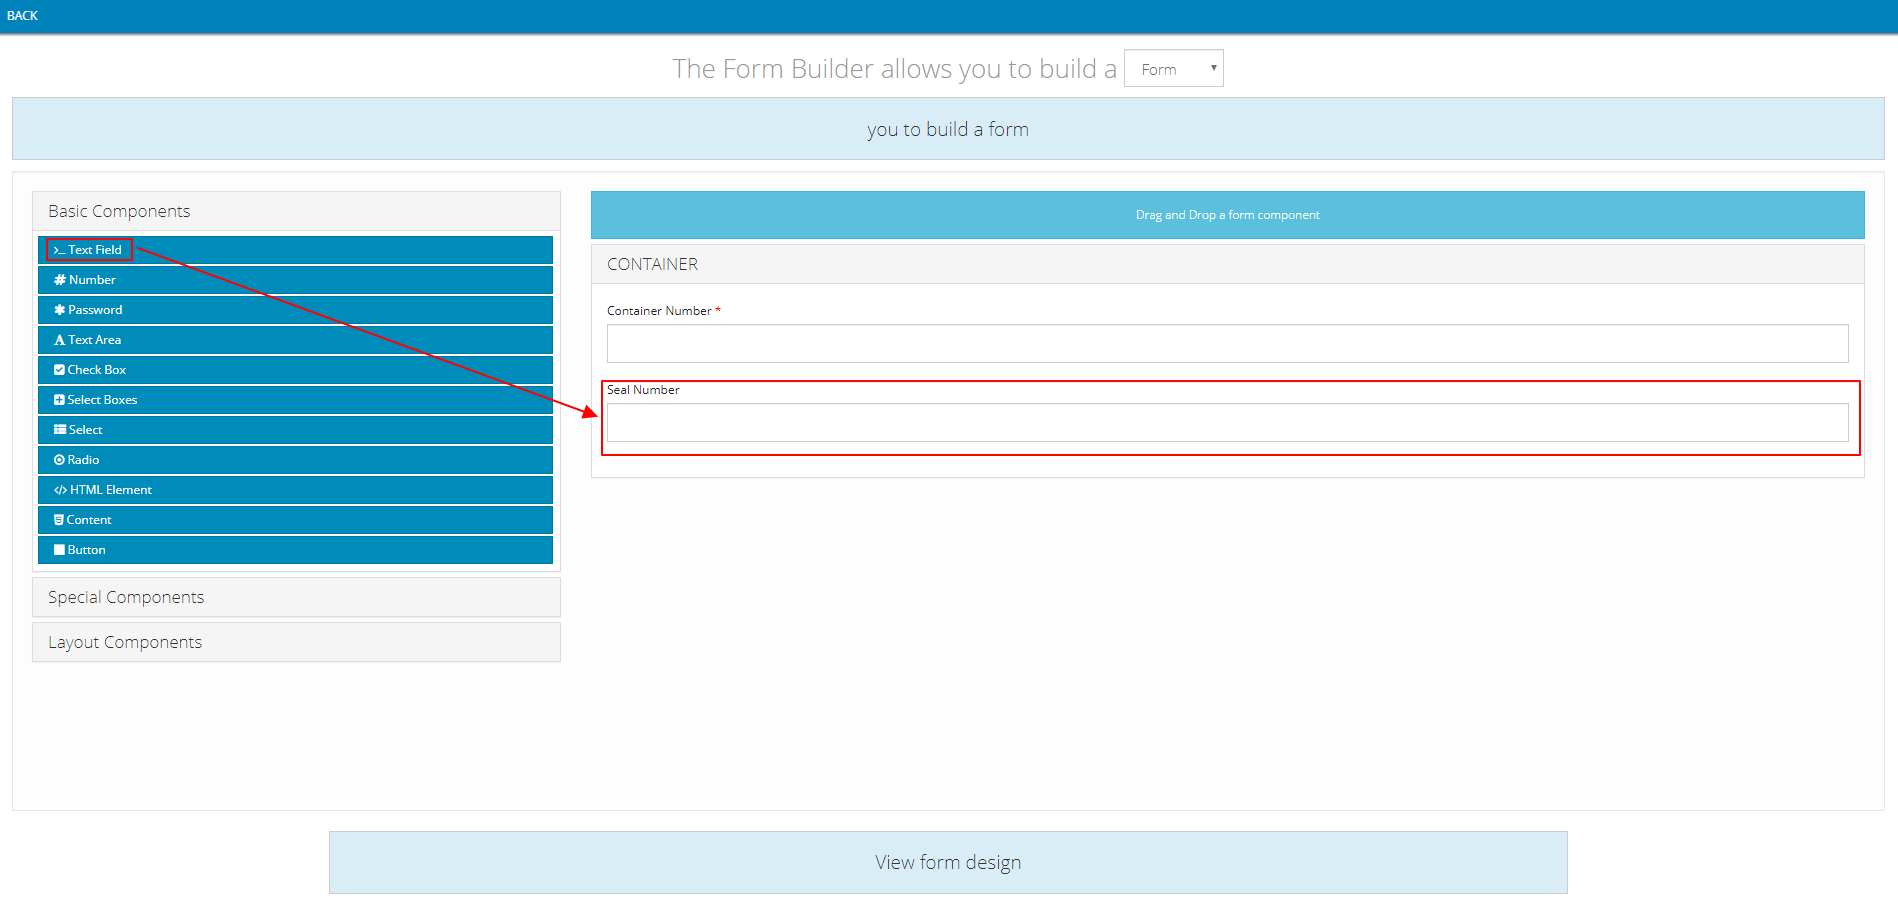
- Component content:
- Note: The value input into Label field can be changed freely

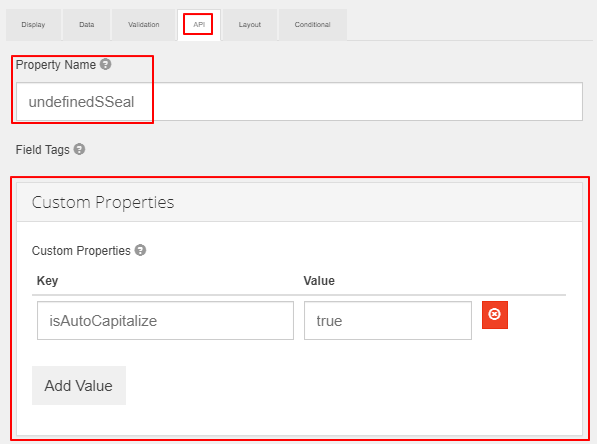
2.4 Container Tare Weight field
- Component used: Basic Components > Number
- Position: Inside Container Panel, below Seal Number field
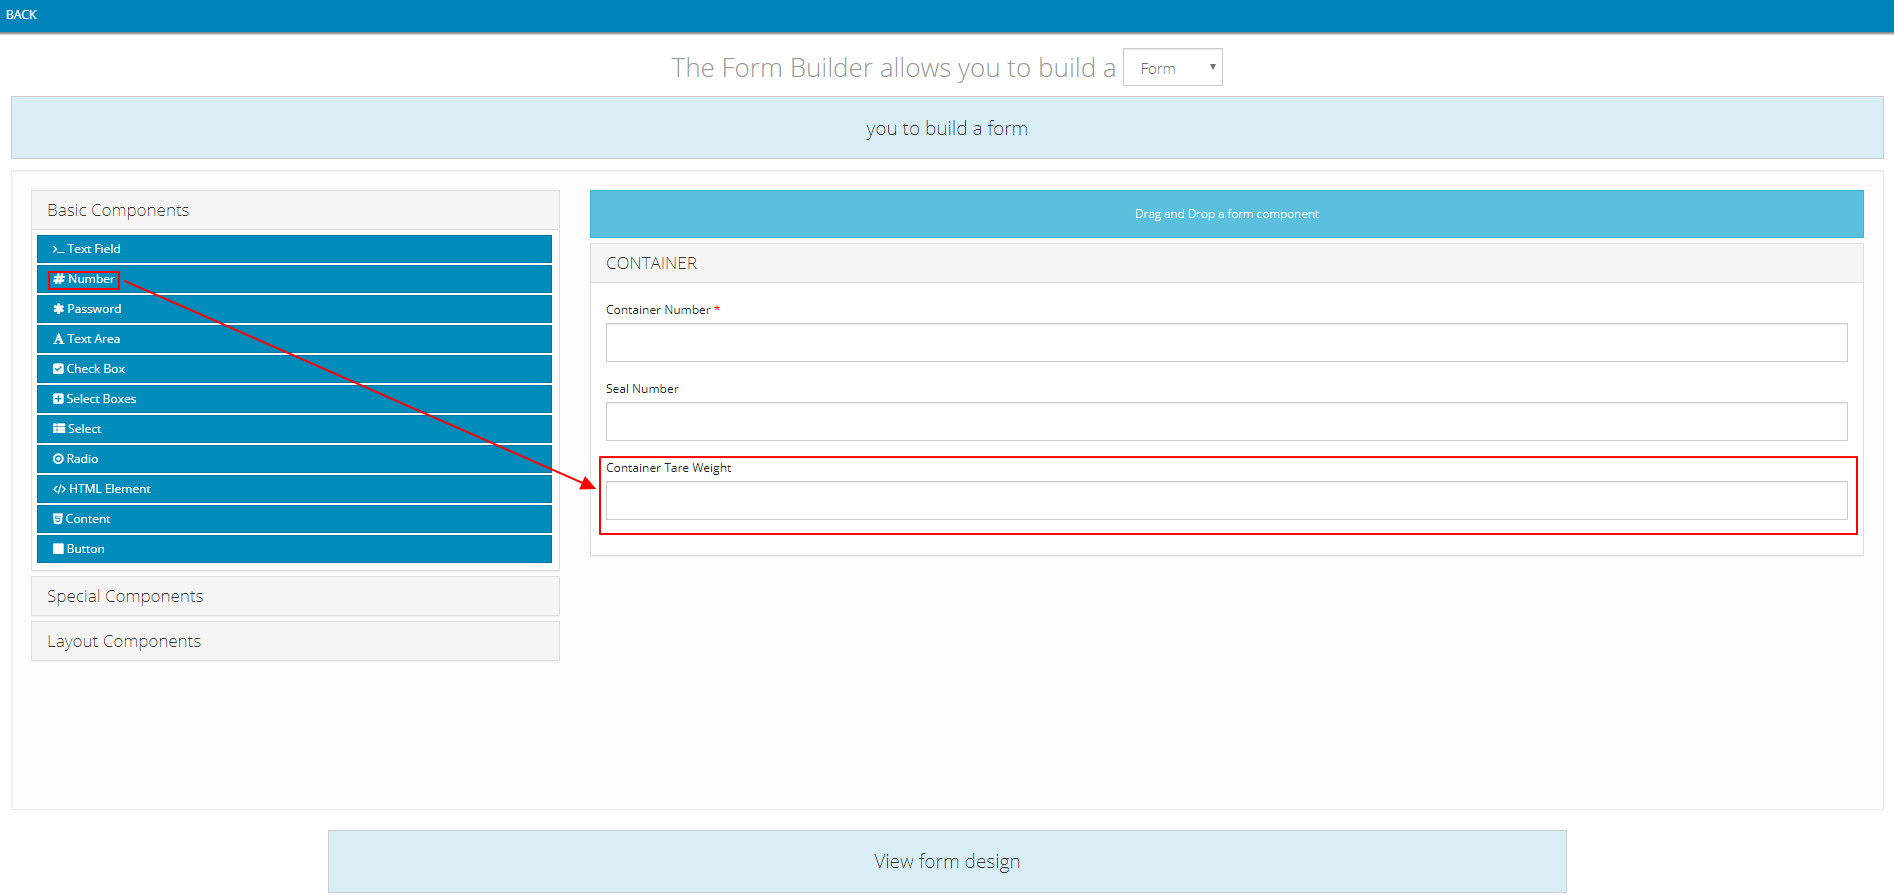
- Component content:
- Note: The value input into Label field can be changed freely

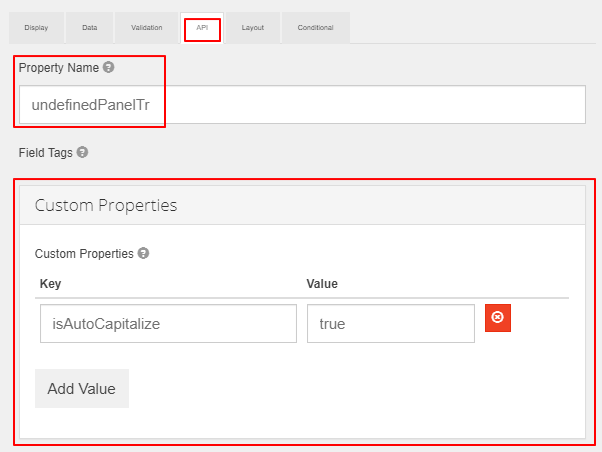
2.5 Container Max Gross Weight field
- Component used: Basic Components > Number
- Position: Inside Container Panel, below Container Tare Weight field
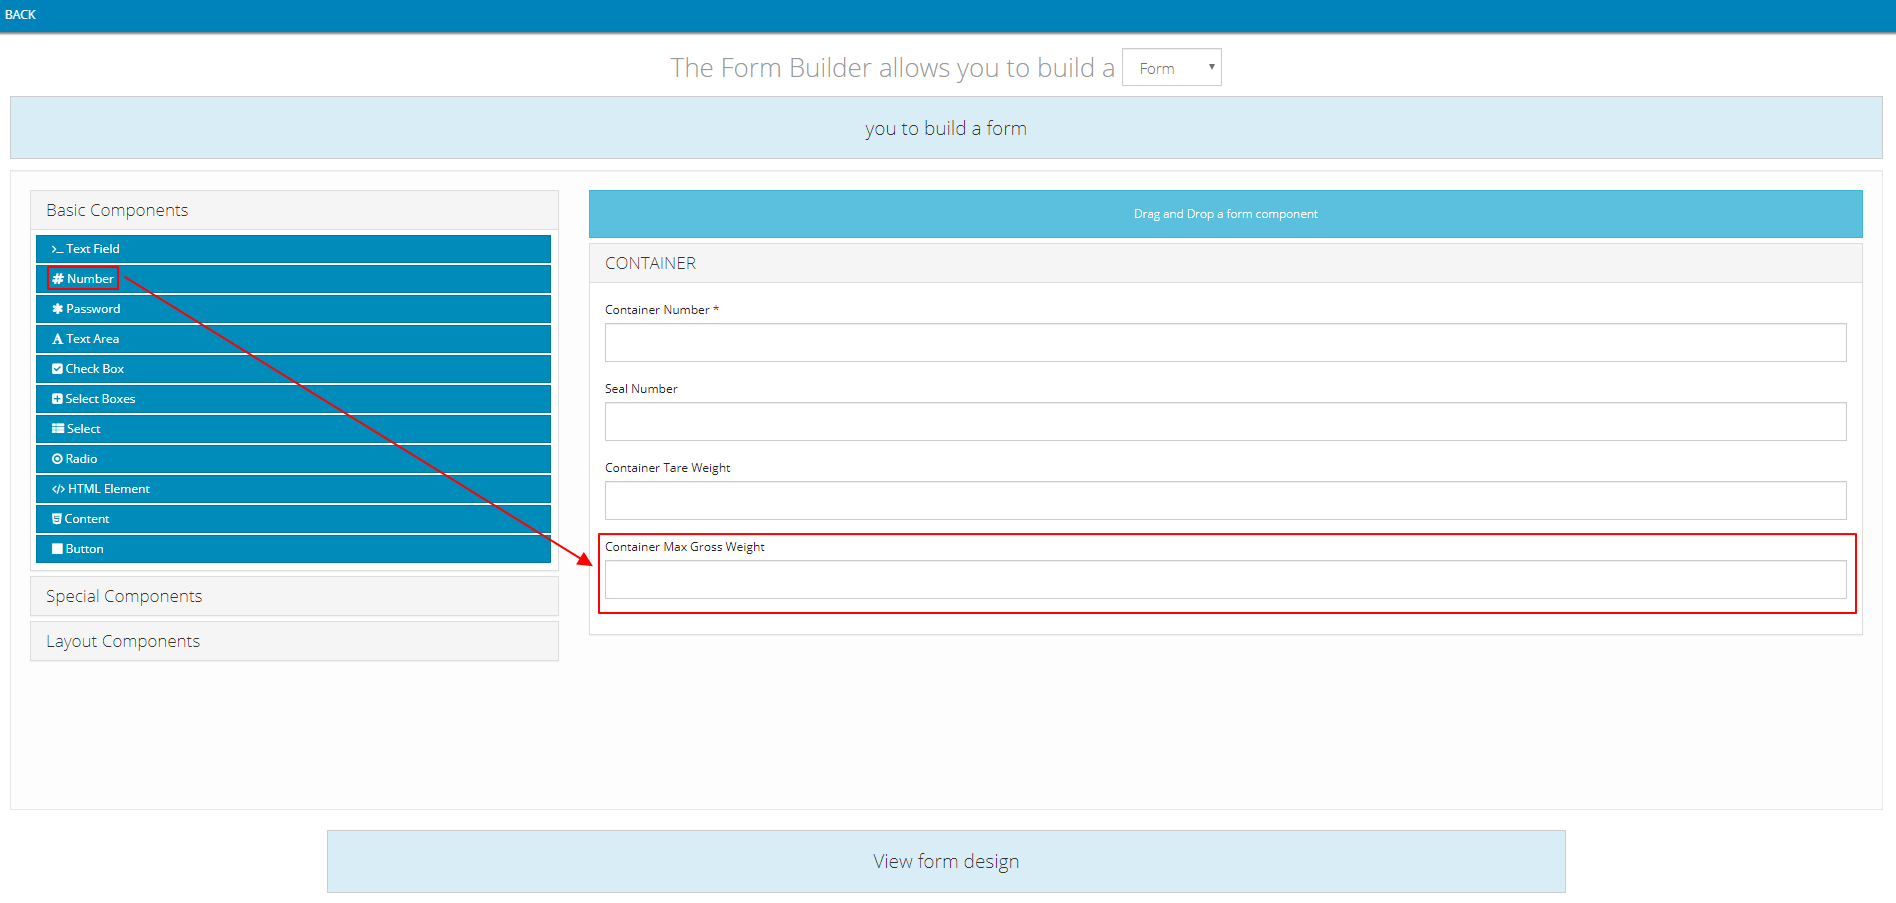
- Component content:
- Note: The value input into Label field can be changed freely

2.6 Container Photos Panel
- Component used: Special Components > File
- Position: Inside Container Panel, below Container Max Gross Weight field
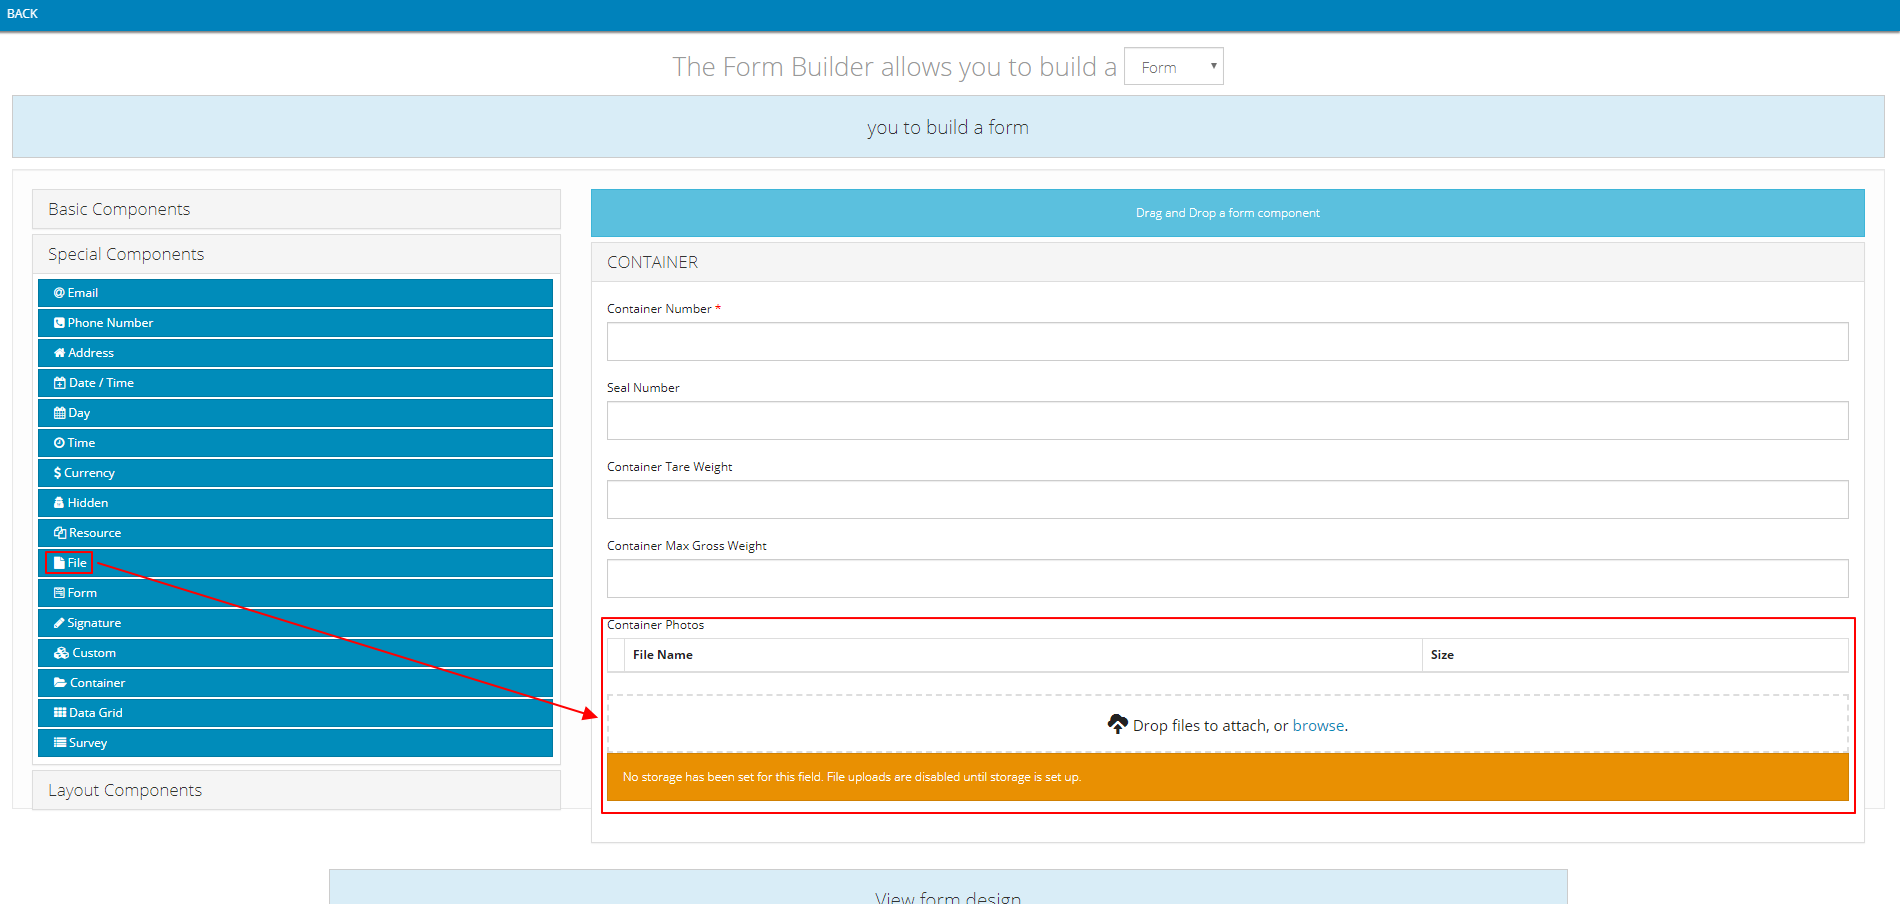
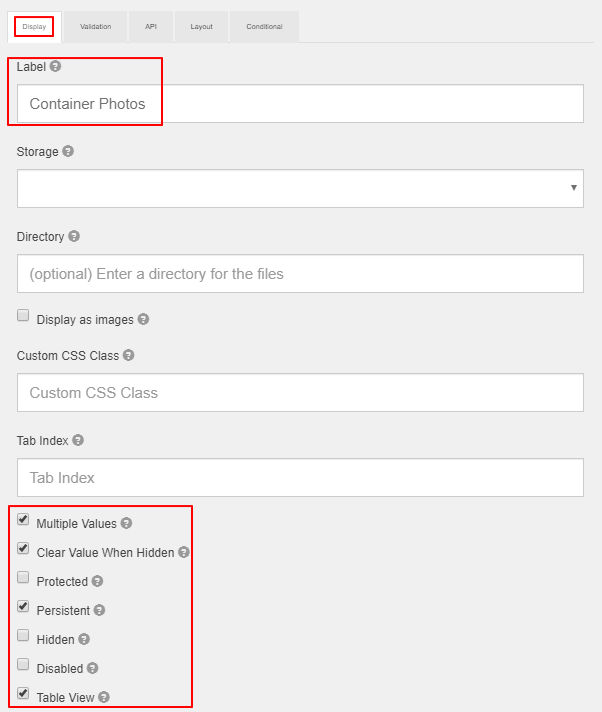
- Component content:
- Note: The value input into Label field can be changed freely
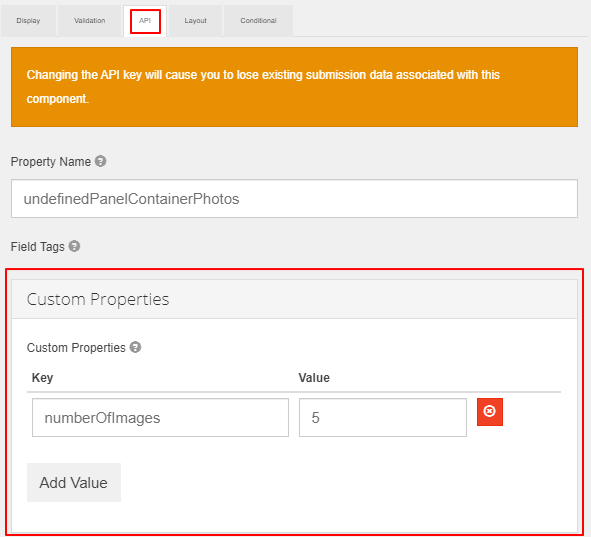
- Note: The value of the property numberOfImages doesn't necessarily have to be 5. You can change to a different number according to how many photos you need
TRAILER_ATTACH Action code
3.1 Trailer Selection panel
- Component used: Basic Components > Select
- Position: On top

- Component content:
- Tab Display
- Note: The value input into Label field can be changed freely

- Tab Data
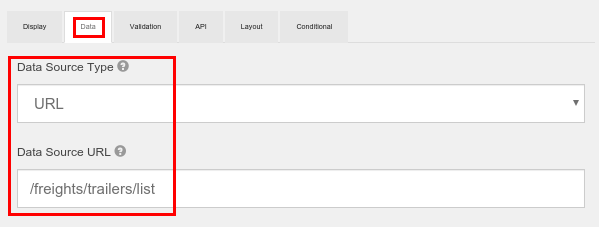

- Tab Validation
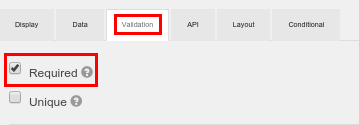
- Tab API
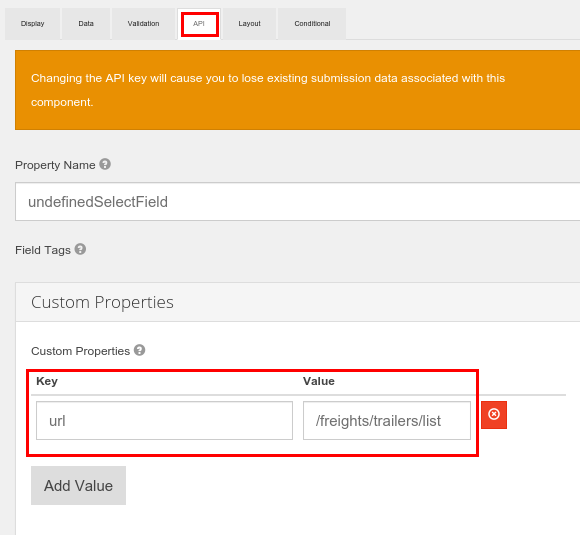
3.2 Trailer Photos Panel
- Component used: Special Components > File
- Position: Below Trailer Selection panel
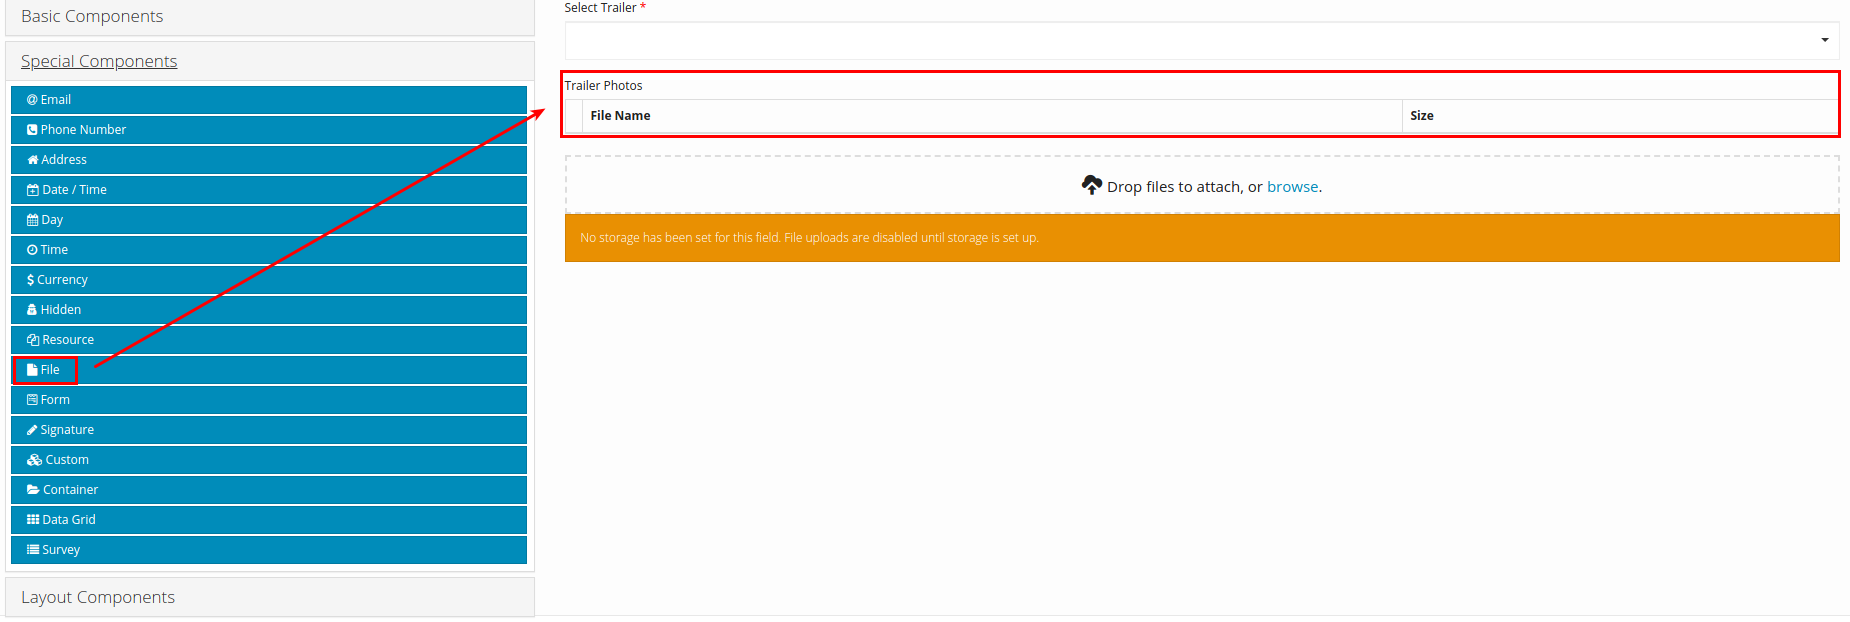
- Component content:
TRAILER_DETACH Action code
4.1 Trailer Photos Panel
- Component used: Special Components > File
- Position: On top
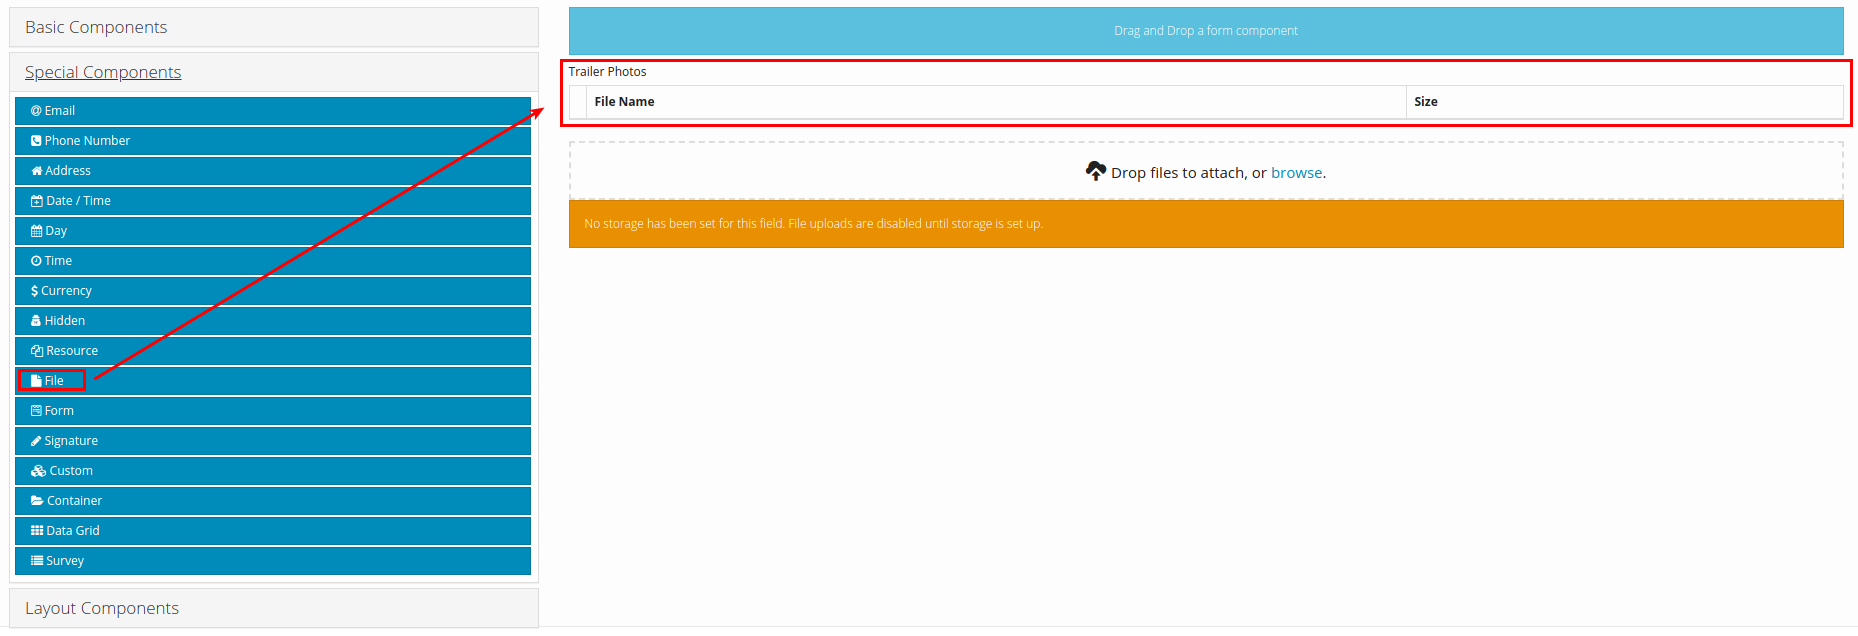
- Component content:
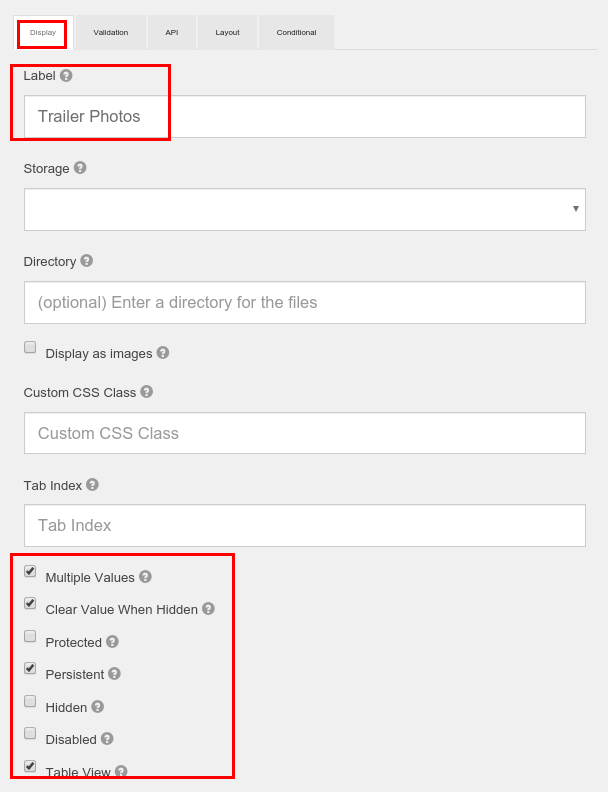
- Tab Display
- Note: The value input into Label field can be changed freely
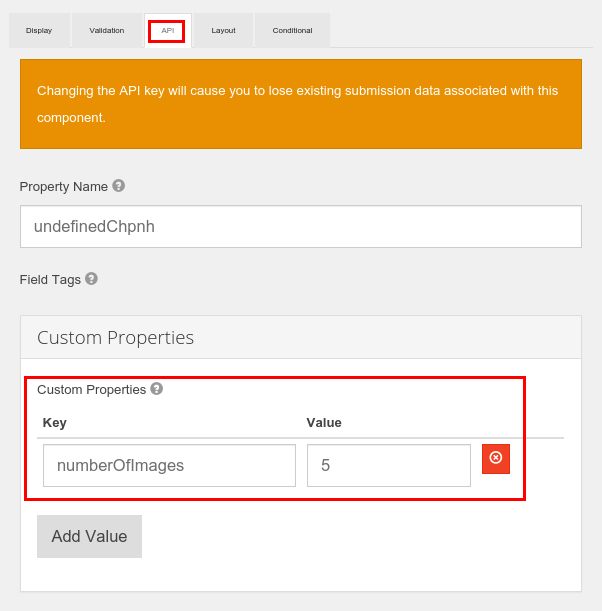
- Tab API
- Note: You can change the value input into the field Value to be a different number, as long as it is less than 5. The value input here equals to the maximum photos you can take when using the Mobile app
Updated about 2 months ago
