Manage Product Inventory
At the moment, this feature only works for VRP - Transporters to Create Routes Model
General information
- After the products have been created, the depot administrators can start tracking the transaction status of the products in Products > Inventory tab
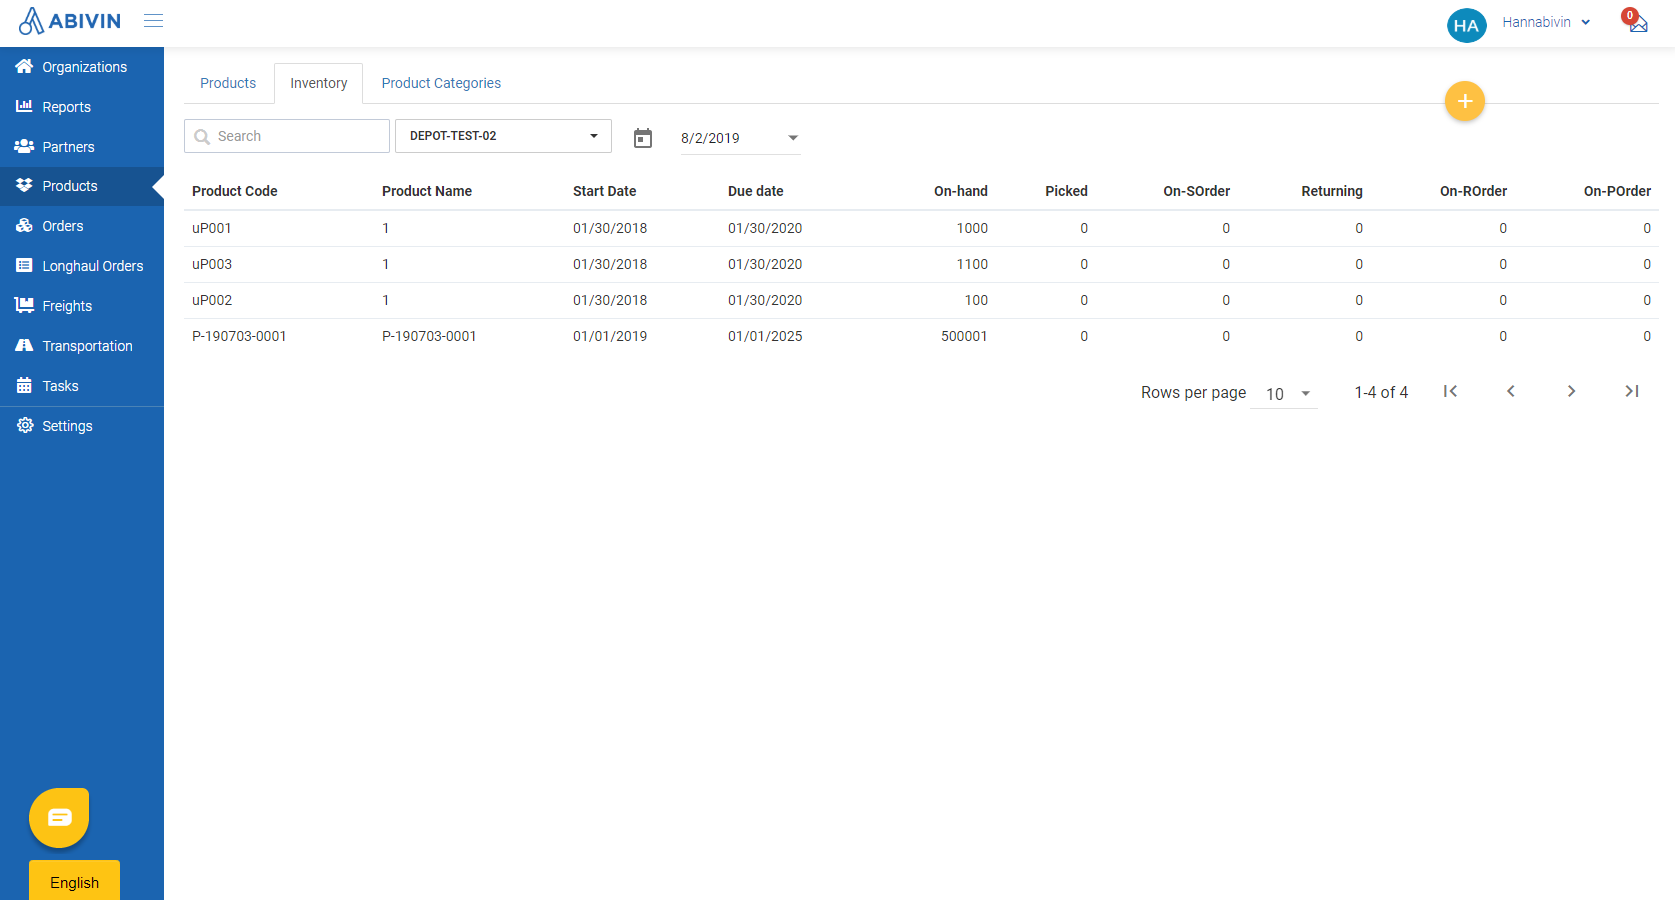
- Apart from the general information fields of the products (which have been input during the creation process), in Products > Inventory tab, there are some other information fields which reflect the changes in inventory of the products
At the moment, the system only tracks the changes in whole case quantity, not single items quantity of the products
Information field | Description |
|---|---|
On-hand | The quantity of whole cases of a specific product (Finished products) physically available on your organization warehouse shelves |
Picked | The aggregate quantity of whole cases of a specific product (Finished products) which have actually been picked out of your organization's warehouse shelves and put on to the delivery vehicles, about to be delivered to other locations (Partner or Customer warehouses) |
On-SOrder | Short for: On Sales Order |
Returning | The aggregate quantity of whole cases of a specific product (Empty product cases or Returned products - products that the partners refused to receive) that have actually been picked up from the customers and are being carried by the delivery vehicles back to your manufacturing warehouses |
On-ROrder | Short for: On Return Order |
On-POrder | Short for: On Purchase Order |
- For a product, the number displayed in each of the above fields will change accordingly to the operation status of all orders which have that specific product
Filter inventory by warehouse
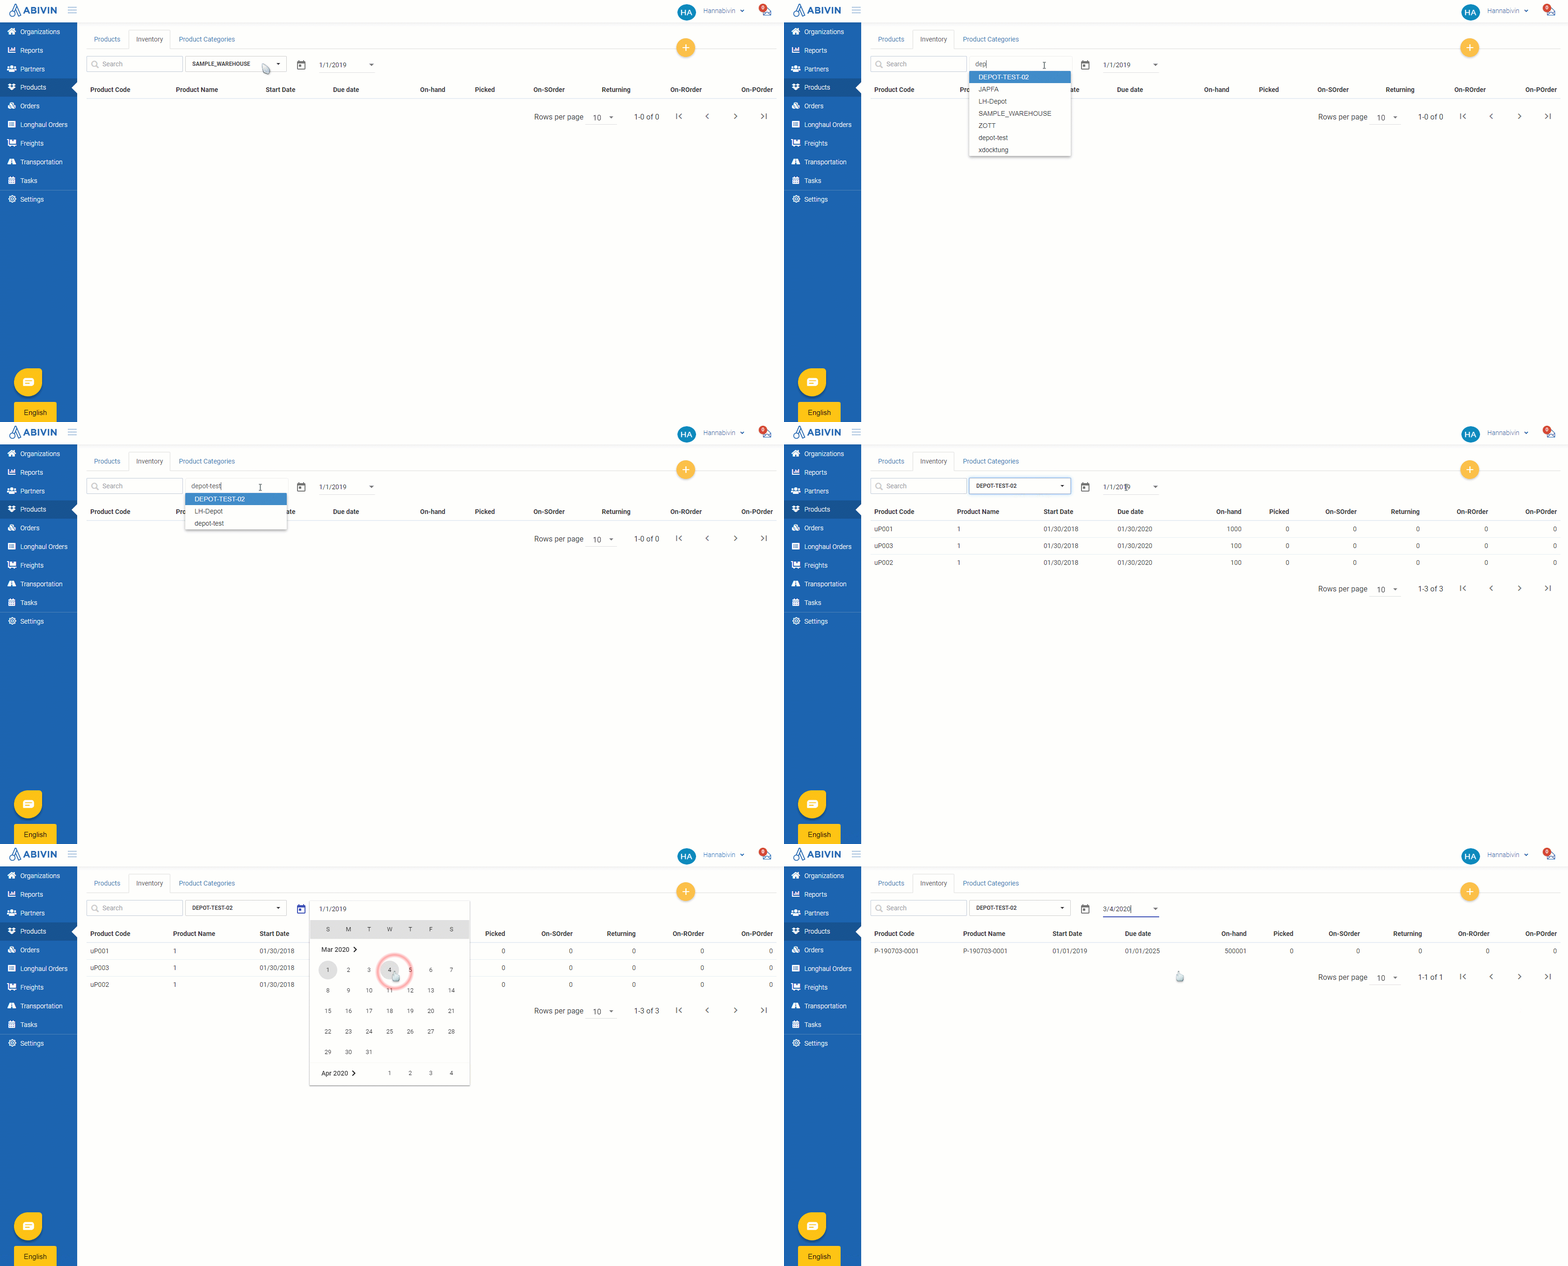
- If you are the top administrator, you can view inventory of every warehouses (Depot/Sun/Xdock) under your management
- Click on the Organization field next to the Search:fa-search: field, type the name of the warehouse into this field and choose from the drop down menu
- Next, click on the Date field next to the Organization field. Choose a date from the calendar
- After doing the above two steps, a list of products will show up, following two criteria:
- They are under the chosen warehouse's management
- They have the Due Date (End Date) attribute set before the chosen date above
View product transaction history
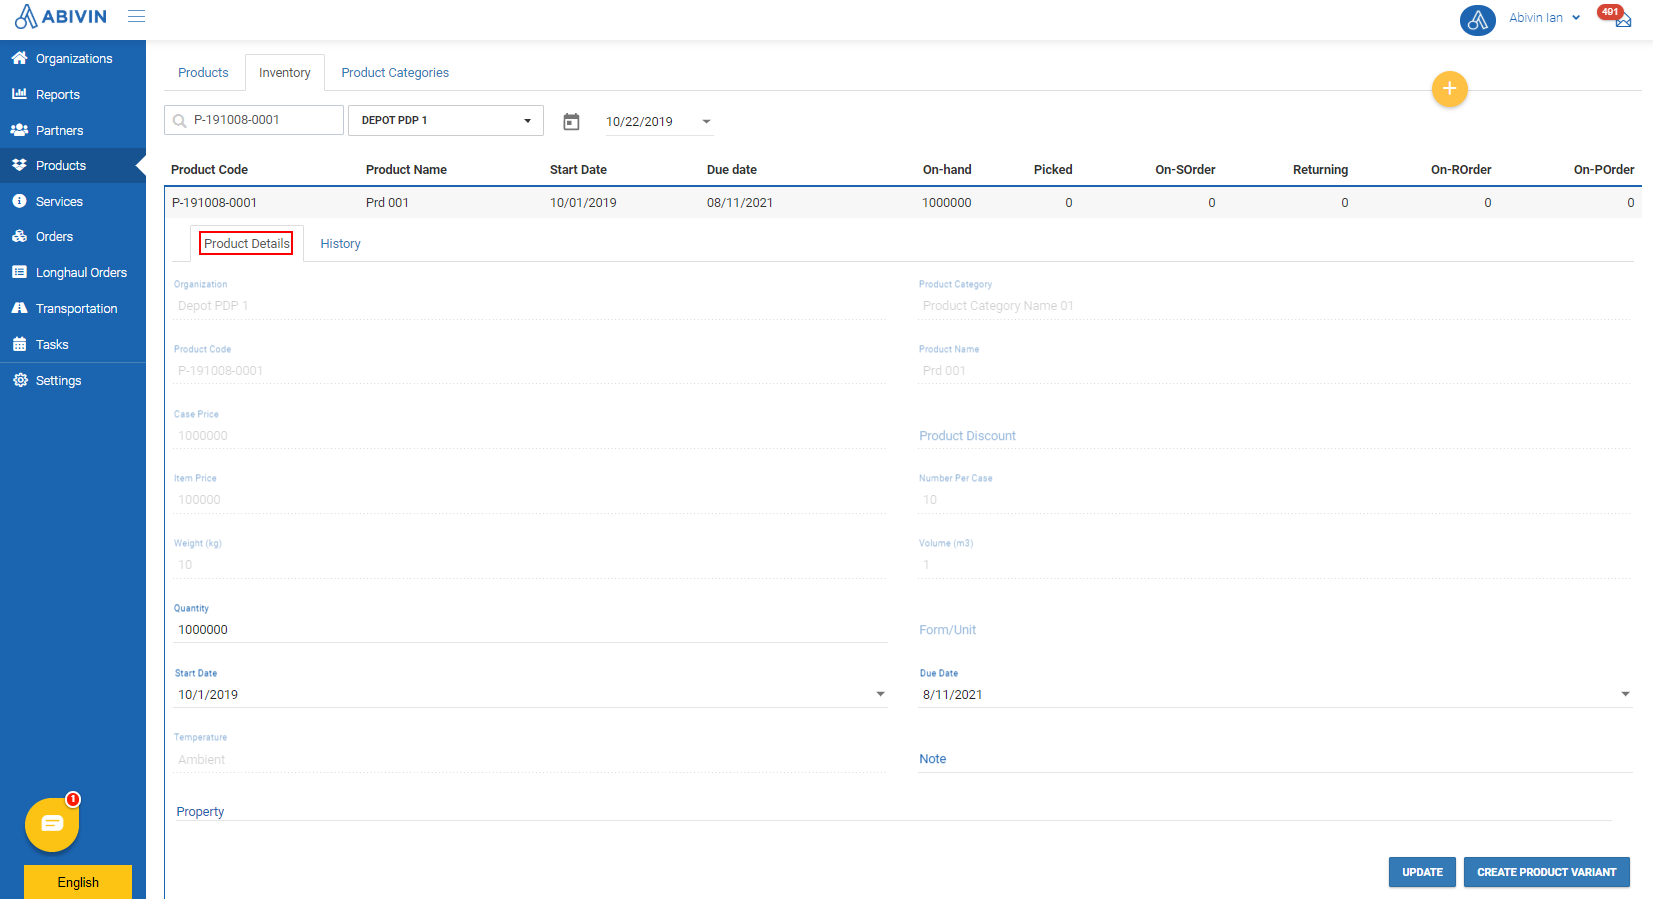
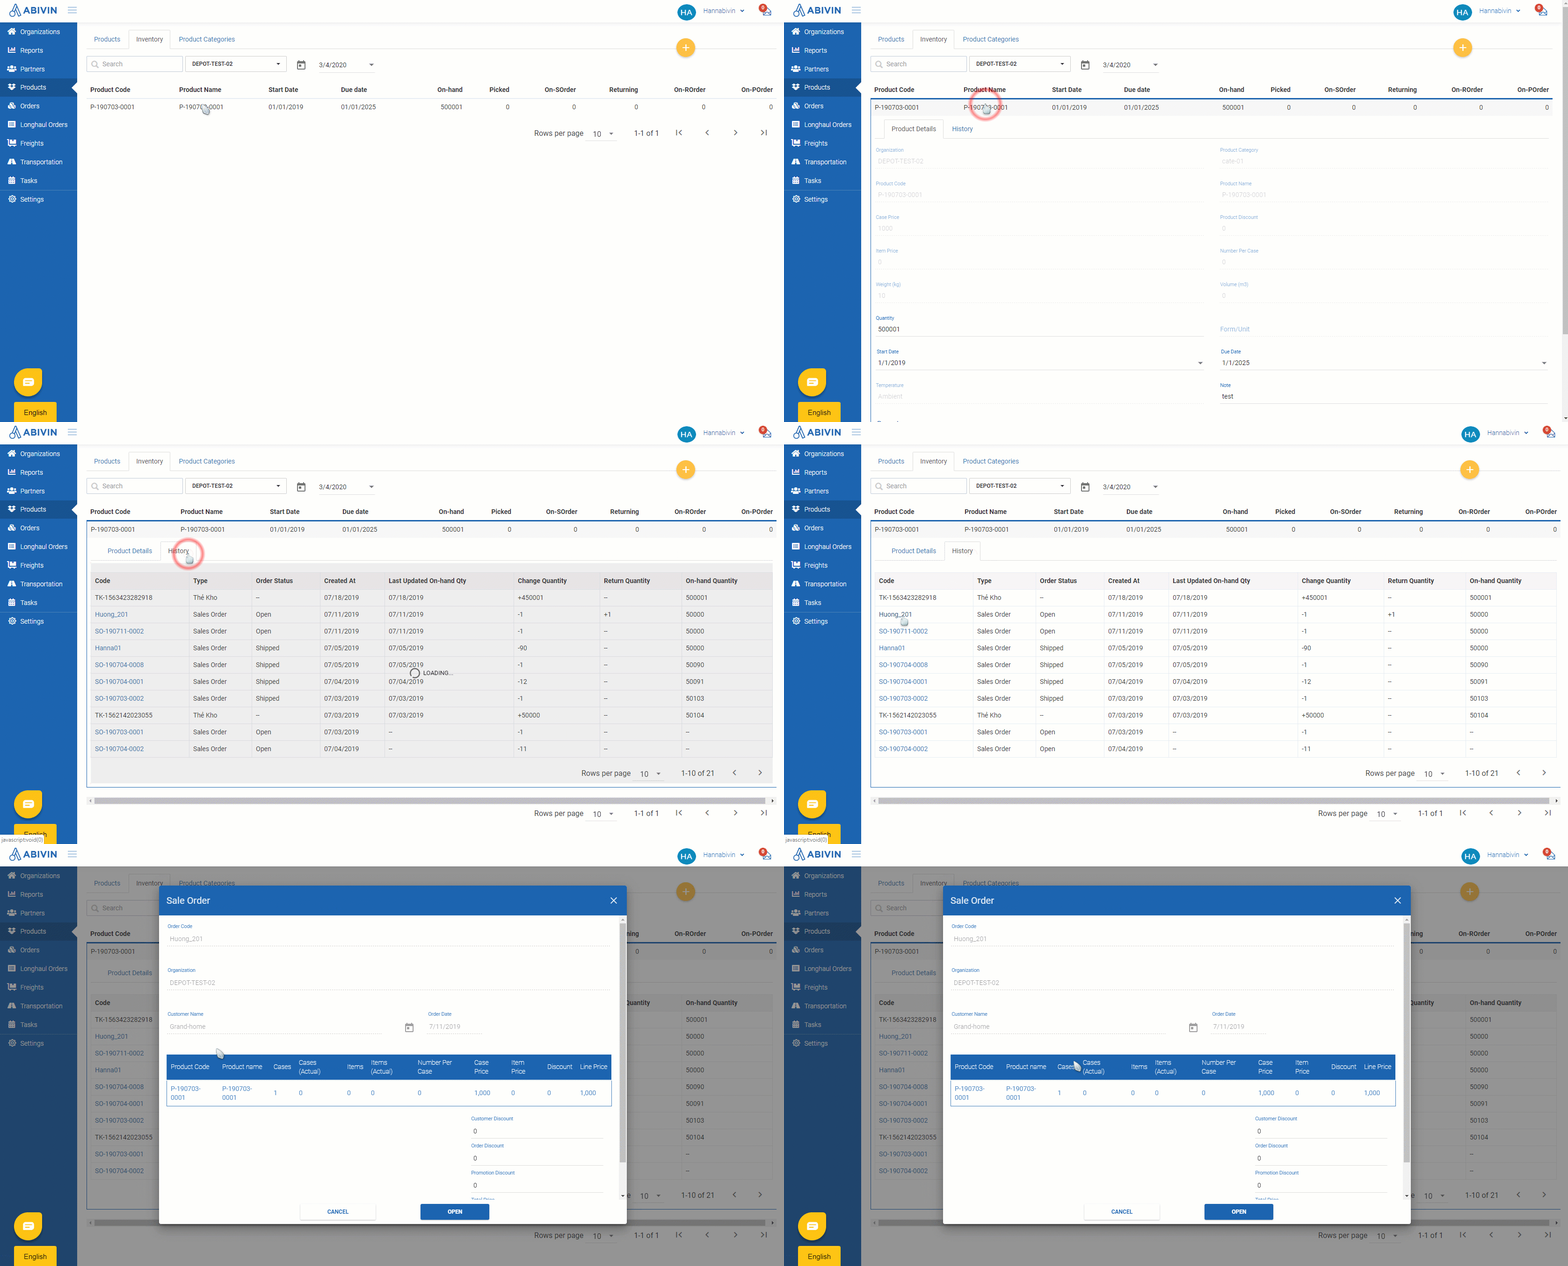
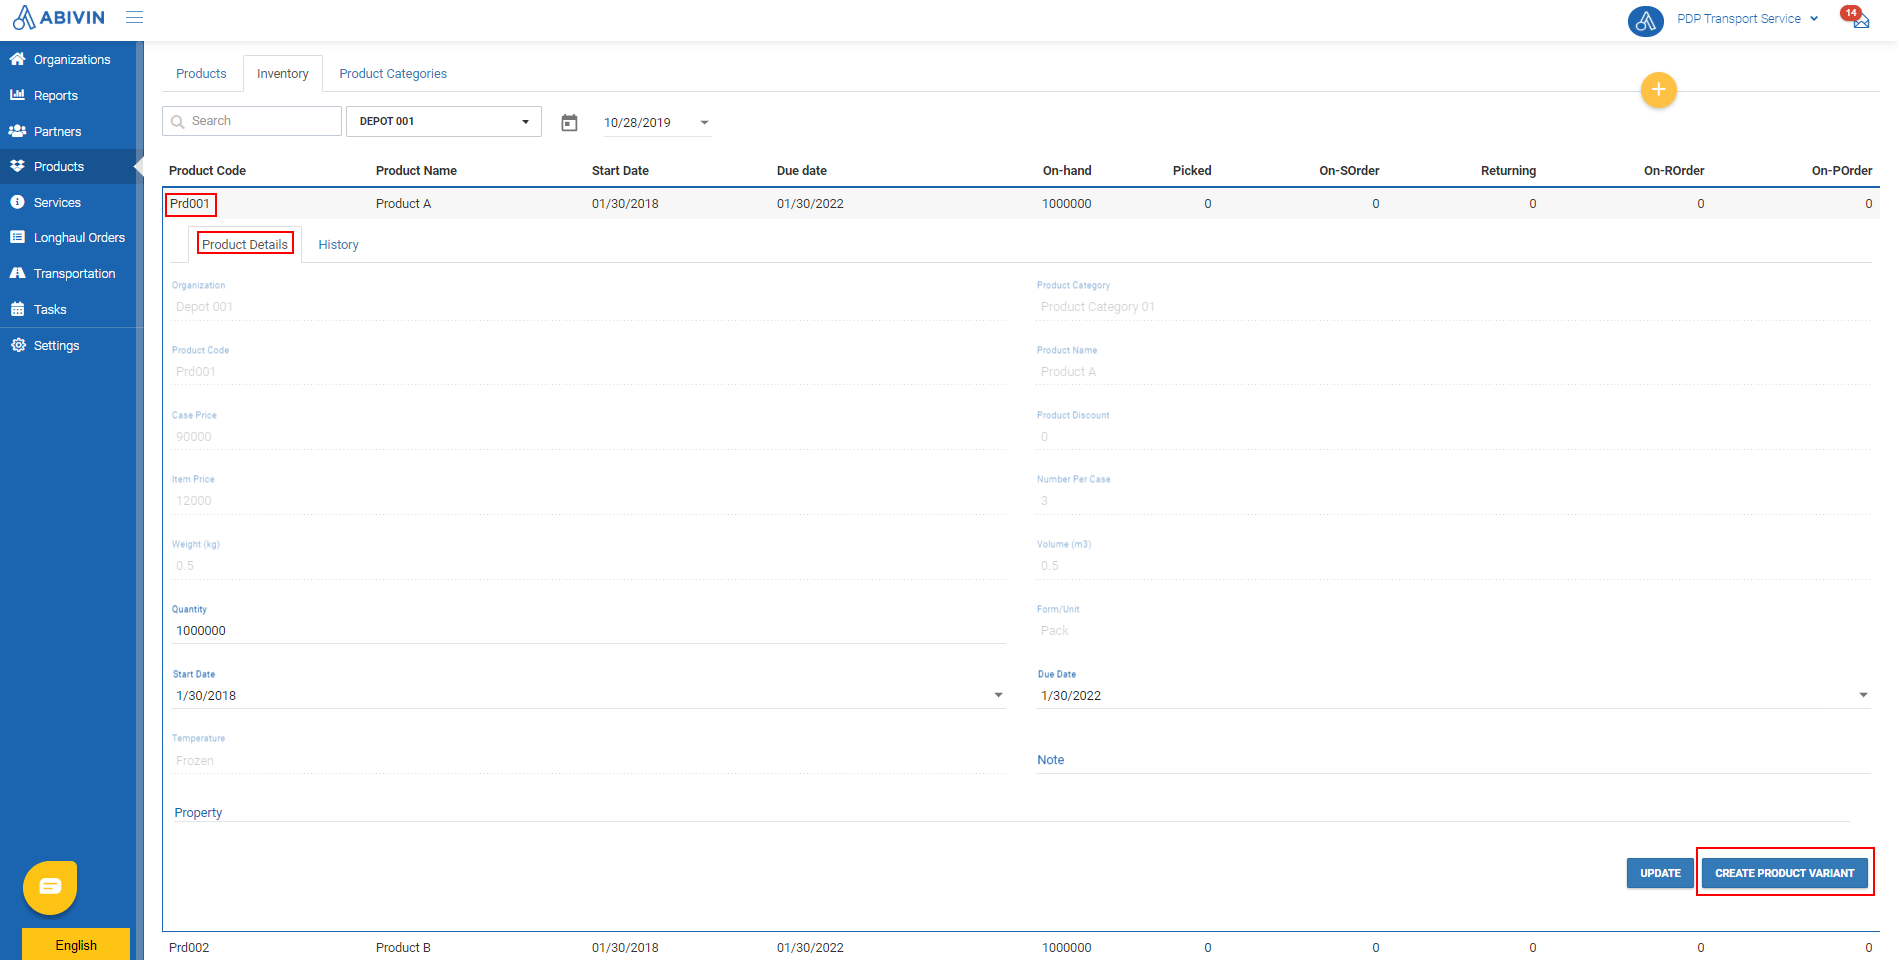
- To view the transaction history of a specific product, click on that product row. The row will immediately expand and show two tabs:
- Product Details: This tab shows the general information of the product
- History: This tab shows the transaction history of the product. Each change in the quantity of the product will be recorded and shown here
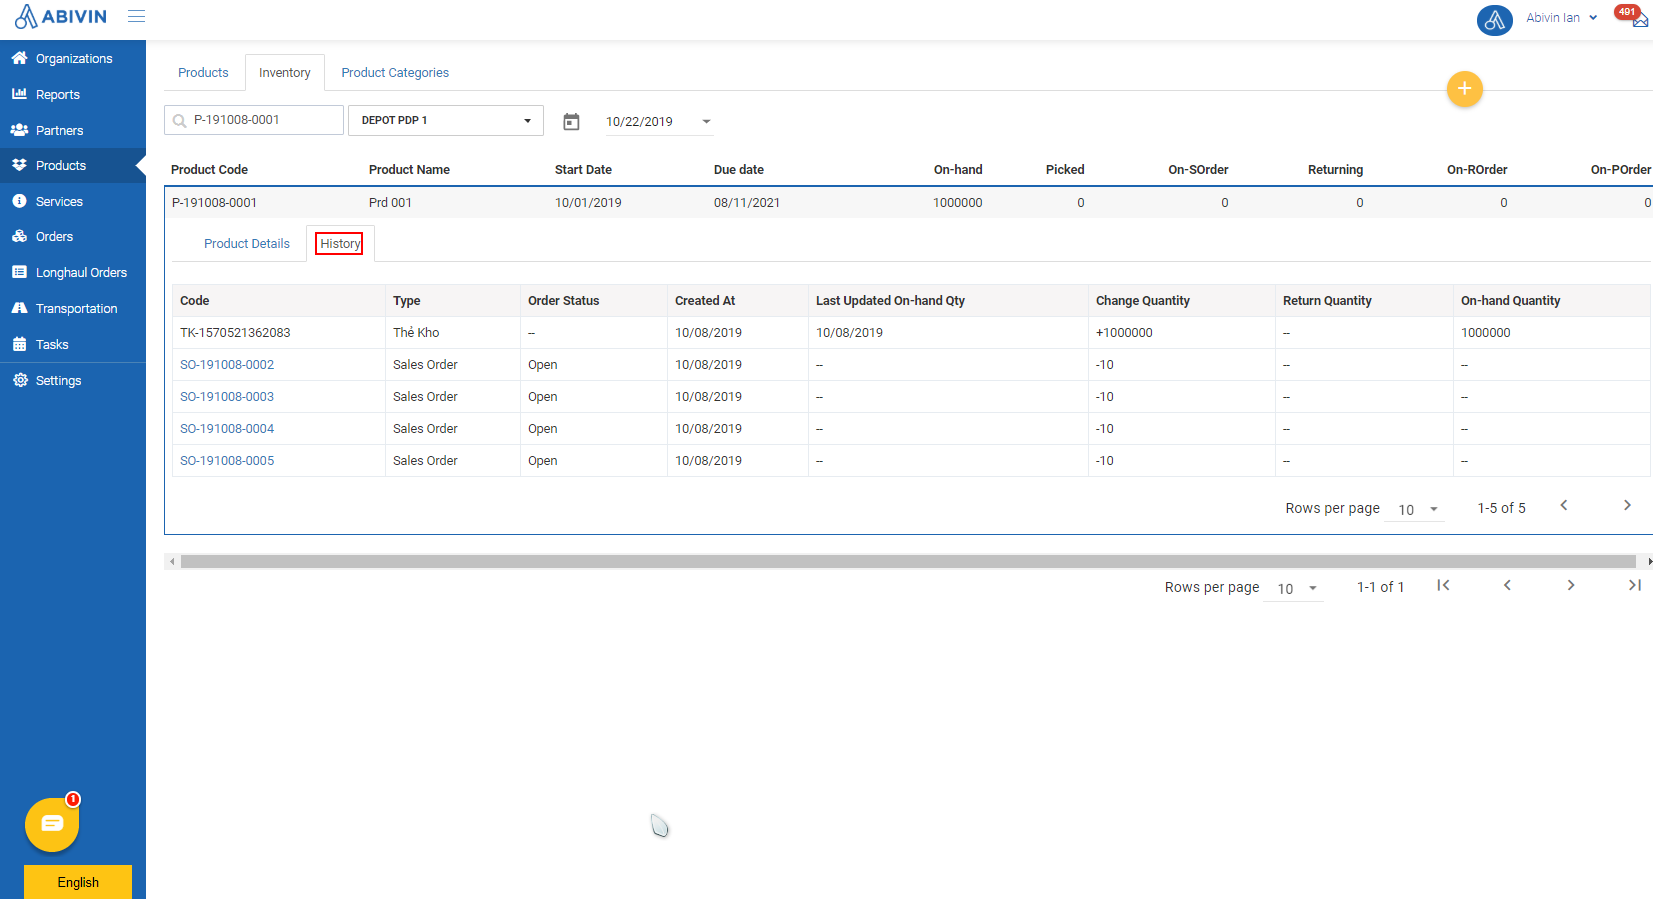
- You can click directly on an order in this tab to view details of that order
Update product inventory information
Update on Web form
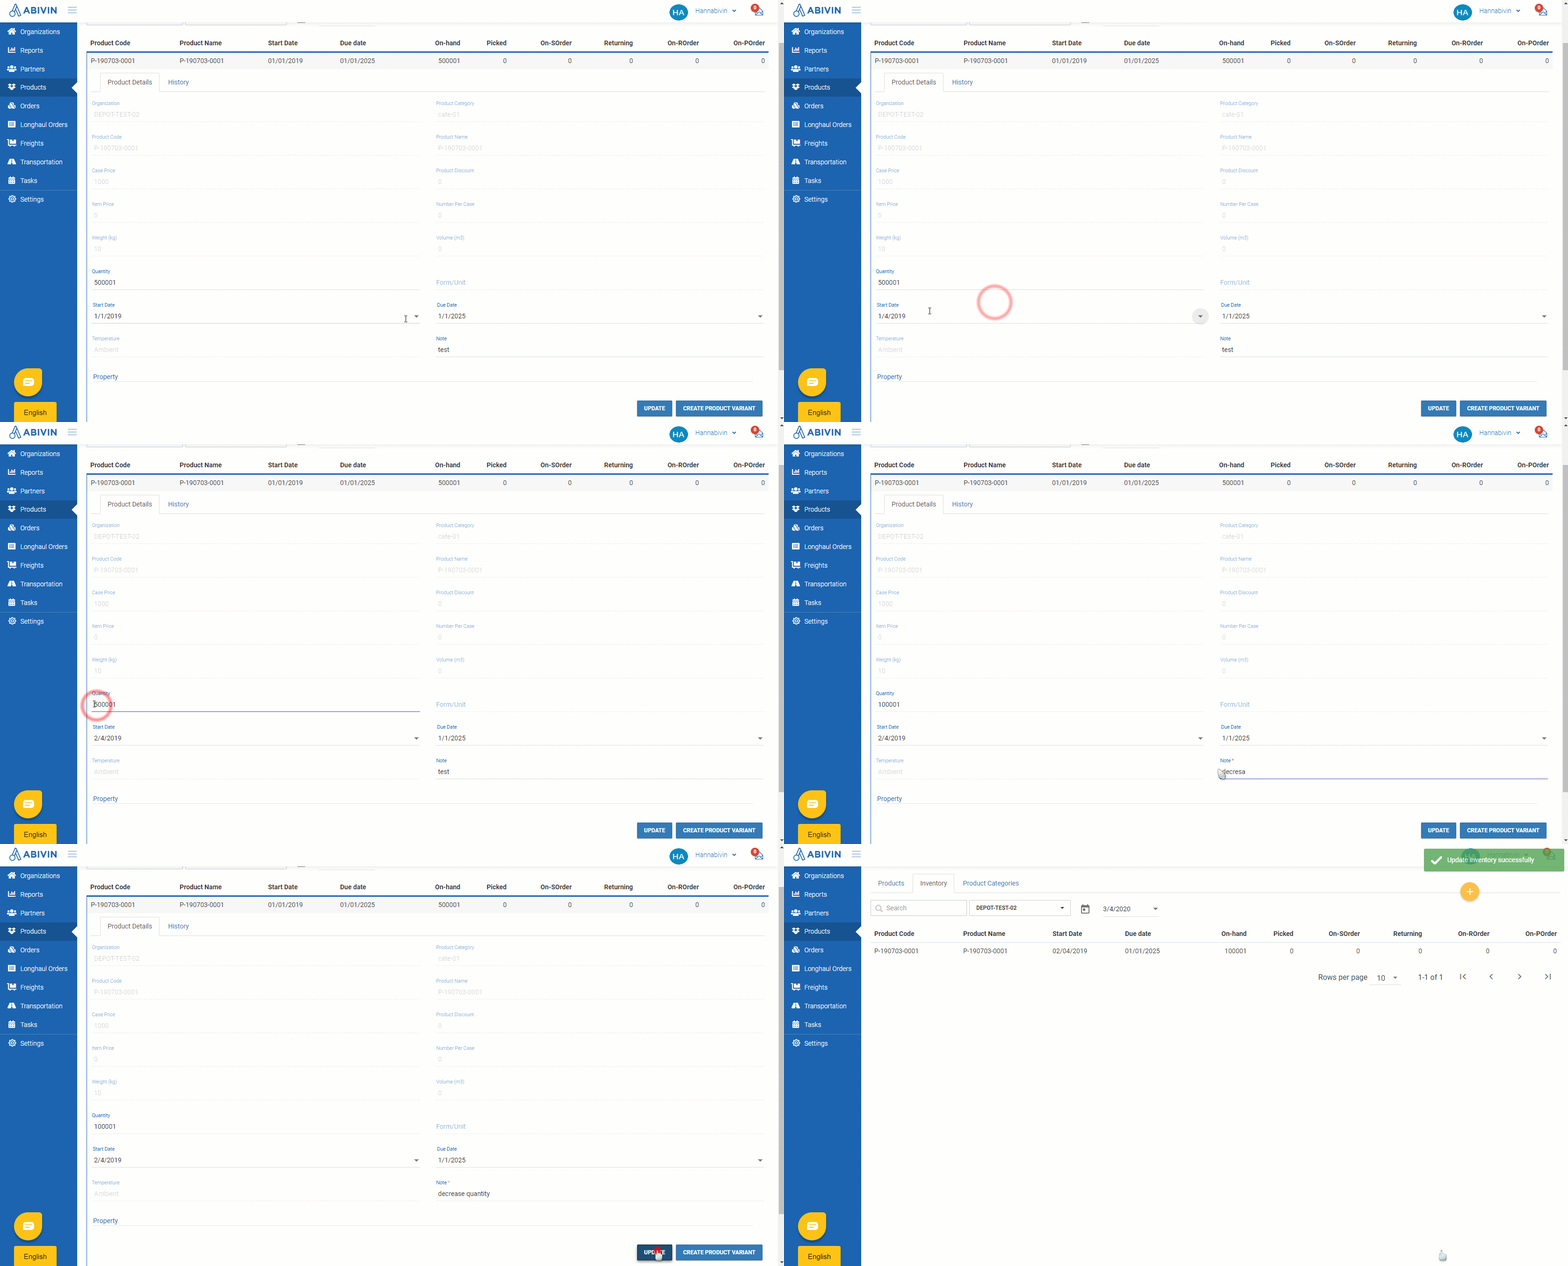
- On Product Details sub tab of a specific products, you can change some attributes of that product, including: Start Date, Due Date and more importantly Quantity
- Start Date, Due Date: Change by clicking on those fields and choose from the drop down calendar; or type directly onto the fields
- Quantity: Input the desired quantity into the field, write a short description for the change at the Note field
- After inputting all the necessary changes, click Update to confirm the change
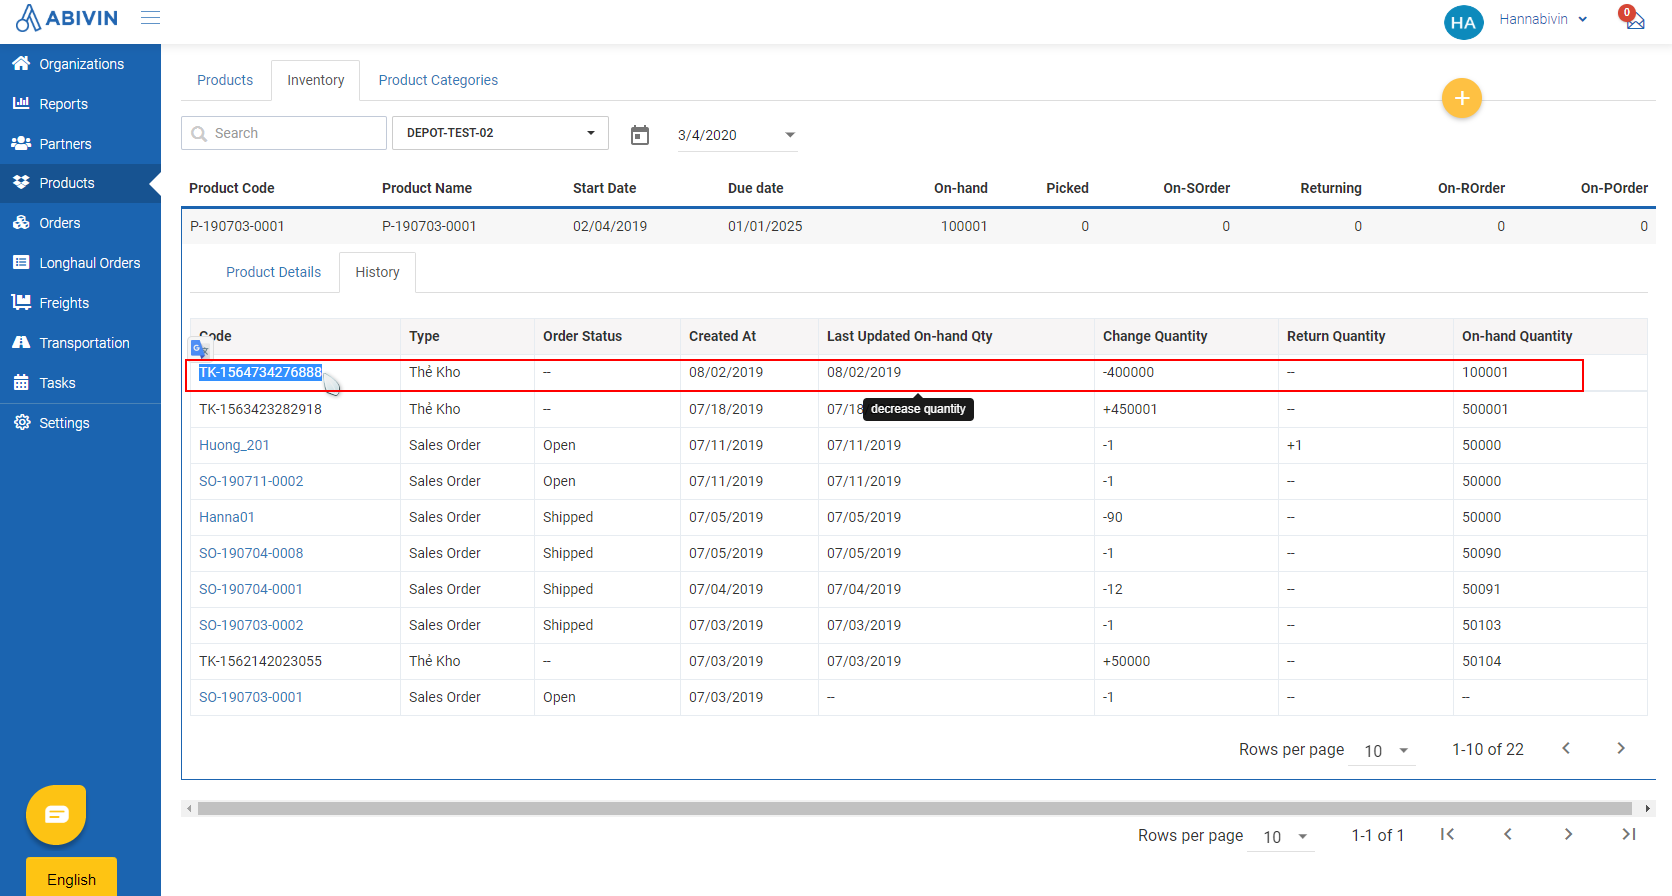
- A Warehouse card will be generated automatically with the prefix TK, reflecting the change in the product quantity. This feature will come in handy for organizations who want to change product quantity without having to create Sales/Purchase orders (Which in turn will generate business invoices according to accounting practices)
Update by Excel file
- You can bulk update multiple products by uploading the Excel file, similar to creating products
- Warehouse cards will also be created when using this option
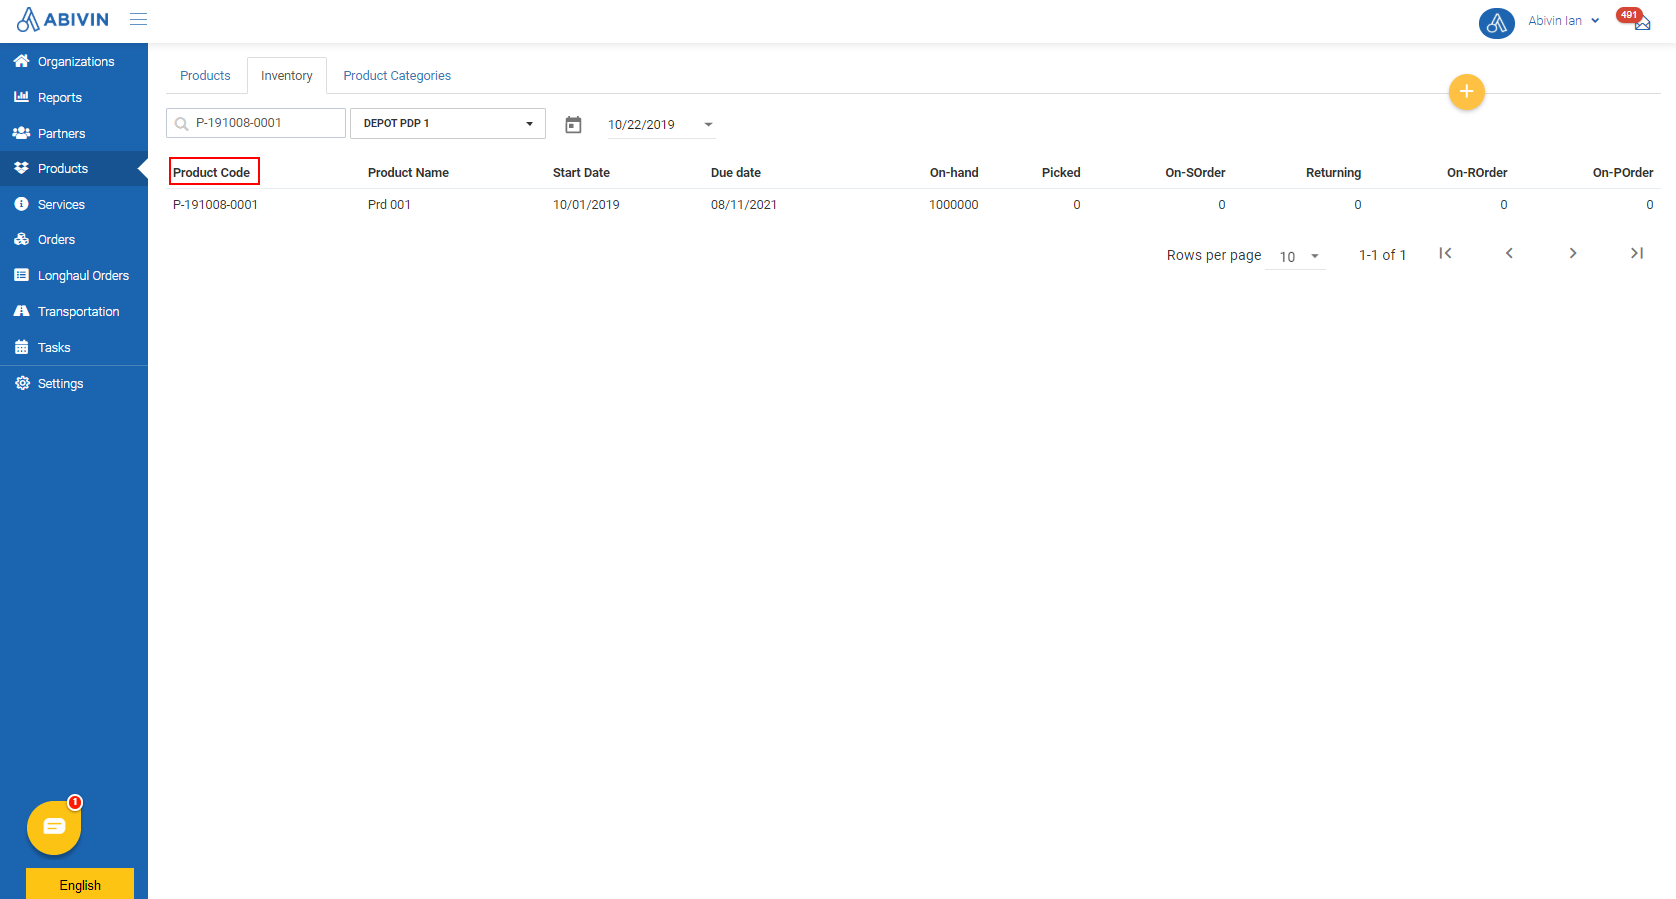
- You have to make sure the Product Codes of the existing products are not changed. To ensure, copy the Product Code of the existing products on Web app (Under Product Code column in Products > Inventory tab), then paste into Product Code cell in the Excel template
Export product inventory information
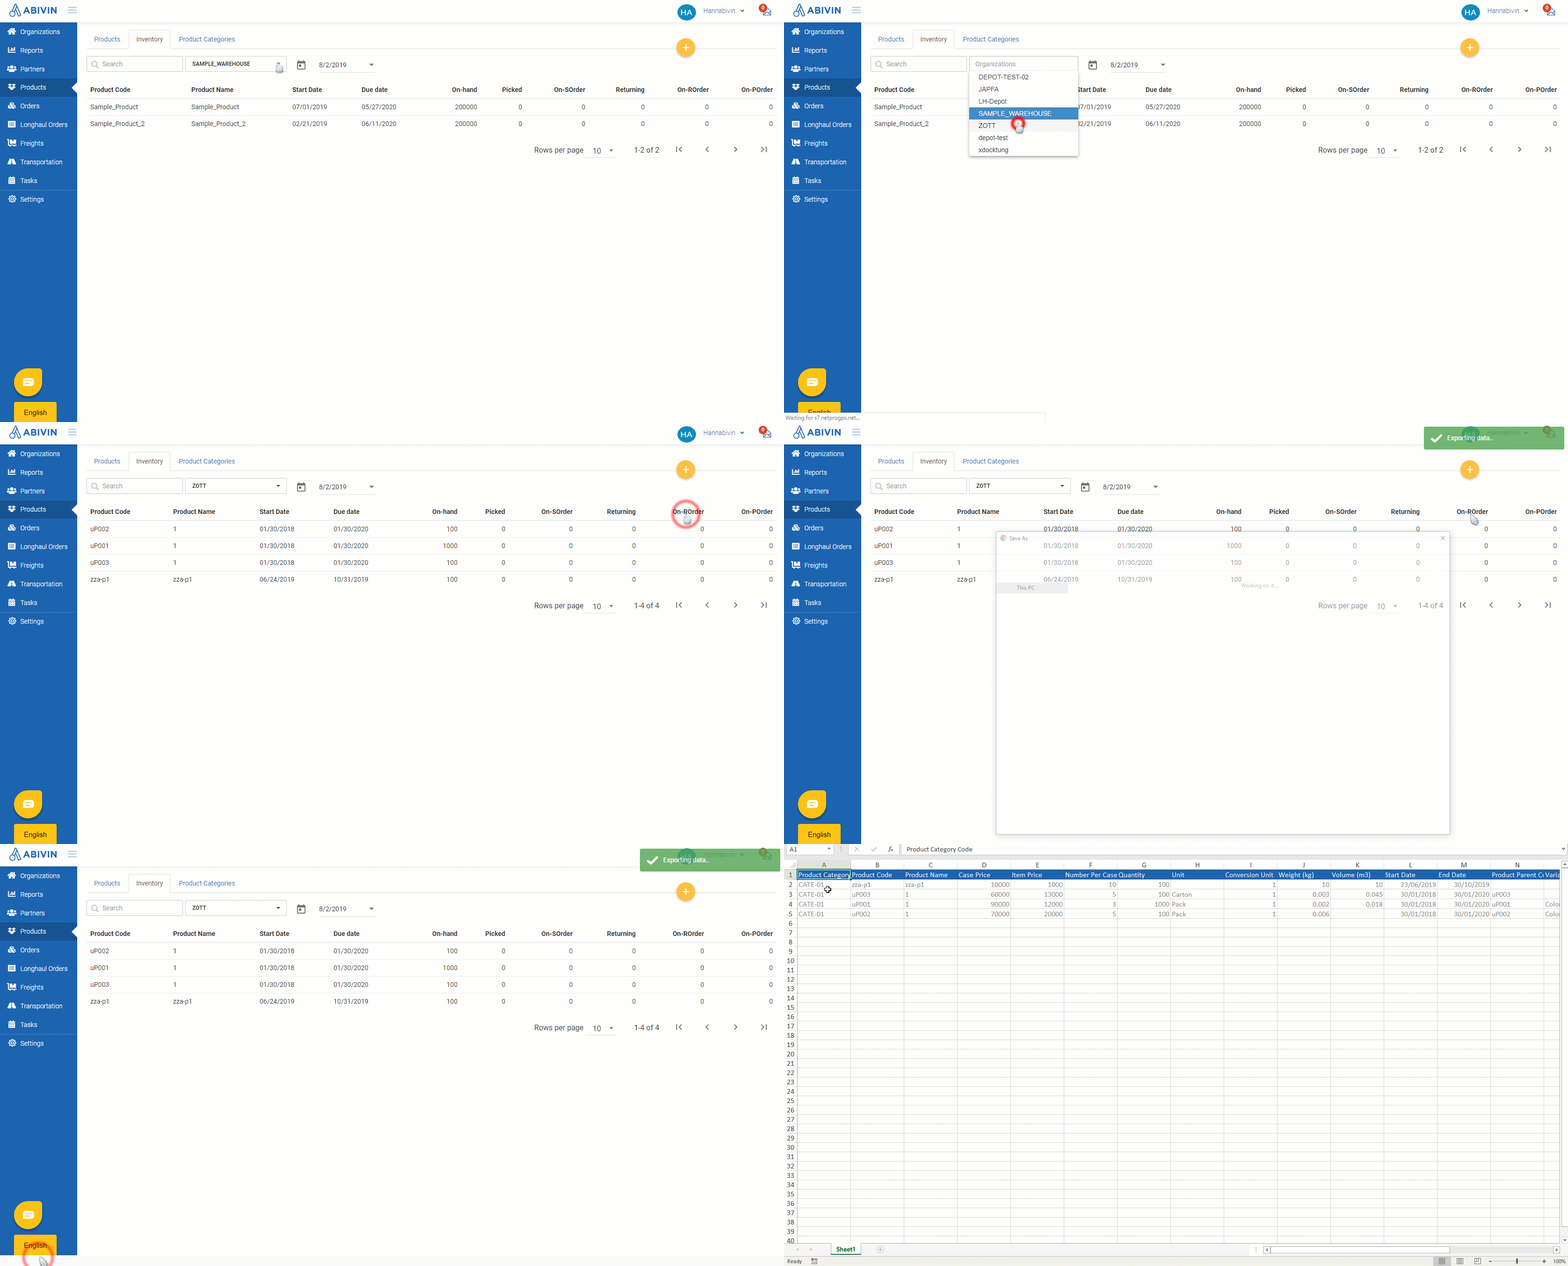
- To export the product inventory information to an offline record, follow the below steps:
- Click on the Organizations field, type the Organization Name of the warehouse you want to export inventory information, then choose from the drop down menu
- Hover over the icon, then click on Export icon
- Inventory data of the chosen warehouse will be generated and can be downloaded shortly as an Excel file
Create product variant
- Product variant is an easy way for you to create an entire new product based on a current product, which will retain certain information fields of that current product, without having to create from scratch
- To create a product variant, follow the steps below
- Click on the Product code of the products you want to create variants
- On the Product Details sub tab, click on Create Product Variant button
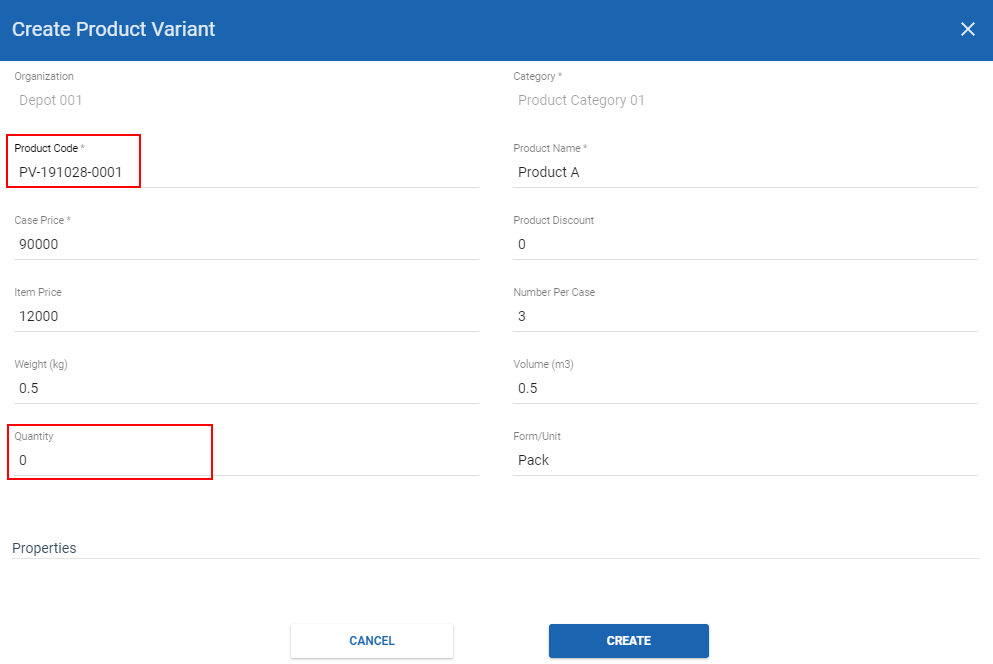
- On Create Product Variant form, almost all basic information fields of the selected current product will be retained
- The product code of the product variant being created will be automatically filled in the following format
PV-yymmdd-xxxx - PV stands for Product Variant
- yy is the last two digits of the current year
- mm is the current month
- dd is the current date
- xxxx is the numerical order of the product variant being created
- You could make changes to all of the pre-filled fields
- Next, do not forget to specify the quantity of the new product variant in the Quantity field
- After you have filled every information fields, click on Create to finish creating the product variant
Updated about 2 months ago
