Manage Actions
Create actions
- Navigate to Tasks > Action List tab
- You will notice that a set of actions has been automatically created. These are the default action codes for VRP model
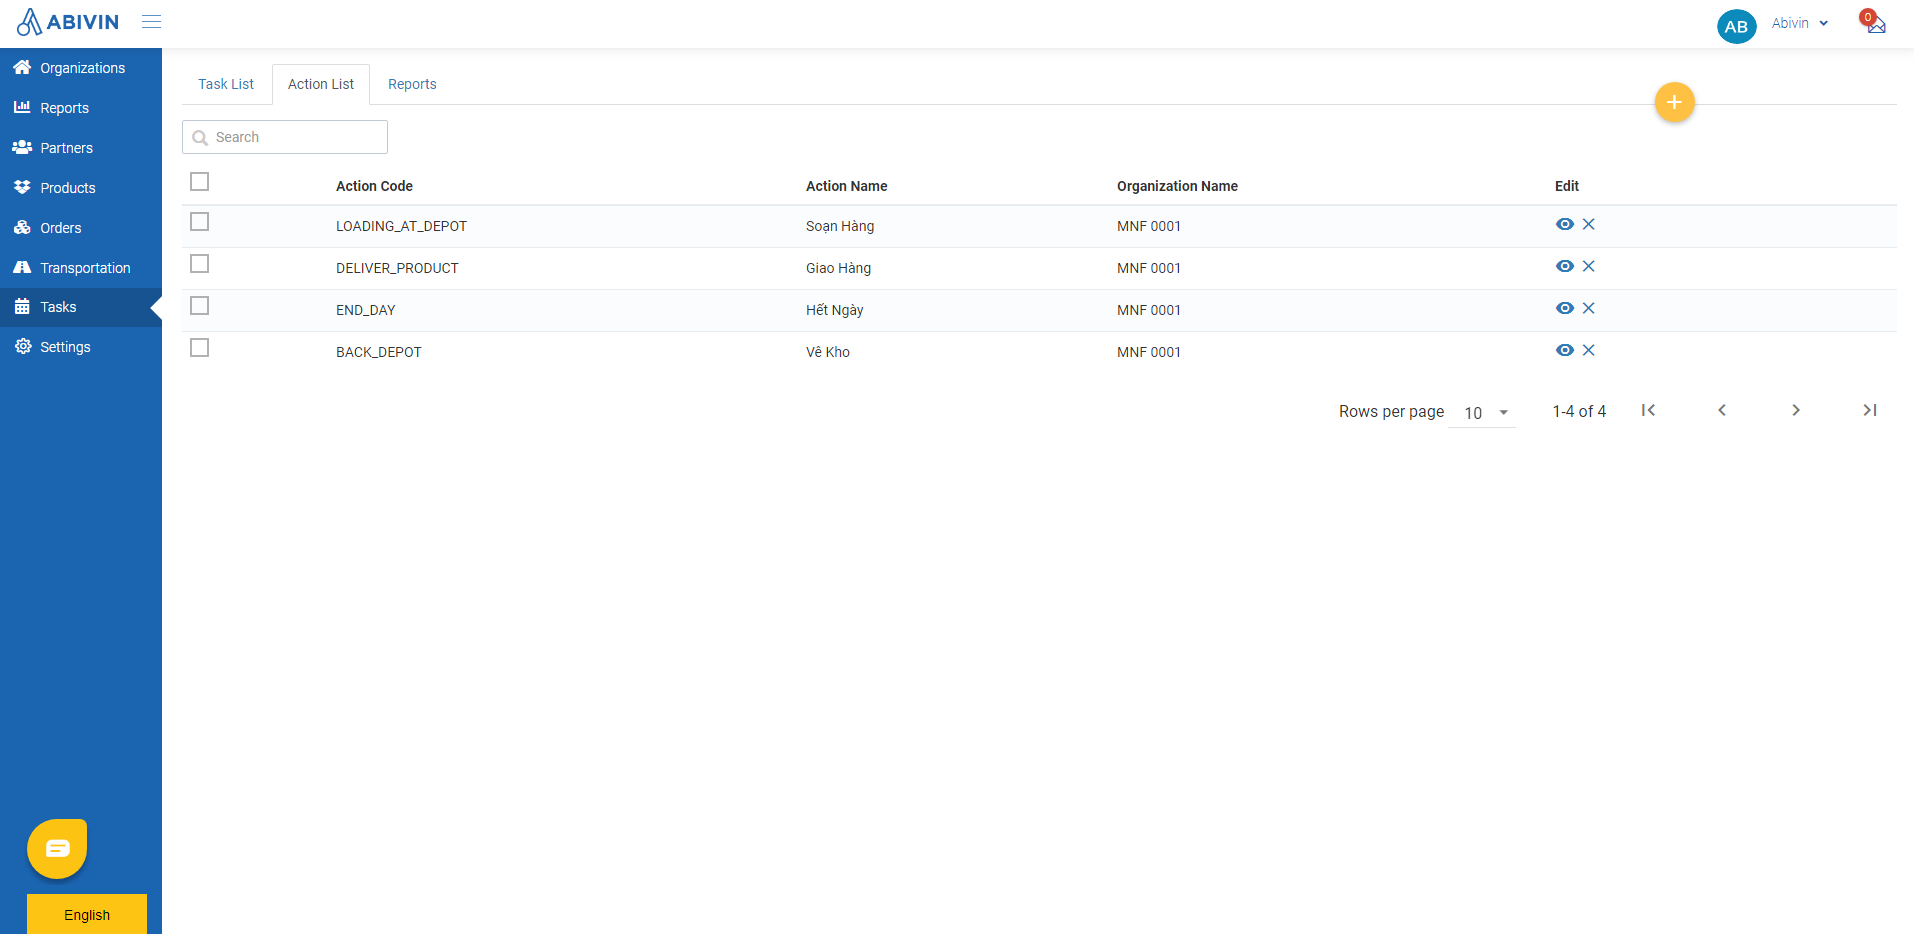
- In case there are no action code, you can create the action using Excel template. Below are the information fields of the actions
Action Code (Compulsory) | Action Name (Can be changed) | Organization Code |
|---|---|---|
LOADING_AT_DEPOT | Loading Products at Depot | Always use the organization code of the Manufacturer |
DELIVER_PRODUCT | Deliver Products to customer | Always use the organization code of the Manufacturer |
END_DAY | End of Day | Always use the organization code of the Manufacturer |
BACK_DEPOT | Back to Depot | Always use the organization code of the Manufacturer |
Create forms for actions
General steps
- Hover on the Action code for which you want to create form, then click on Form Builder icon

- You will be directed to the Form Builder screen, where you can start creating form for that Action code
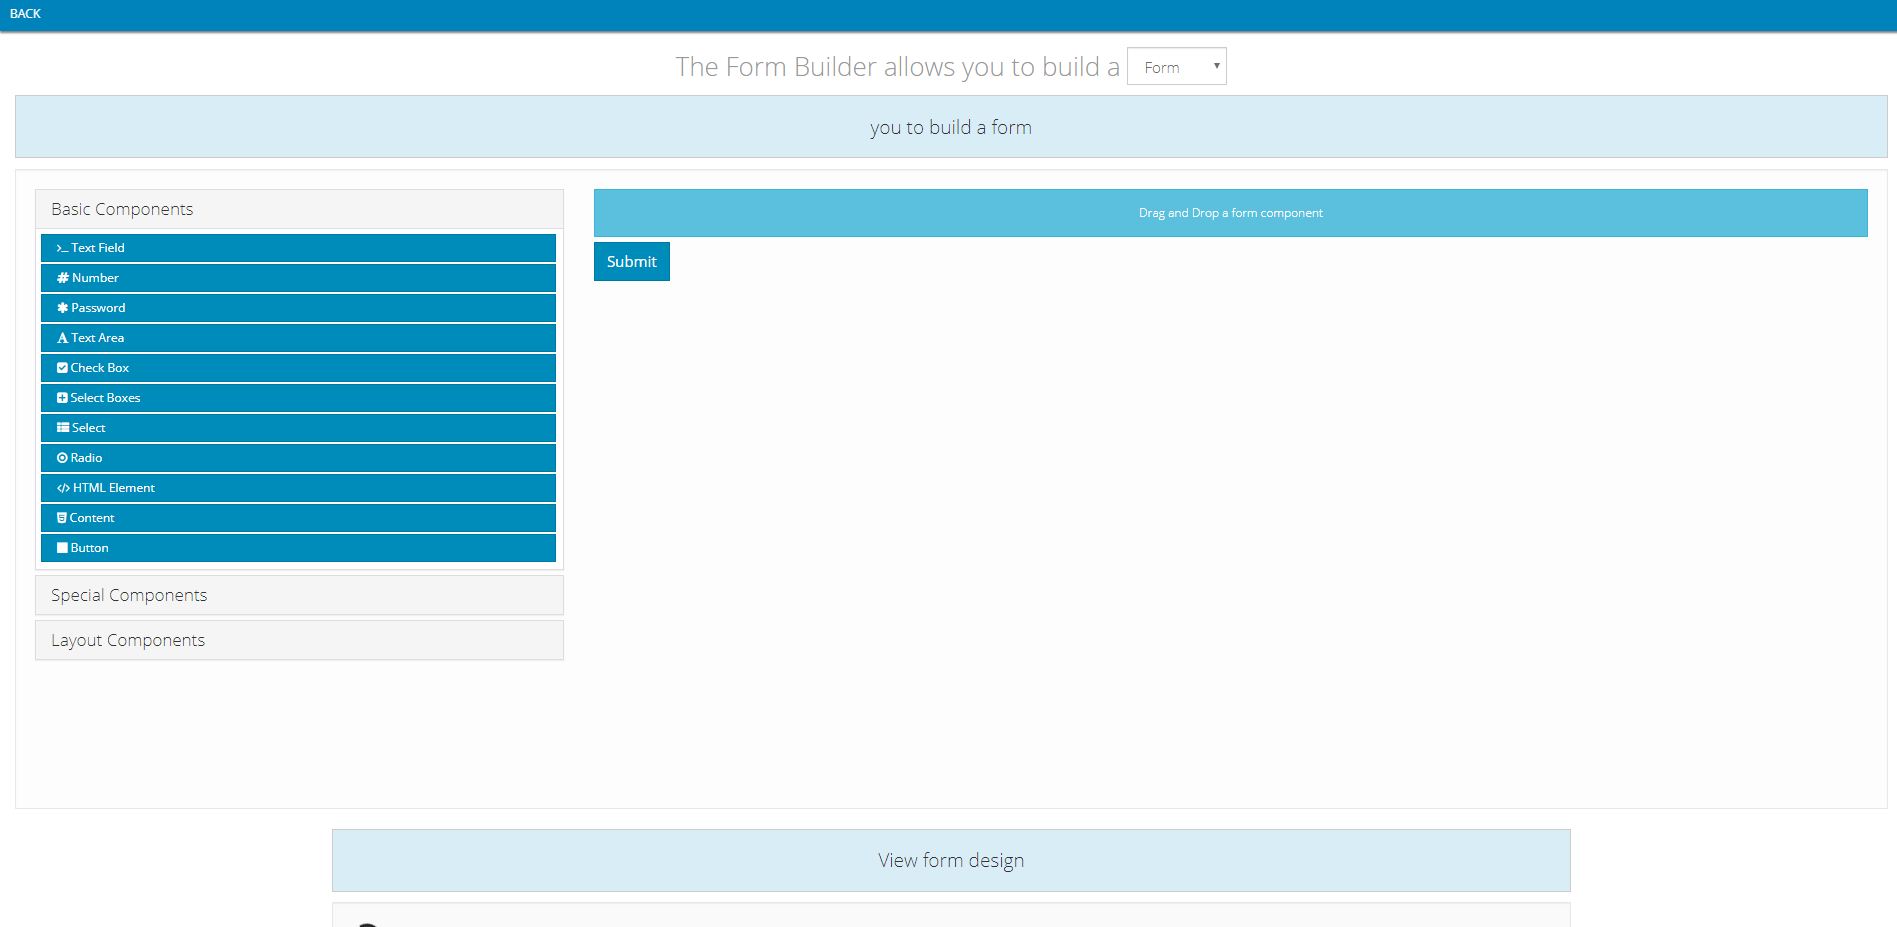
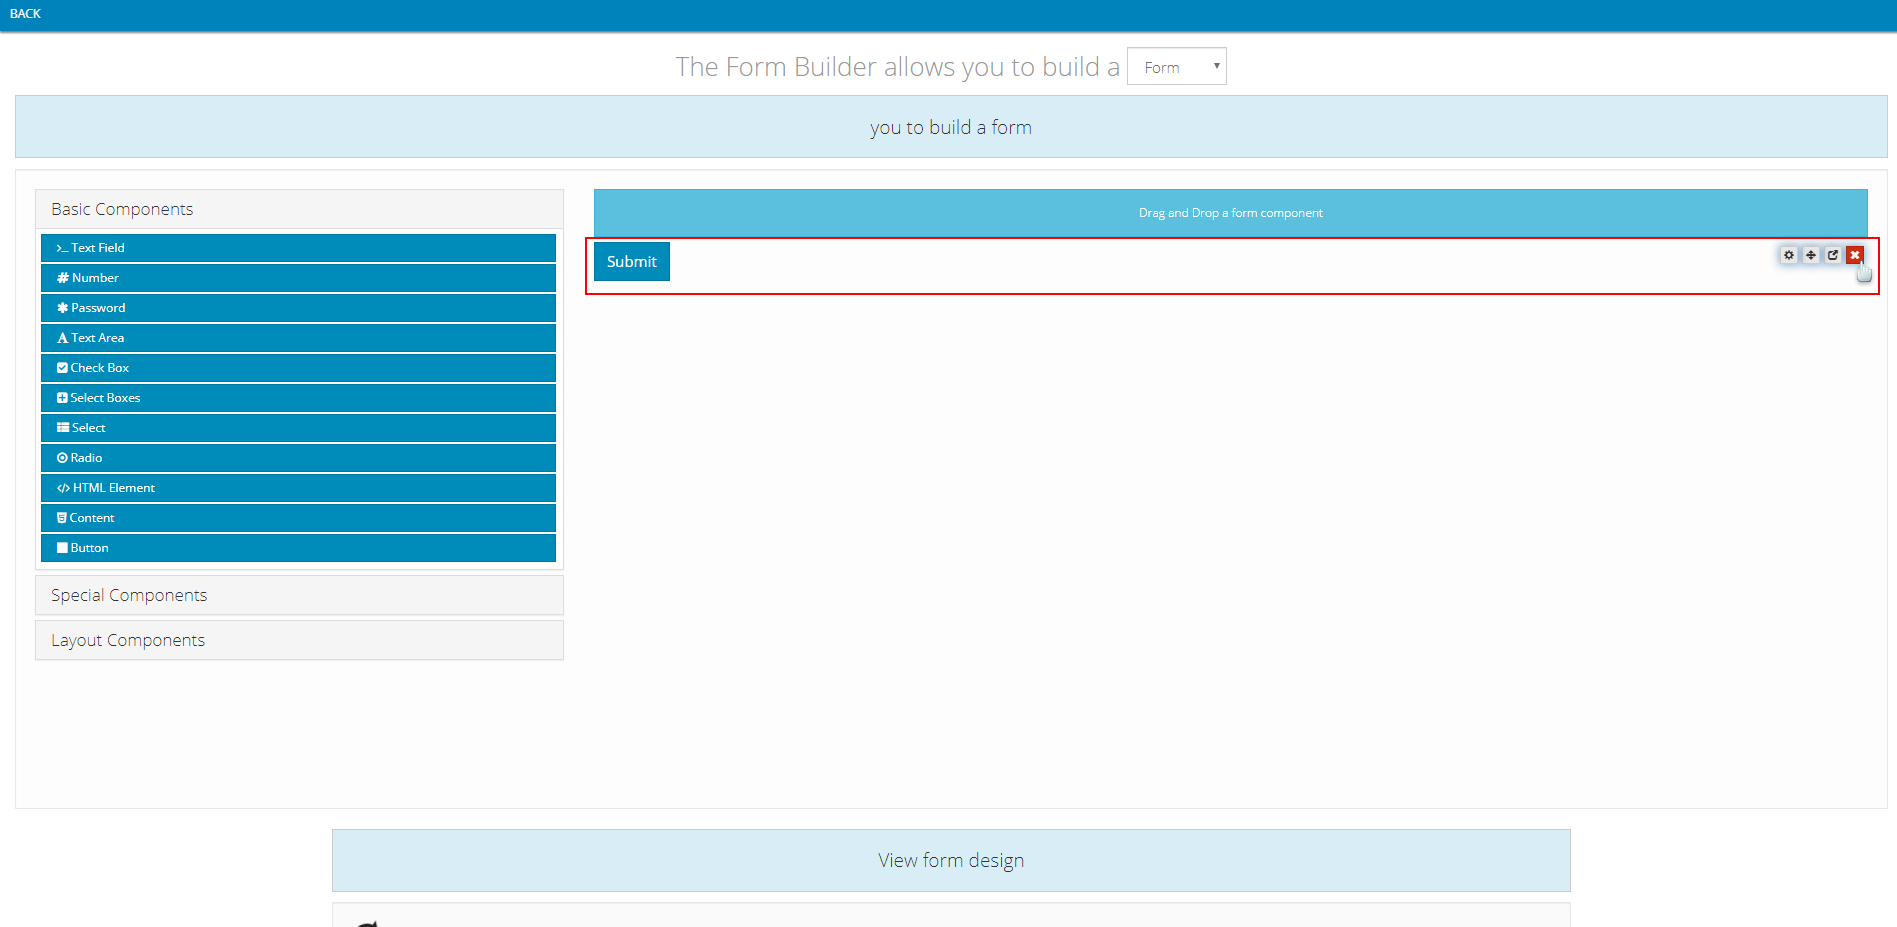
- You will see a blue Submit button. You need to remove it by hovering your mouse over it, then click on the red icon at the far right
- Now you can begin to create form for the Action code, by dragging the appropriate component on the left side to the right side
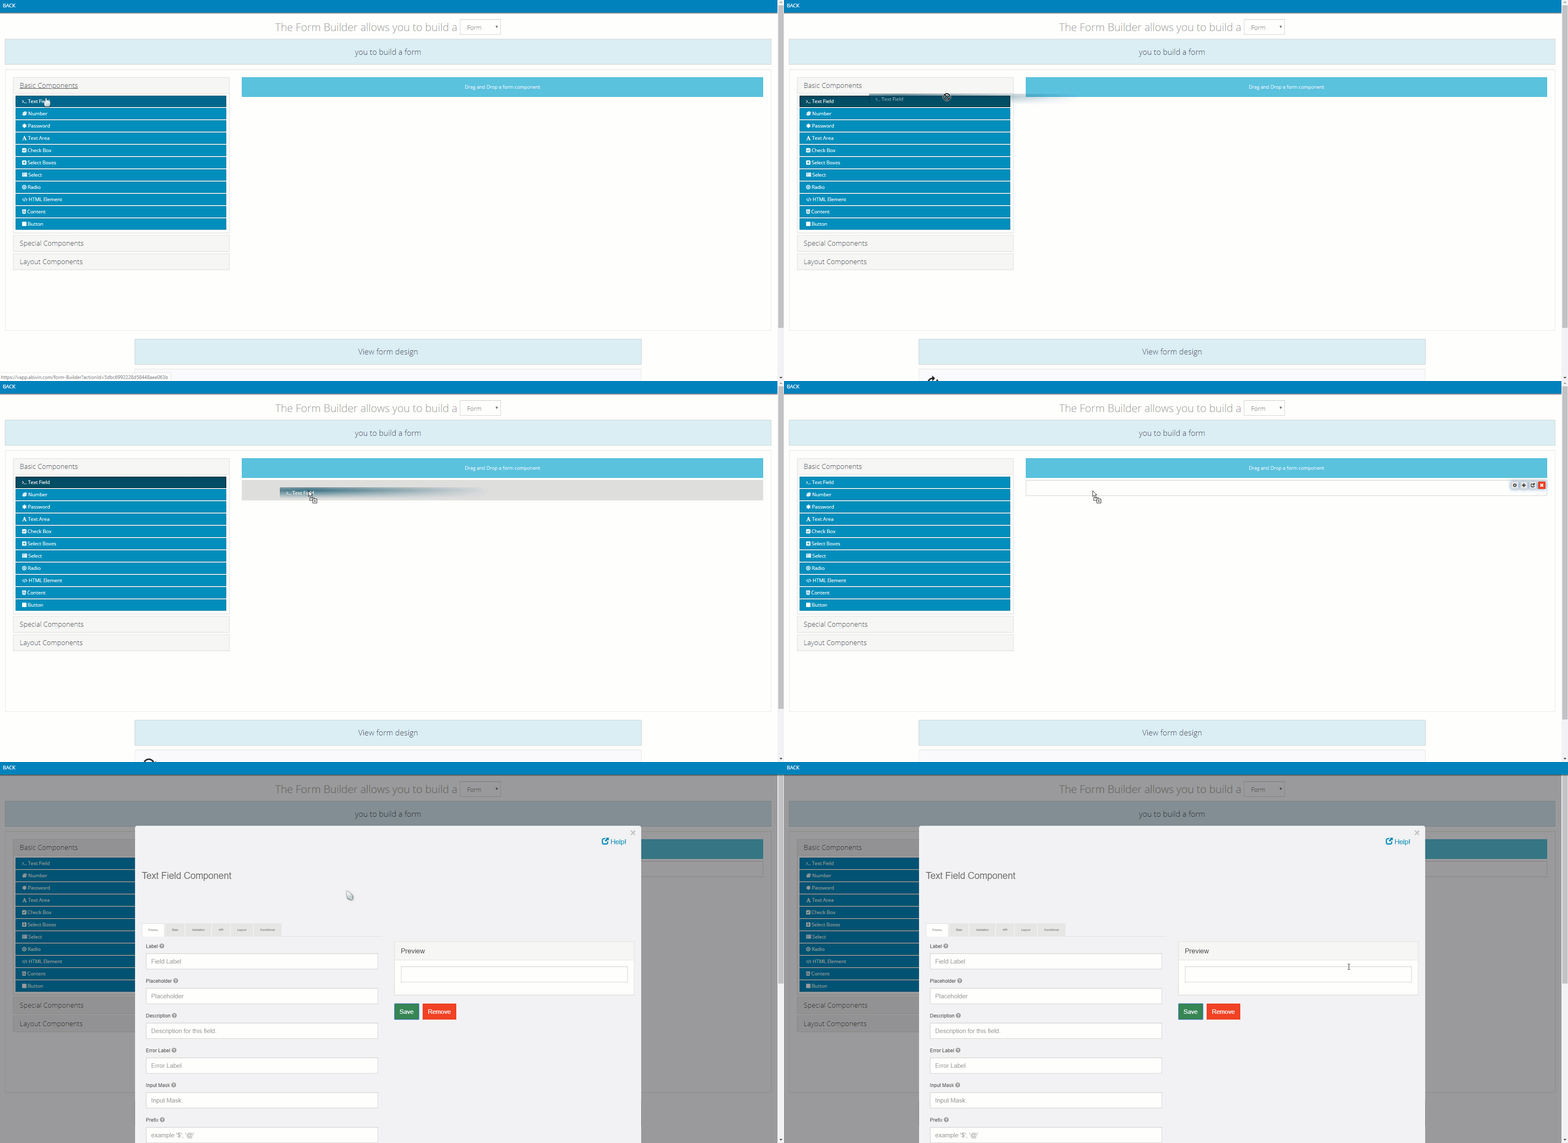
- The set up form of the component will appear. Input data into that form, then click Save
- We will specify the detail for each component below
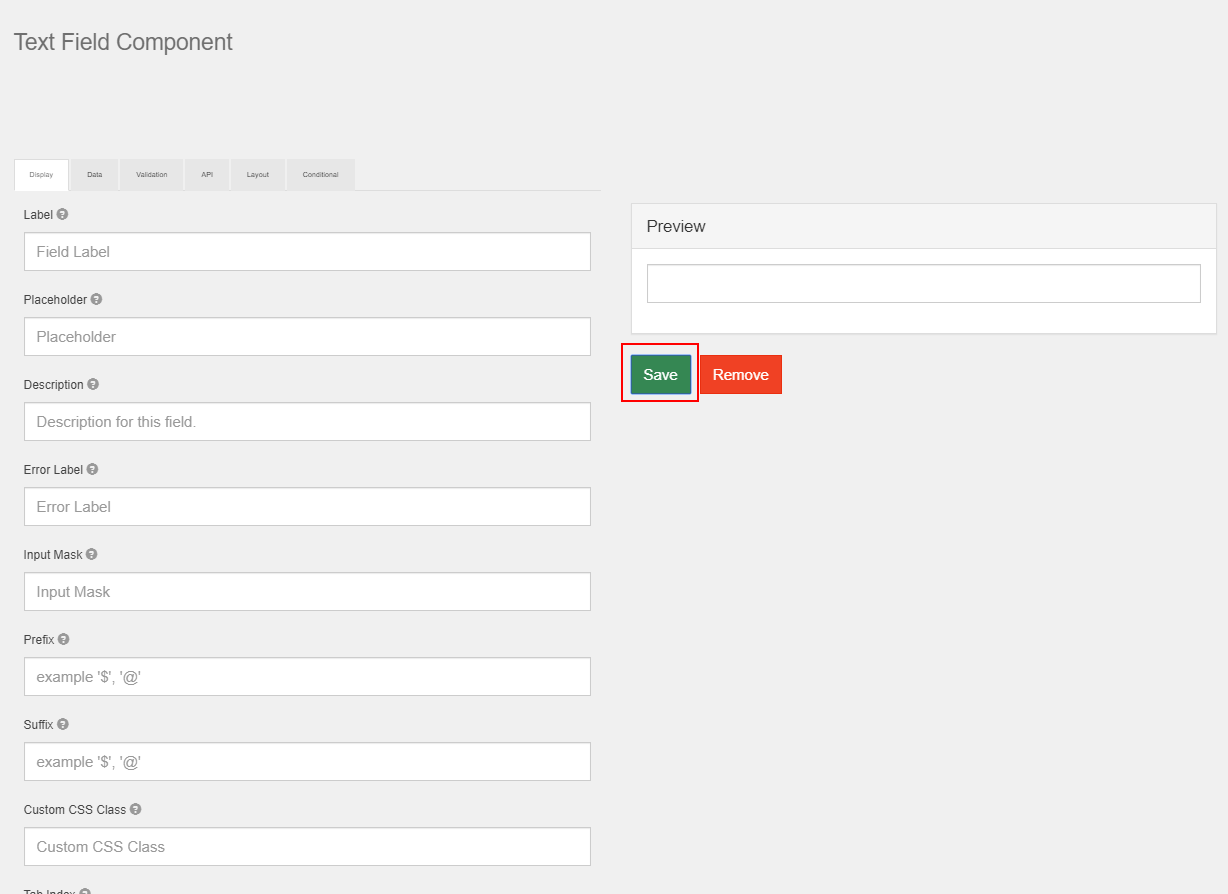
- Note: For some special components, you can drag other components inside them
- After you have finished configuring all components, scroll down the Form Builder screen, then click on Save View to finish creating the form for the Action code
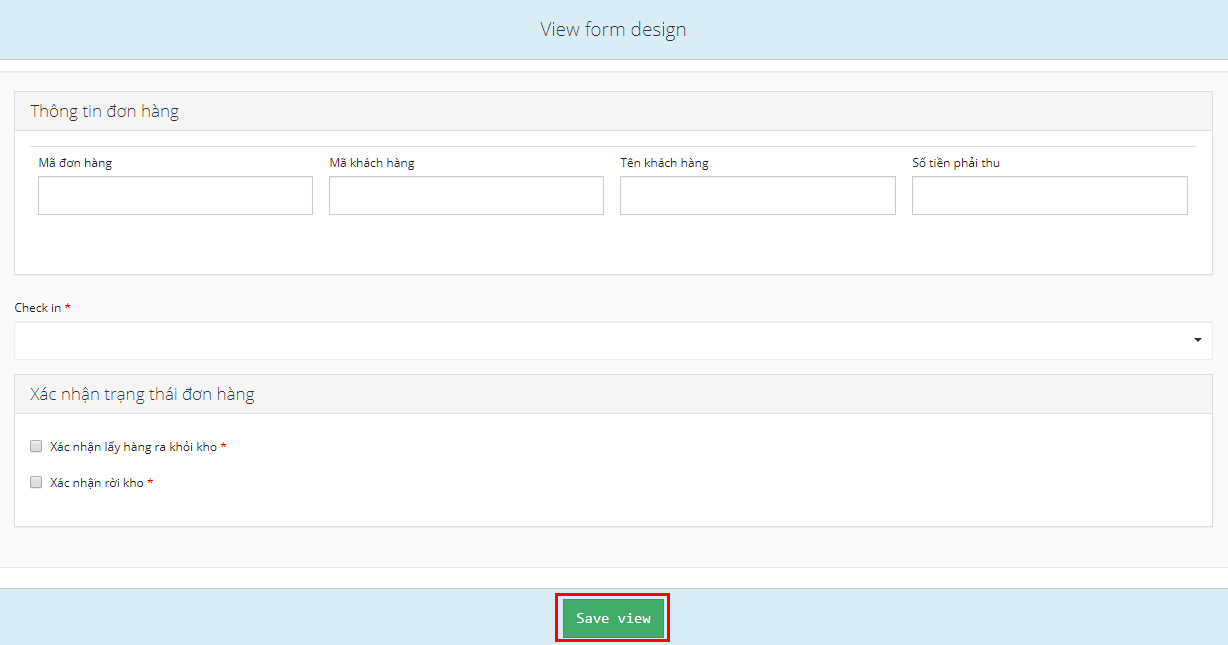
- A pop up will appear to let you know you have succeeded creating the form

- Click on Back to get back to the Action list tab. You can continue to create forms for other Action codes
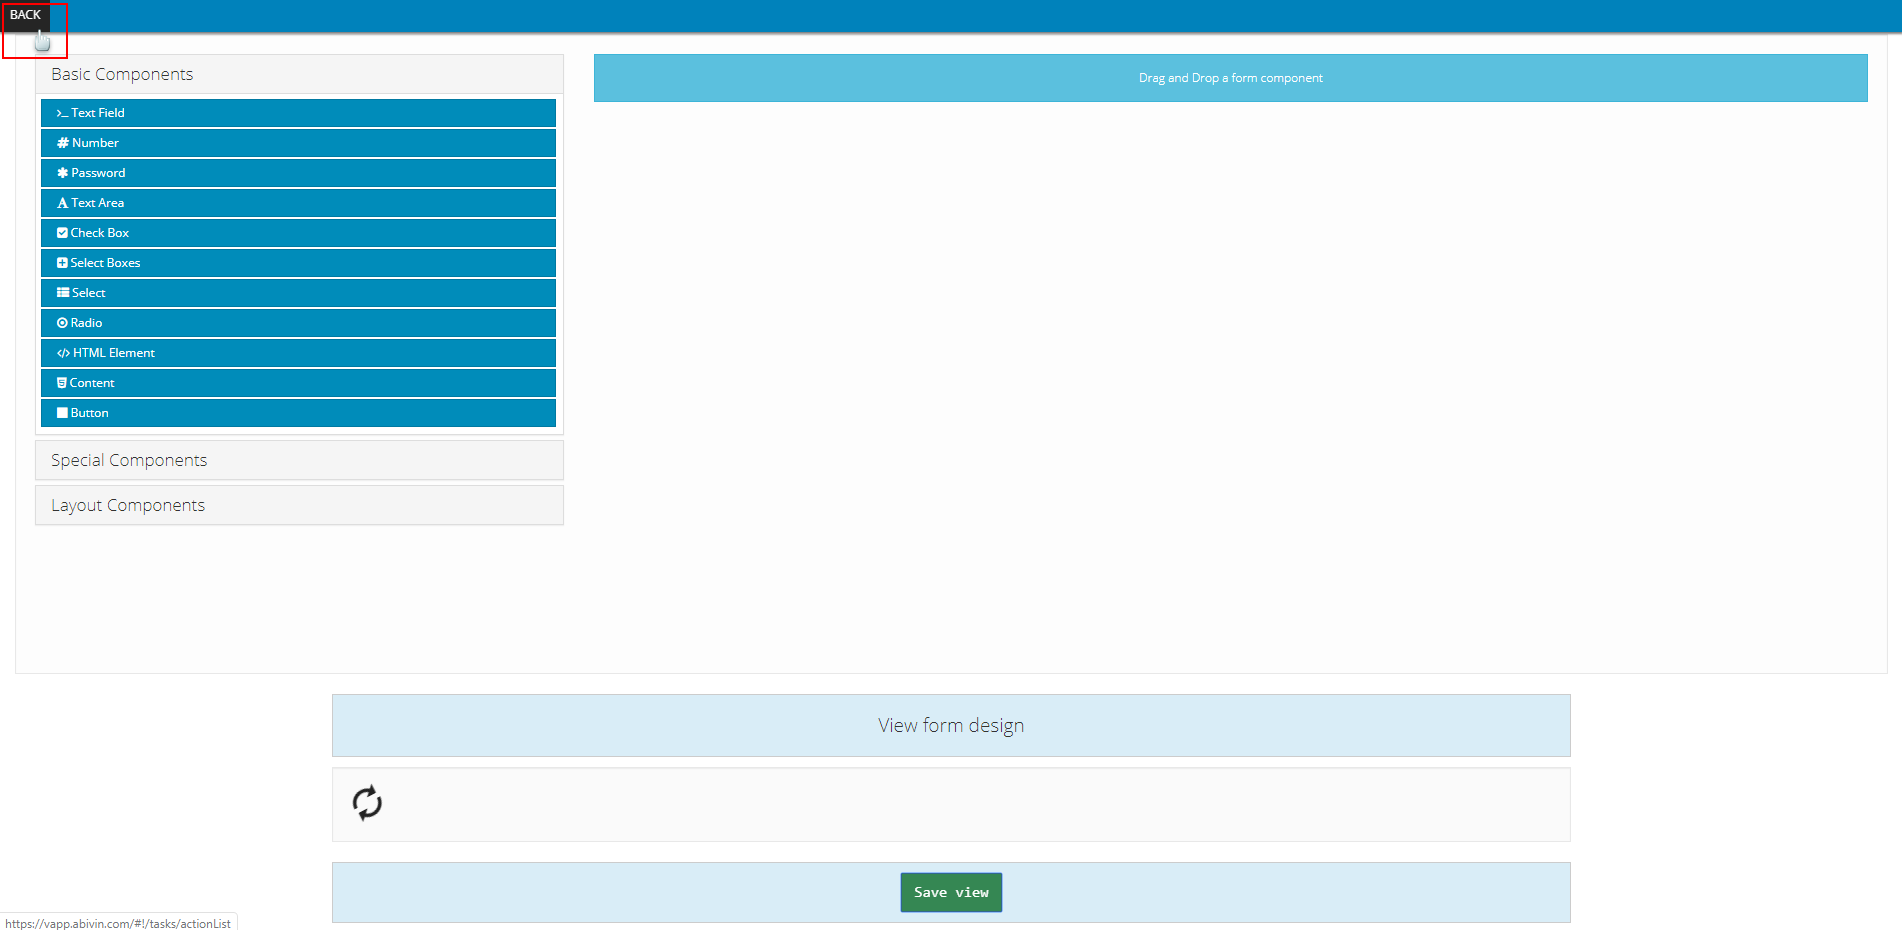
- We will now move on to create form for each action code
LOADING_AT_DEPOT Action code
1.1 Order Information panel
- Component used: Layout Components > Panel
- Position: On top
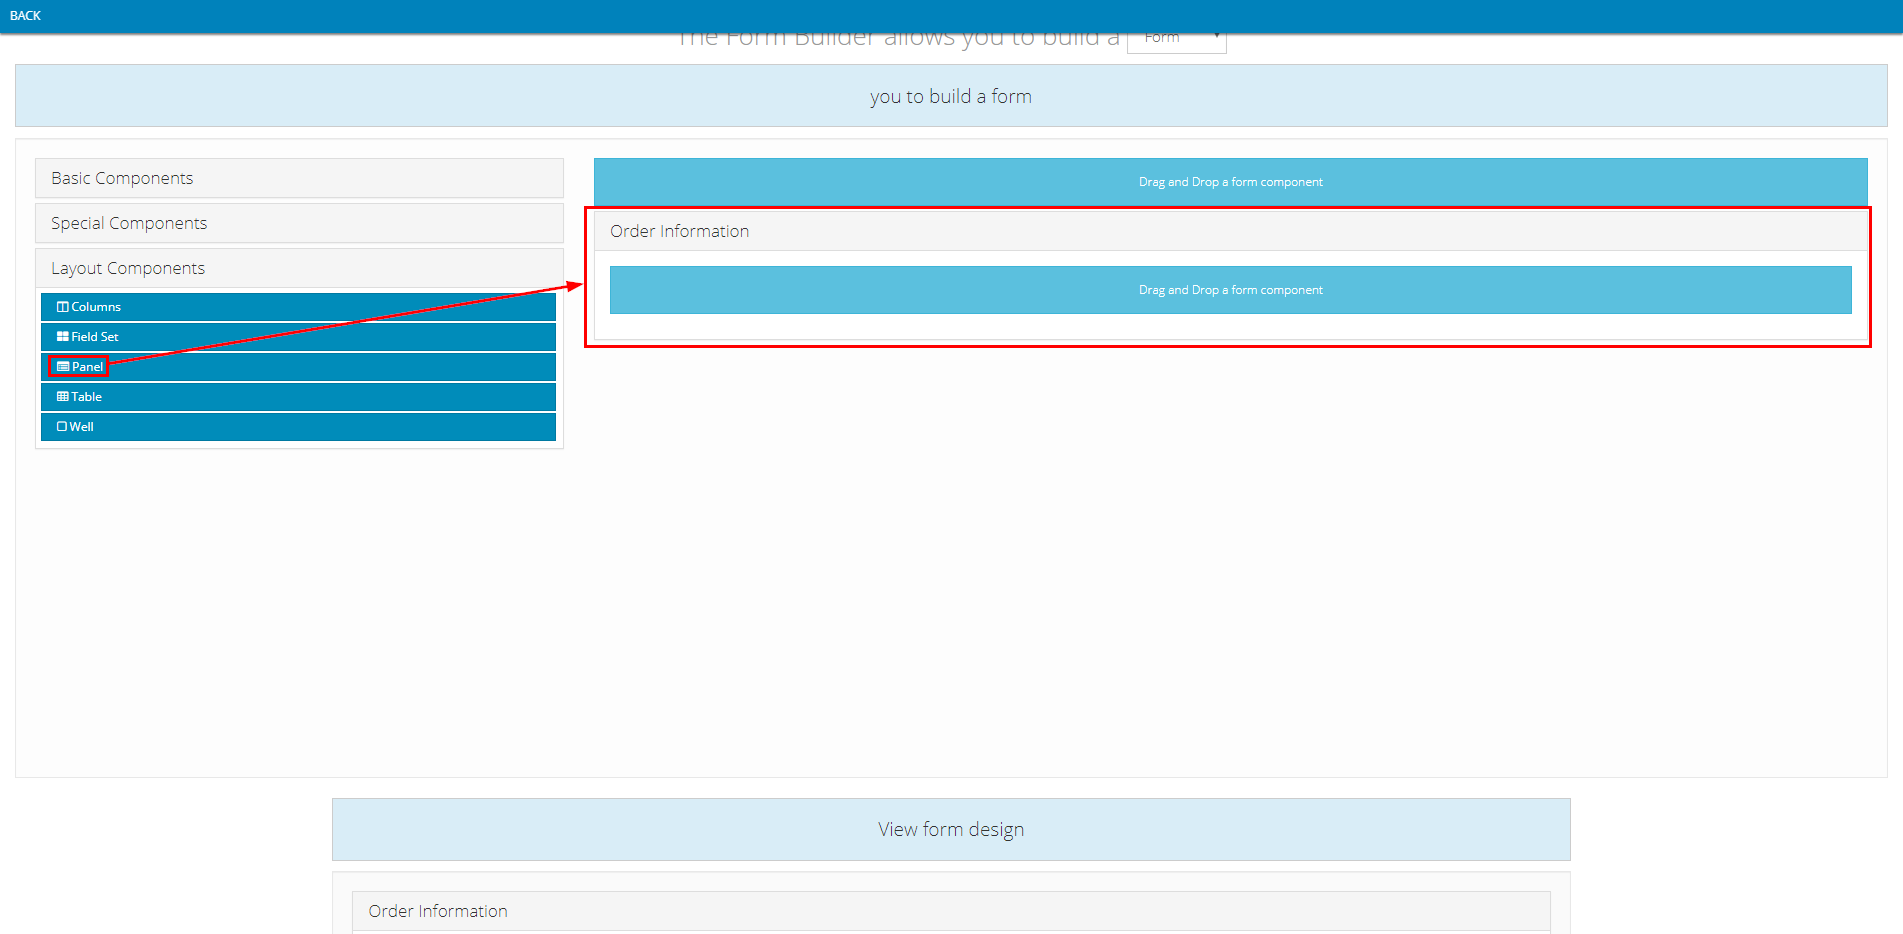
- Component content:
- Note: The value input into Title field can be changed freely

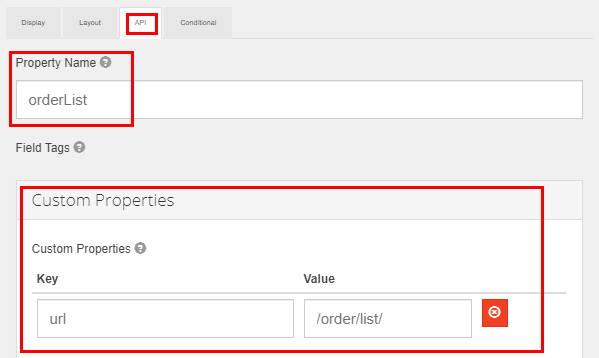
1.2 Order Information Table
- Component used: Layout Components > Table
- Position: Inside Order Information Panel component
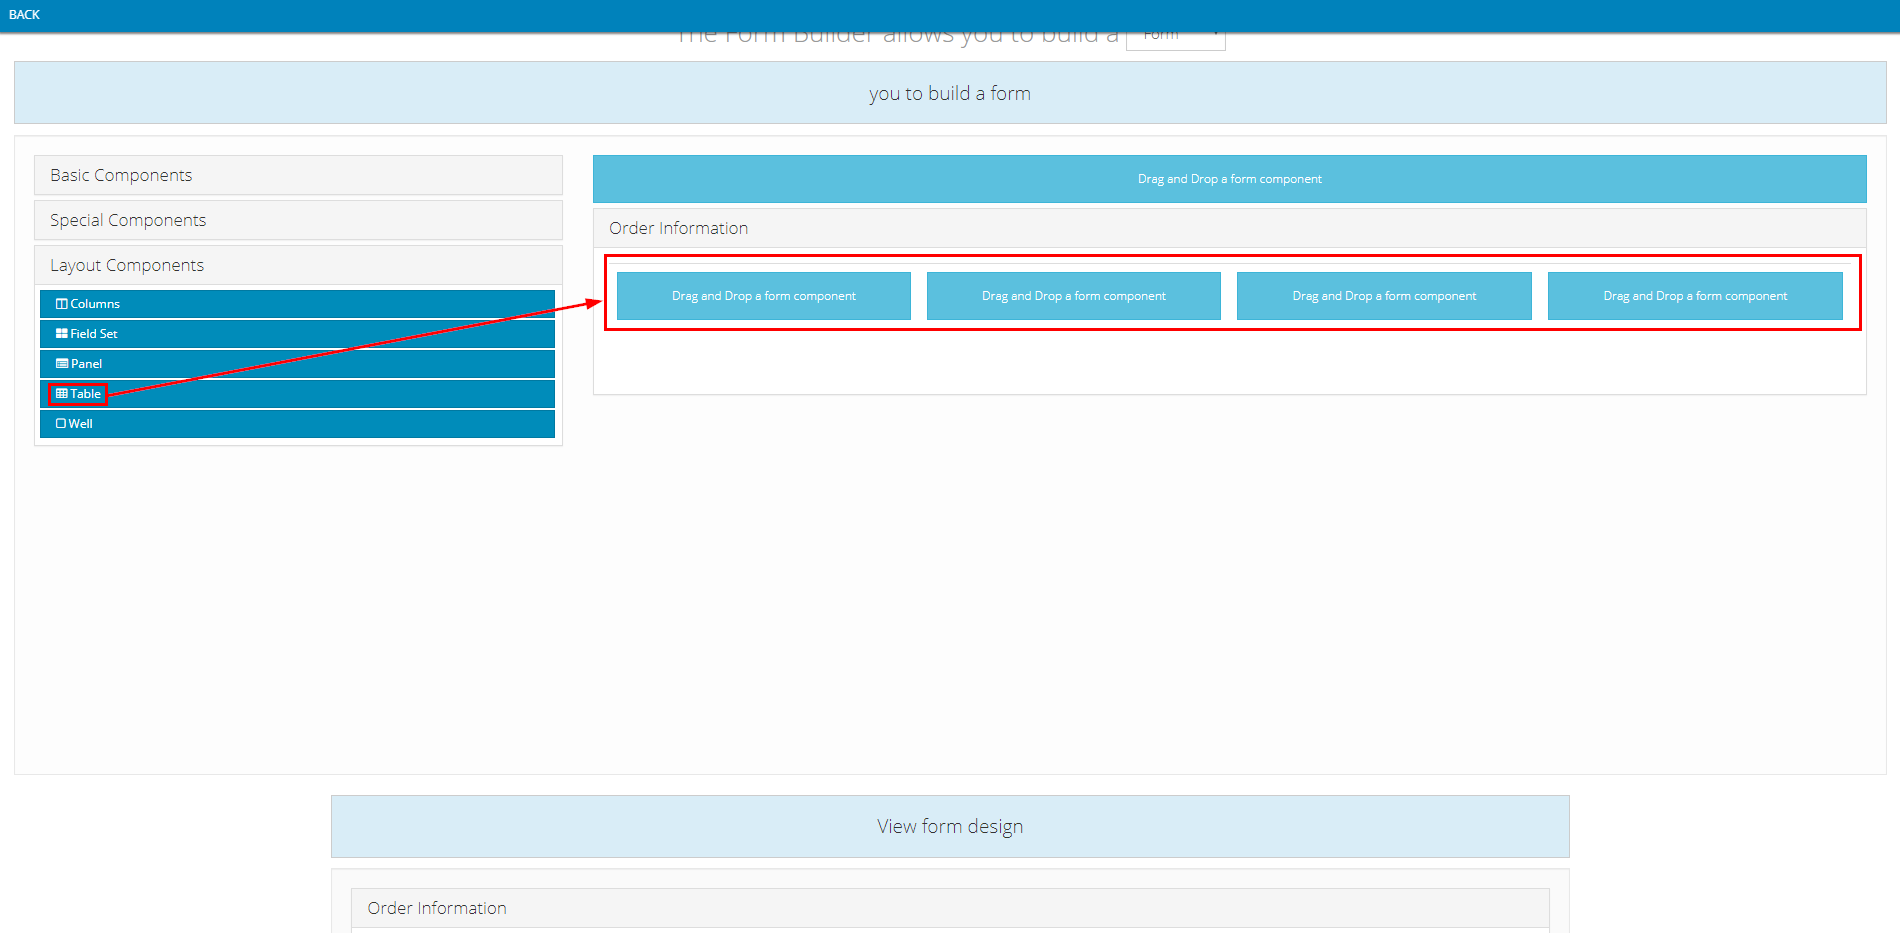
- Component content:
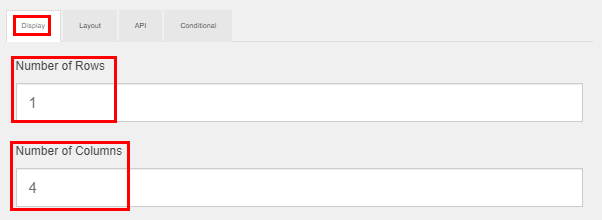
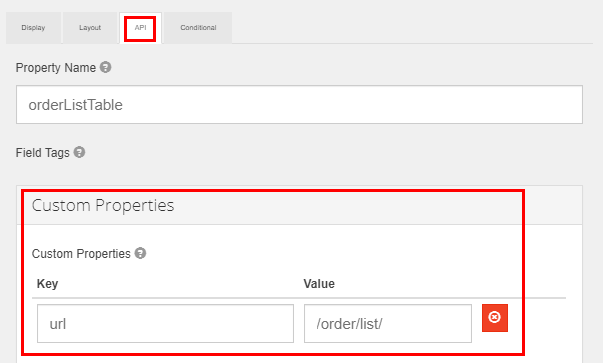
1.3 Order Code Field
- Component used: Basic Components > Text Field
- Position: Inside Order Information Table component
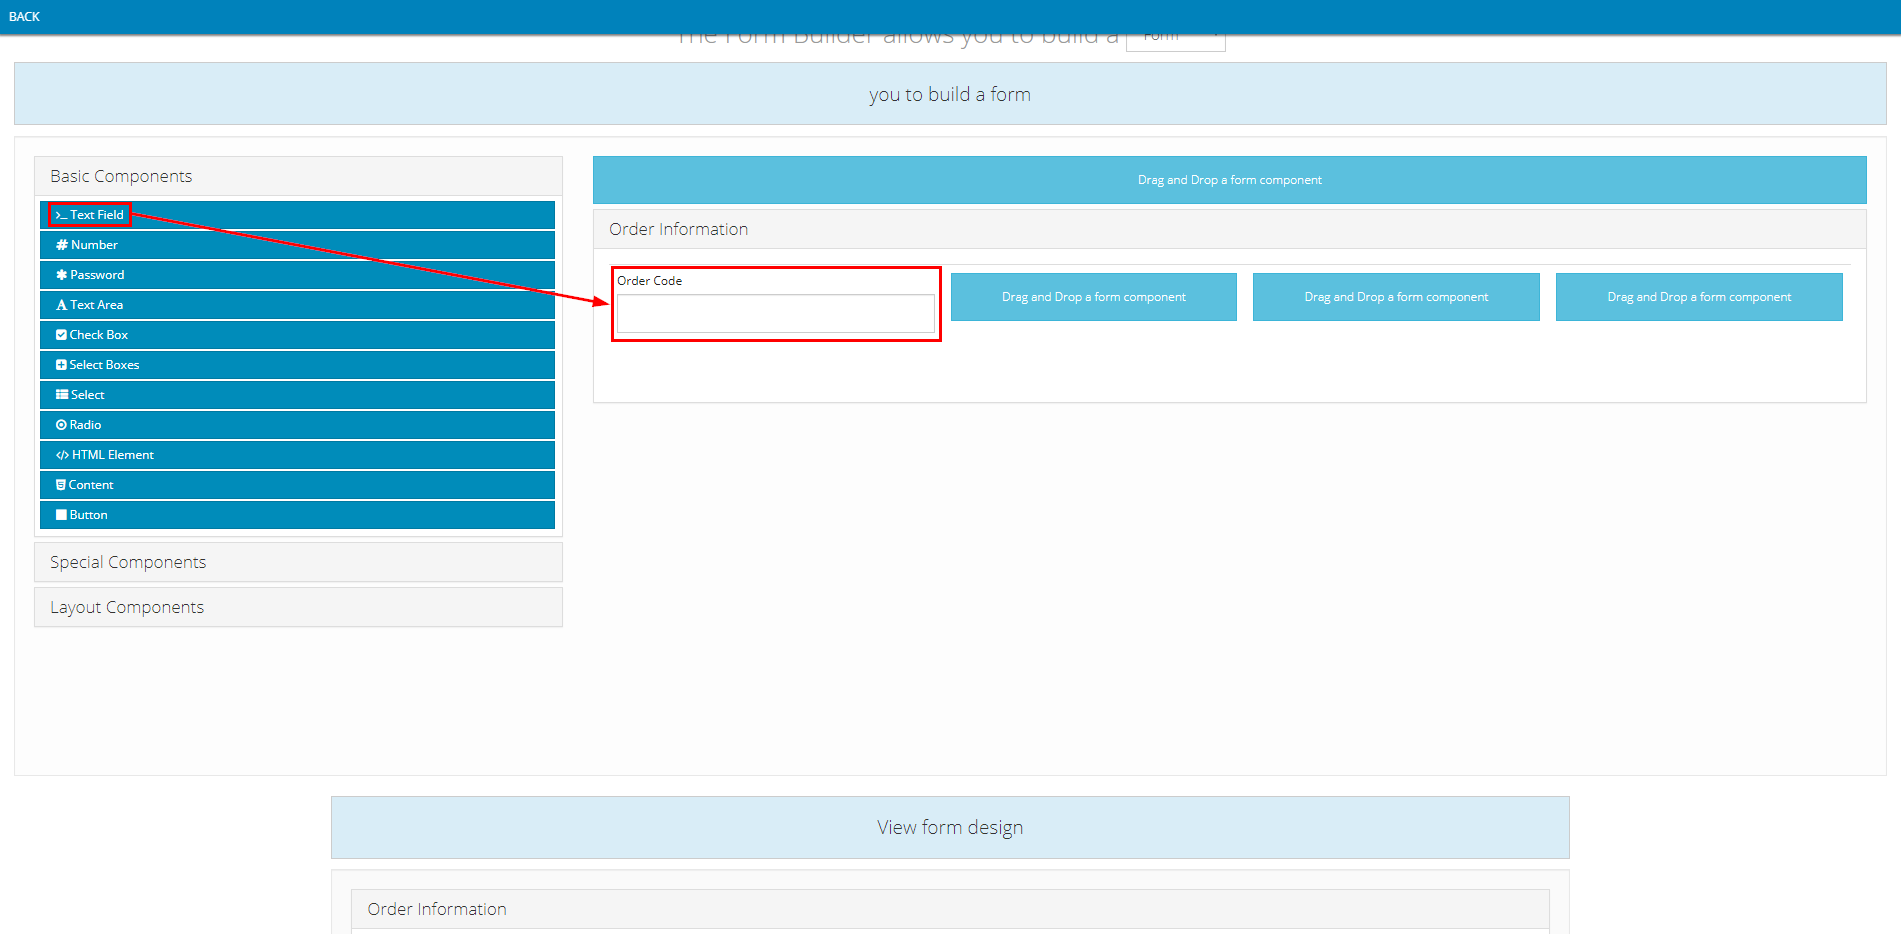
- Component content:
- Note: The value input into Label field can be changed freely


1.4 Customer Code Field
- Component used: Basic Components > Text Field
- Position: Inside Order Information Table component, to the right of Order Code Field component
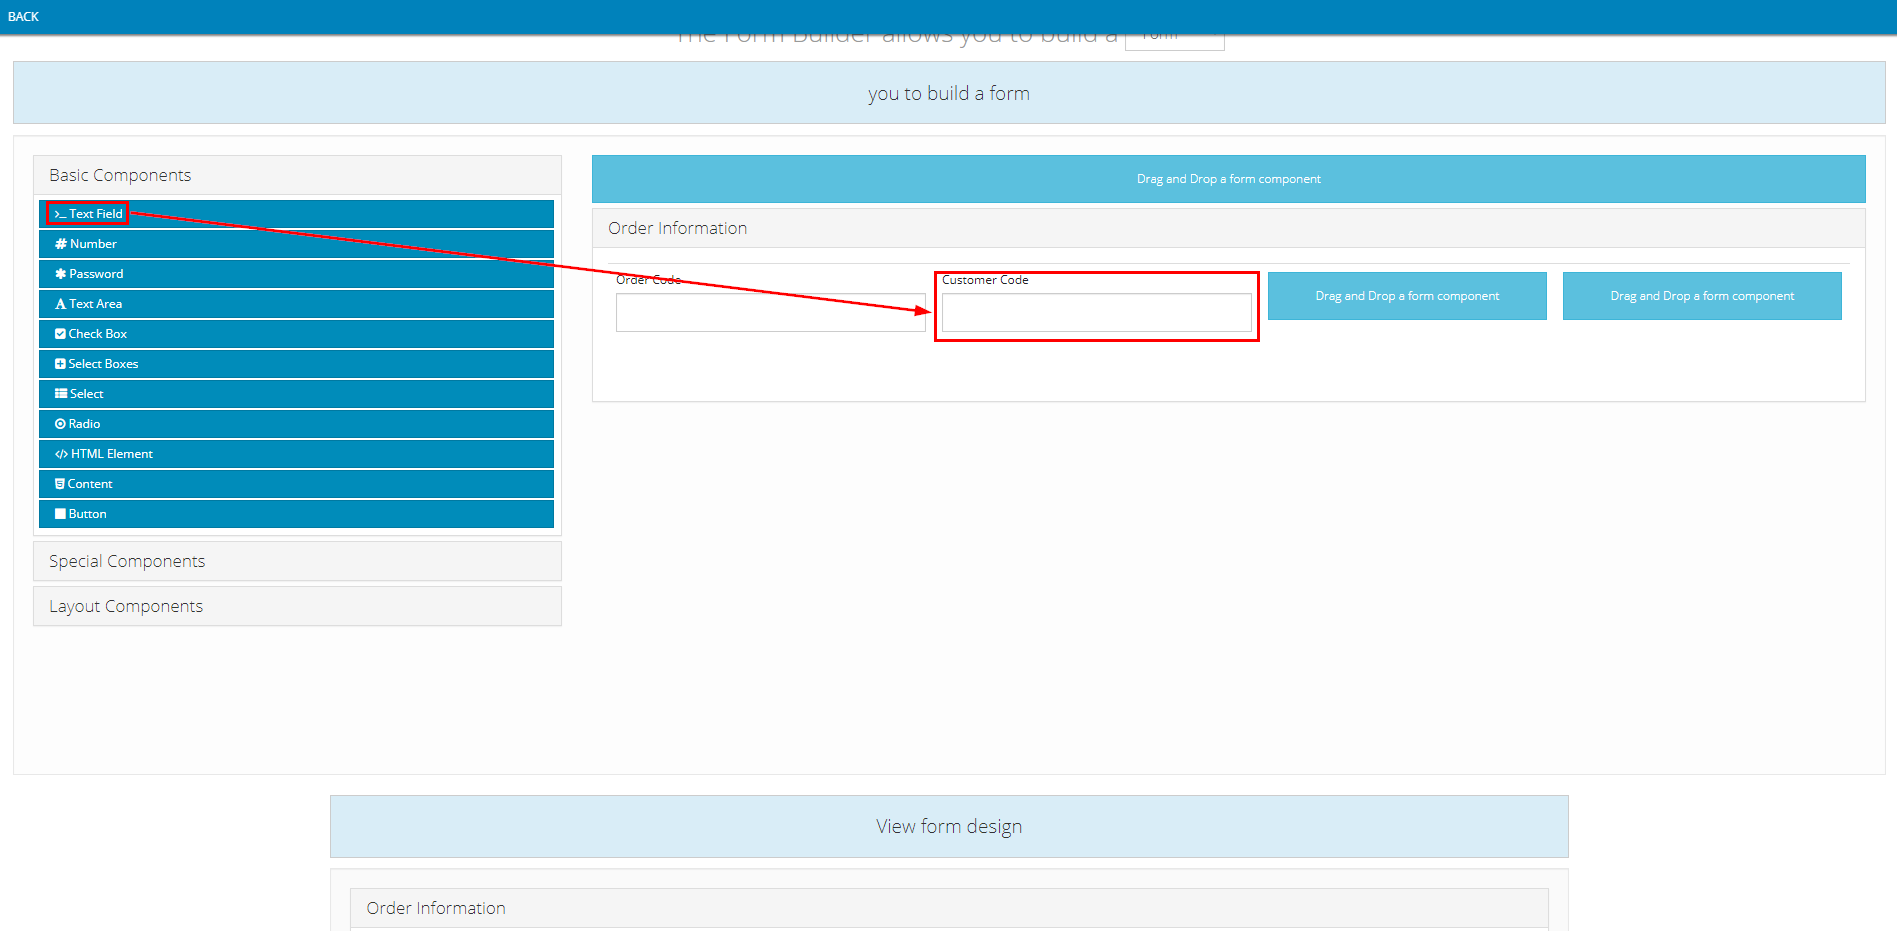
- Component content:
- Note: The value input into Label field can be changed freely


1.5 Customer Name Field
- Component used: Basic Components > Text Field
- Position: Inside Order Information Table component, to the right of Customer Code Field component
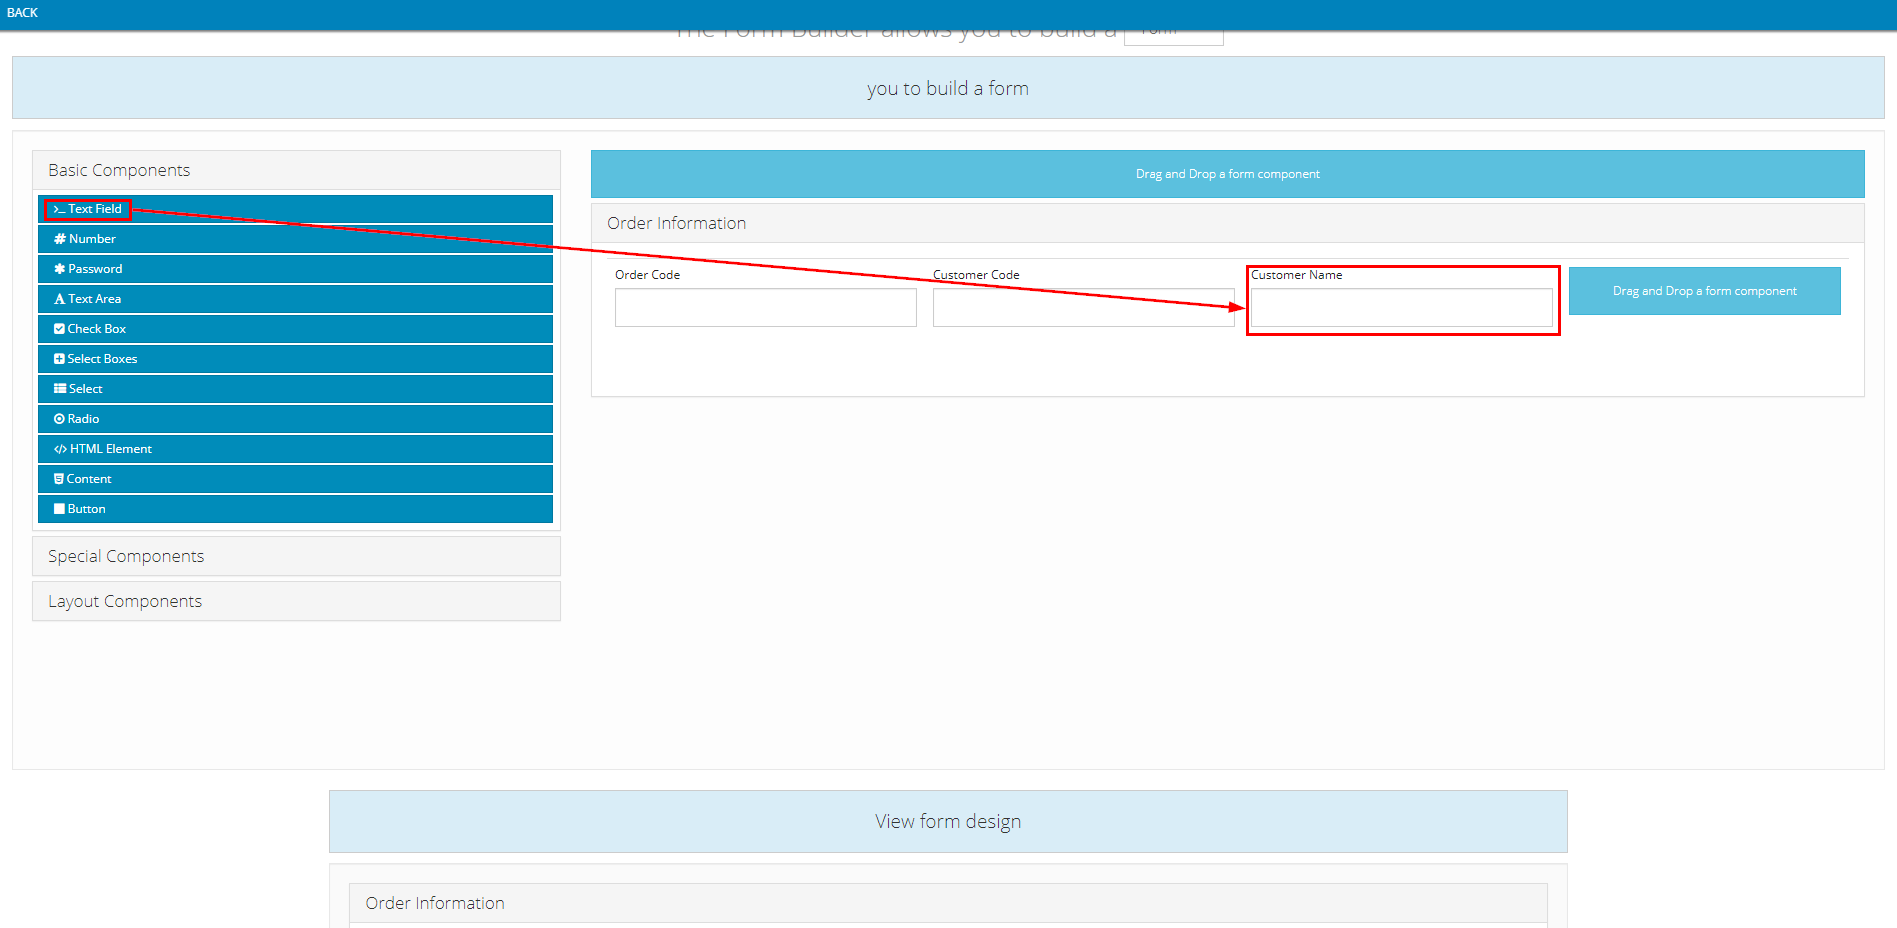
- Component content:
- Note: The value input into Label field can be changed freely


1.6 Amount of Money to be collected Field
- Component used: Basic Components > Text Field
- Position: Inside Order Information Table component, to the right of Customer Name Field component
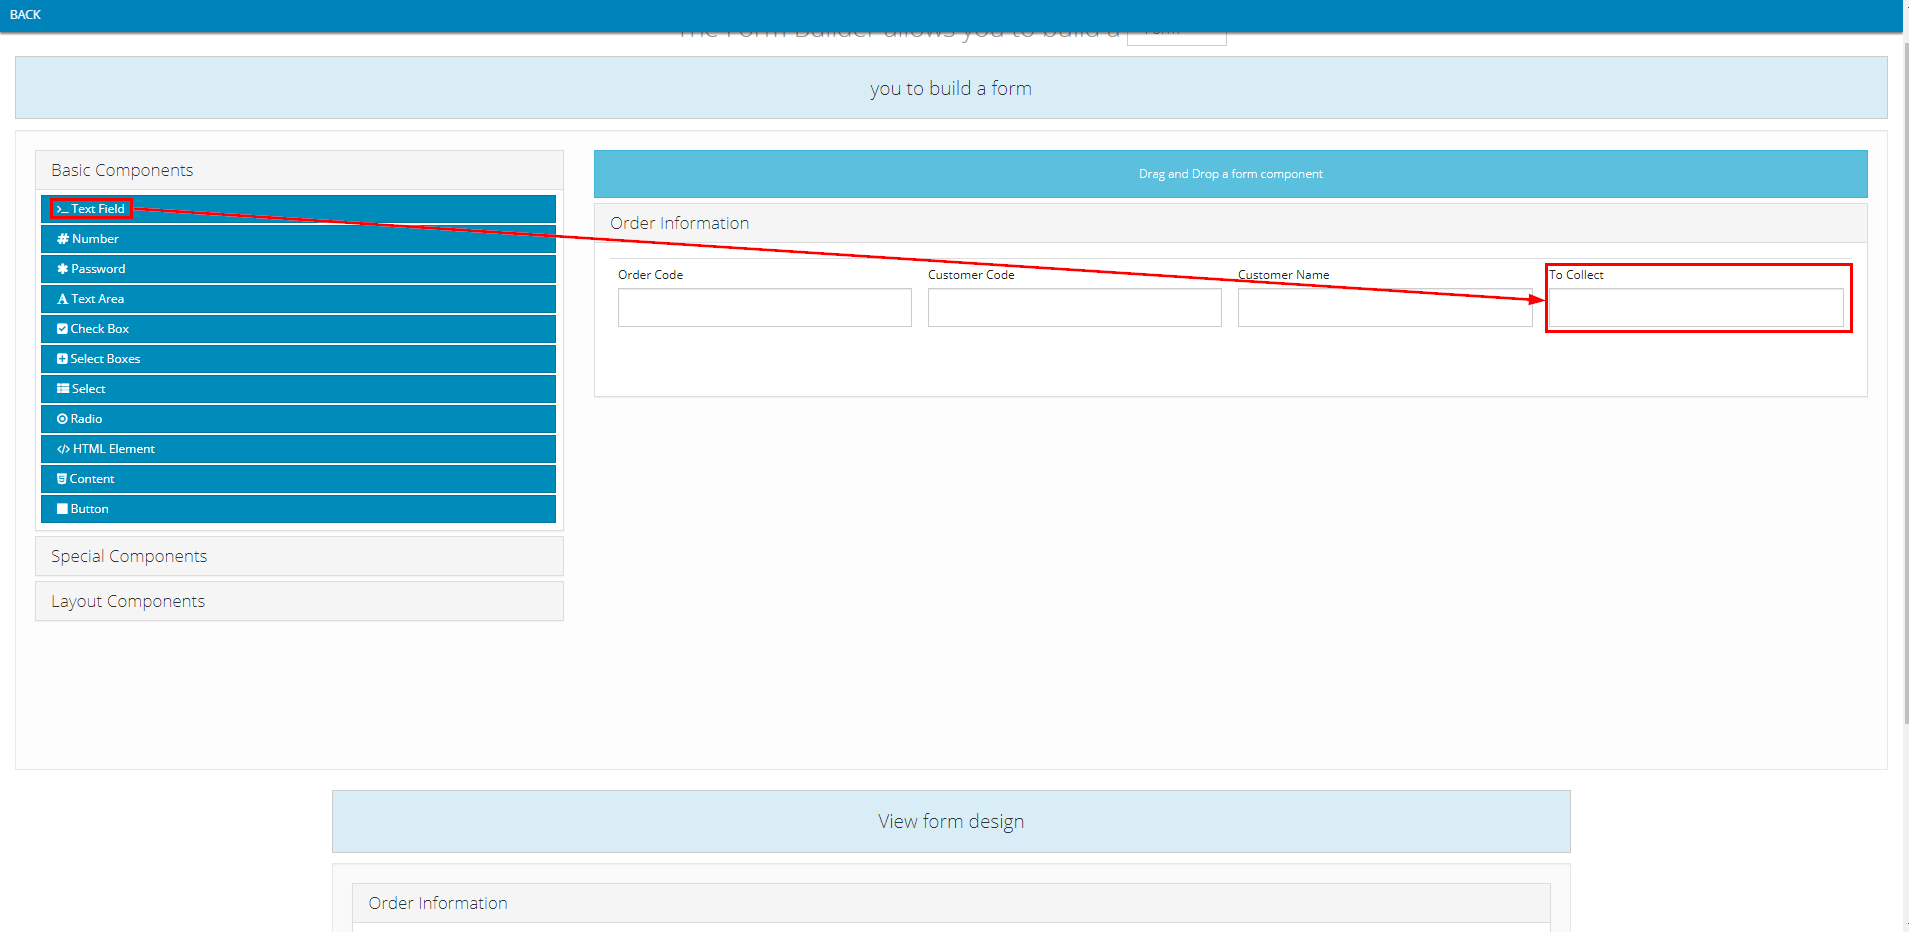
- Component content:
- Note: The value input into Label field can be changed freely


1.7 Check In panel
- There are two options on how the driver performs the Check In action
1.7.1 Check In with the coordinate information of the location where the driver is standing
- Component used: Special Components > Address
- Position: Below Order Information panel component
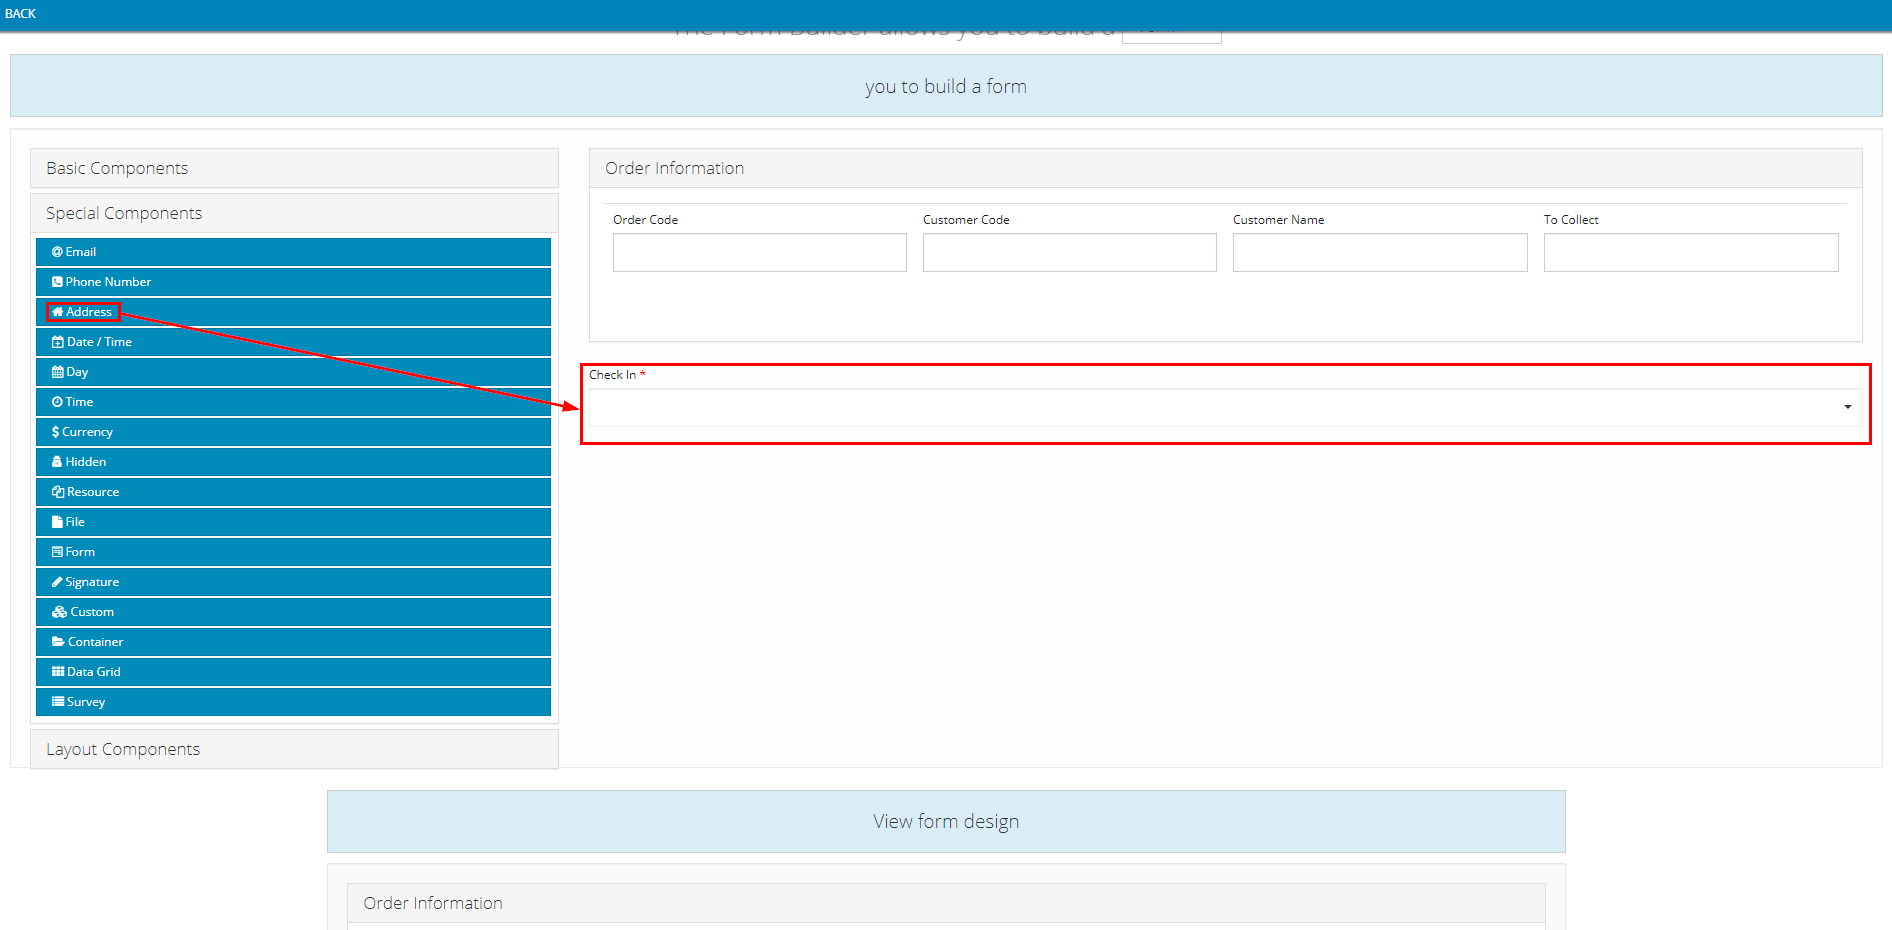
- Component content:

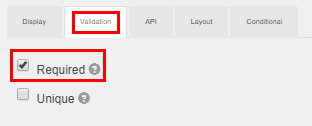
1.7.2 Check In with an image of the location where the driver is standing
- Component used: Special Components > File
- Position: Below Order Information panel component
- Component content:
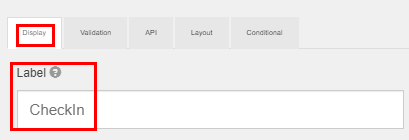

1.8 Order Status Confirmation panel
- Component used: Layout Components > Panel
- Position: Below Check In panel component
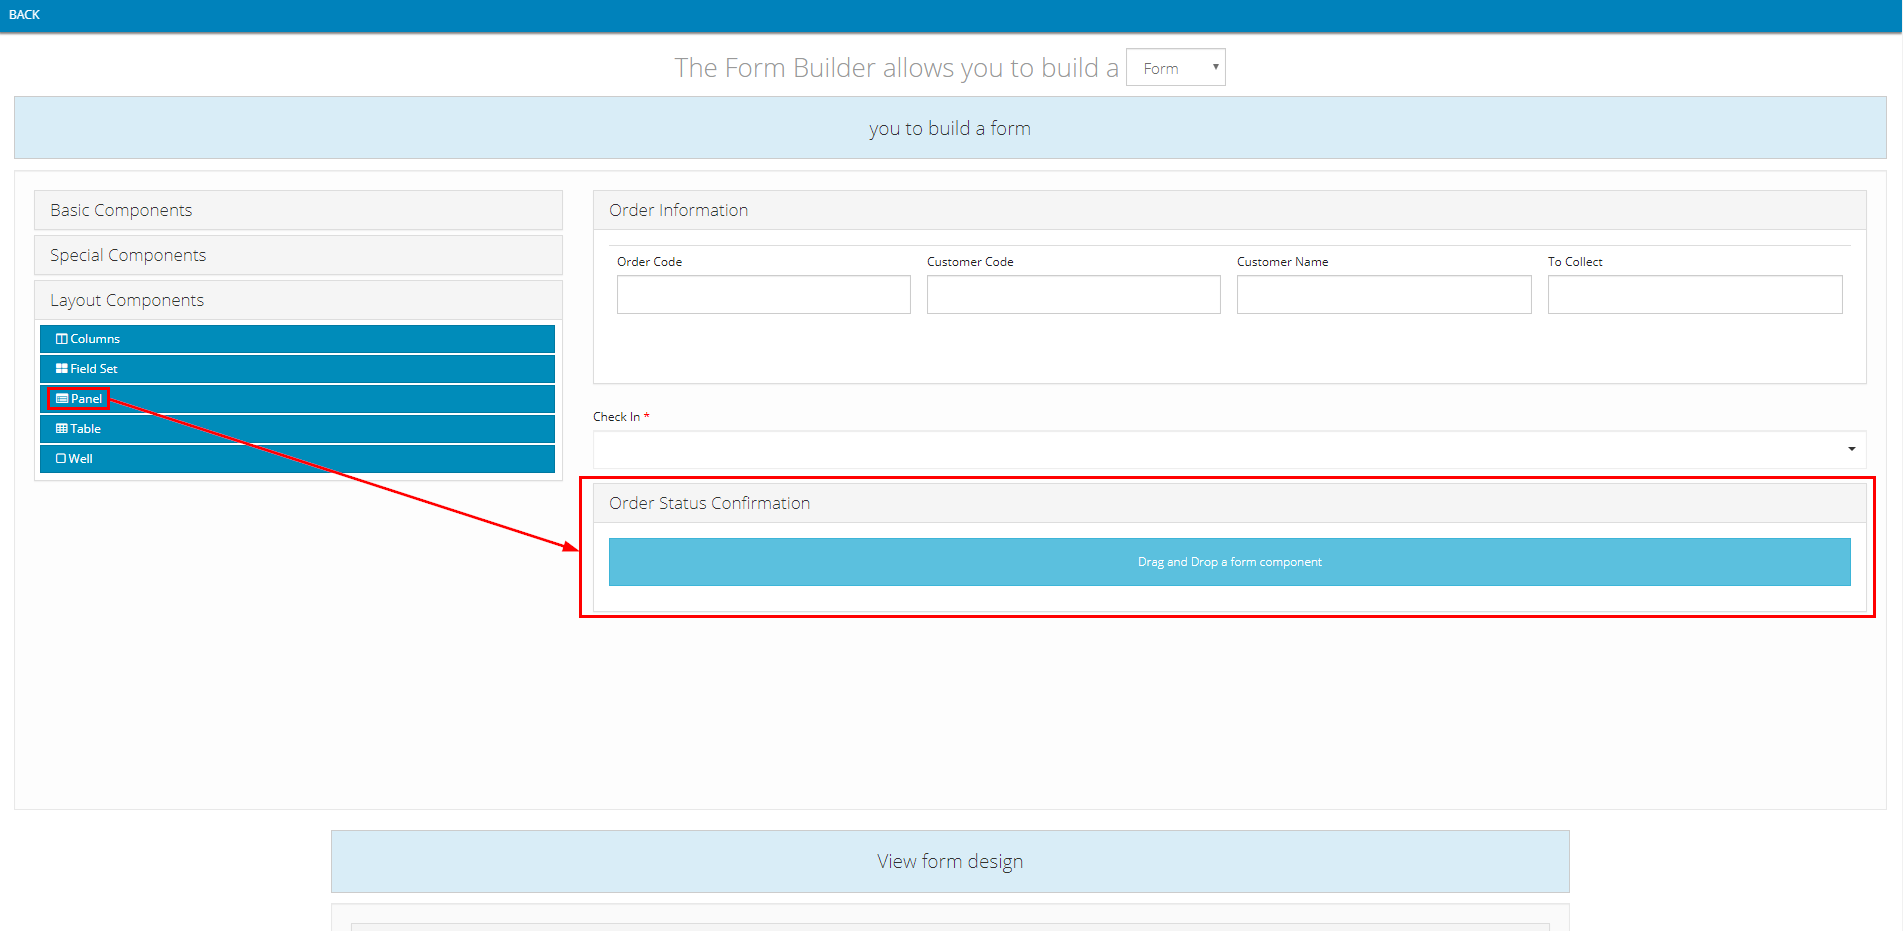
- Component content:
- Note: The value input into Title field can be changed freely

1.9 Confirm to have taken products out of the warehouse Checkbox
- Position: Inside Order Status Confirmation panel component
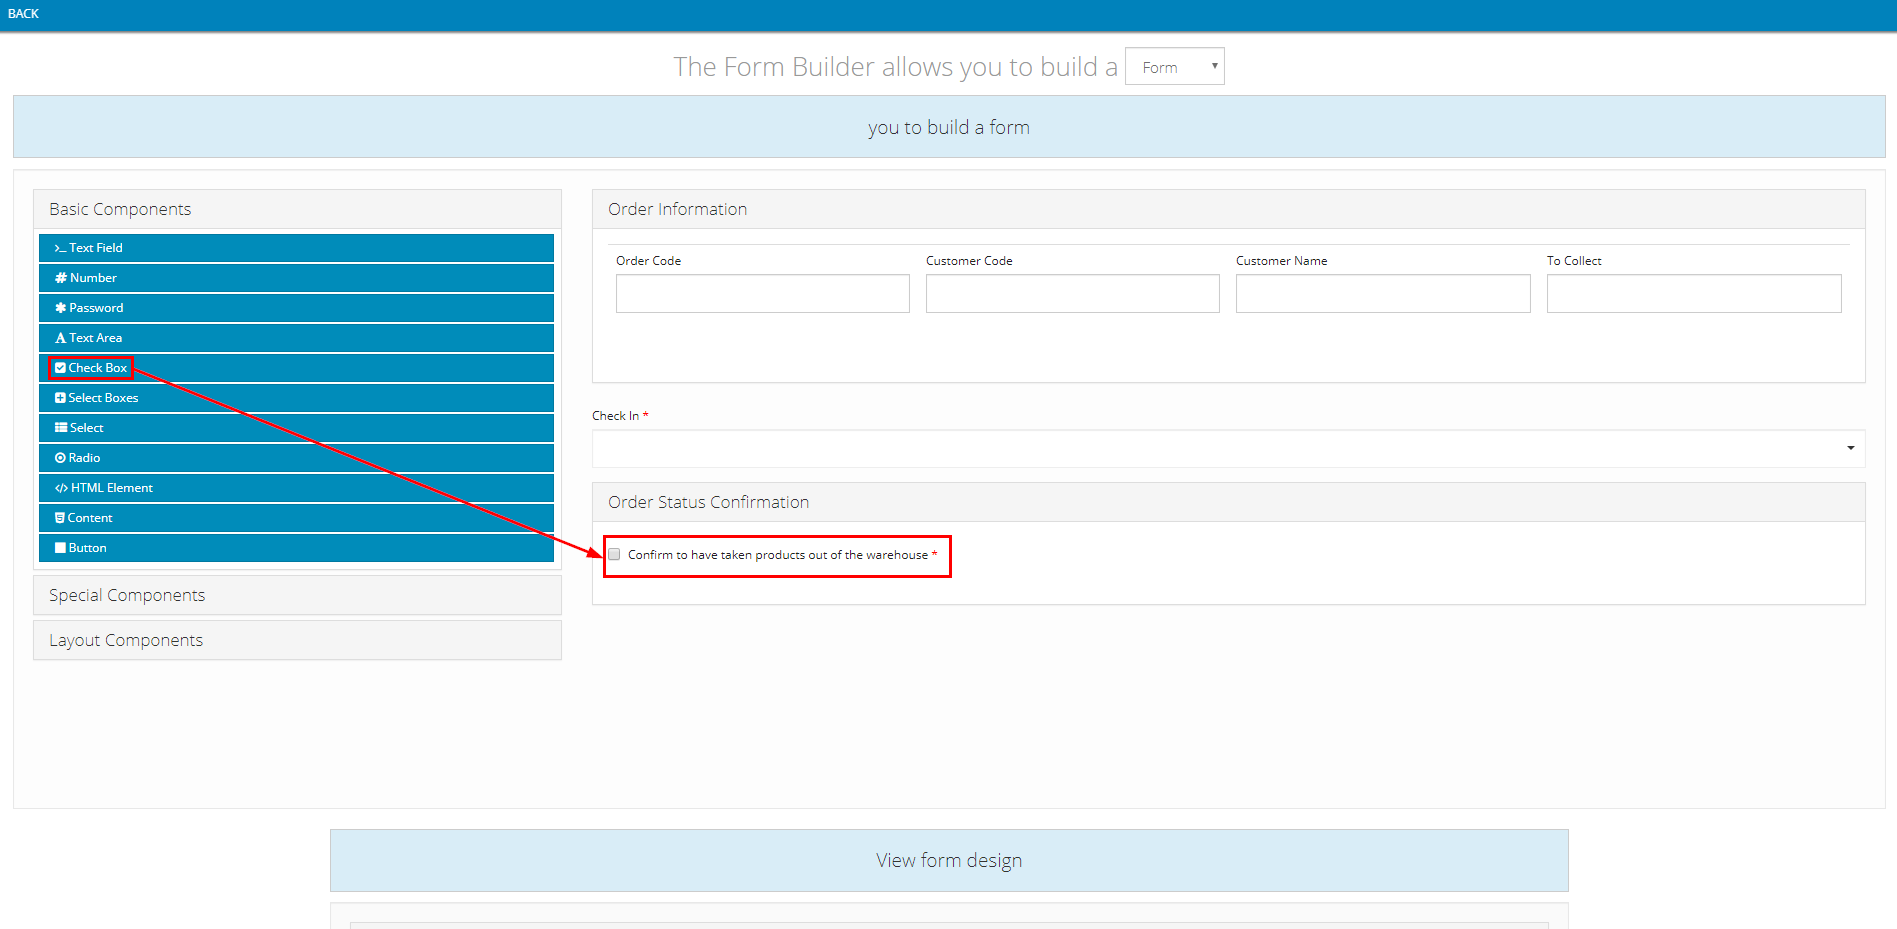
- Component content:
- Note: The value input into Label field can be changed freely


1.10 Confirm to have left the warehouse Checkbox
- Position: Inside Order Status Confirmation panel component, below Confirm to have taken products out of the warehouse checkbox component
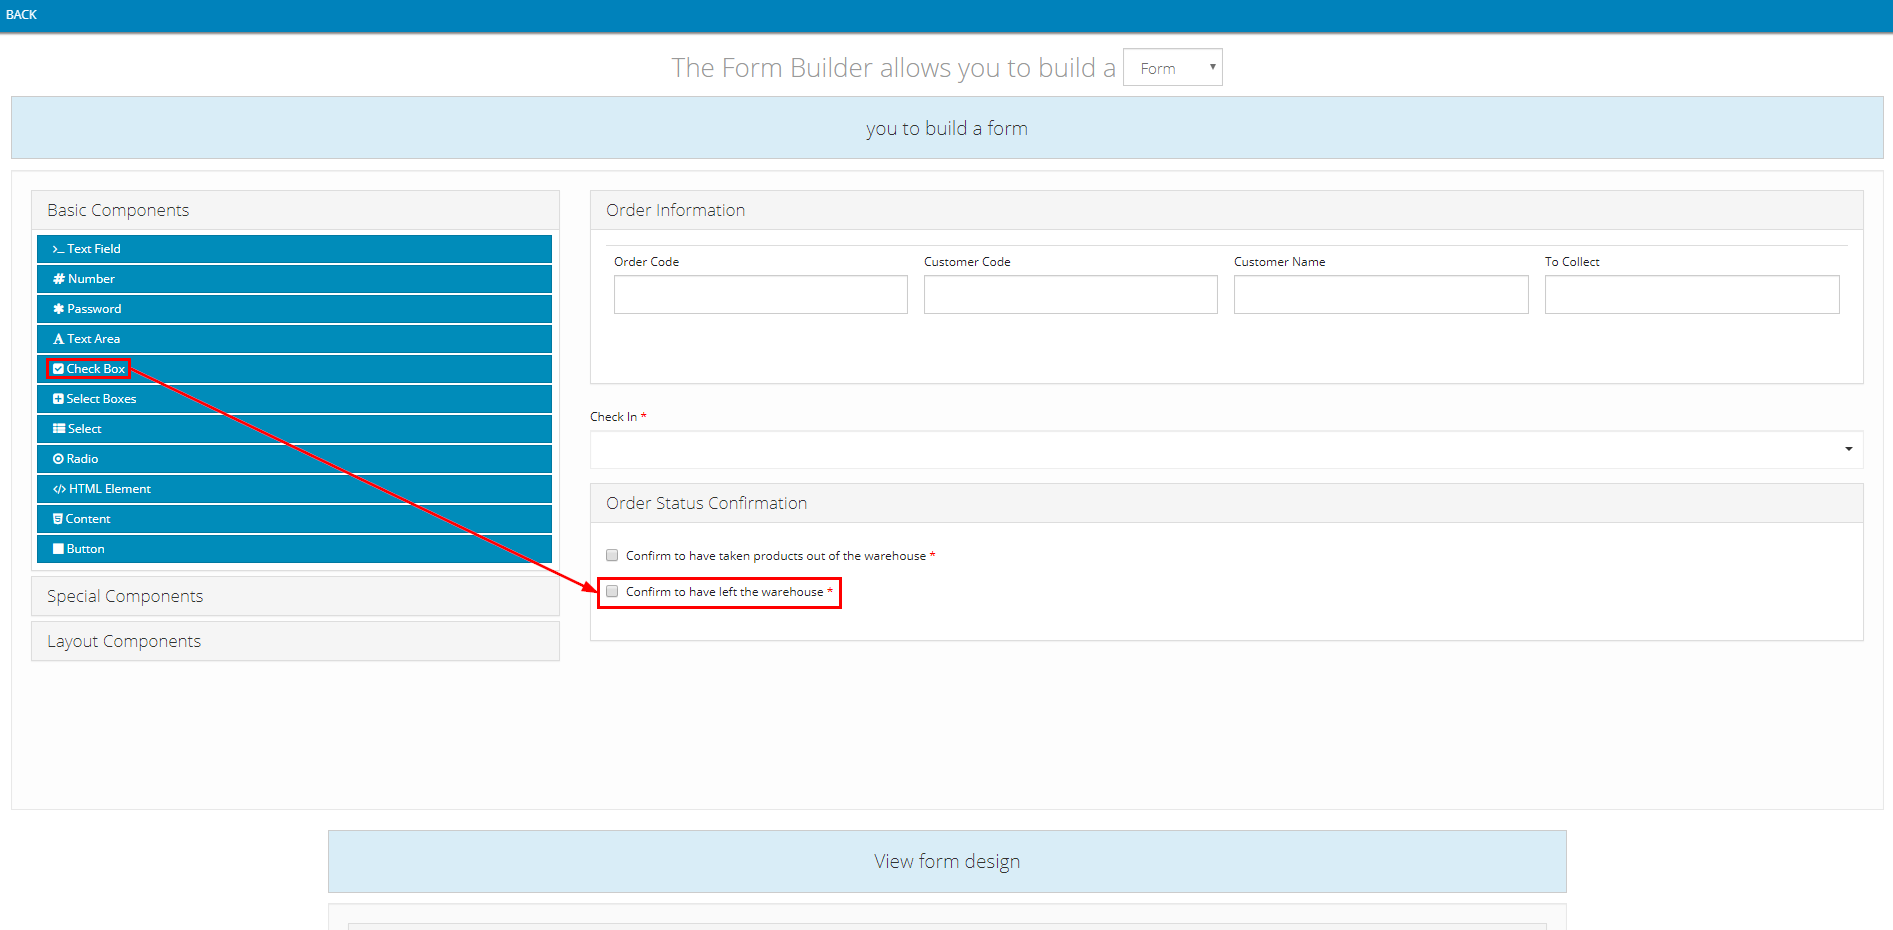
- Component content:
- Note: The value input into Label field can be changed freely


DELIVER_PRODUCT Action code
2.1 Check In panel
- See instruction above
2.2 Bill receiving confirmation panel
- Component used: Layout Components > Panel
- Position: Below Check In panel component
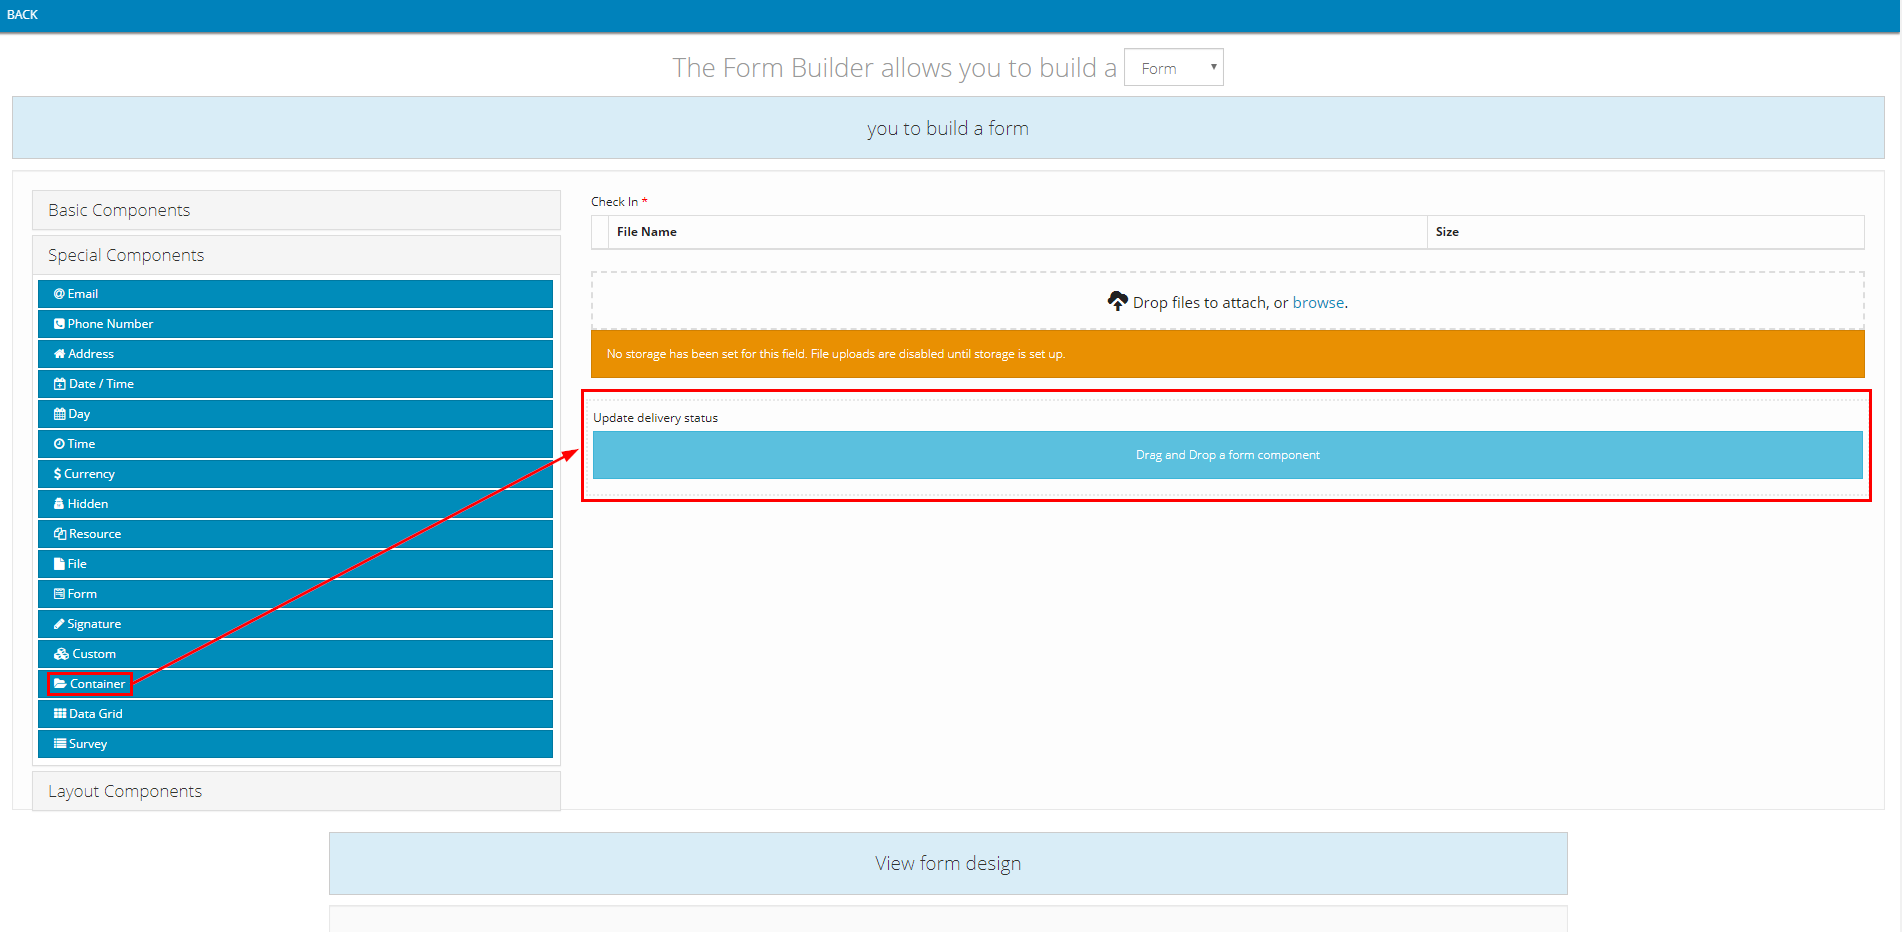
- Component content:
- Note: The value input into Title field can be changed freely

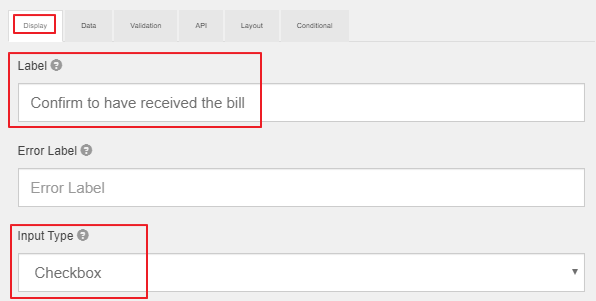
2.3 Bill receiving confirmation check box
- Component used: Basic Components > Check Box
- Position: Inside Bill receiving confirmation panel
- Component content:
- Note: The value input into Label field can be changed freely


BACK_DEPOT Action code
3.1 Check In panel
- See instruction above
3.2 Update status at the end of day panel
- Component used: Layout Components > Panel
- Position: Below Check In panel component

3.3 Confirm to have handed all redundant products to the warehouse manager Check box
- Component used: Basic Components > Check Box
- Position: Inside Update status at the end of day panel component
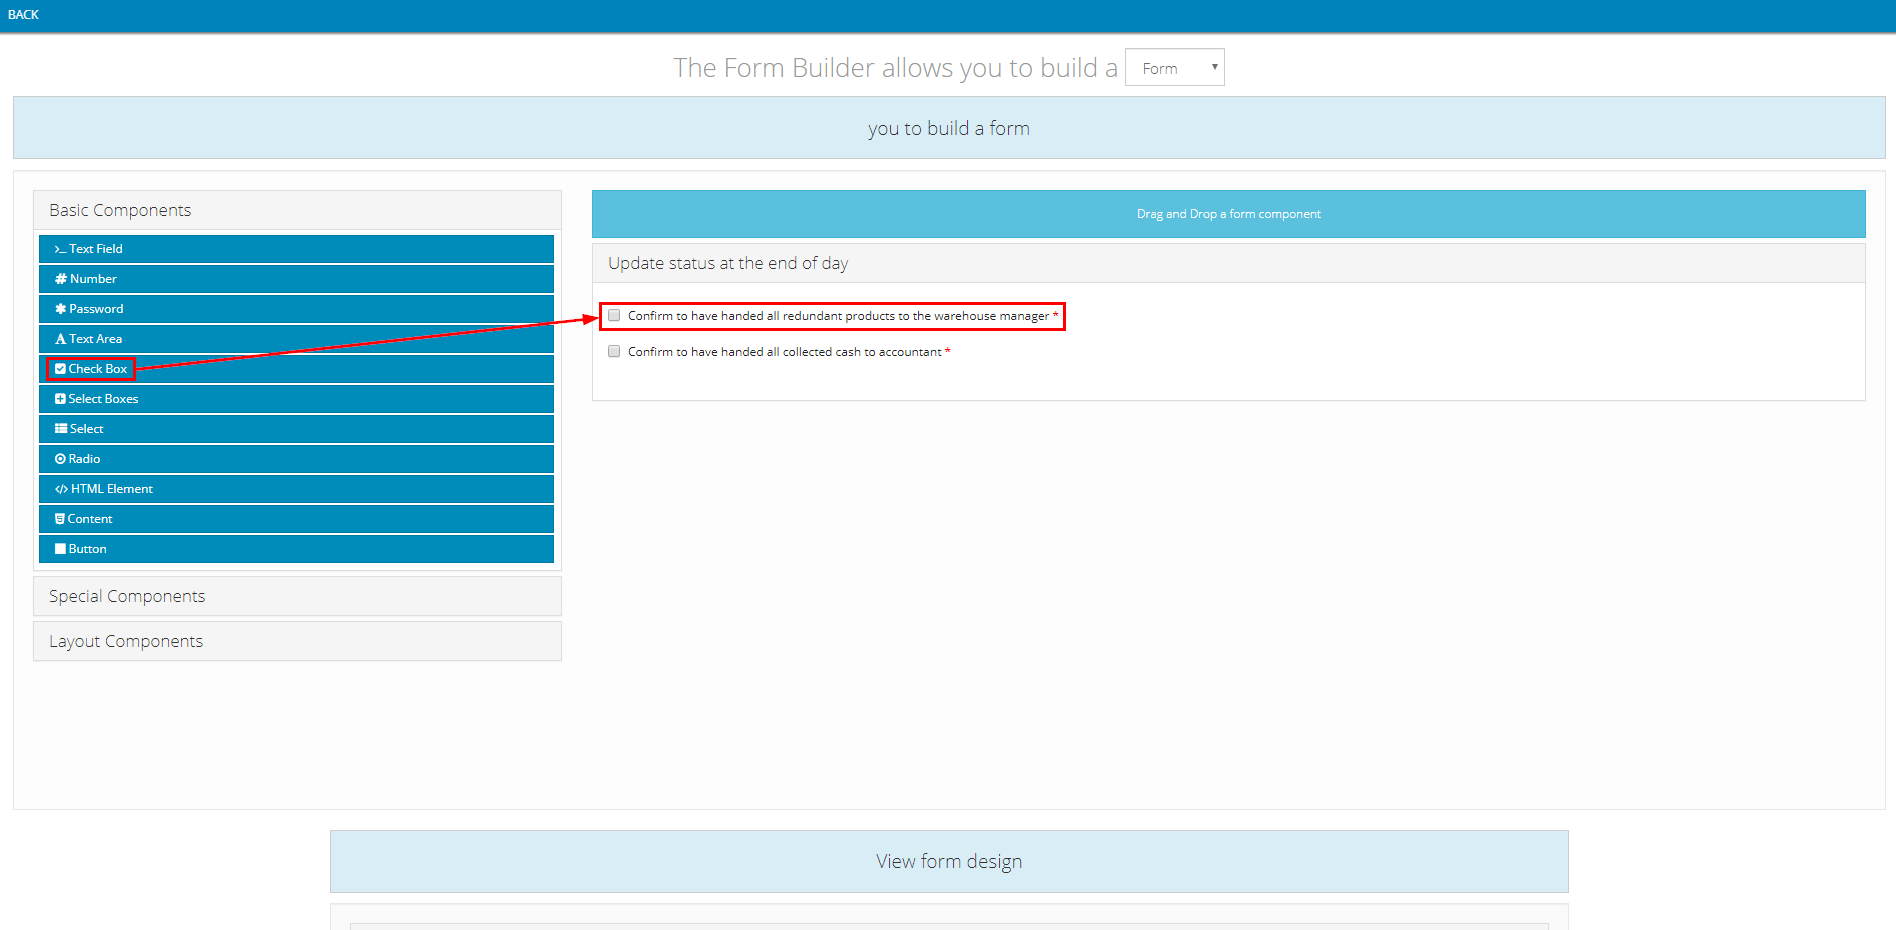
- Component content:
- Note: The value input into Label field can be changed freely


3.4 Confirm to have handed all collected cash to accountant Check box
- Component used: Basic Components > Check Box
- Position: Inside Update status at the end of day panel component, below Confirm to have handed all redundant products to the warehouse manager Check box component
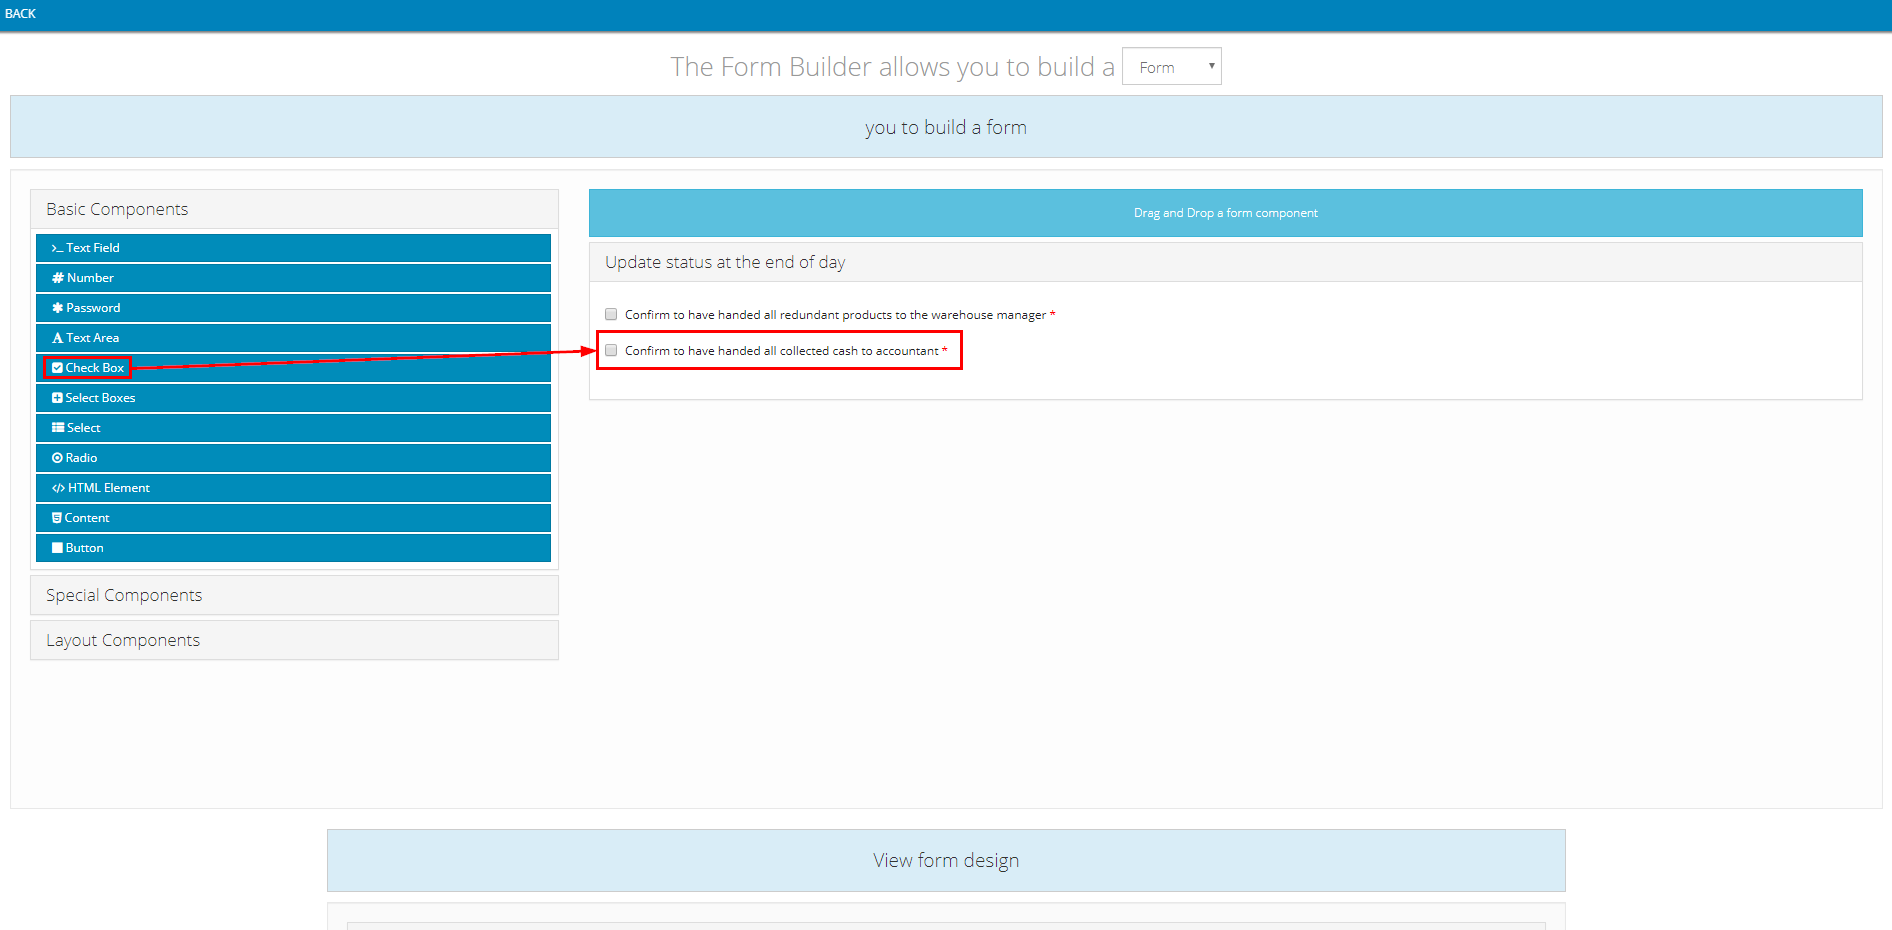
- Component content:
- Note: The value input into Label field can be changed freely


END_DAY Action code
4.1 Check In panel
- See instruction above
Updated about 2 months ago
