Delivery Progress Tracking
Track Delivery Progress by Vehicle
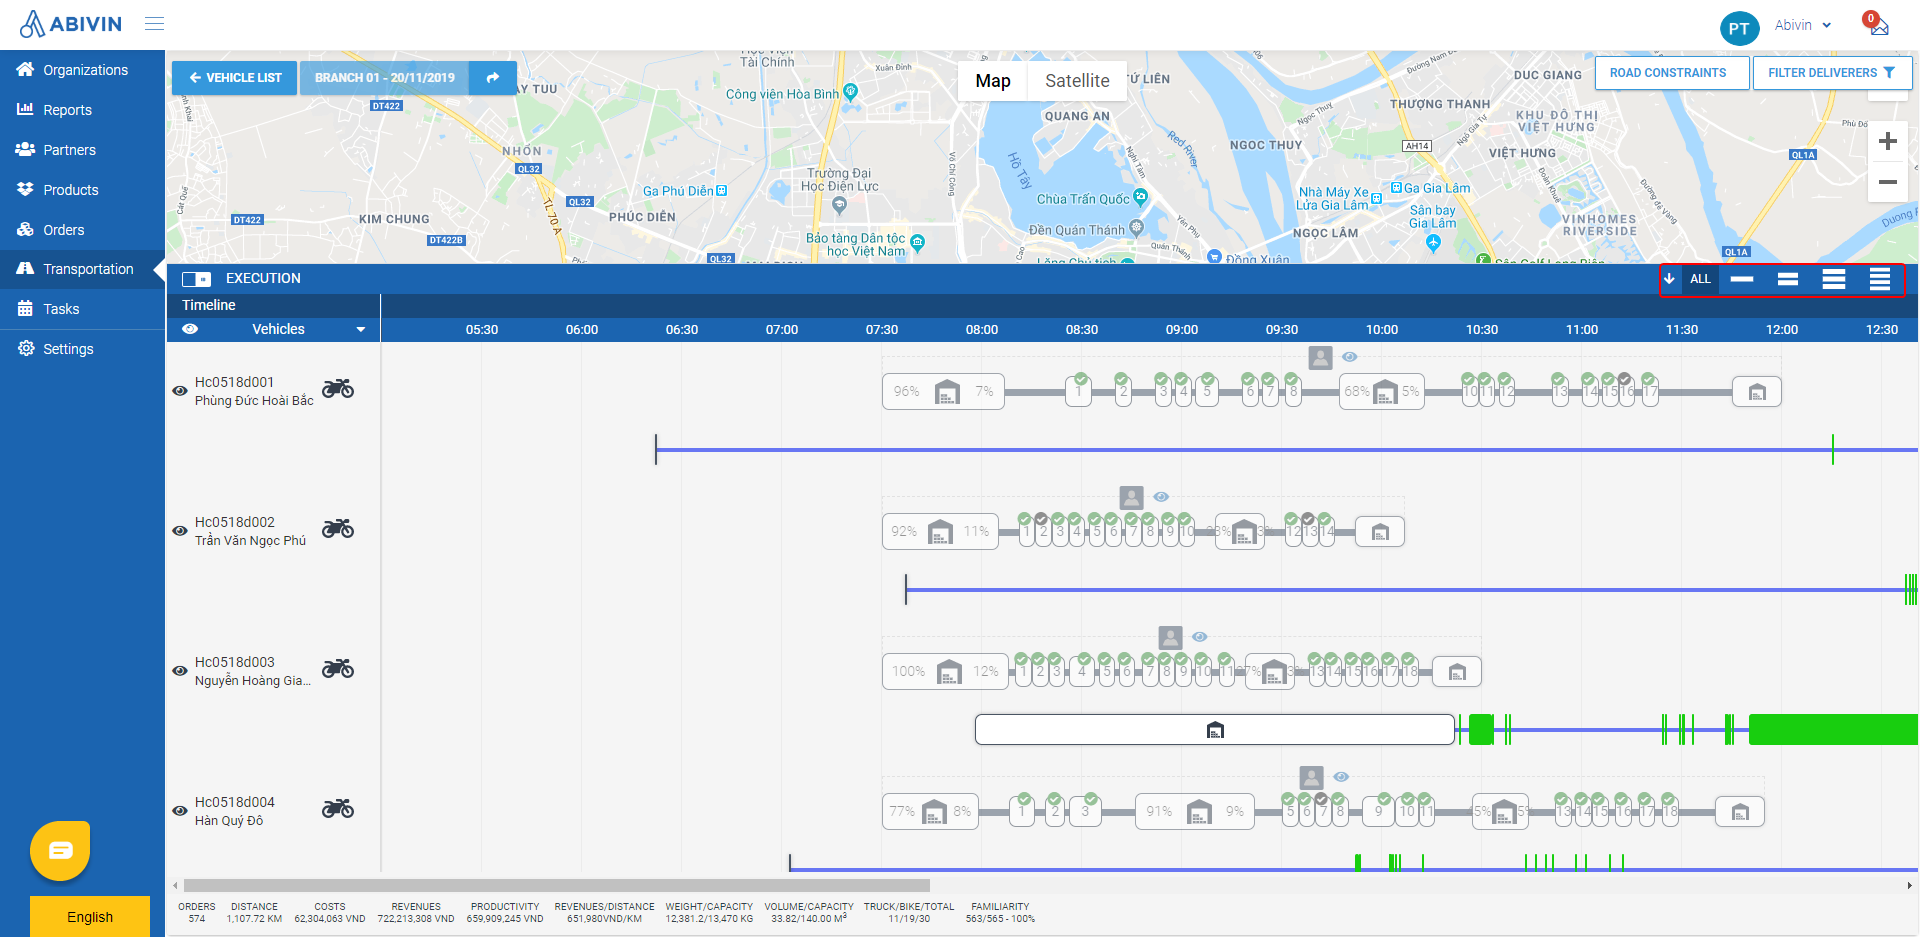
- On the Map screen, aside from the Plan Timeline, you can also access the Execution Timeline once you have optimized and locked the routes
- The Execution Timeline serves as a tracking timeline, where you can view the actual delivery progress of the vehicles in real time
- To access the Execution Timeline, click on the switch button next to the text Plan on the Timeline panel
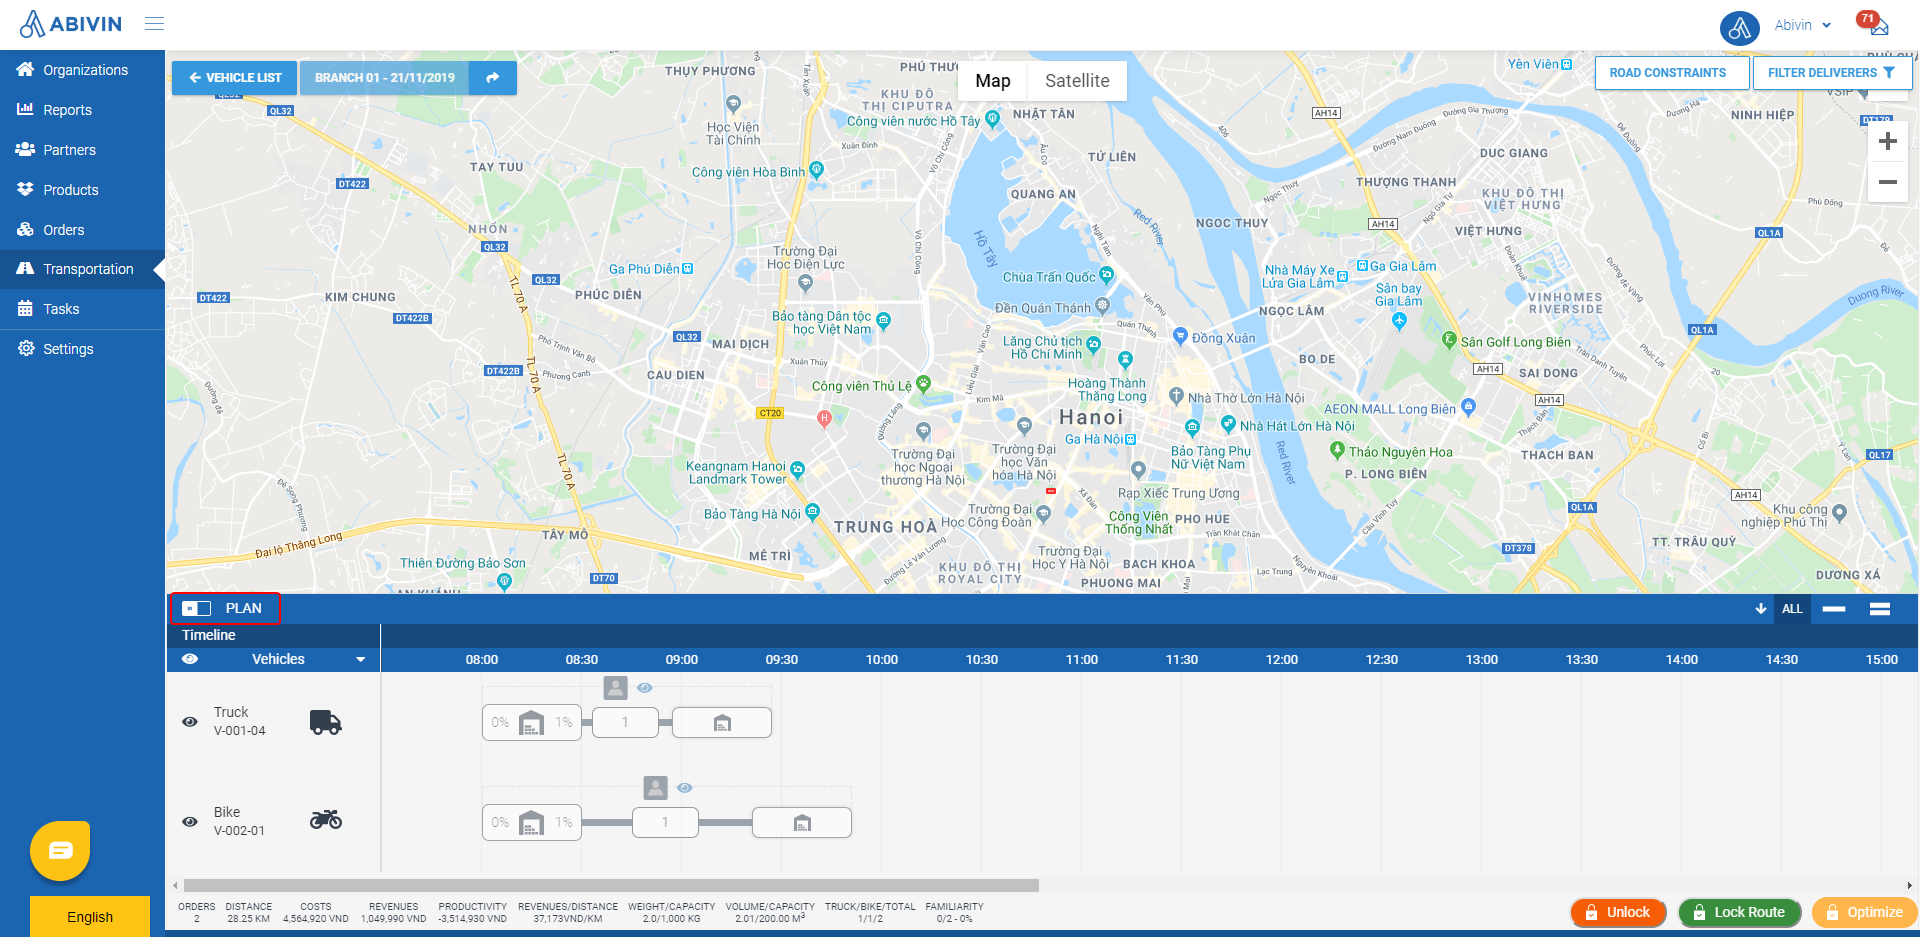
- The Execution Timeline panel will appear
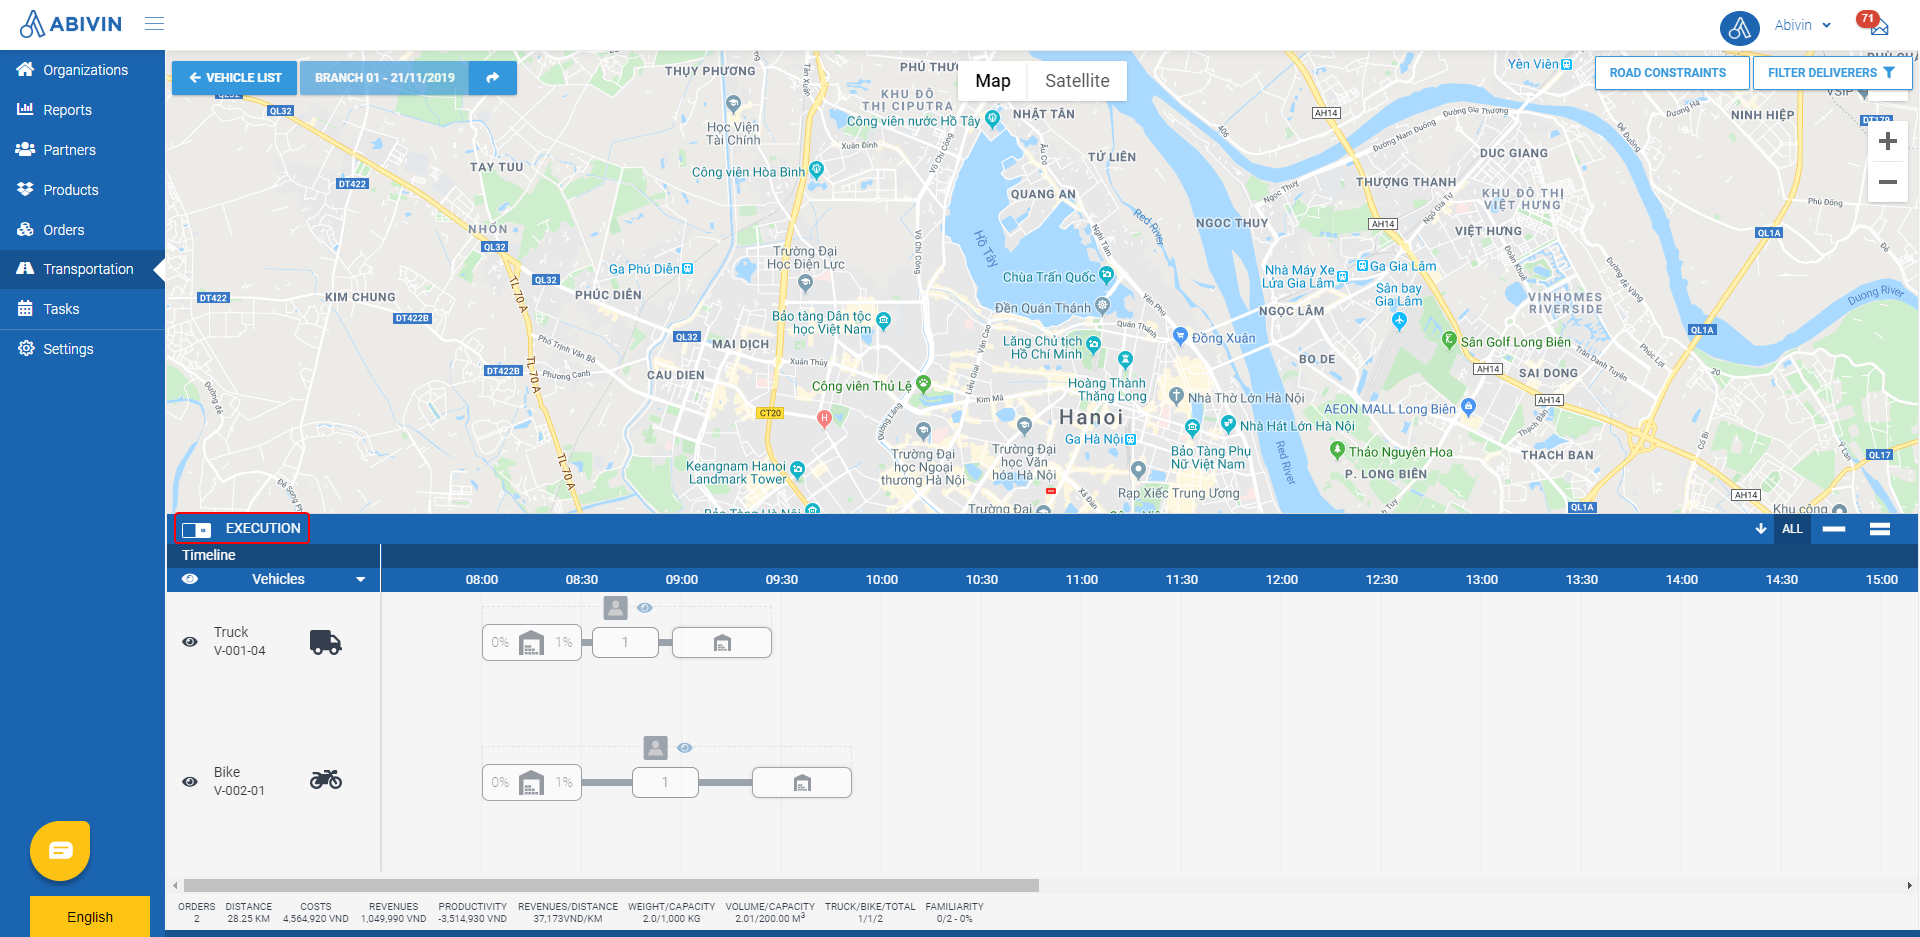
- Below we will list the features of the Execution Timeline
View actual delivery result
- You can see the delivery result of each customer by the color of the checkmark icon on the planned timeline horizon

- The color of that icon represents the Delivery status of the order:
- Green color: The Orders of that Delivery Stop were Successfully Delivered
- Orange color: The Orders of that Delivery Stop were Partially Delivered
- Black color: The Orders of that Delivery Stop were Not Delivered

- On the map area above, the border colors of the marker symbols of the Delivery Stops will also be different according to the delivery result:
- Green color: The Orders of that Delivery Stop were Successfully Delivered

- Orange color: The Orders of that Delivery Stop were Partially Delivered

- Red color: The Orders of that Delivery Stop were Not Delivered

View actual delivery time points
- On the Execution Timeline panel, you can see that below the Plan Timeline of each vehicle, there is an additional timeline. That is the Execution Timeline
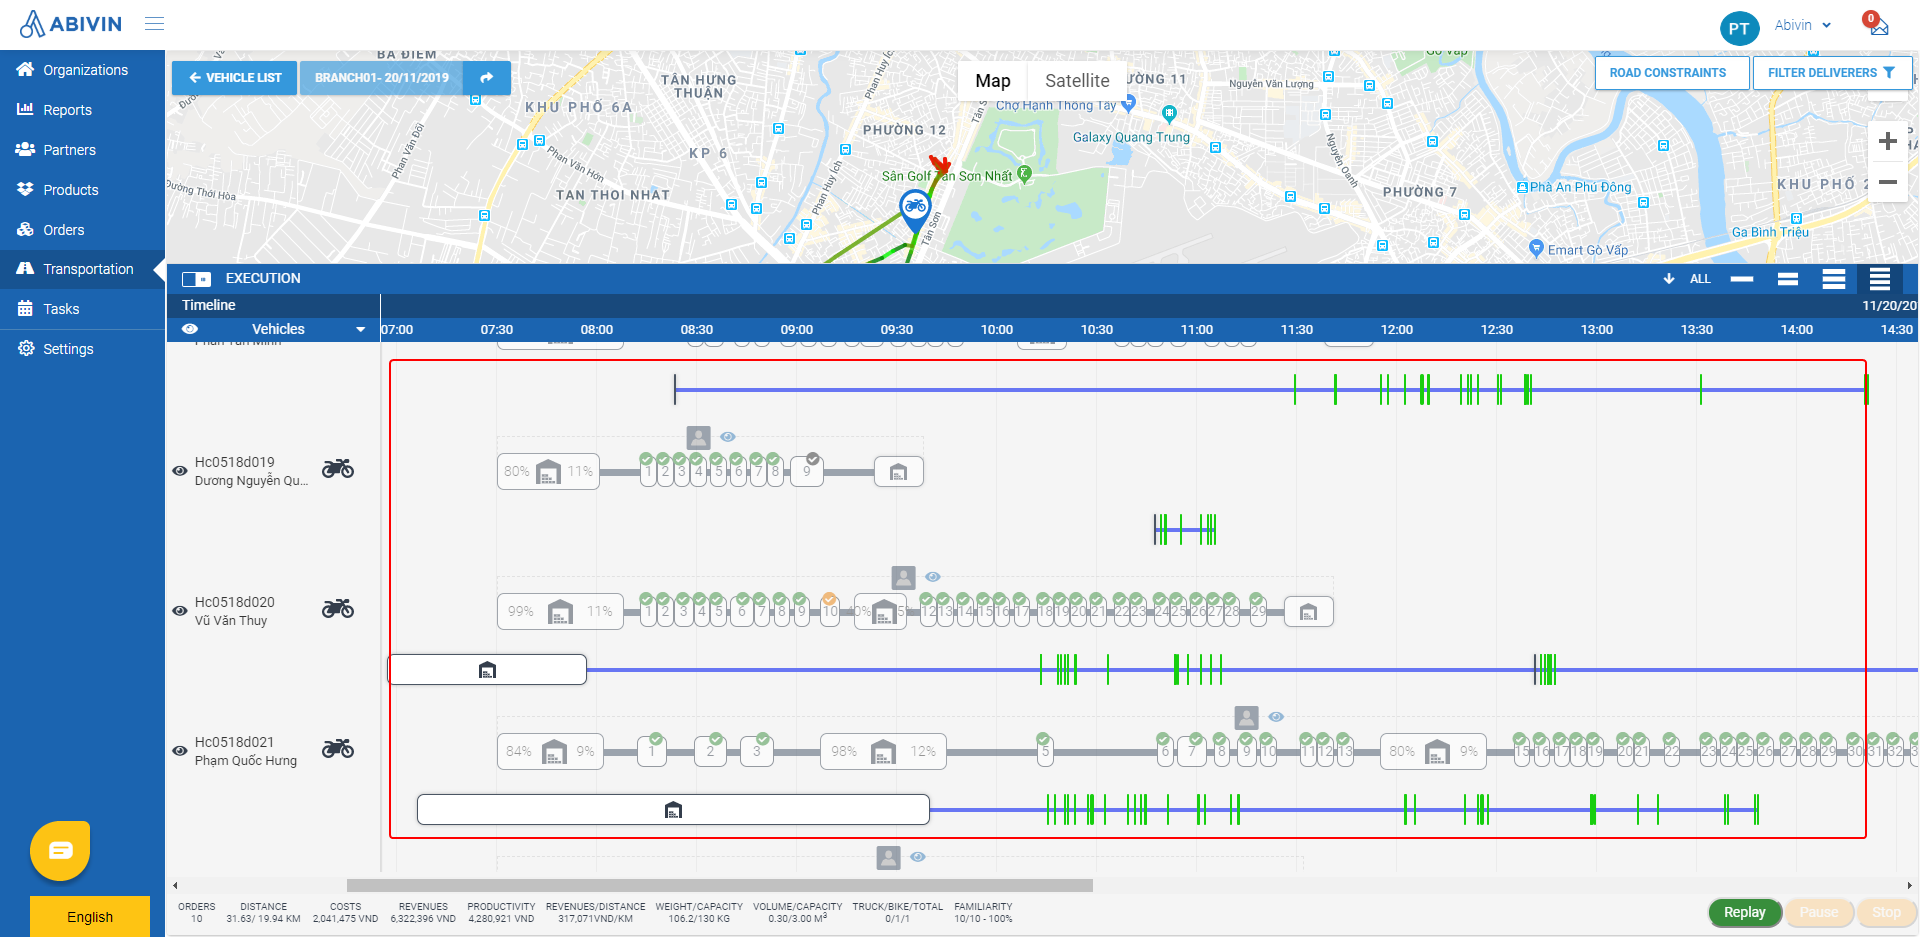
- On the Execution Timeline, the time blocks indicate the time period the driver has actually spent at a particular location (Manufacturing warehouse or Customer store/warehouse). They record the time points when the delivery tasks are submitted on Mobile app

- You can use the horizontal scrollbar to scroll the timeline horizon from left to right and vice versa
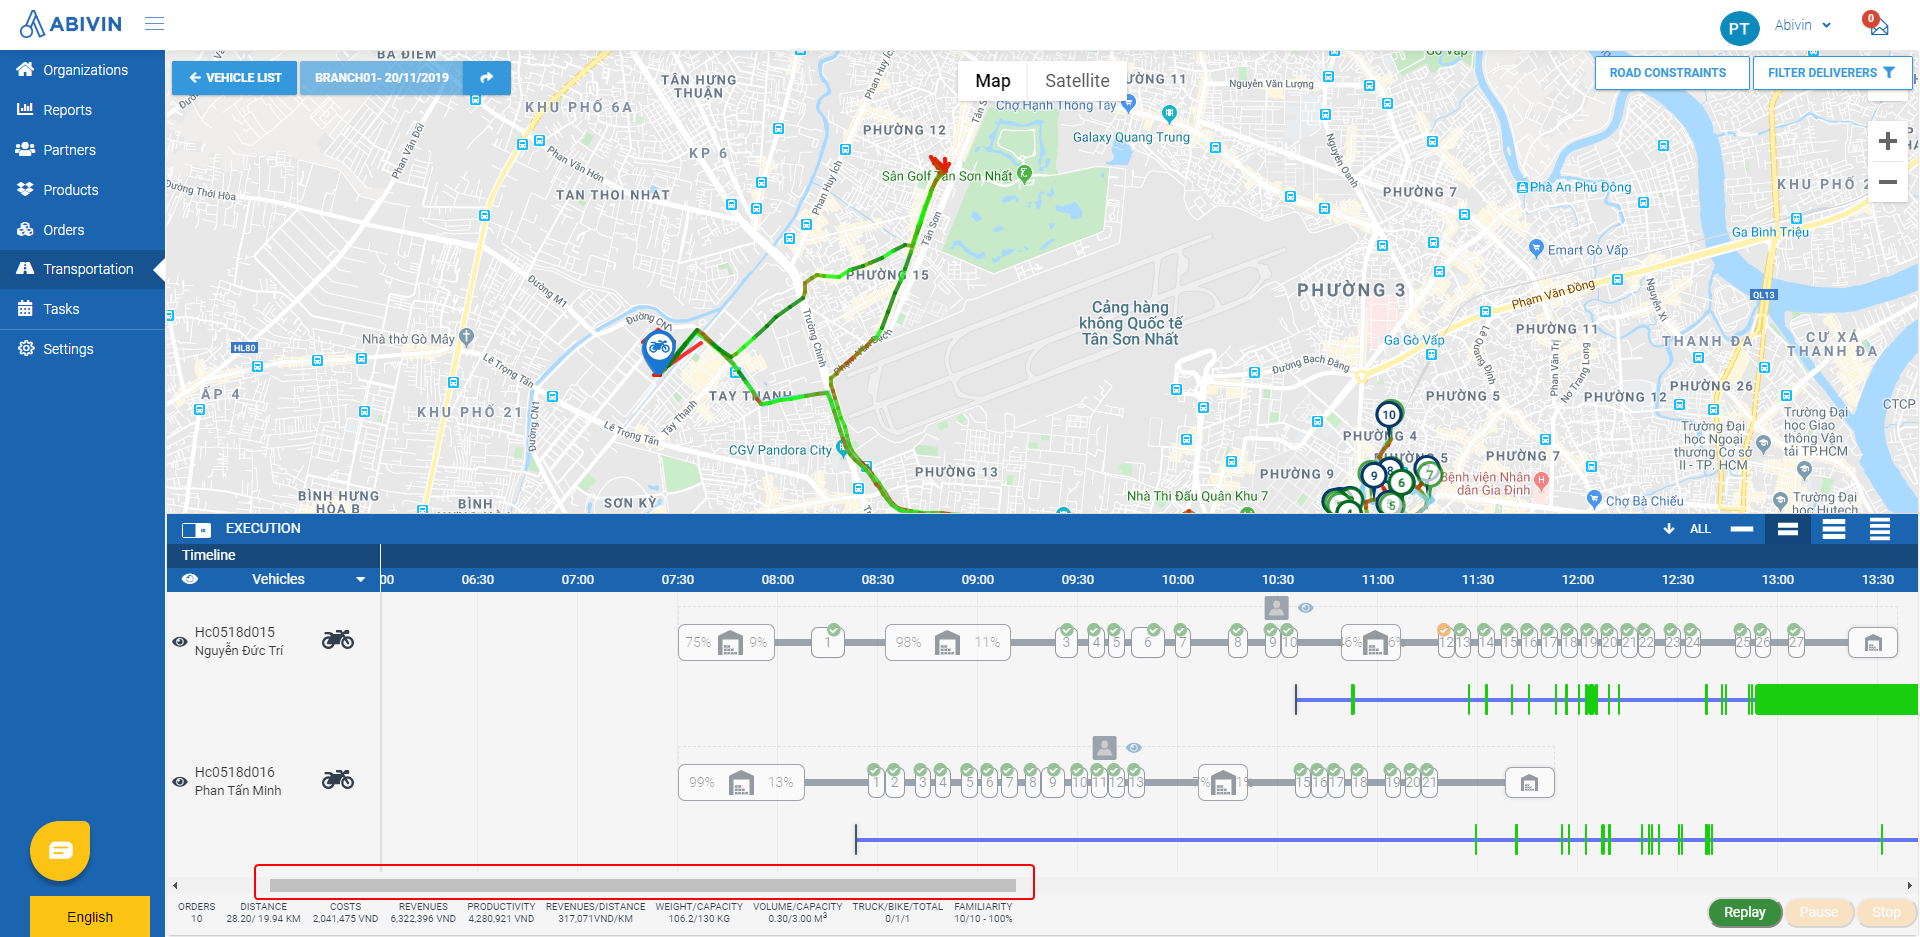
- You can change the width of the Timeline panel by clicking on the Artboard icons on the top right side of the Timeline panel. The number of rows on each artboard icon corresponds to the number of vehicle rows shown on the Timeline panel
- Clicking on the All text will show (limit is 5 rows), while clicking on the icon will collapse the panel
- If the Timeline panel doesn't show all timelines of the vehicles, you can click on a blank point on the panel, then use the mouse scroll wheel to scroll the panel up and down
Replay actual delivery routes
- You can view the actual delivery route of a vehicle in real time, or after that vehicle has completed the delivery route, following the steps below
- On the Execution Timeline Panel, click on the icon of the vehicle which you want to replay the actual delivery route. On the bottom right of the Timeline panel will appear a new set of buttons, serving for playback functions of the actual delivery route
- To view the actual delivery route, click on Replay button
- The system will playback the actual delivery route of that vehicle on the map screen
- You can click on Pause button to temporarily pause the playback; or Stop button to completely stop the playback
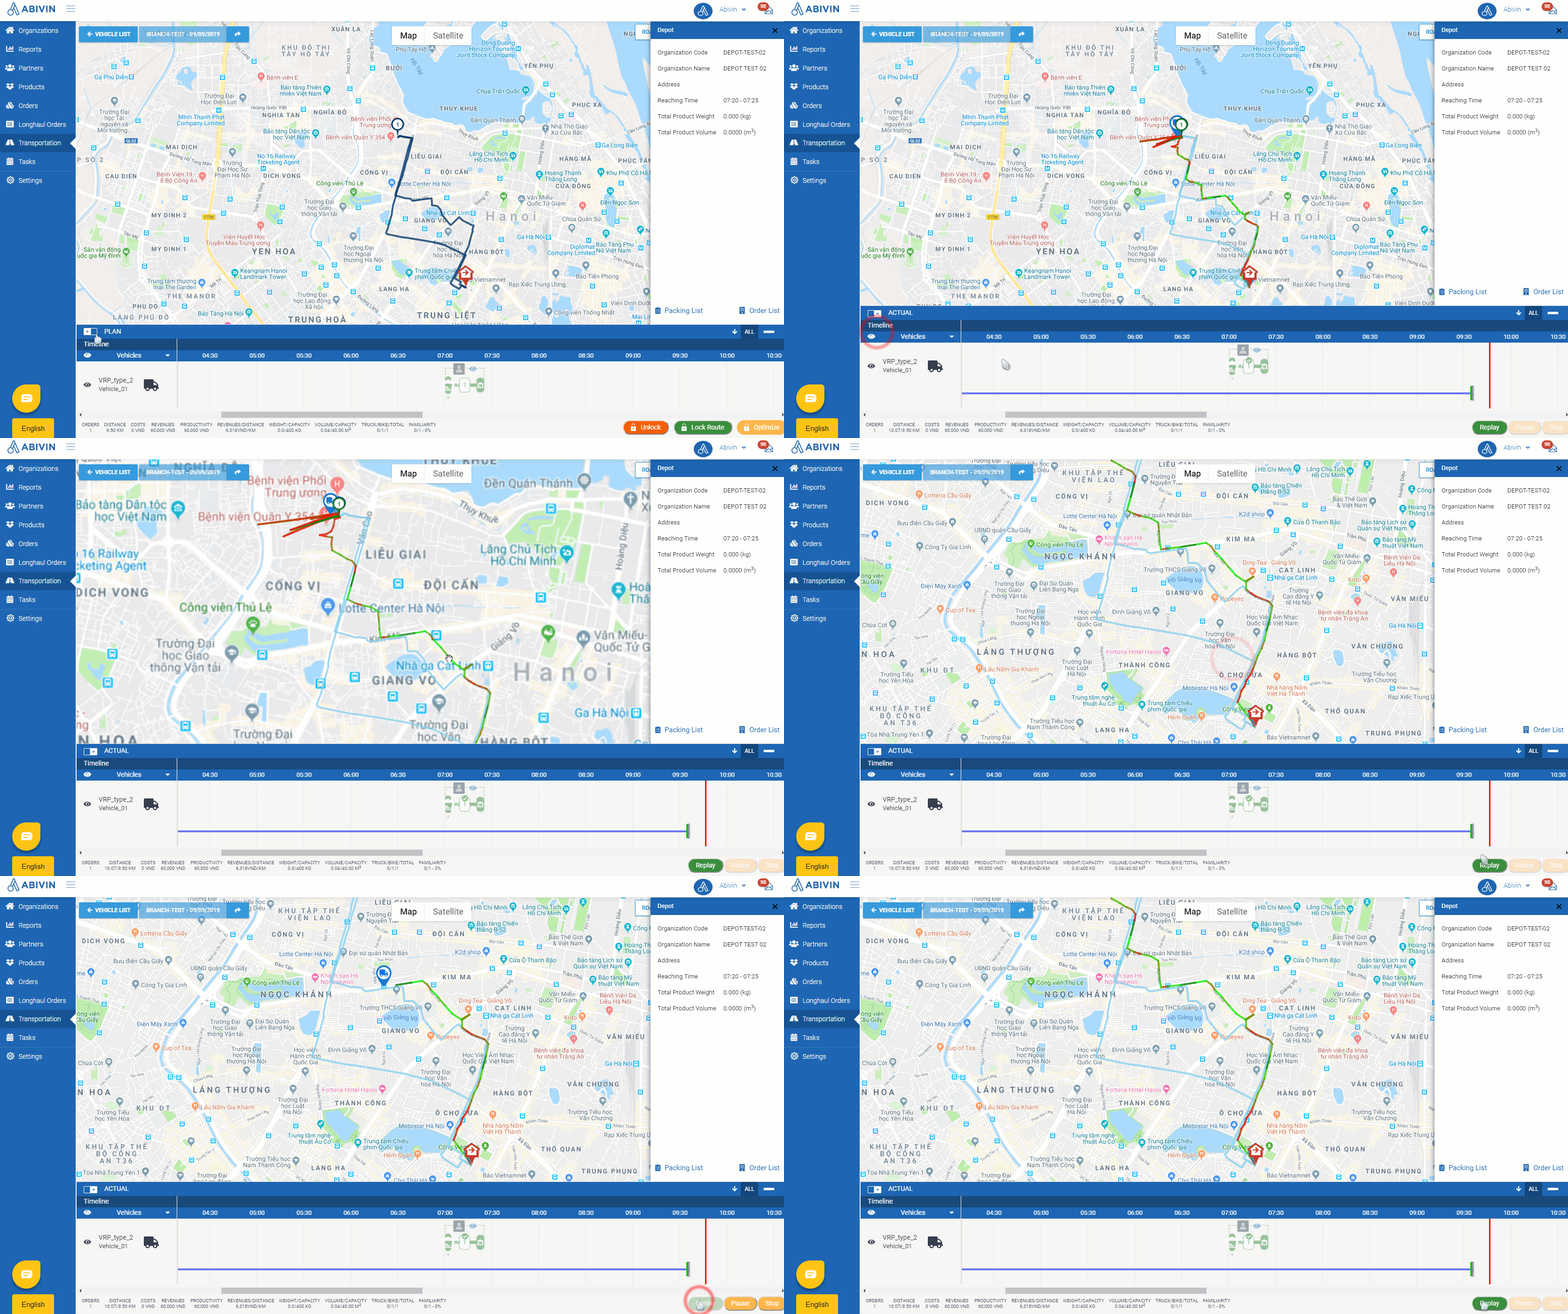
- As you replay the actual delivery route of the vehicle, you might notice that some parts of the actual delivery route display different colors from the rest. Below is the meaning of each color
- 1 - Red color:

- There are two possibilities
- The first possibility, the Mobile app lost the GPS signal. In this case, the part of the delivery route having this color will look very disorganized (might consist of various slanting straight lines)
- The second possibility, the driver traveled at a slower speed than the speed of the Vehicle. In this case, the part of the delivery route having this color will still look normal
- 2 - Vivid green color: The vehicle traveled approximately at the same speed registered on the system

- 3 - Dark green color: The vehicle traveled relatively faster than the speed registered on the system

View customer information
- When you click on the timeline block of a particular customer, on the right side of the map screen will appear a panel showing various information of that customer
- You can view customer information on both Plan and Execution timelines. On Execution timeline, if a customer has been checked in by the vehicle, the panel will also display the check in photo
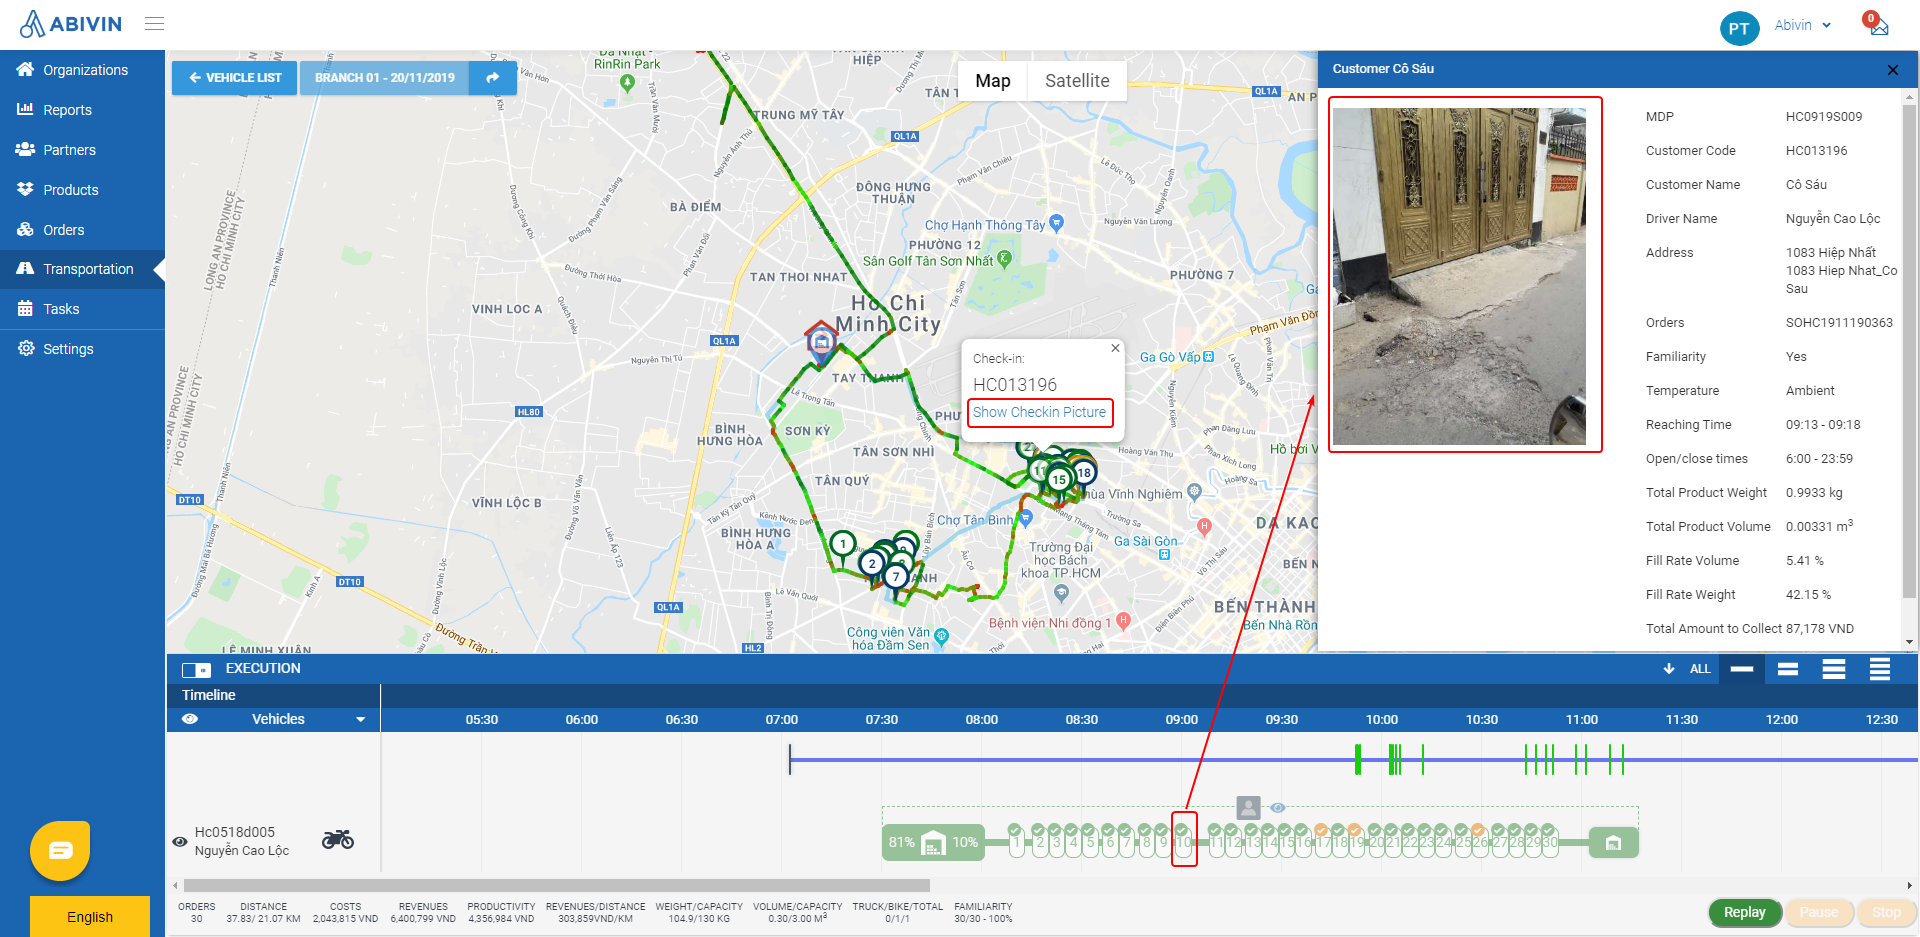
Check In photo
View route information
- You can view the detailed information of a particular route or several routes by clicking on the corresponding icon of those routes
- You can also view the detailed information of all routes by clicking on the icon next to Vehicle text
- The detailed information will display on the status bar at the bottom of the Timeline panel
View and export lists
Packing List and Order List
- Packing List is the detailed list of the products that have been packed at the Depot, including the Product Code; Product Name; Quantity and Weight
- Order List is the detailed list of the orders and destination customers
- To view these lists, first click on the timeline block of the Depot. The information panel of that Depot will appear on the right side of the map screen. Scroll down that panel and click on the corresponding text Packing List or Order List
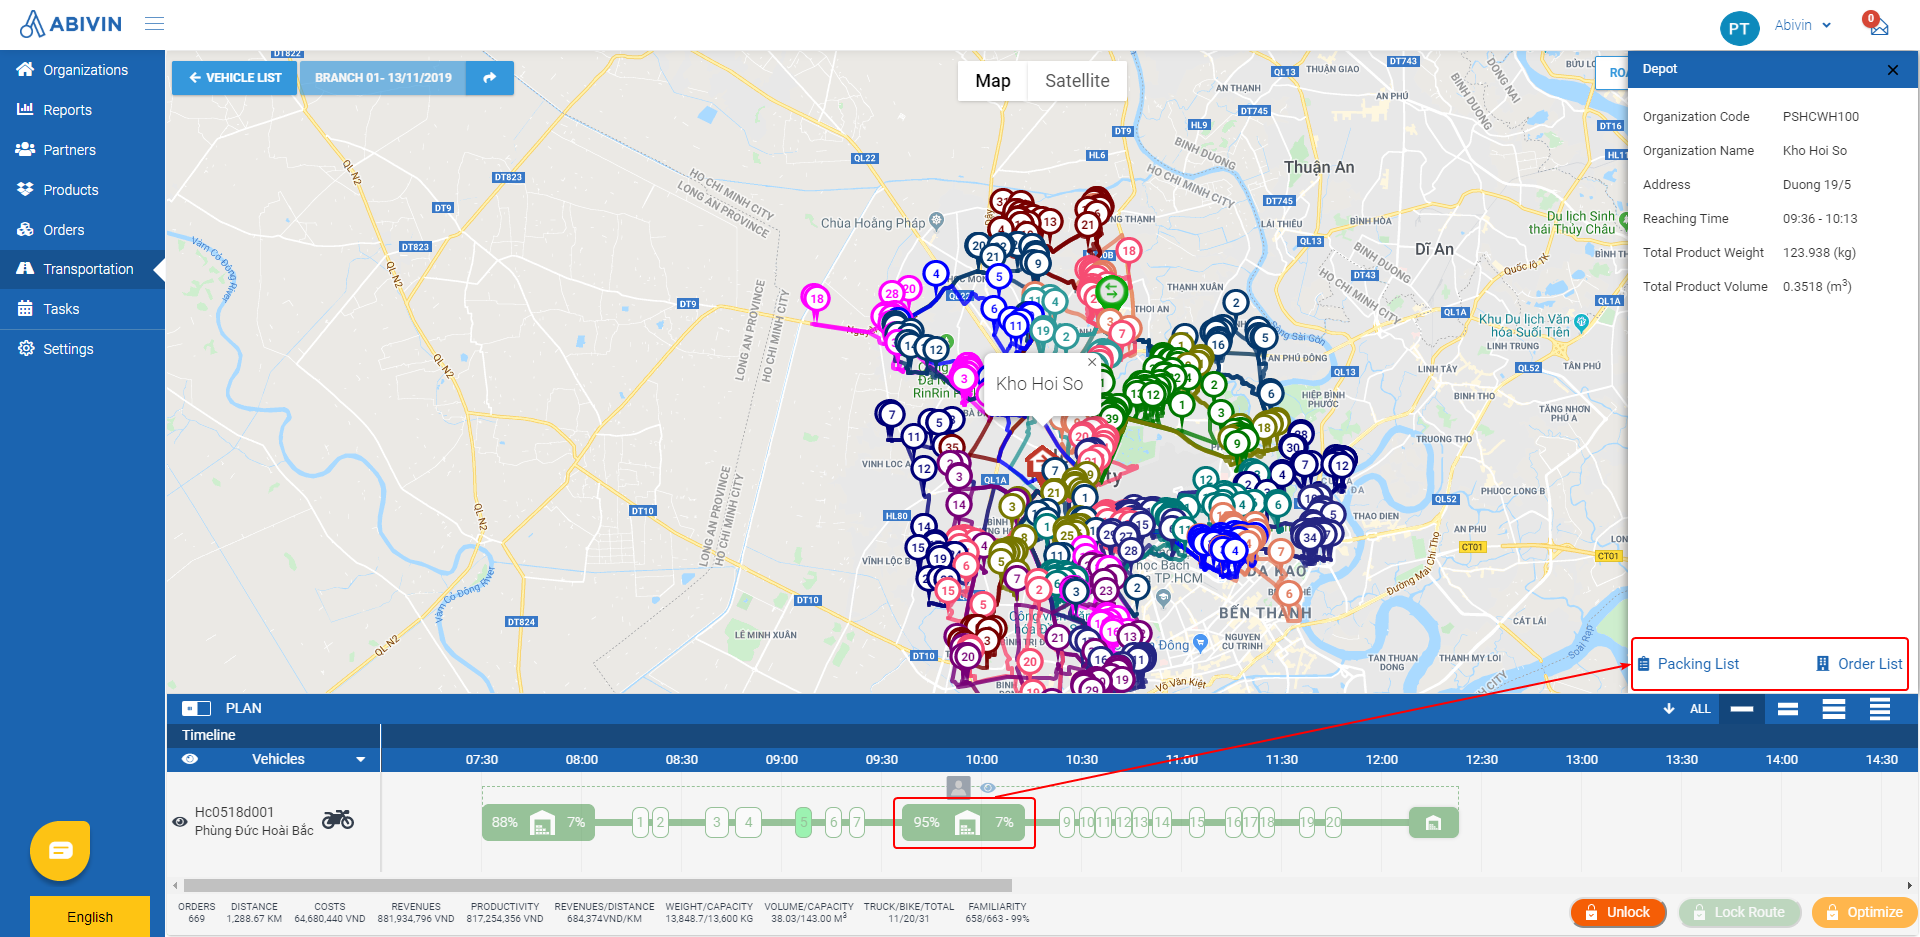
- The list will appear. To export click on the Export button
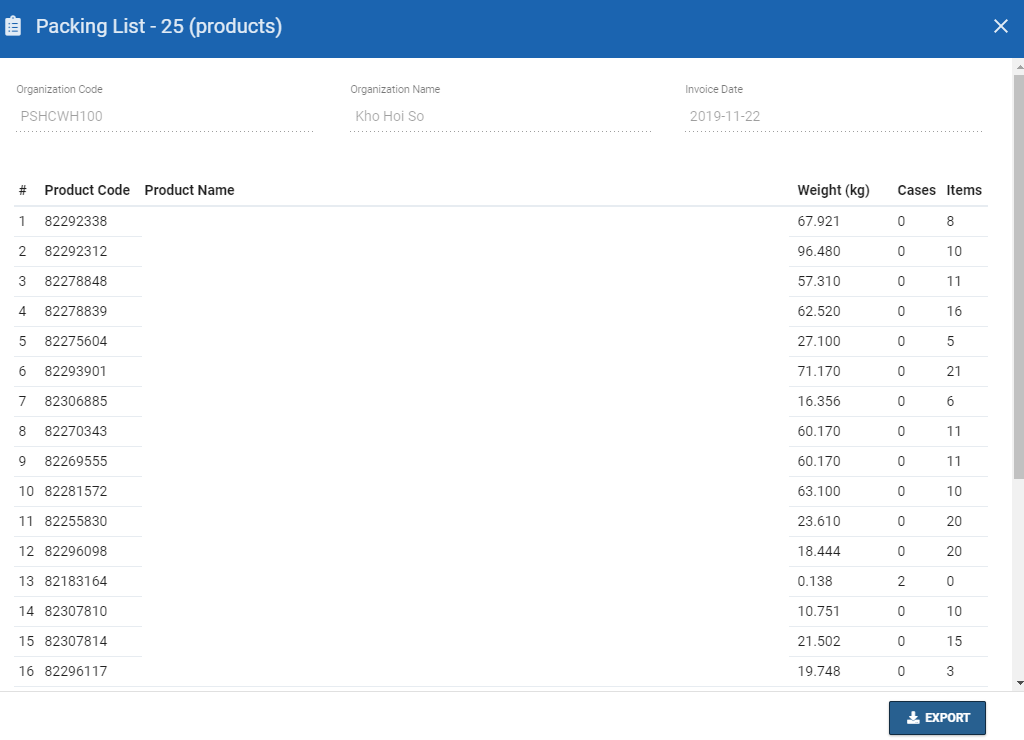
Packing List
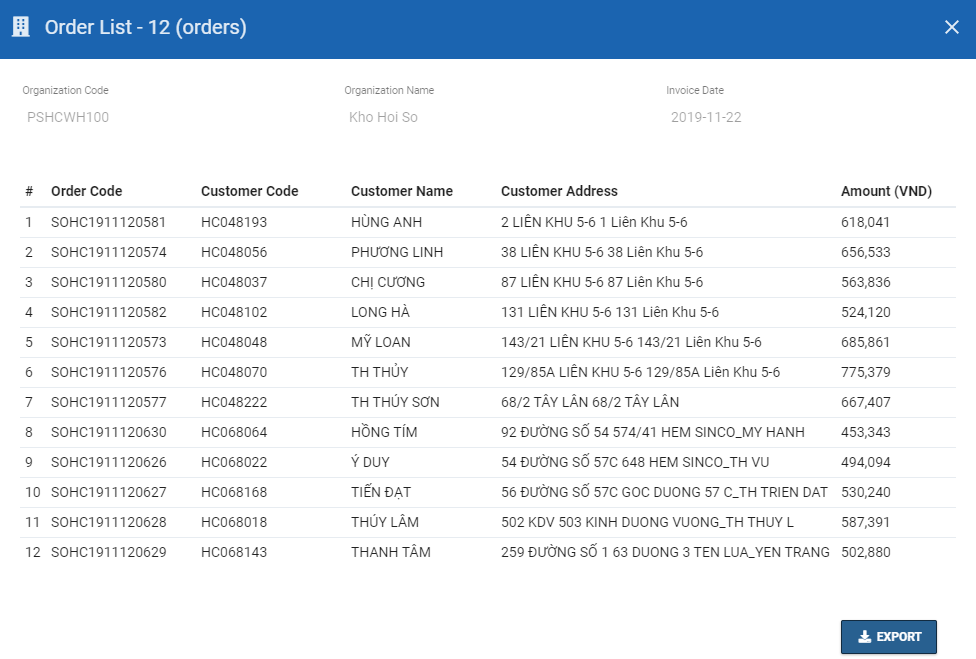
Order List
Picking List
- Picking List is the combination of the Packing List and Order List mentioned above. This list provides the delivery information of each vehicle, including: License Plate; Order Code; Customer Code; Customer Name; Product Code; Product Name; Quantity of single product items
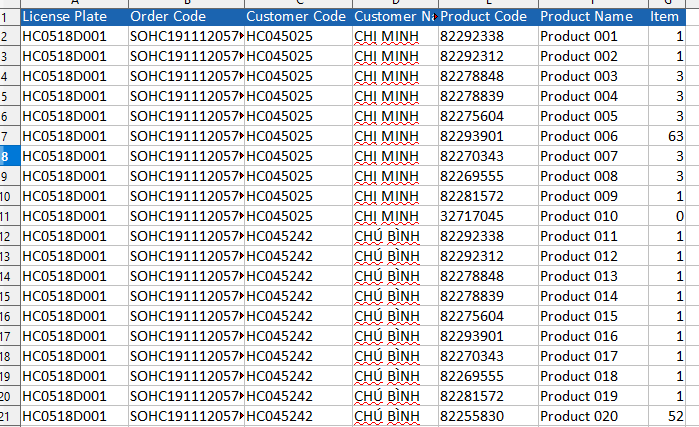
Picking List
Filter delivery man (Driver)
- You can view the list of delivery men (Drivers) who have been assigned the delivery tasks, by clicking on Filter Deliverers button on the top right of the map screen
- You can filter this list by the Vehicle type (Truck/Semi-truck; Motorbike); by the Depot or the Branch
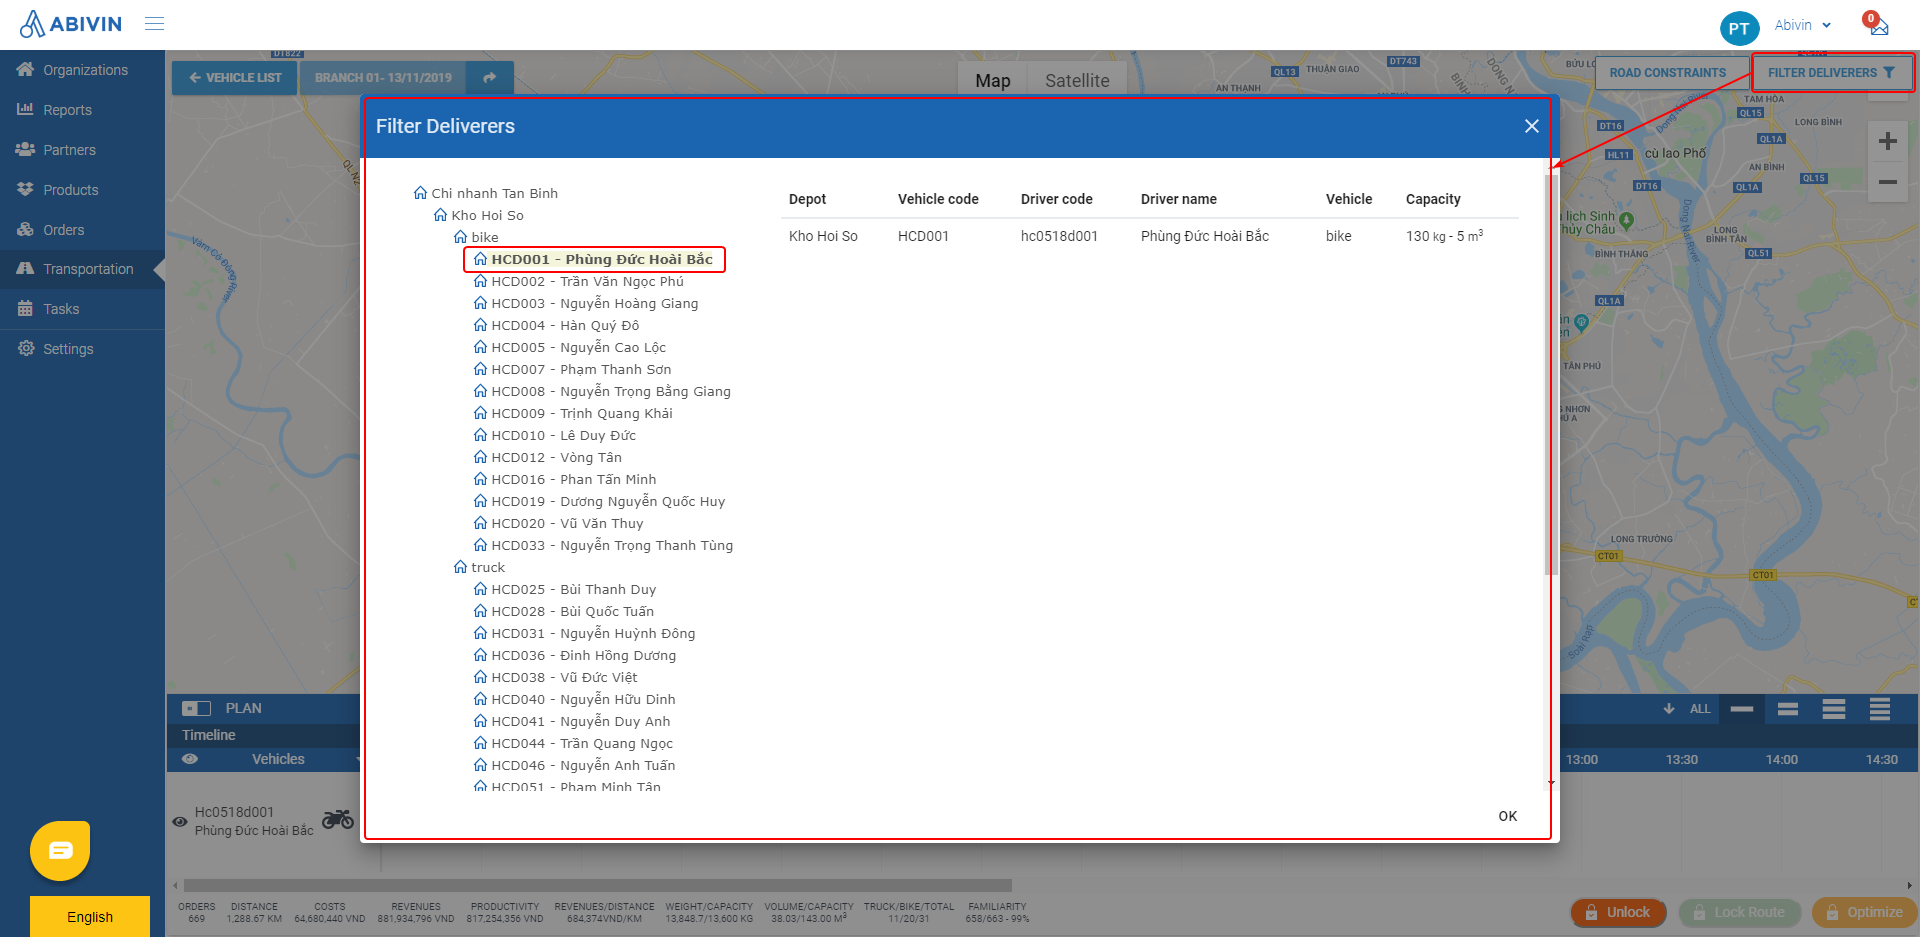
Track Delivery Progress by Order Tasks
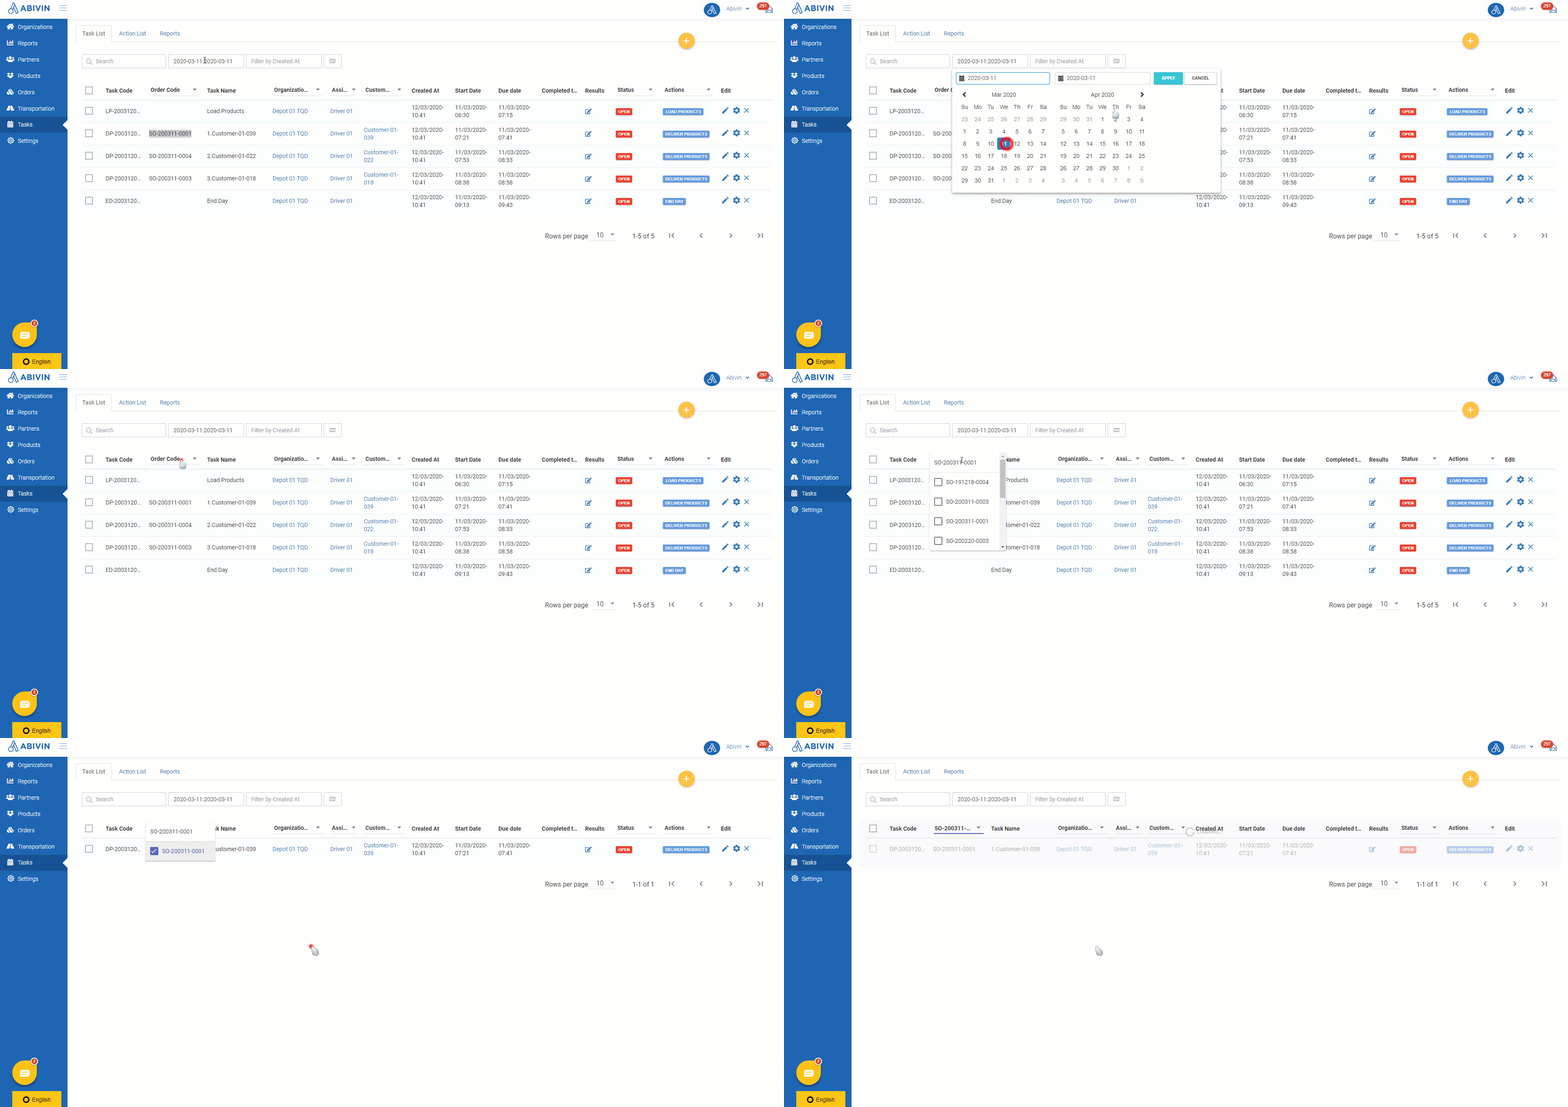
- Navigate to Tasks > Task List tab
- Click on the Date field on the toolbar. On the drop down calendar, select the date range in which the order you're finding falls into
- Next, click on Order Code column and input the Order Code of the order you want to check status into the search bar, then click on the corresponding check box of the order from the drop down menu
You can select multiple order codes on the drop down menu
- The system will filter out all tasks related to that order
Updated about 1 month ago
