Perform shipment tasks
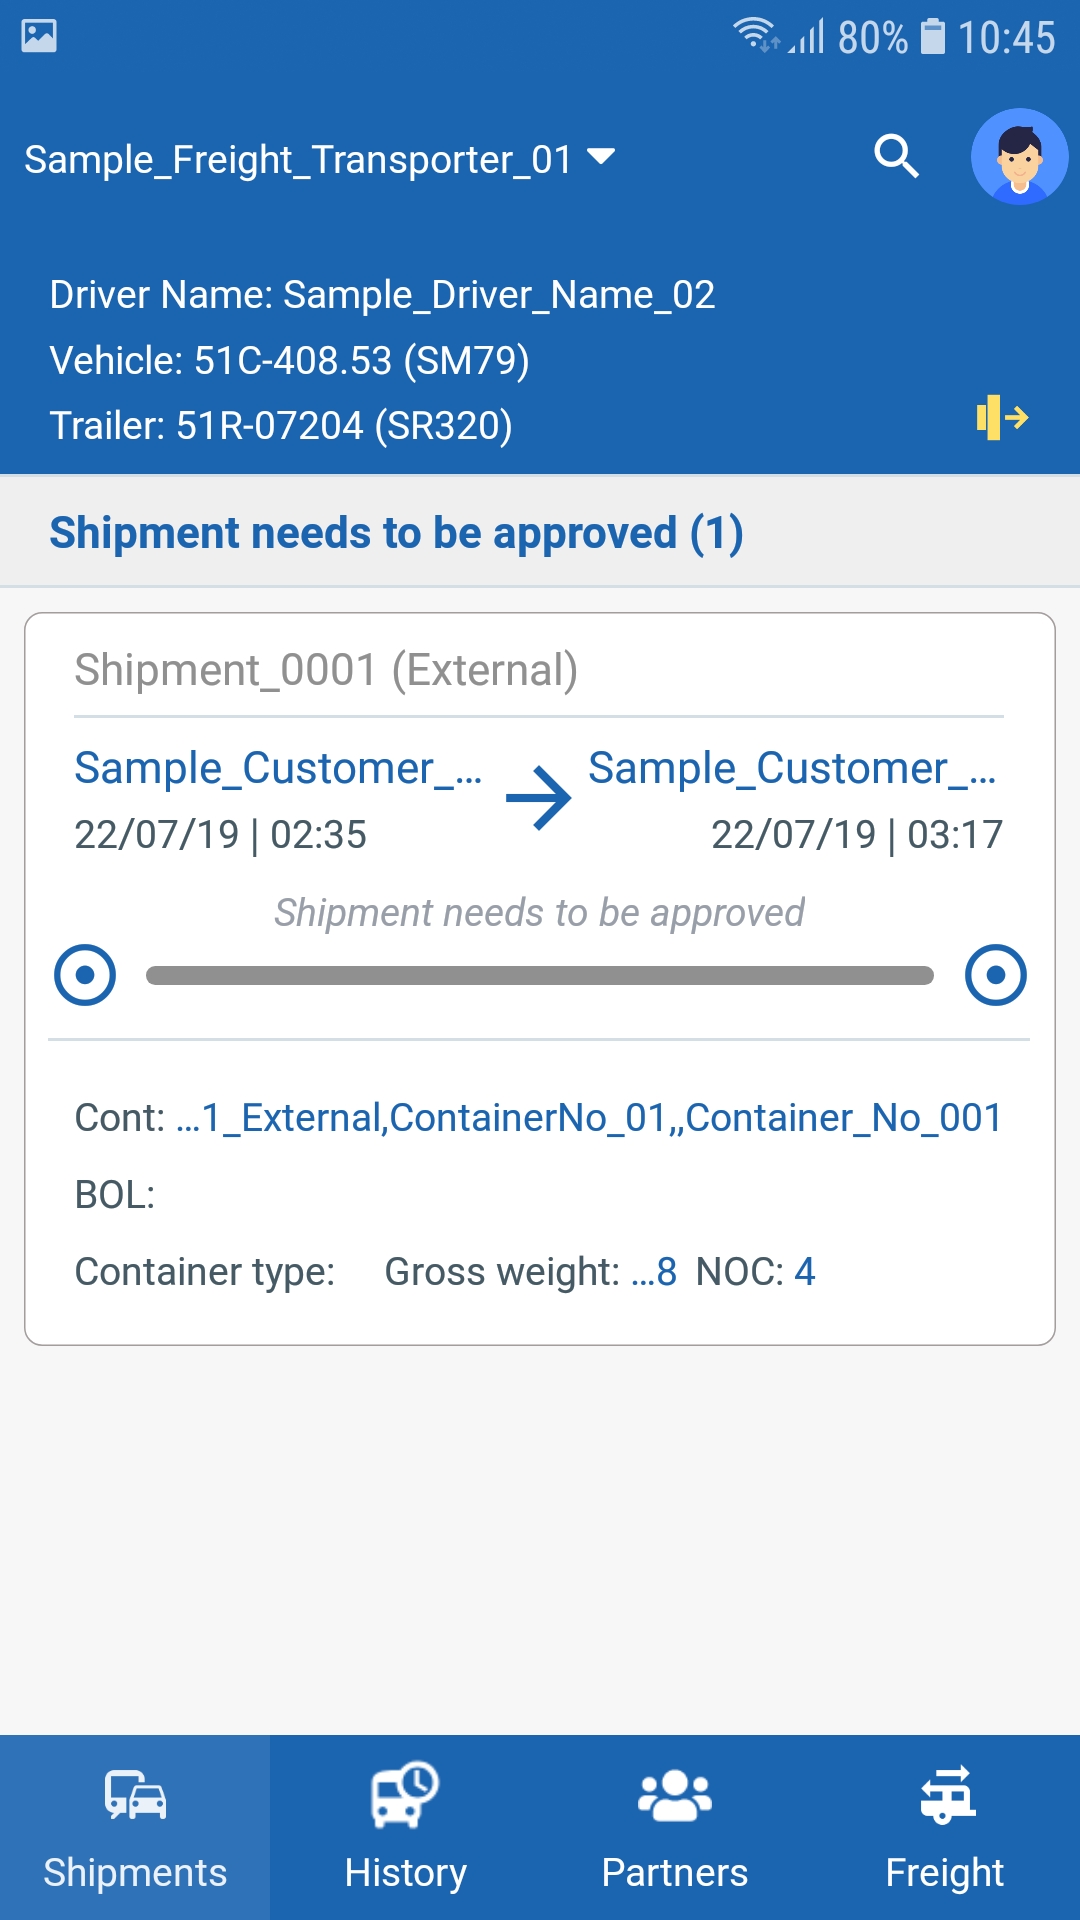
On the Shipments tab, the driver can see the current status of his shipment, with the following information:
- The organization which manages the truck tractor
- Driver Name
- Truck tractor license plate number
- Trailer license plate number
- Name of the shipment
- Status of the shipment (Assigned shipment, shipment being approved, shipment being operated)
- The information of the first and last destination of the shipment, including: Names of the destinations, Planned departure date, Planned arrival date
- Bill of Lading (BOL) number
- Gross weight
- The shipment progress bar
Perform shipment tasks
- By tapping on the shipment, the driver can view in details the shipment information, including all the events (or tasks) that he needs to perform at each stop point of the shipment route, in order to complete the shipment
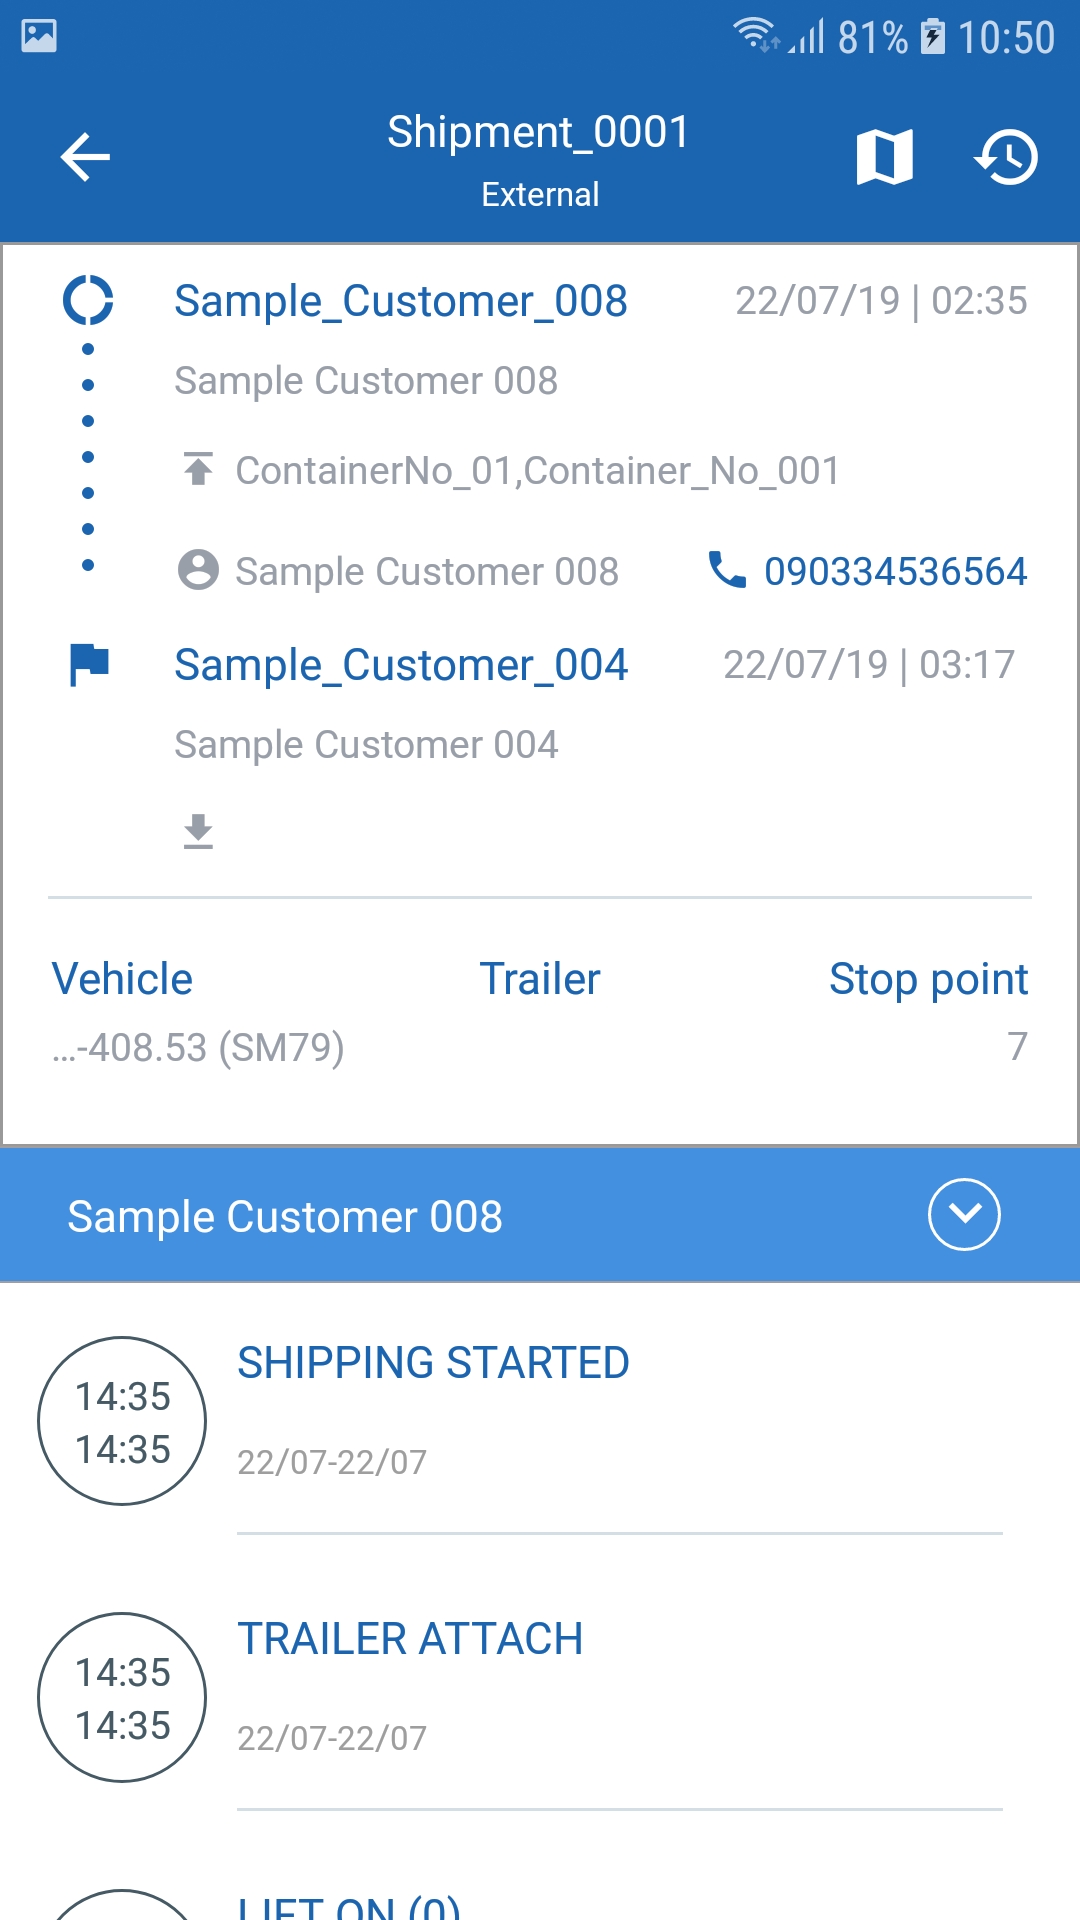
- The list of events that can happen during a shipment is in the below table:
Event (Task) Code | Description |
|---|---|
"SHIPPING STARTED" | The shipment is started. This is the first task of every shipment |
"SHIPPING COMPLETED" | The shipment is finished. This is the last task of every shipment |
"GATE IN" | The truck tractor comes into the stop point |
"GATE OUT" | The truck tractor comes out of the stop point |
"TRAILER ATTACH" | The trailer is attached (or hooked) to the truck tractor |
"TRAILER DETACH" | The trailer is detached (or unhooked) from the truck tractor |
"LIFT ON (1)" | An empty container is lifted on the trailer |
"LIFT ON (0)" | A non-empty container is lifted on the trailer |
"LIFT OFF" | A container is lifted off the trailer |
"STUFFING START" | Start loading goods into the container |
"STUFFING FINISH" | Finish loading goods into the container |
"DESTUFFING START" | Start unloading goods off the container |
"DESTUFFING FINISH" | Finish unloading goods off the container |
- In order to complete a shipment, the driver needs to complete every tasks assigned in that shipment, in chronological order
- Upon completing each task, the driver needs to take photos of the task as a form of proof, then tap on Submit to submit the photos to Abivin vRoute server. For each task, the driver could submit up to 5 photos
- As long as the driver hasn't submitted the SHIPPING COMPLETED task, he can re-submit photos of other tasks as many times as he needs to
- For the LIFT ON (1) events, in which the driver picks up empty containers onto the trailer, besides taking pictures of the containers, the driver needs to input the container information
- Below are the container information fields:
Information field | Description & Input |
|---|---|
Container Number (Required) | 1. Description: |
Seal Number | 1. Description: |
Max Gross Weight | 1. Description: |
Tare Weight | 1. Description: |
- If the drivers incorrectly input any of the above information, he will not be able to submit the LIFT ON (1) events
- If the Container Number is input correctly length wise, but fails to comply with ISO standard, there will be a pop-up to warn the driver, showing exactly which container was inputted incorrectly. The driver can choose to check the container number again, or continue to submit the event
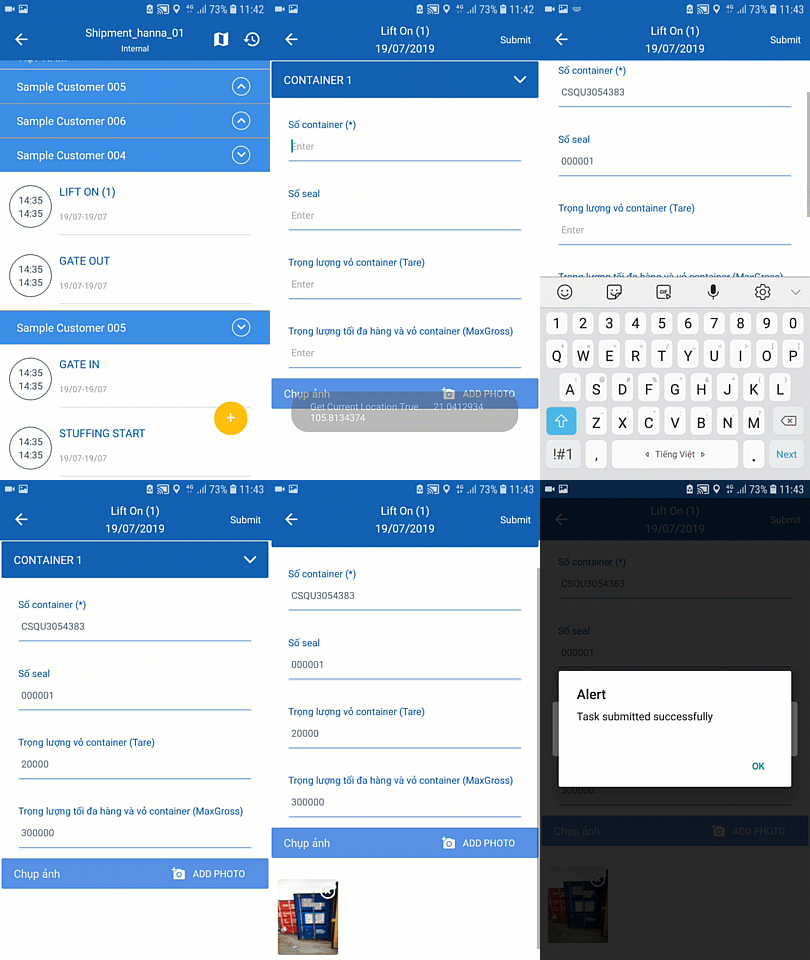
- Once the task is successfully submitted, the mobile screen will automatically redirect back to the task list screen so that the driver can follow up the next tasks
- The time icon next to the completed tasks will turn green, while the incomplete tasks still appear white

- When the shipment has been completed, with all the tasks turn green, the shipment will be moved to History tab
View planned and actual delivery routes
During the delivery trip, the driver can view the optimized route and check against the actual route he's been travelling.
View planned route
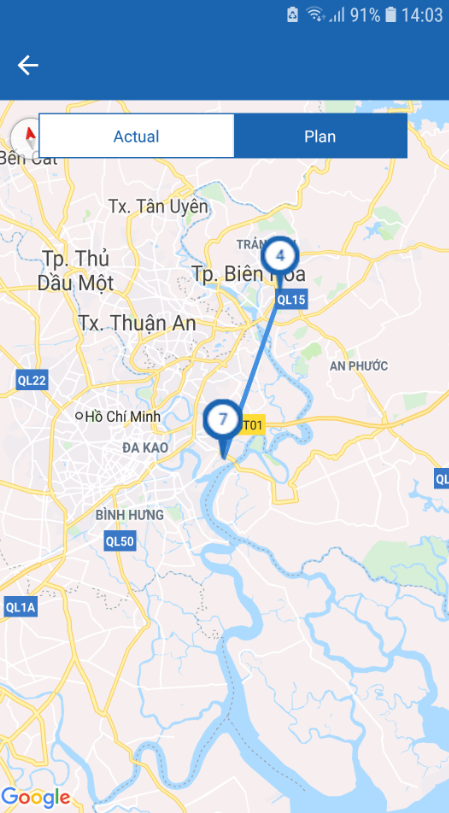
- On the task list screen, tap on Map icon on the top right of the screen. The driver will be directed to the map view screen
- The driver can use two fingers to zoom in the map (Swipe the two fingers closer to each other) or zoom out the map (Swipe the two fingers further from each other)
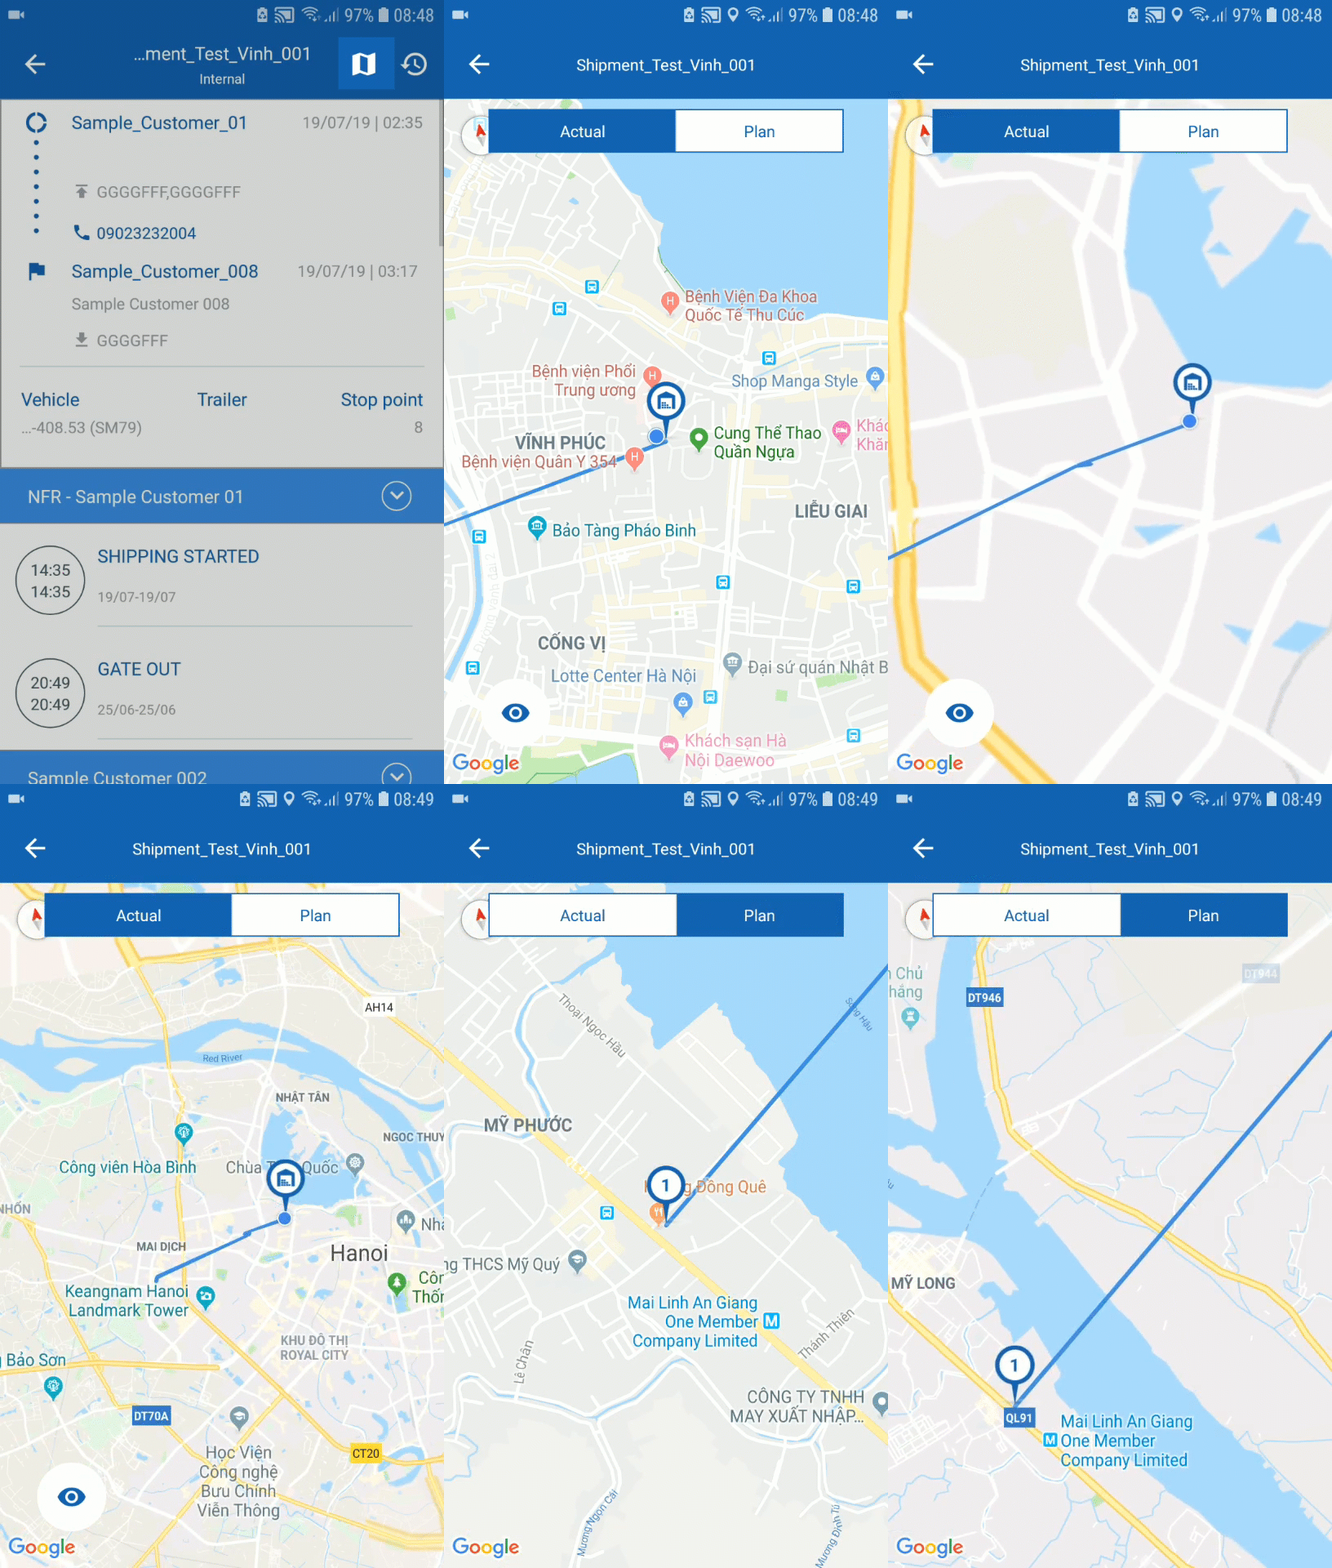
- Tap on Plan tab. On the screen, there will be the original planned route of the shipments, with all the stops the driver has to visit
View actual route
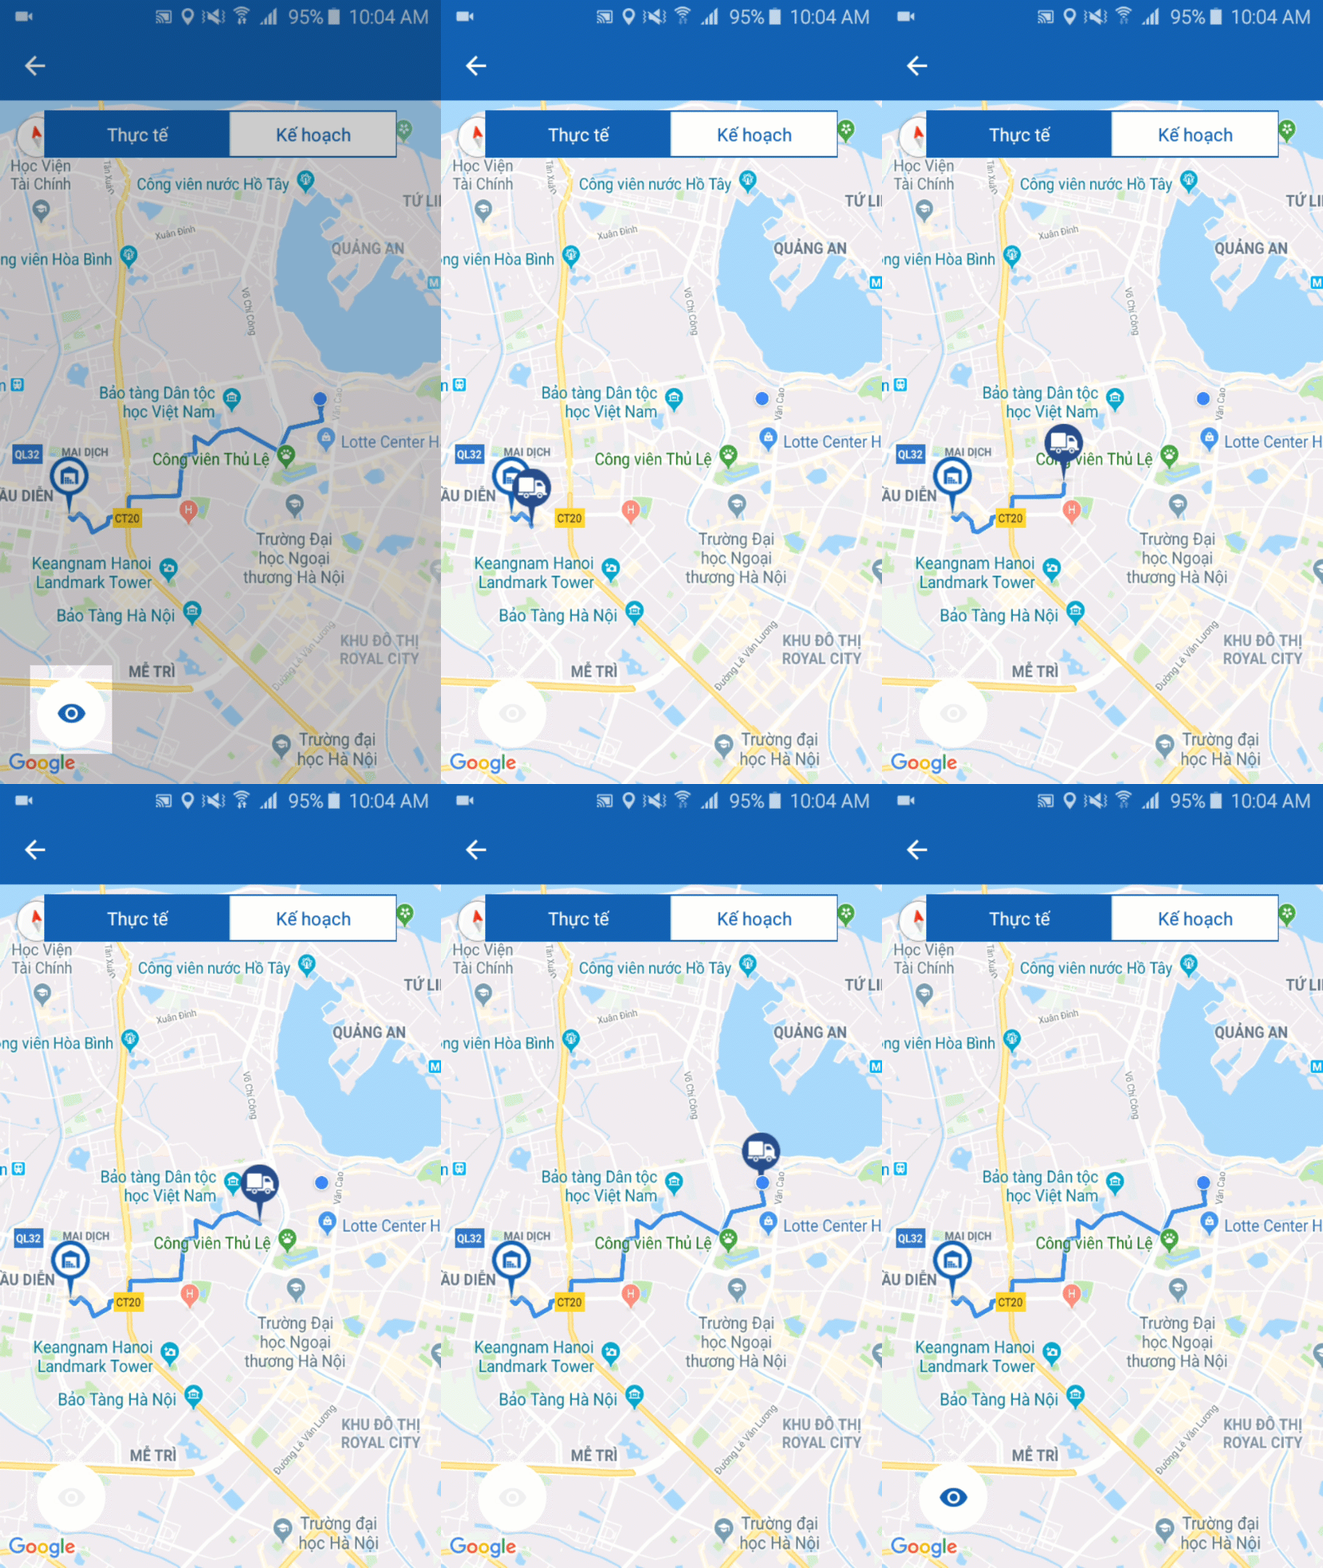
- Tap on Actual tab. The map will display the route that the driver has actually been travelling.
- To play back the actual delivery route, the driver can tap on icon on the bottom left corner of the screen. The actual delivery route will be played back
Request Non-freight related stop (NFR)
- After completing the shipment, the truck tractor driver might need to travel from the end location of the recently completed shipment to:
- The start location of the next shipment, or
- A location not related to the next shipment
- He can do so by actively requesting a Non-freight related stop (NFR), a stop point not tied to any specific shipment
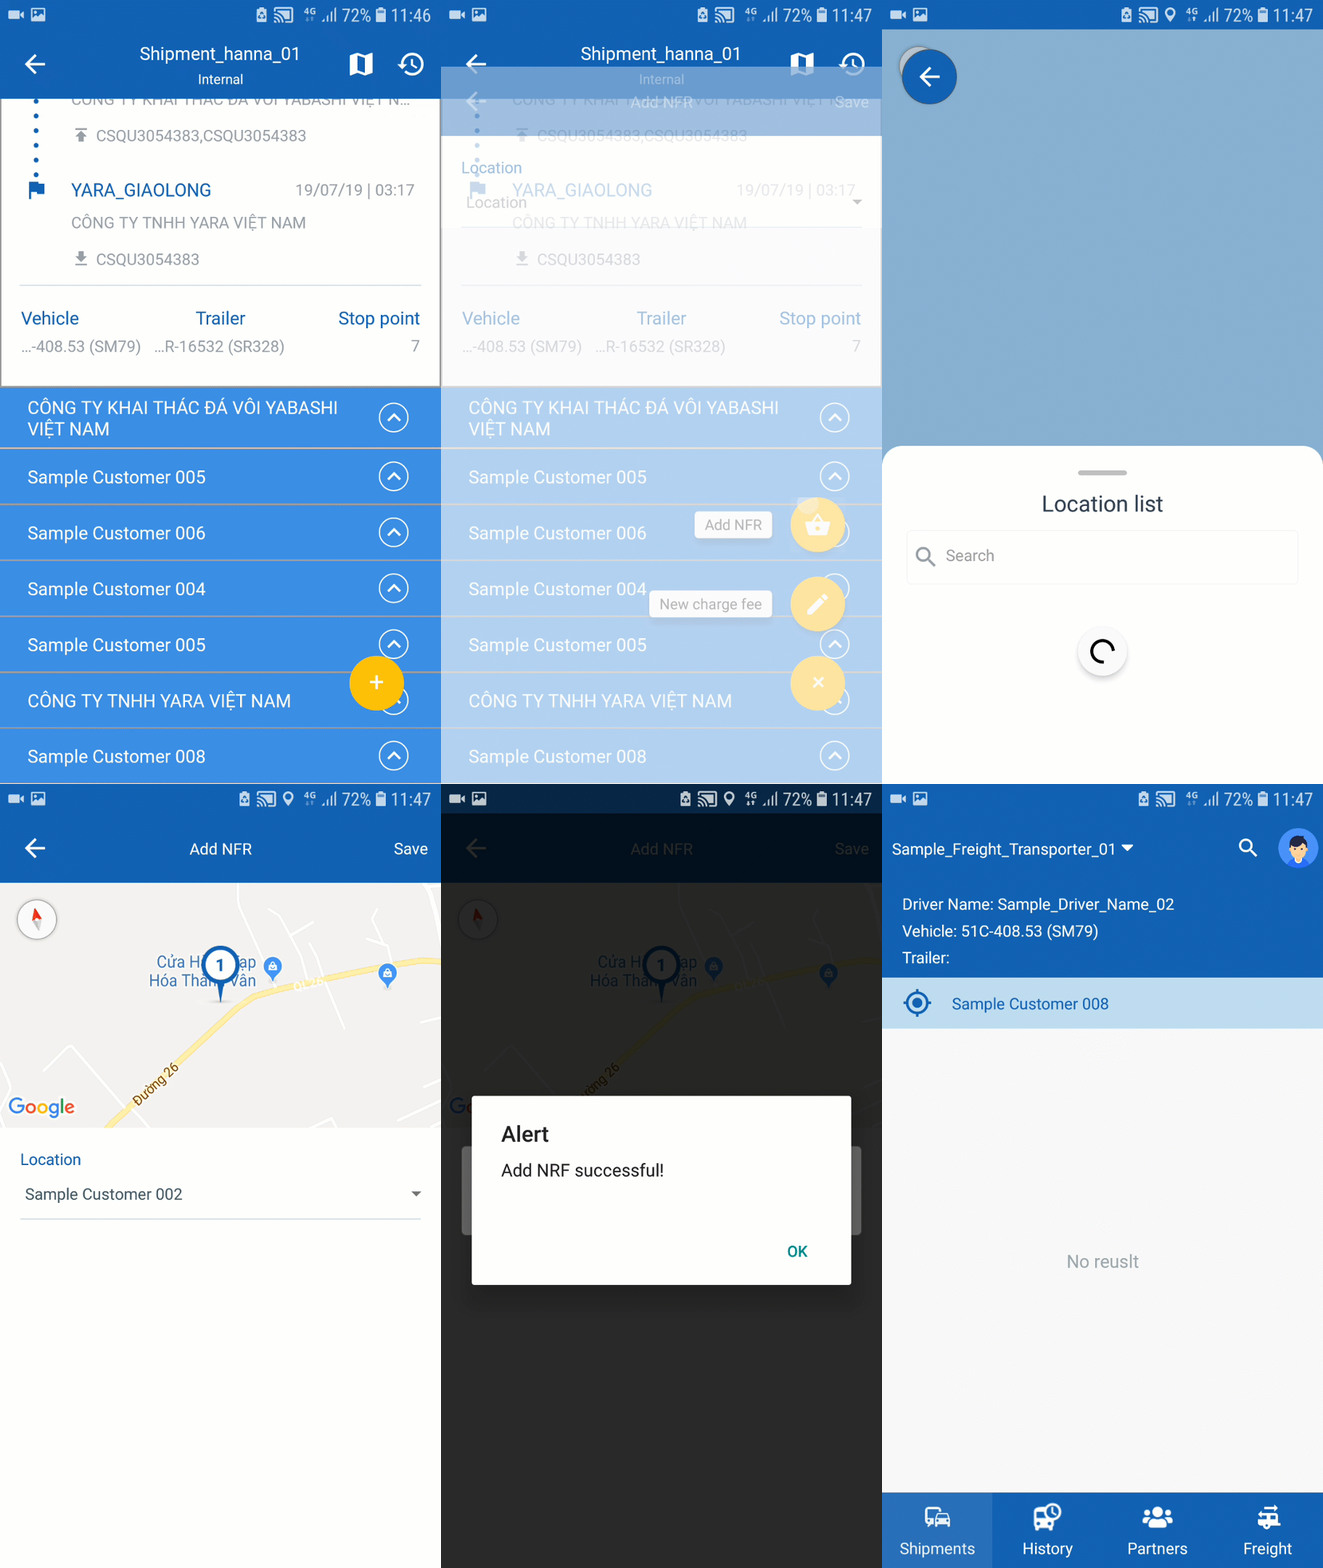
- To do that, the driver needs to tap on History tab, then tap on the recently completed shipment
- On the task list screen, tap on icon, then tap on the icon that reads Add NFR
- On the Add NFR screen, tap on Location field, then choose the desired location on the Location list, or search for the location in the Search field, then click Save. The NFR request will be submitted to the dispatcher, waiting for approval
- The driver can simply swipe the Mobile app screen to refresh and update the approval status of the NFR
- If the NFR request has been approved, the shipment will be moved back to the Shipments tab. The task list of the recently completed shipment will be updated. There will be additional tasks the driver need to perform, in order to get to the desired location, such as: GATE OUT (from the current port), GATE IN (to the desired port) etc. Only when completing these additional tasks, the shipment is finally deemed completed
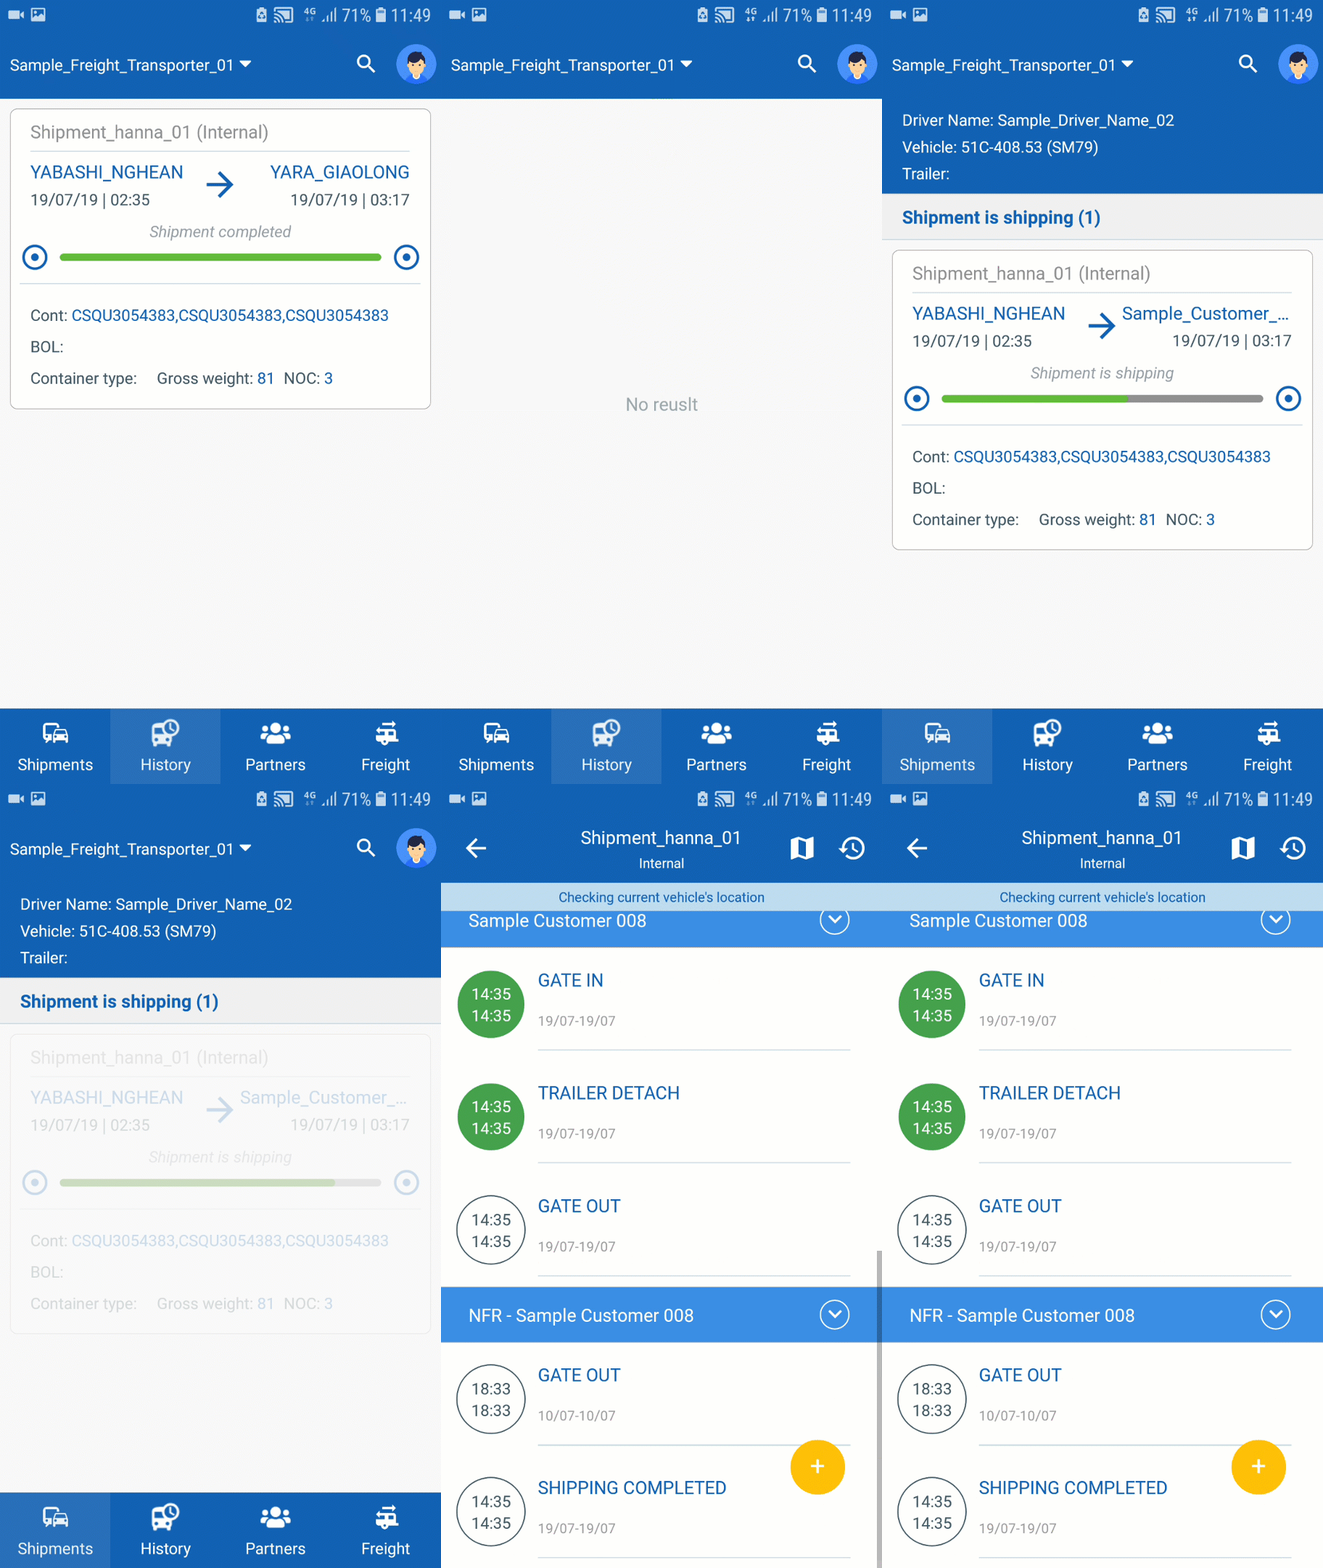
If there has been a NFR request sent from the mobile associated with the truck tractor earlier, which is still waiting for the dispatcher decision, the driver will not be able to submit another NFR from that mobile
Submit shipment charge requests to dispatchers
Submit charge requests
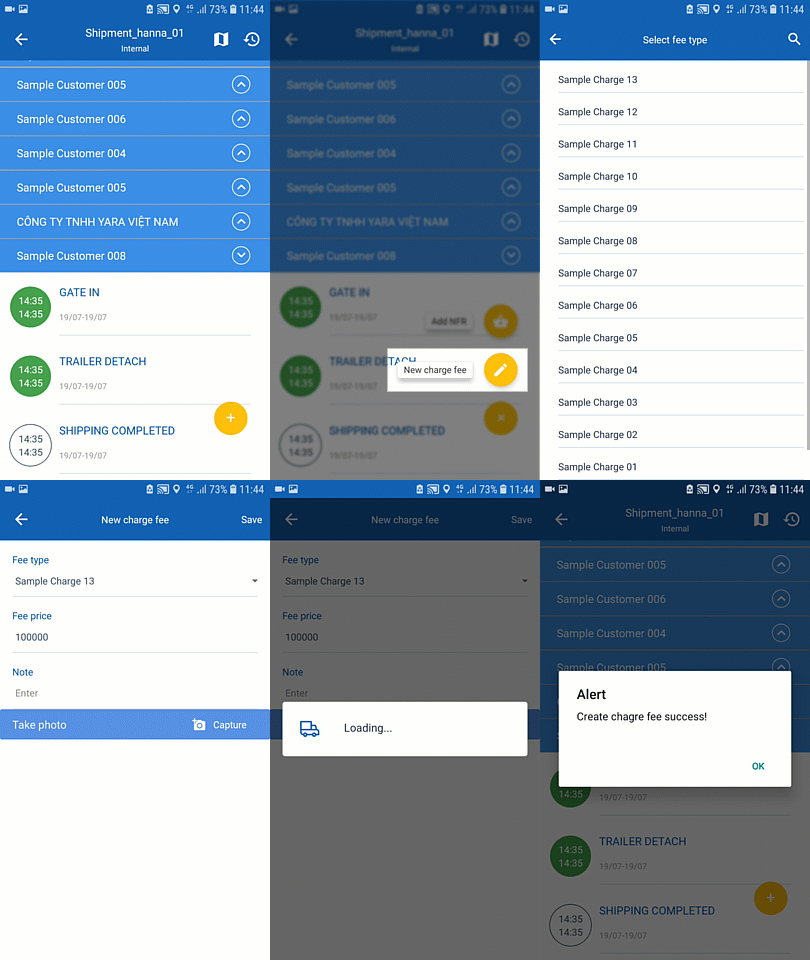
- On the task list screen, tap on the yellow button.
- Two other buttons will reveal. Tap on the New charge fee button, the driver will then be able to submit the fee he has just been charged.
- The driver could choose the type of fee (Fee type) from the drop down menu, the amount of that fee (Fee price), a short description of that fee (Note). The driver could also take pictures of the fee bill.
- If the driver doesn't want to submit charge request, he can tap on the icon.
- The charge request will then be submitted to server, waiting for the dispatcher's approval.
View list of submitted charge requests
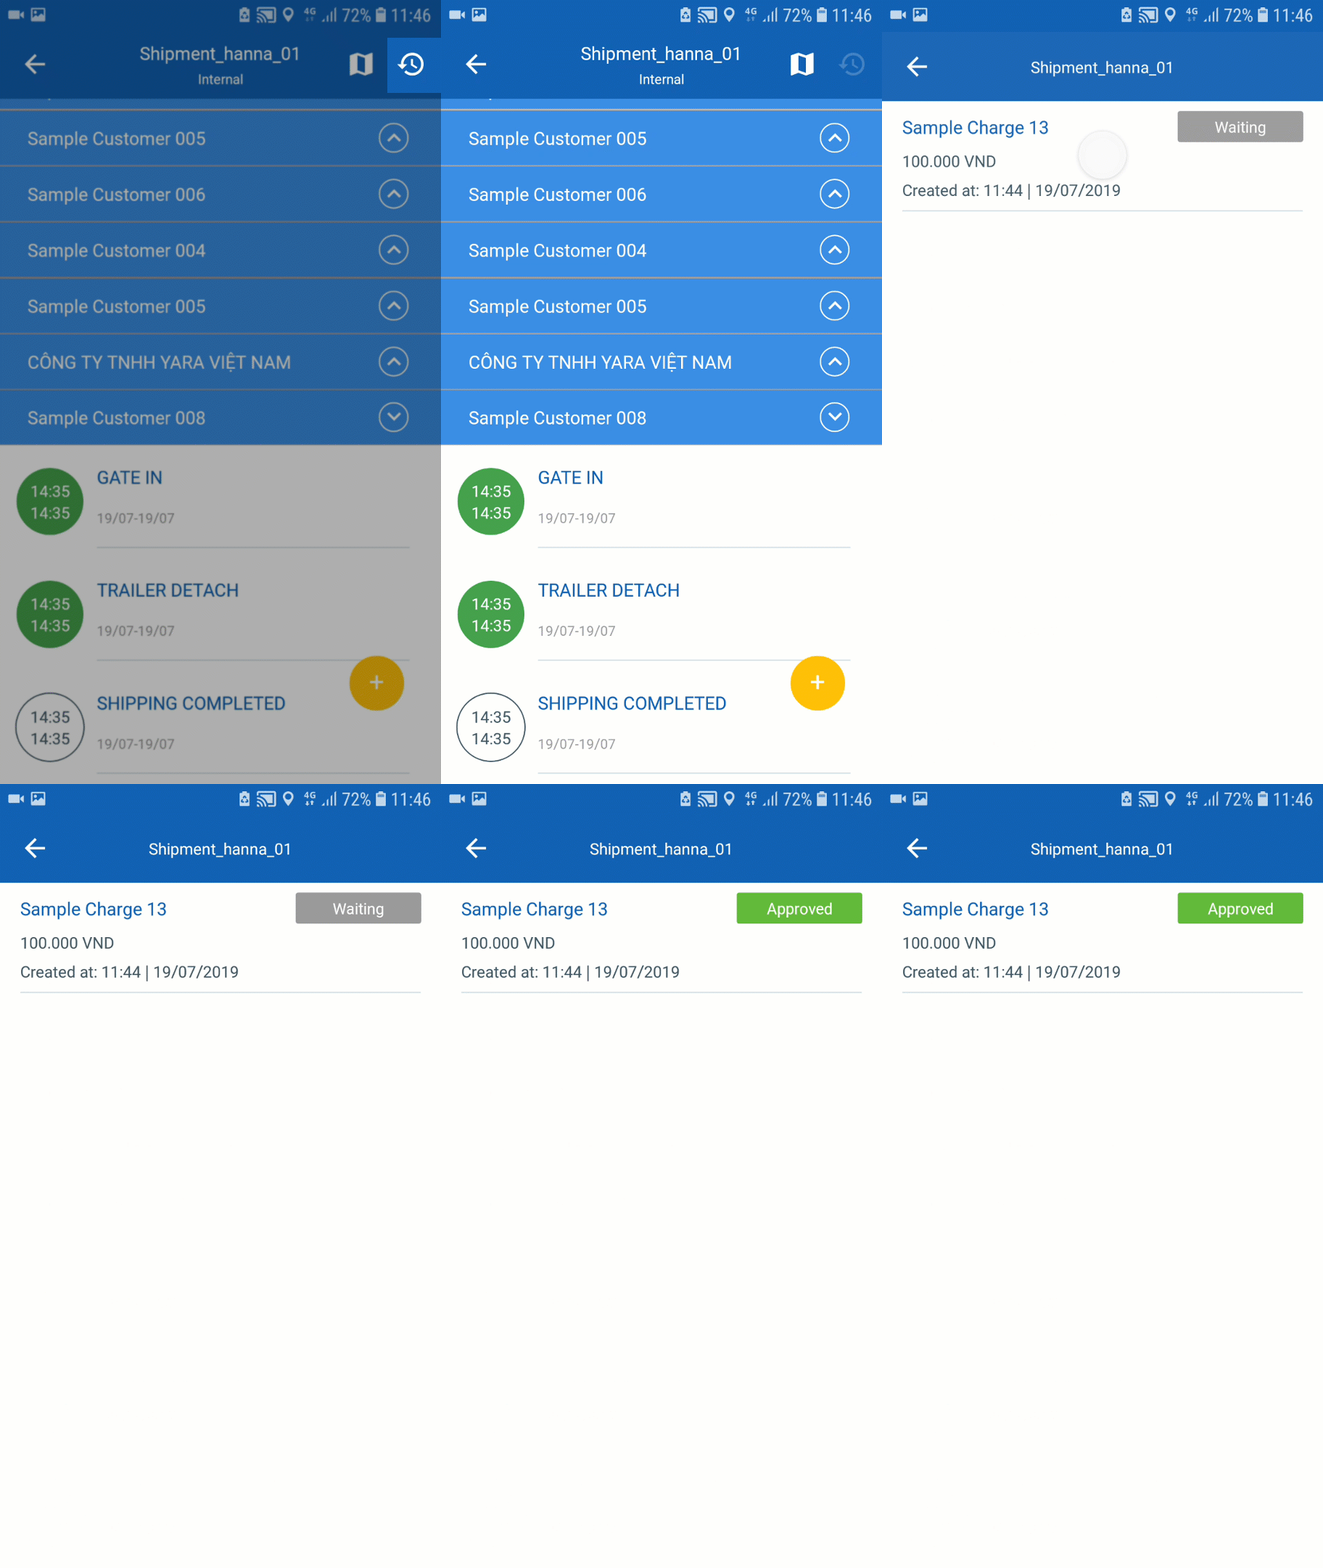
- By tapping on the icon on the top right of the task list screen (Next to the Map icon), the driver can see a list of charge requests associated with the shipment he's currently operating, along with the status of the request (pending or has been approved).
- To update that status of pending charge requests, the driver can simply swipe the mobile screen down to refresh the list. When the status of the pending charge requests changes from Waiting to Approved, that means the request has been approved by the dispatcher on Web app
View container note
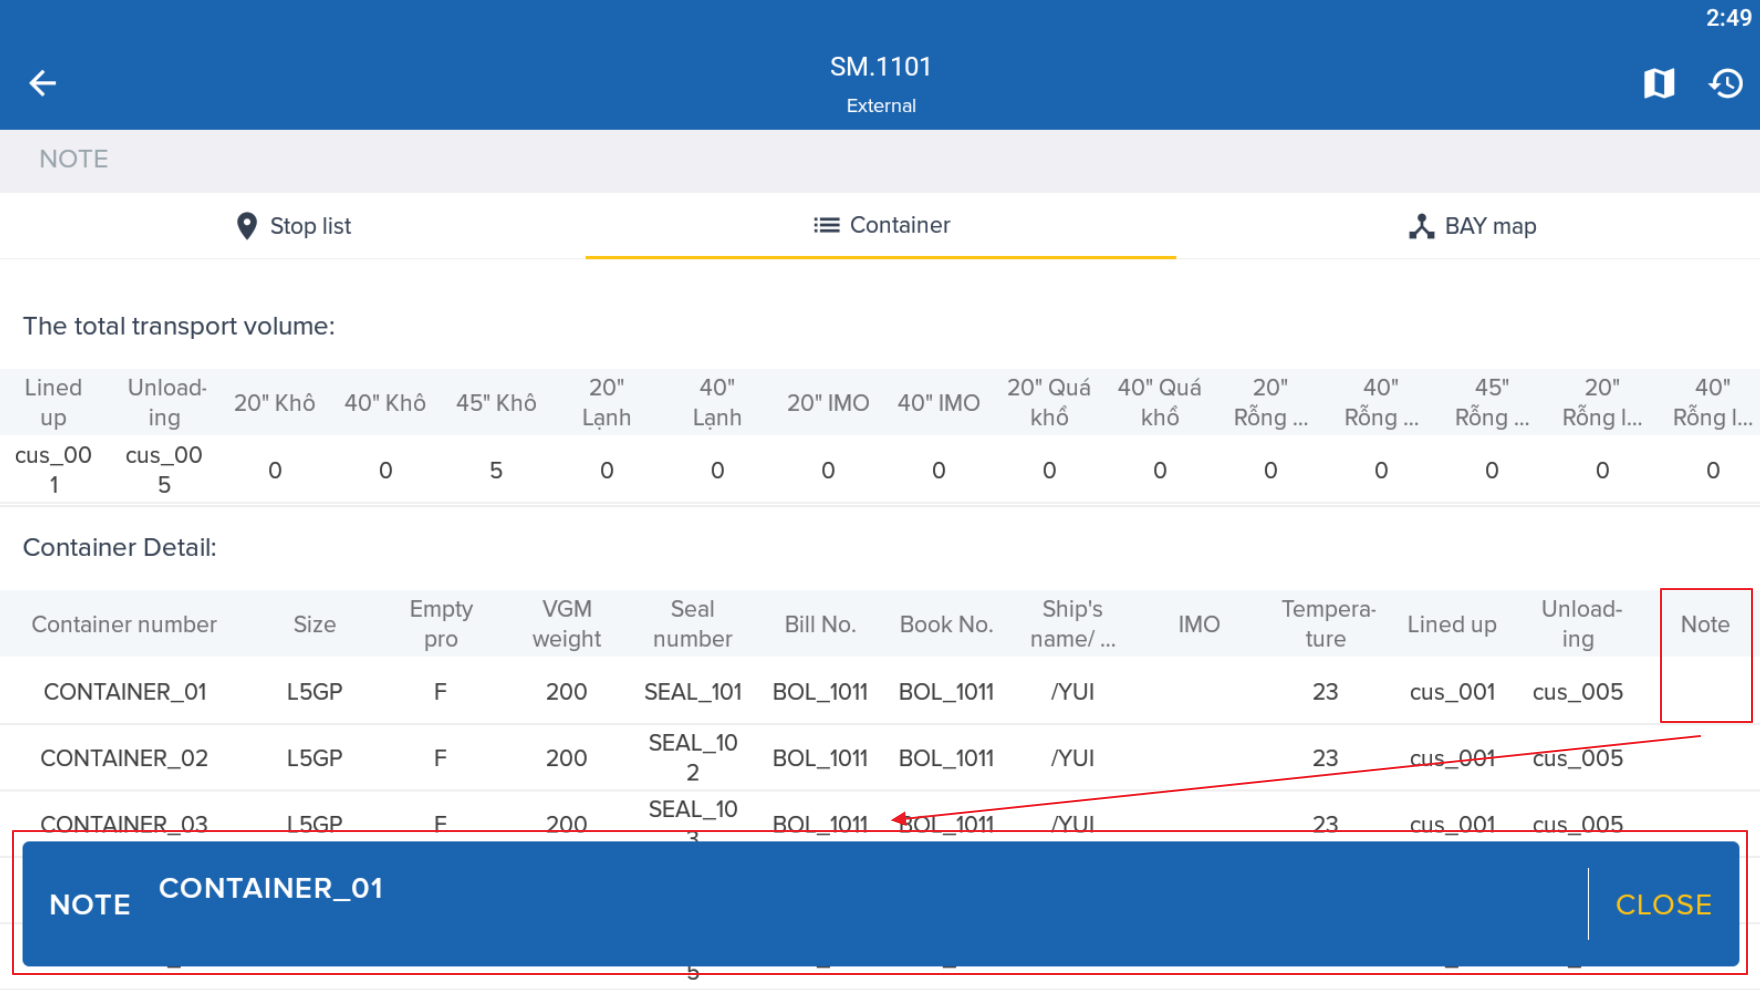
- Each container of a shipment might container a short note. To view a container's note, you have to navigate to the Shipment detail screen. Next, tap on Container tab, then tap on the note of a container under Note column
Send And Receive Shipment Notes
- During the Shipment performing process, you can send as well as receive shipment related notes on the Mobile app
- First, tap on the Shipments tab
- Notice the Shipment note section at the bottom of the Shipment. This section will display the latest note sent by the dispatcher from the Web app
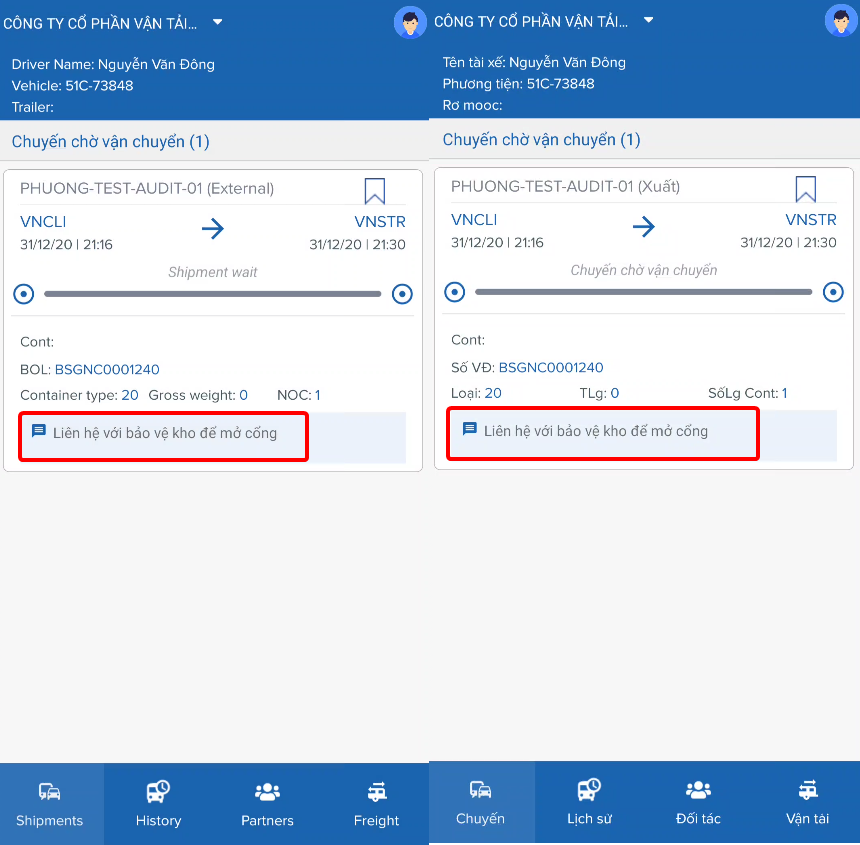
- To view the full note history, tap on that section. The Mobile app will redirect to the Shipment Note screen
- To send a new note, tap on the Note from Driver section then input the note. You can input a maximum of 500 characters (letters; numbers; special characters including spaces) per note.
- After that, tap on the Send icon to send the note to the dispatcher
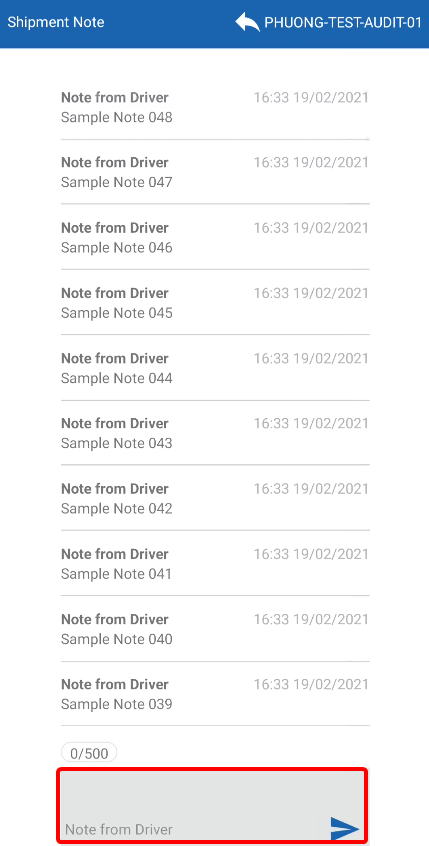
- There are some notes:
- 1 - Once a note is created and sent, you can not edit it
- 2 - For each Shipment, you can send and receive a maximum of 50 notes
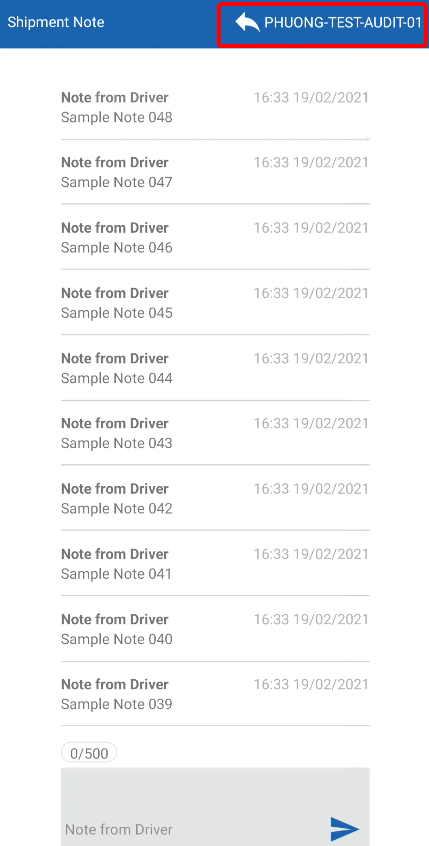
- To go back to the Shipment tab, tap on the Back icon
Updated about 1 month ago
