System Operations
System Data Structure
- In Abivin vRoute system
Create Records
- To create records of a specific resource, the users need to navigate to the tab where the records of that resource are stored. For example, records of the Customer resource are stored in the Partners > Customers tab, records of the Vehicle resource are stored in the Transportation > Vehicles tab
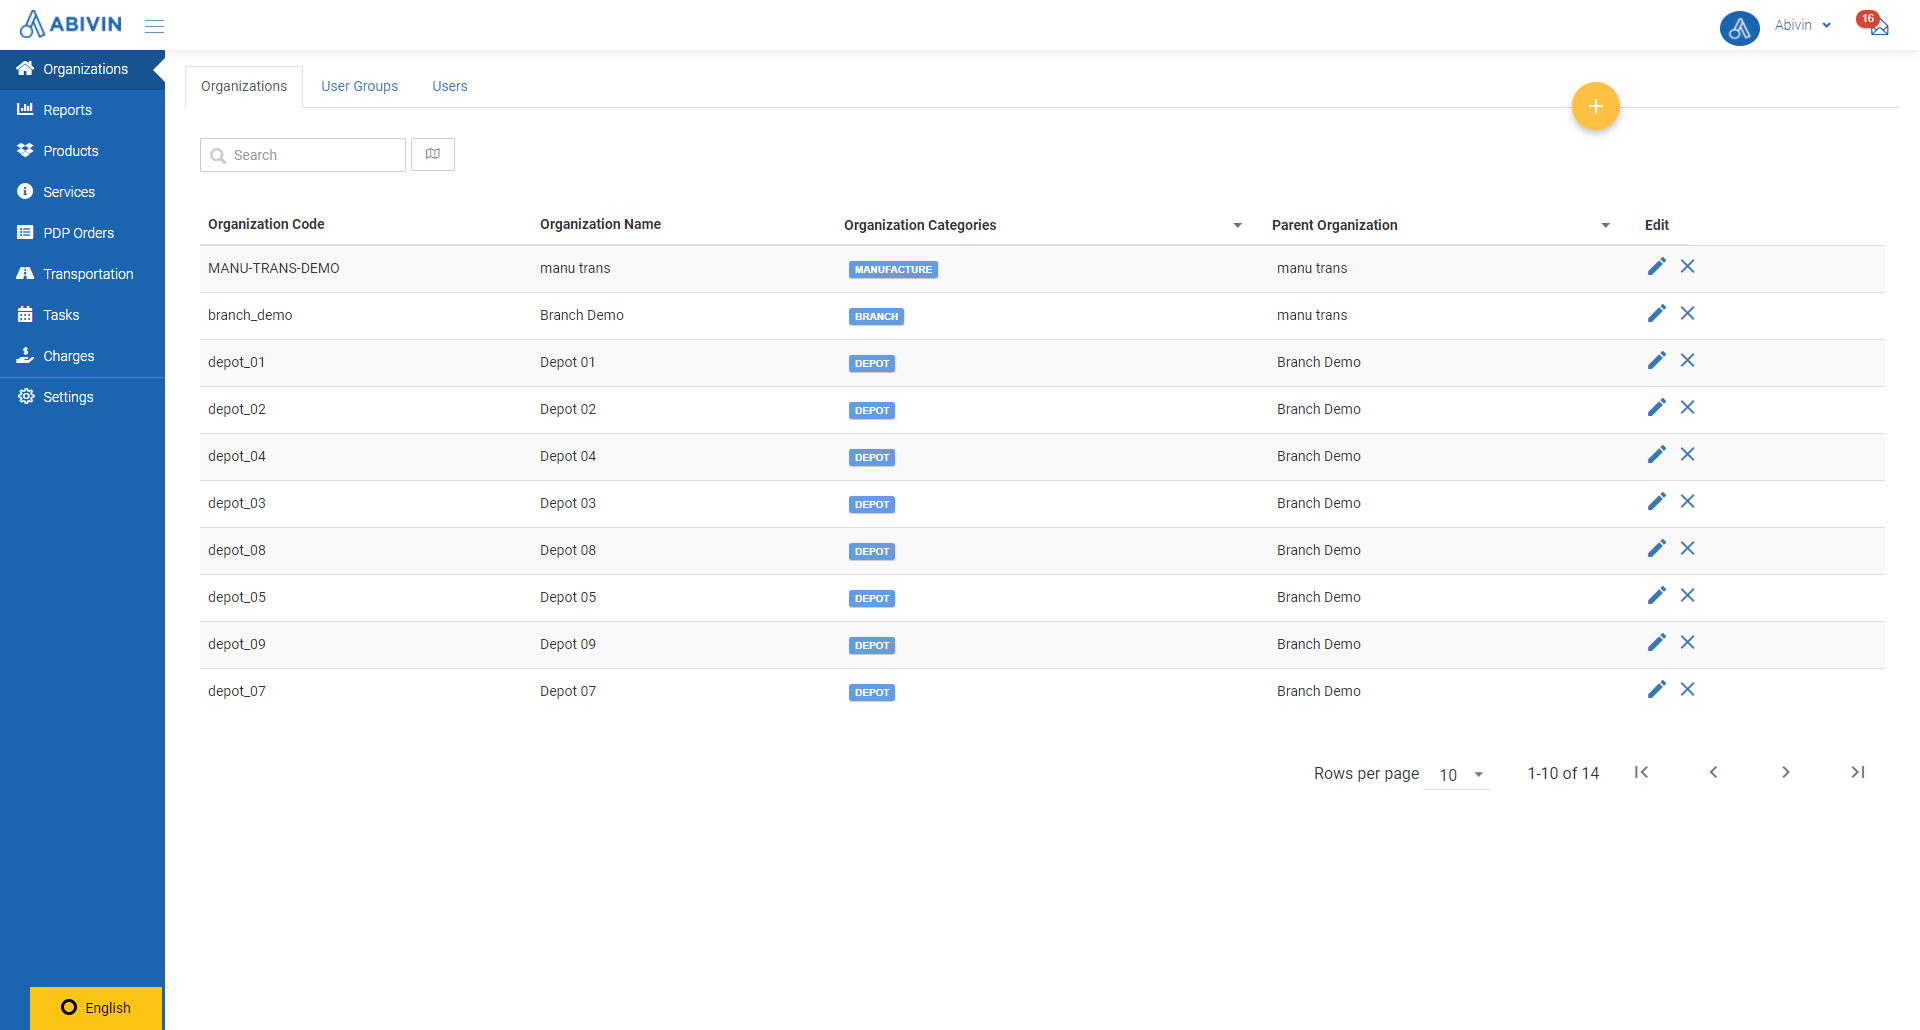
Organizations > Organizations tab, where records of the Organizations are stored
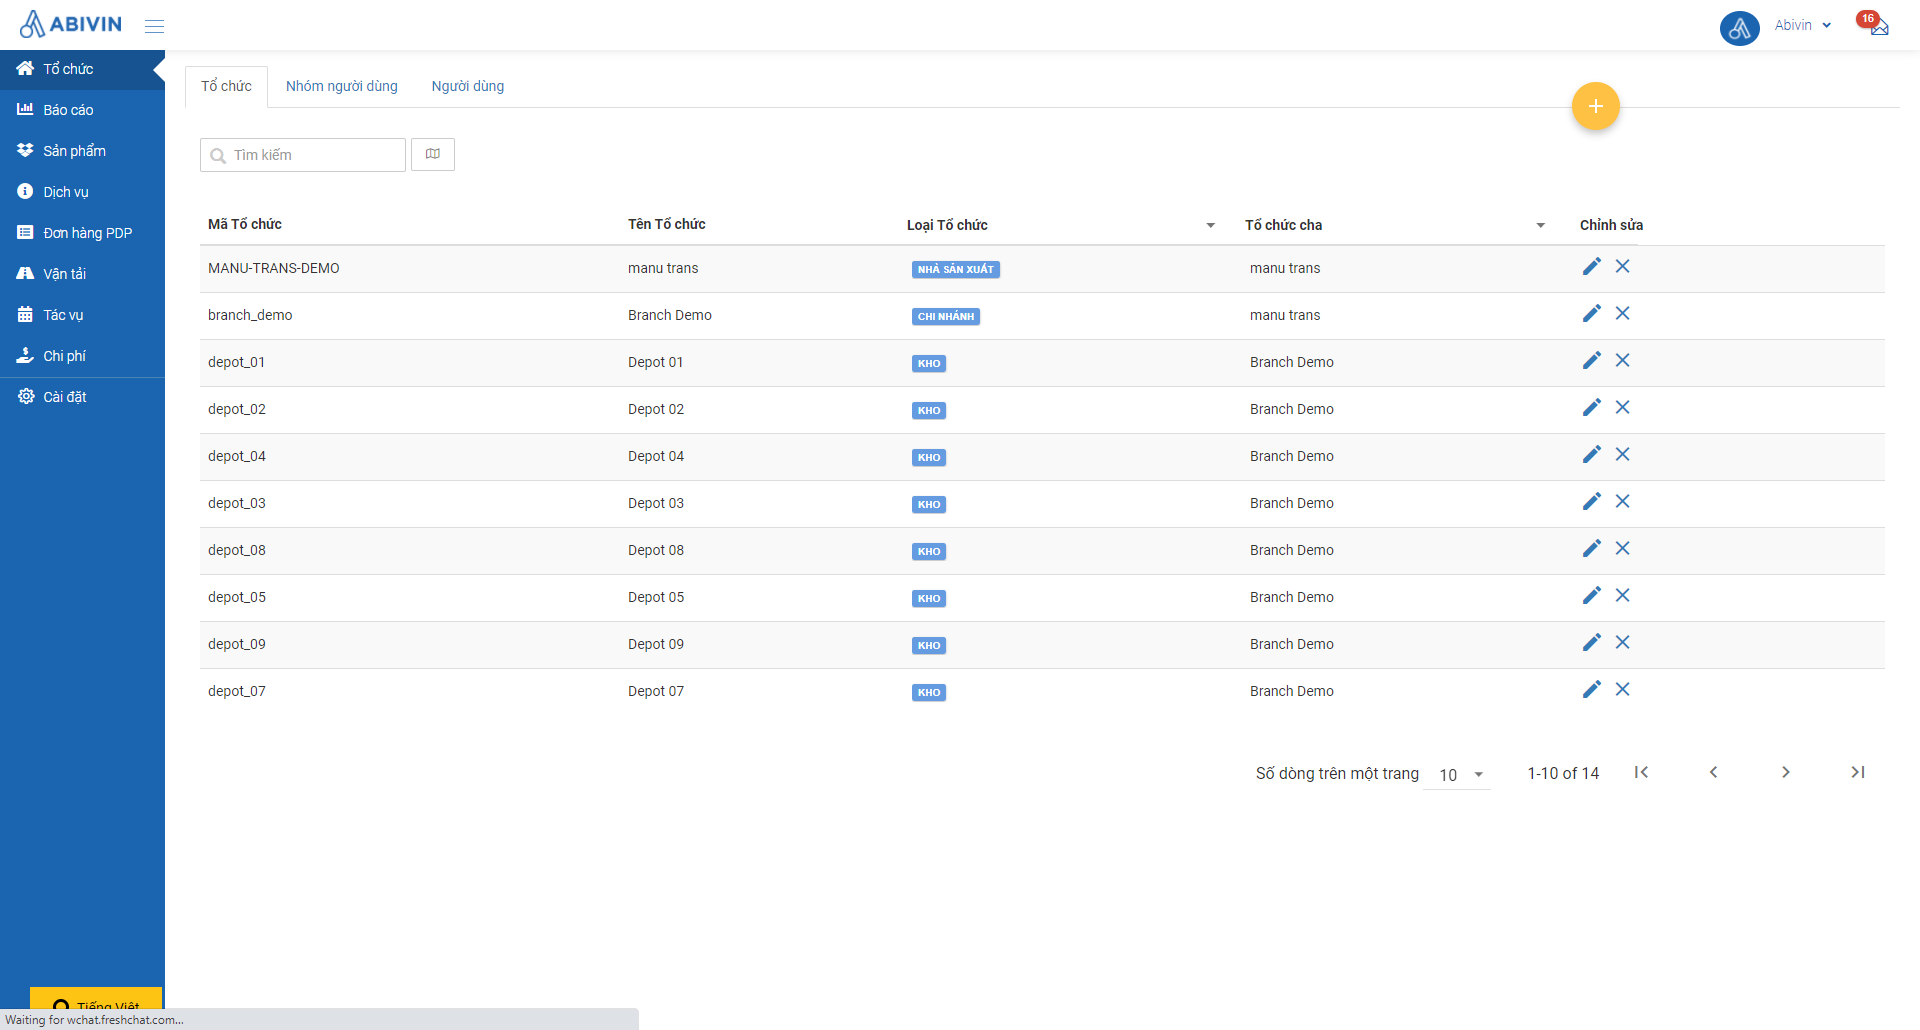
Organizations > Organizations tab, where records of the Organizations are stored
- Usually, the users are offered two methods to create records:
- Method 1: Using Webform. This method is used when you just want to create a single record
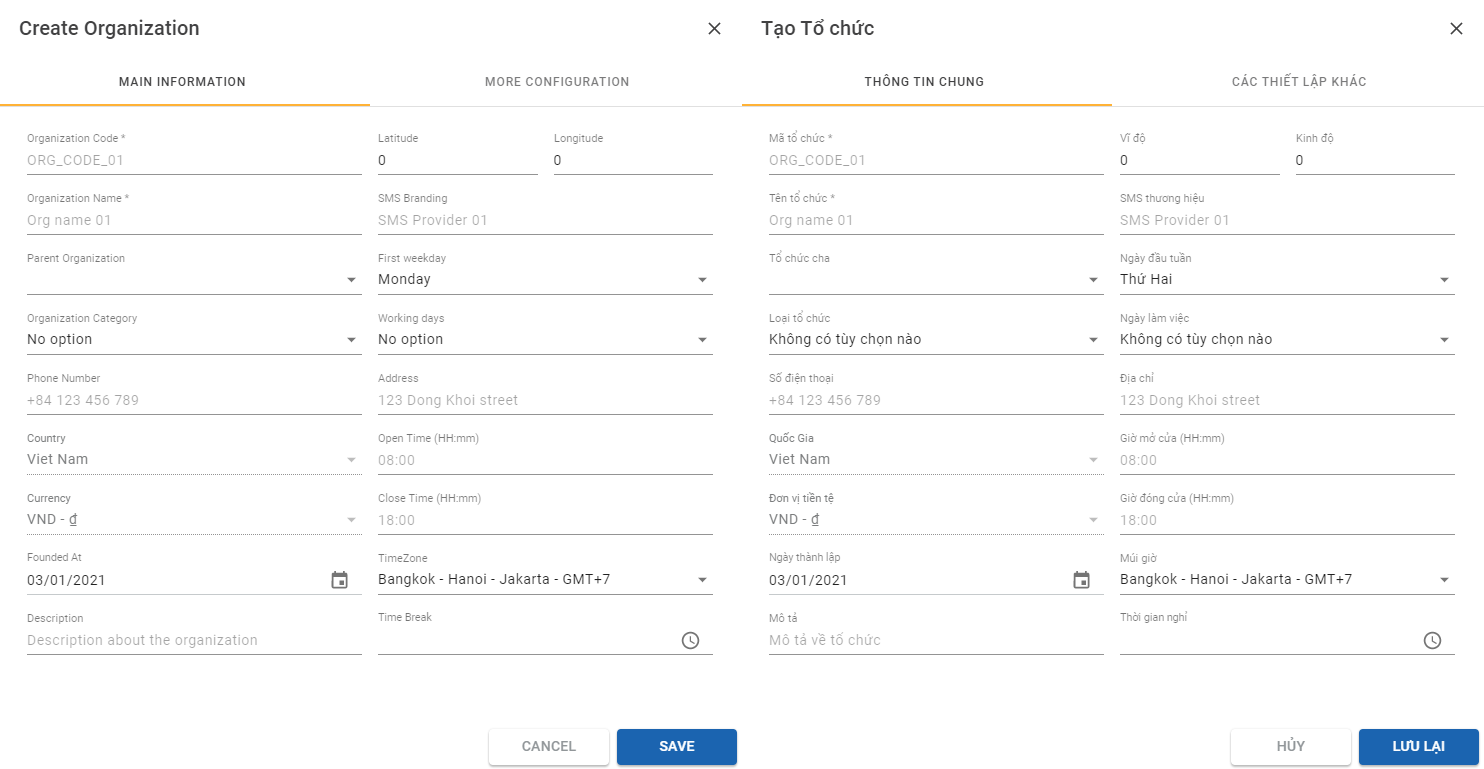
Webform
- Method 2: Using Excel file. This method is used when you want to create multiple records

Excel file
Method 1: Create a single record using the Webform
- This method applies when you want to create one object at a time
- First, hover your mouse over the orange plus-circle icon :

- The plus-circle icon will reveal several icons below. One of them is the Create icon that looks like a pencil

- Click on the Create icon, a Webform will appear. On the Webform, you need to input data of the record being created into the information fields
- There are information fields that you must not leave blank. These information fields will be referred to as Required fields. On the other hand, there are information fields that you can leave blank. These information fields will be referred to as Optional fields
- After you have finished inputting the data, you need to click on the blue Save (Or Create in some tabs) button at the end of the web form in order to generate and store the record into the database
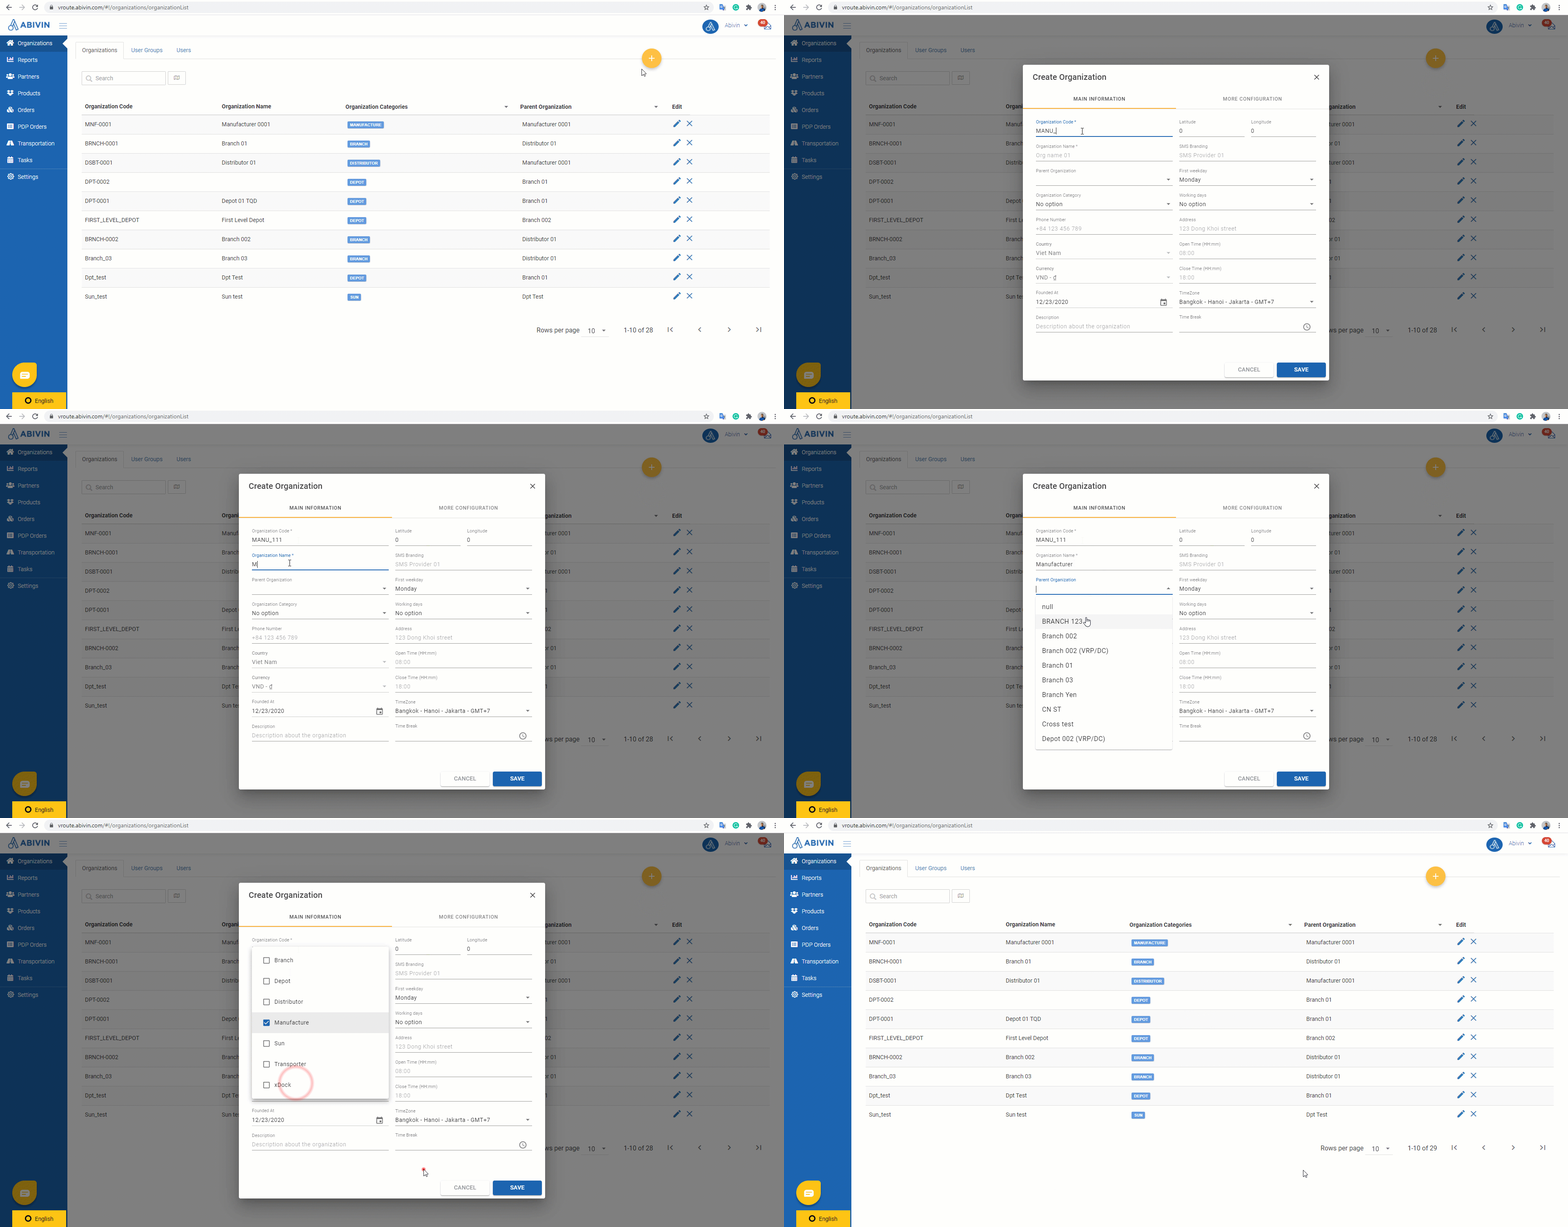
Illustration (English)
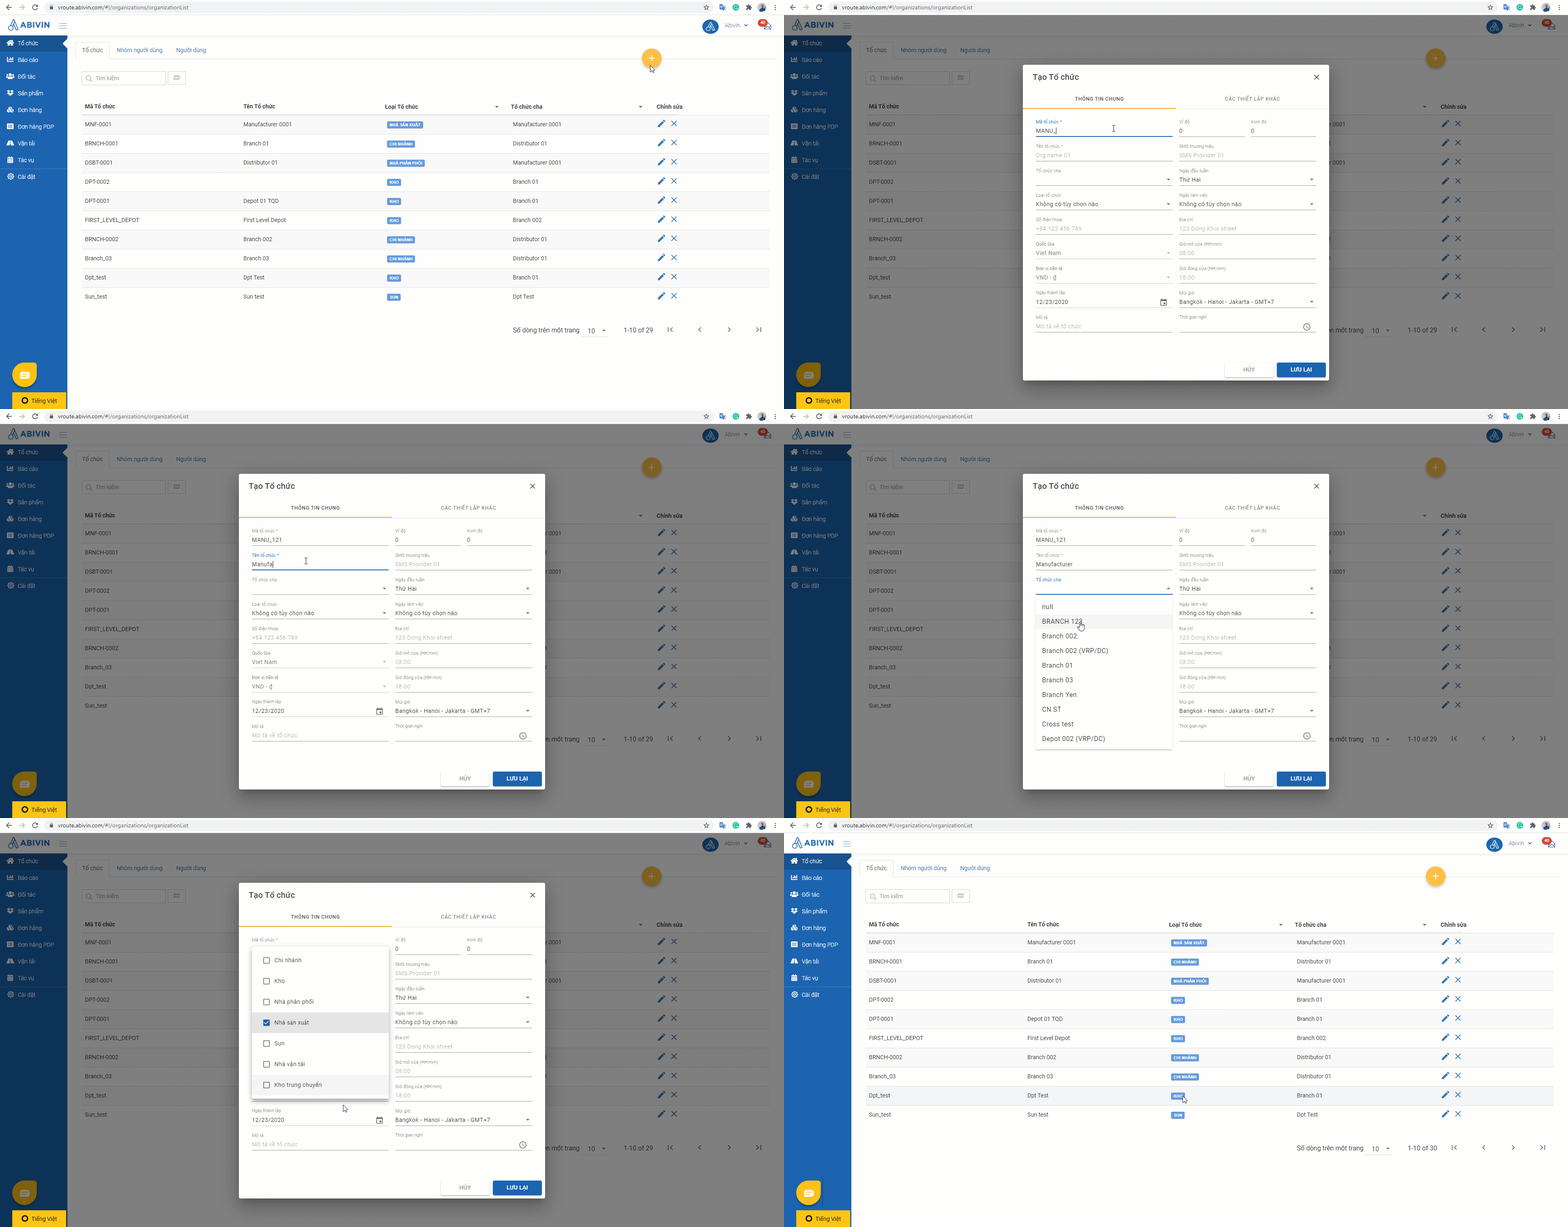
Illustration (Vietnamese)
Method 2: Create multiple records using Excel file
- First, hover your mouse over the orange plus-circle icon :

-
- The plus-circle icon will reveal several icons below. One of them is the Import icon that looks like a file

- Click on that icon. The Upload Data form will appear.
- On the Upload Data form, click on the Download Sample area. You will be able to download the sample Excel file to your computer
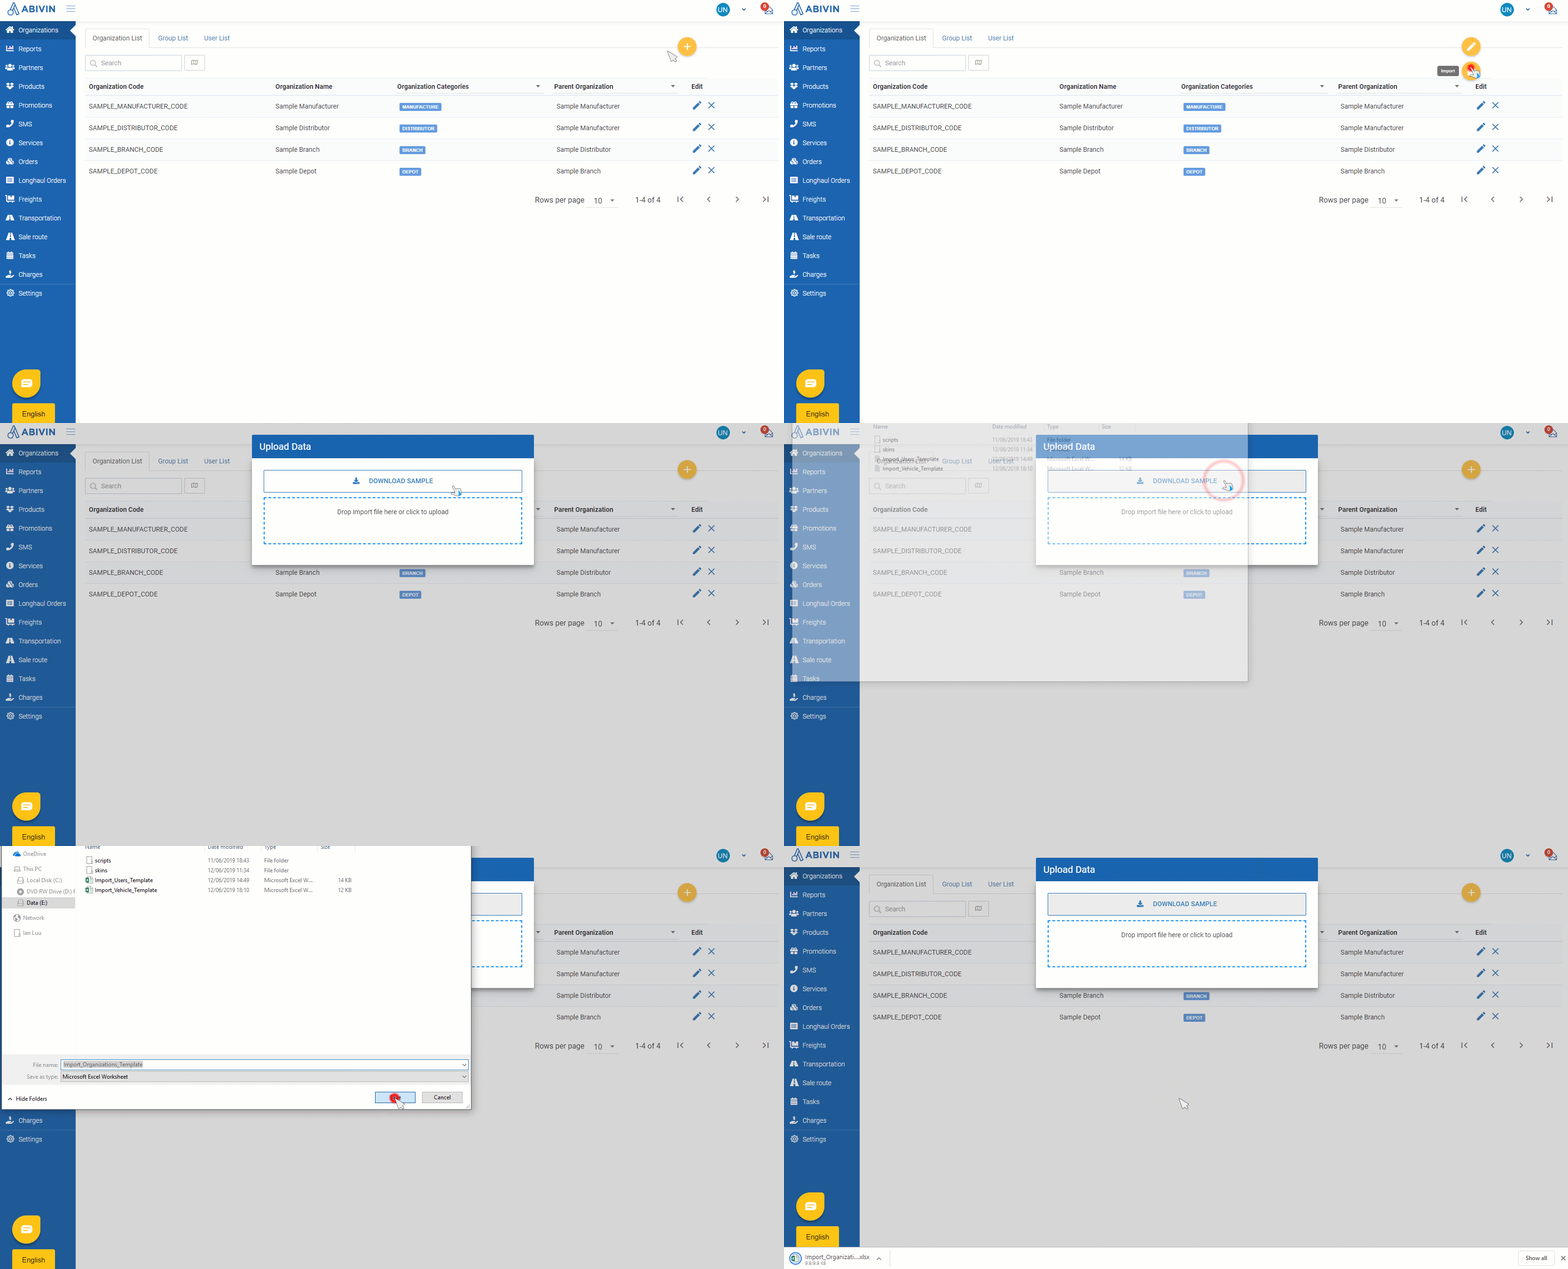
Illustration GIF (English)
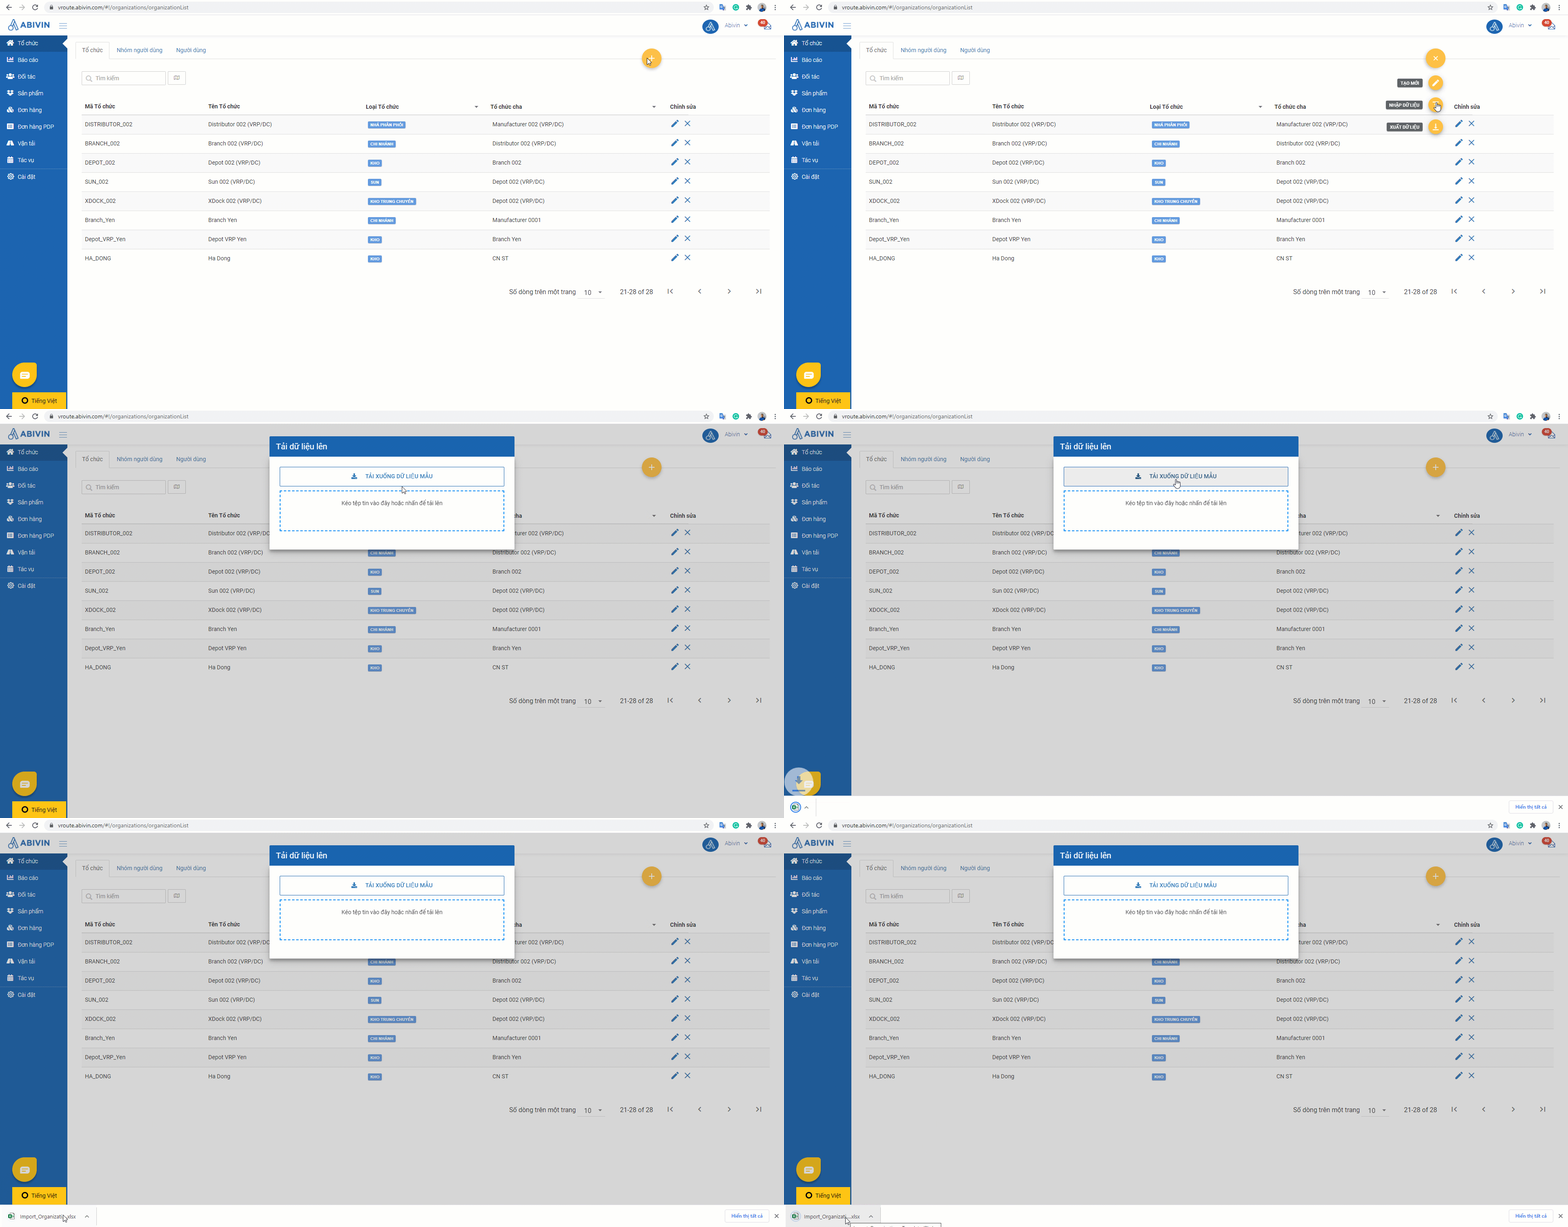
Illustration GIF (Vietnamese)
- Open the Excel template, you will encounter the information fields similar to Web form. These are mostly basic/compulsory information fields. After uploading the Excel template onto the system, you might need to input additional information for the objects
- After inputting the necessary data into the Excel template, you can upload the template onto Abivin vRoute database by clicking on Drop import file here or click to upload area, then choose the Excel template from your computer
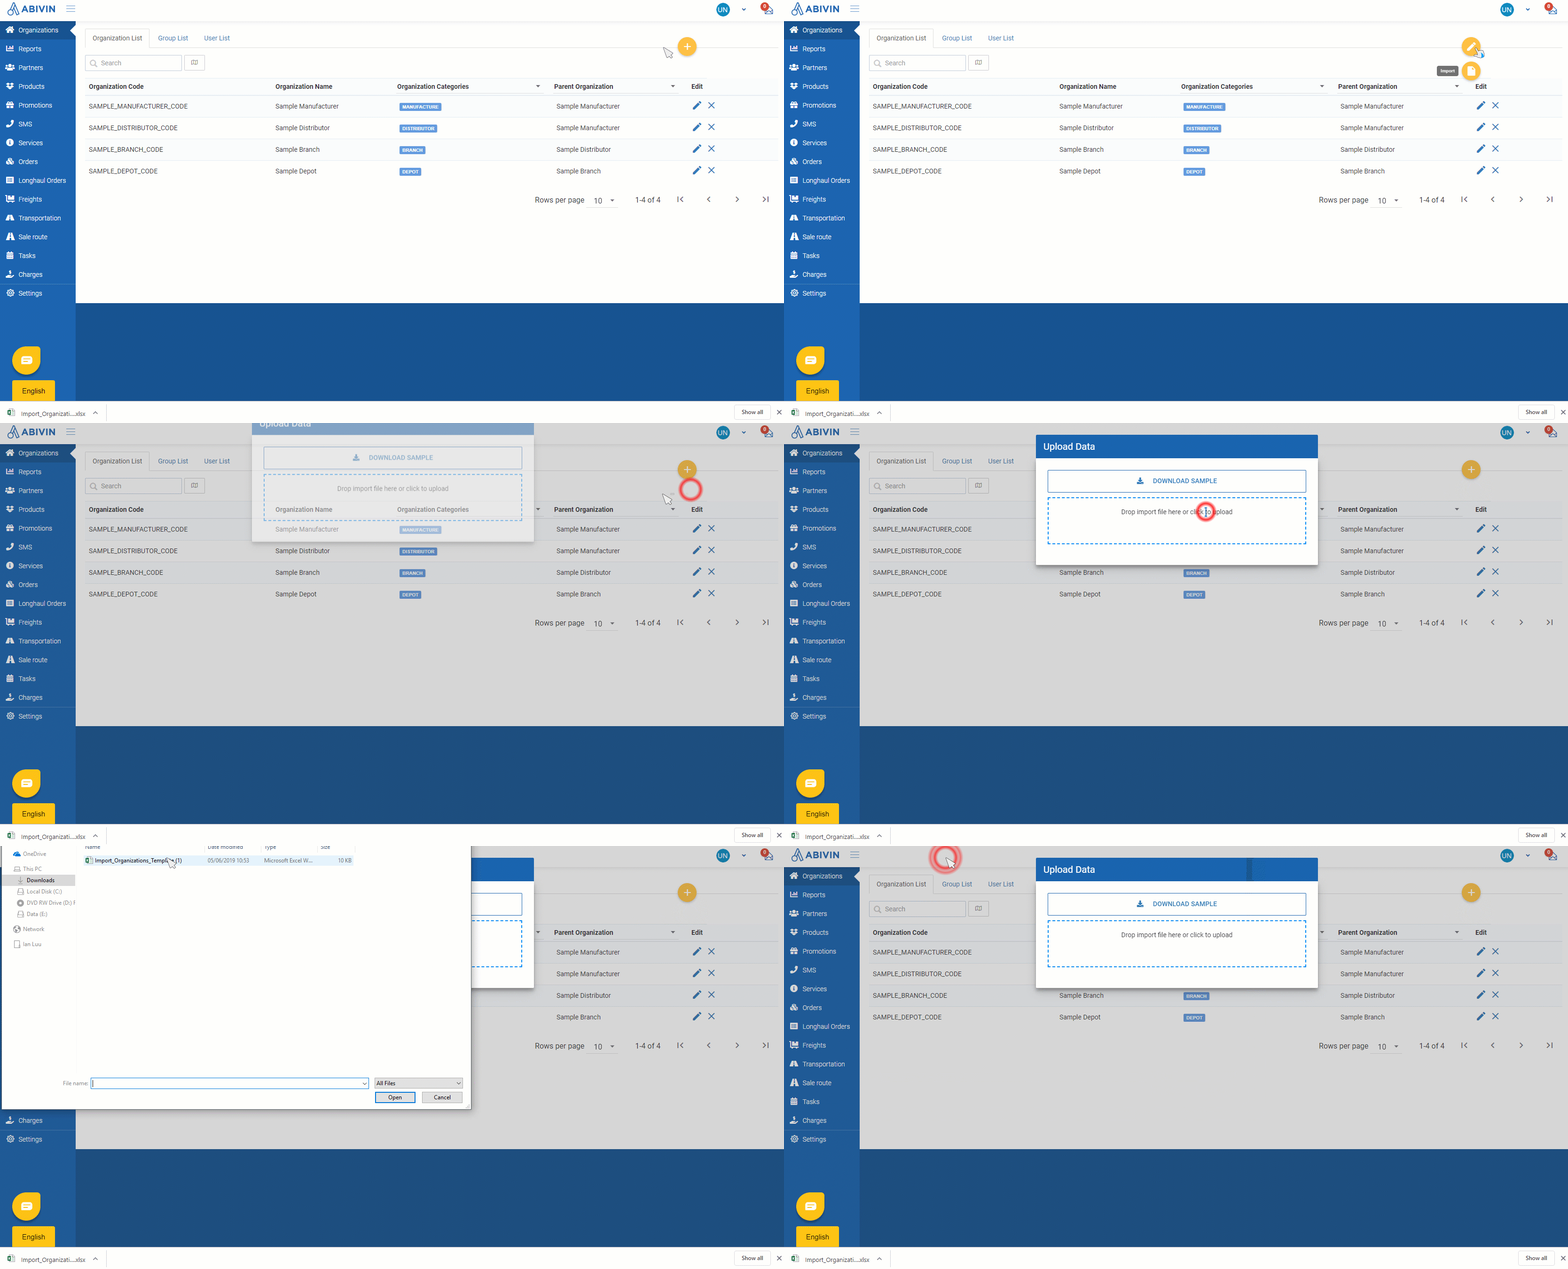
Illustration GIF (English)
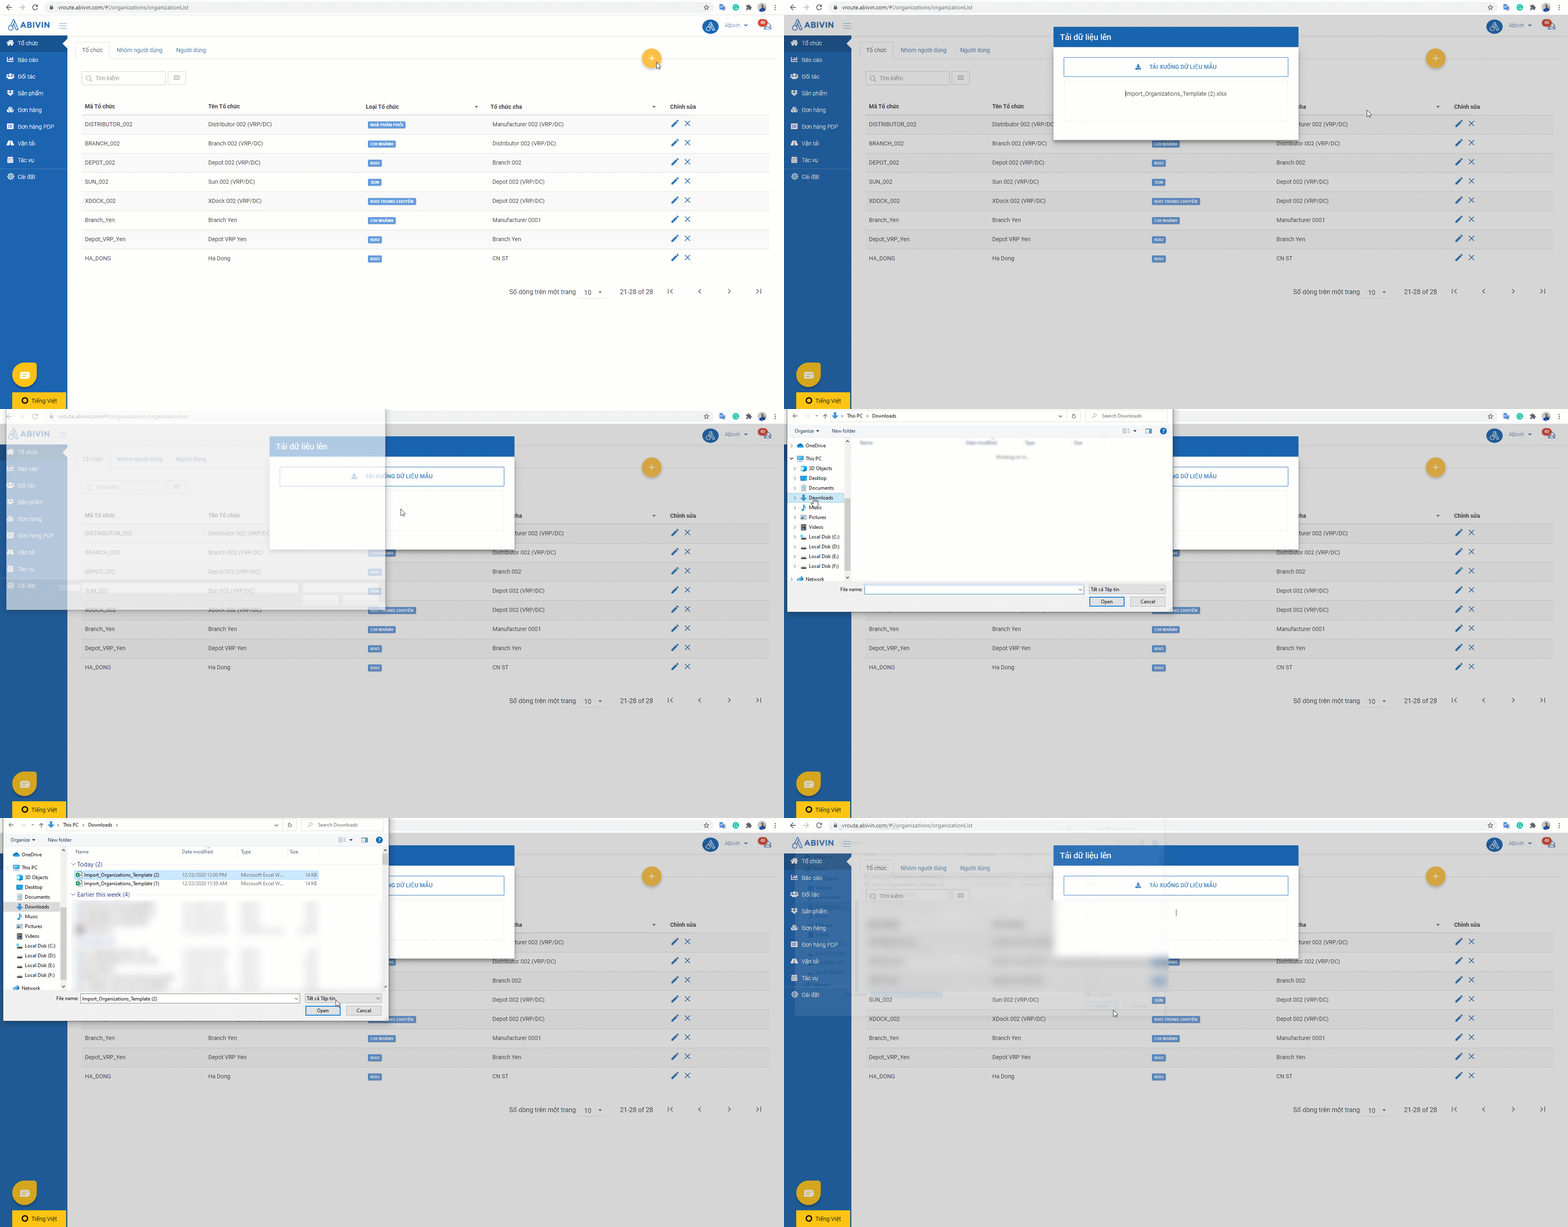
Illustration GIF (Vietnamese)
- If the data in your Excel templates match the system criteria, there will be green pop-ups on the top right corner of the screen announcing the successful upload (Content of the message will vary depends on the kinds of data uploaded)
- On the contrary, if some information don't match the system criteria, you will not be able to upload the Excel template. The system will show a red pop-up, citing the reason. Based on the pop-up content, you will need to revise the Excel template before uploading again
Object information fields
- Each object has various information fields during the creation process. Some information fields are present on both Web form and Excel template, some fields can only be found on either the Web form (mostly) or Excel template
- In the official management articles of each object, we will have a section to list all the existing information fields of objects, with their description, and specify whether an information field is Required - must be input during the creation process, or Optional - can be input later
Important rules when using Excel templates
Rule 1: Input date value in the same format of your computer
- In some Excel templates, there are certain cells where you need to input the date. You would need to take note of the current time format setting on your computer (Date/Month/Year - dd/mm/yyyy or Month/Date/Year - mm/dd/yyyy ) and input the data in the Excel template in that exact same format
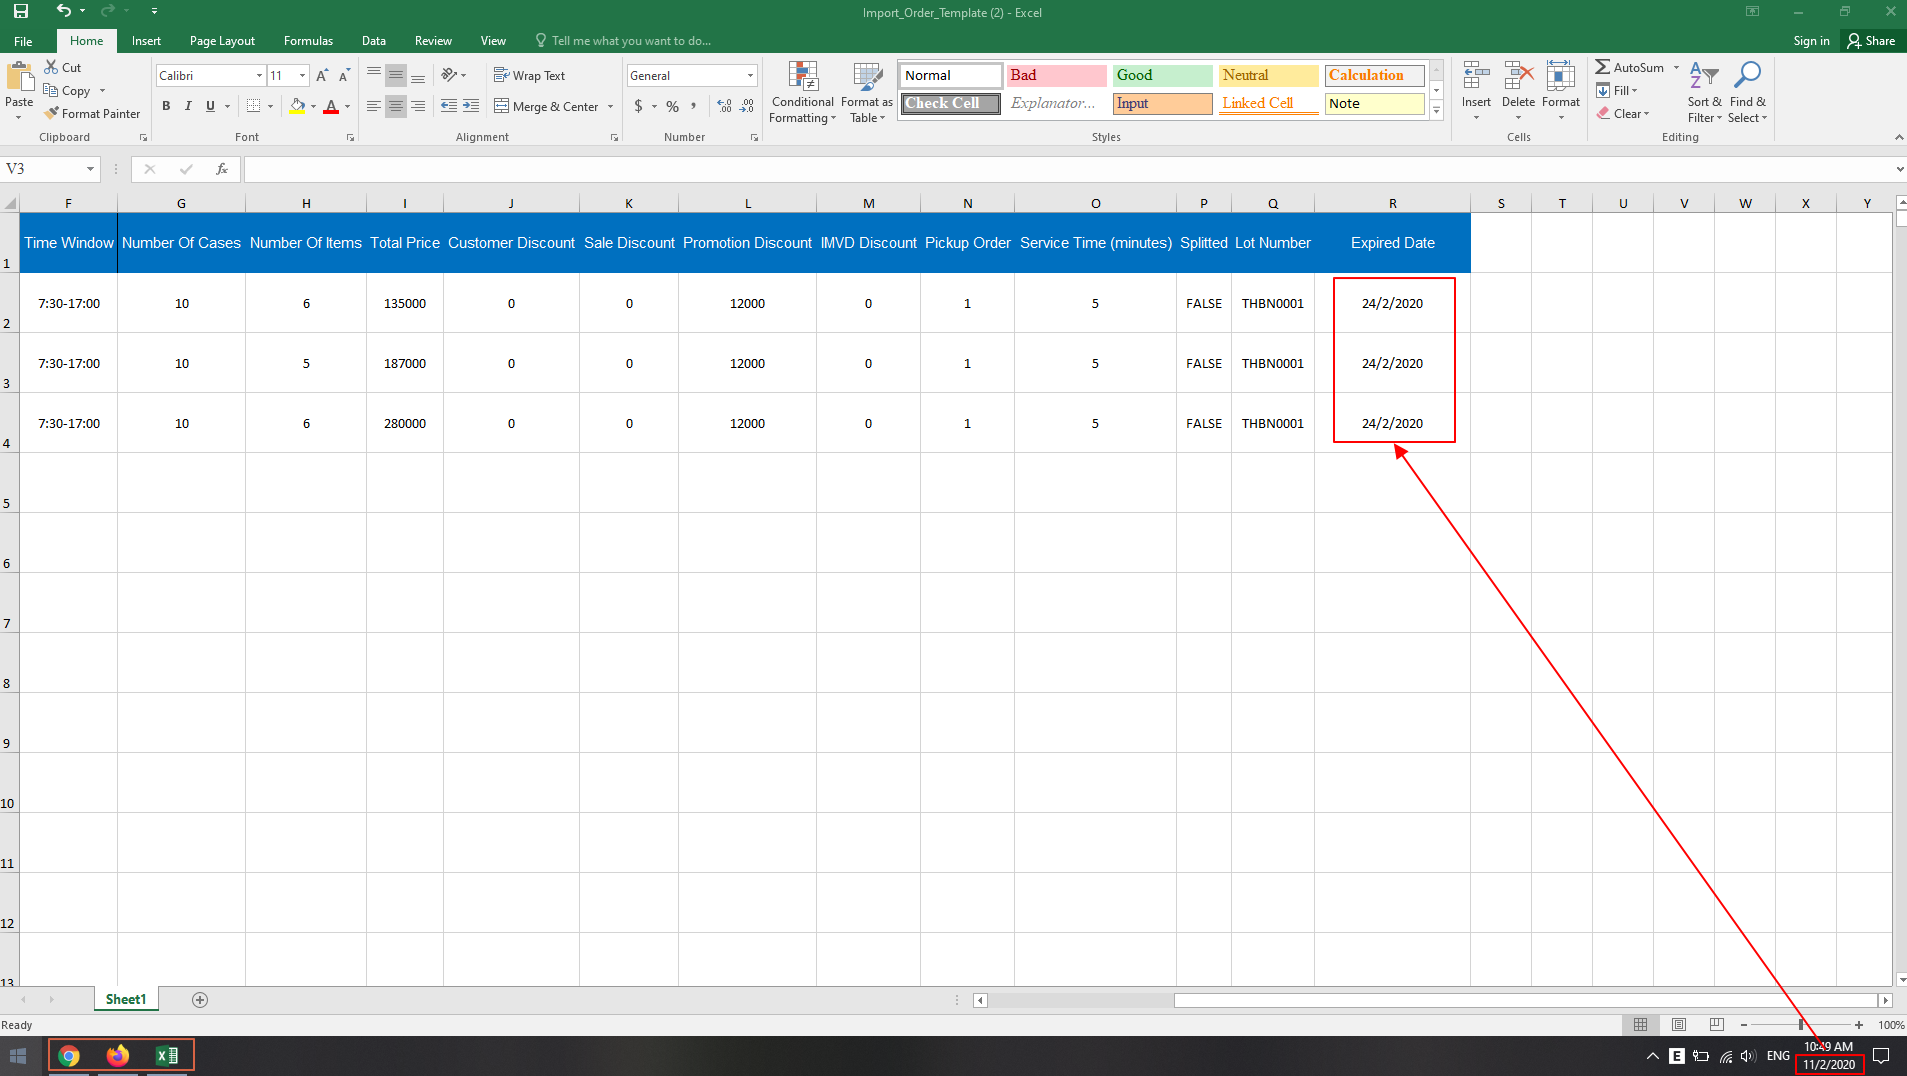
Illustration Image (English)
dd/mm/yyyy format
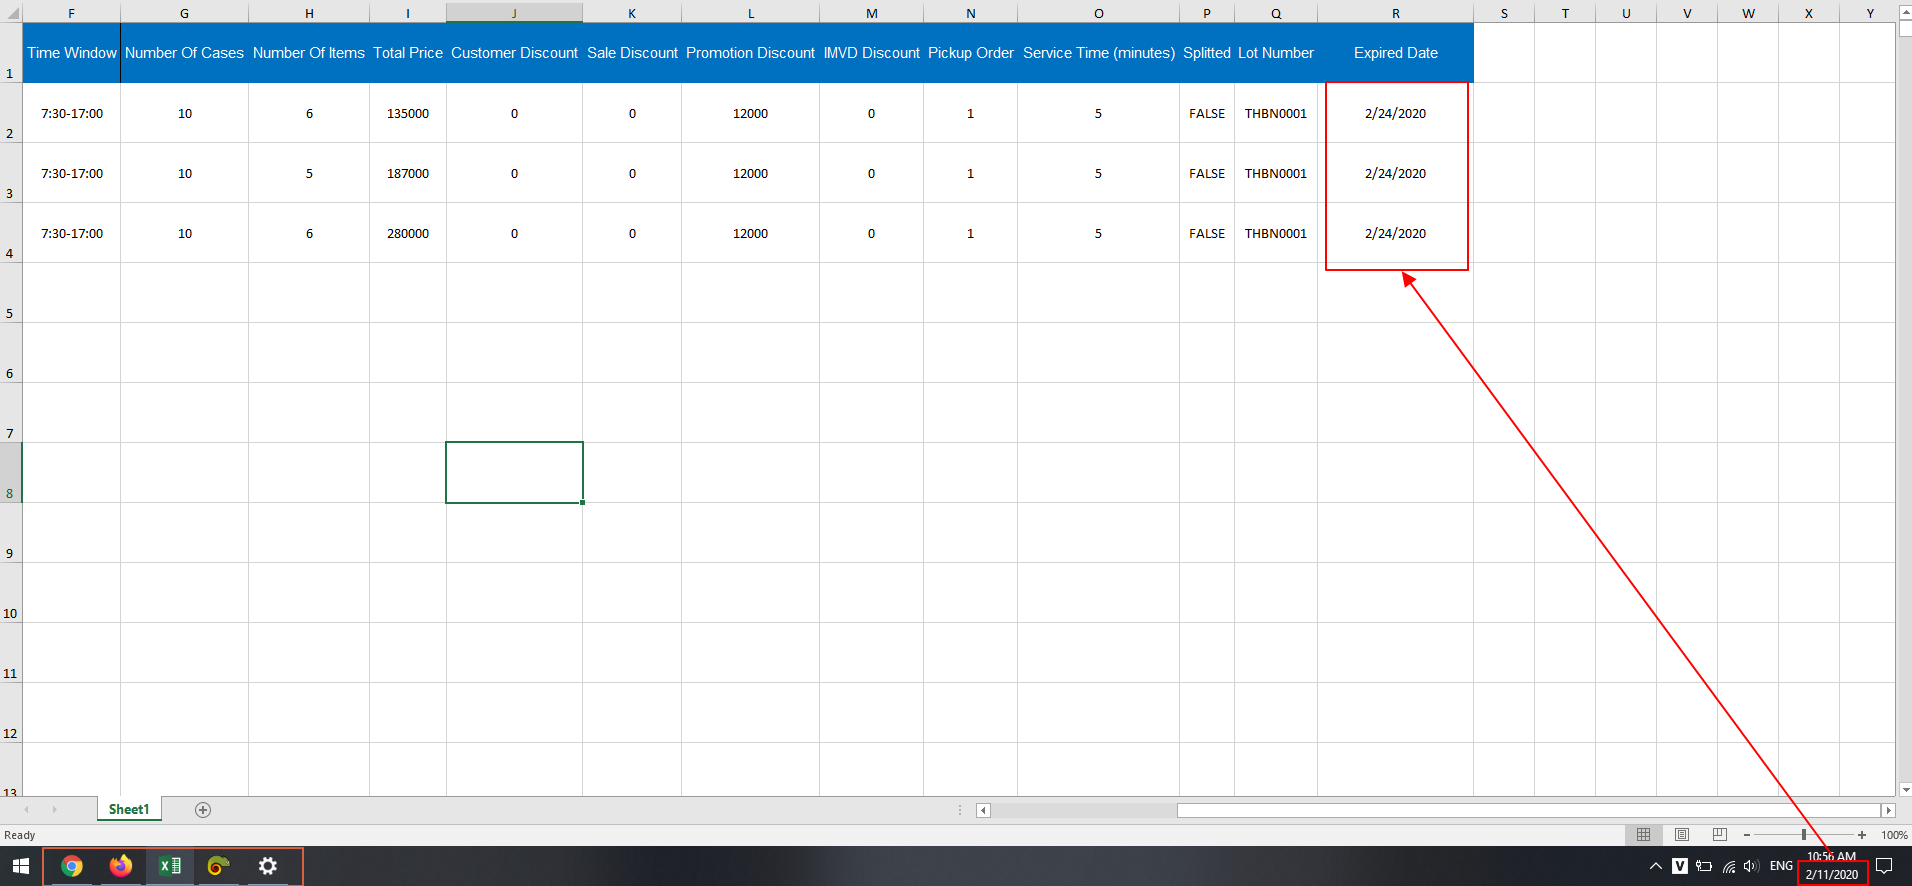
Illustration Image (English)
mm/dd/yyyy format
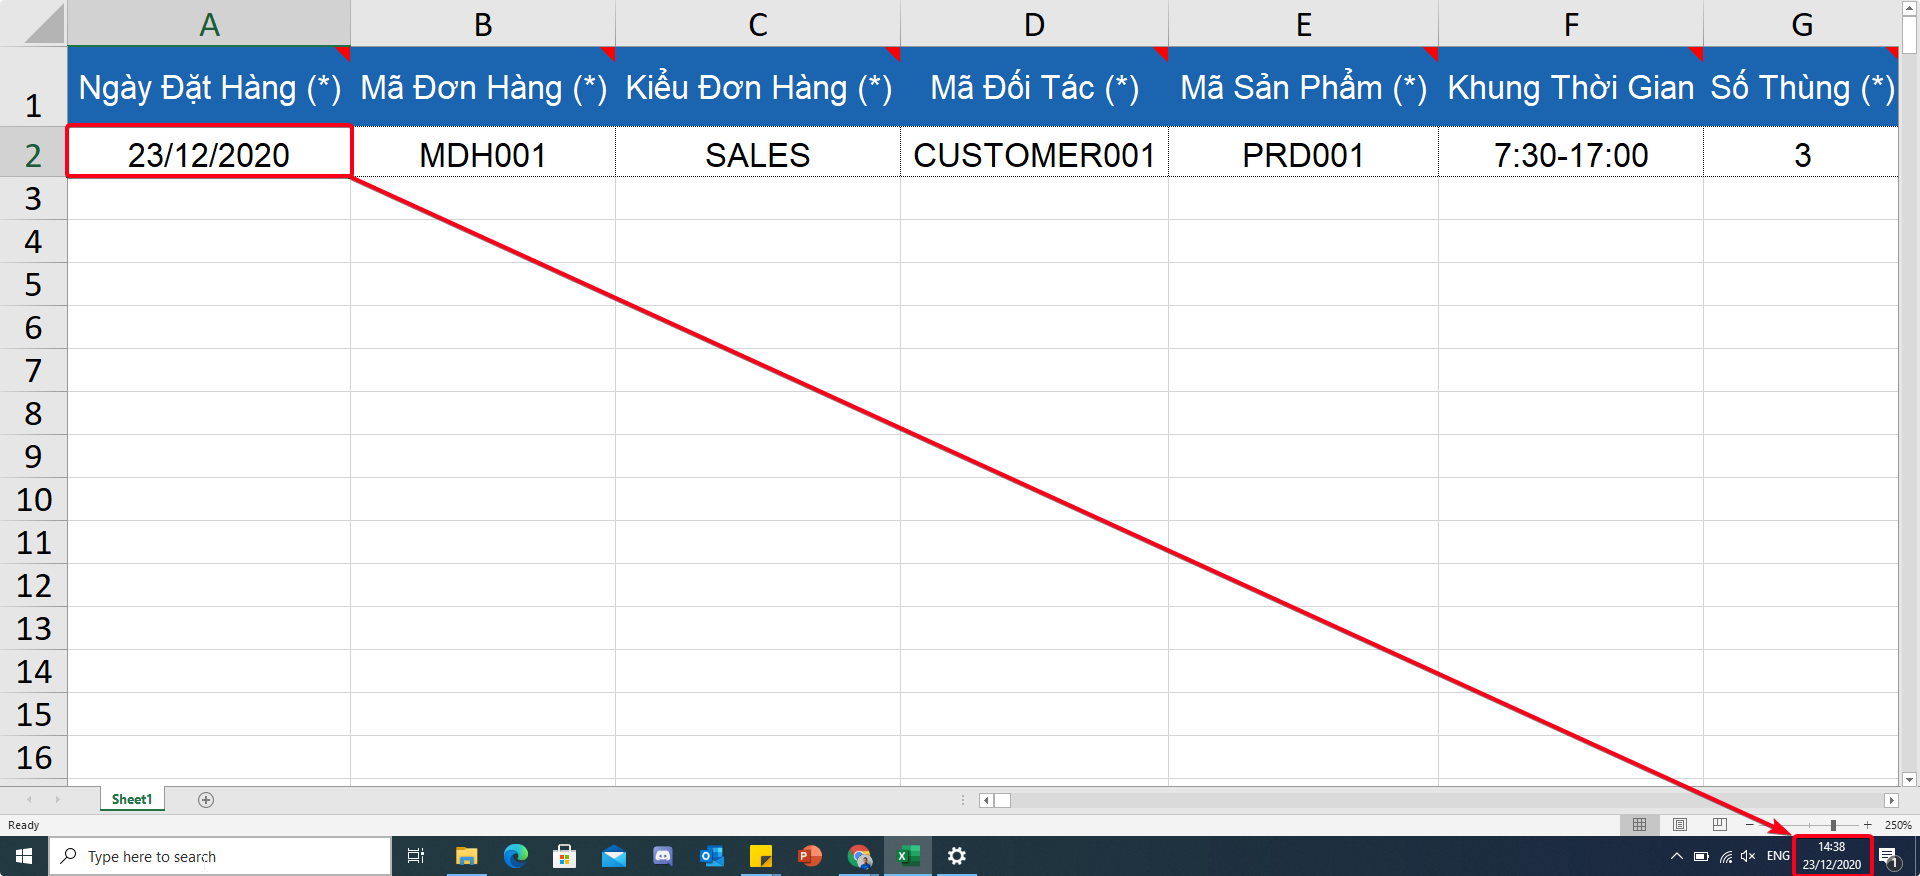
Illustration Image (Vietnamese)
dd/mm/yyyy format
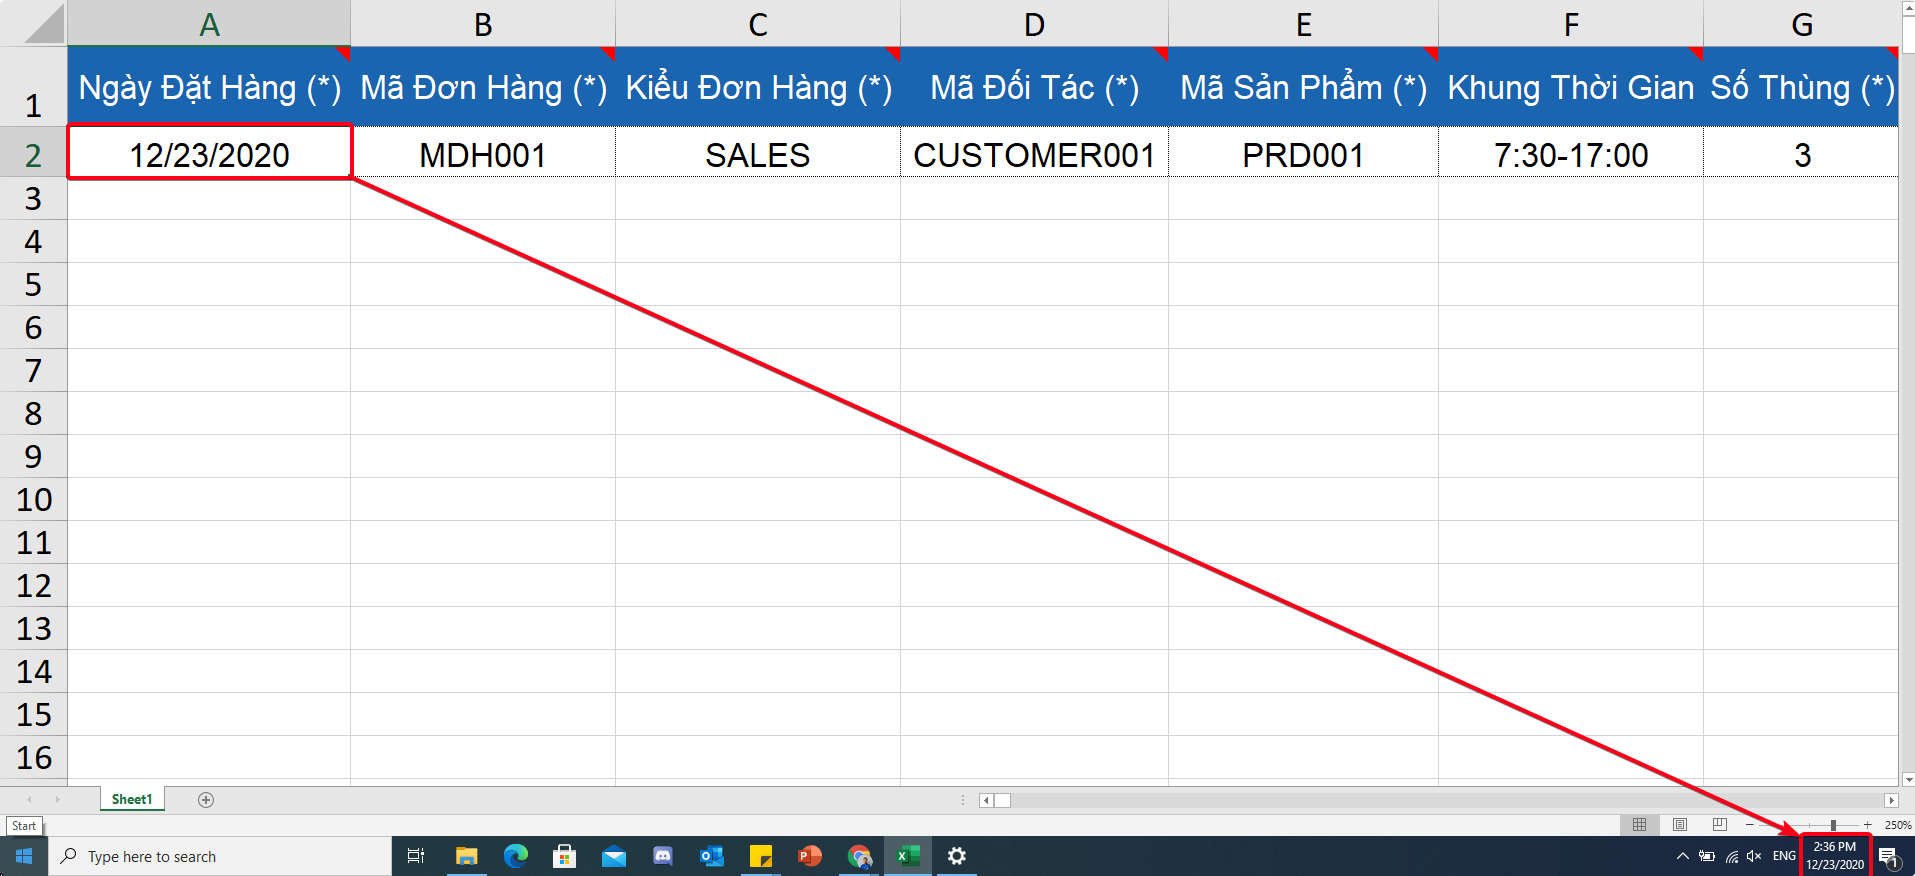
Illustration Image (Vietnamese)
mm/dd/yyyy format
Rule 2: Do not alter column order in the Excel template
- Our system can only read and receive data exactly in the column order laid out in the Excel templates. You must not alter the order of columns in the Excel templates in any way (Delete/Add/Change)
Rule 3: Select the same language when download/upload
- Our Excel templates are optimized for each supported language. You have to make sure that the language you choose when downloading the Excel template is the same as when you upload. If this condition is violated, there will be a red warning, and you will not be able to upload the Excel templates
Rule 4: Remove hyperlinks from email addresses
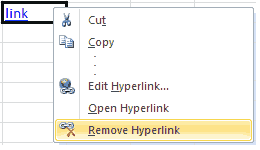
- In some Excel templates (Import Users, Import Partners for example), there is the Email column. After you input the email address values, the email addresses are often underlined, which means they have been inserted hyperlinks

- The system will not be able to decifer those values. Therefore, you must remove the hyperlinks from all email addresses in the templates before uploading onto the web app
- To do that, follow the steps below:
- Left click on the label of the Email column to select the whole column

- Right click on a cell that has hyperlink, then click on the text Remove Hyperlinks from the pop out menu
Read Objects
Read objects on Web app
- Once the objects are created, they are listed out in their respective tabs, along with their details. All users that have been granted access can read the object information
- On certain tabs, where there are too many information fields, there might be a Column button for you to select what fields are displayed, so that you can have a more streamlined view
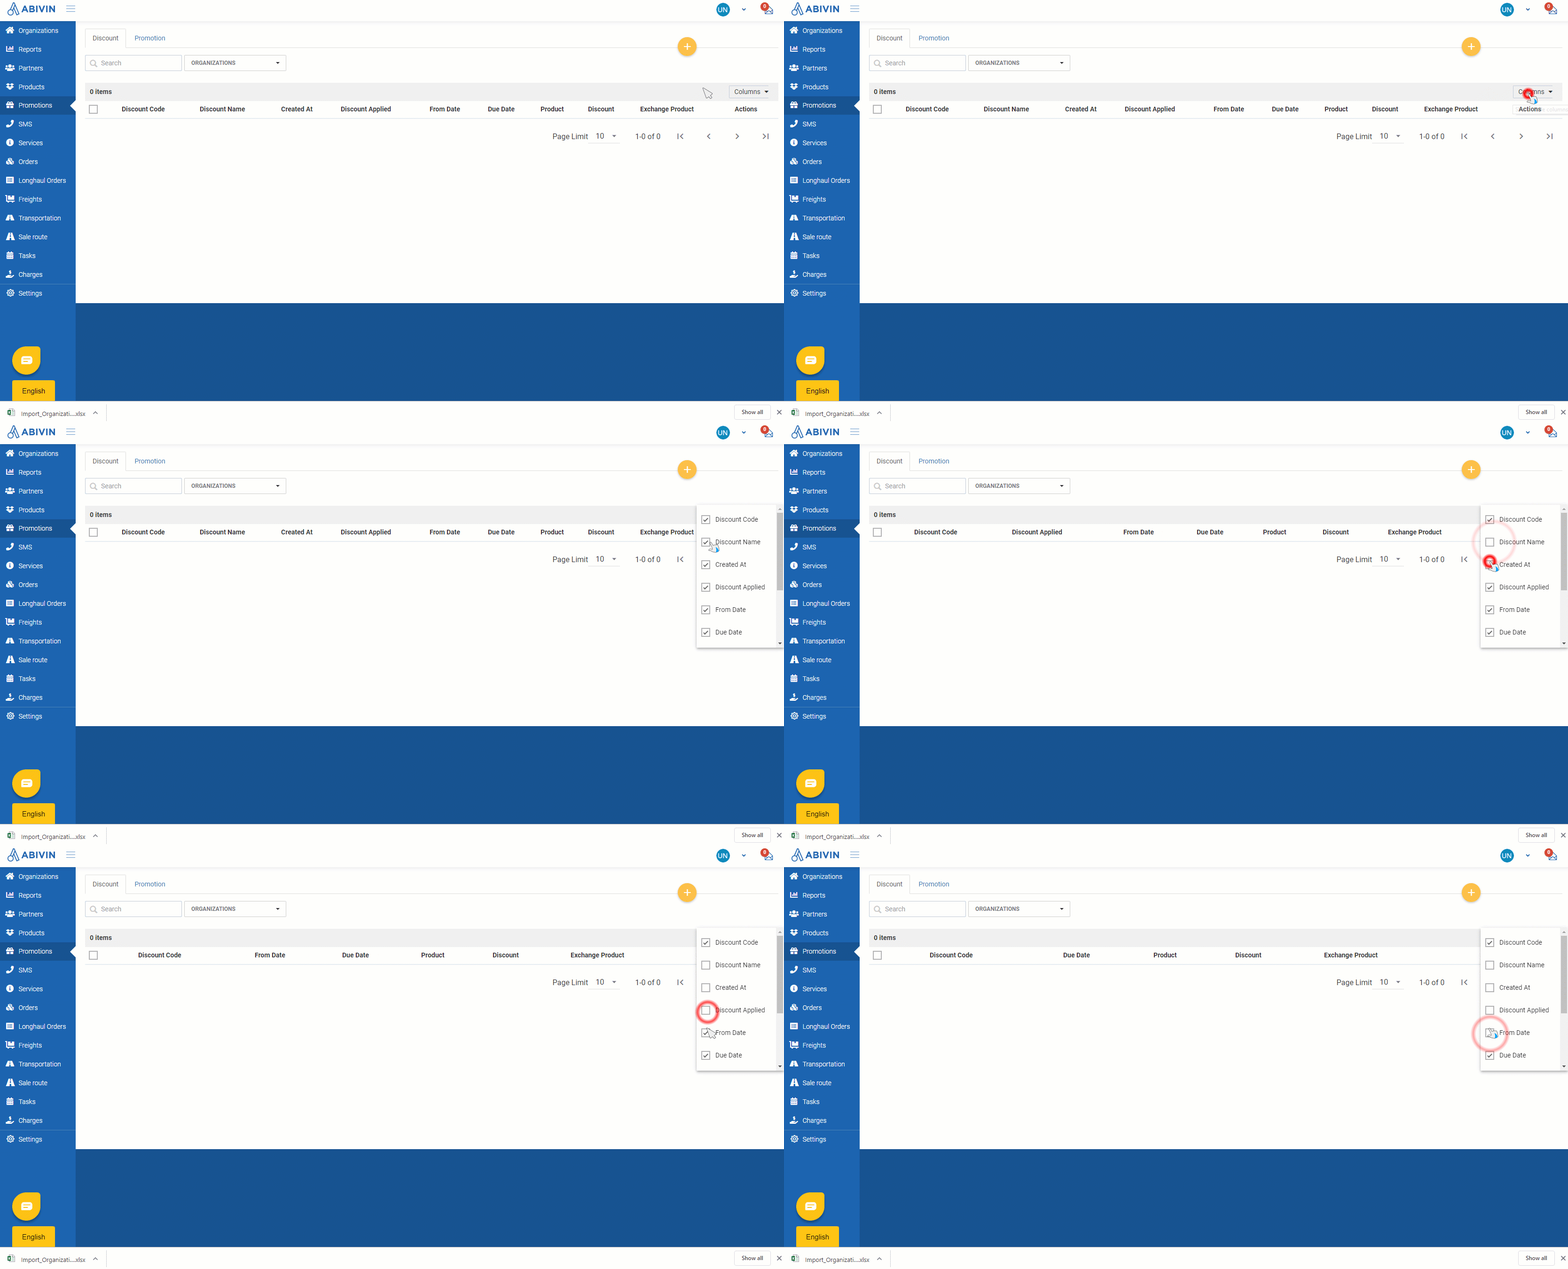
Illustration Image (English)
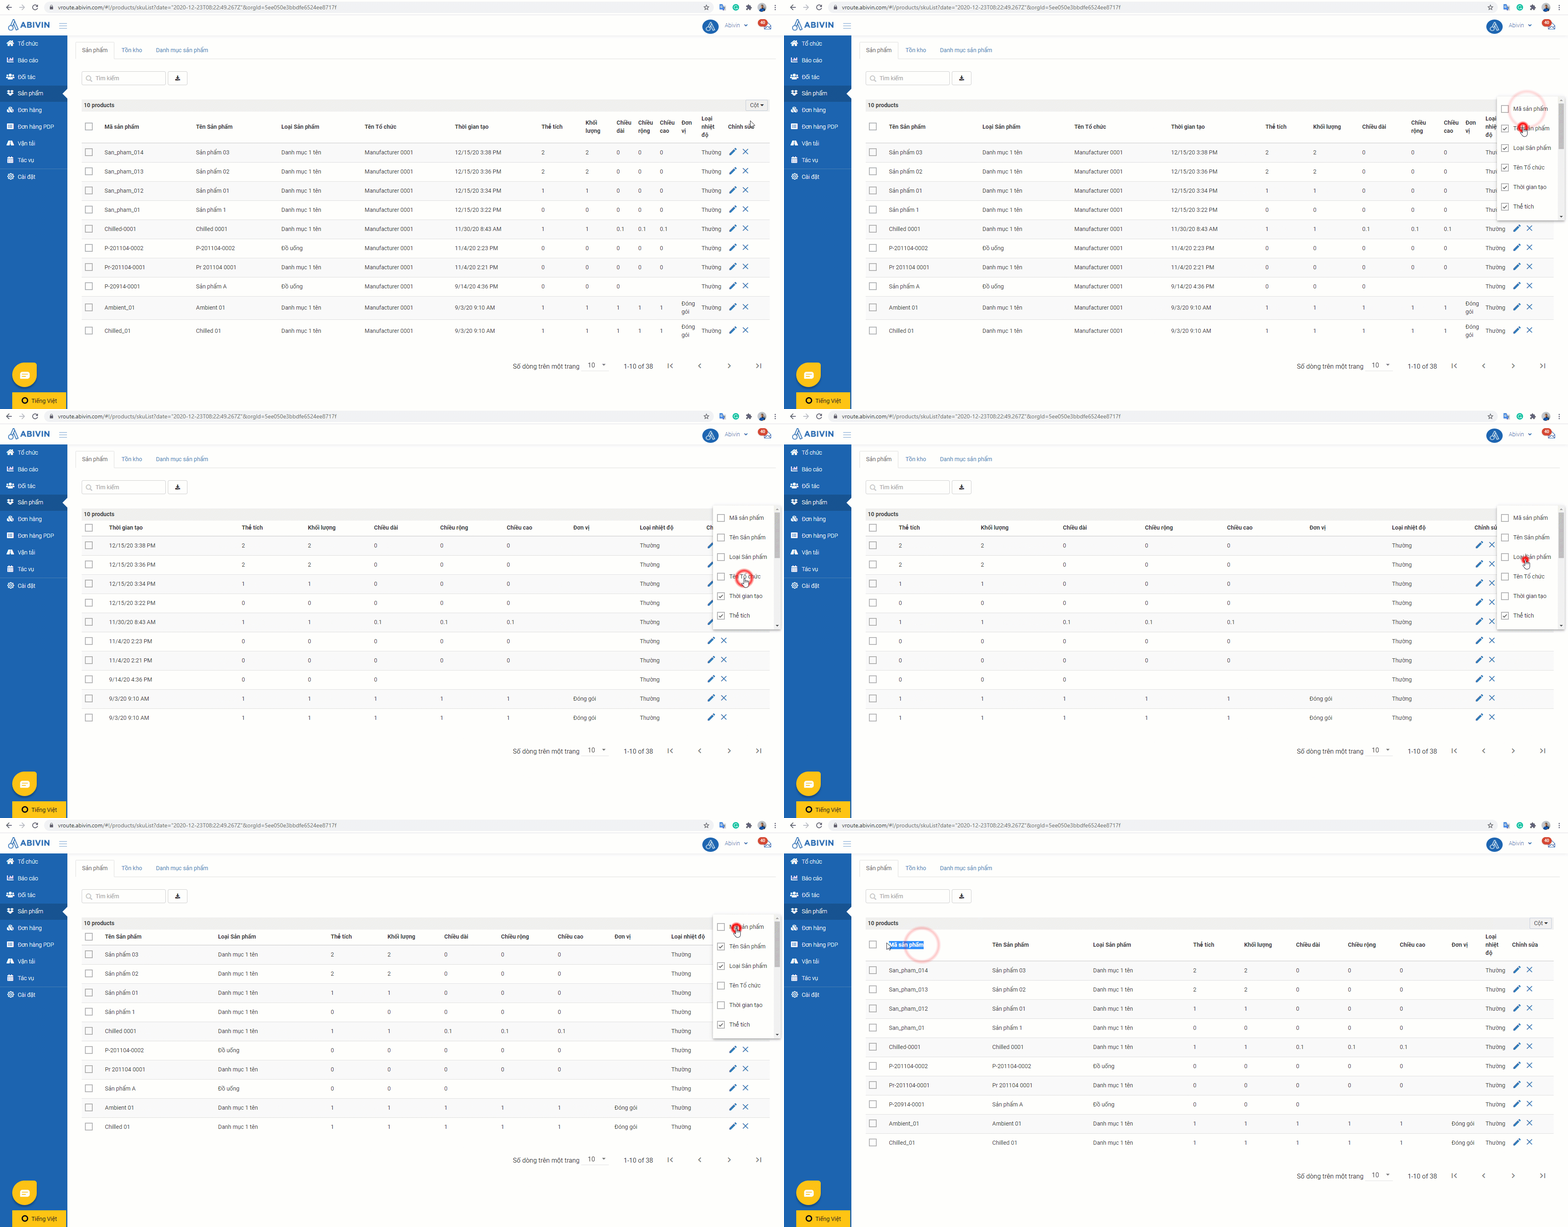
Illustration Image (Vietnamese)
Read objects on Excel file (Export)
- In some tabs, users can download the objects information to read offline via using Export function
- To use this function, hover on the yellow icon at the respective tab, then click on Export icon (Note: In some cases, you can or will need to choose some attributes before proceeding)
- The Excel file will be generated and will automatically be downloaded shortly
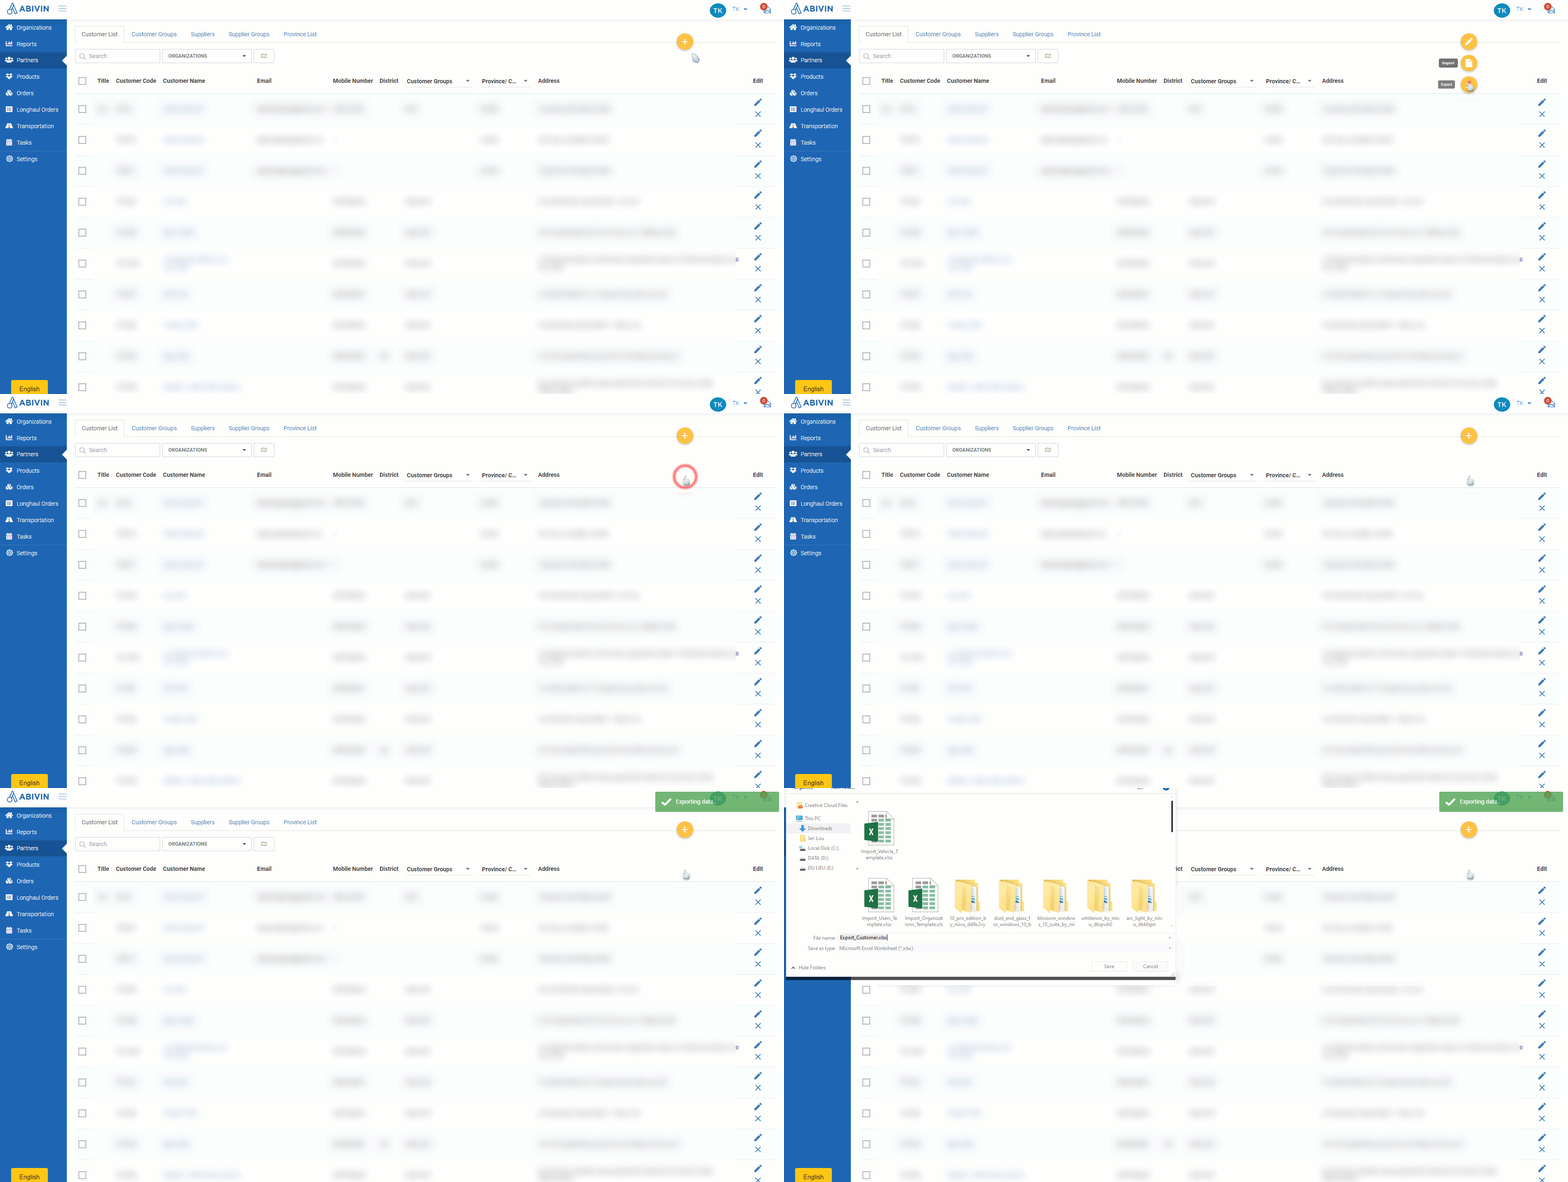
Illustration Image (English)
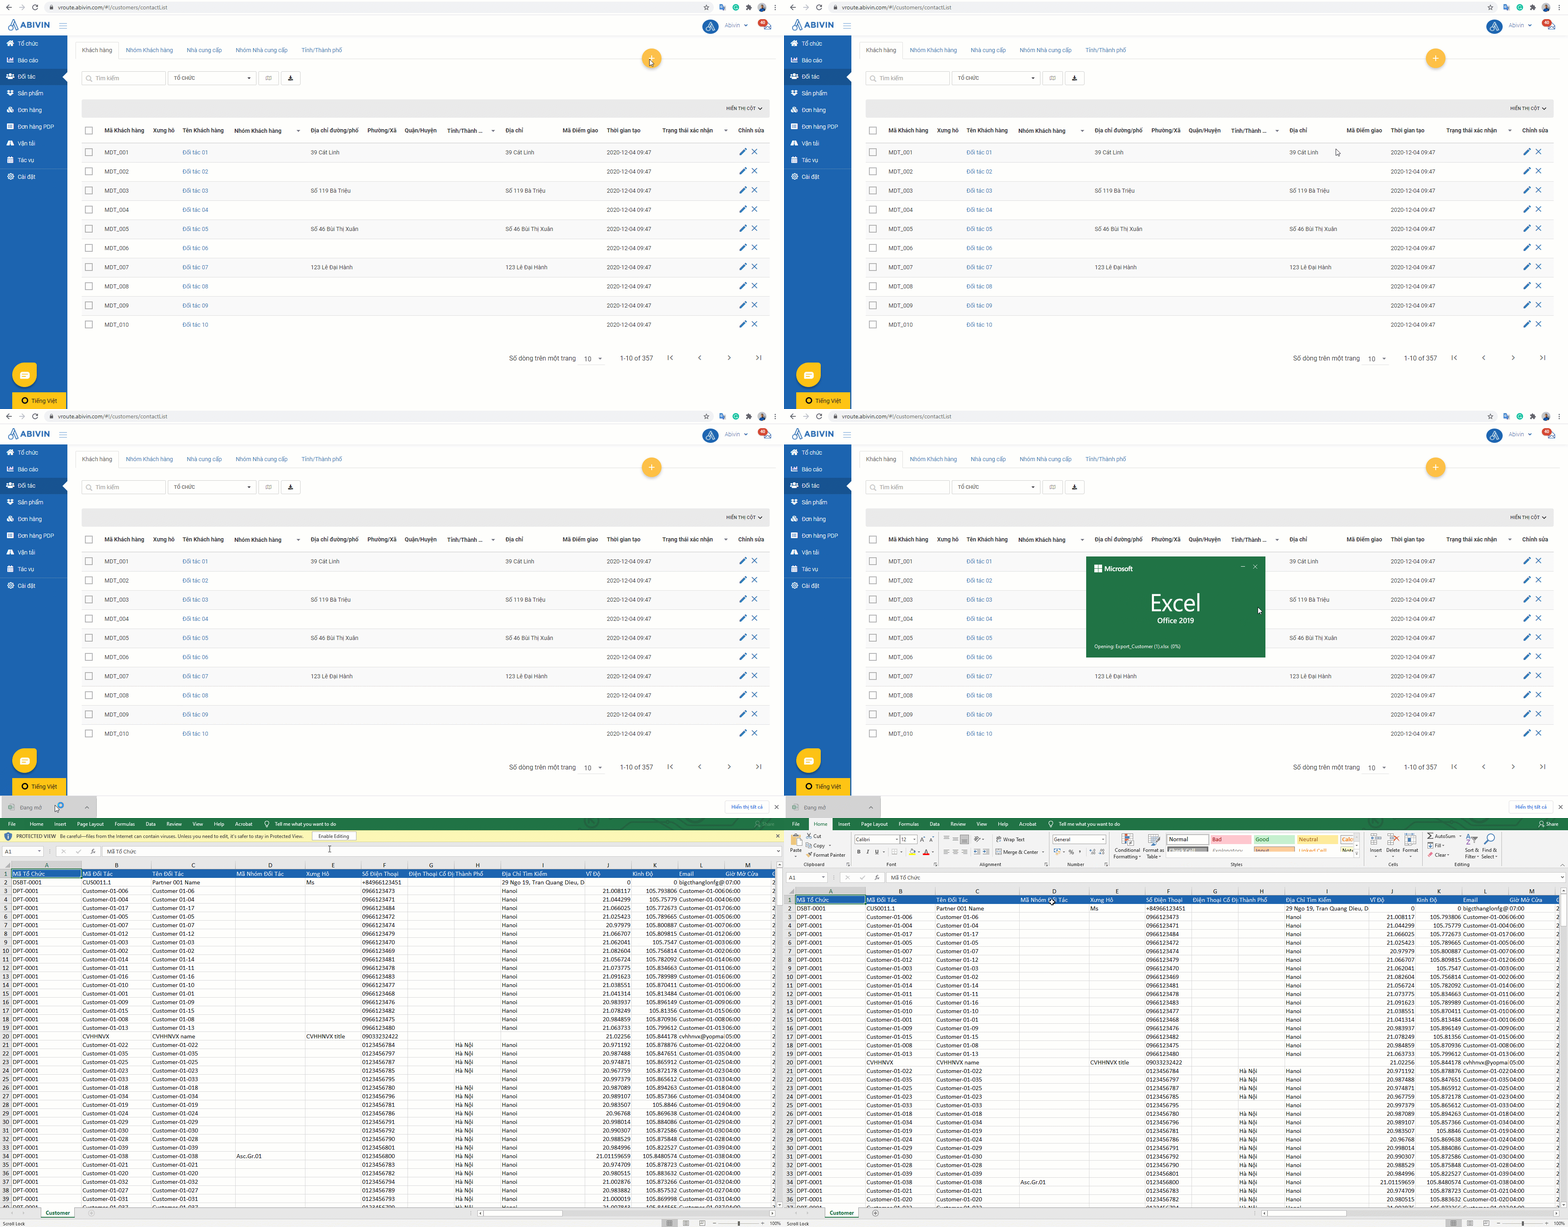
Illustration Image (Vietnamese)
Update Objects
- If you are the user who have created the objects before, or if you are the top administrator who can have all the rights in Abivin vRoute, you can update the objects information by clicking on Edit icon on the object row and change the information on web form.
- After changing the details, click on the blue Save (Or Update in some tabs) button to confirm the changes
- If you want to perform update on multiple objects, you can do so by using the Excel template described above. However, this method is only applicable for some specific objects
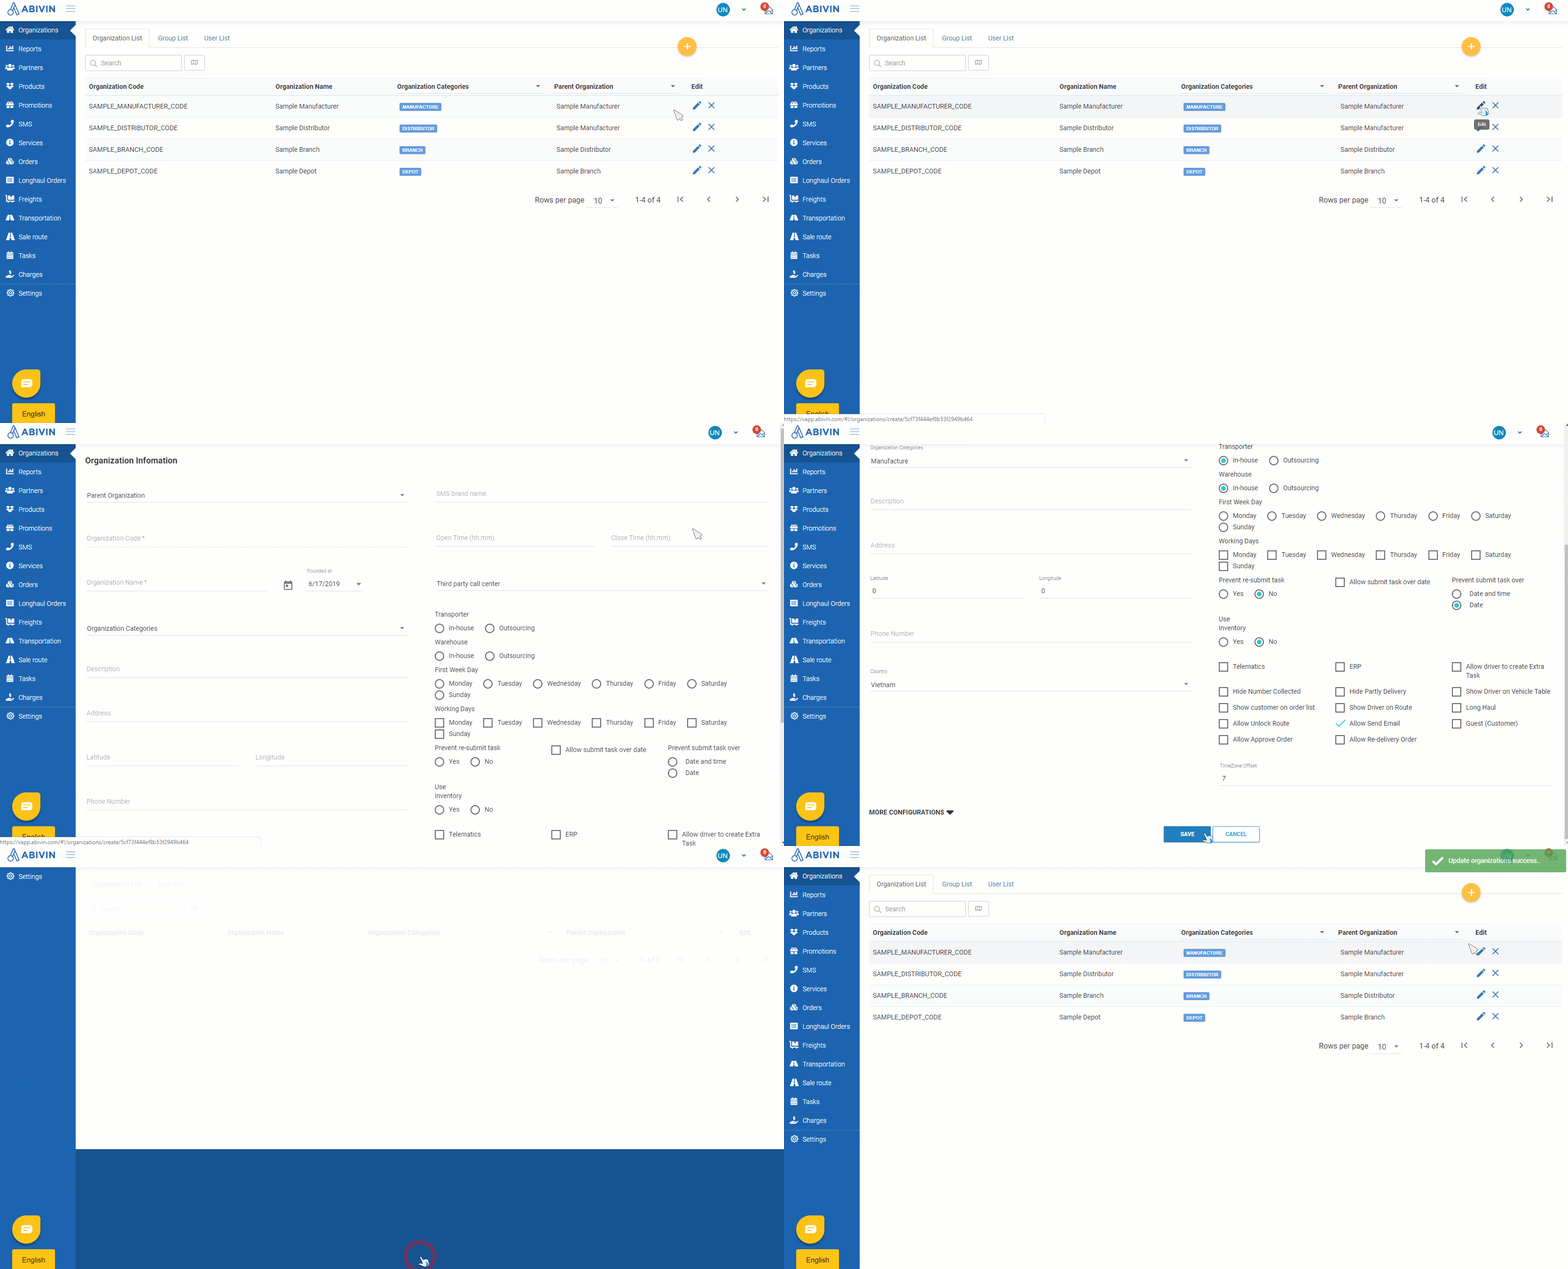
Illustration Image (English)
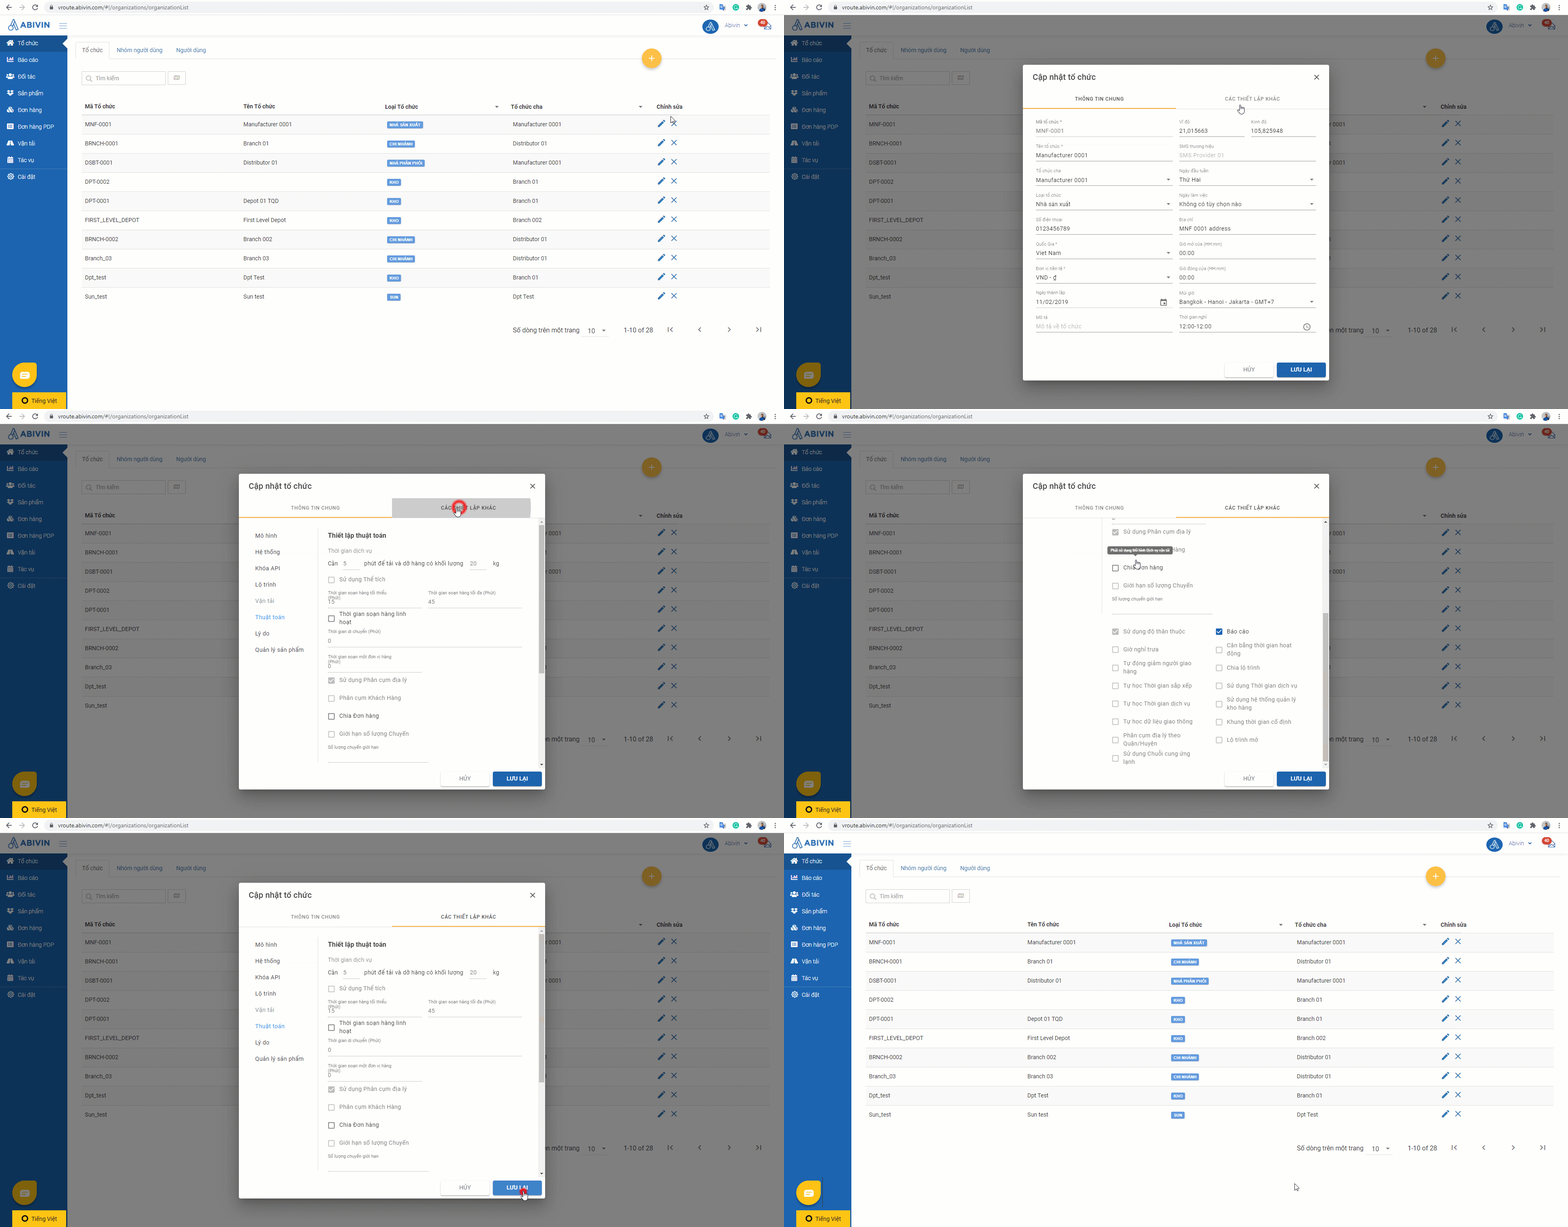
Illustration Image (Vietnamese)
Delete Objects
Delete single object
- If you no longer wish to use certain objects, you can delete them from the database by clicking on Delete X icon on those object rows
- There will be a pop-up asking if you want to confirm the deletion. Click on the blue OK button if you confirm, or click on Cancel button next to it if you don't intentionally want to delete that object
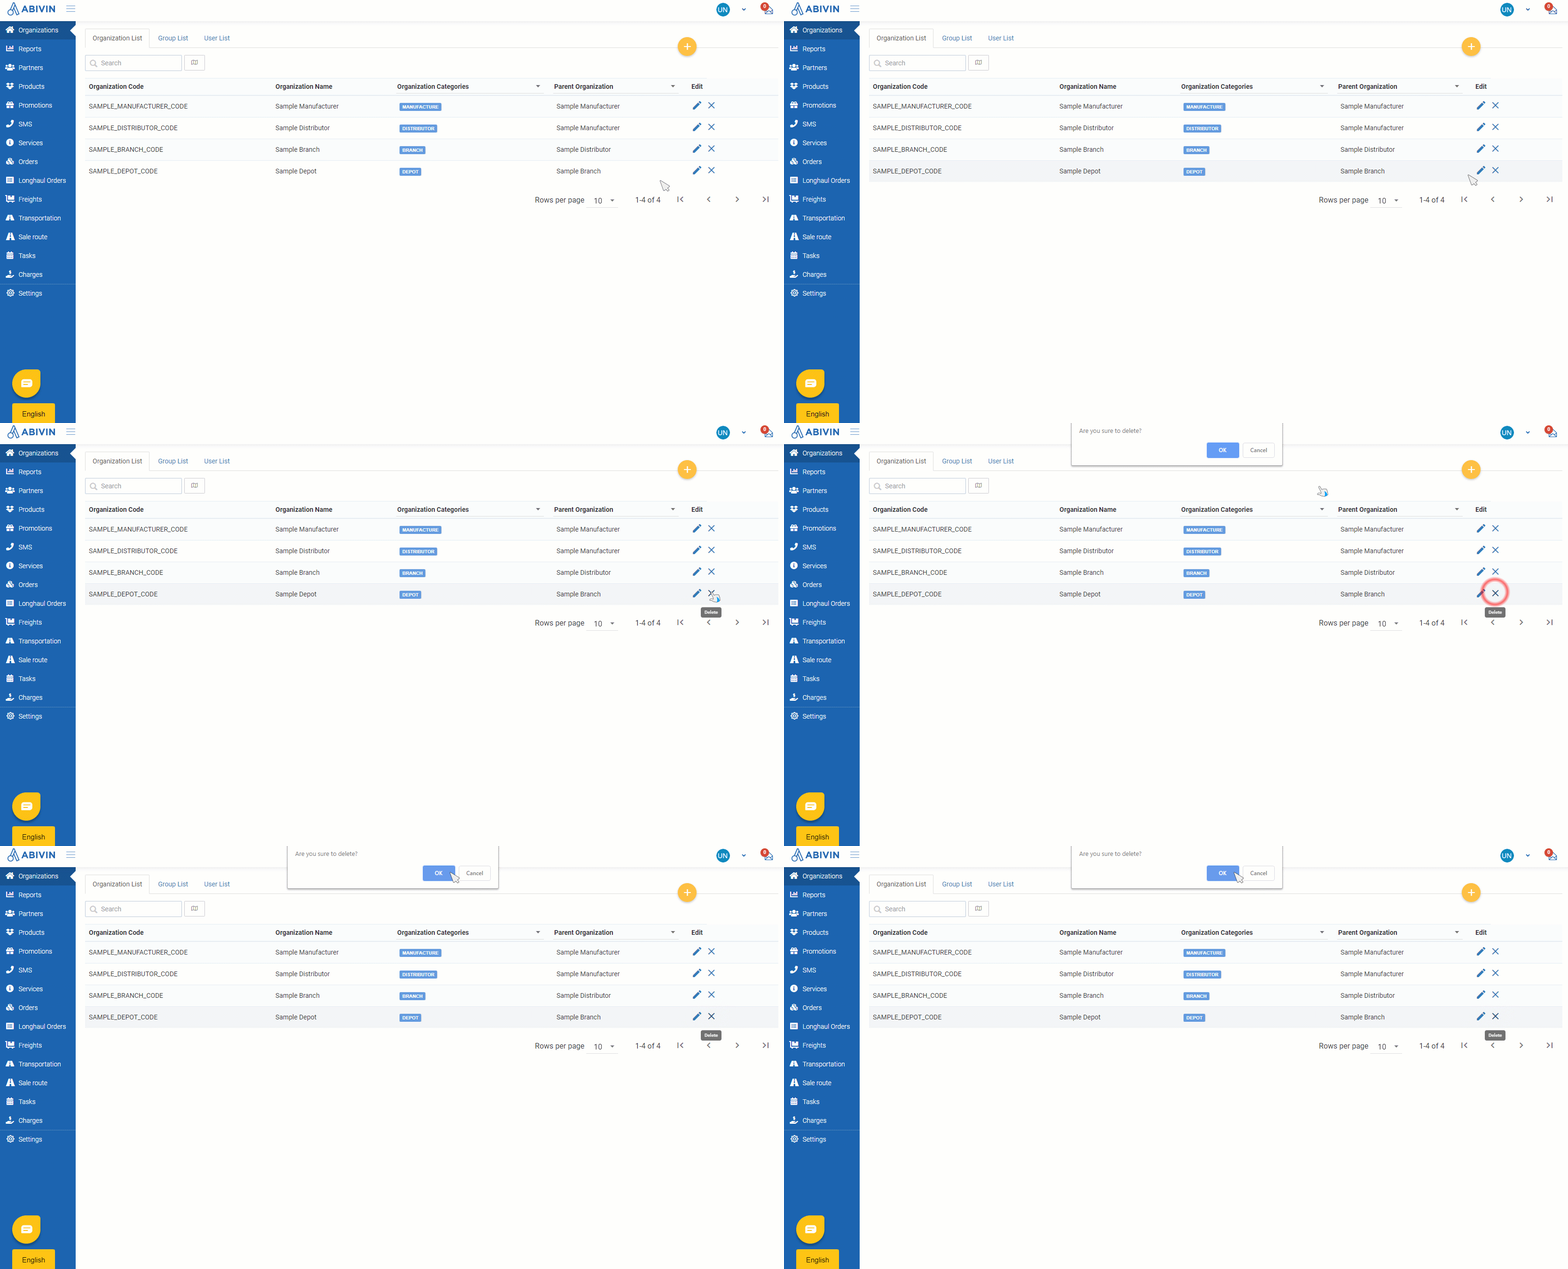
Illustration GIF (English)
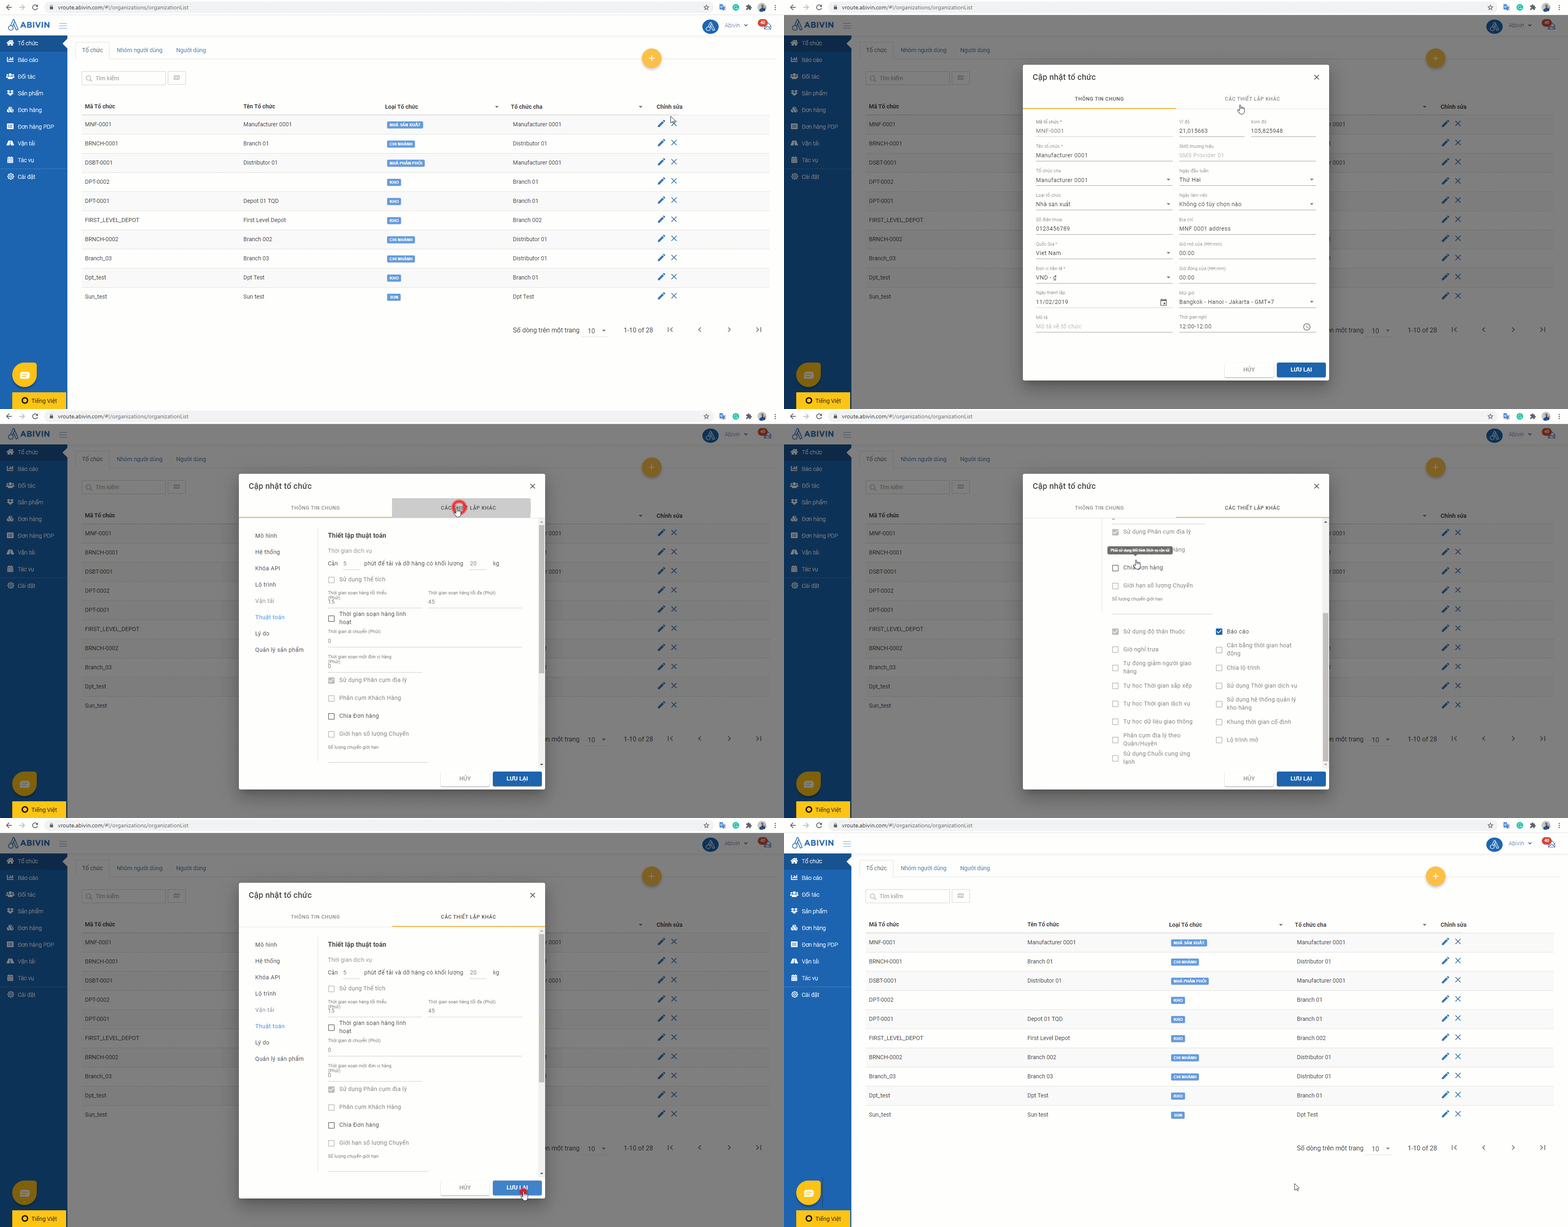
Illustration GIF (Vietnamese)
Delete multiple objects
- In some tabs, the users can delete multiple objects at once
- At those tabs, there will be boxes at the beginning of the object rows
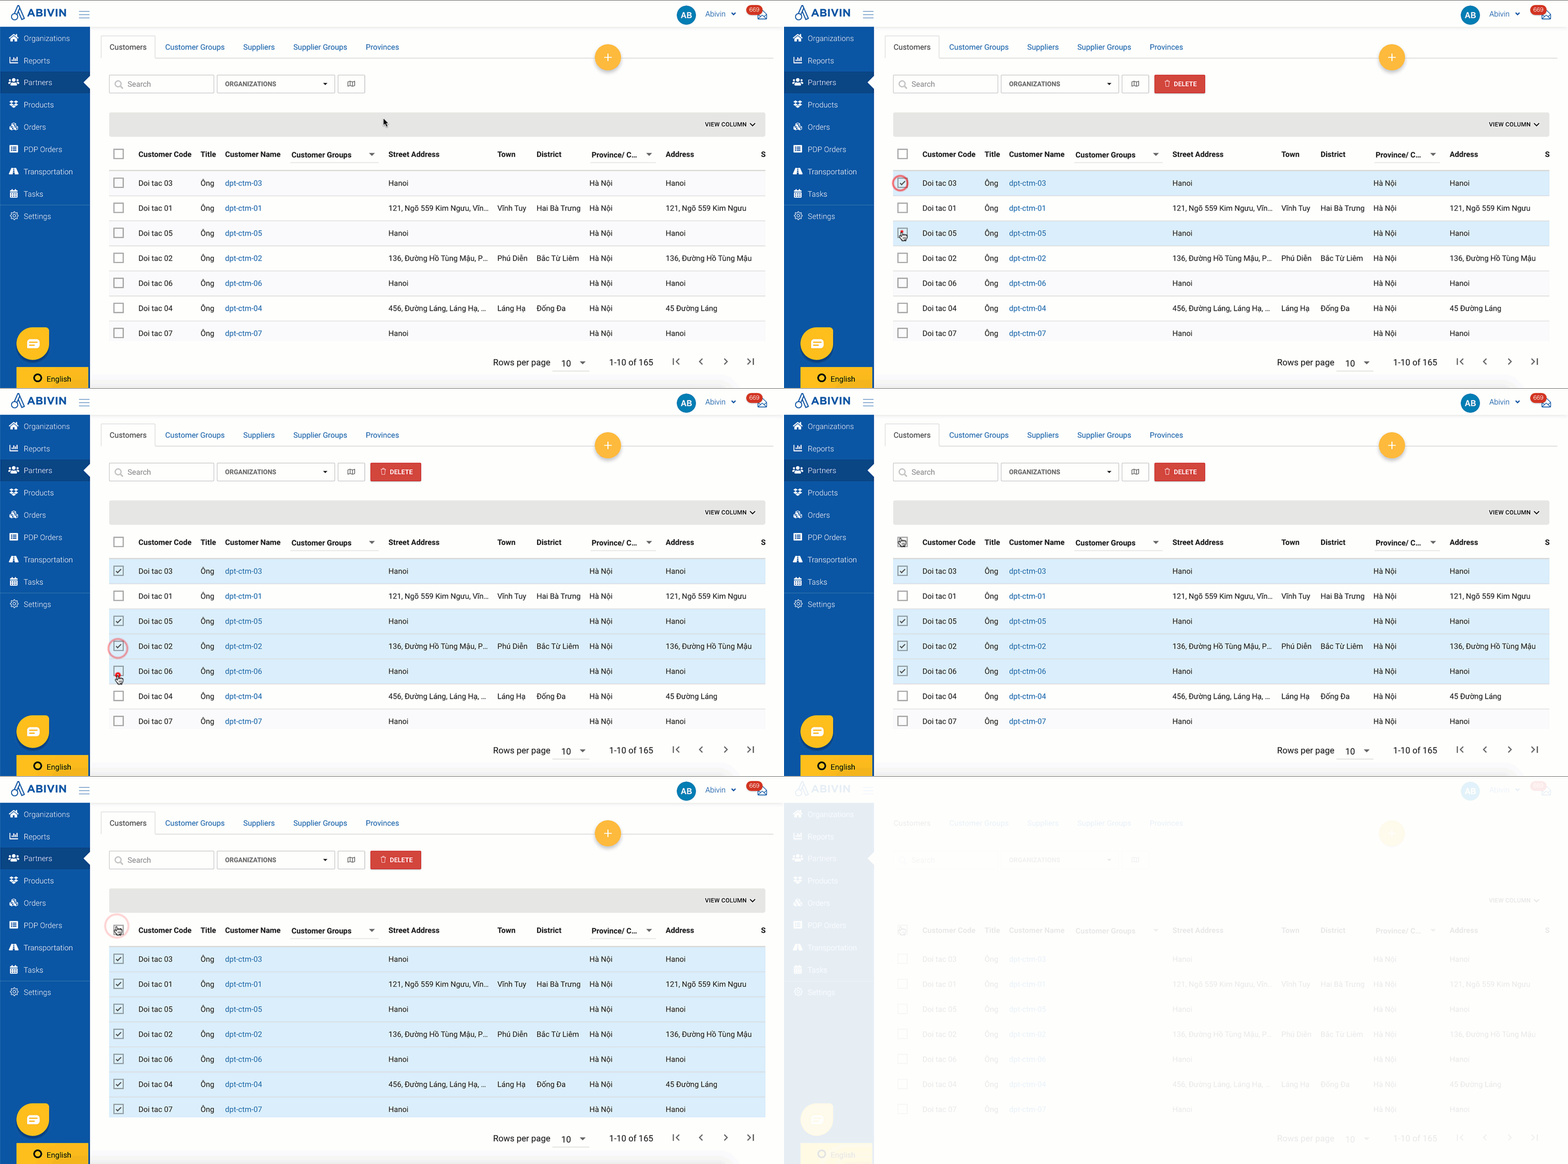
- You can sequentially click on each box of the objects you want to delete, or click on the box on the information bar above the object list, to select all objects currently shown on the screen
- After selecting the objects, there will be a Delete button showing on the tool bar. To delete the selected objects, click on that button
- There might be a message pop out to confirm whether you truly want to delete the objects. Click OK on that message to confirm the deletion, or Cancel to not confirm
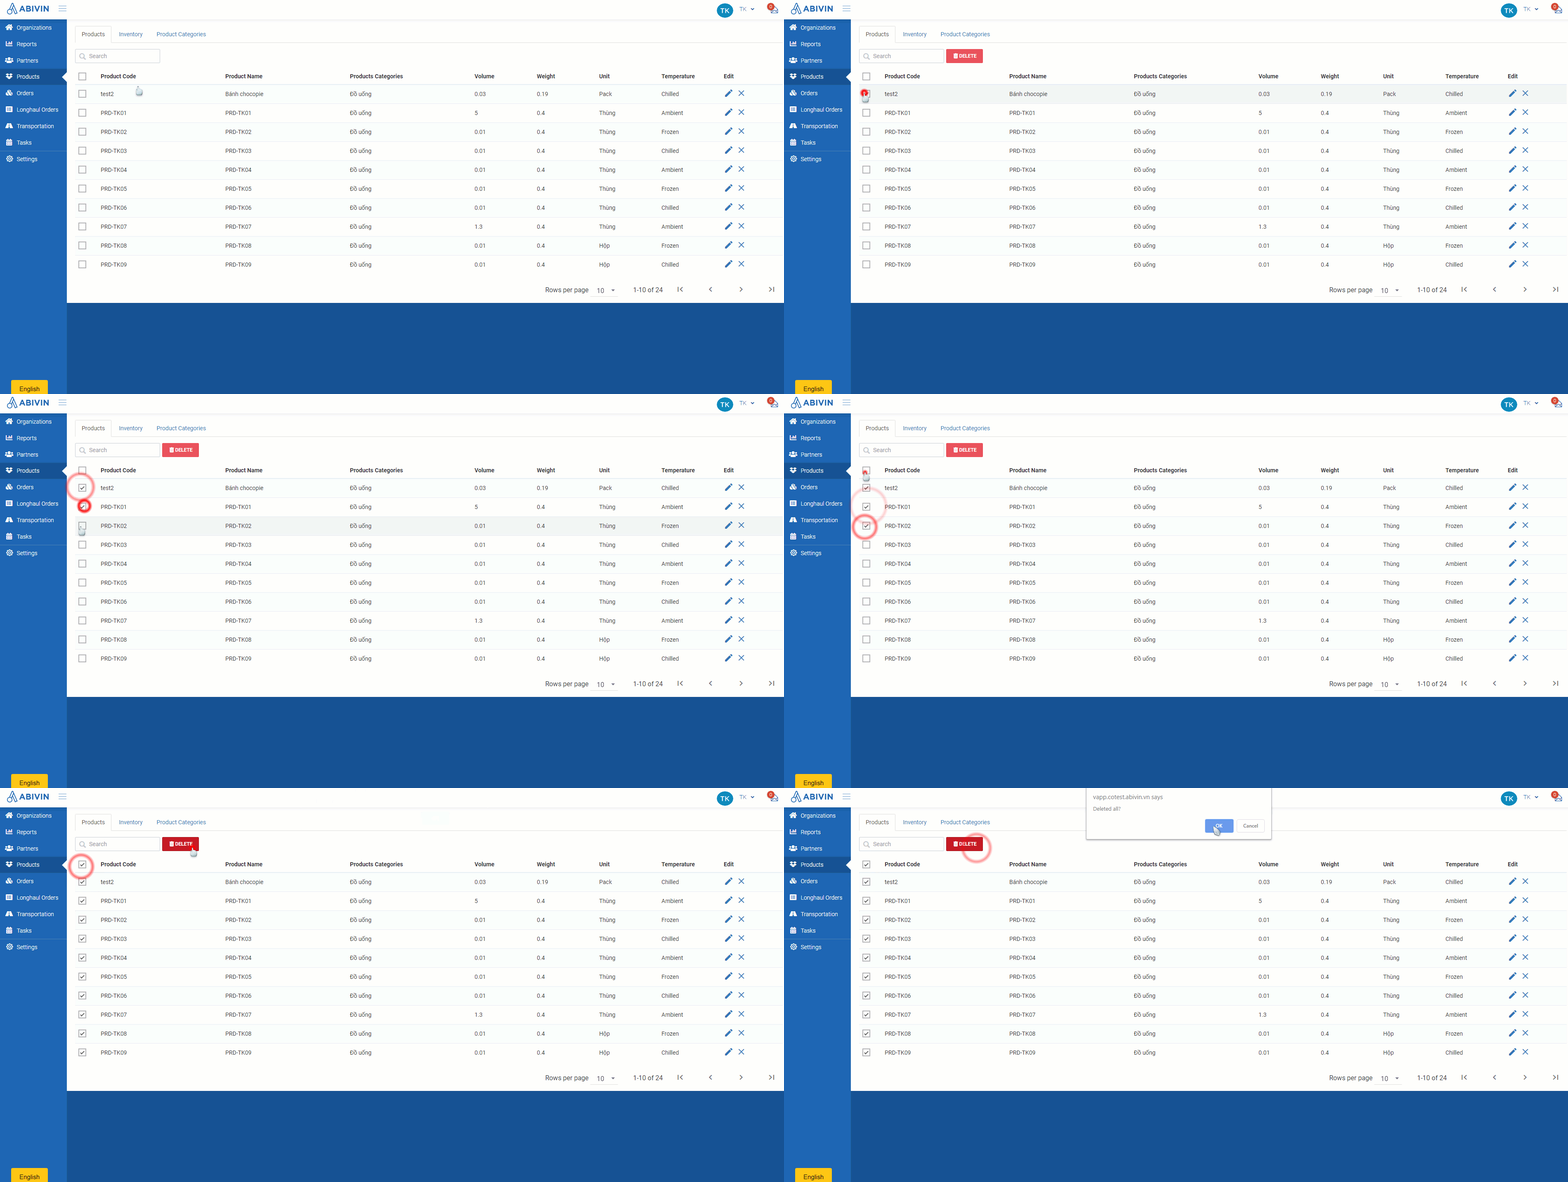
Illustration GIF (English)
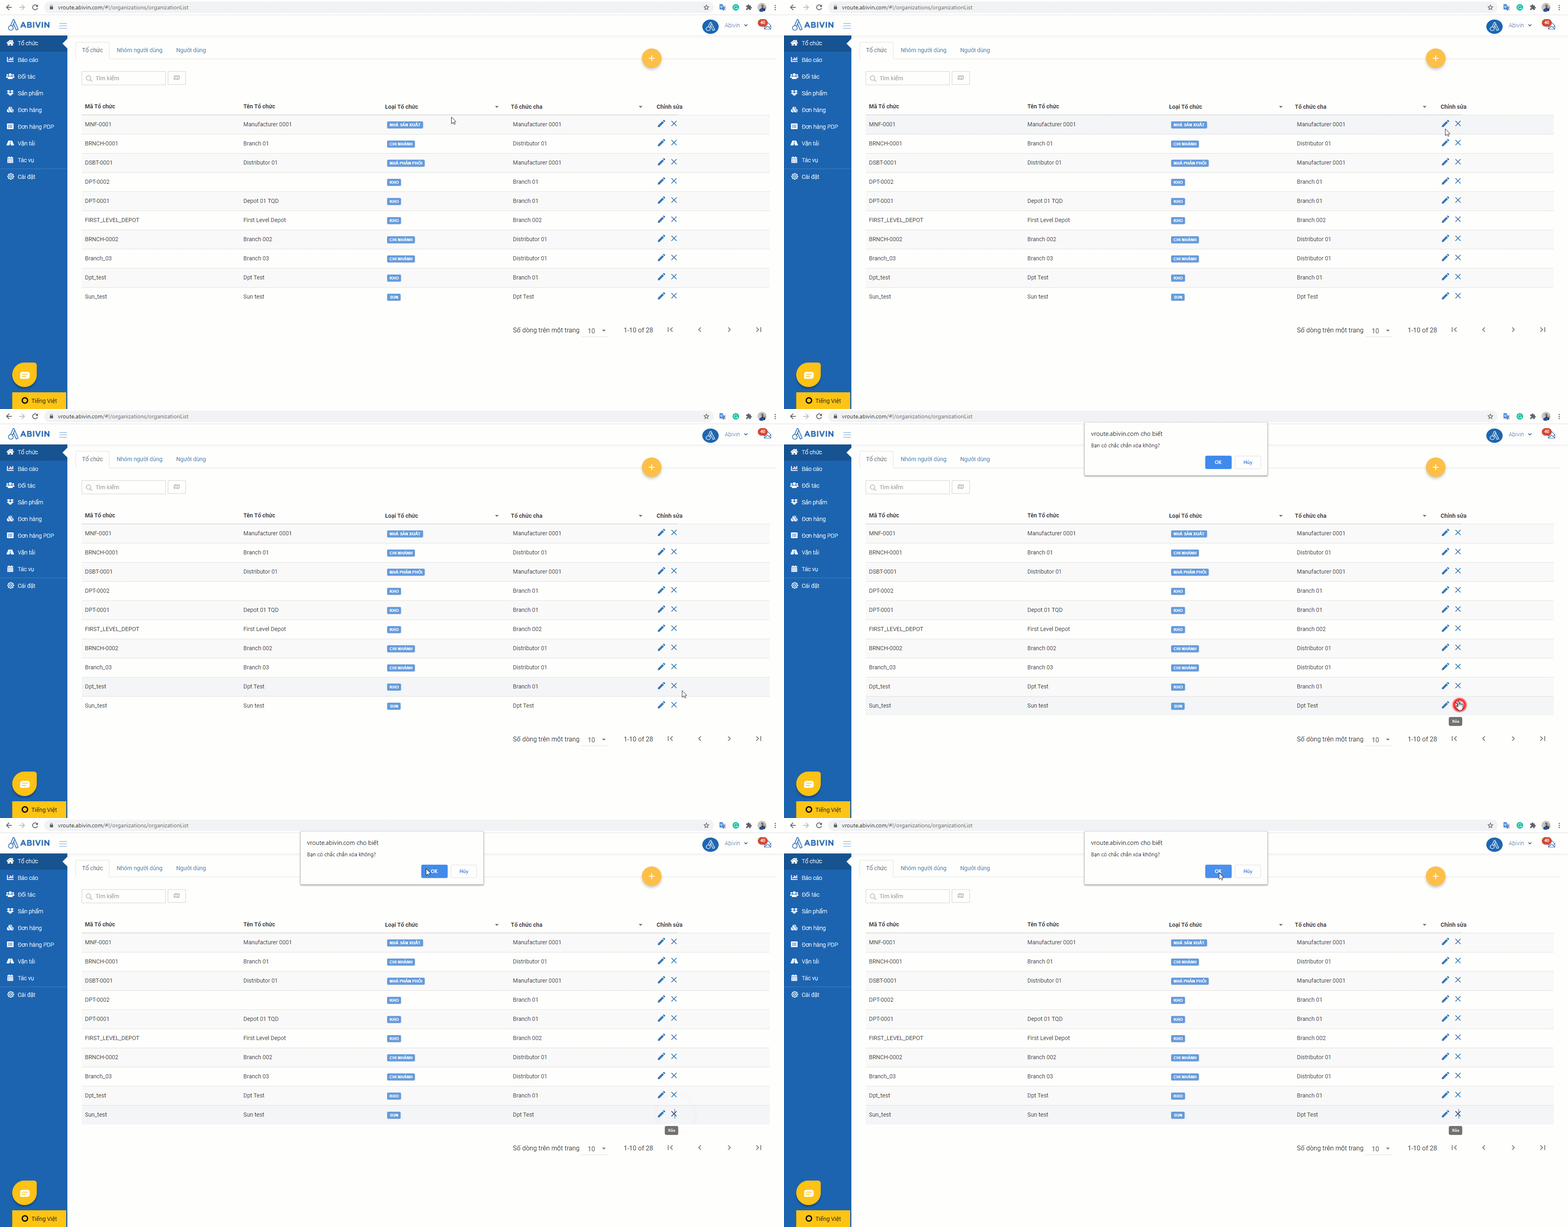
Illustration GIF (Vietnamese)
Sort Records
Search Records
Filter Records
Rearrange Fields
Select Fields
Screen Functional Buttons
Scrollbars
- There are two types of scrollbars: Vertical Scrollbar and Horizontal Scrollbar
- In the screens with few records, no scrollbars will show up.
- In the screens showing lists, the vertical scrollbar is often on the left. You can scroll up and down with this vertical scrollbar.
- If users select multiple fields to display, the horizontal scrollbar will show up and be firmly placed under the list. You can drag the mouse to the left and right with this horizontal scrollbar
Highlight Selected Records
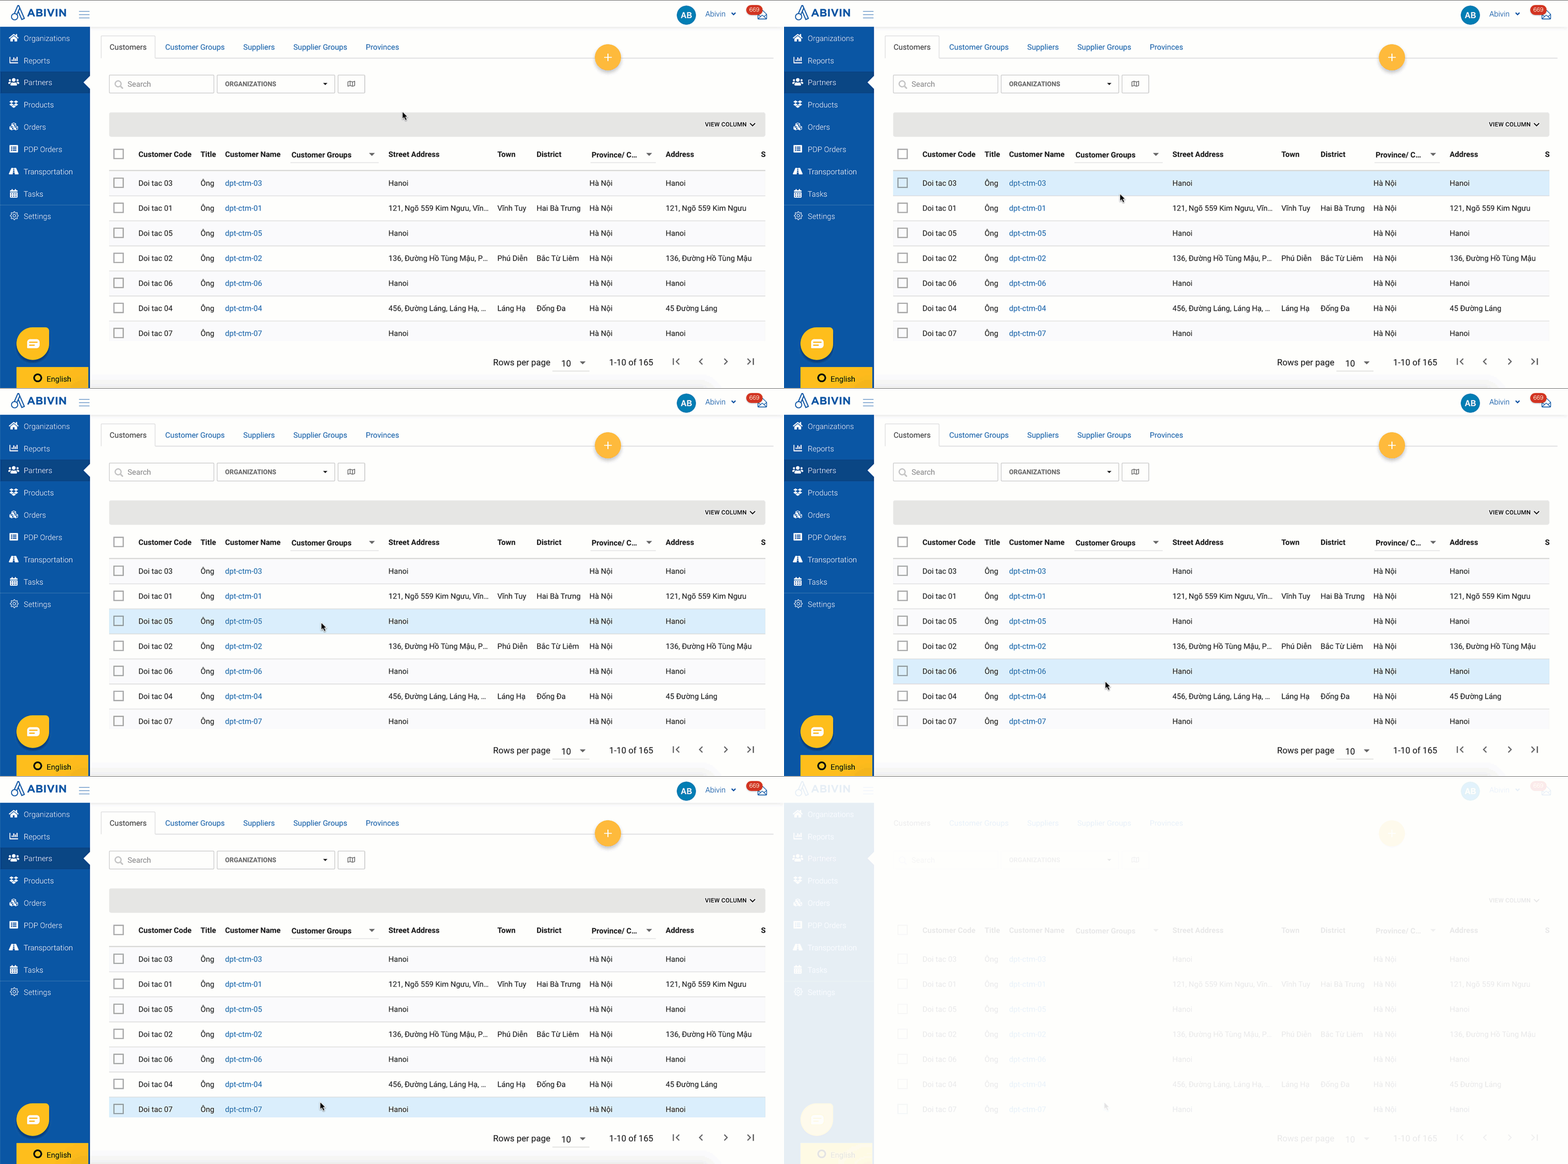
- Hover over records
- The system will highlight whichever records you hover your mouse over
- Select records
- When you select a record, or tick its checkbox, the system will highlight it. Similarly, unticking the checkbox will remove the highlighted color of that record
Updated about 1 month ago
