Search & Filter Functions
Search object
- Normally, each tab will have one or more search bars, represented by a icon. You can search for an object using that search bar by typing one information of the object into the that bar
- In each specific management article, we will specify what information you can type into the search bar
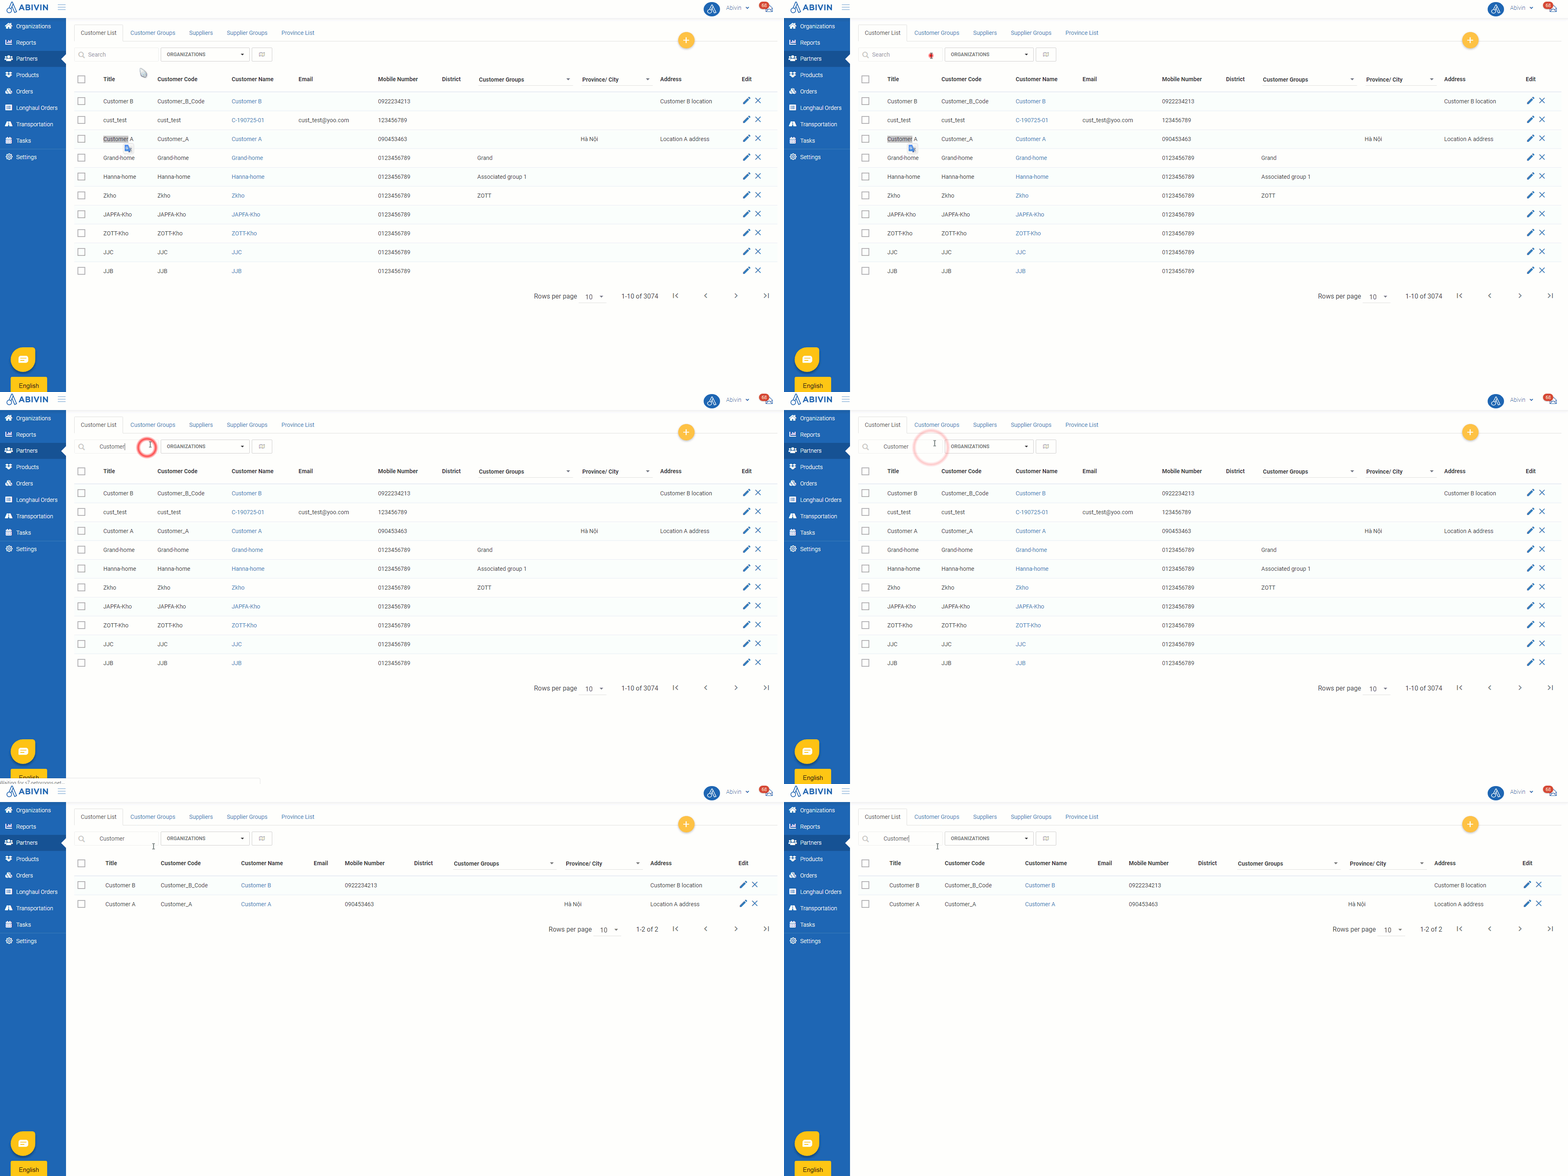
Filter objects
Filter by information
- On each tab, there will be a filter bar on the main tool bar above the object list. The title on the bar will signify what kind of information you can filter (For example: A bar titled Organizations means that you can filter objects by their management organizations)
- You can click on the bar and select the value from the drop down menu. However, for many information fields, there are too many values that it's not impractical to make all of them visible. Therefore we have streamlined and just show some values to illustrate what information could be input to filter out. The drop down menu will have a search bar, where you can copy and paste the existing value (For example: the Organization Code of an existing organization) to search the exact value
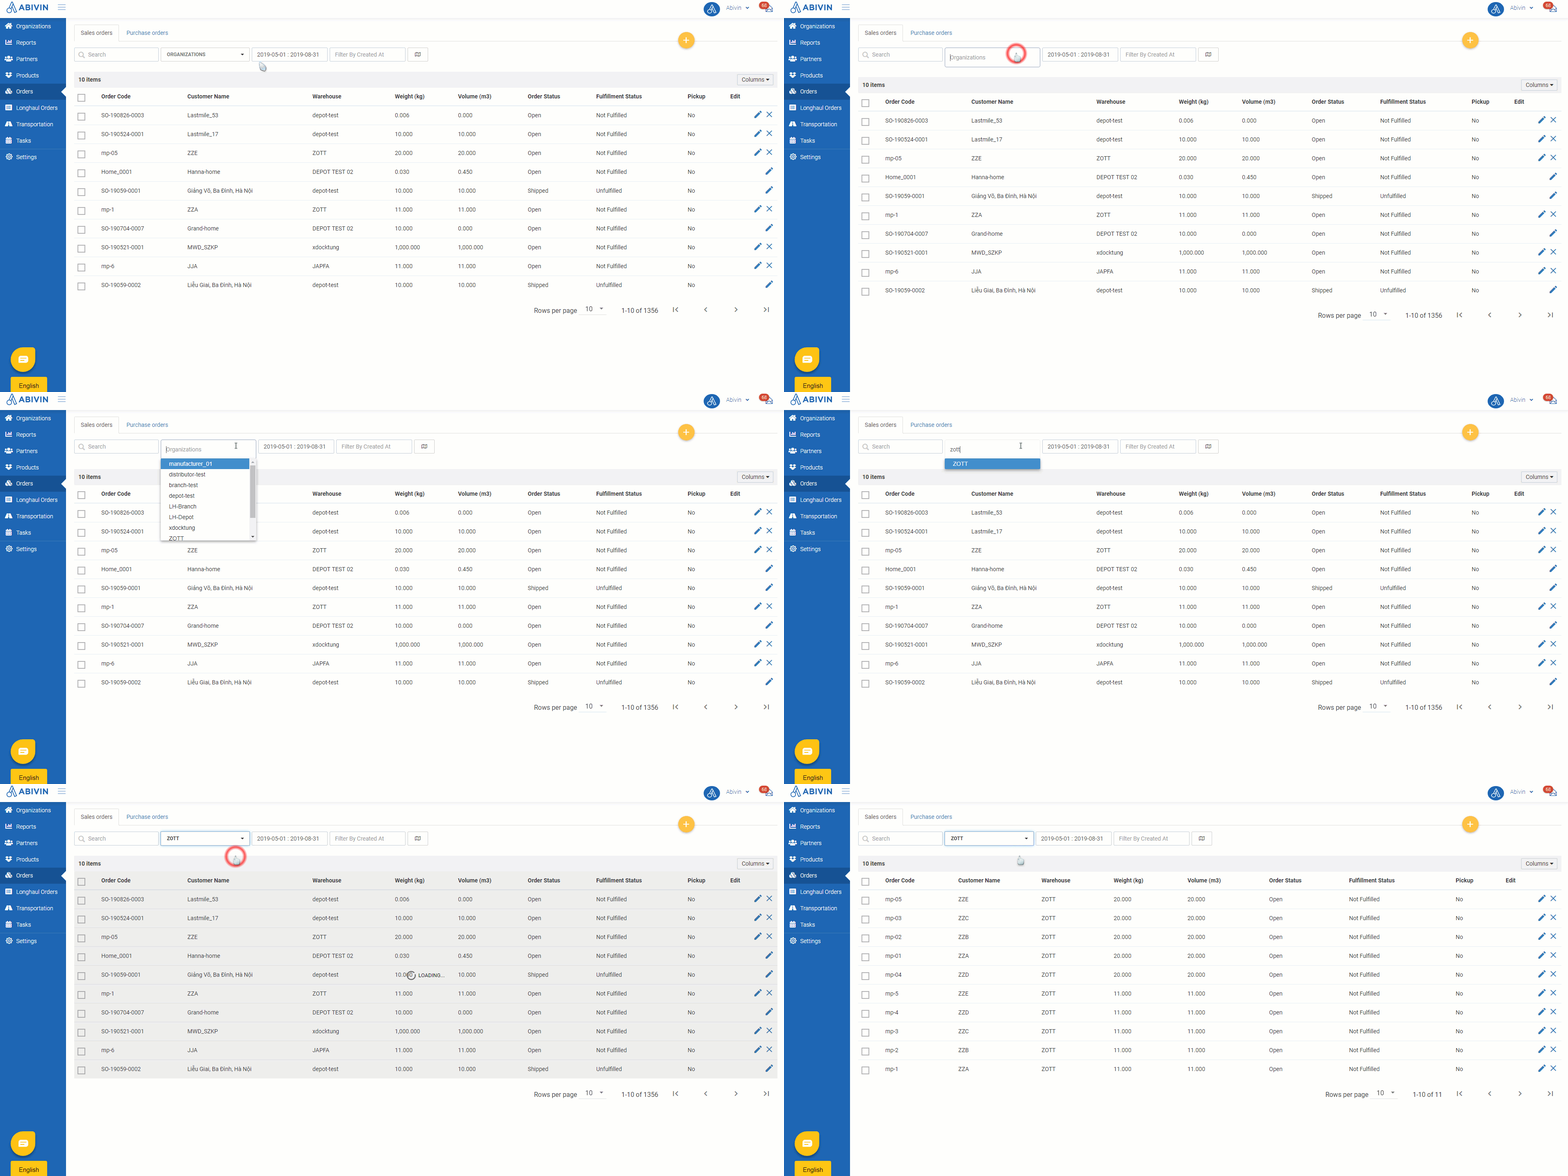
Filter Sales orders by Depot
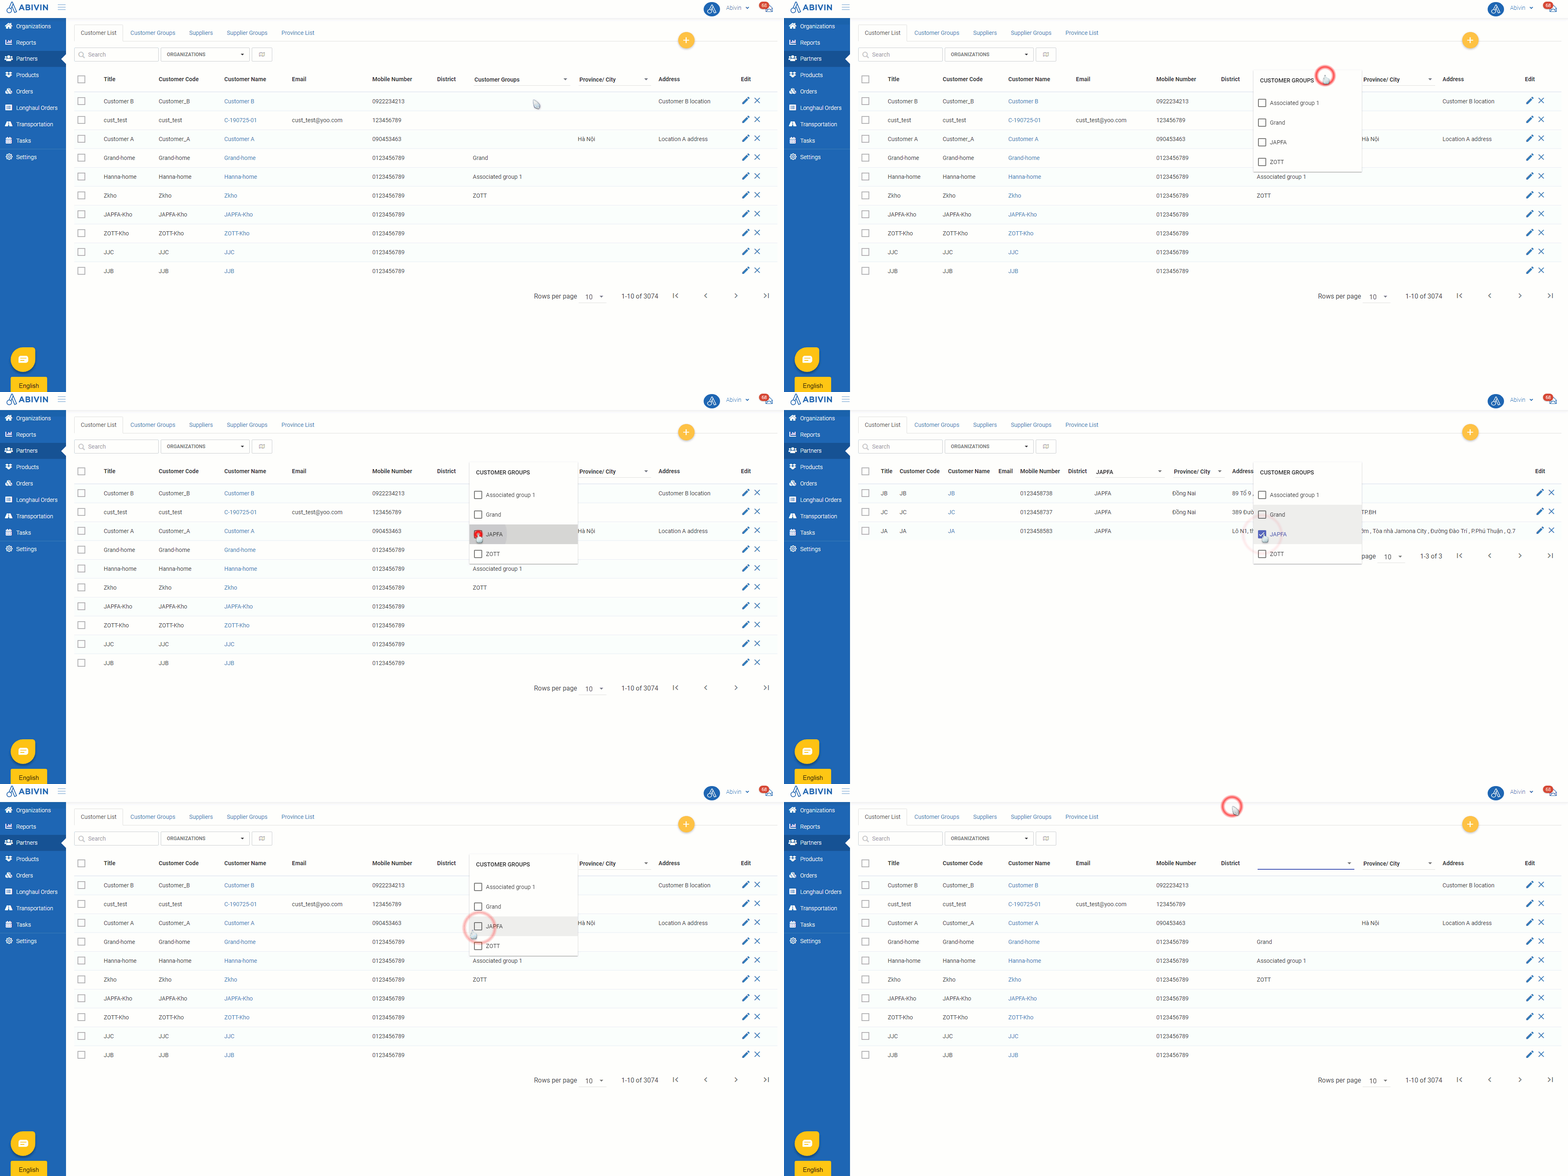
- Also notice that on some tabs, there are certain information columns that have icons at the end of their titles. This indicates that you can click on those column titles and filter information, normally by clicking on check boxes on the drop down menus. Only objects that meet the conditions of the filter will show up
- To remove the filters, revert the steps by clicking on boxes next to the values you have chosen
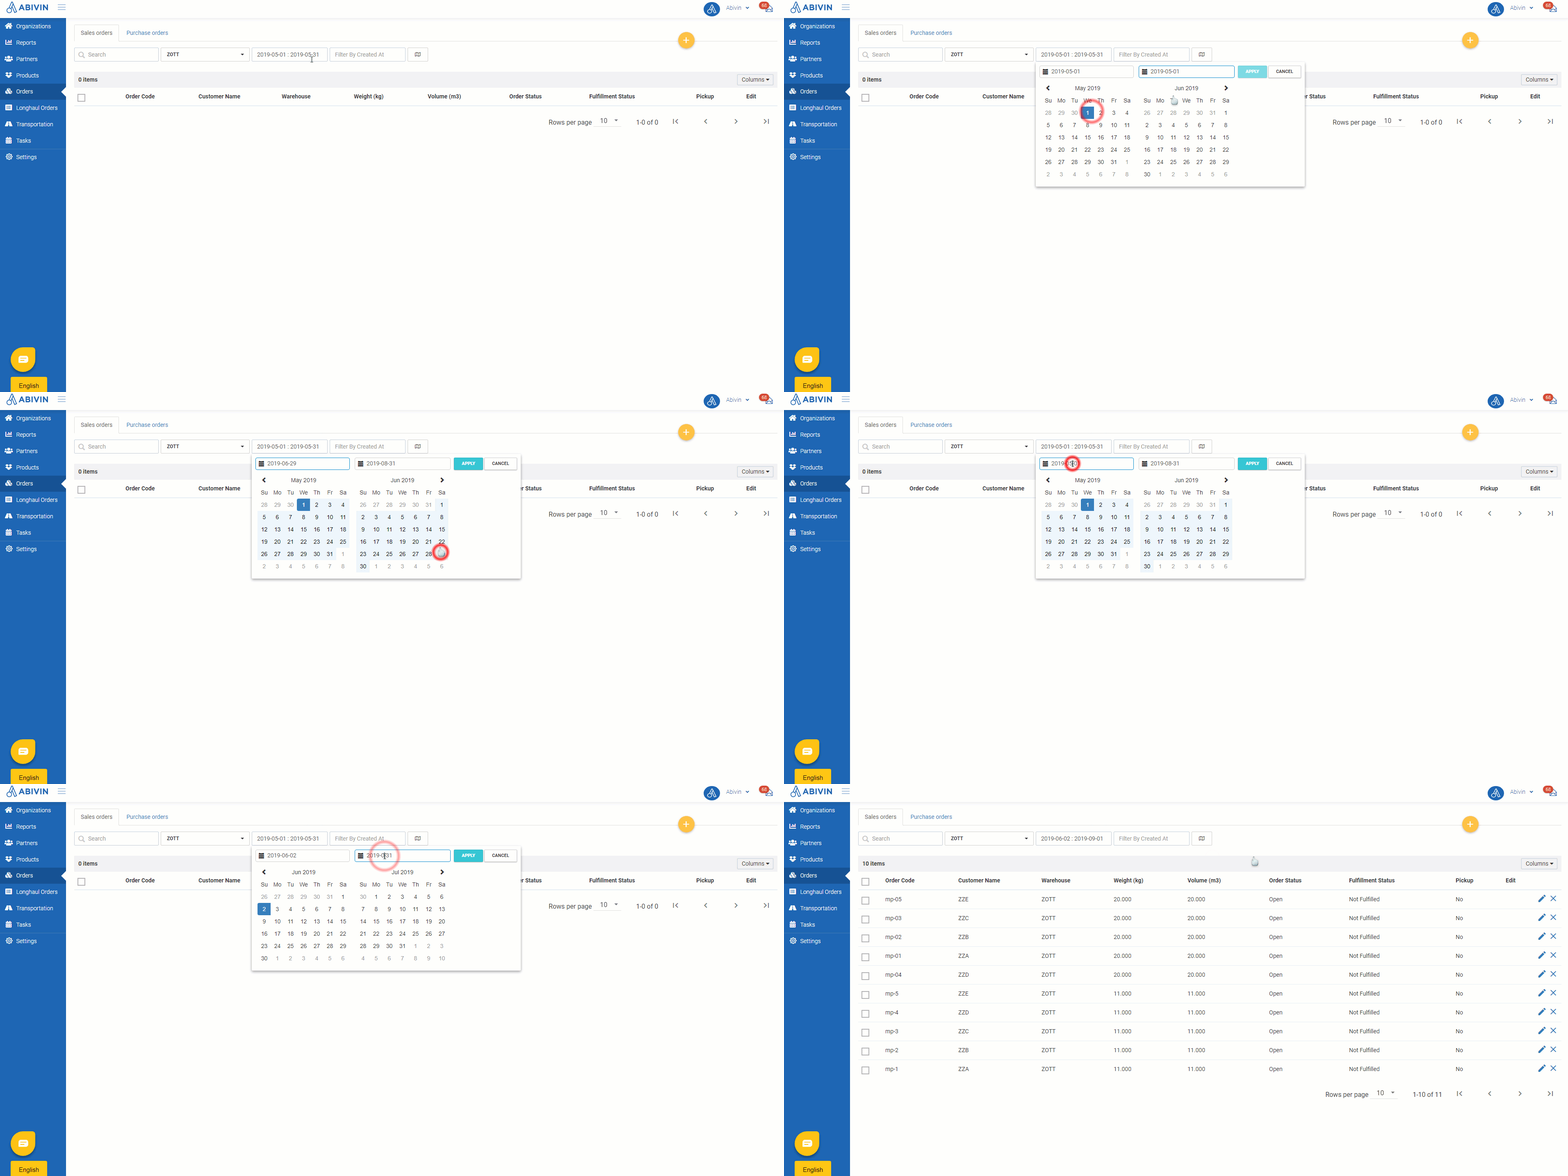
Filter by date
- In some specific tabs, where the objects are highly influenced by dates (Such as Creation date and Execution date of orders), you can filter them by date. There will be a calendar, on which you can create a Date range to limit and show only the objects in that date range
- To create a Date range, click on the calendar field. A calendar will drop down. Click on a date to select it as the Start date of the Date range, then click on another date to select it as the End date of the Date range. The dates selected will be highlighted with blue background. To deselect the dates, click on them a second time
- You can select the date range to be in just one specific date by clicking twice on the date
- You can move around between past and future months by clicking on and icons
- An alternative way is to directly input the dates into the text fields right above the calendars
- After selecting the suitable Date range, click Apply to create the Date range. Objects filtered by the recently created Date range will show up
Some notes when using Search and Filter functions
Use when creating/editing objects
- The search and filter functions do not only apply to existing objects. You can also use these functions when creating or editing objects using Web forms with some information fields that require selecting existing values in the database
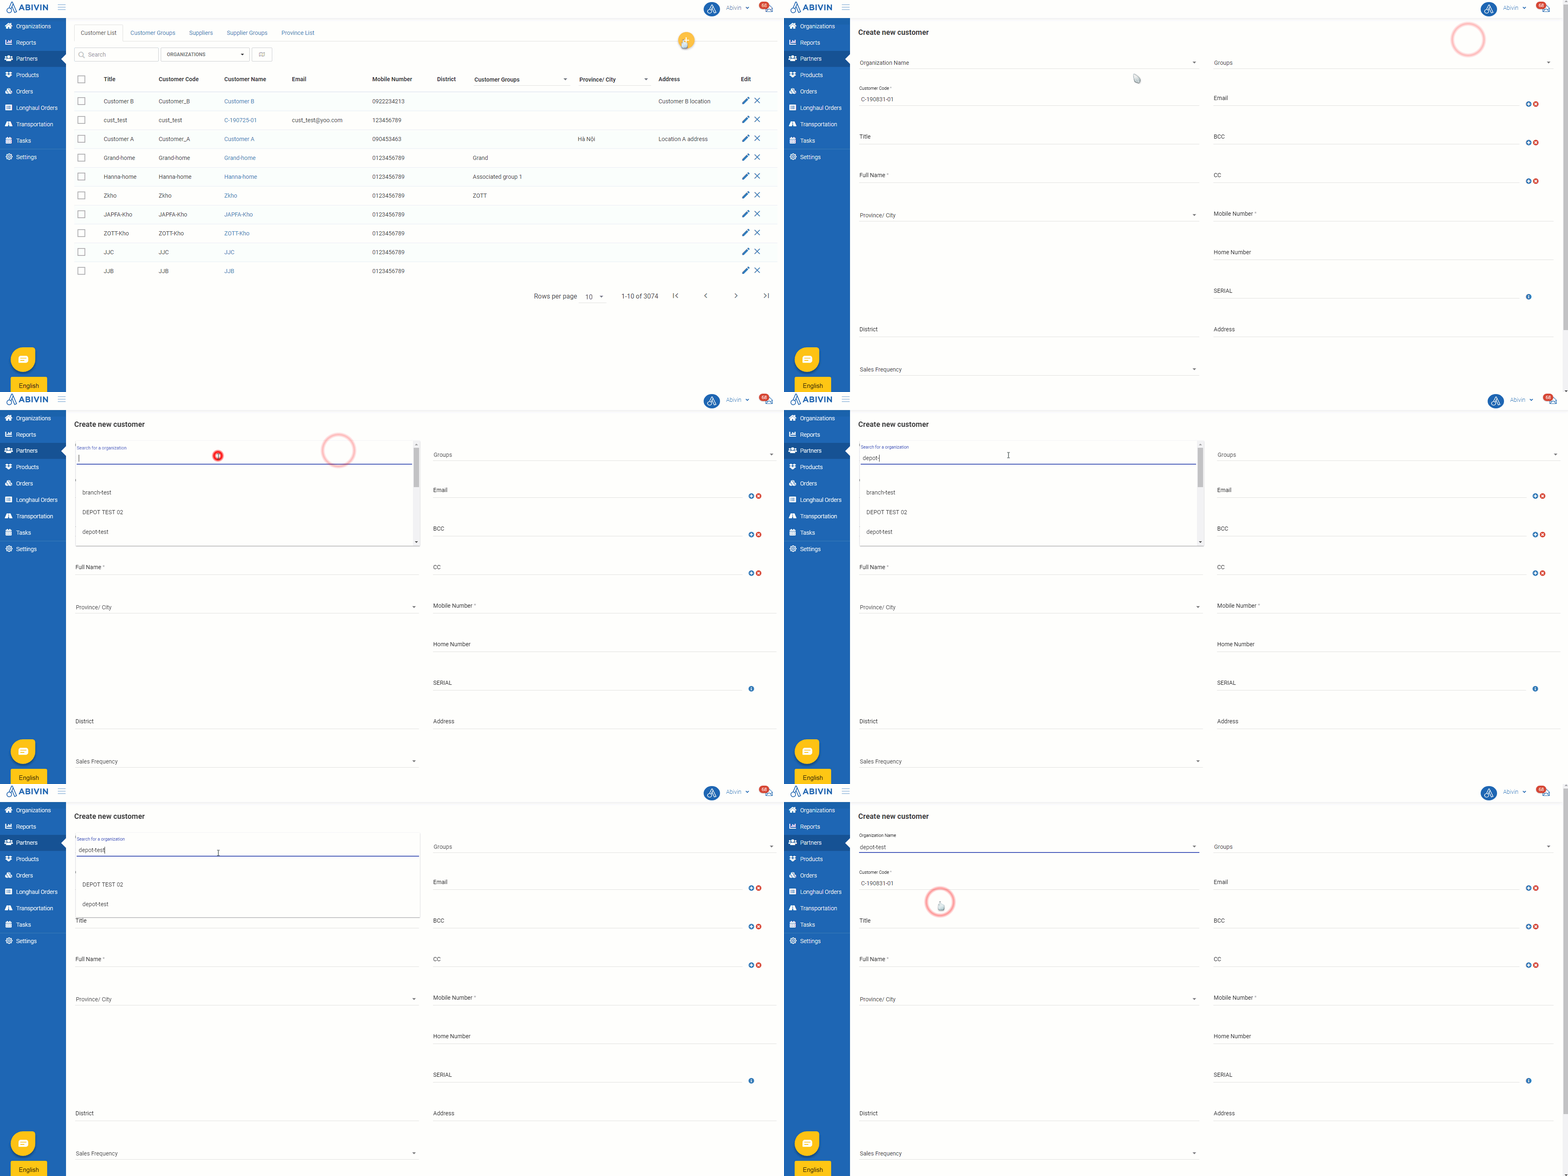
Combine multiple filters
- You can use the search and filter functions together, even make several filters in order to quickly find the desired results
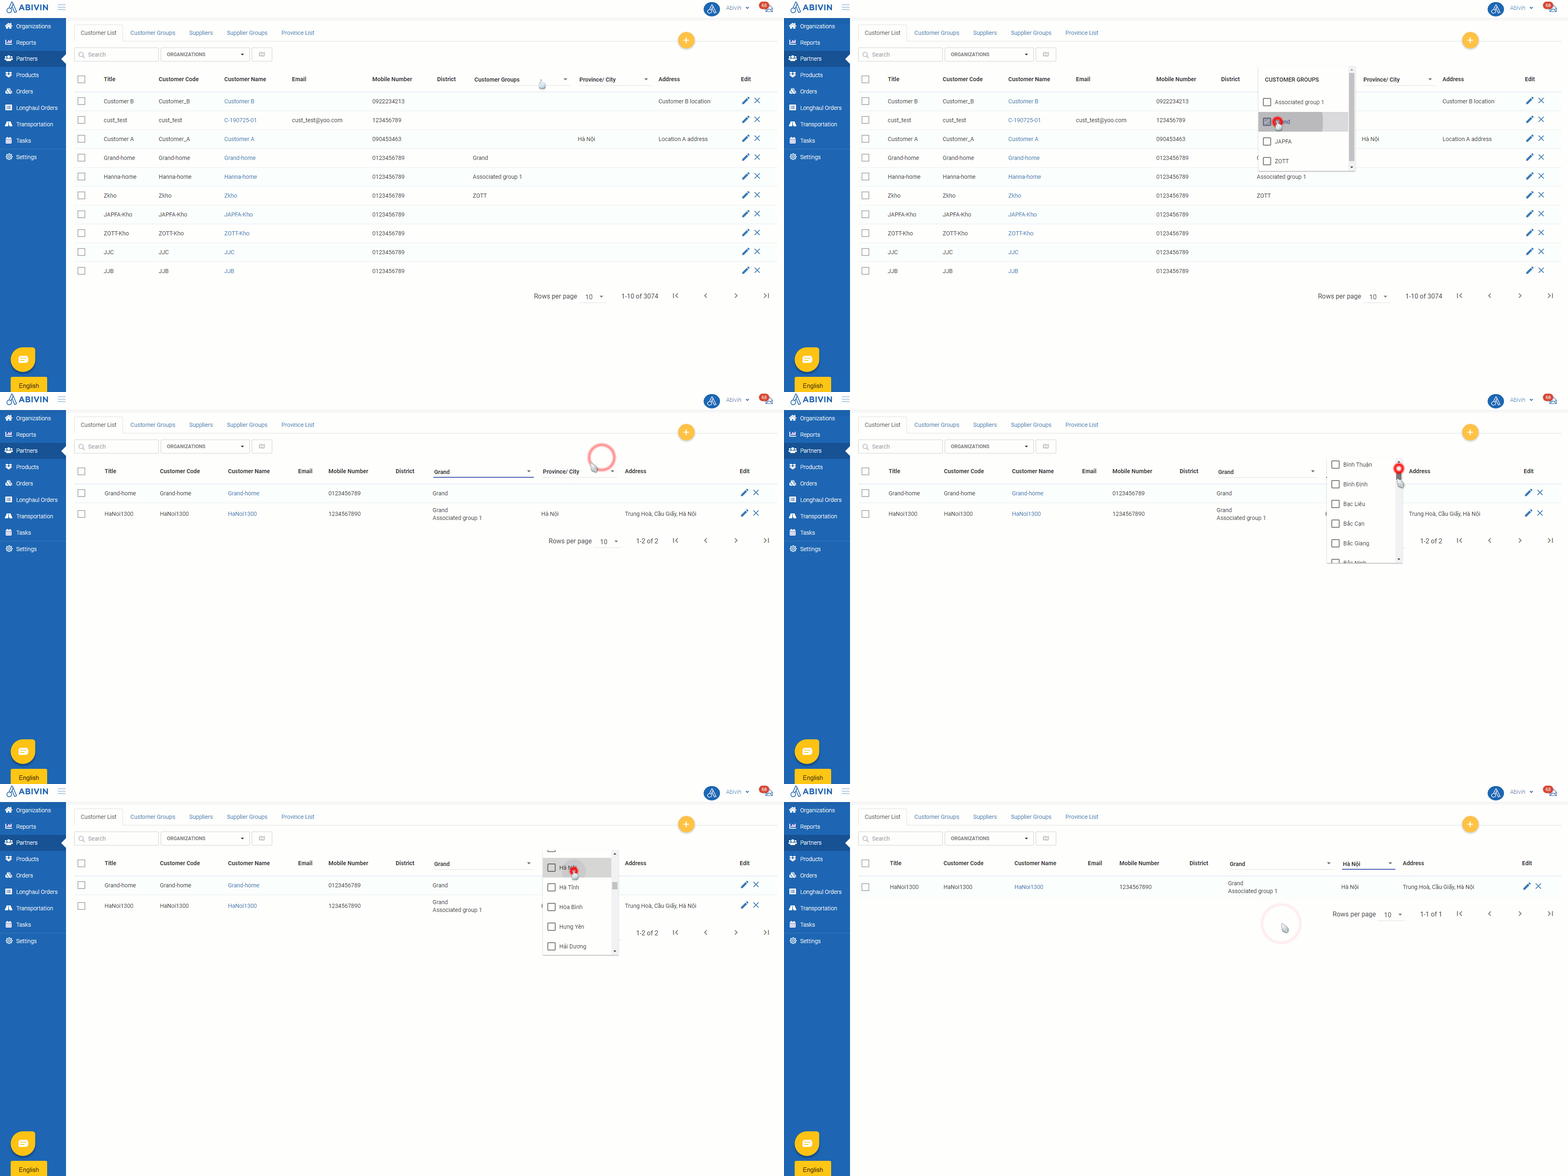
Results will display on the first page
- Results after searching/filtering will appear on the first page. If you're currently at a different page, you have to go back to the first page to see the results, by clicking on the icon
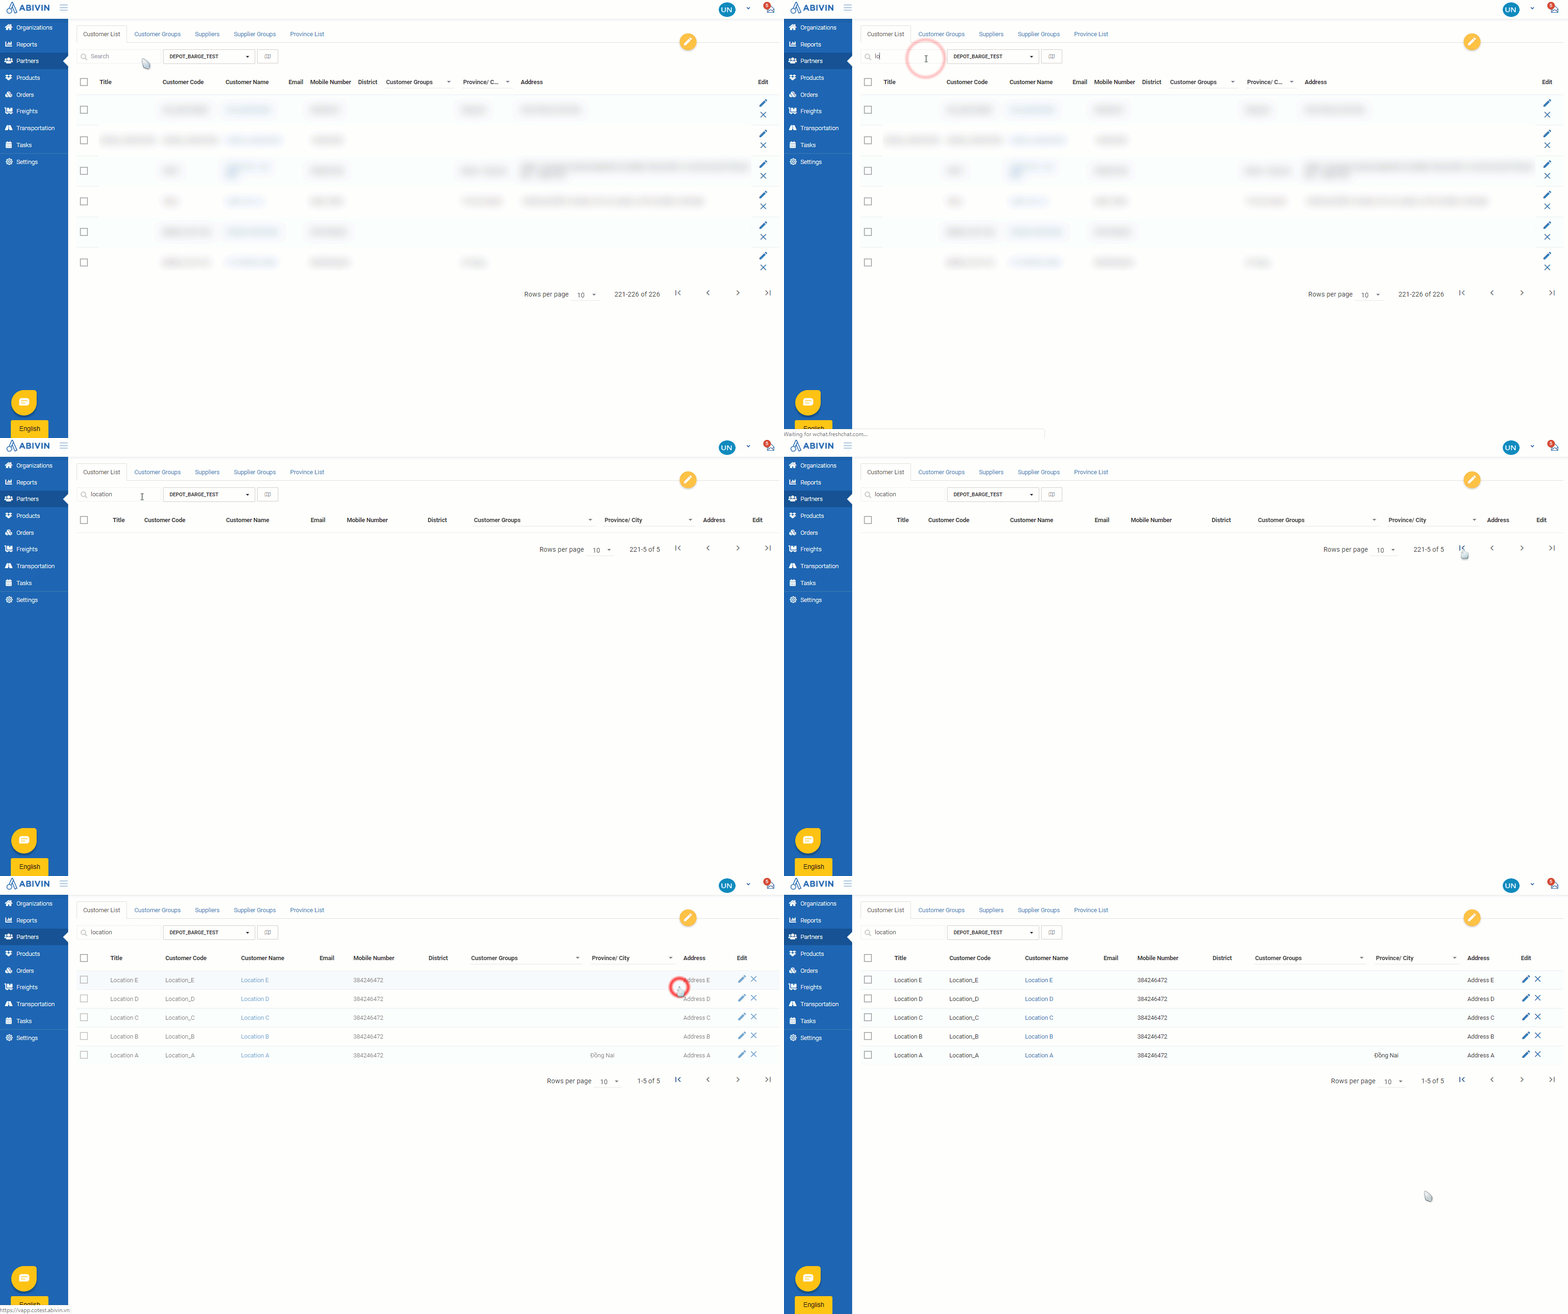
Updated about 1 month ago
What's Next
