Route Plan Optimization (Old Map View)
- After you have created Sales Orders of all Depots under the management of a Branch, the next step is to perform the Route Plan Optimization process for those Orders
- In this model, a typical Route Plan optimization process comprises three phases:
- Phase 1: Select the Branch and the Route Plan date
- Phase 2: Generate the optimized Delivery Routes of the Vehicles on the selected Route Plan date
- Phase 3: Lock the optimized Delivery Routes and create the Delivery Tasks for the Drivers
- In order to get a better understanding of the Route Plan optimization process, we recommend you learn about the different delivery journey units of this model in the following section: Delivery Journey Units
Necessary Preparations
- In order to perform the Route Plan optimization process, make sure the following resources have all the necessary information:
- 1 - The Depots/Sun/Crossdock: Latitude; Longitude; Open Time
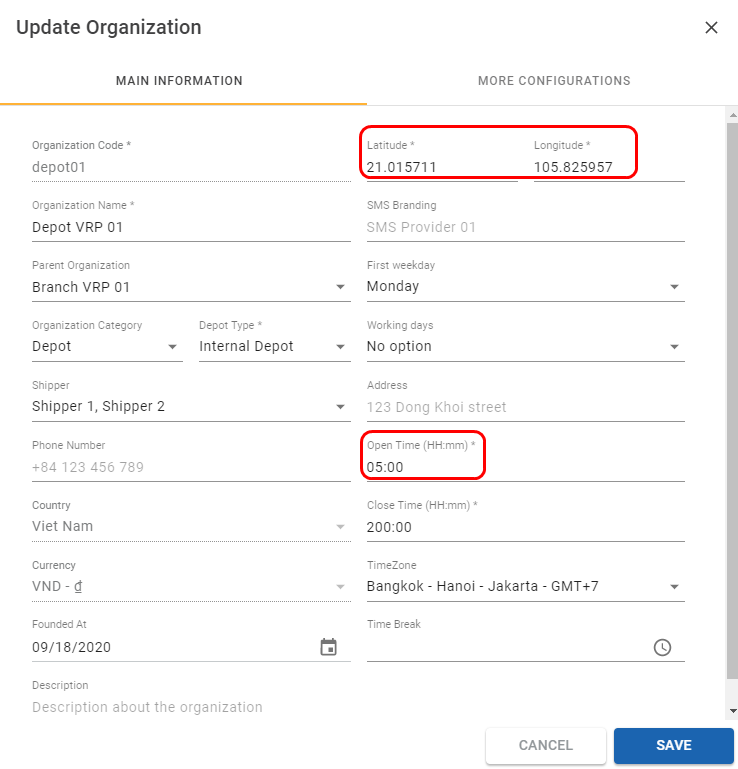
Illustration (English)
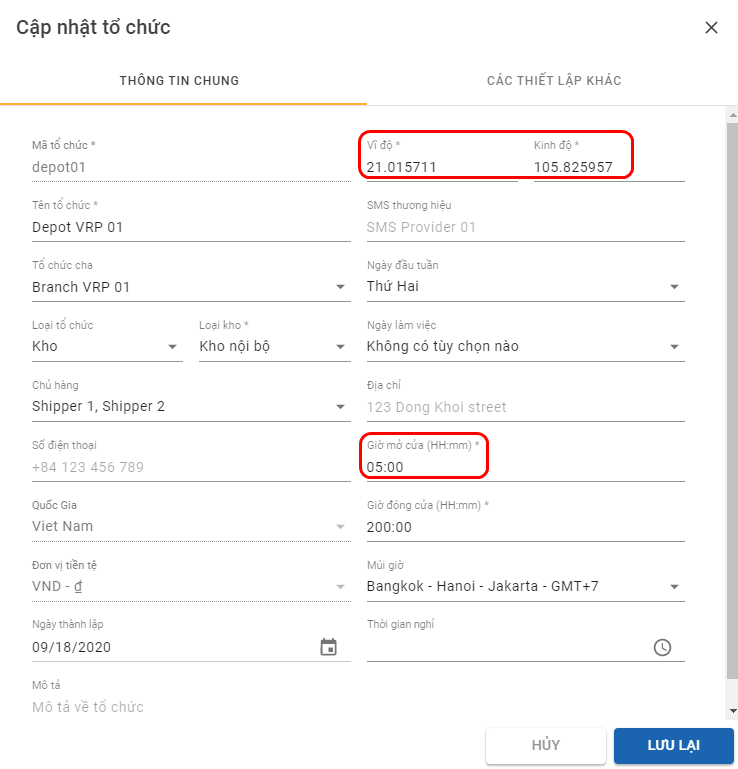
Illustration (Vietnamese)
- 2 - The Customer: Latitude; Longitude; Open Time; Close Time; Allowed Vehicle Types (The system default Vehicle Types - Motorbike; Truck/Semi-truck, or custom Vehicle Types input by the users); Minimum and Maximum Unloading Time
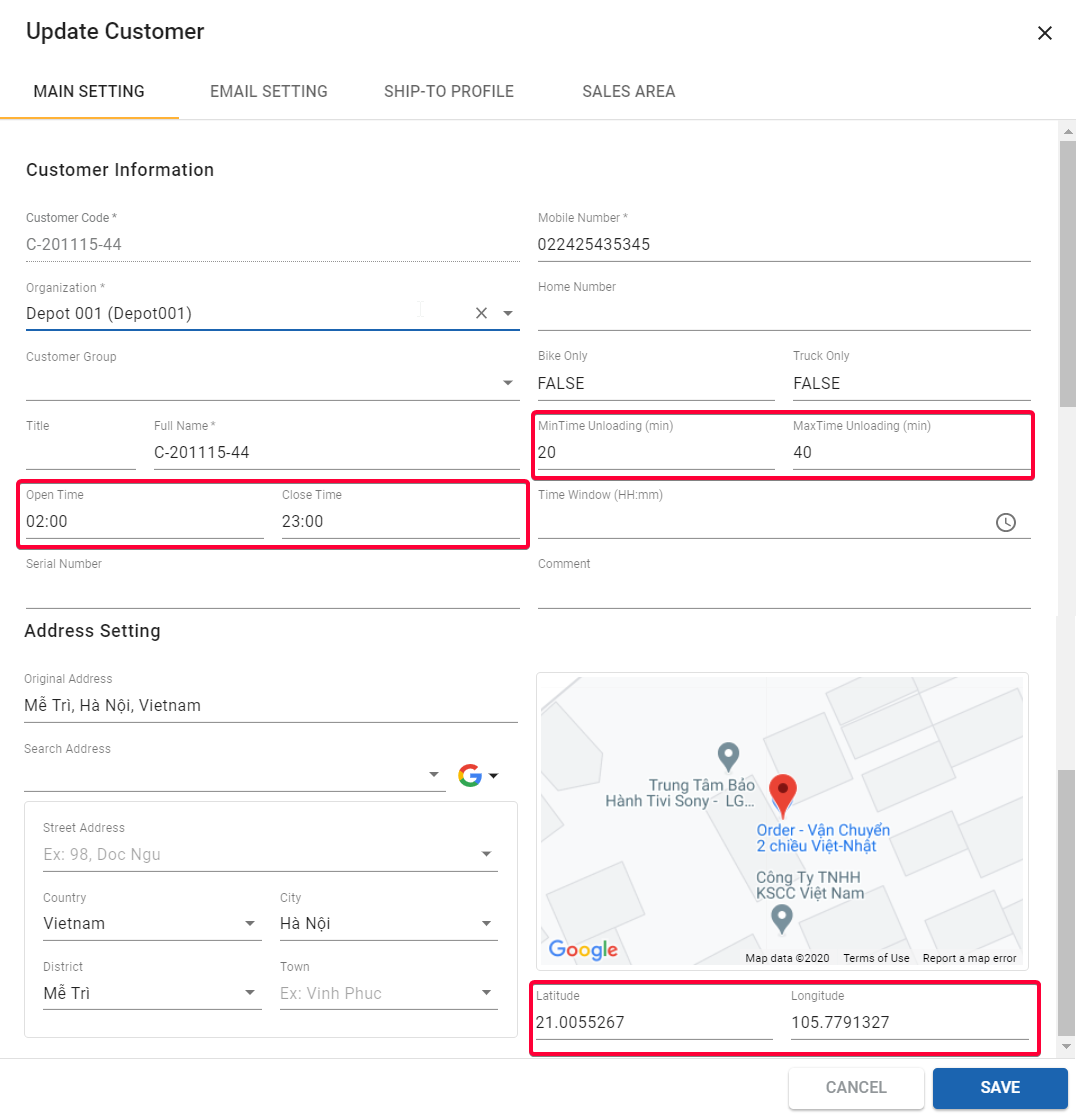
Illustration (English)
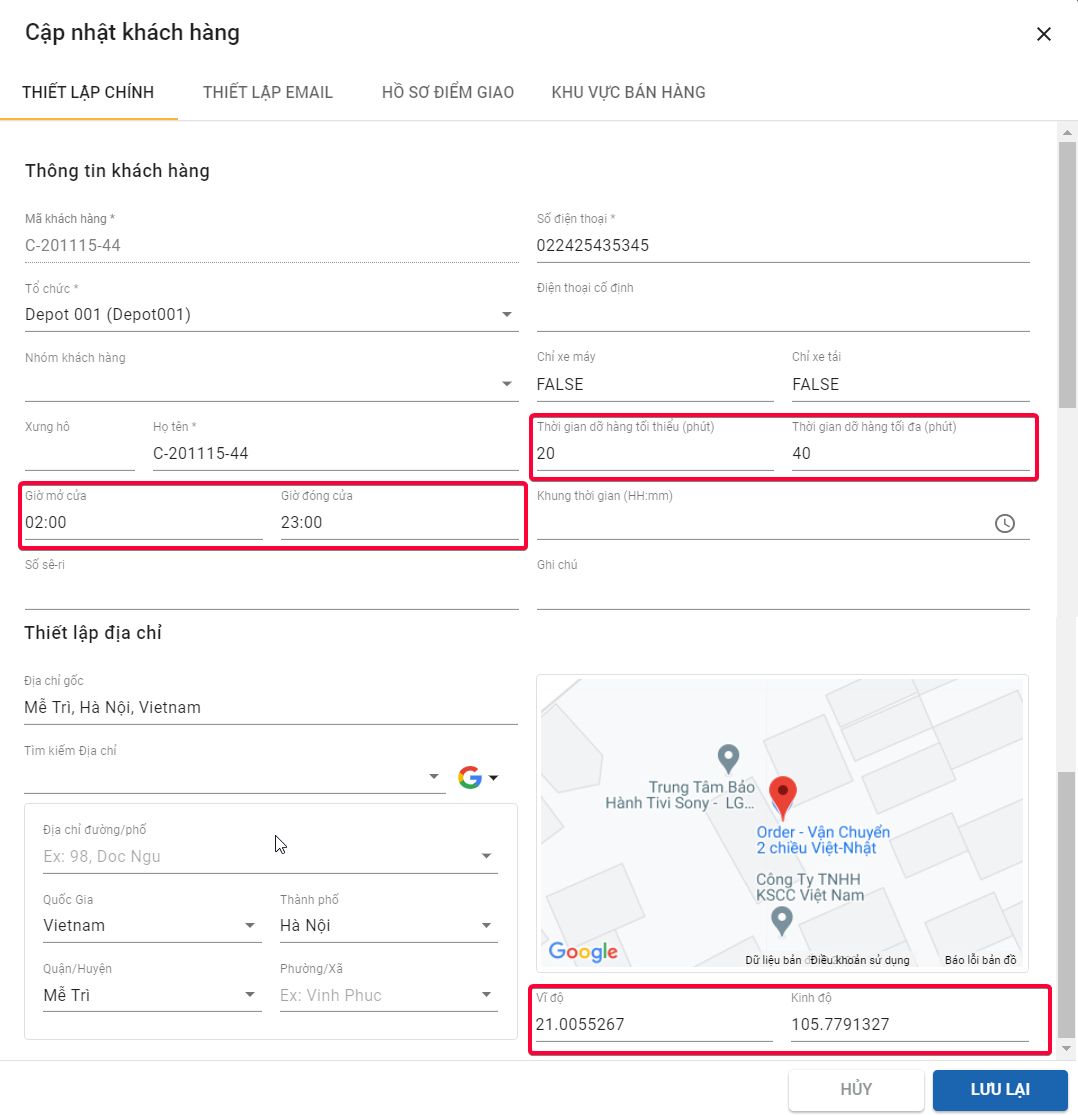
Illustration (Vietnamese)
- 3 - The Vehicles: Start Time; Stop Time; Weight; Volume; Speed. You also need to set the Active Status of the Vehicles that you wish to use in the Route Plan optimization process to Active
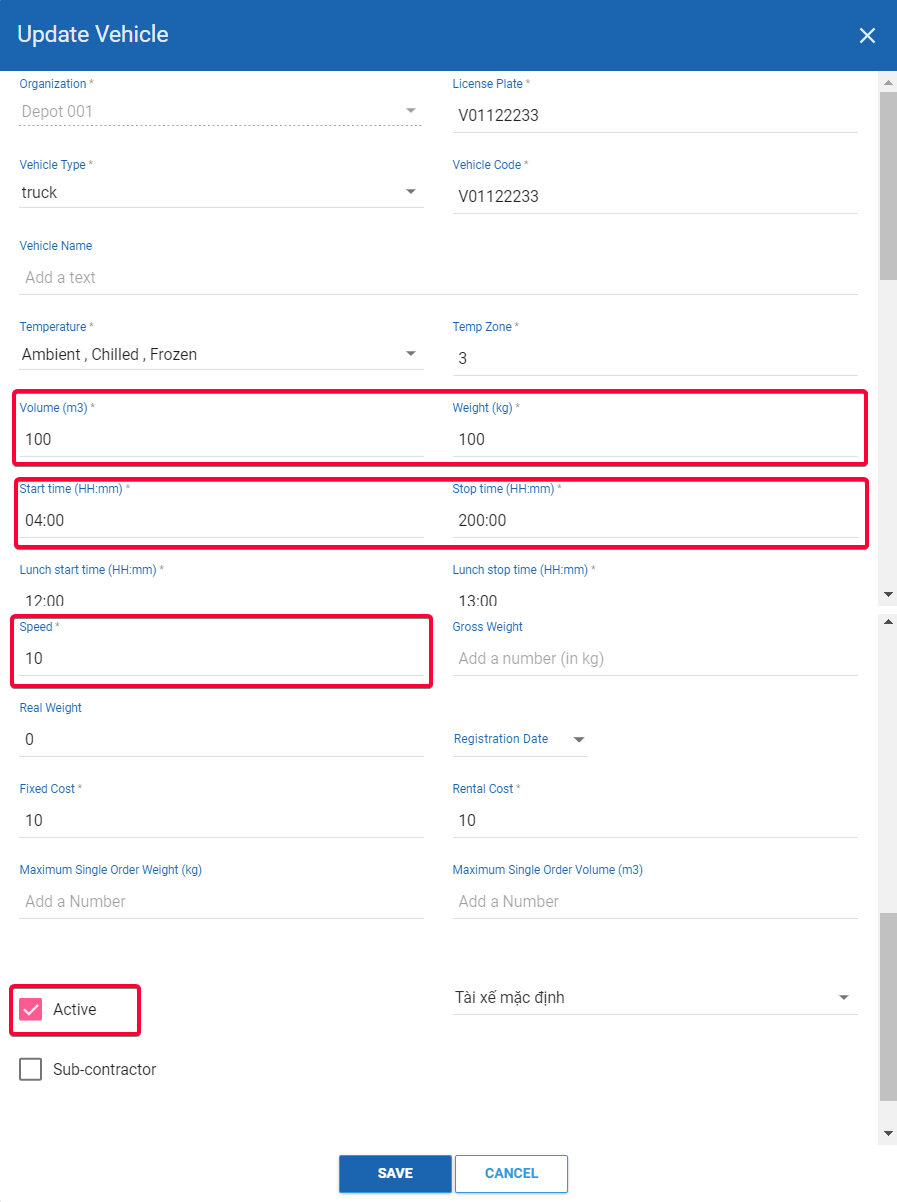
Illustration (English)
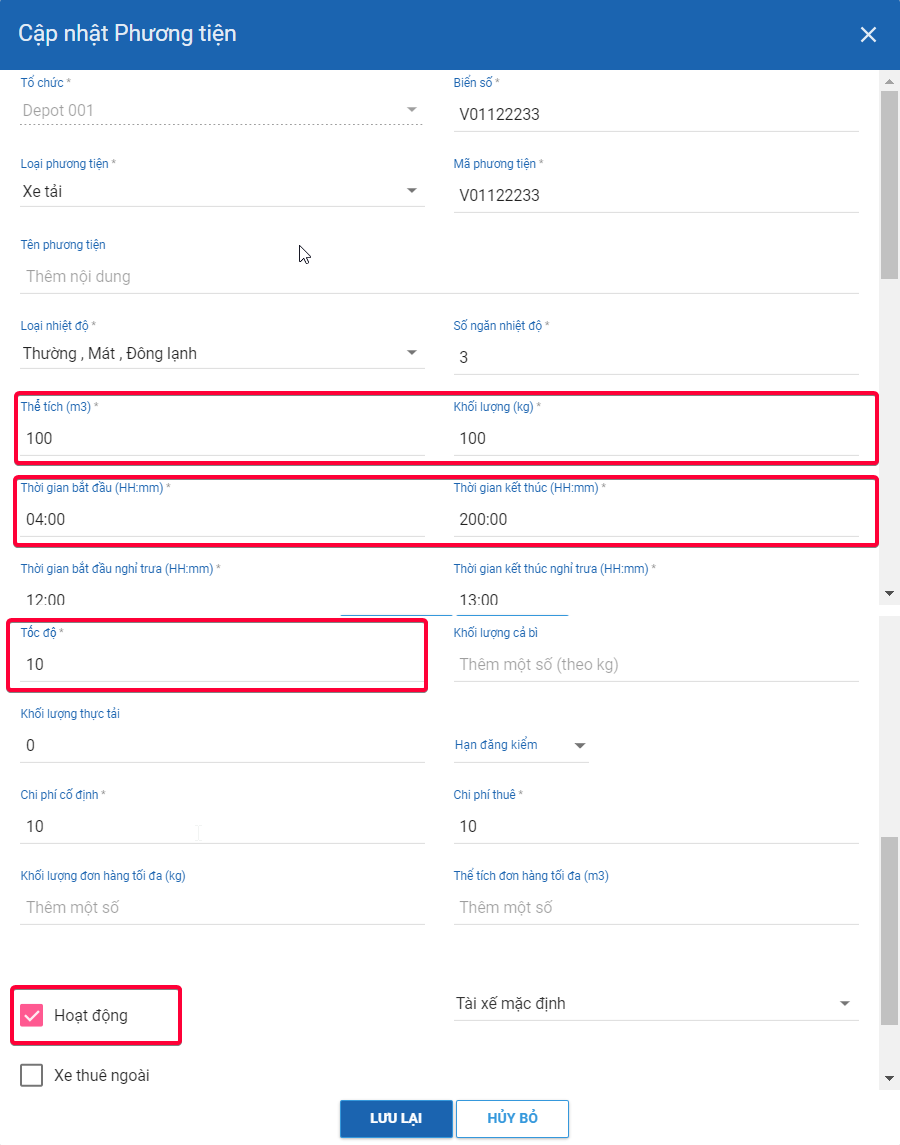
Illustration (Vietnamese)
Phase 1: Select Branch And Route Plan date
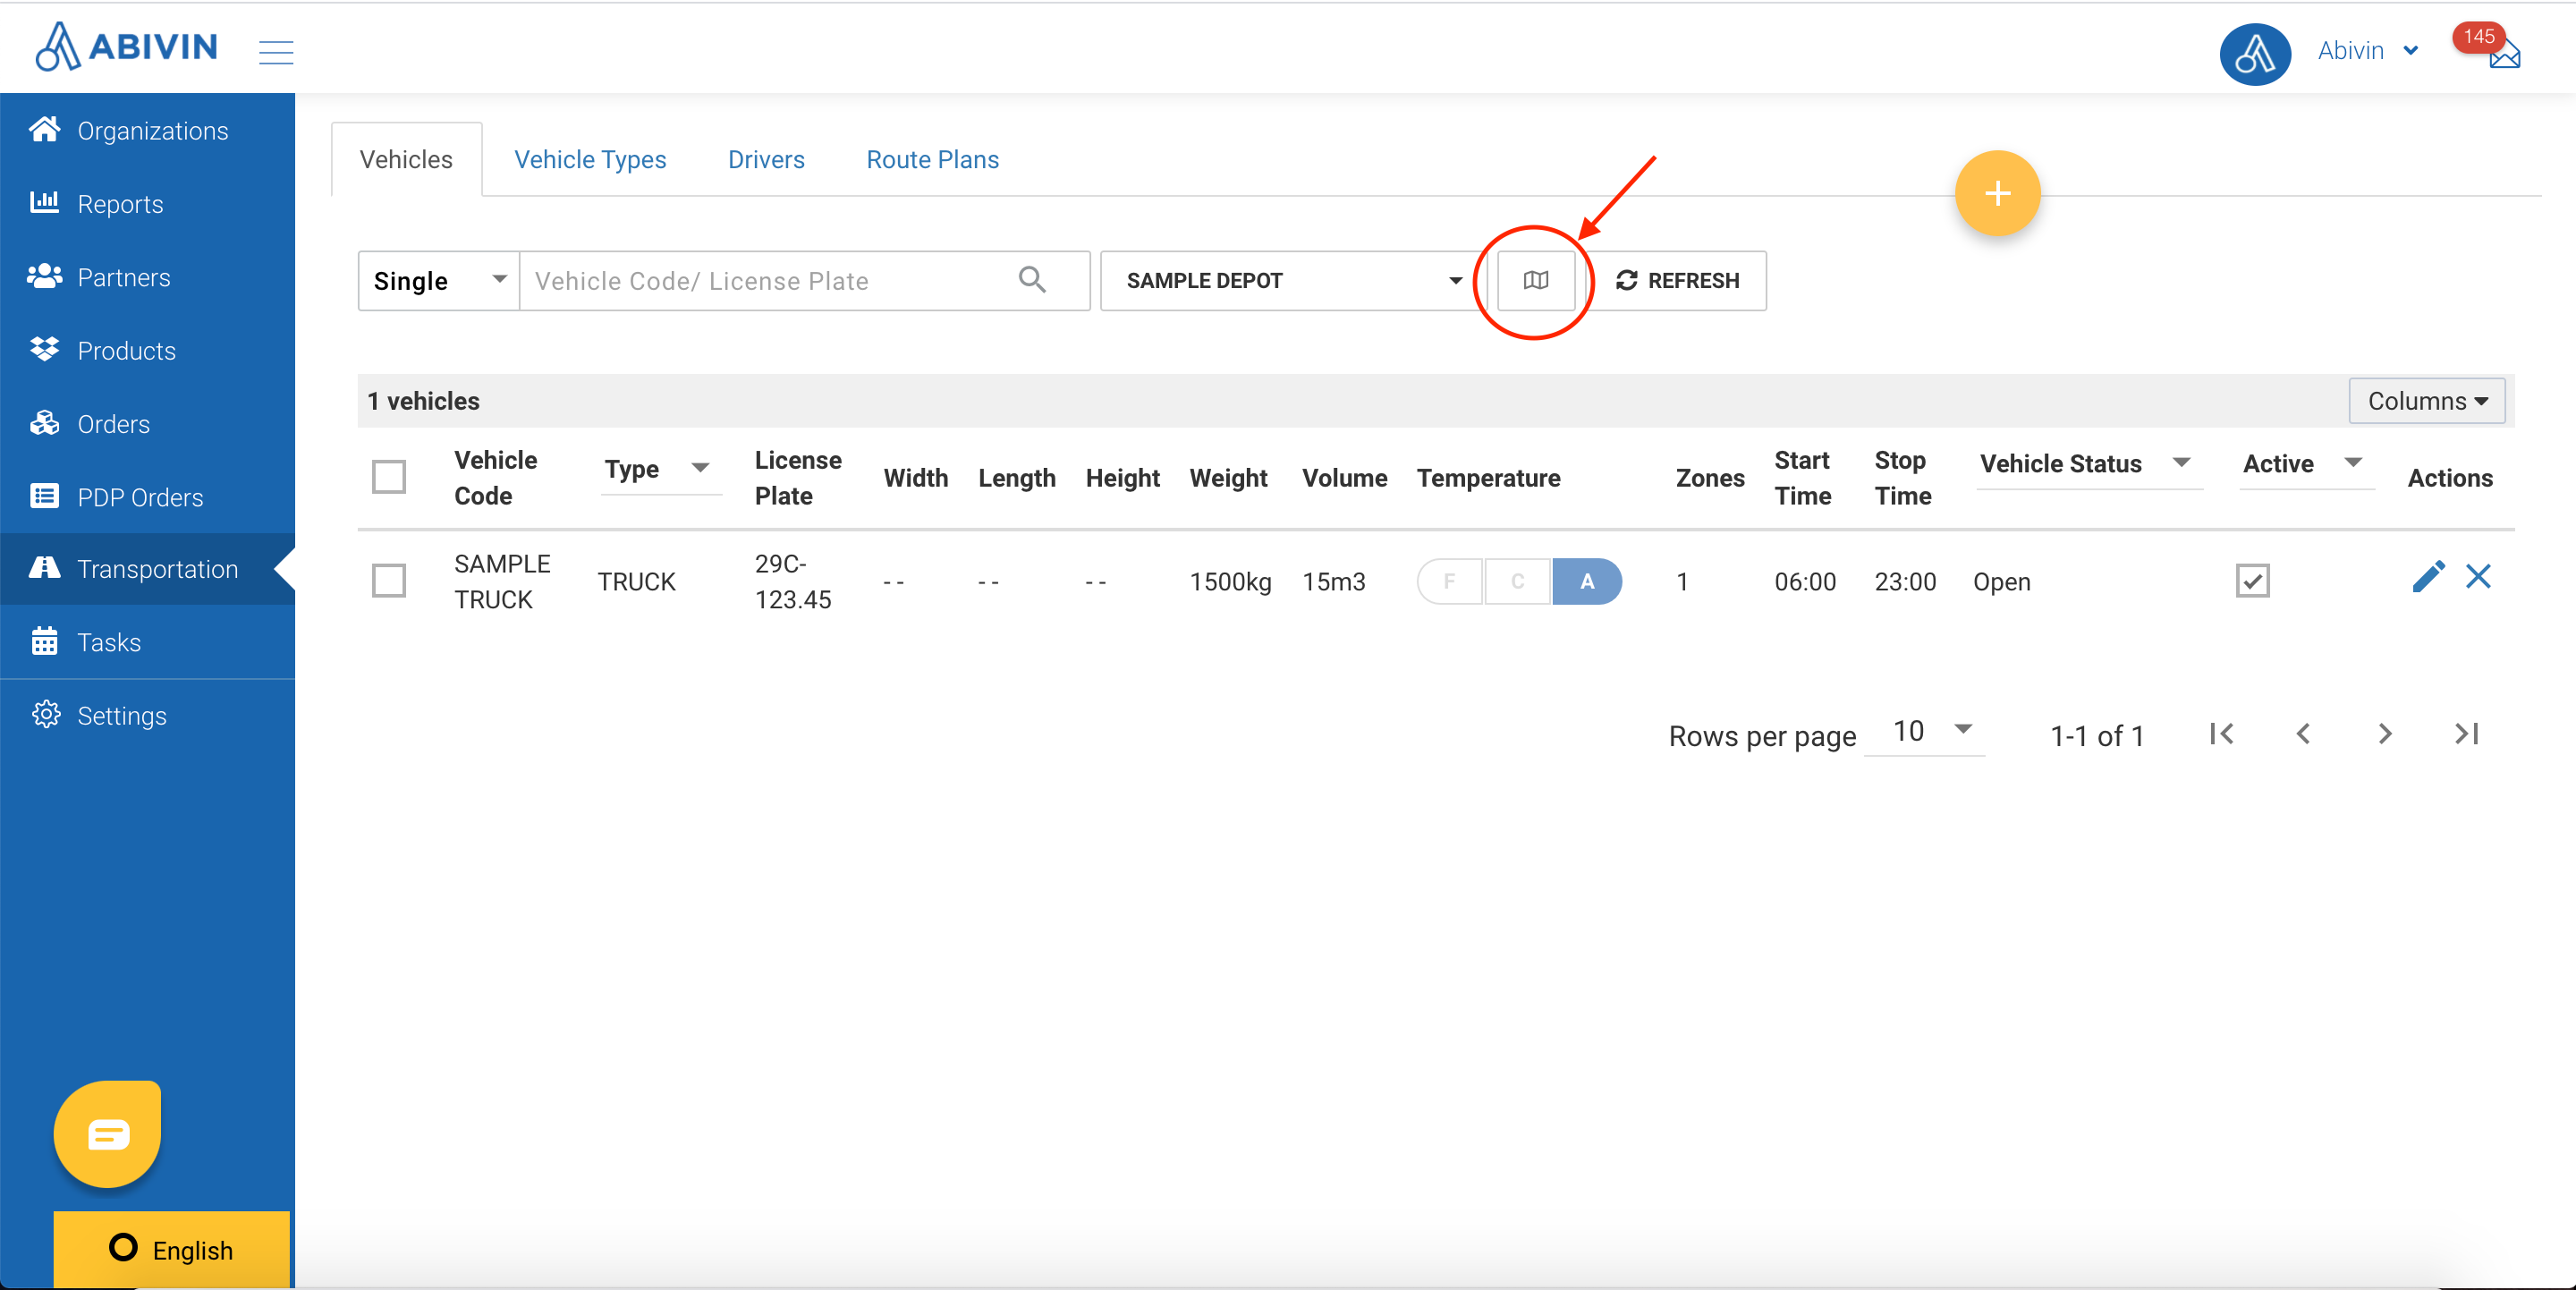
- Navigate to Transportation > Vehicles tab
- Click on the View Map icon on the toolbar

Illustration (English)

Illustration (Vietnamese)
- You will be directed to the Map screen
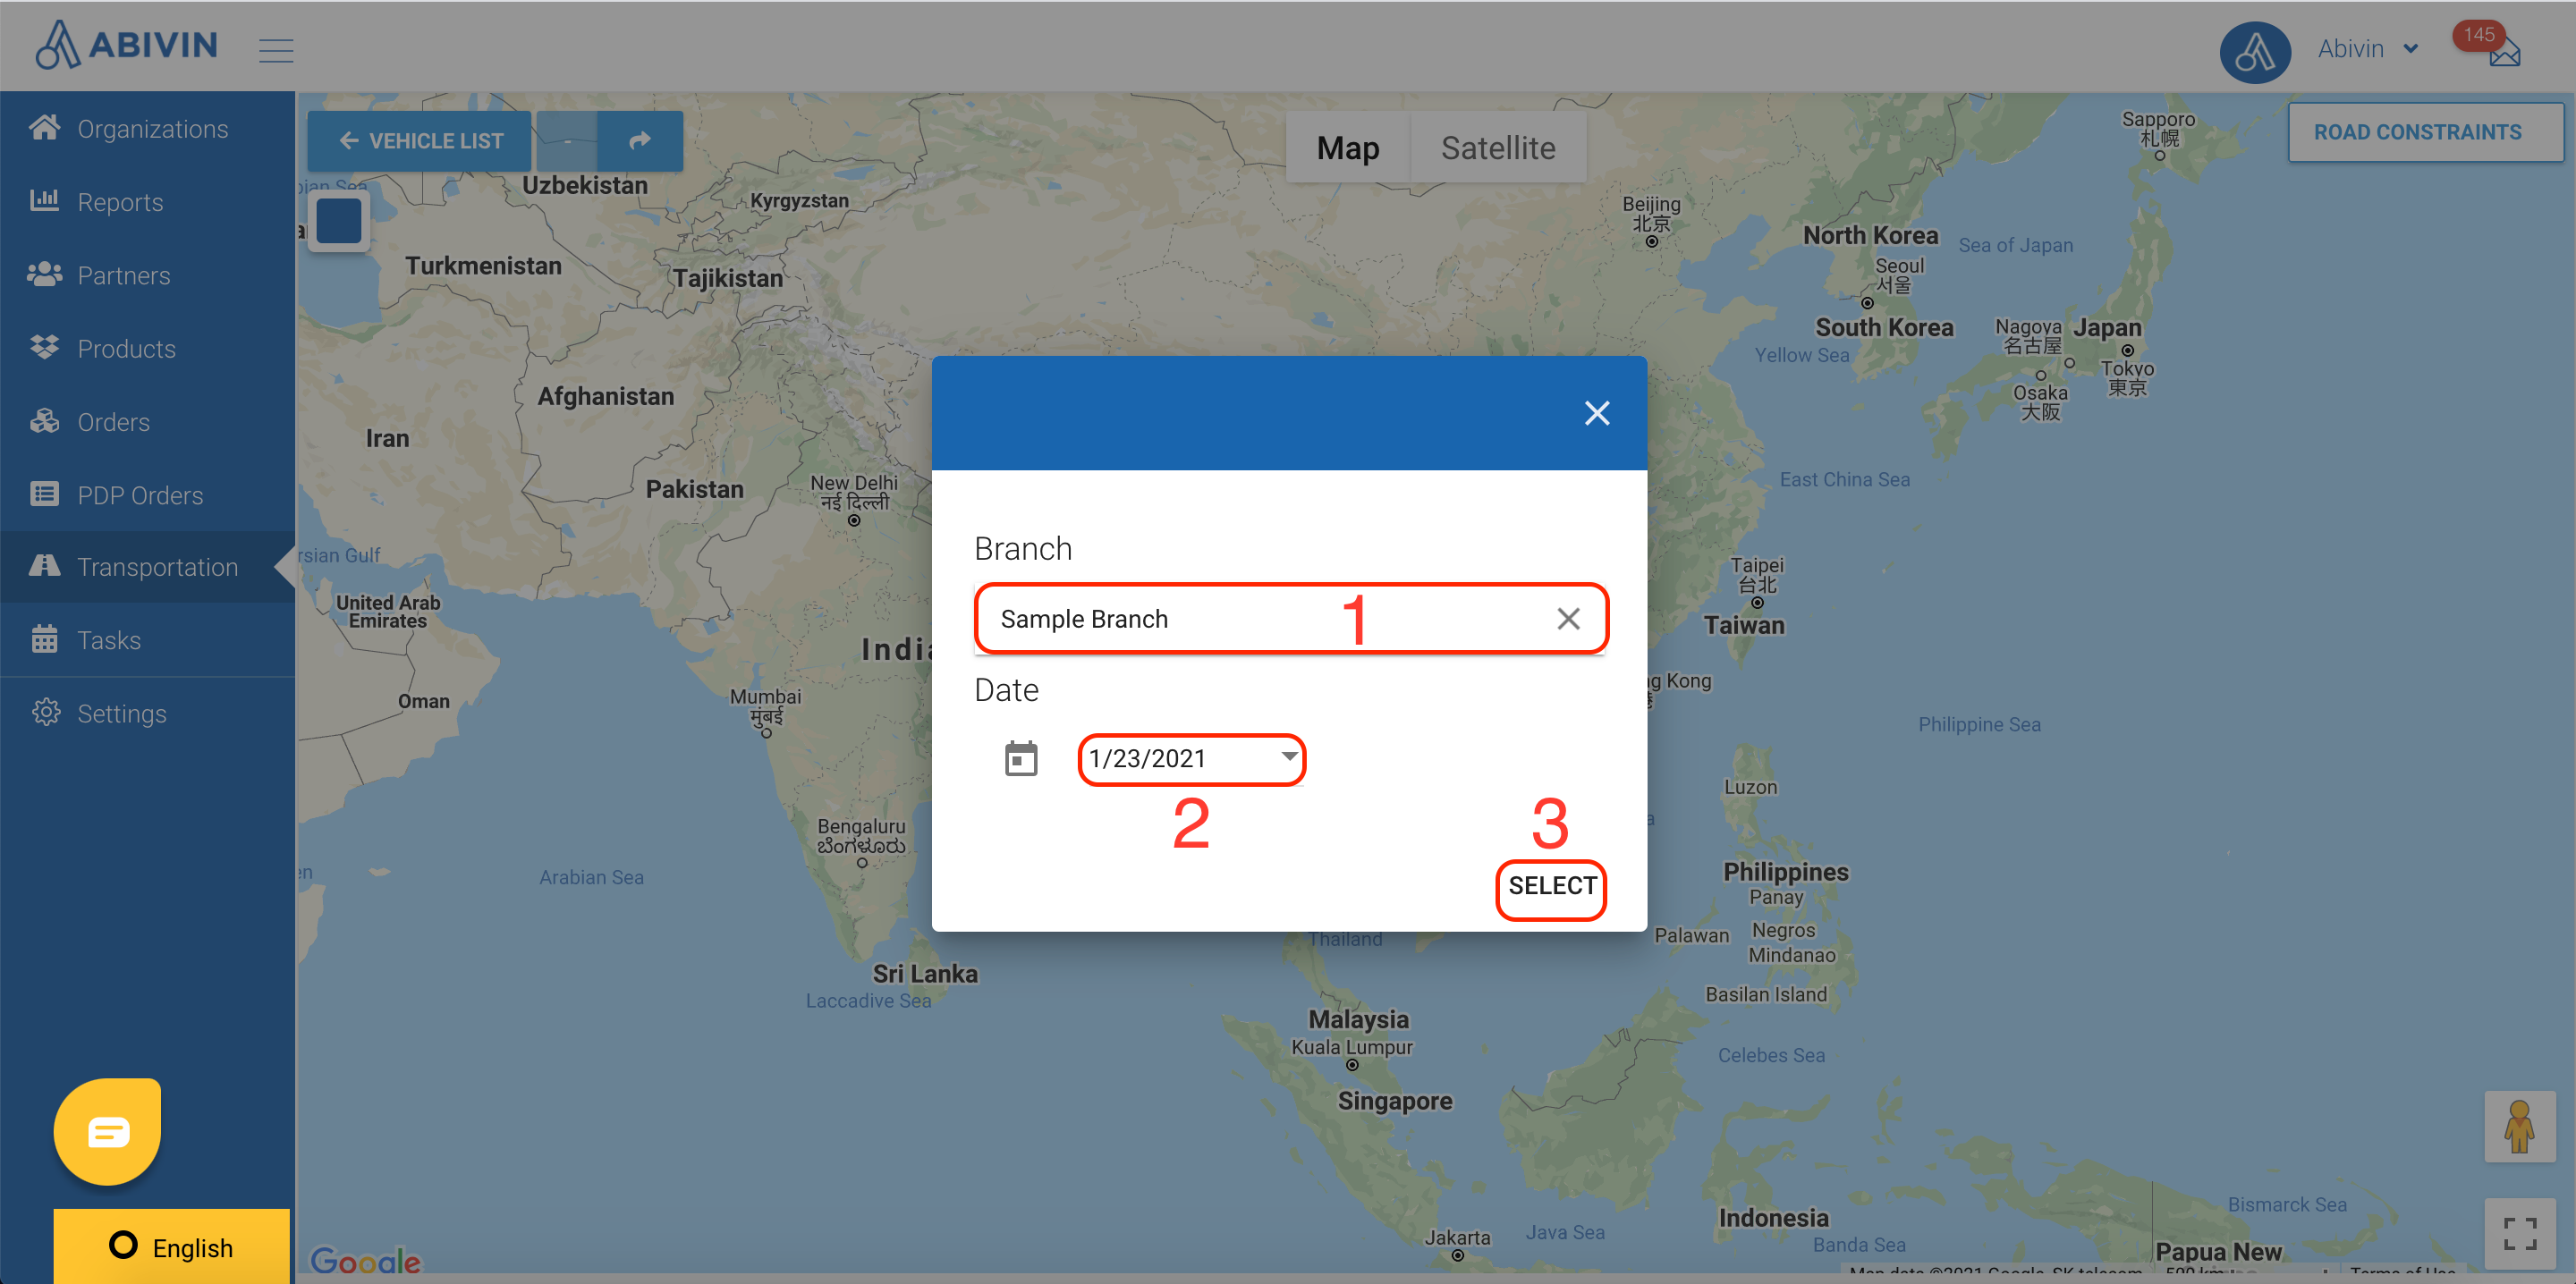
- On the Map screen, a form will automatically appear. On this form, you have to select the Branch and the Date to generate the optimized Delivery Routes for the Vehicles
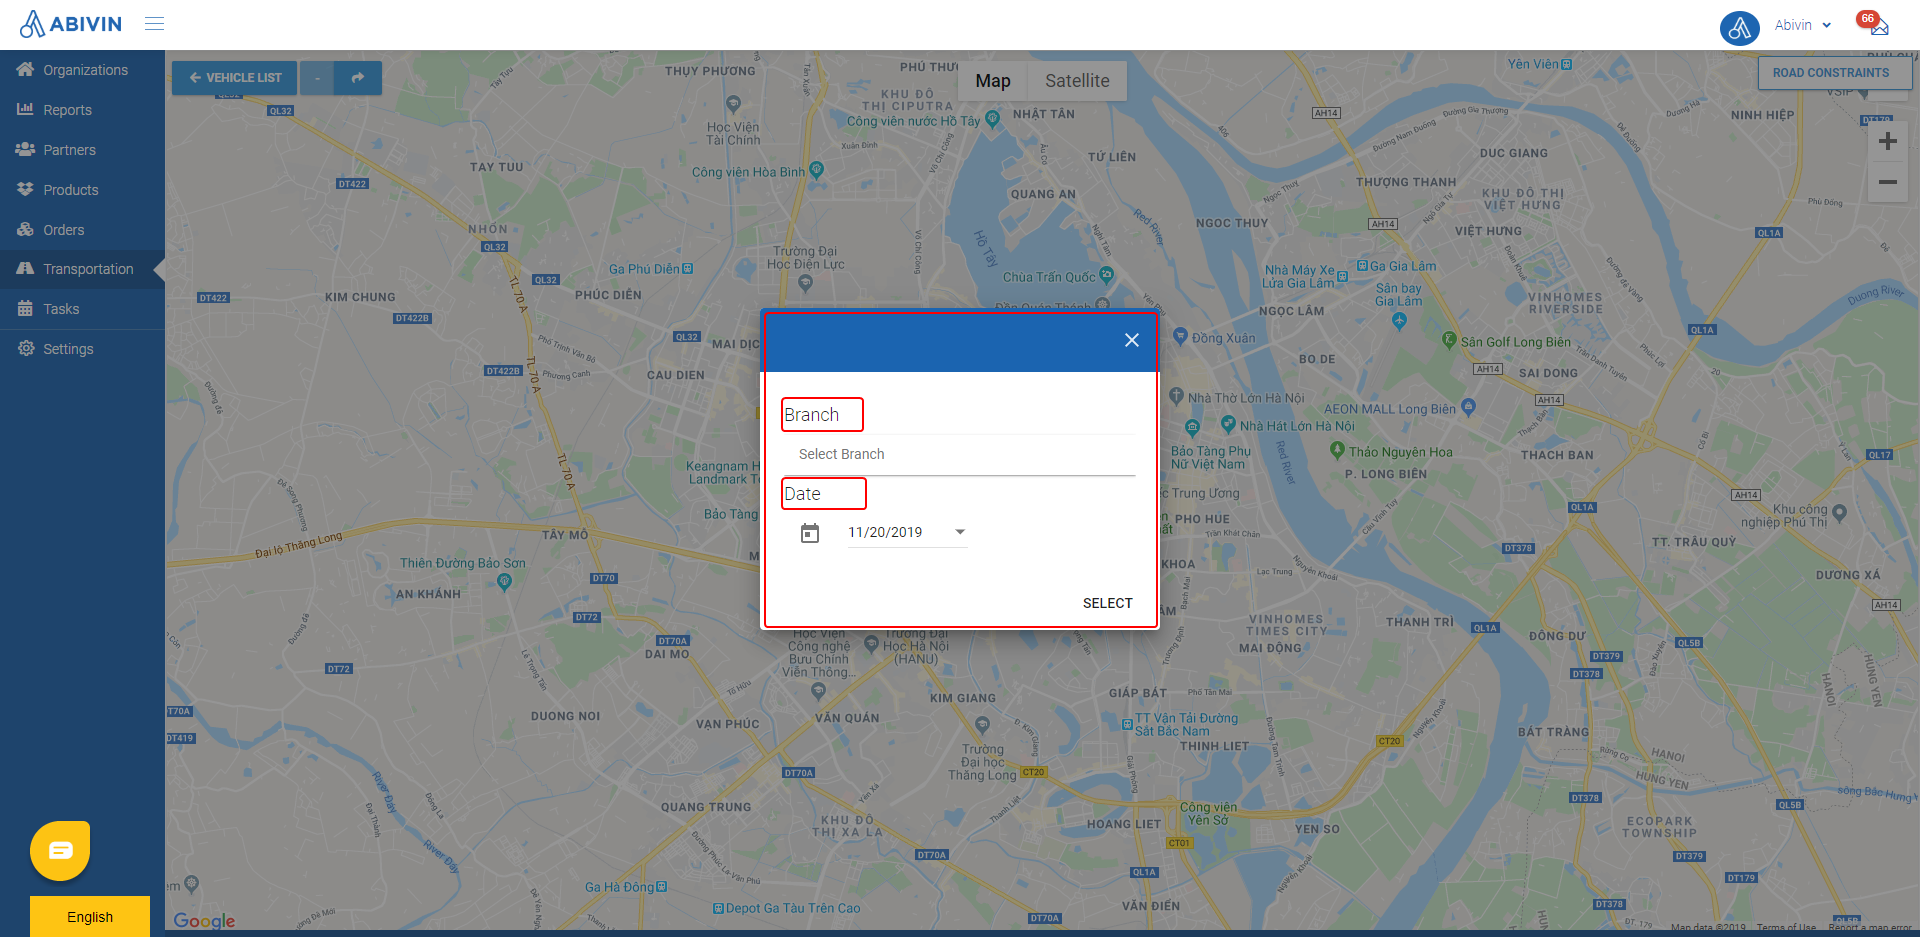
Illustration (English)
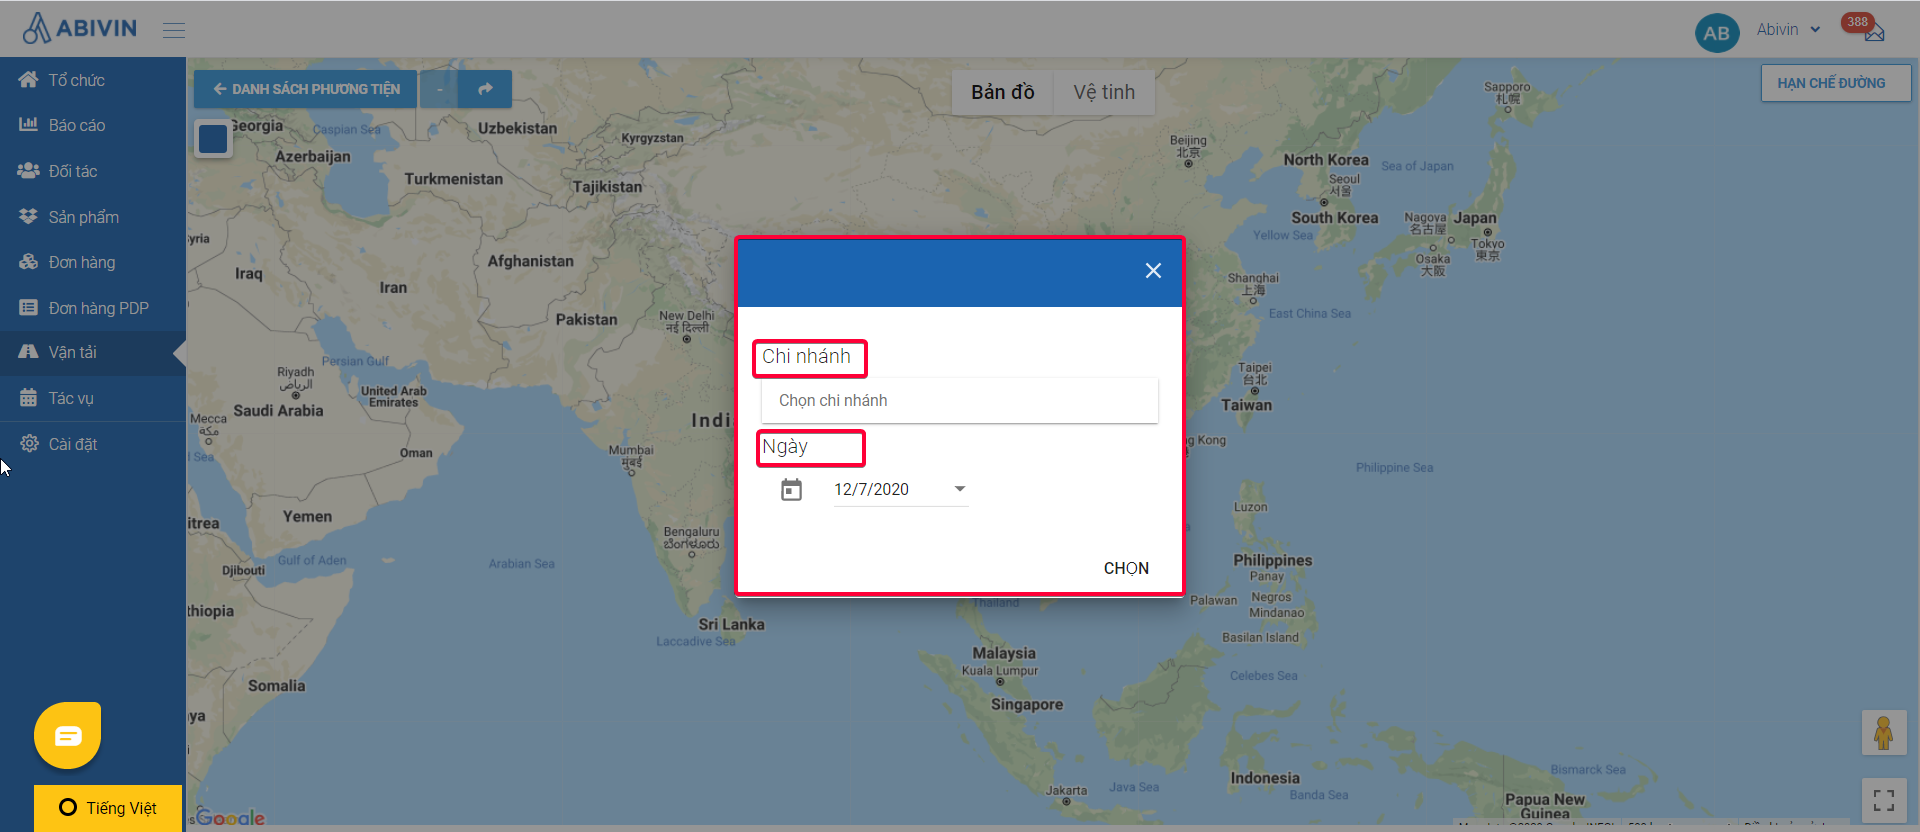
Illustration (Vietnamese)
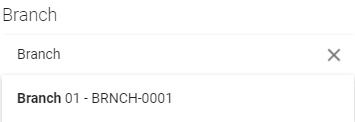
- Branch: Click on this field. Select the appropriate Branch from the drop-down list. Alternatively, you could input the Organization Name of the Branch into the search bar, the system will filter out the Branch being searched
- Date: Click on the calendar icon. A drop-down calendar will appear to let you select the date on which you want to generate the optimized Delivery Routes for the Orders. This date equals the Order Date attribute of the Sales Orders. Alternatively, you can directly input the date in the field following the mm/dd/yyyy (Month/Date/Year) format
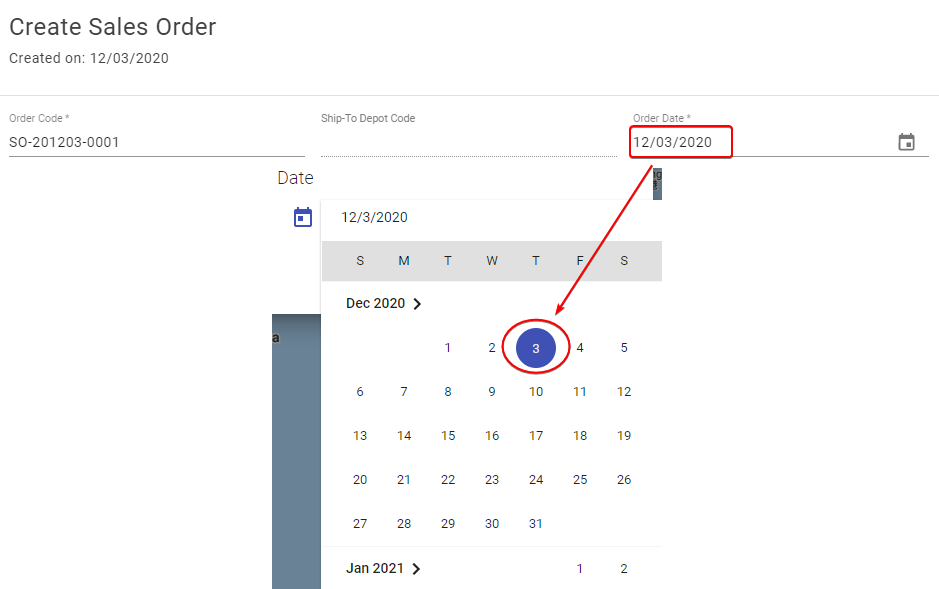
Illustration (English)
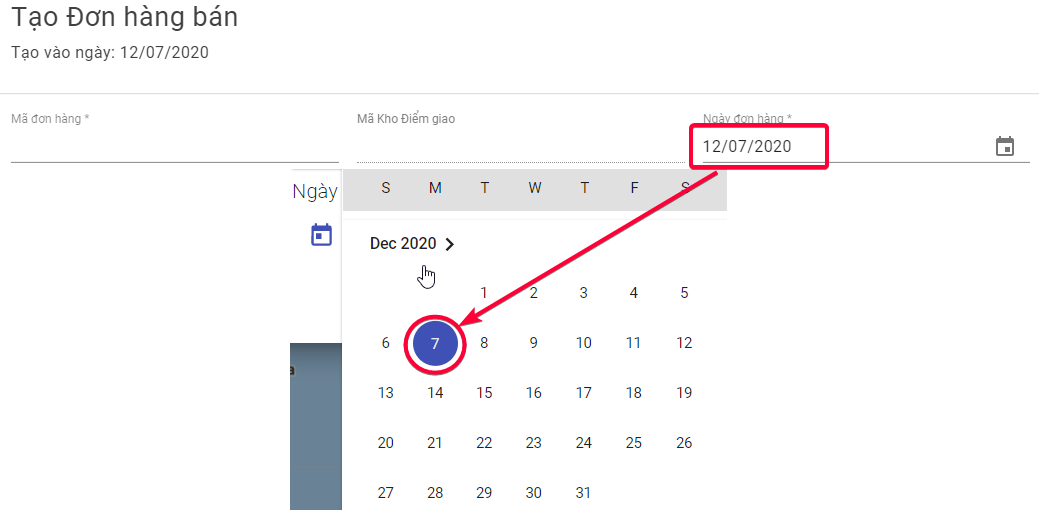
Illustration (Vietnamese)
Phase 2: Generate Optimized Delivery Routes
- After you have chosen the Branch and the Route Plan date, click Select
- The Optimize Route form will appear. On this form, click Optimize
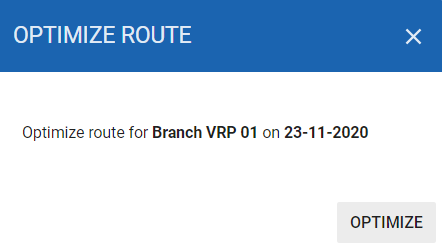
Illustration (English)
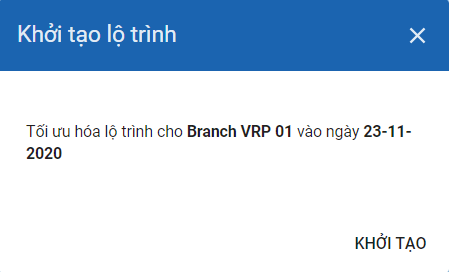
Illustration (Vietnamese)
- The system will start gathering all the Orders of which the Order Date attribute is the same as the Route Plan date that you have selected above, allocate them to the suitable active Vehicles, then display the optimized Delivery Route of the Vehicles on the Timeline panel
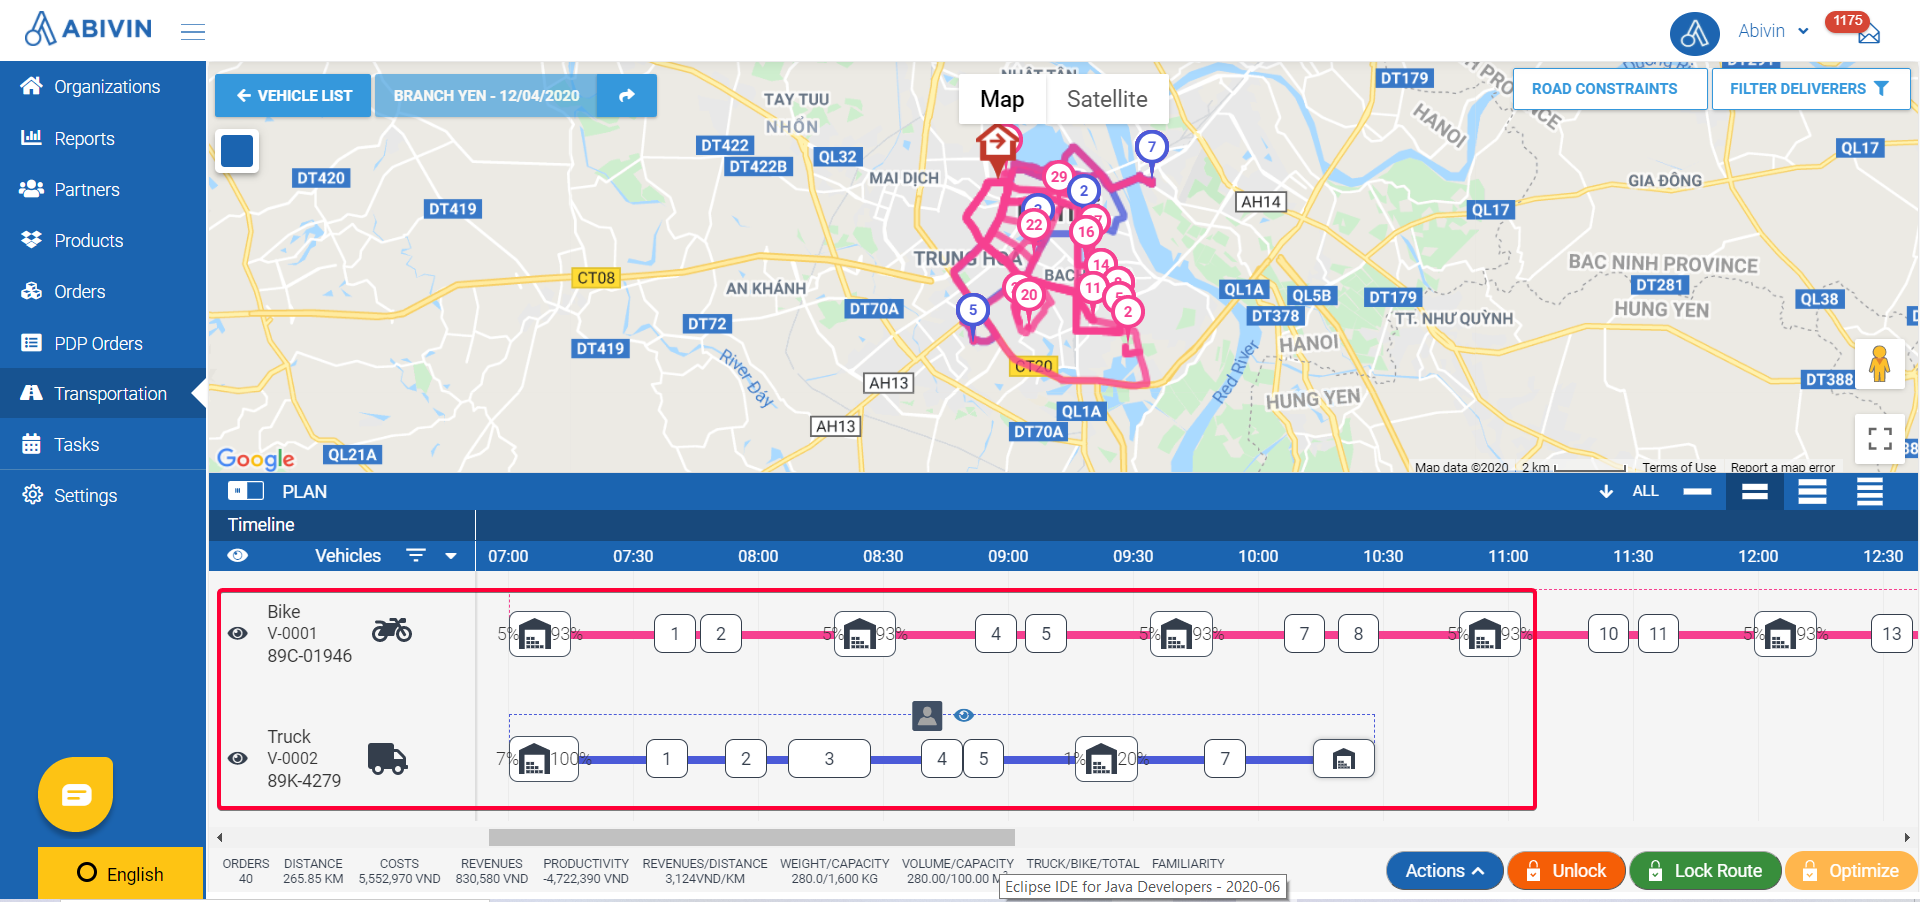
Illustration (English)
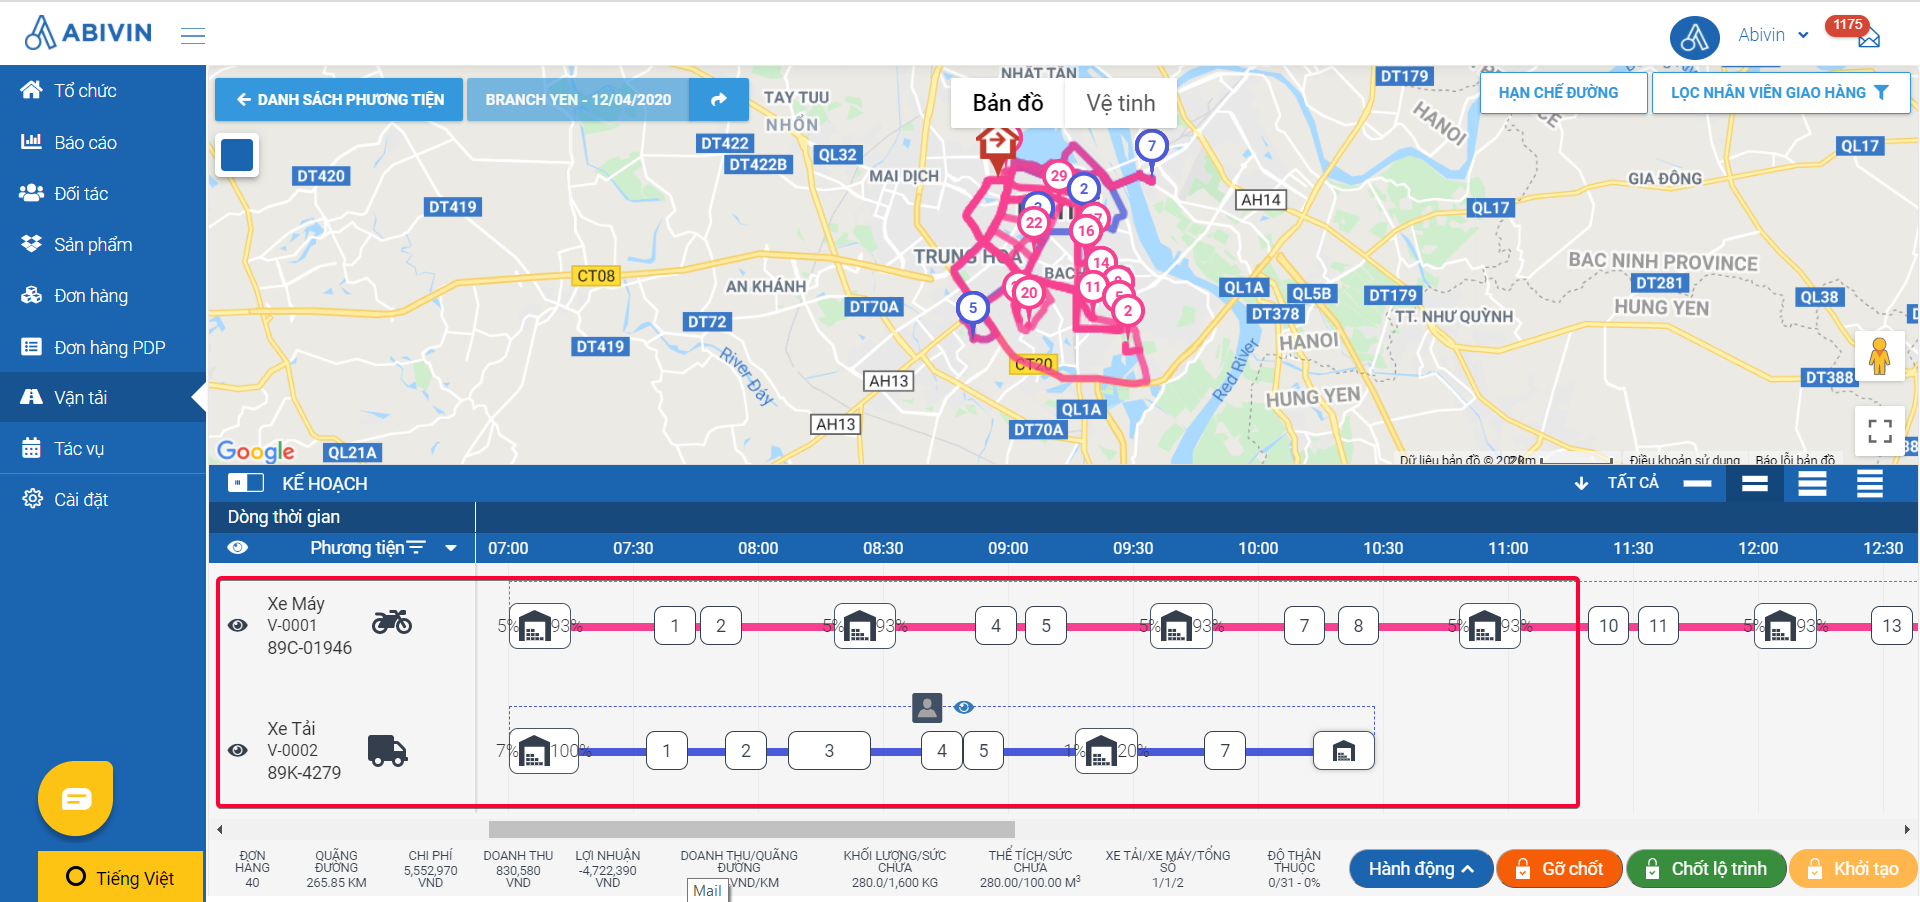
Illustration (Vietnamese)
- The default routing algorithm that the system utilizes is described in the following section: Default Routing Algorithm
- To understand how the loading/unloading time (The unloading time is also referred to as the Service Time) is calculated, please refer to the following article: Service Time Calculation
- The Route Plan screen holds numerous information and functions. Please refer to the following section to learn more: Route Plan Screen Description
- In this phase, you can make necessary adjustments to the optimized Delivery Routes recently generated, such as Change Delivery Shift driver; Change Customer coordinates; Adjust Customer sequence on a Delivery Trip/Delivery Shift, etc. The detailed instructions are presented in the following article: Route Plan Adjustment (Map View)
Phase 3: Lock Optimized Delivery Routes And Create Delivery Tasks
- If you see that the optimized Delivery Routes generated by the system have met your expectation, or after you have made appropriate adjustments, you can now lock the Delivery Routes by clicking on the Lock Route button
- A confirmation form will appear. Click OK to confirm
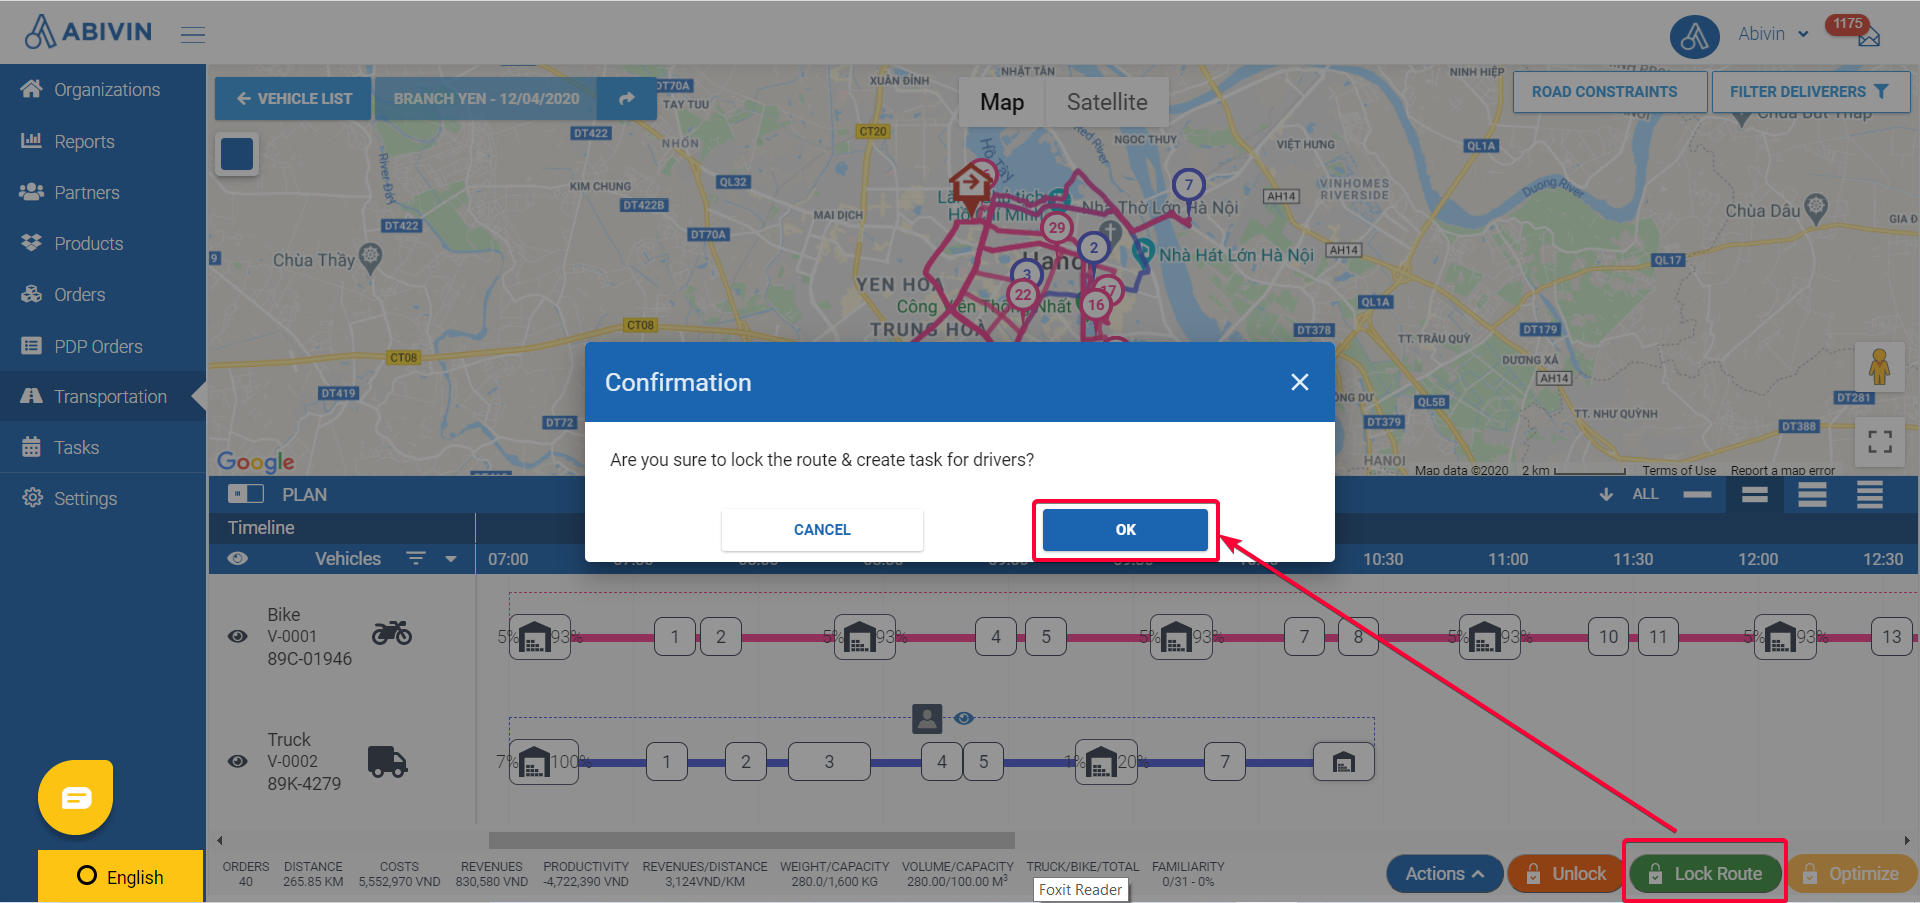
Illustration Image (English)
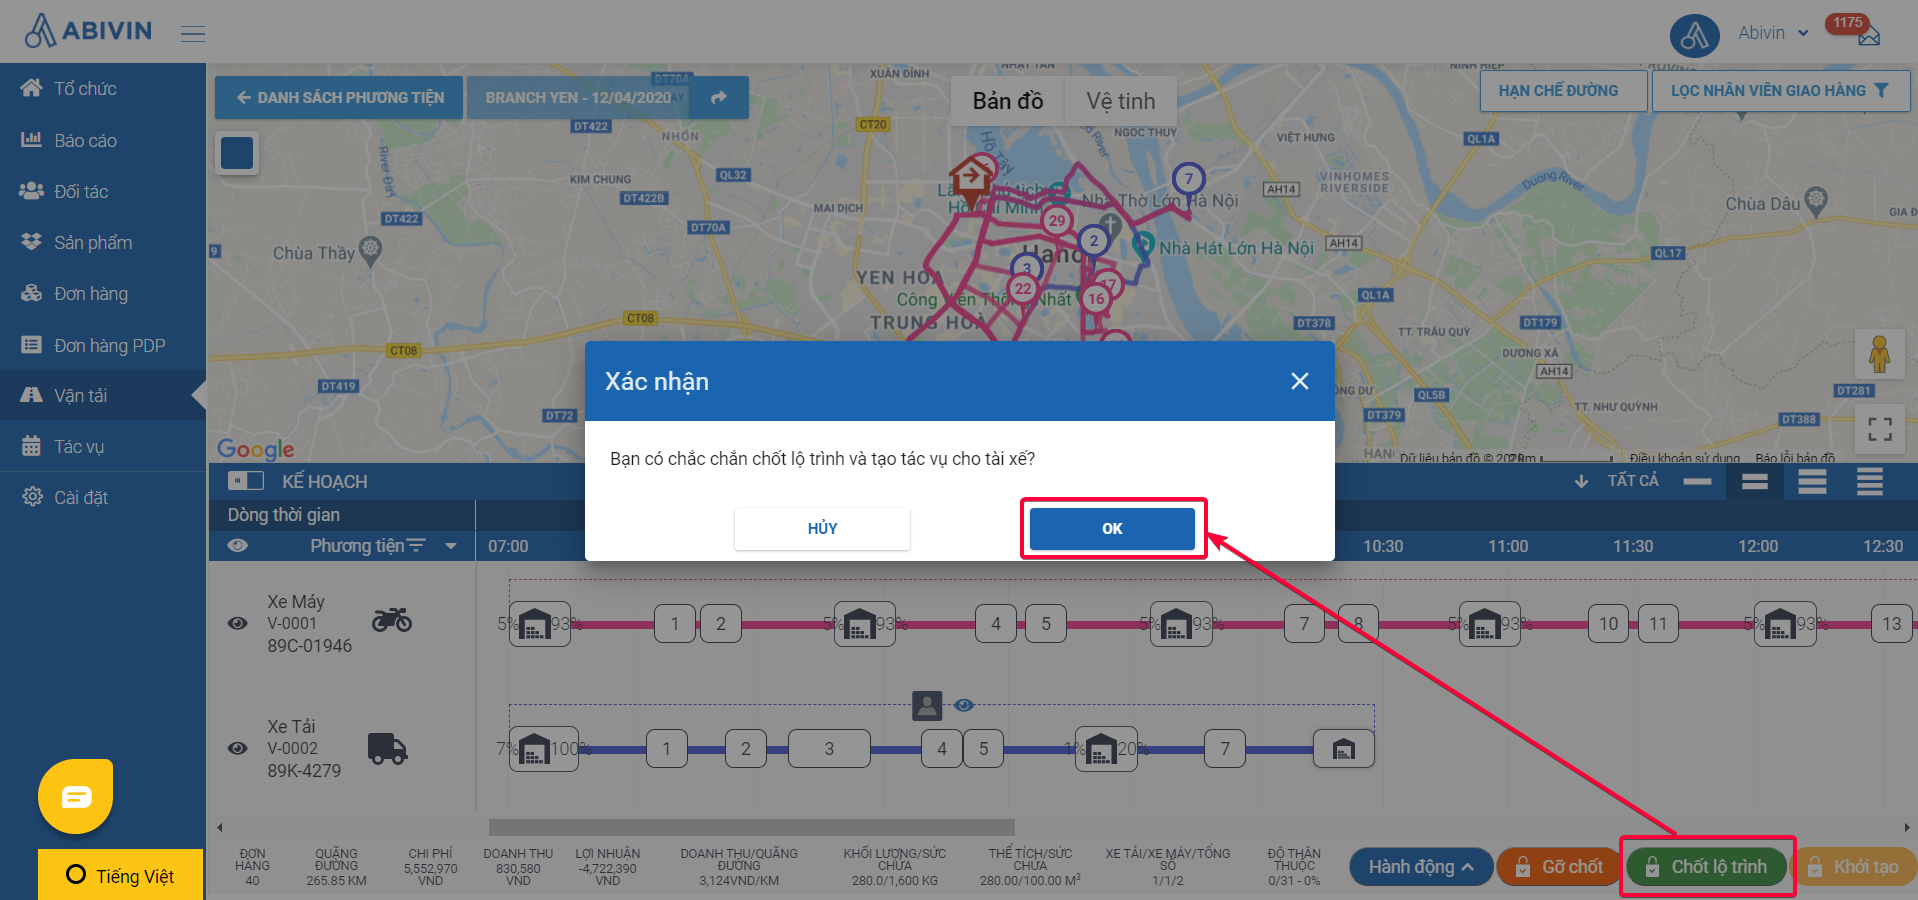
Illustration Image (Vietnamese)
By default, the system will lock the Delivery Routes of all vehicles on the Timeline panel at once. If you wish to be able to manually select and lock the Delivery Routes of certain vehicles, please read the following article:
- After you have locked the Delivery Routes, the Delivery Routes color will turn gray on the Timeline panel
- The part of the Delivery Route that is recently locked is defined as a Delivery Shift
- As a Delivery Shift is locked, the delivery tasks will be generated and sent to the Mobile app of the drivers who operate the vehicles. The delivery tasks will also show up in the Tasks > Tasks tab
- To track the actual delivery progress of the vehicle in real-time, you can use the Execution Timelines. Please refer to the following article for instruction: Delivery Progress Tracking
- To update the result of the delivery tasks, head over to the Tasks > Tasks tab. Please refer to the following article for instruction: Manage Tasks
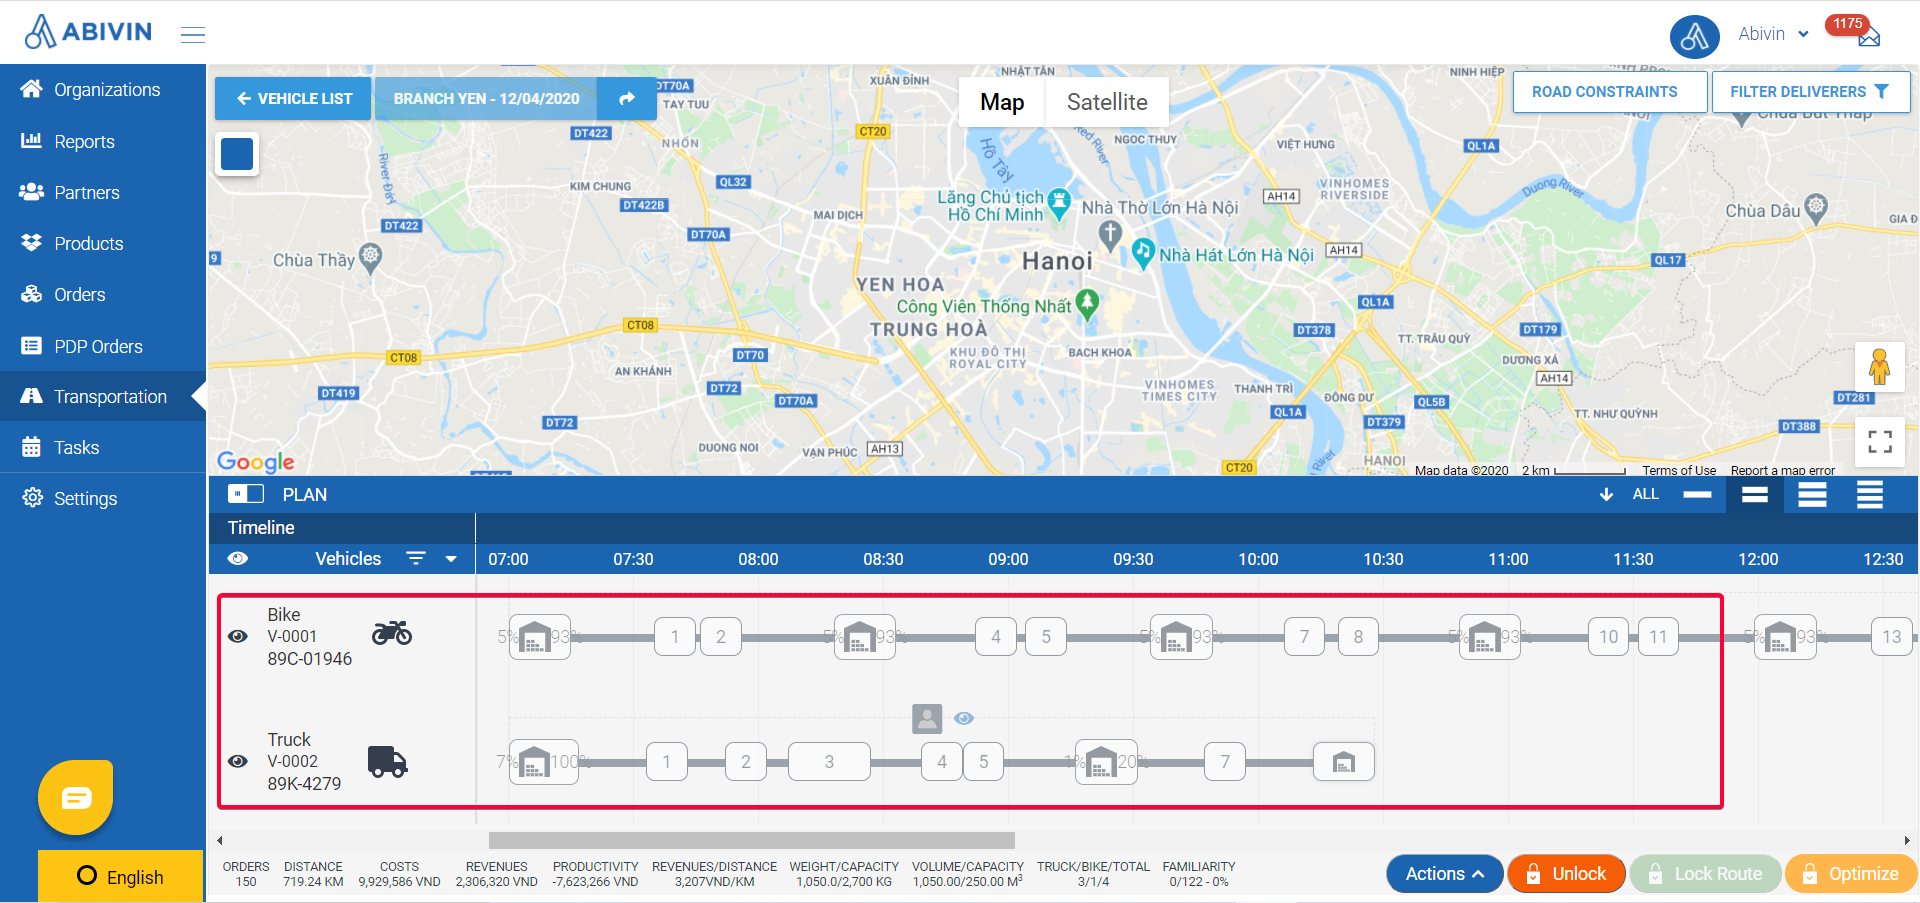
Illustration Image (English)
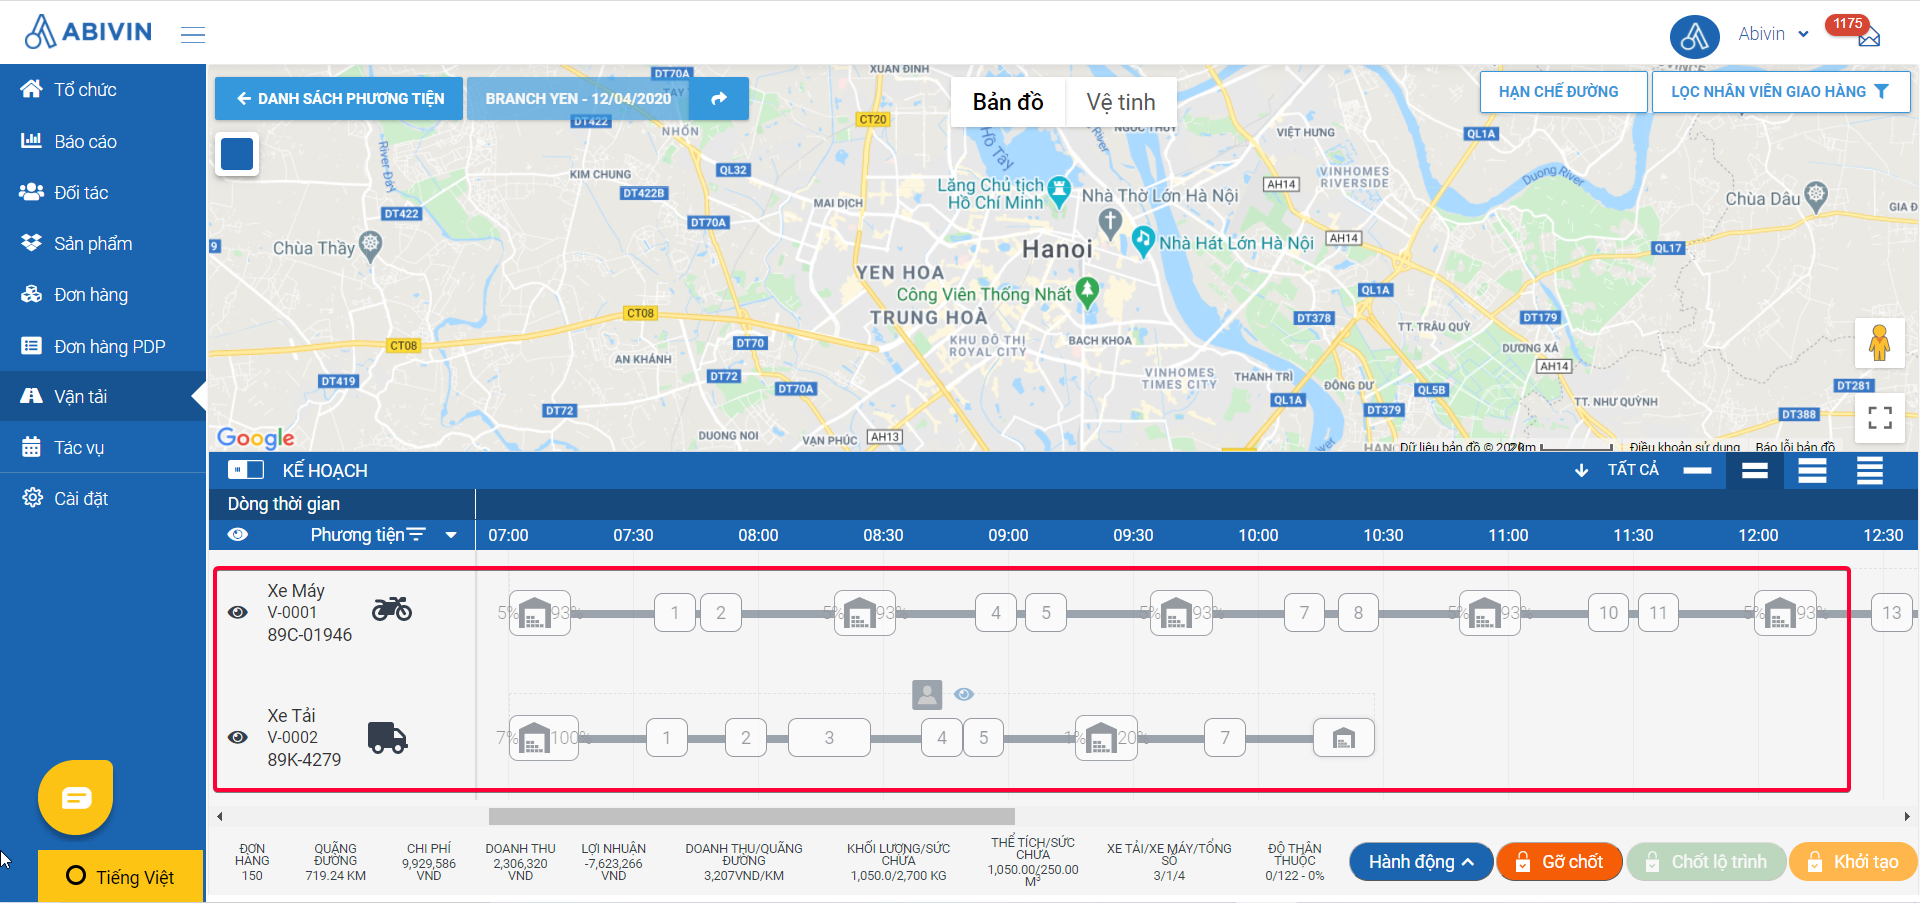
Illustration Image (Vietnamese)
- In case you want to change certain elements of the recently locked Delivery Shifts (Such as remove or add Orders), you can unlock them
- To unlock the locked Delivery Shifts, click the Unlock button at the bottom right of the Timeline panel
- A confirmation dialog will display. Click OK to continue
- The system will revert the locked Delivery Shifts to Planned status
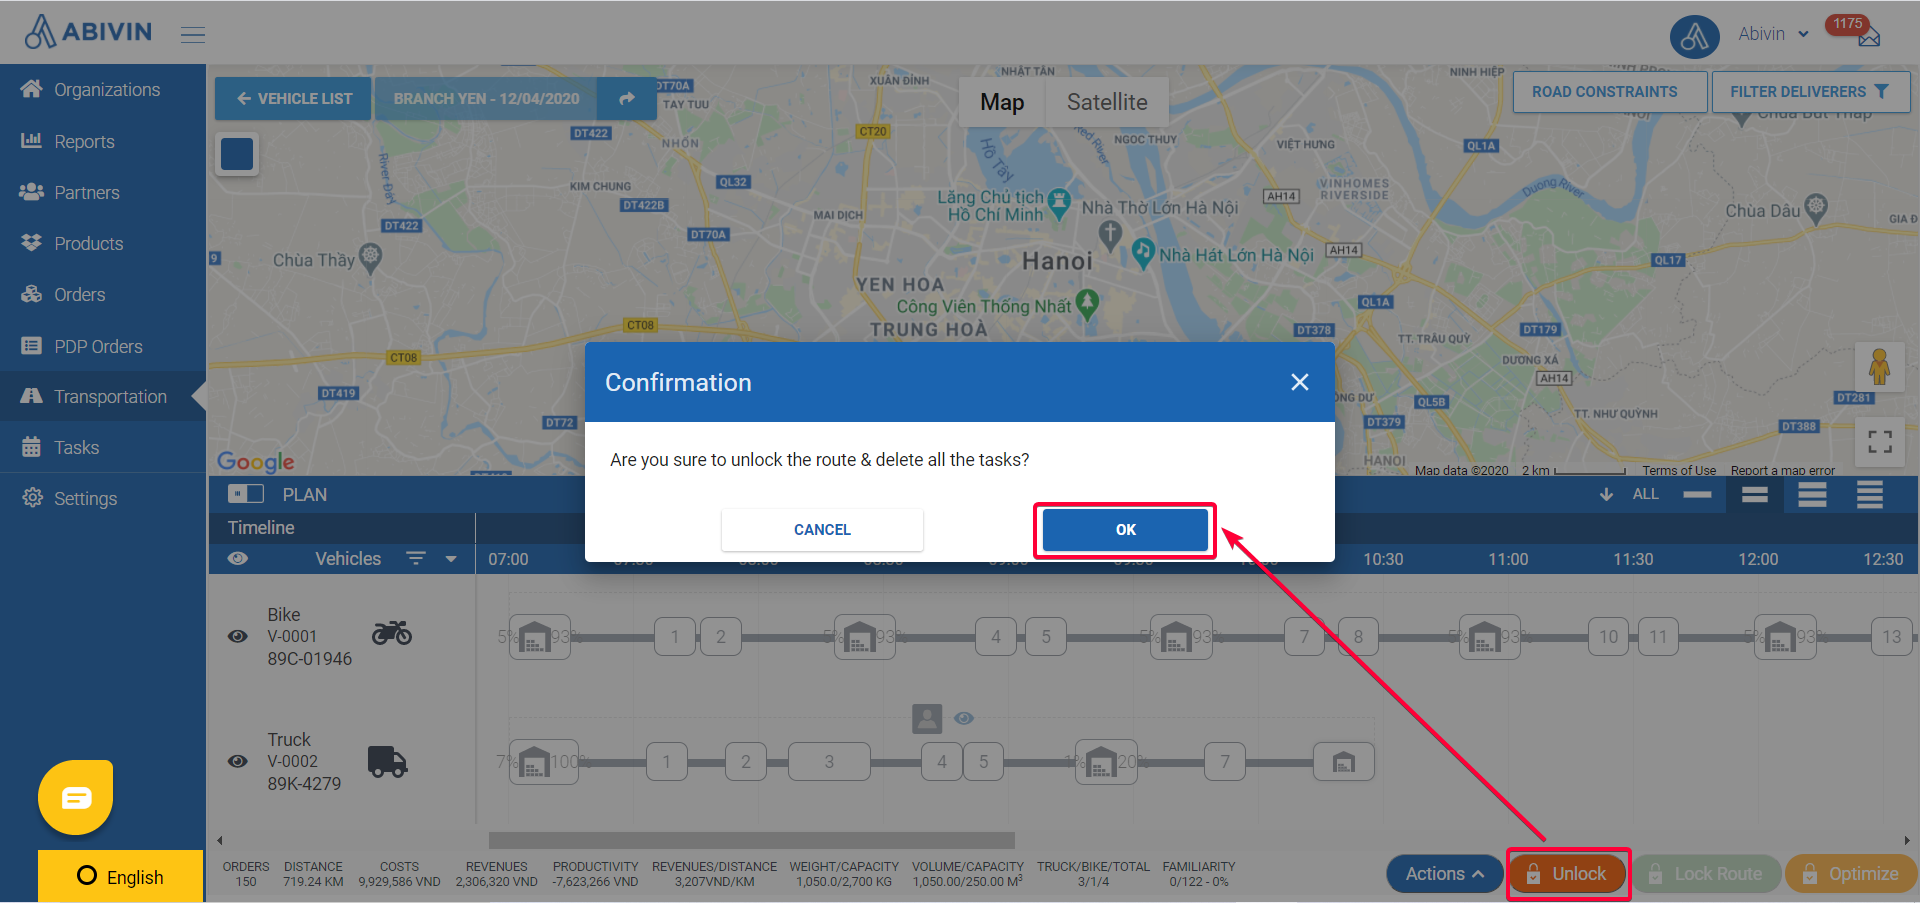
Illustration Image (English)
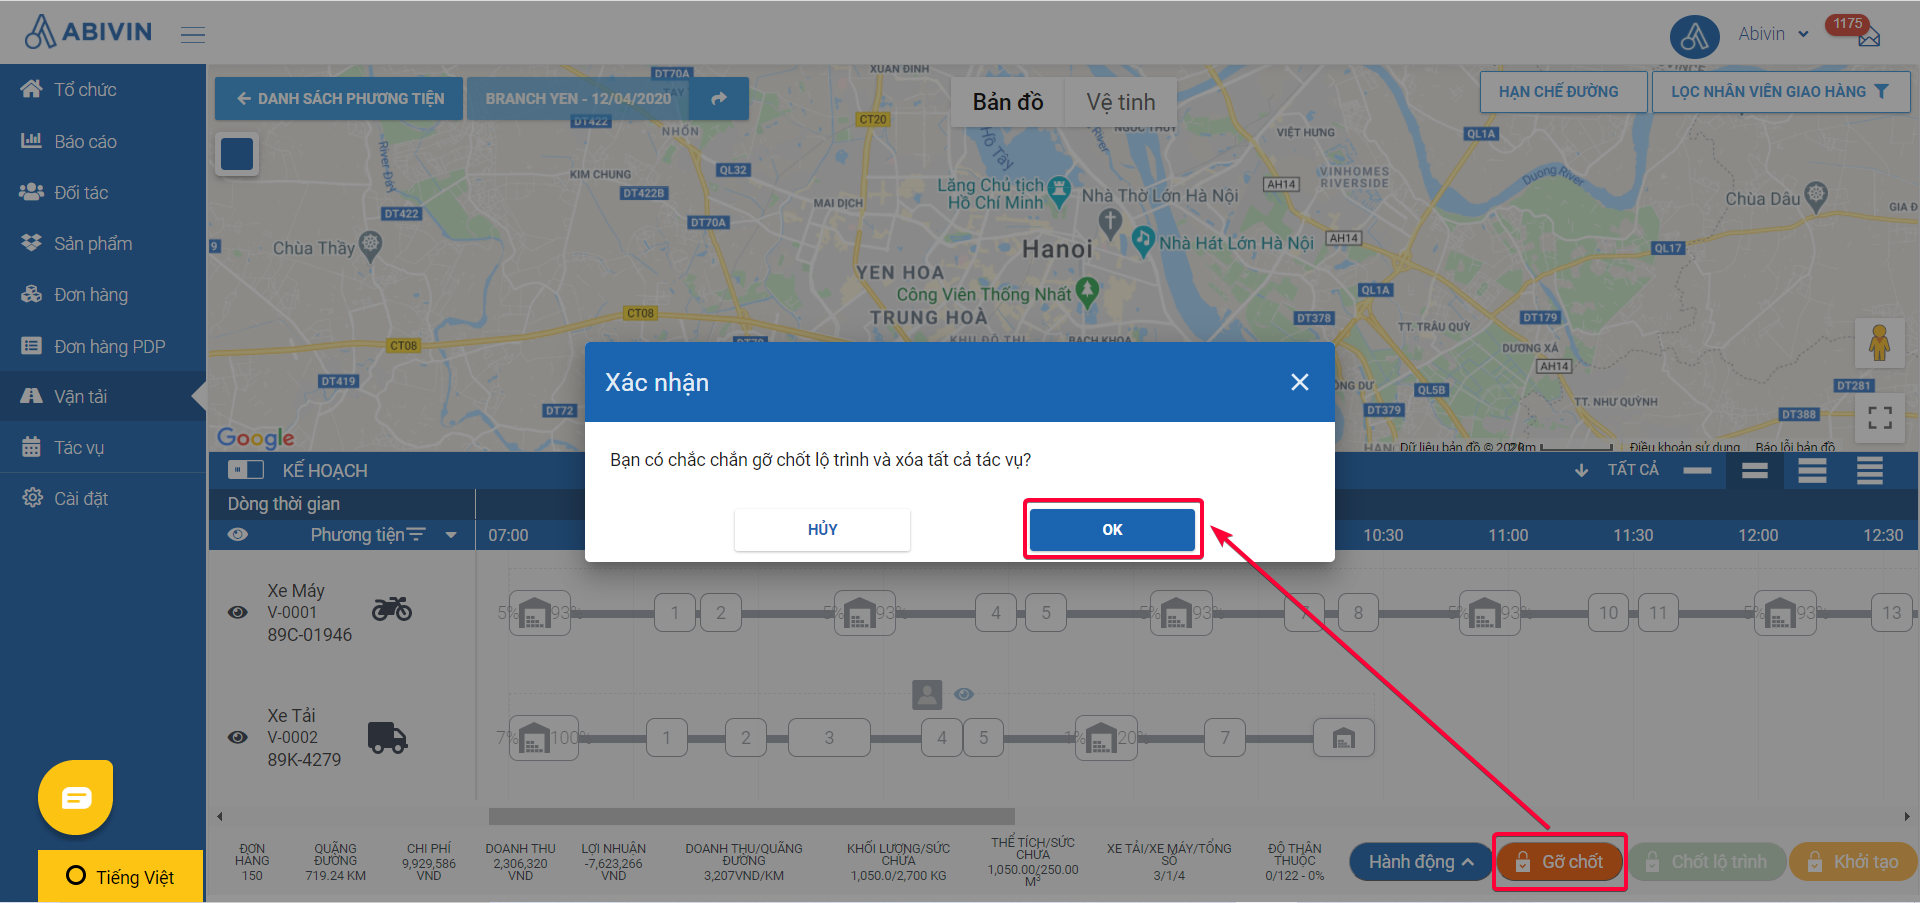
Illustration Image (Vietnamese)
Default Routing Algorithm
- By default, if you don't enable any other additional algorithm configurations, the system will apply the fundamental constraints of the classic Vehicle Routing Problem to the optimized Delivery Routes:
- 1 - One visit per Customer: A Customer will be visited only once per Delivery Shift. This means that if a Customer places multiple Orders, the system will 1. allocate all of that Customer's Orders to one vehicle instead of several vehicles, and 2. plan the assigned vehicle to deliver all Orders of that Customer in one turn per Delivery Shift instead of several turns
- Note: This constraint might lead to a situation where there is no vehicle that has enough weight and/or volume capacity to carry the Orders of a particular Customer in one turn. In this situation, the system will treat that Customer's Orders as Unplanned (Missing) Orders
- 2 - Closed Route: The Vehicles are planned to travel back to their managing Depots after completing all assigned delivery tasks
Route Plan Screen Description
- The Route Plan screen is divided into two sections: The Route Map and the Timeline panel
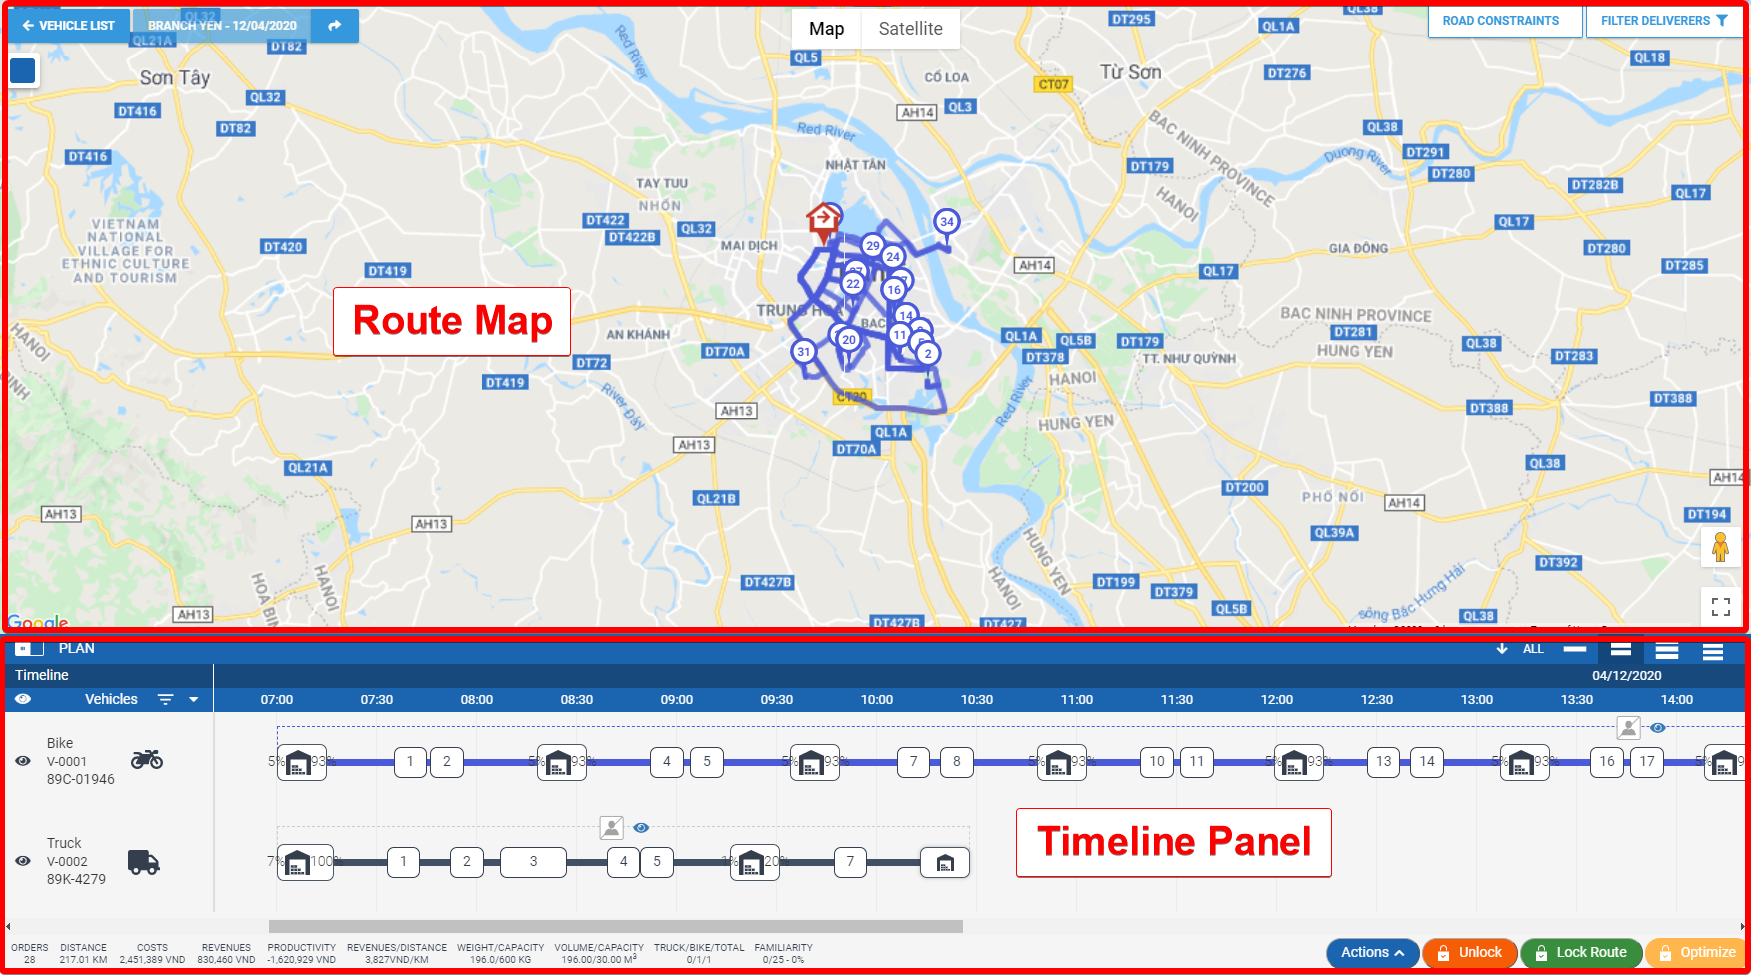
Illustration Image (English)
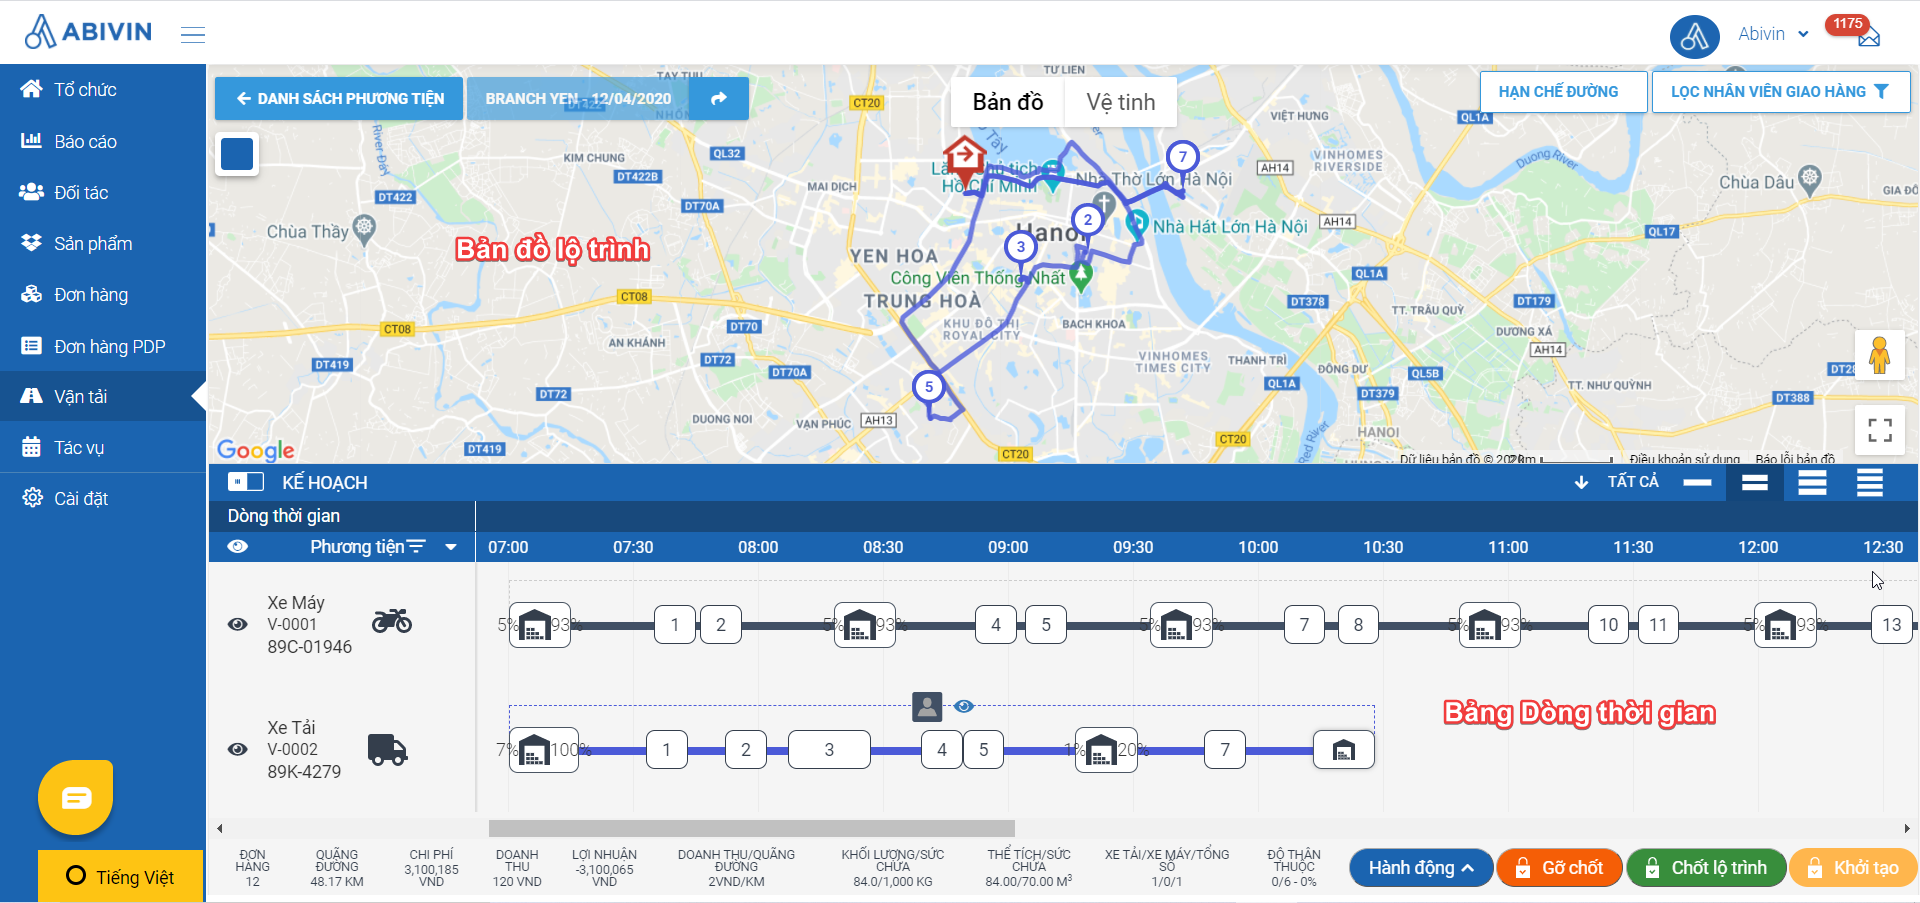
Route Map Section
- To zoom in/zoom out the Route Map, move your mouse onto a point on the Route Map, then use the middle scroll button to zoom in/zoom out
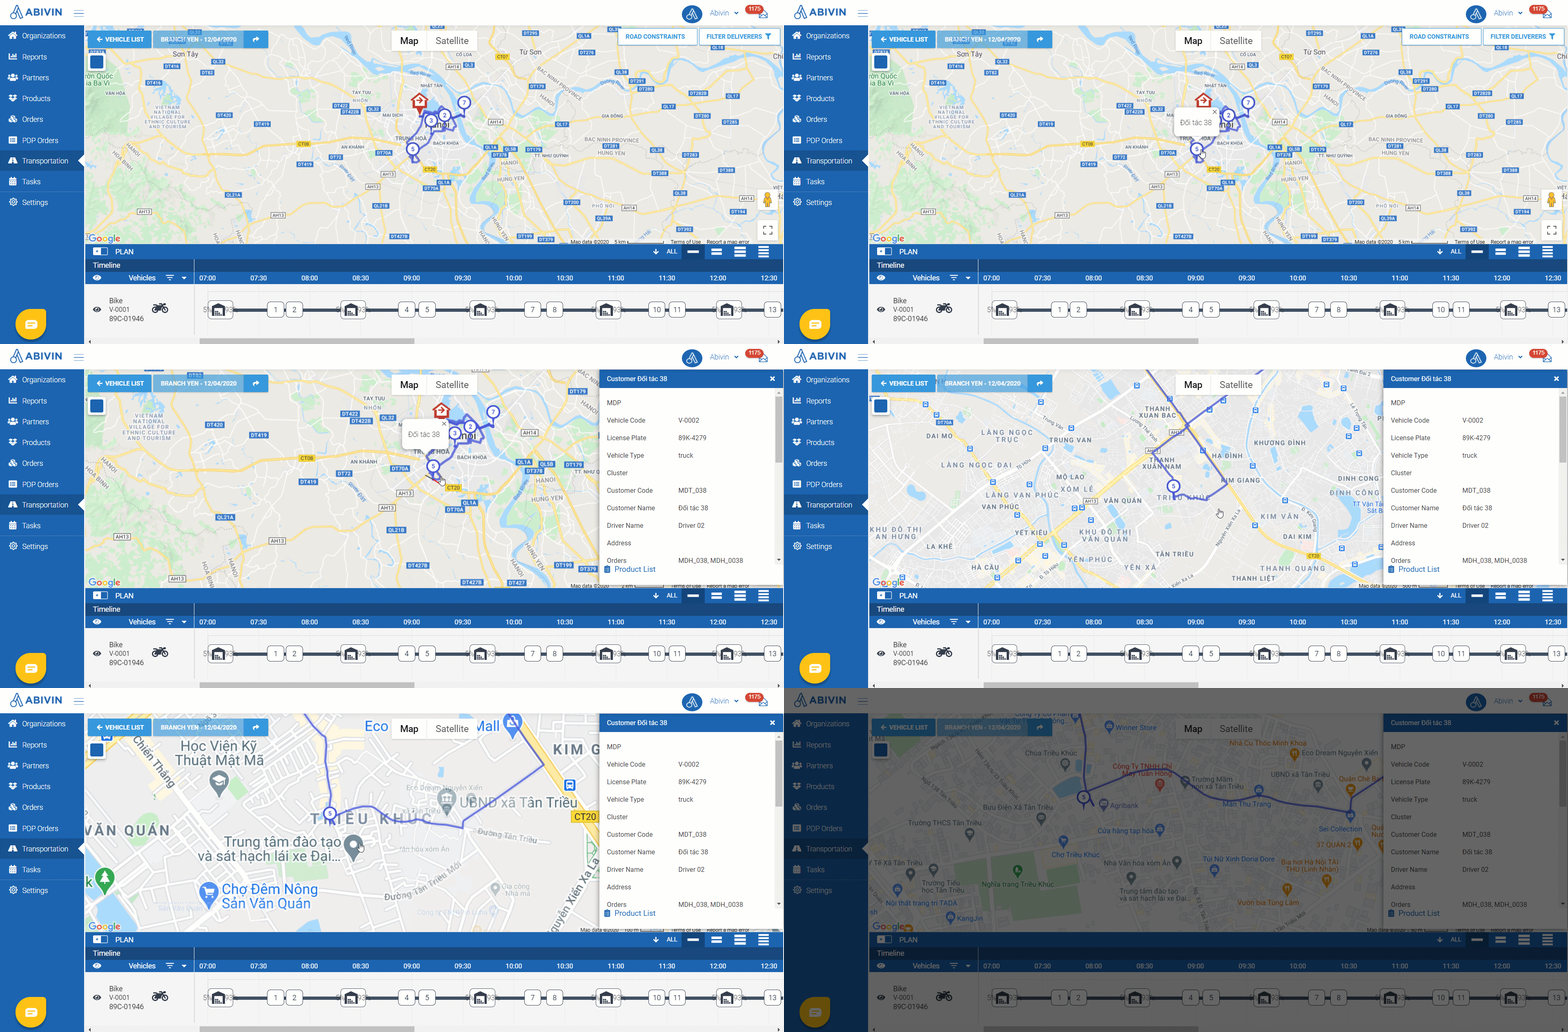
Illustration (English)
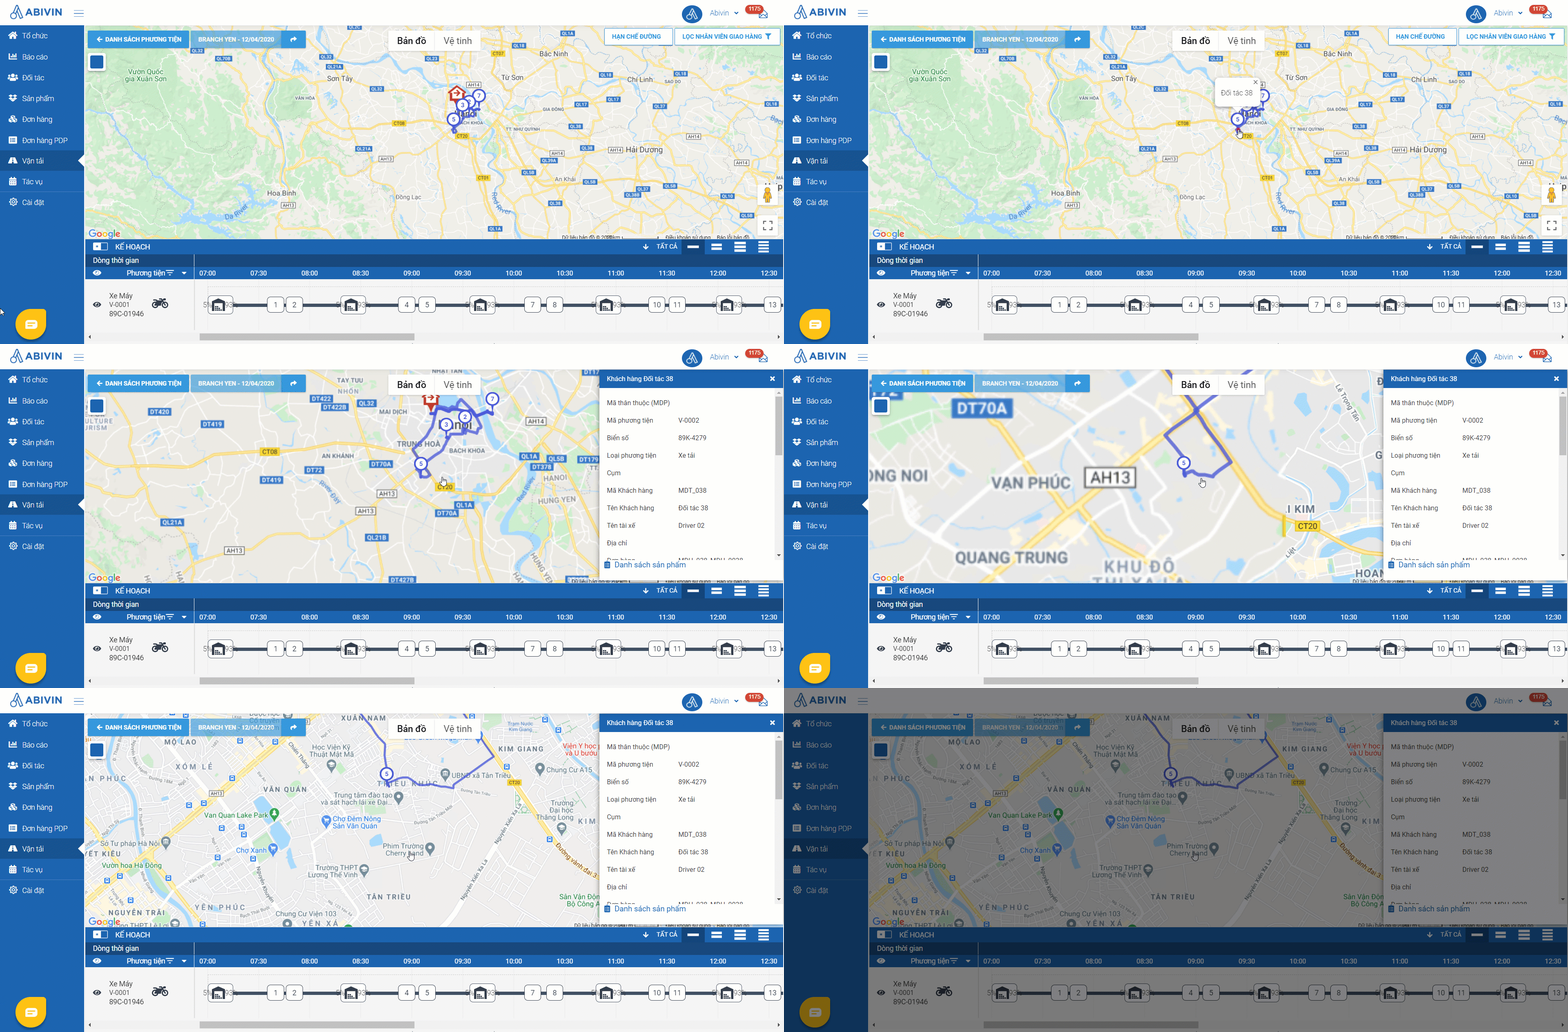
Illustration (Vietnamese)
- To move around the Route Map, left-click on a point on the Route Map, then, with the left button still clicked, drag your mouse around
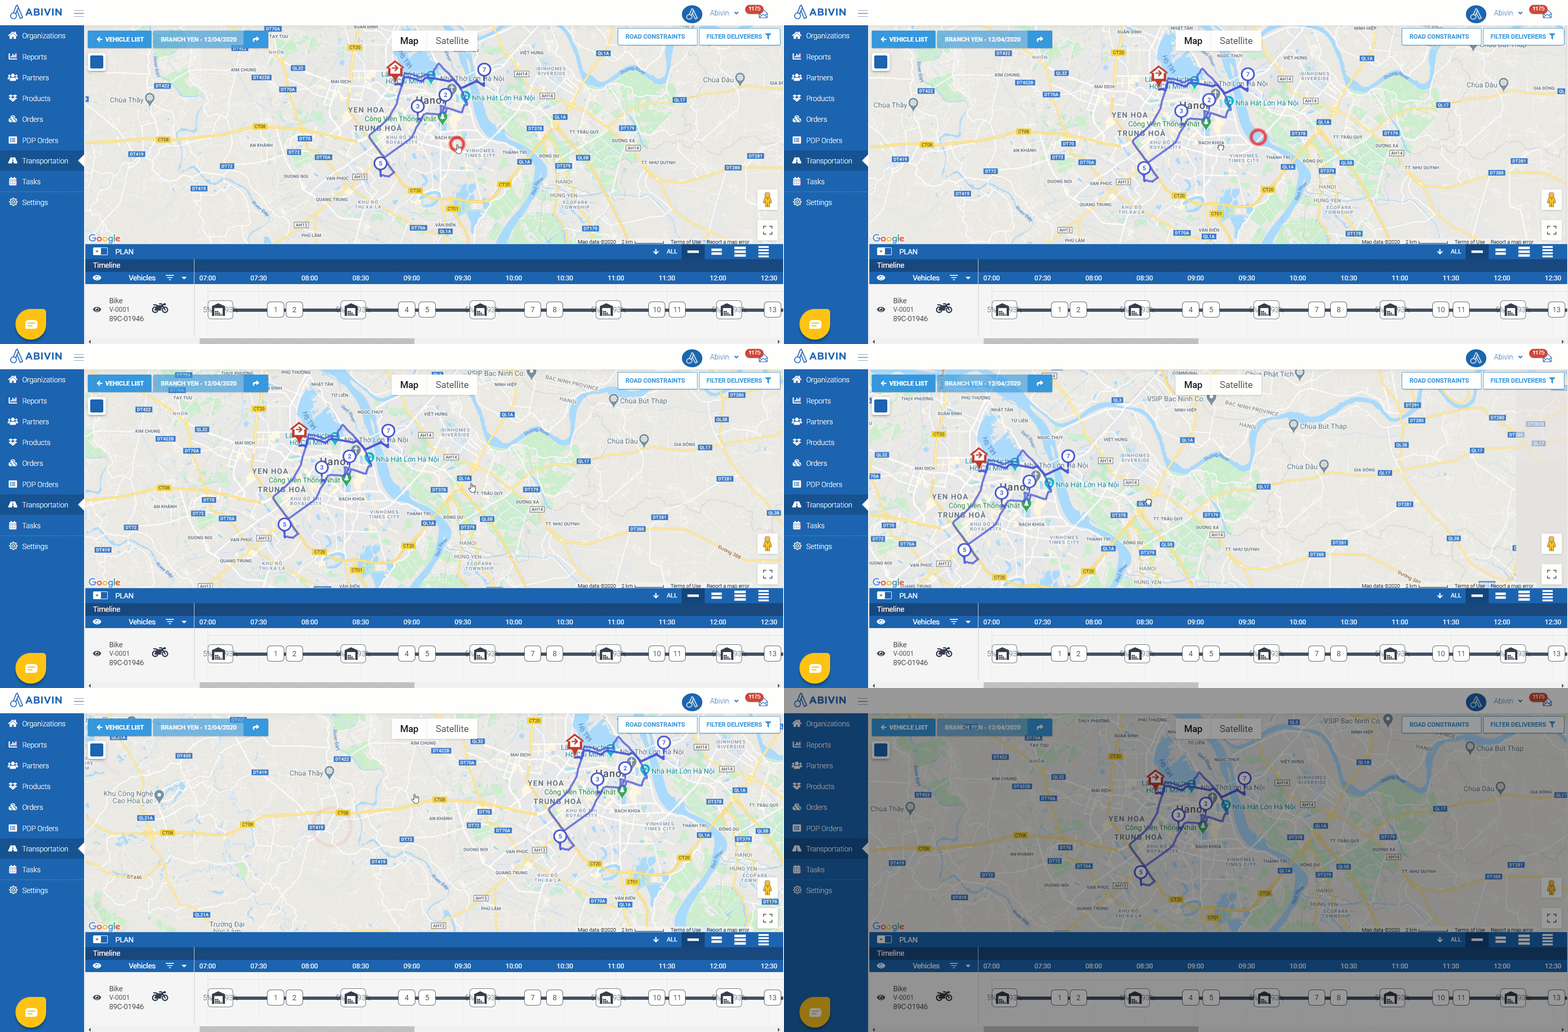
Illustration (English)
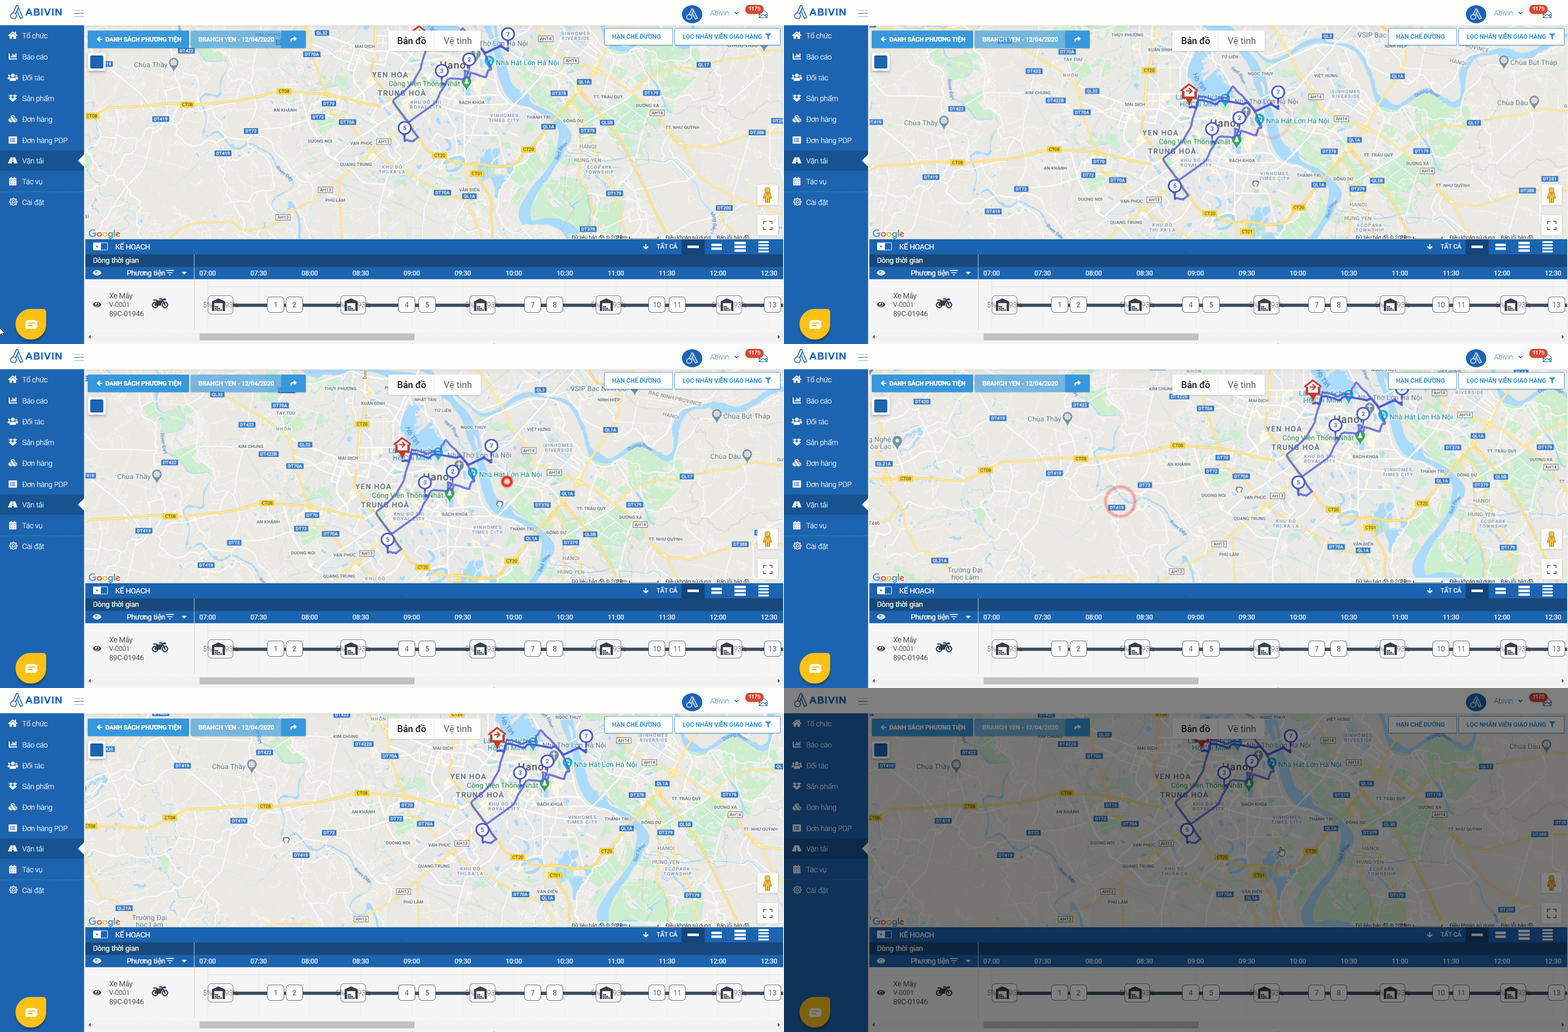
Illustration (Vietnamese)
- To change the color theme of the Route Map, hover your mouse over the color box near the top left corner of the Route Map. The box will then expand and shows three color themes: Default; Light and Dark. Select the appropriate color theme
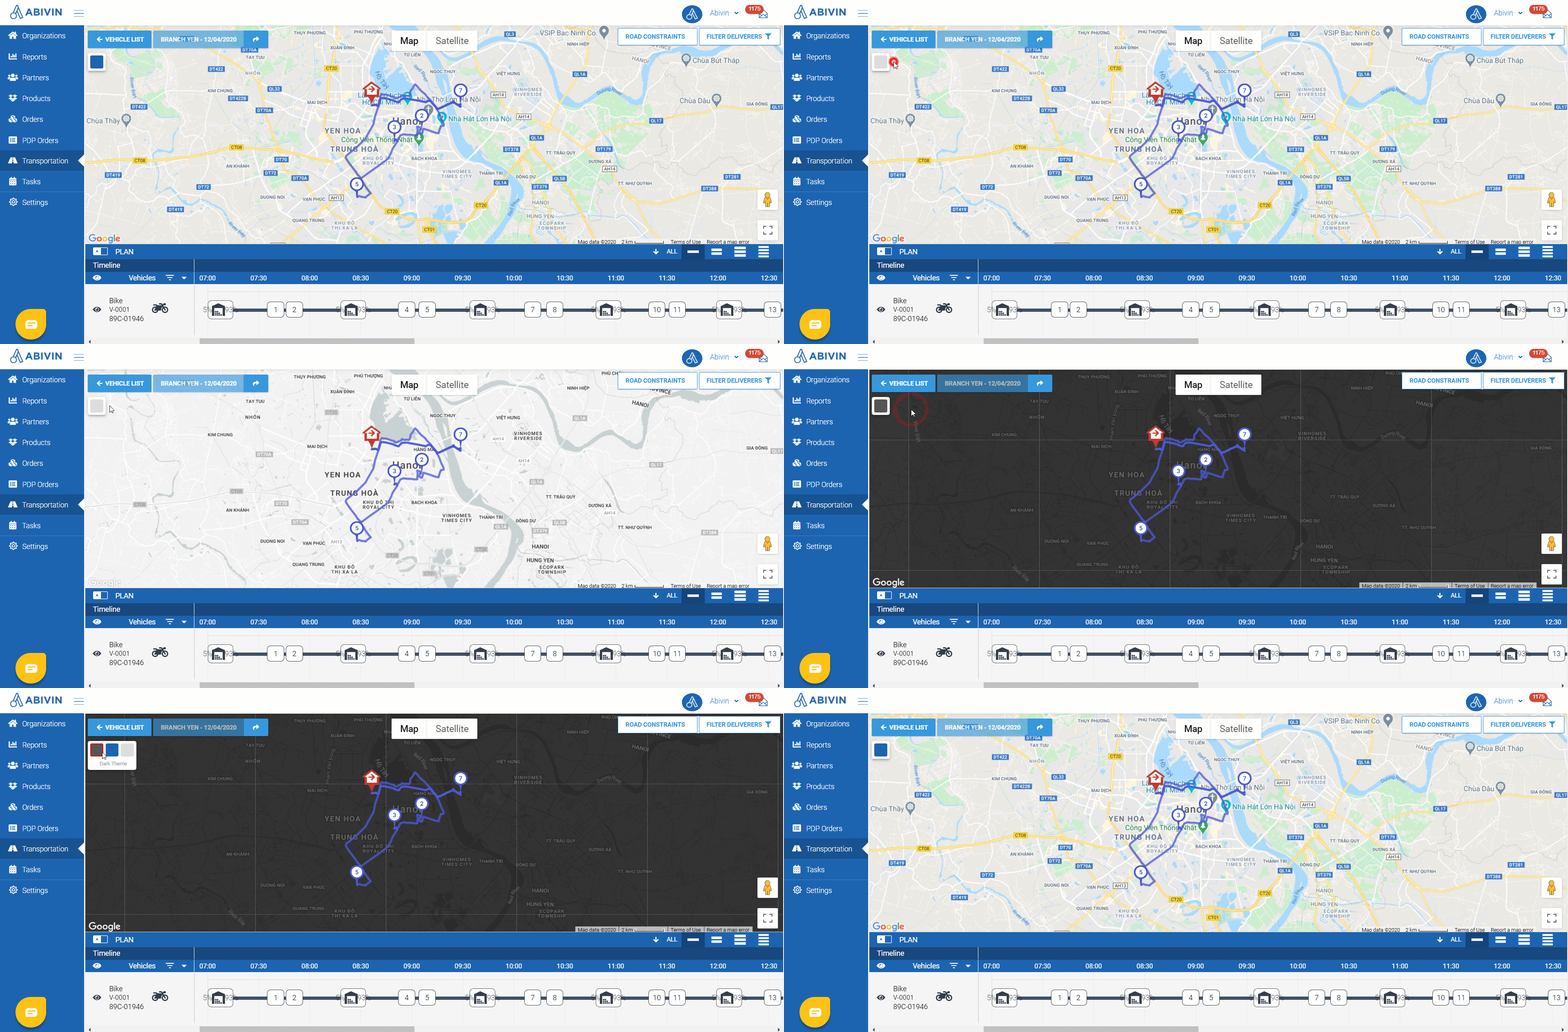
Illustration (English)
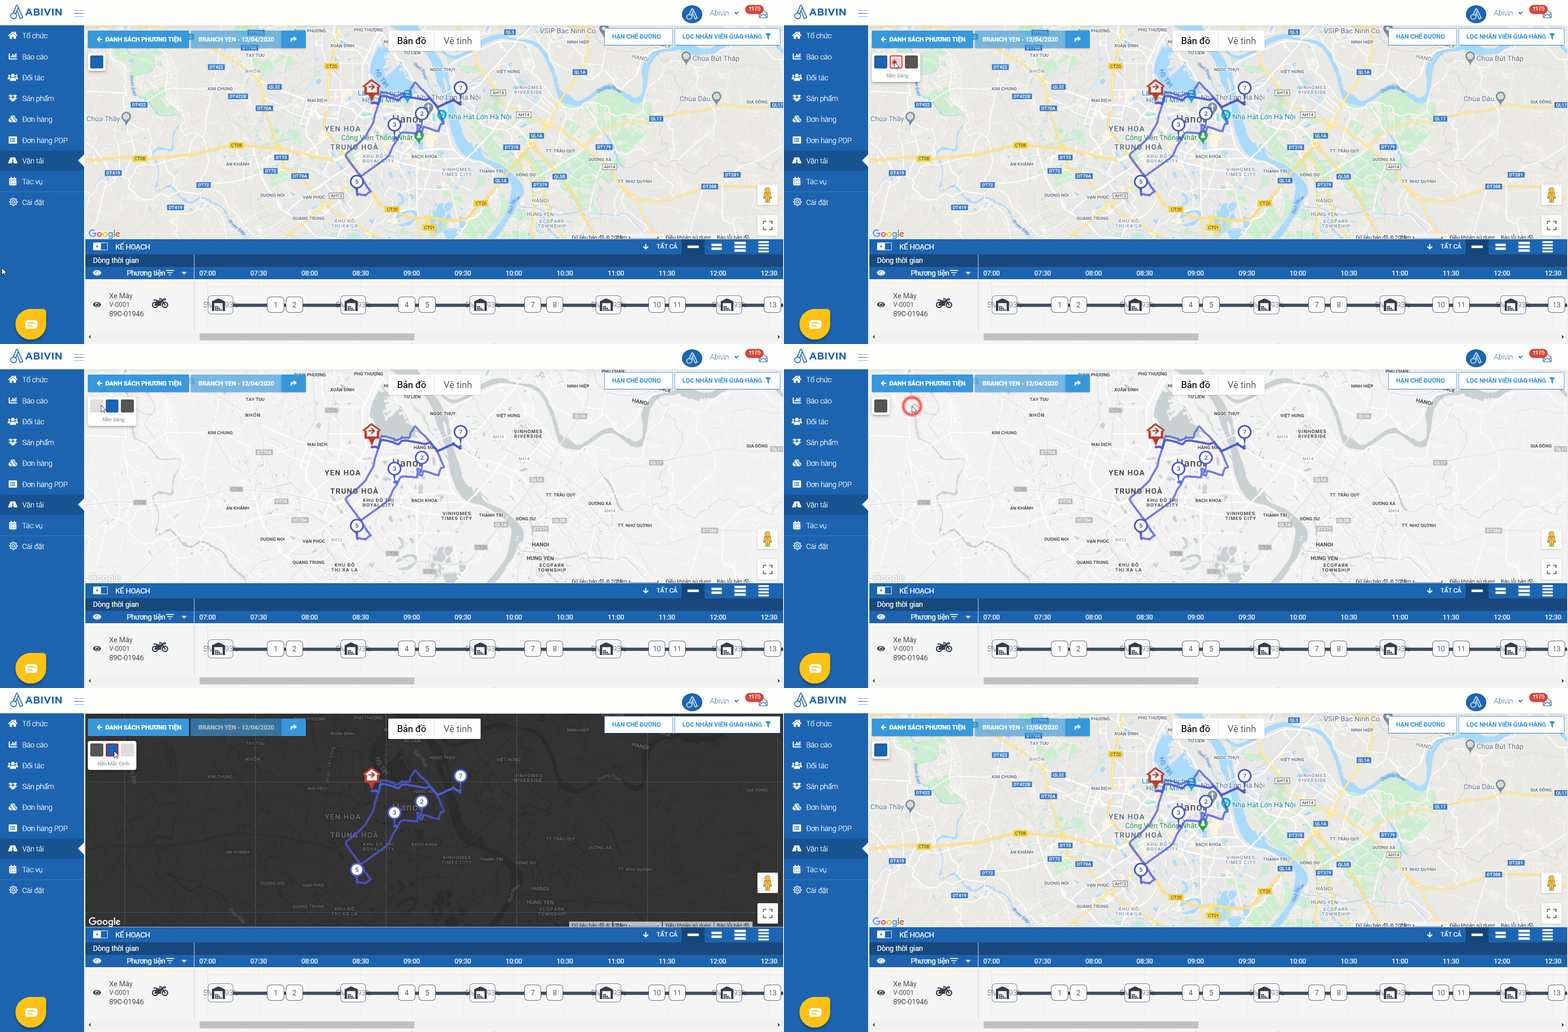
Illustration (Vietnamese)
- To view the Route Map in fullscreen mode, click on the Toggle Fullscreen View button at the bottom right of the Route Map
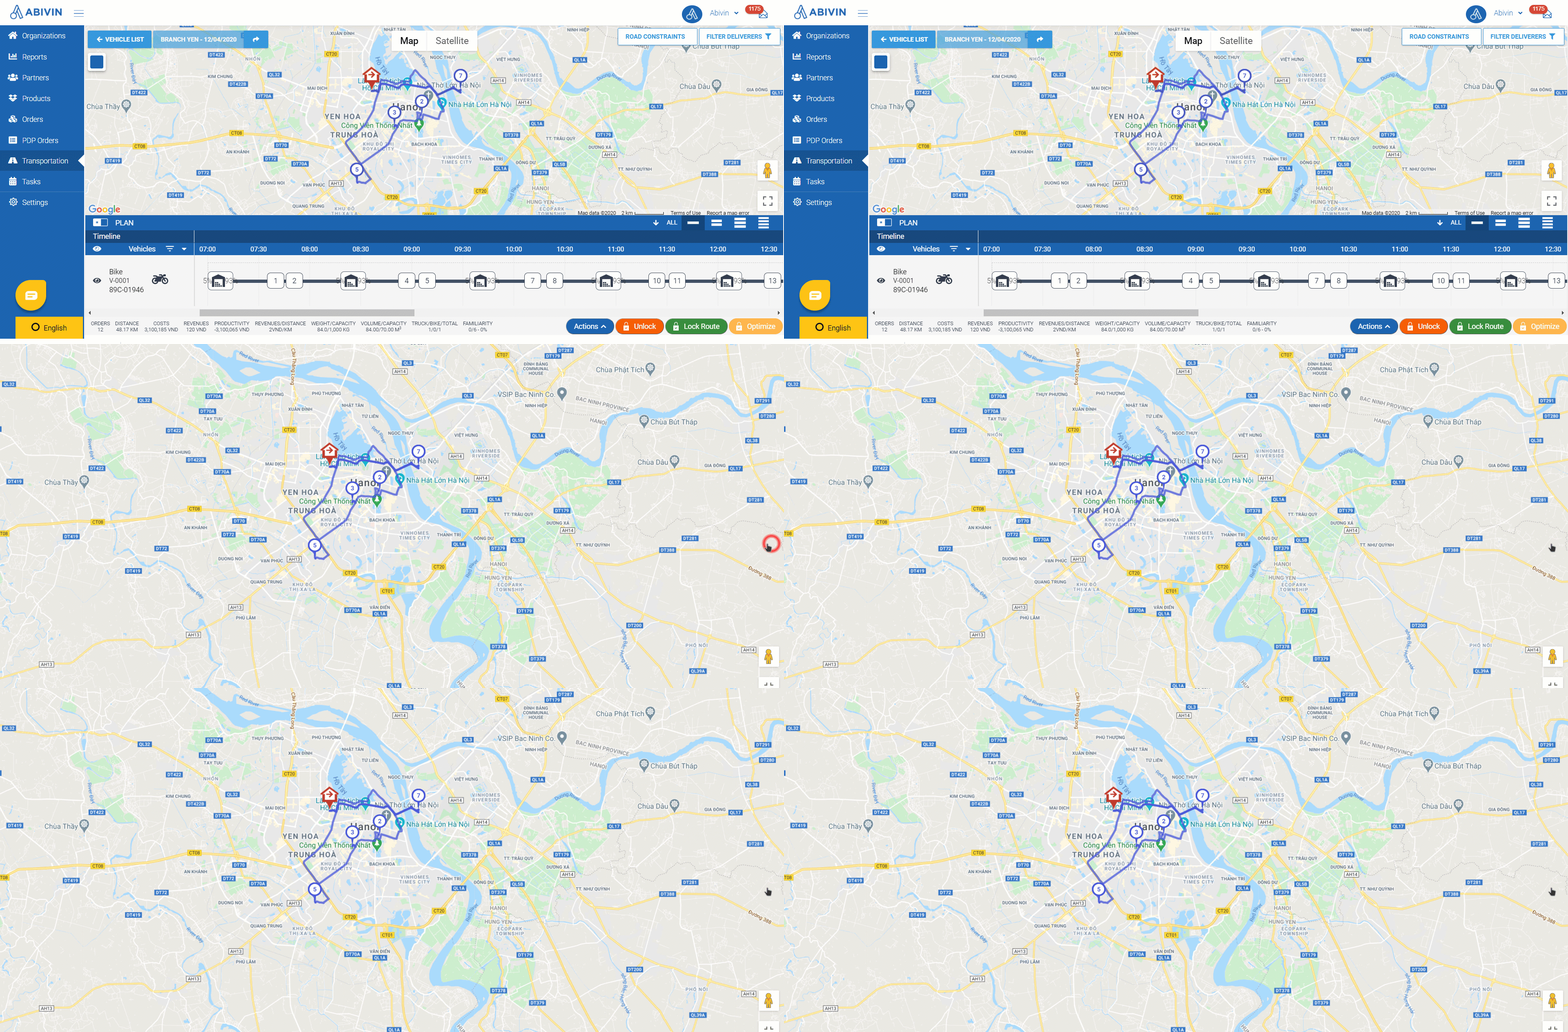
Illustration (English)
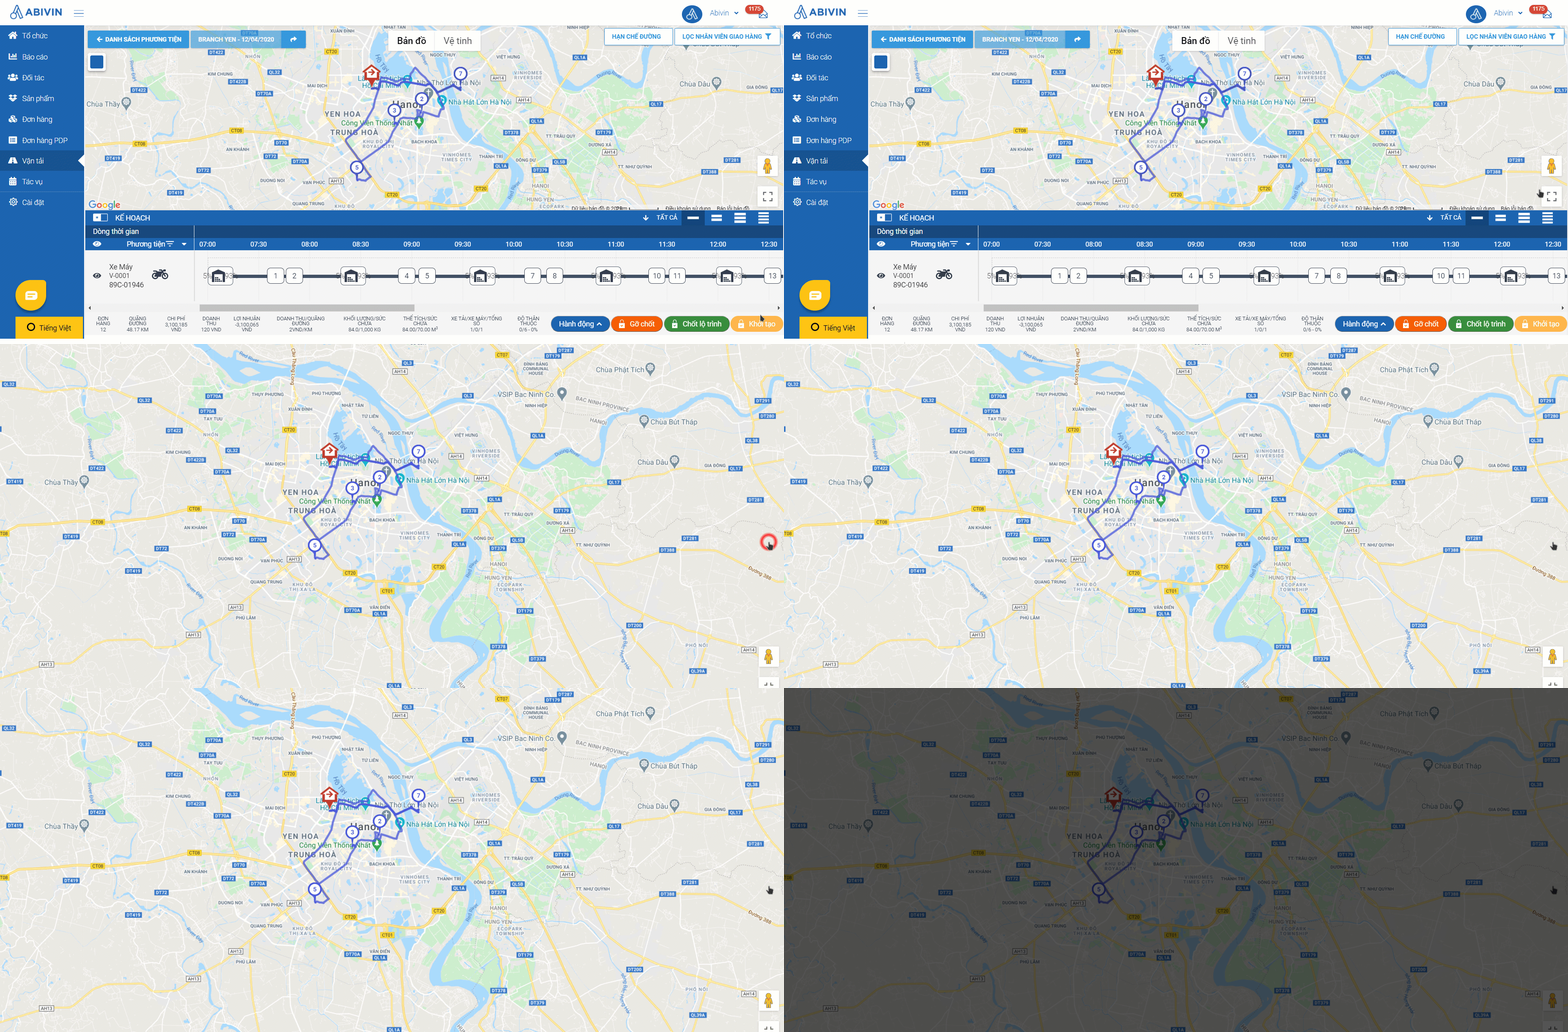
Illustration (Vietnamese)
- To see the actual photos of a particular road on the Route Map, you can use the Street View mode
- To access this mode, click on the Pegman icon above the Toggle Fullscreen View button, then drag it onto a point on the Route Map where you want to view the actual road. There will be a small thumbnail showing the actual photo that was taken at that point. Release the left mouse and you will be navigated to the Street View mode
- In the Street View mode, you can left-click and drag the mouse around to view more angles of the road
- You can also zoom in and zoom out just like in the Route Map
- To exit the Street View mode and return to the Route Map, click on the left arrow icon on the top left corner of the Street View

Illustration (English)

Illustration (Vietnamese)
Timeline Panel Section
- The Timeline panel section consists of many parts:
- 1 - The Delivery Timelines
- 2 - The Vehicle List
- 3 - The Route Plan command buttons
- 4 - The Plan/Execution Timeline switch button
- 5 - The artboard icons
- 6 - The general Delivery Routes information bar
- 7 - Missing Orders Indicator

Illustration Image (English)

Illustration Image (Vietnamese)
- We will go into details of each part below
Part 1. The Delivery Timelines
- The Delivery Timelines of the Vehicles occupy most of the space of the Timeline panel
- The Delivery Timeline will visually present the following time points and time periods during the Vehicle's Delivery Route:
- 1 - Shift Start Time: The time point that a Delivery Shift is supposed to start
- 2 - Shift End Time: The time point that a Delivery Shift is supposed to end
- 3 - Loading Time: The time period that the Vehicles use to load Products at the managing warehouses at the beginning of their Delivery Shift
- 4 - Travel Time: The time period that the Vehicles travel between the Delivery Stops on their assigned Delivery Routes
- 5 - Unloading Time (Also known as Service Time): The time period that the Vehicles use to deliver the Products at the Customers' receiving locations
- 6 - Cut-off Time: The designated time point to start the next Delivery Shift of a Vehicle (If the Delivery Route of that Vehicle consists of more than one Delivery Shift)
- On a Delivery Timeline, the two time periods that the vehicle spends at its managing warehouse at the beginning and end of a Delivery Trip are represented by the time blocks that have the warehouse symbol inside

Time Block at the end of Delivery Trip
- At the beginning of each Delivery Trip, the warehouse time block also has two percentage indicators on the two sides of the warehouse symbol

Time Block at the beginning of Delivery Trip
- The percentage indicator to the left of the warehouse symbol is the Weight Load indicator. It indicates the percentage of the total product weight over the weight capacity of the vehicle for a Delivery Trip
- For example, in a Delivery Trip, the vehicle is planned to load 50 kilograms of product. Its weight capacity is 500 kilograms. The weight load indicator, therefore, will display 10 percent
- The percentage indicator to the right of the warehouse symbol is the Volume Load indicator. It indicates the percentage of the total product volume over the volume capacity of the vehicle for a Delivery Trip
- For example, in a Delivery Trip, the vehicle is planned to load 5 cubic meters (5 m3) of product. Its volume capacity is 50 cubic meters (50 m3). The volume load indicator, therefore, will display 10 percent
- The time periods that the vehicle spends at the Customers' locations to unload/deliver products are represented by the blank time blocks

Symbol of Time Spent at Customer's Location
- The thin line that connects the time blocks represents the traveling time of the vehicle

Illustration of Vehicle's Travelling Time
- If a Delivery Timeline is too long that it exceeds the screen length, you can click on the horizontal navigation bar near the bottom of the Timeline panel and drag it to the left or to the right to view the remaining part of that Delivery Timeline
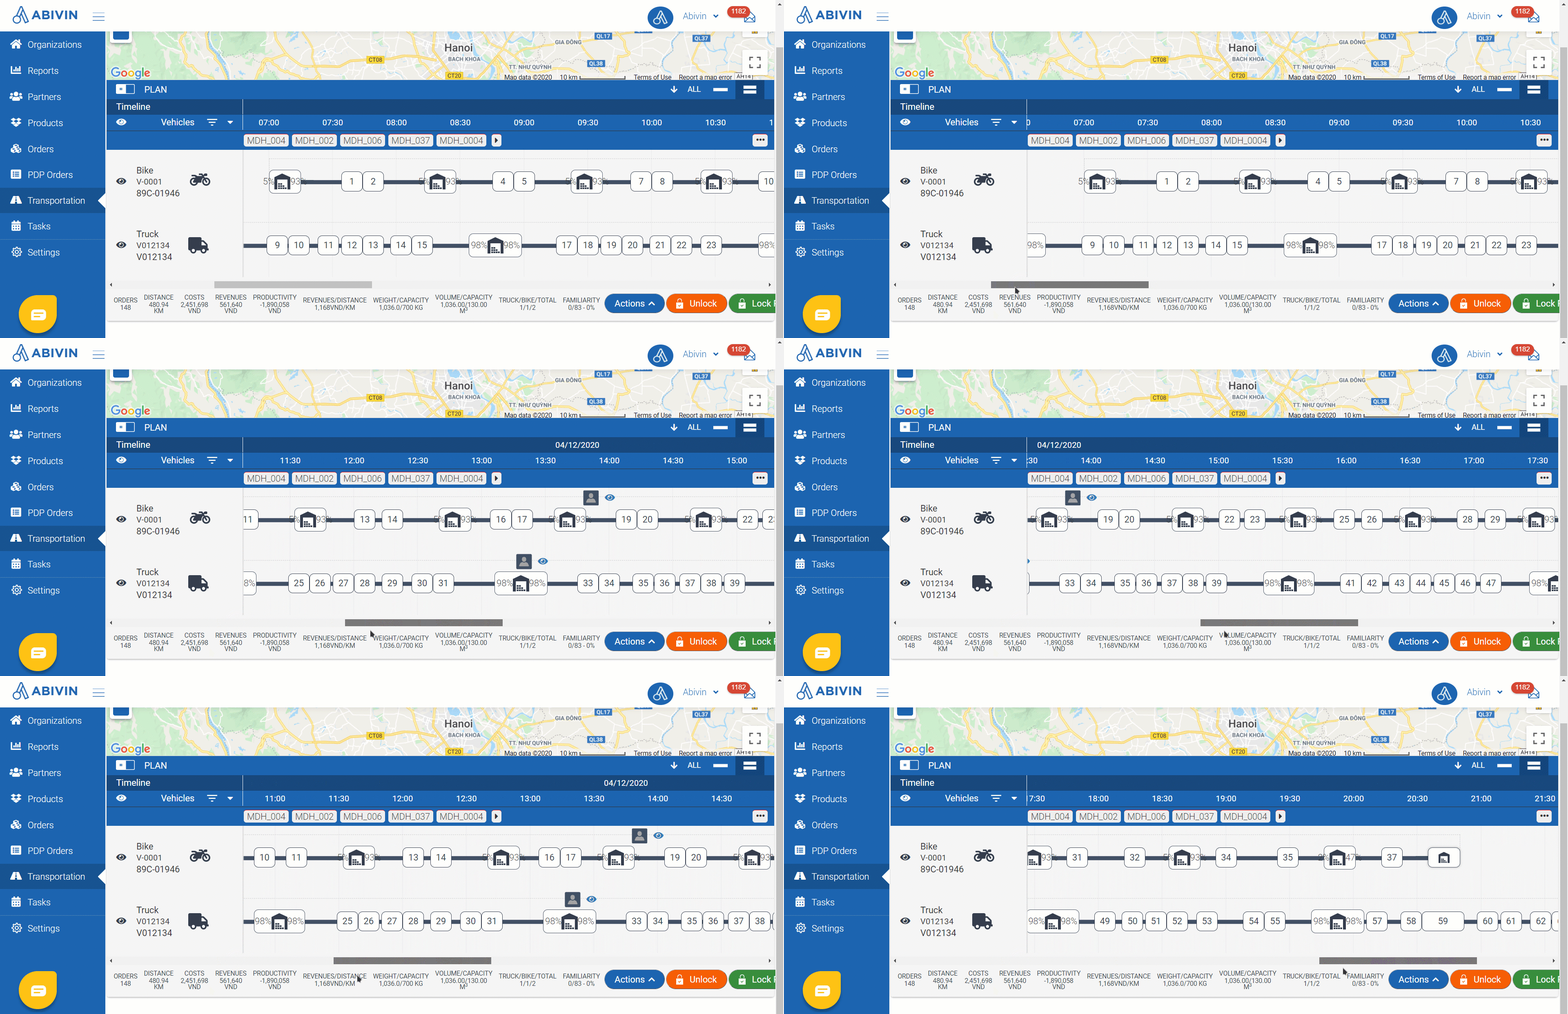
Illustration (English)
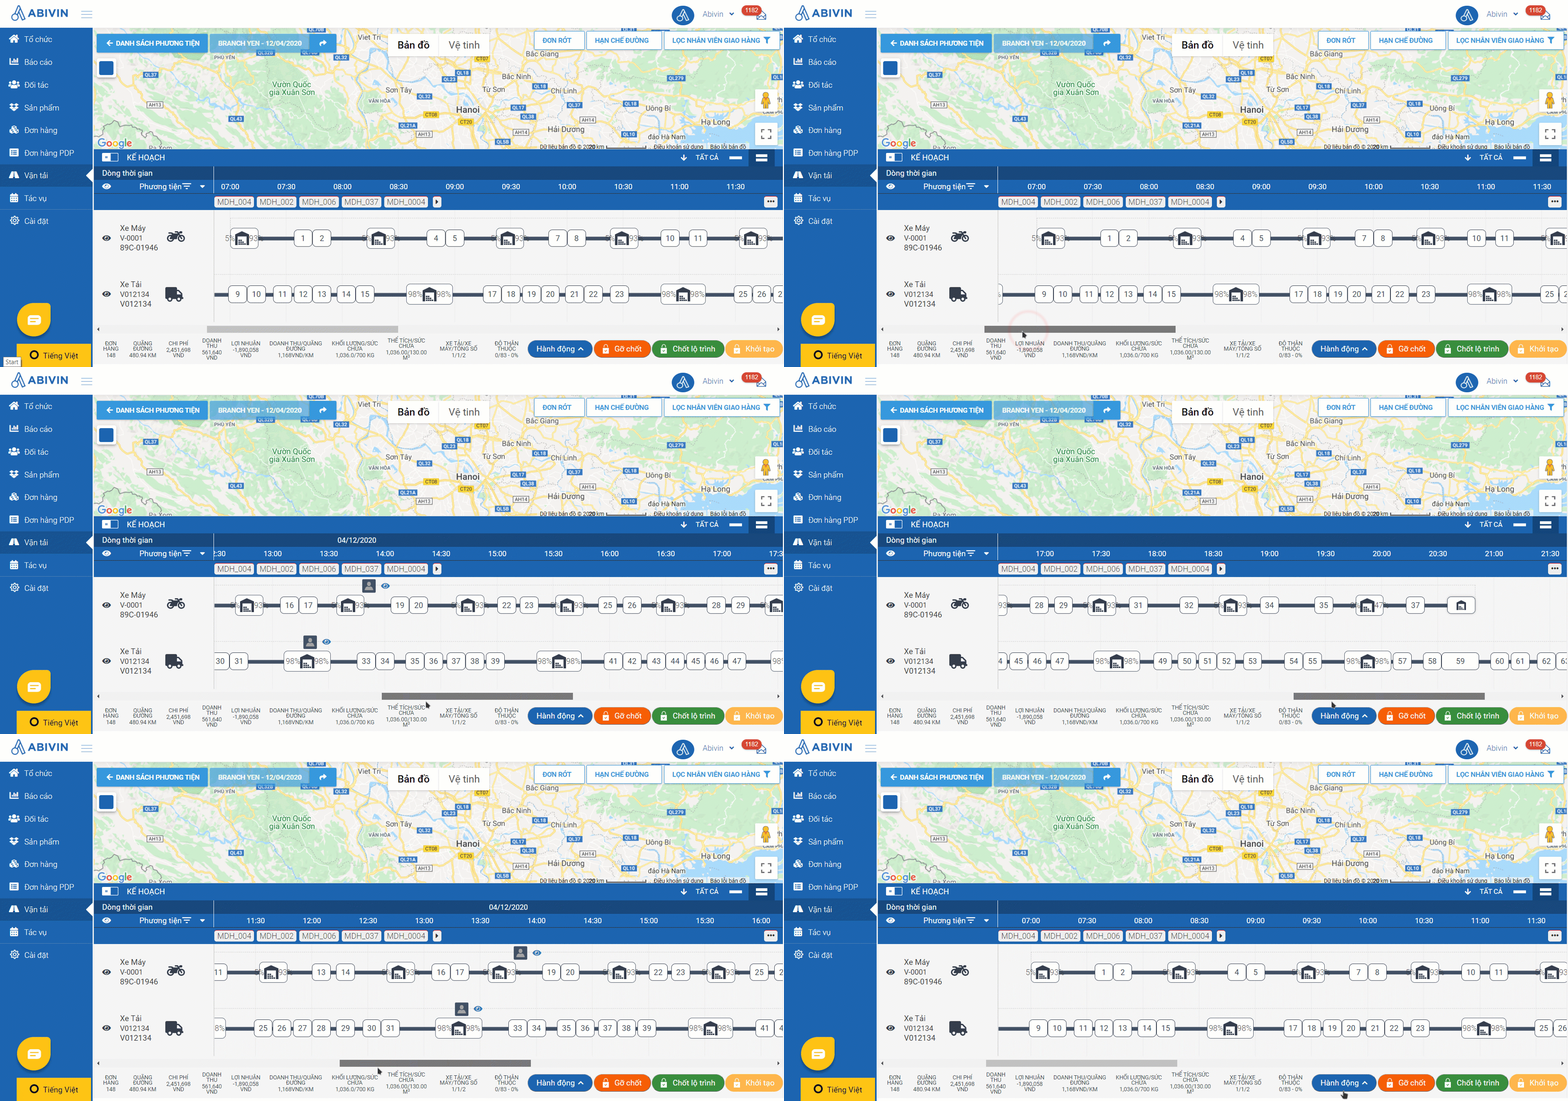
Illustration (Vietnamese)
- To see the assigned driver of a Delivery Shift, hover over the person icon above the middle of that Delivery Shift's Delivery Timeline
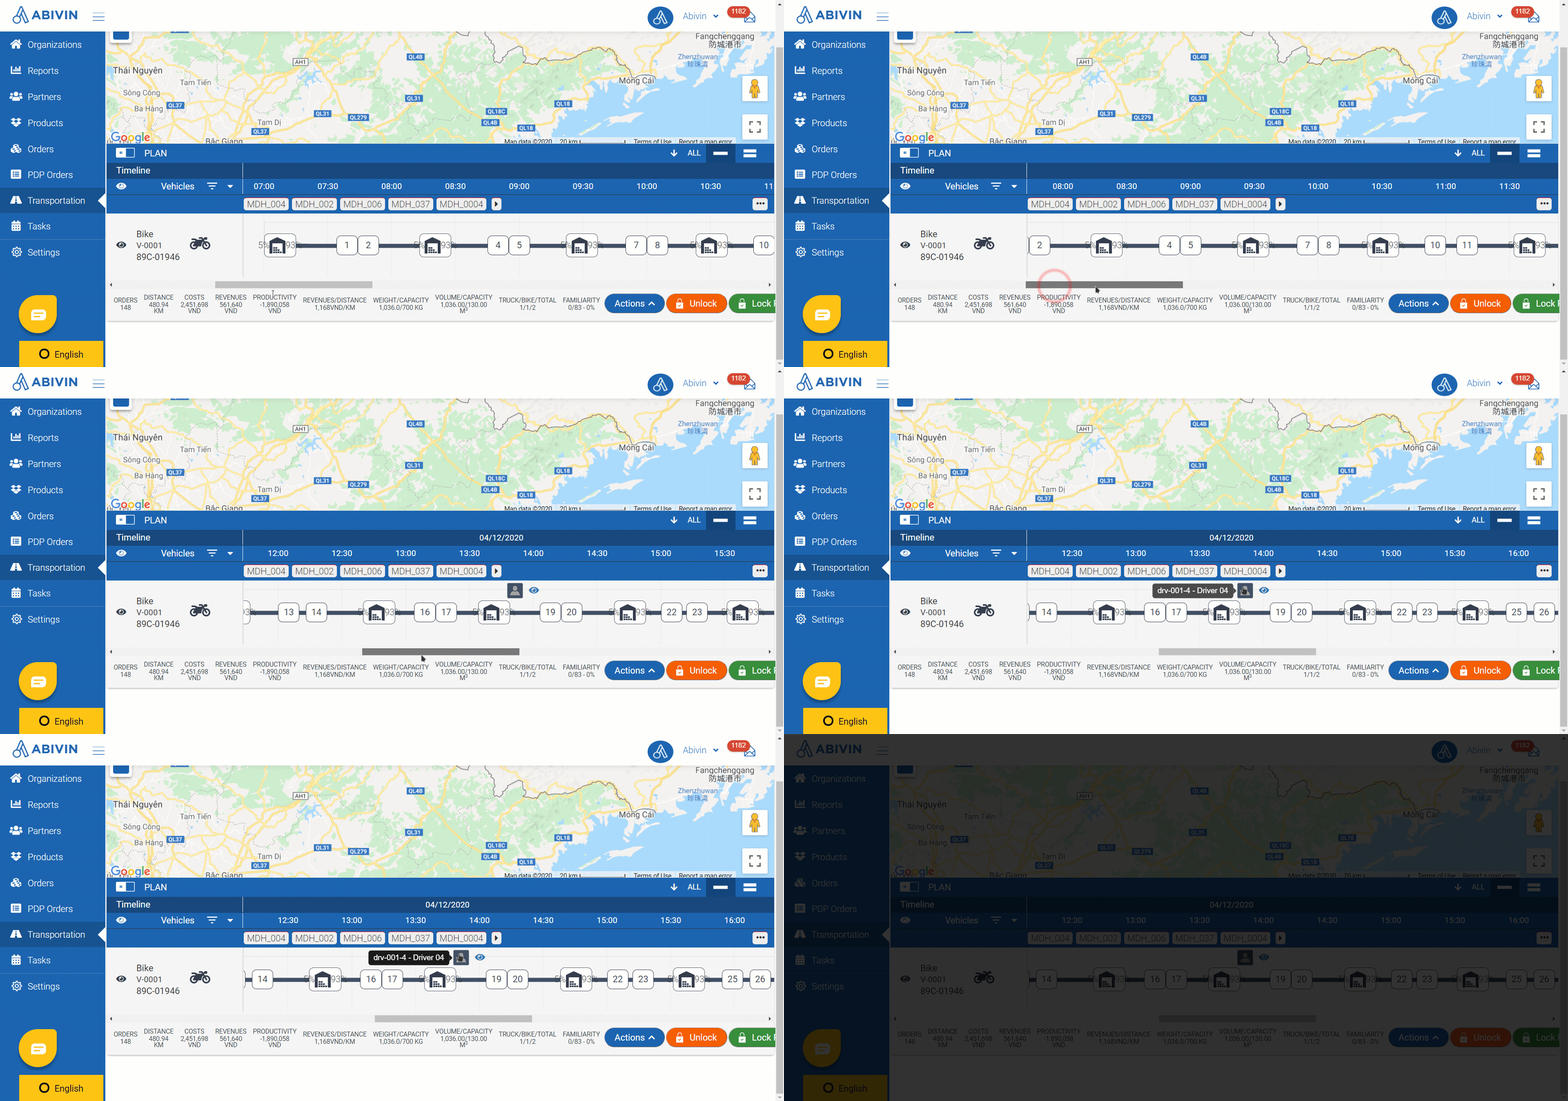
Illustration (English)
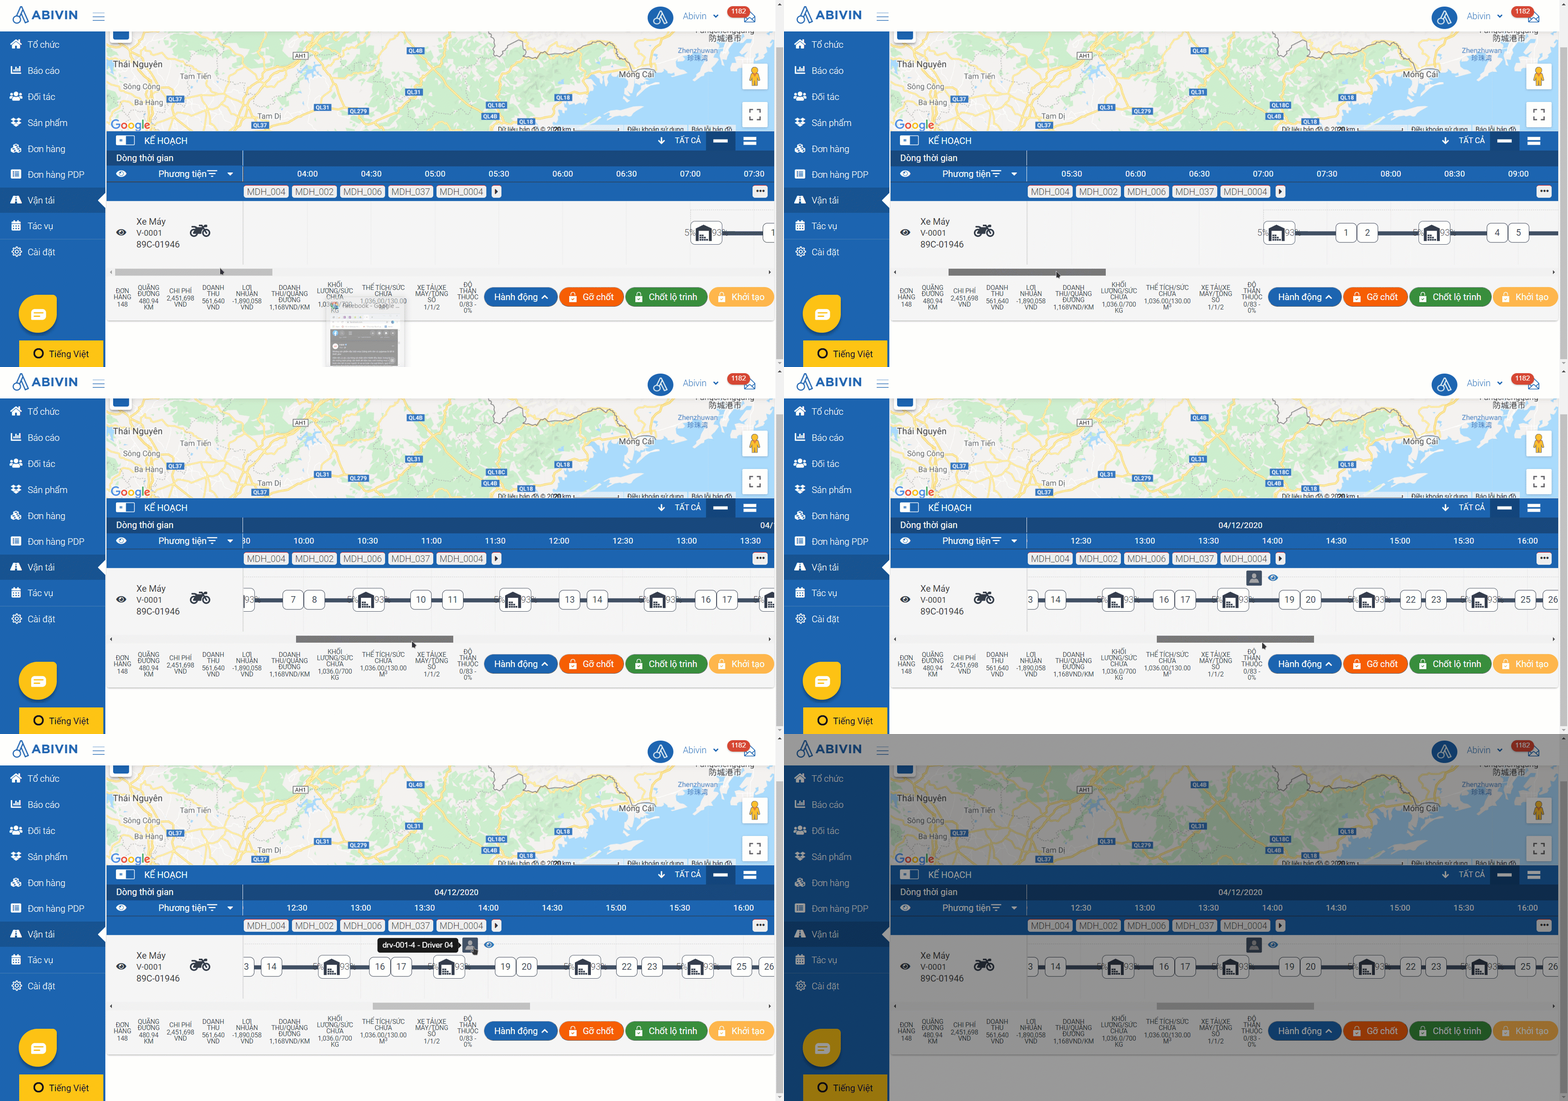
Illustration (Vietnamese)
- If the Delivery Shift hasn't yet been assigned a driver, the person icon will appear grayed out and has a slash over it

Illustration (English)

Illustration (Vietnamese)
- To assign a driver for a not-yet-assigned Delivery Shift, or to change the default driver of a Delivery Shift that has already had a driver, please follow the instruction in the following article: Route Plan Adjustment (Map View)
- As you click on a time block of the warehouse or of the Customer, an information panel will appear to the right of the Route Map. On this panel, you can see some information about the warehouse/Customer
- Below are the information fields on the warehouse information panel
Information field | Description |
|---|---|
Organization Code | Organization Code of the warehouse |
Organization Name | Organization Name of the warehouse |
Address | Address of the warehouse |
Reaching Time | The time points when the vehicle is planned to arrive at and leave the warehouse |
Total Weight by Product | The total weight of all products planned to be loaded onto the vehicle at the warehouse |
Total Volume by Product | The total volume of all products planned to be loaded onto the vehicle at the warehouse |
Vehicle Fill Rate By Volume (%) | The Fill Rate of the vehicle based on the Volume of products loaded onto the vehicle |
The volume of each product | The volume of each Product or SKU |
- Below are the information fields on the Customer information panel
Information field | Description |
|---|---|
MDP | The MDP code of the customer (If available) |
Customer Code | The Customer Code of the customer |
Customer Name | The Customer Name of the customer |
Driver Name | Name of the driver who is assigned to deliver to the customer |
Address | Address of the customer |
Orders | List of Order(s) planned to be delivered to the customer |
Time Window | The time window of the order (If available) |
Familiarity | Specify whether the vehicle has Familiarity relationship with the customer or not |
Temperature | Temperature levels of the products planned to be delivered to the customer |
Reaching Time | The time points when the vehicle is planned to arrive at and leave the customer |
Open/close times | The Open time and Close time of the customer |
Total Product Weight | The total weight of all products on the selected Delivery Route |
Total Product Volume | The total volume of all products planned to be delivered to the customer |
Fill Rate Volume | The vehicle fill rate by volume of the vehicle |
Fill Rate Weight | The vehicle fill rate by weight of the vehicle |
Total Amount to Collect | The total price of all orders to be delivered to the customer |
- On the warehouse information panel, apart from viewing the information, you can also view and export the Packing List, the Picking List, and the Order List. The instruction is described in the following section: View And Export Route Plan Documents
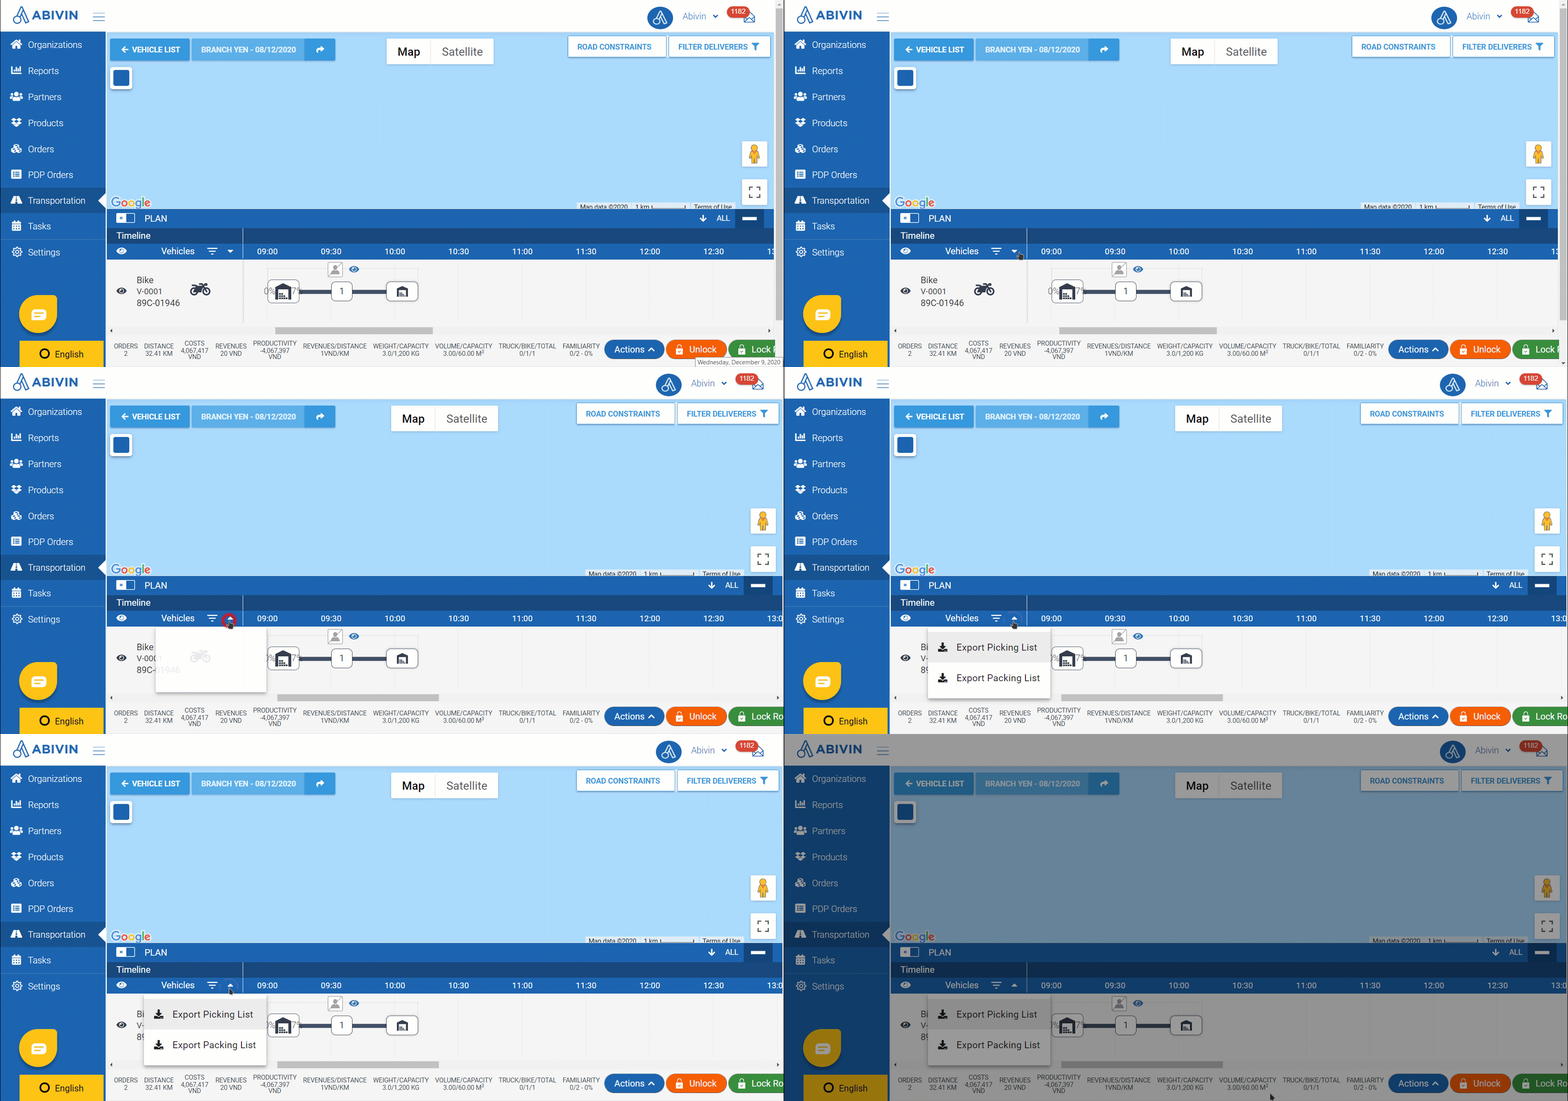
Illustration (English)
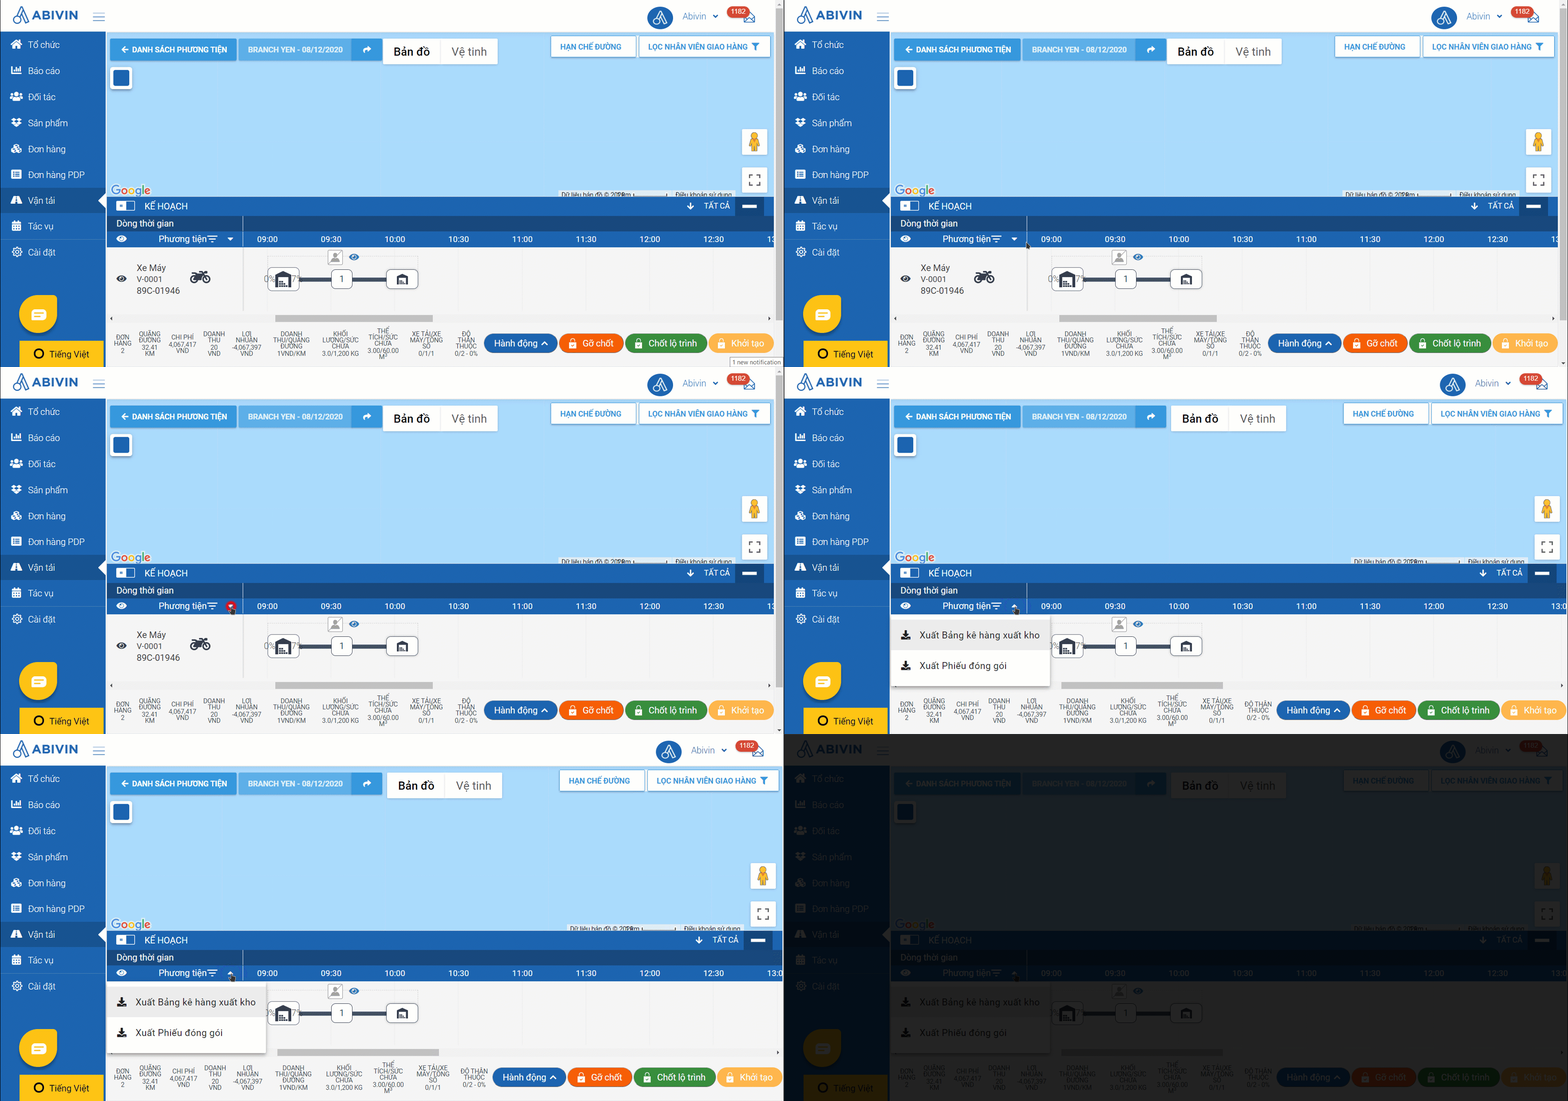
Illustration (Vietnamese)
- On the Customer information panel, apart from viewing the information, you can also 1. Remove the Customer from the current Route Plan (The instruction is described in the following article: Route Plan Adjustment (Map View)), and 2. View and export the Product List of that Customer (The instruction is described in the following section: View And Export Route Plan Documents)
Part 2. The Vehicle List
- The vehicle list is located to the left of the Delivery Timelines
- Here, you can view the list of vehicles that the system used for the current Route Plan, along with some other information about the vehicles
- 1 - Vehicle code
- 2 - Vehicle Type. The motorbike icon represents the Motorbike. The truck icon icon represents the Truck/Semi-truck
- 3 - Driver name

Vehicle Panel (English)

Vehicle Panel (Vietnamese)
- To show/hide the optimized Delivery Routes of the Vehicles on the Route Map, click on the corresponding eye icons of the Vehicles on this list

View Route Map of Selected Vehicles (English)

View Route Map of Selected Vehicles (Vietnamese)
- To view the optimized Delivery Routes of all Vehicles, click on the eye icon next to the Vehicles text on the top left corner of the Timeline panel

View Route Map of all Vehicles (English)

View Route Map of all Vehicles (Vietnamese)
- To sort the vehicles by certain parameters (License Plate; Vehicle Type; Weight Capacity; Volume Capacity; Fill Rate by Volume), follow the steps below:
- Step 1: Click on the funnel icon to the right of the Vehicle text. A drop-down list will appear, showing the list of parameters
- Step 2: On the drop-down list, click the checkbox icons of the parameters by which you want to arrange the vehicles
- Step 3: Select the sorting mode for each parameter by clicking on the arrow icon at the end of each parameter. If you want to sort in ascending mode, leave the up arrow icon . If you want to sort in descending mode, click on that icon to switch it to the down arrow icon
- Step 4: Click Apply. The system will sort the vehicles by the selected parameters and sorting modes
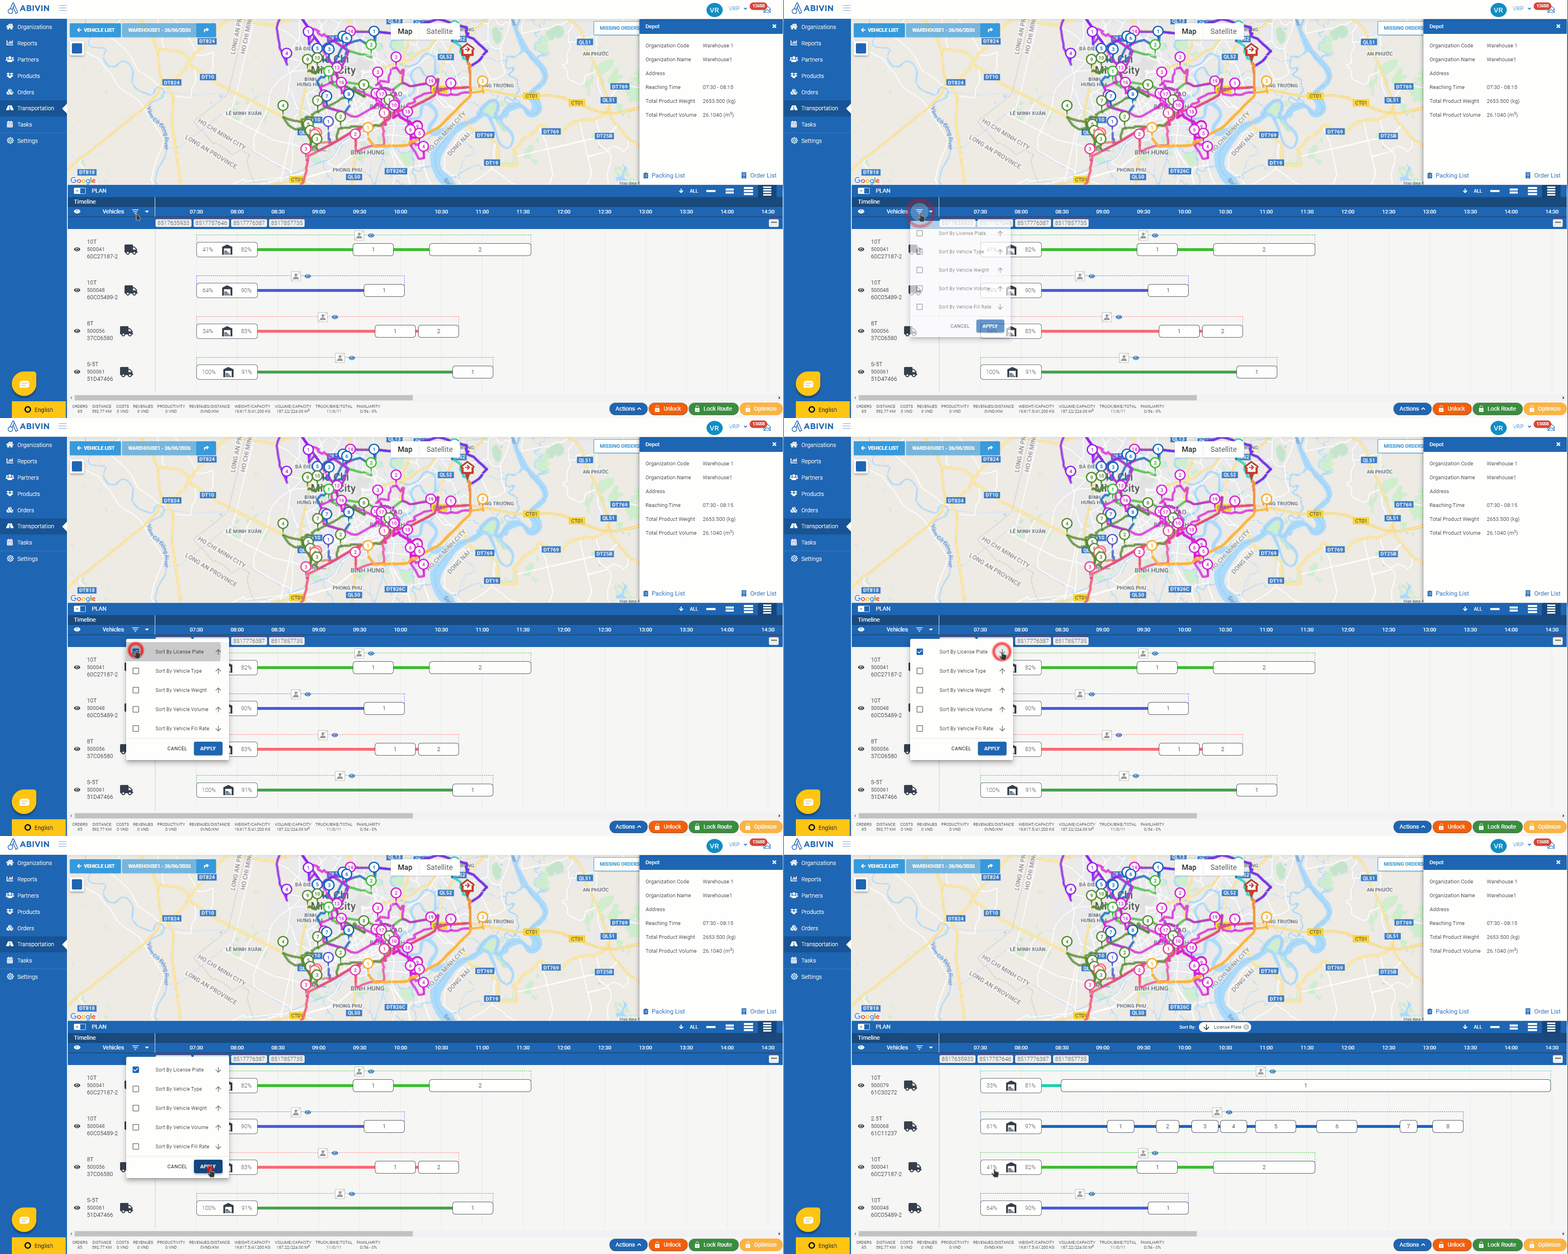
Sort Vehicles (English)
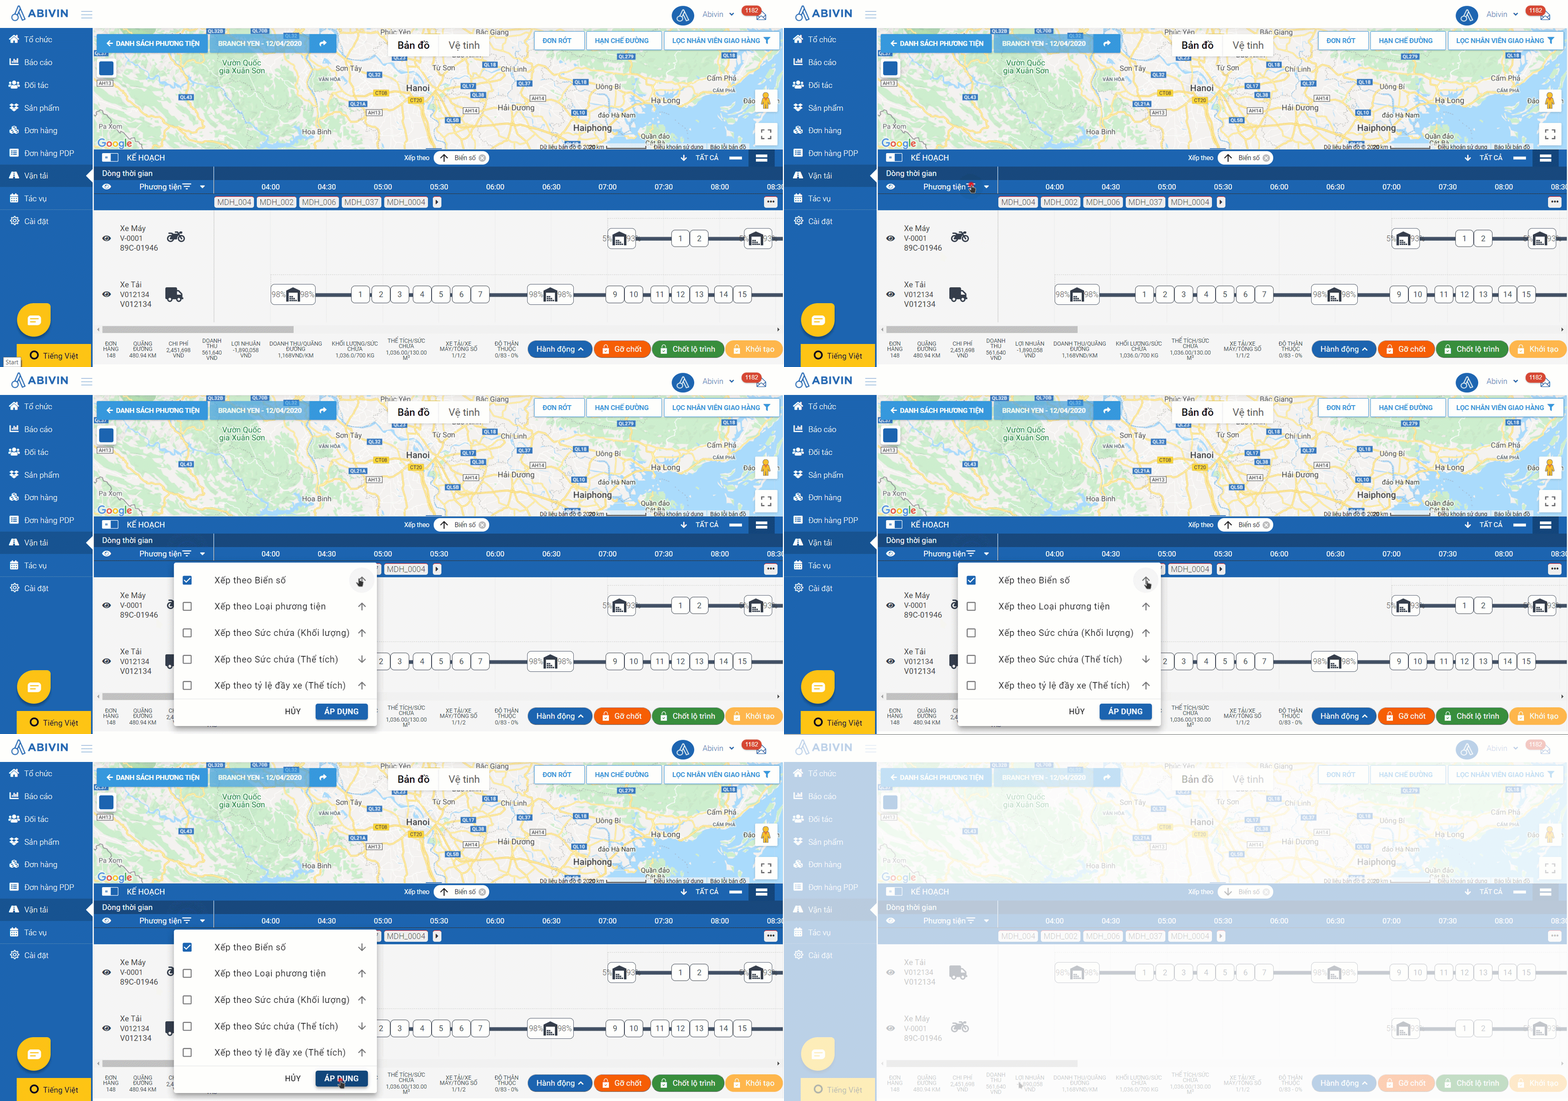
Sort Vehicles (Vietnamese)
- Here, you can also export some Route Plan documents: The Packing List and the Picking List. The detailed instruction is described in the following section: View And Export Route Plan Documents
Part 3. The Route Plan command buttons
- The set of buttons located at the bottom right of the Timeline Panel is the Route Plan command buttons. These buttons allow you to manipulate the Route Plan
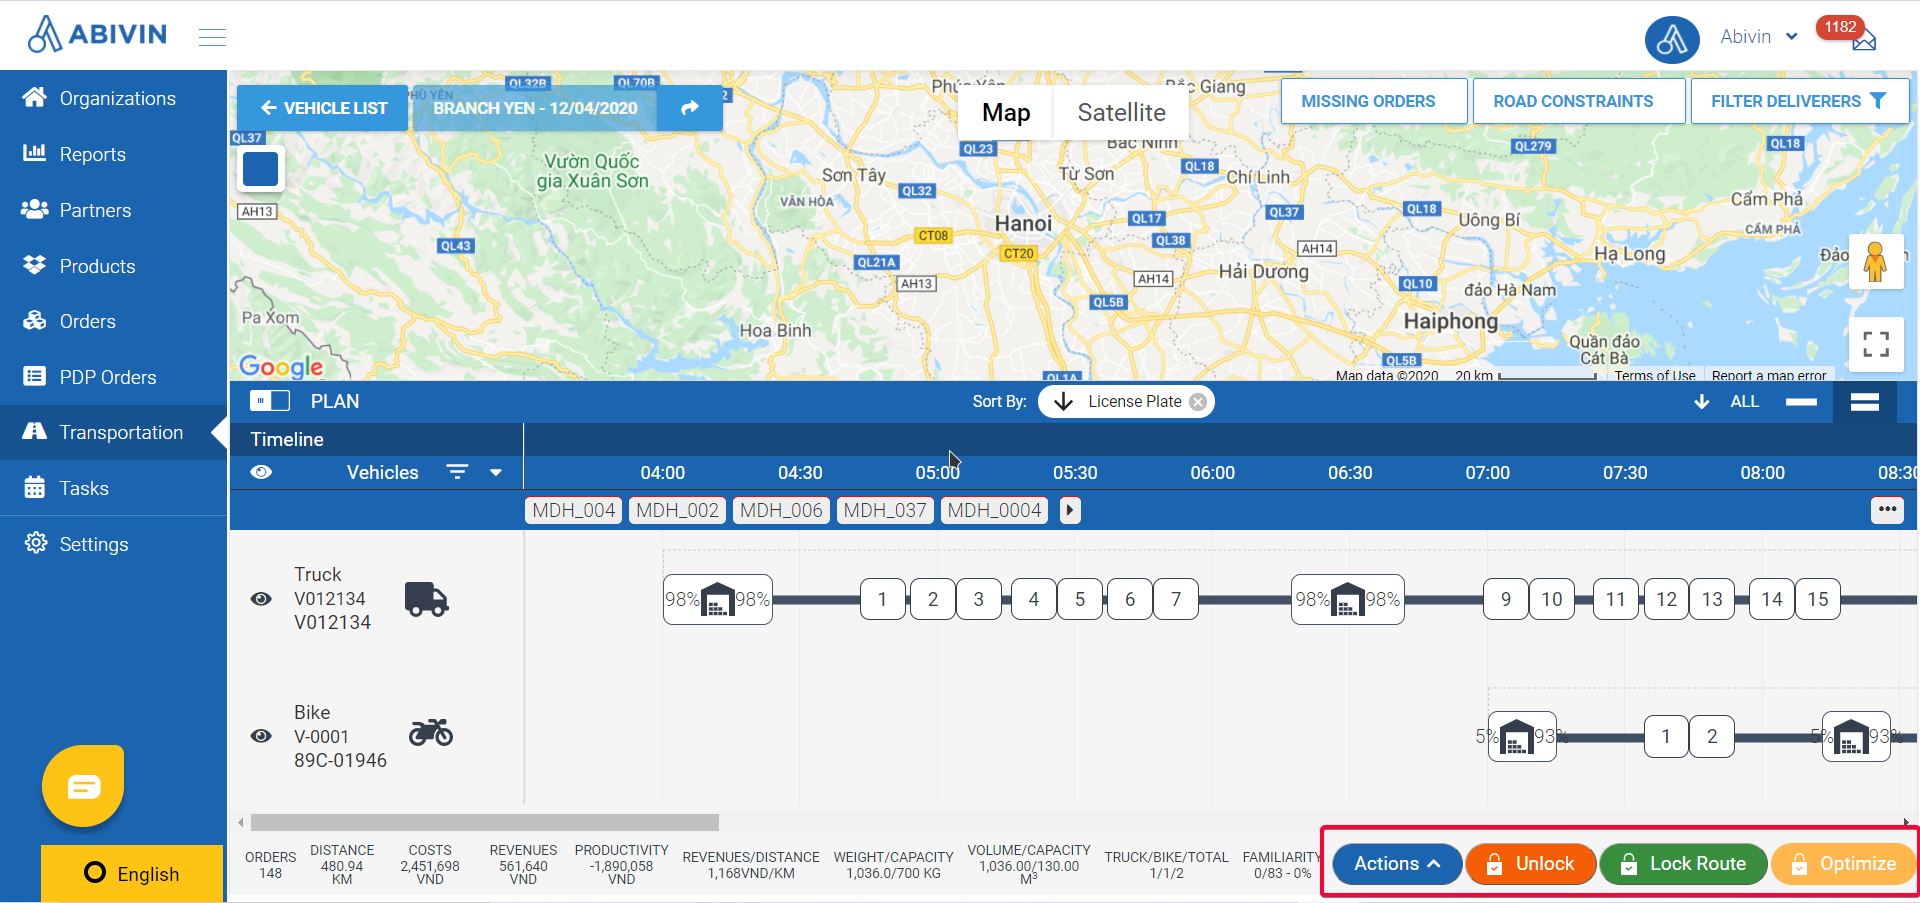
The Command Buttons (English)
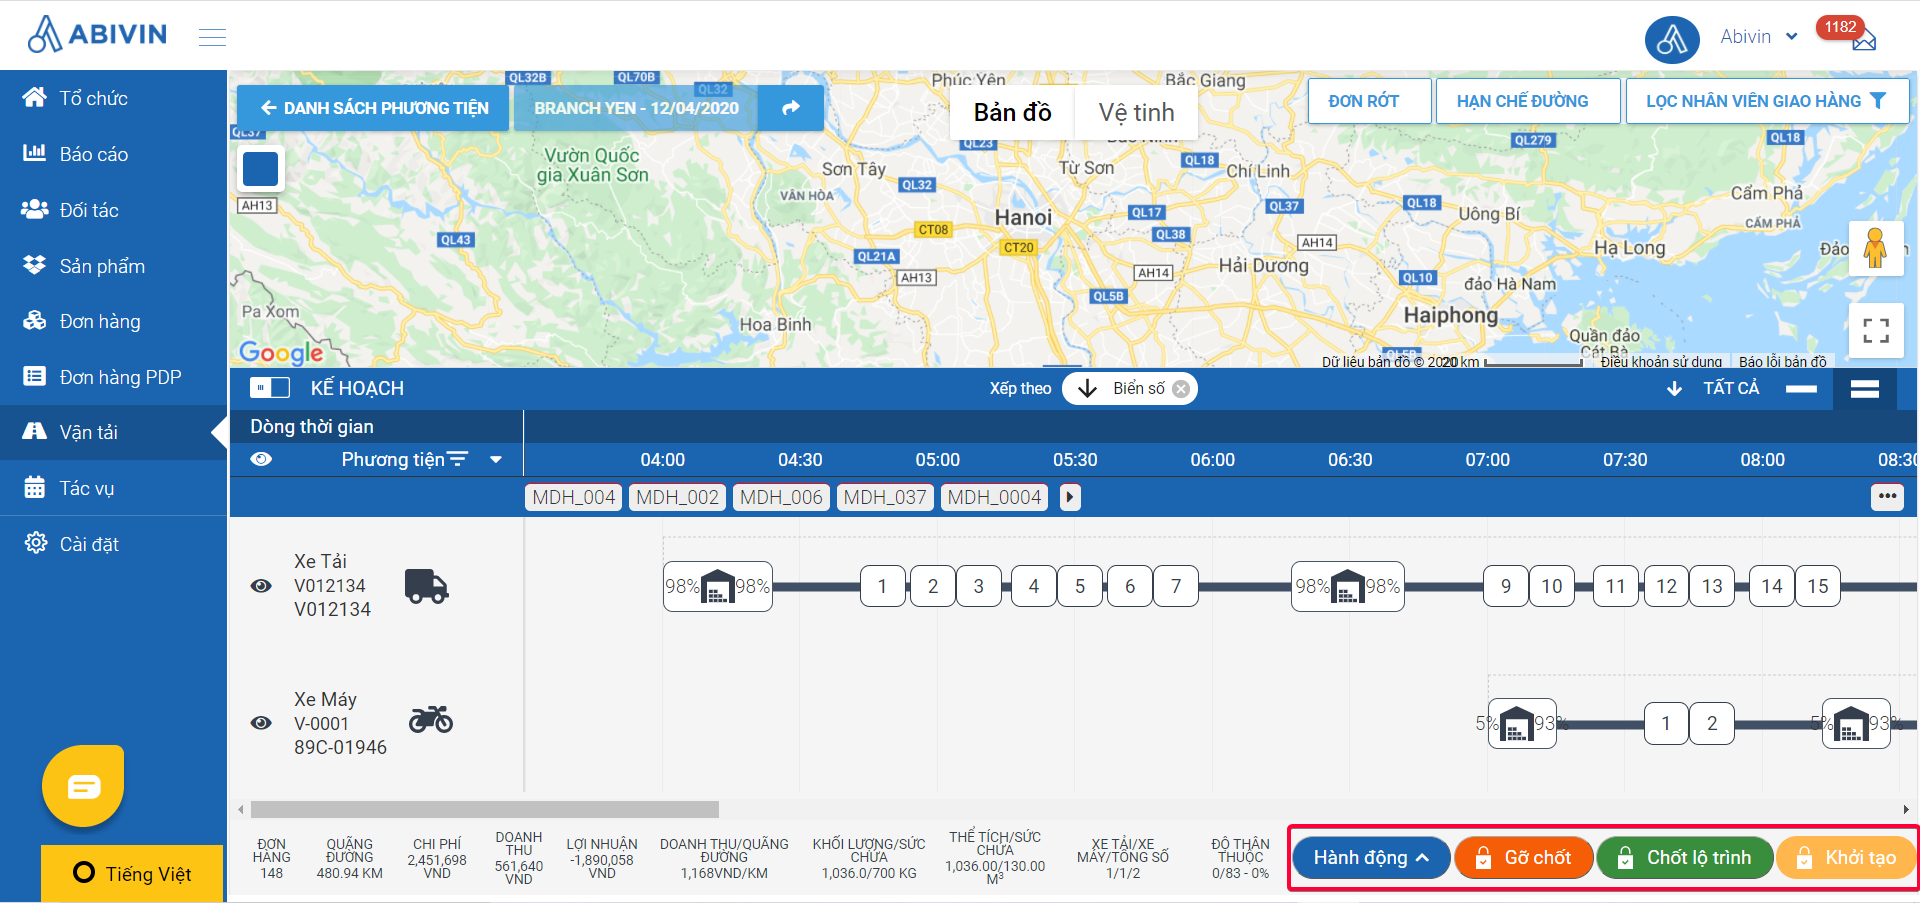
The Command Buttons (Vietnamese)
Part 4. The Plan/Execution Timeline switch button
- The switch button on the top left corner of the Timeline Panel is the Plan/Execution Timeline switch button
- Clicking on this button will switch between the Plan Delivery Timelines (The Delivery Timelines generated by the system) and the Execution Delivery Timelines (The actual Delivery Timelines when the vehicles begin to perform the delivery tasks)

Switch Plan and Execution (English)

Switch Plan and Execution (Vietnamese)
- The Execution Timeline allows you to track the delivery progress of the vehicles in real-time. Read more in the following article: Delivery Progress Tracking
Part 5. The Artboard icons
- The Artboard icons are located in the top right corner of the Timeline Panel.
- These icons allow you to change the number of the Delivery Timelines that will appear on the Timeline Panel
- The number of lines on each Artboard icon indicates the number of Delivery Timelines that will on the Timeline panel.
- You can click on the All text to display a maximum of six Delivery Timelines.
- If the number of Delivery Routes on the Timeline panel is more than six, you can click on an empty point on the Timeline Panel then use the middle scroll button on your mouse to scroll through the Delivery Routes
- To collapse the Timeline panel, click on the down arrow button to the left of the All text. After that, you can show the Timeline panel again by clicking on the Show Timeline button at the bottom right corner of the Map screen.

Illustration Image (English)

Illustration Image (Vietnamese)
Part 6. The general Delivery Routes information bar
- At the bottom of the Timeline panel, you can see some general information related to the selected Delivery Route
- The information bar will update as you select more Delivery Routes

General Delivery Route Information Bar (English)

General Delivery Routes Information Bar (Vietnamese)
- Below are the information fields on this information bar
Information field | Description |
|---|---|
ORDERS | The number of orders planned to be delivered by the selected vehicle |
DISTANCE | The distance planned to be traveled by the selected vehicle |
COSTS | The total estimated operational cost of the selected vehicle's Delivery Route |
REVENUES | The planned revenues of the selected vehicle on the whole route |
PRODUCTIVITY | The difference of the Revenues minus the Costs of the selected vehicle's Delivery Route |
REVENUES/DISTANCE | The average revenue per one kilometer of the selected vehicle's Delivery Route |
WEIGHT/CAPACITY | The total weight of all Orders on the Delivery Route over the weight capacity of the selected vehicle |
VOLUME/CAPACITY | The total volume of all Orders on the Delivery Route over the weight capacity of the selected vehicle |
TRUCK/BIKE/TOTAL | The number of trucks/semi-trucks, the number of motorbikes, and the sum of all vehicles of these vehicle types that have been selected to perform the orders |
FAMILIARITY | The number of orders that meet the familiarity criteria over the total number of orders delivered by the selected vehicle |
Delivery Journey Units
- In this model, there are three delivery journey units: Delivery Trip, Delivery Shift, Delivery Route
Delivery Trip
- Delivery Trip is the most fundamental delivery journey unit. It is the delivery journey unit in which the vehicle starts at the managing warehouse, travels to the Customers, and then travels back to the warehouse

A Typical Delivery Trip
Delivery Shift
- Delivery Shift is the journey unit that the system generates after you perform the Delivery Route locking phase

A Typical Delivery Shift
- A Delivery Shift can consist of just a single Delivery Trip or multiple Delivery Trips
- The first delivery shift of the route will be started at the later of
-
- The open time of the Depot where the vehicles have to travel to and load products.
-
- The starting time of the vehicles assigned.
- For example, an assigned vehicle starts at 2 AM, and the open time of the depot in charge is at 4 AM. Because the depot opens later than the assigned vehicle starts (4 AM is behind 2 AM), the depot's open time will be chosen as the start time of the first delivery shift.
- The following delivery shifts will be started after the delivery shifts right before them are finished and the cut-off time.
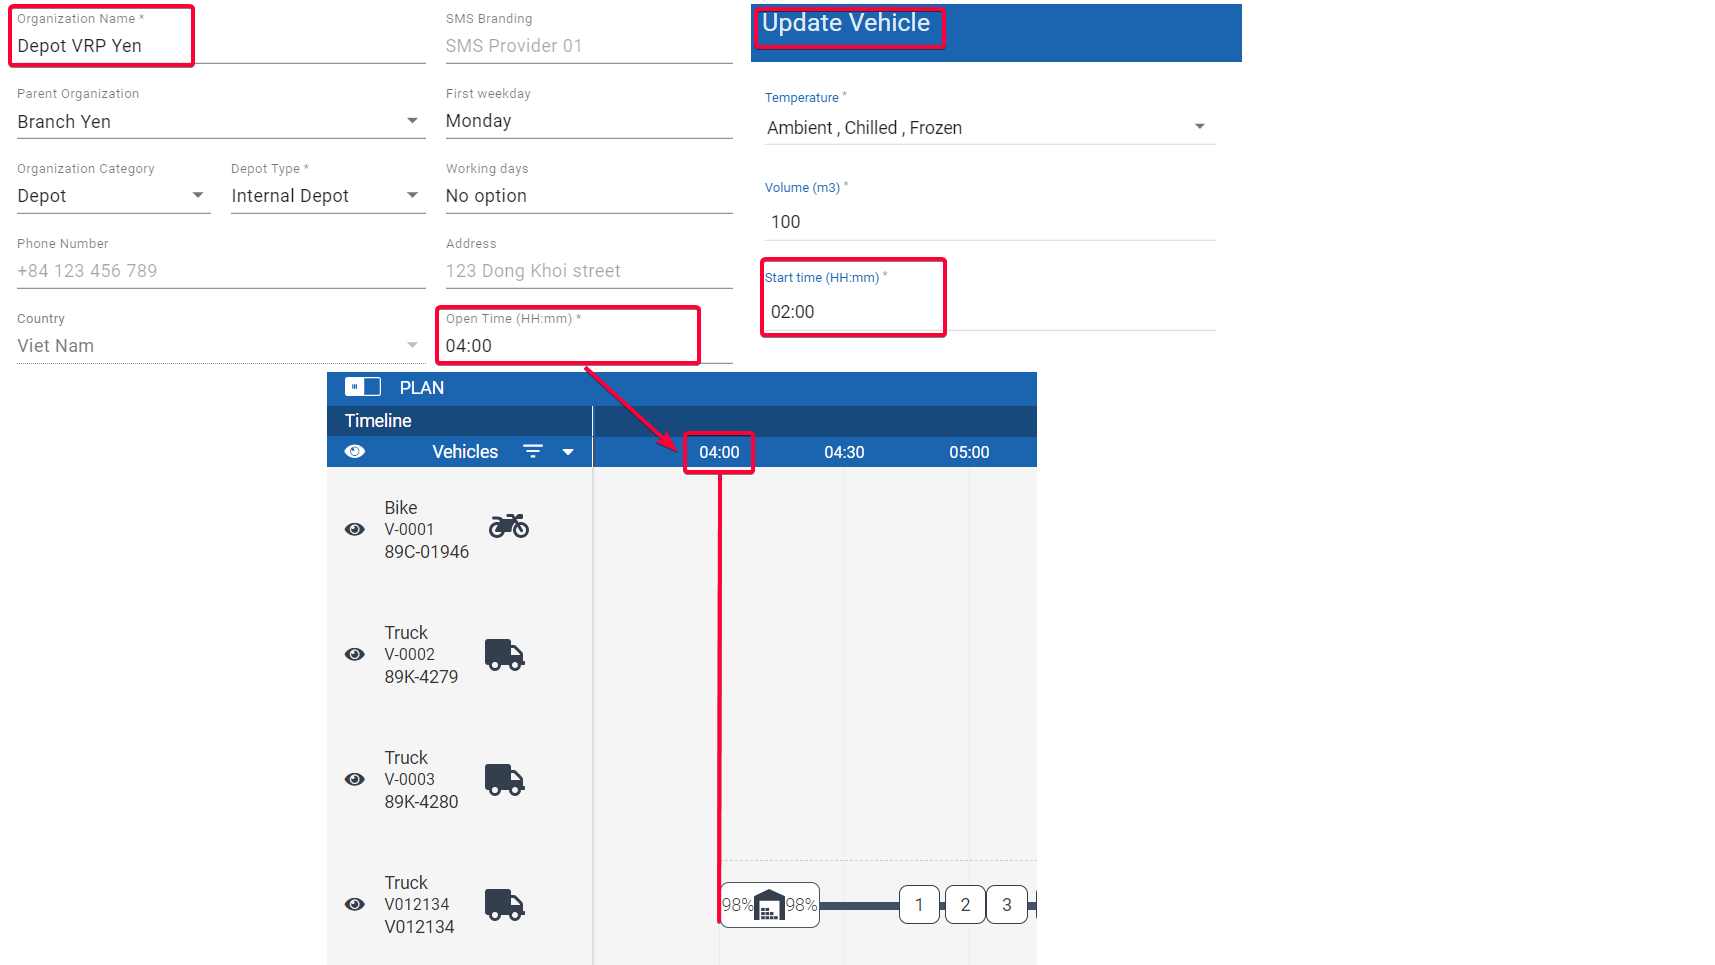
Illustration (English)
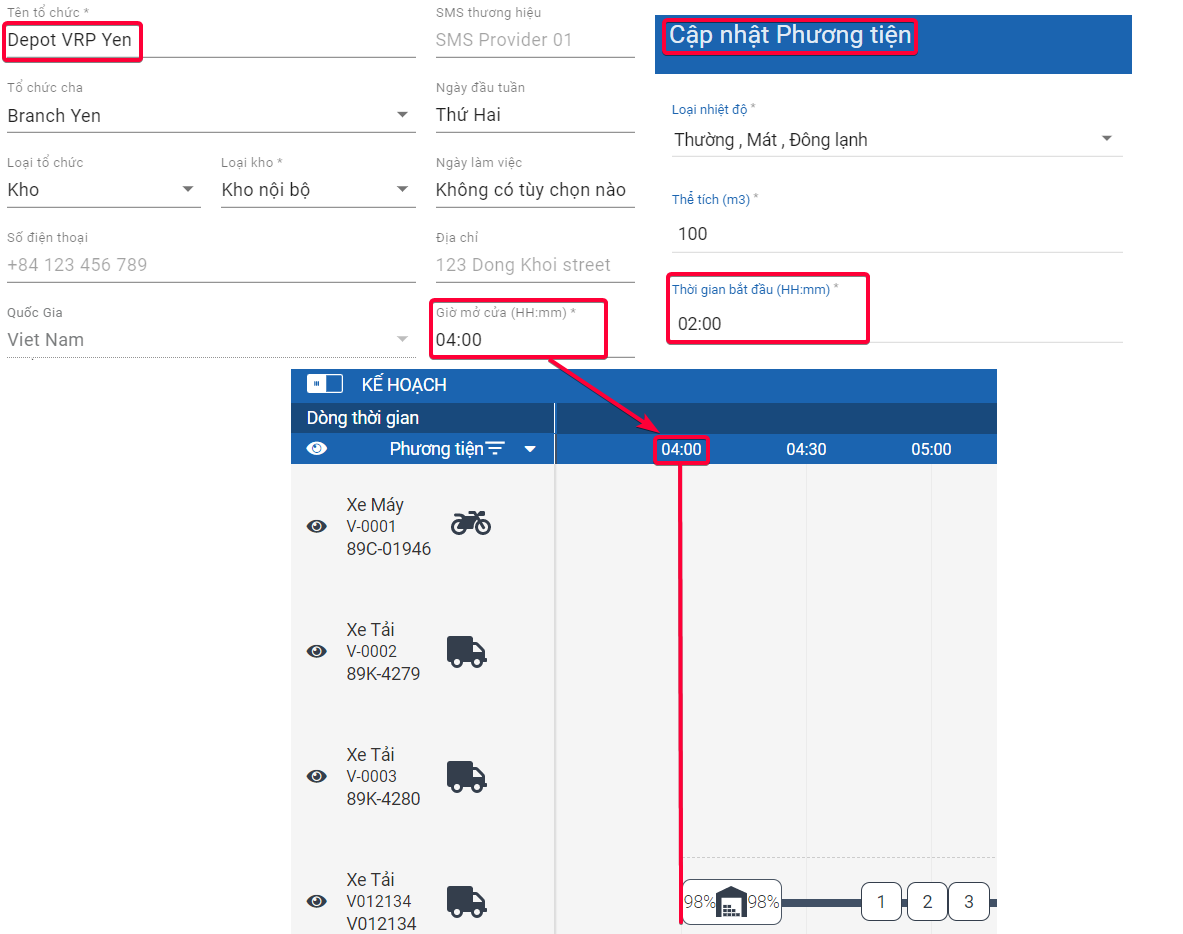
Illustration (Vietnamese)
Delivery Route
- Delivery Route is the final delivery journey unit of a vehicle. It encompasses both the Delivery Trip and Delivery Shift
- A Delivery Route can consist of just a single Delivery Shift or multiple Delivery Shifts

A Typical Delivery Route with 2 Delivery Shifts
View And Export Route Plan Documents
- On the Route Plan screen, you can view and export the Route Plan documents: Packing List; Picking List; Order List; Product List
Packing List
- The Packing List details the Order detail for each separate Customer on a Delivery Trip
Picking List
- The Picking List lays out what products have been taken out of the Depot shelves for a Delivery Trip
Order List
- The Order List specifies the Orders on a Delivery Trip
Product List
- The Product List shows the products to be delivered to a specific Customer
- To view the Packing List/Picking List/Order List of a Delivery Trip, click on the respective Depot time block of that Delivery Trip on the Timeline panel. Upon clicking, an information panel will appear on the right side of the Map screen. You can access each list by clicking the respective text at the bottom of the panel
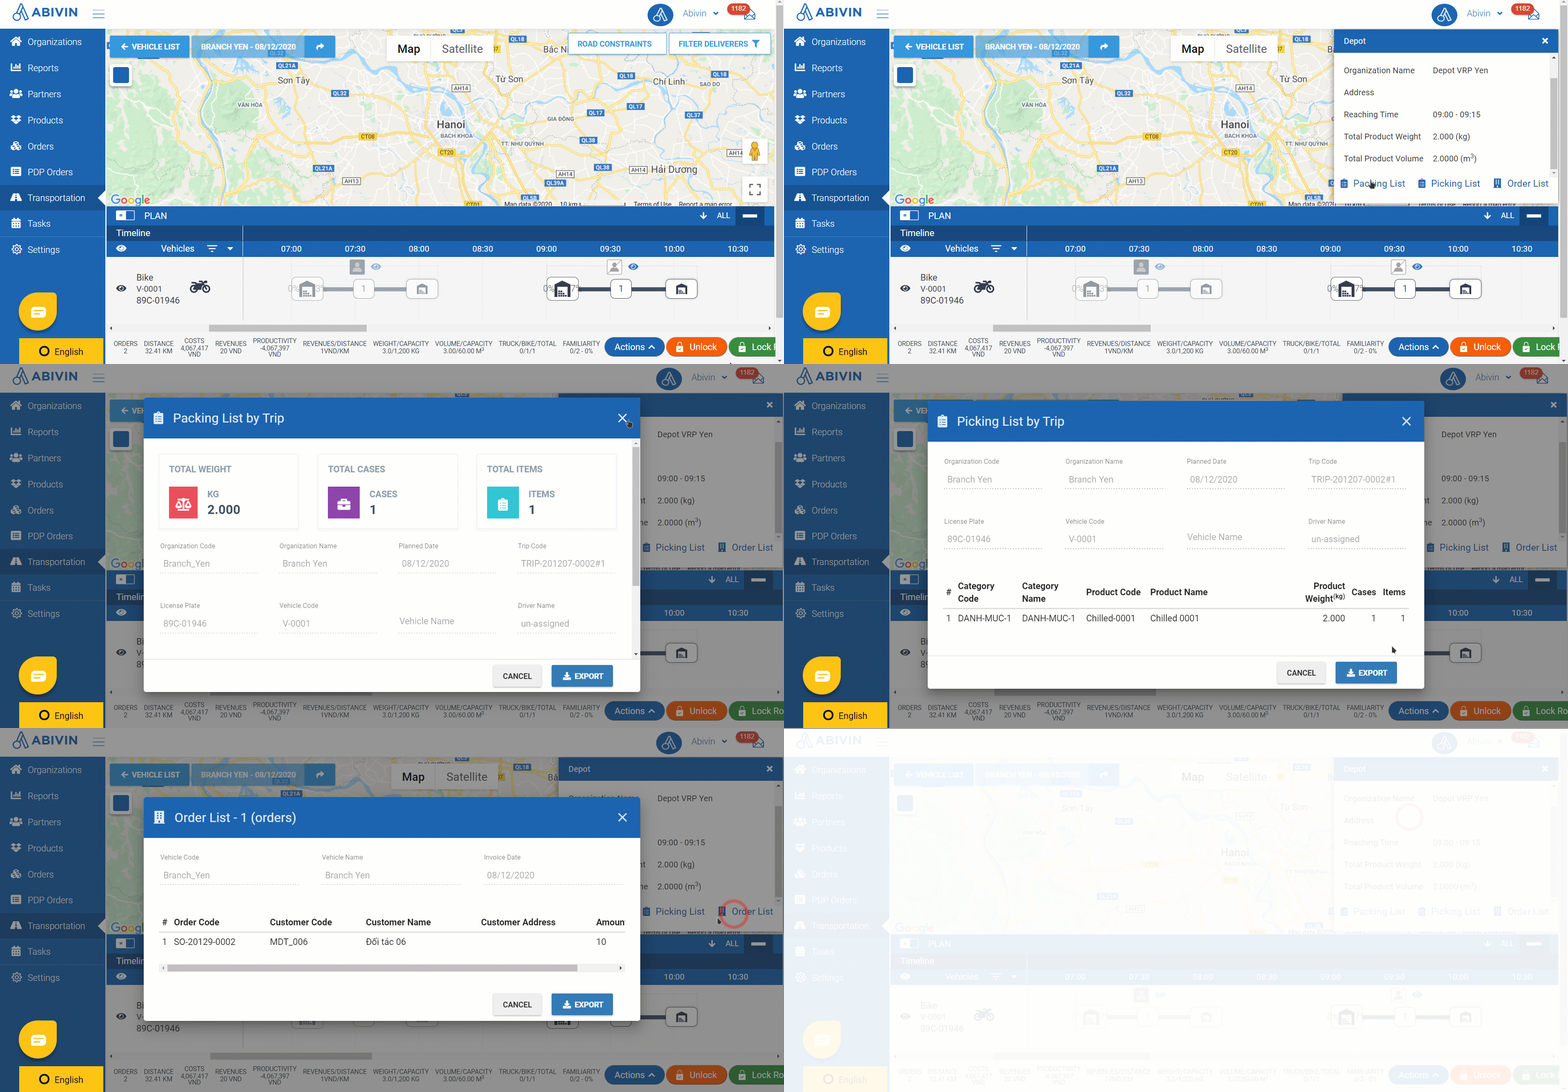
View And Export Route Plan Documents
(English)
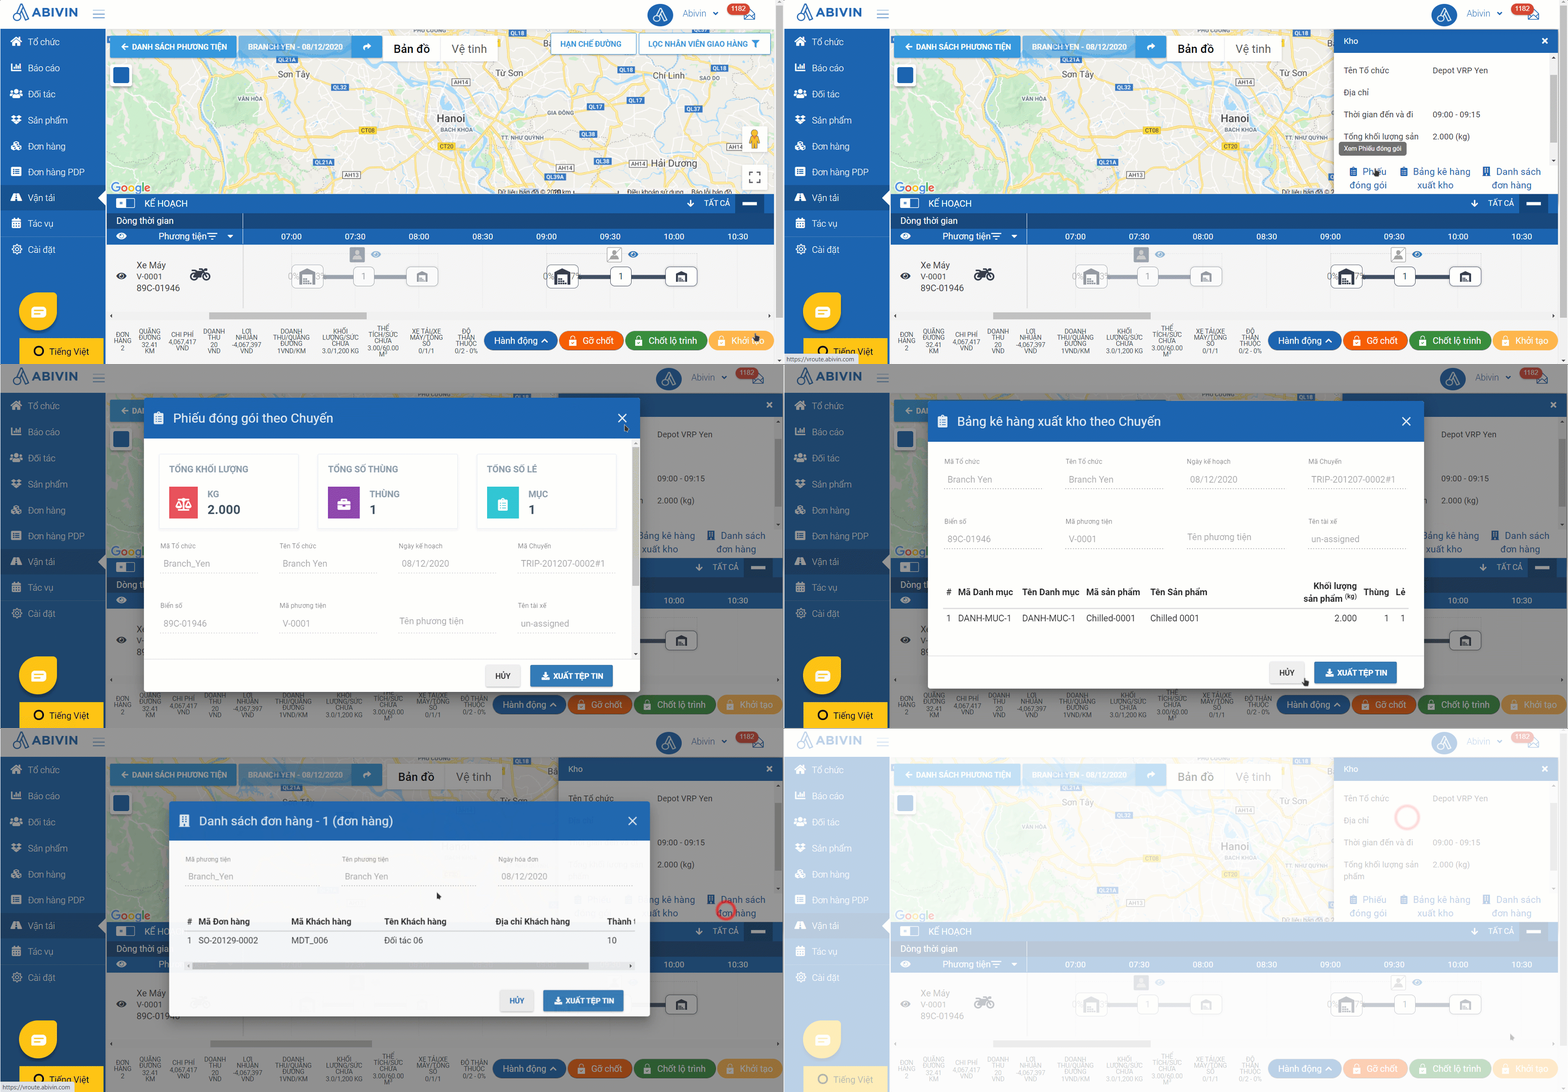
View And Export Route Plan Documents
(Vietnamese)
- You can also view the Packing List/Picking List of the whole Route Plan by clicking the caret down icon near the Vehicle text on the top left corner of the Timeline panel

Illustration Image (English)

Export Picking List/Packing List (Vietnamese)
- To view the Product List of a Customer, click the respective time block of that Customer on the Timeline panel
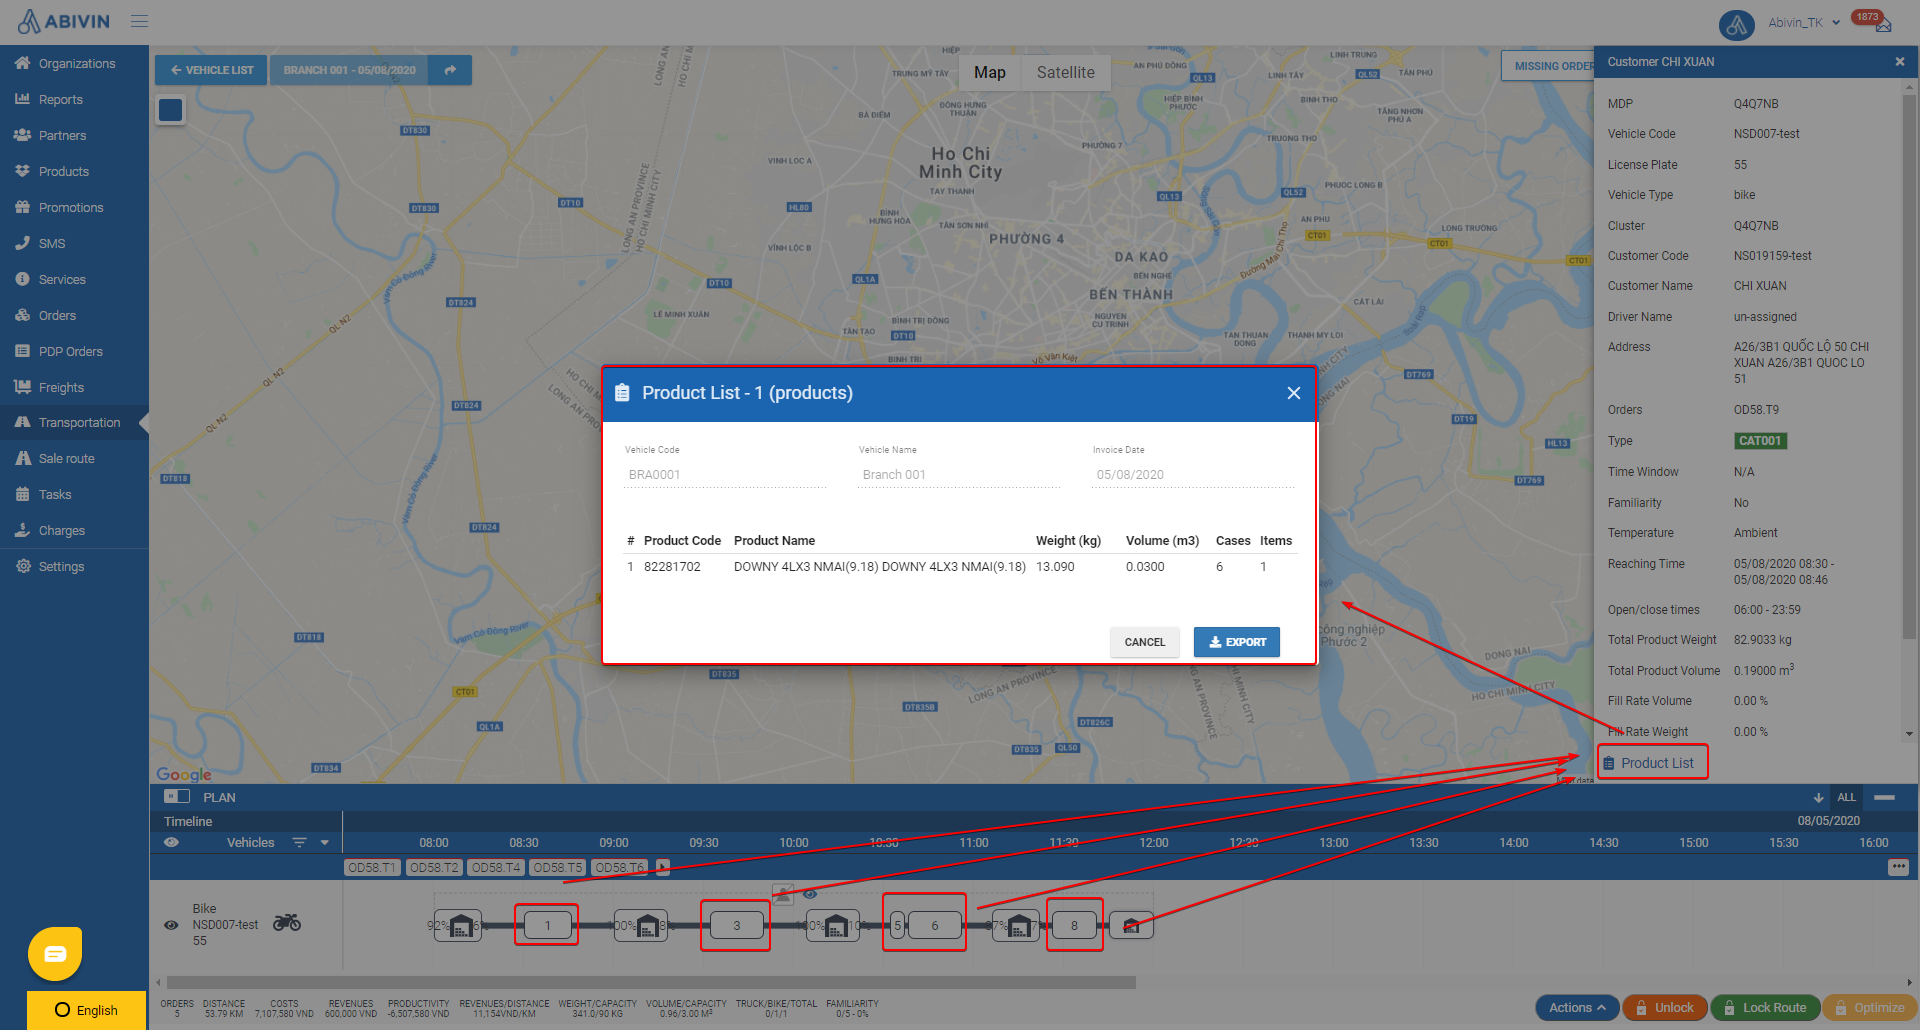
Illustration Image (English)
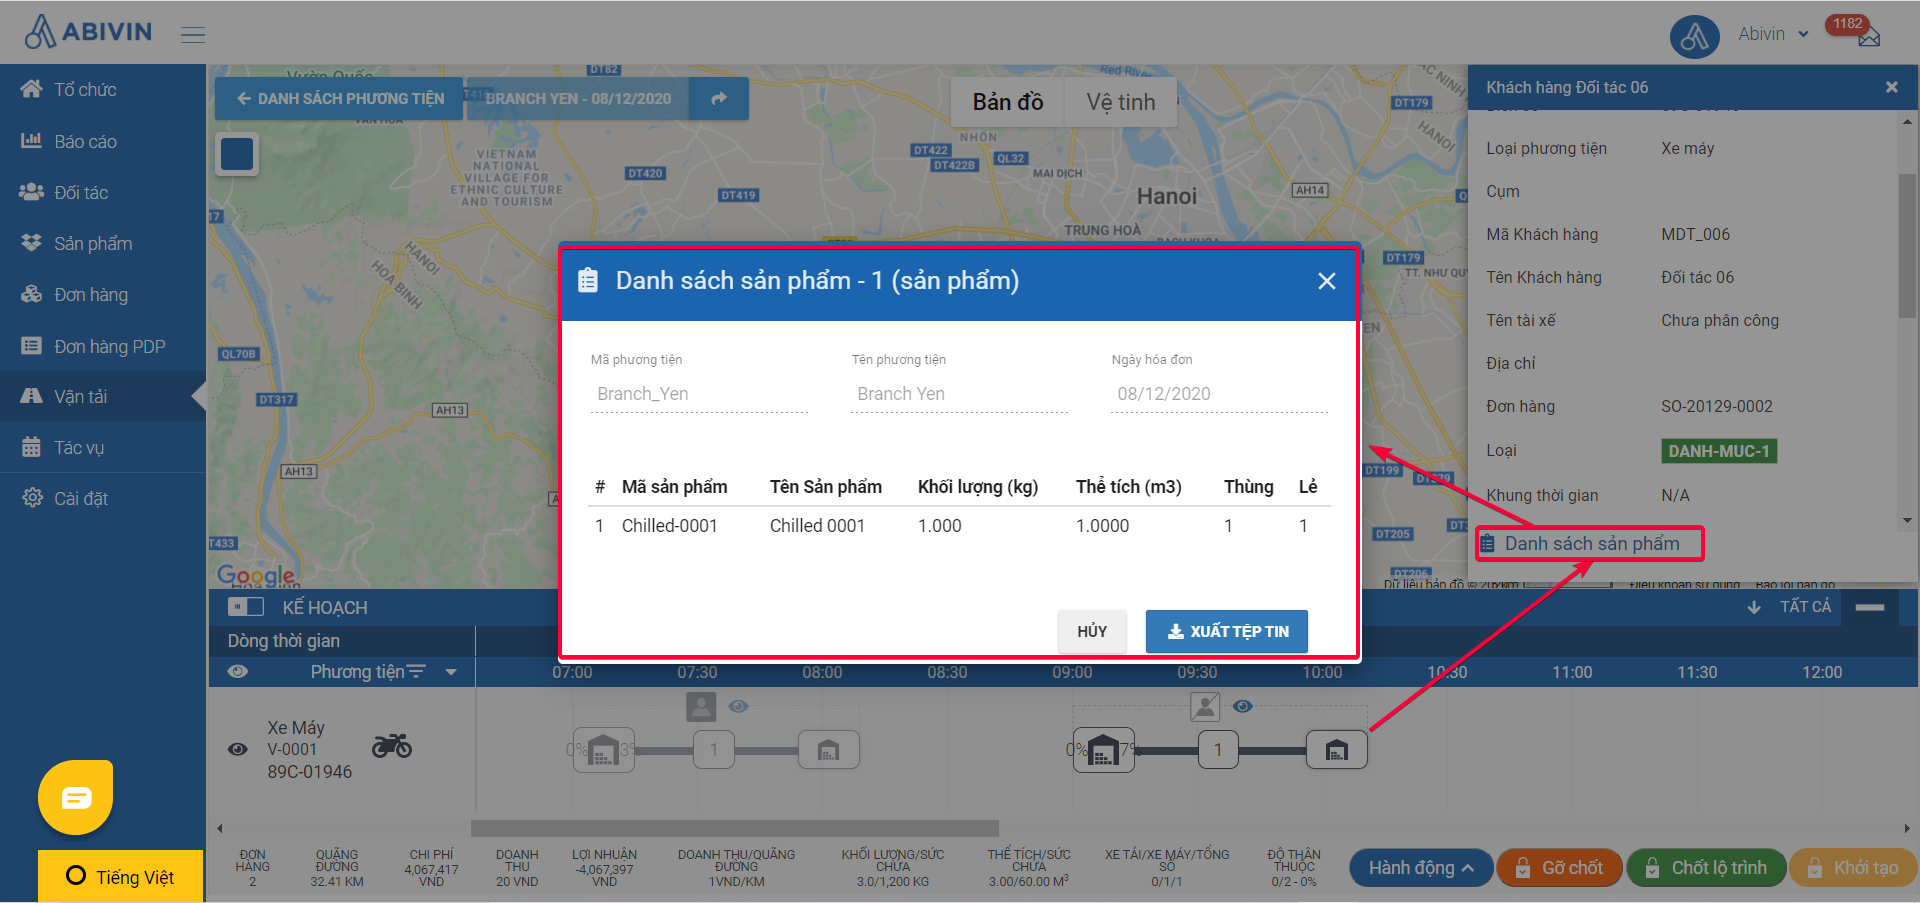
Product List (Vietnamese)
- You can export these lists to Excel templates to view offline by clicking on the button Export
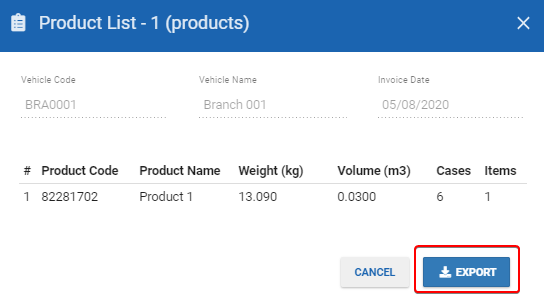
Illustration Image (English)
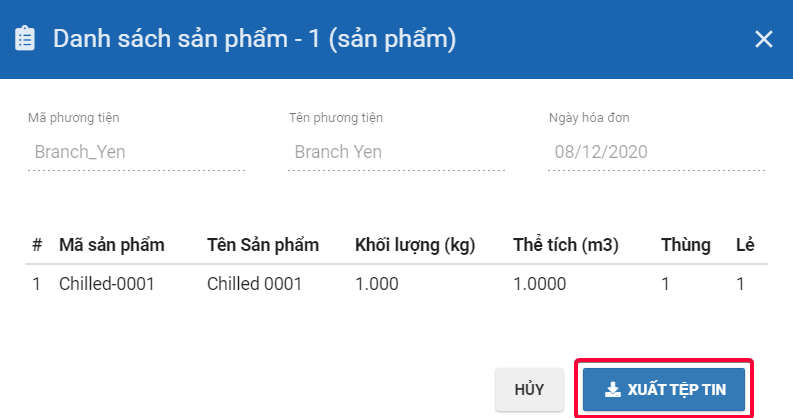
Export Product List (Vietnamese)
Split Delivery
- There can be situations in which: A customer places multiple Orders, or just one Order, but the total weight and/or volume of the products exceeds the weight and/or volume capacity of each of the active delivery vehicle in the Depot
- This will cause the Orders of that customers to not be optimizable during the Route Optimization process (Defined as Missing Orders)
Manually Split Orders
- If you see that a single Order has its weight and/or volume exceeding the weight and/or volume capacity of each of the active delivery vehicles in the Depot, you can manually split that Order into other smaller Orders that fit better for the delivery vehicles' capacity. Please refer to the following instruction to know the detailed steps: Manually split an Order into smaller Orders
- For example:
Automatically Split Orders
In order for this function to work, you need to enable the configuration Split Delivery at the Branch
- If an Order's weight and/or volume exceeds the weight and/or volume capacity of each of the active delivery vehicles in the Depot, then during the route optimization process, the system will try to automatically split that Order to several vehicles, according to the capacity of the vehicles. Vehicles with larger capacity will be selected first
- For example: The Order below, when initially created, is warned as Over-capacity. It weights at 6 kg, while the Depot only has two active vehicles, one has the weight capacity to be 4 kg, the other has the weight capacity to be 3 kg
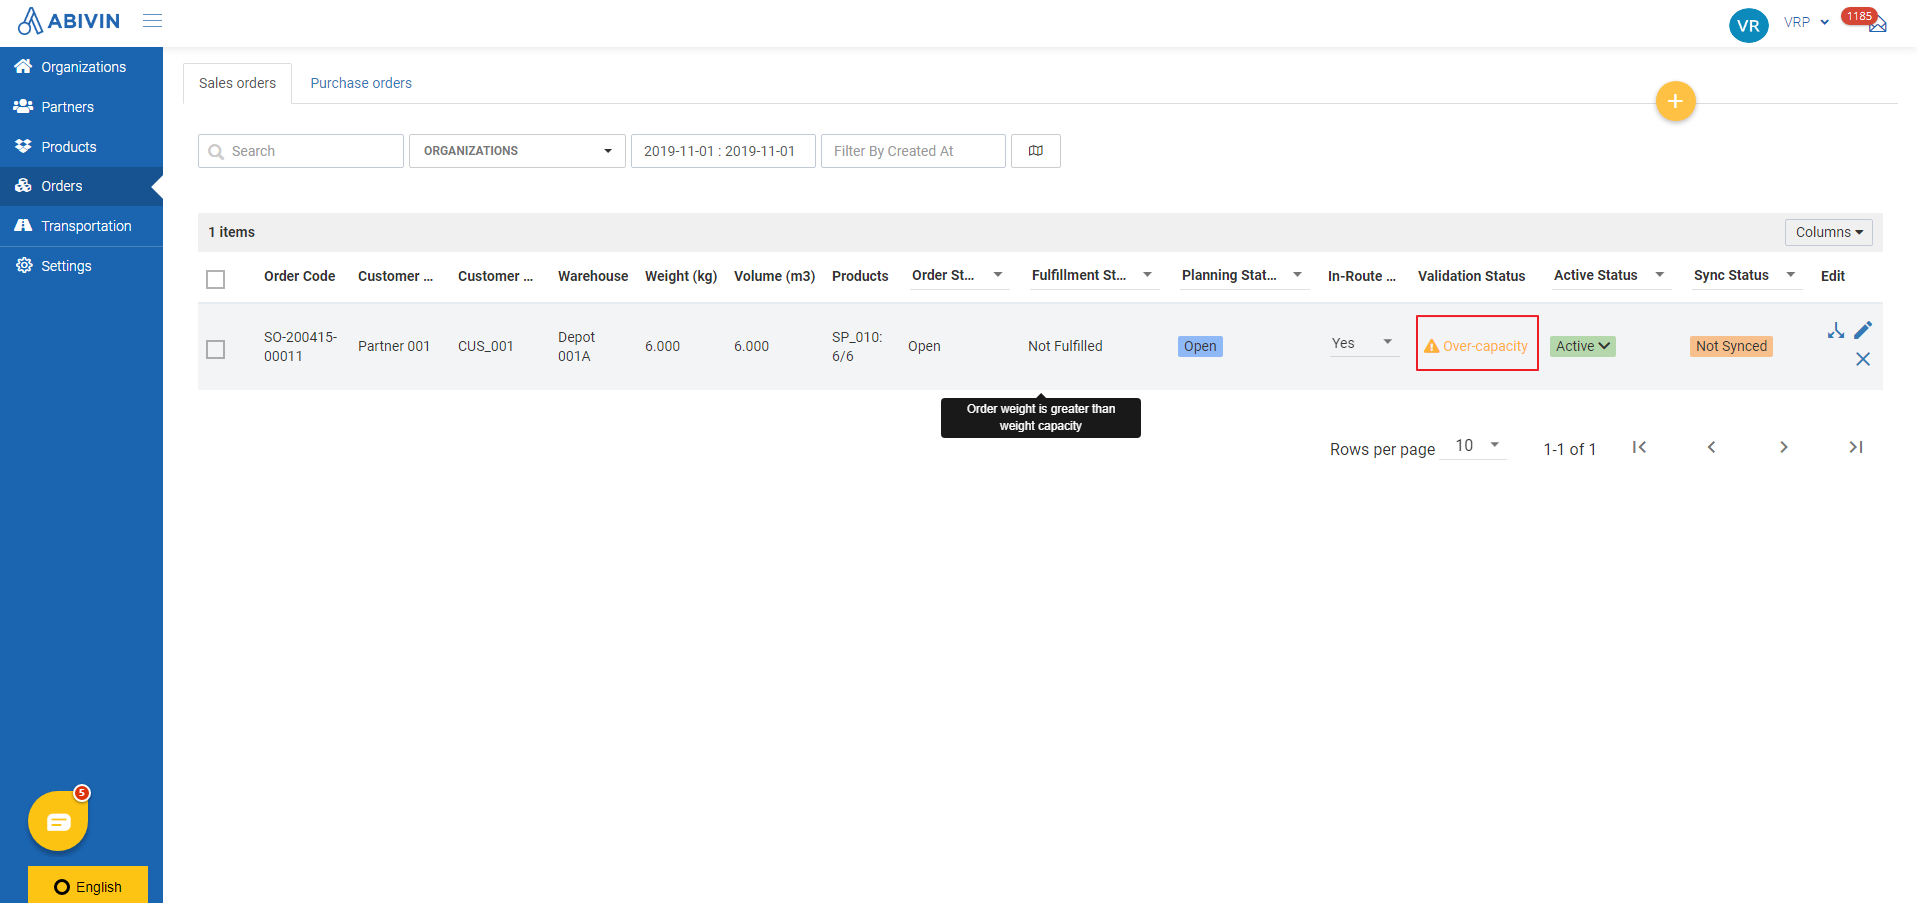
Illustration Image (English)
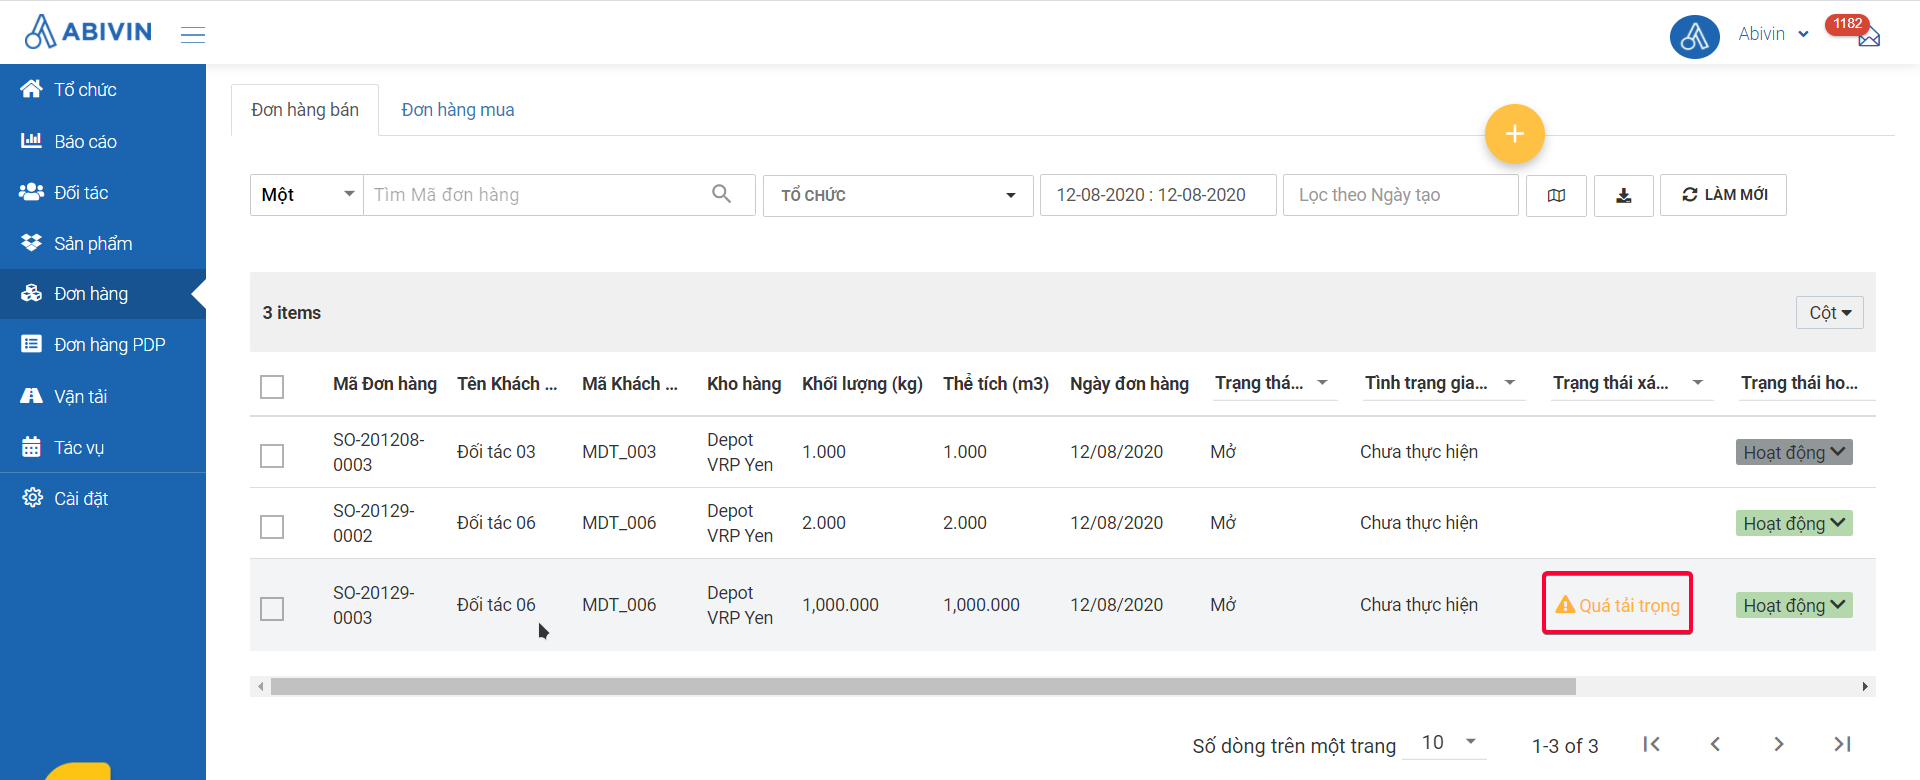
Overcapacity Orders
-
During the Route optimization process, the system will try to split that over capacity Order into smaller orders to fit the capacity of the above vehicles
-
In this example, the Original Order has been split into two smaller Split Orders
-
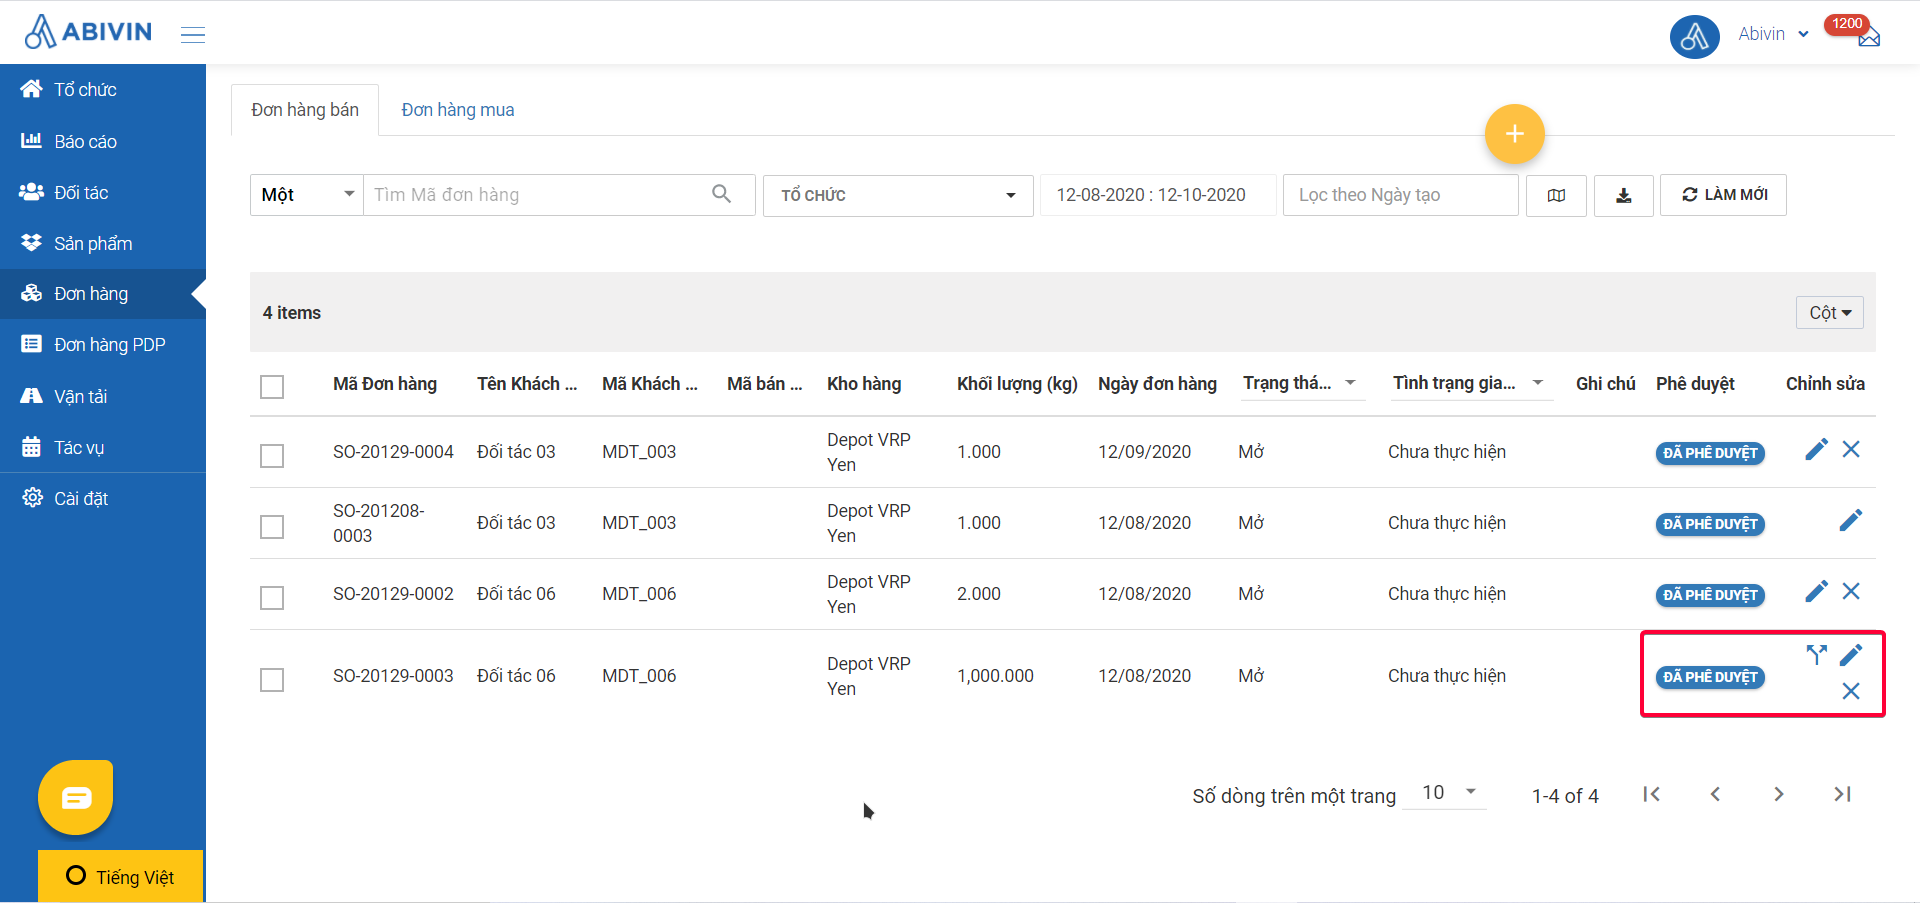
Notice that as you navigate to Orders > Sales Orders tab, you would see that beside the Original Order, the Split Orders will show up as well
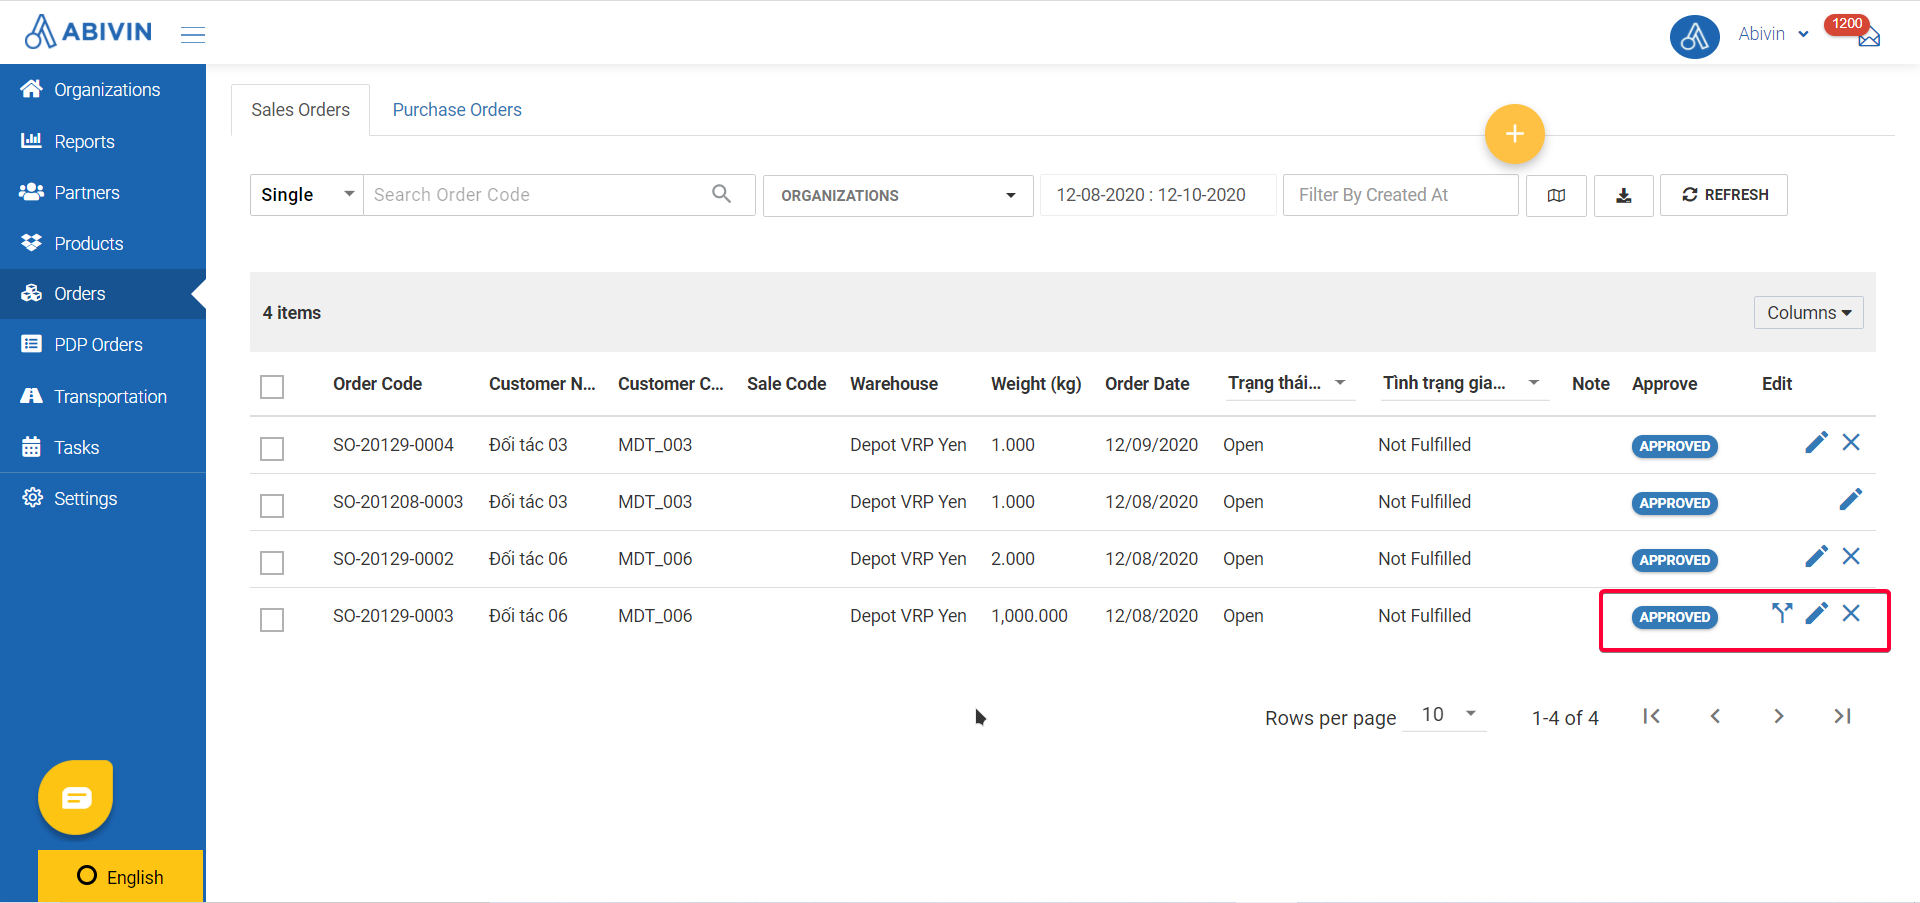
Split Order (English)
Split Order (Vietnamese)
- Important Note: If you want to edit the Original Order after it has been split during the Route Optimization process, you need to remove the optimized Delivery route. If the optimized Delivery route is still unlocked, you need to click on Unlock button one time to remove it. If the optimized Delivery route has been locked, you need to click on Unlock button two times to remove it
Beginner's Guide
Perform a Route Optimization
- Now that you have completed creating a sales order, the route plan optimization can be initiated after the following steps:
- Step 1: Navigate to Transportation > Vehicles tab.
- Step 2: Click on the Organization search bar, input the organization (in this case it is a depot/sun) then choose from the drop down menu.
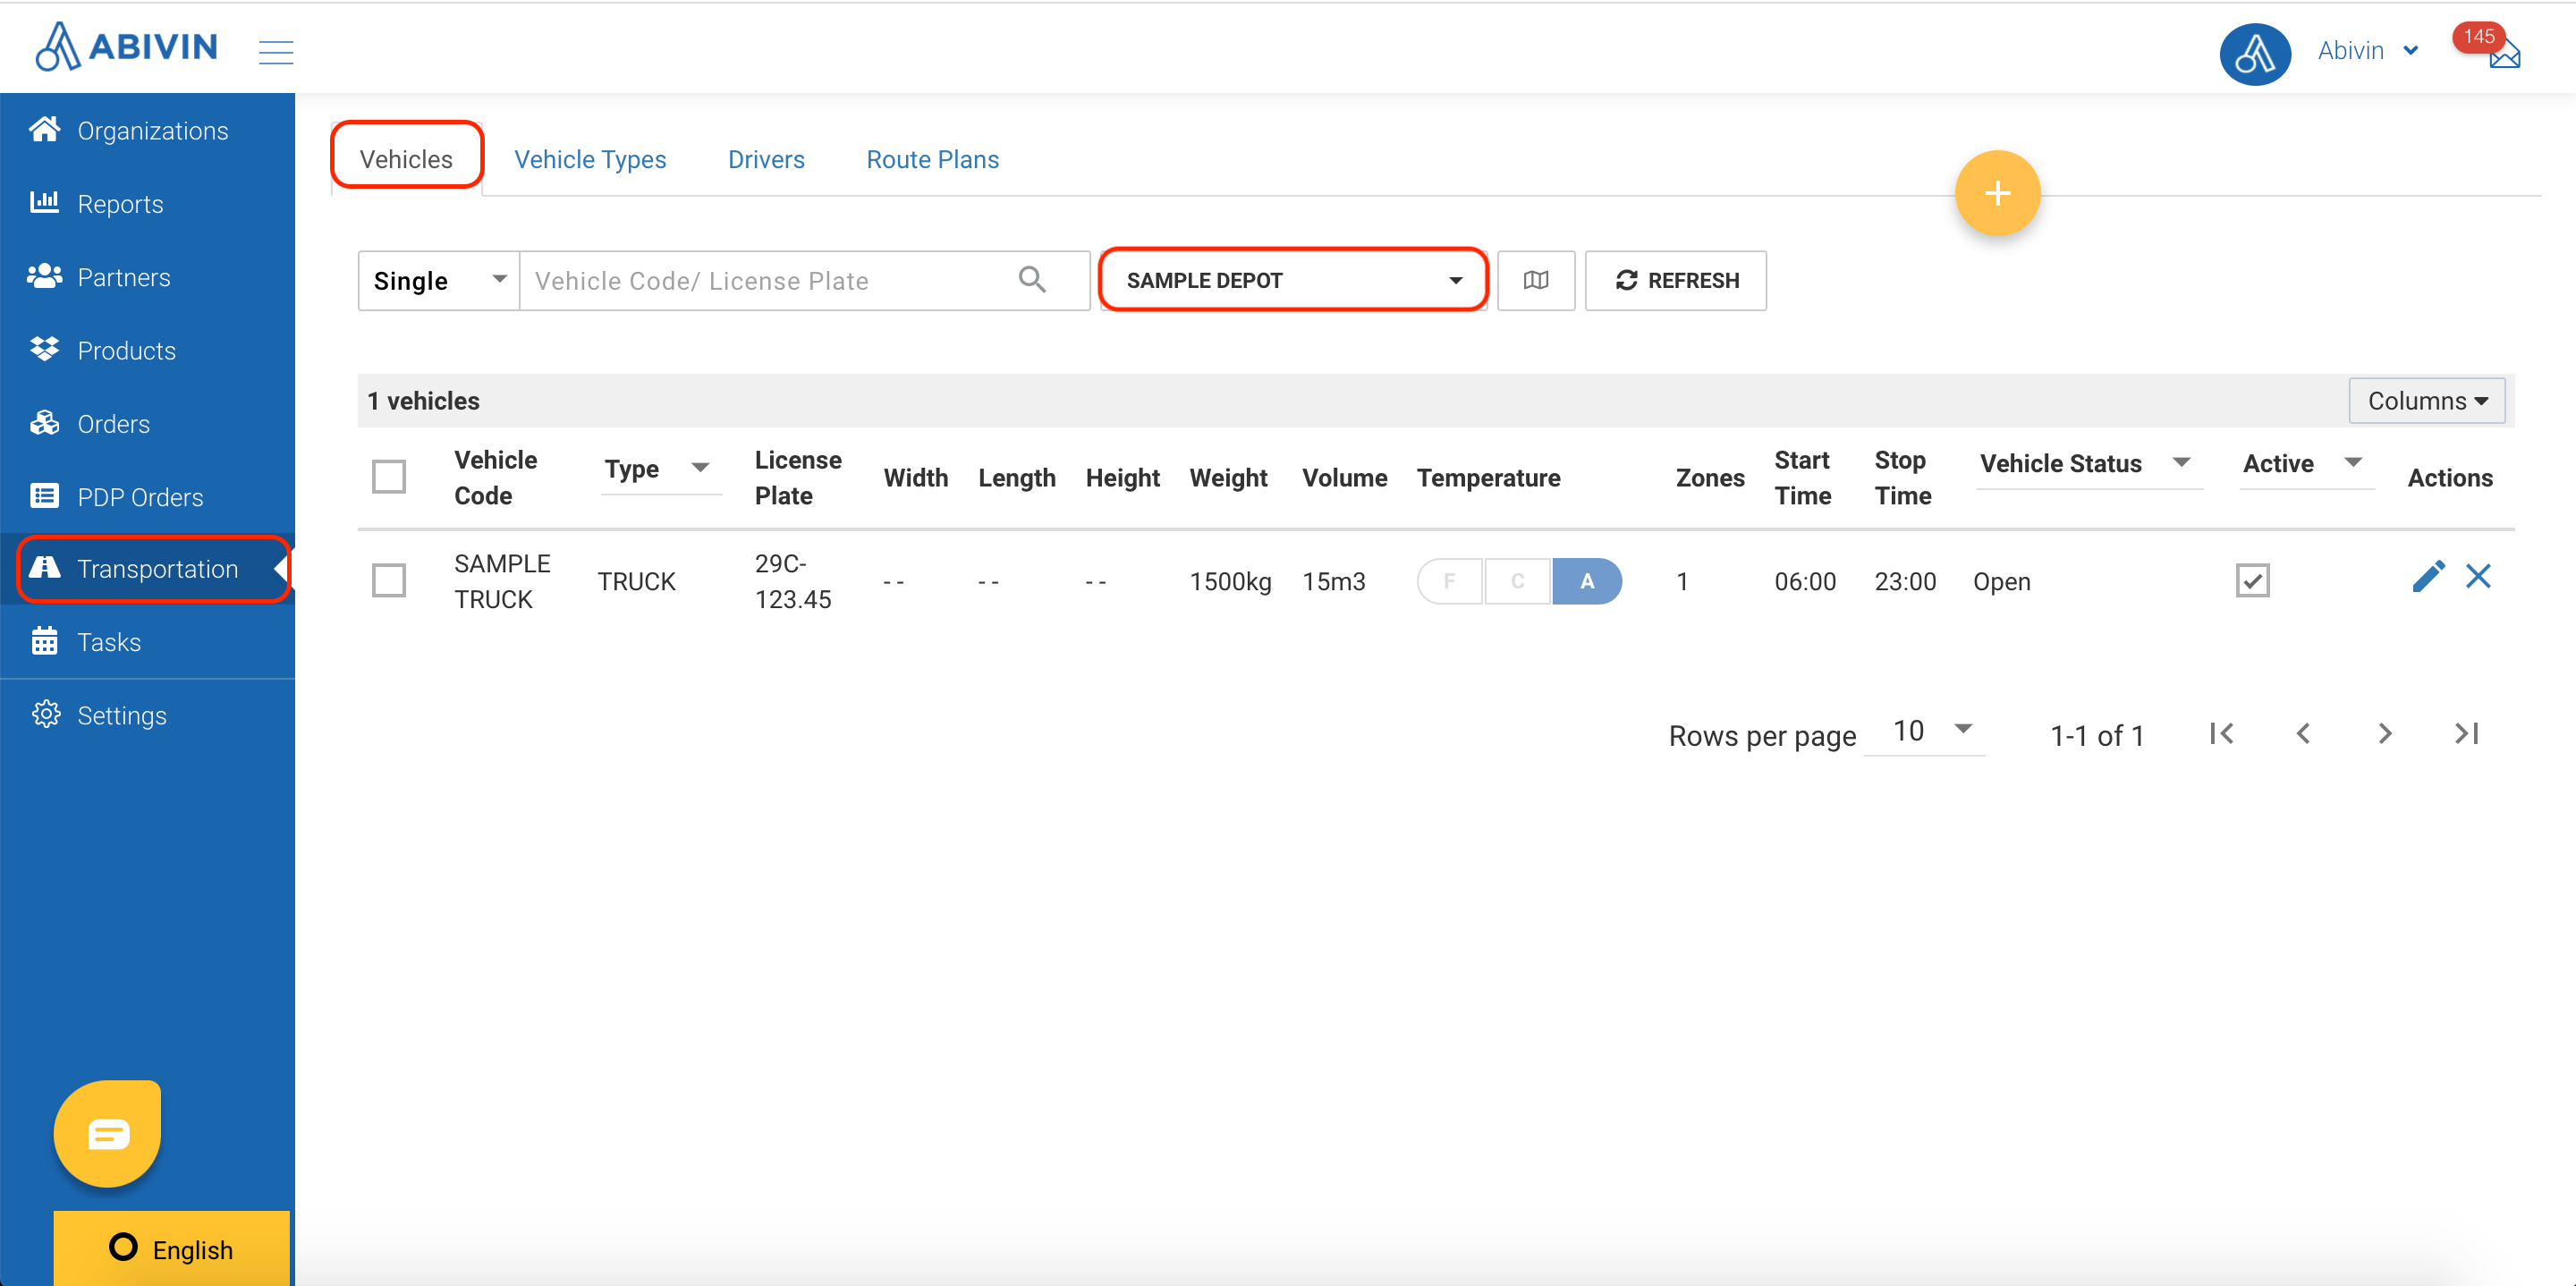
- Step 3: You will see your order has been planned. Click the View Map icon on the toolbar.
- Step 4: Now you shall be directed to the Map screen. This is where you select the branch and date to generate the optimized Delivery Routes.
- Branch: Input the appropriate Branch and choose from the drop down list.
- Date: Click on the icon, then choose the date equal to the Order Date attribute of the Sales Order.
- Next, click SELECT.
- Step 5: A table will pop up with information of the Branch and Date you have previously chosen. Click OPTIMIZE.
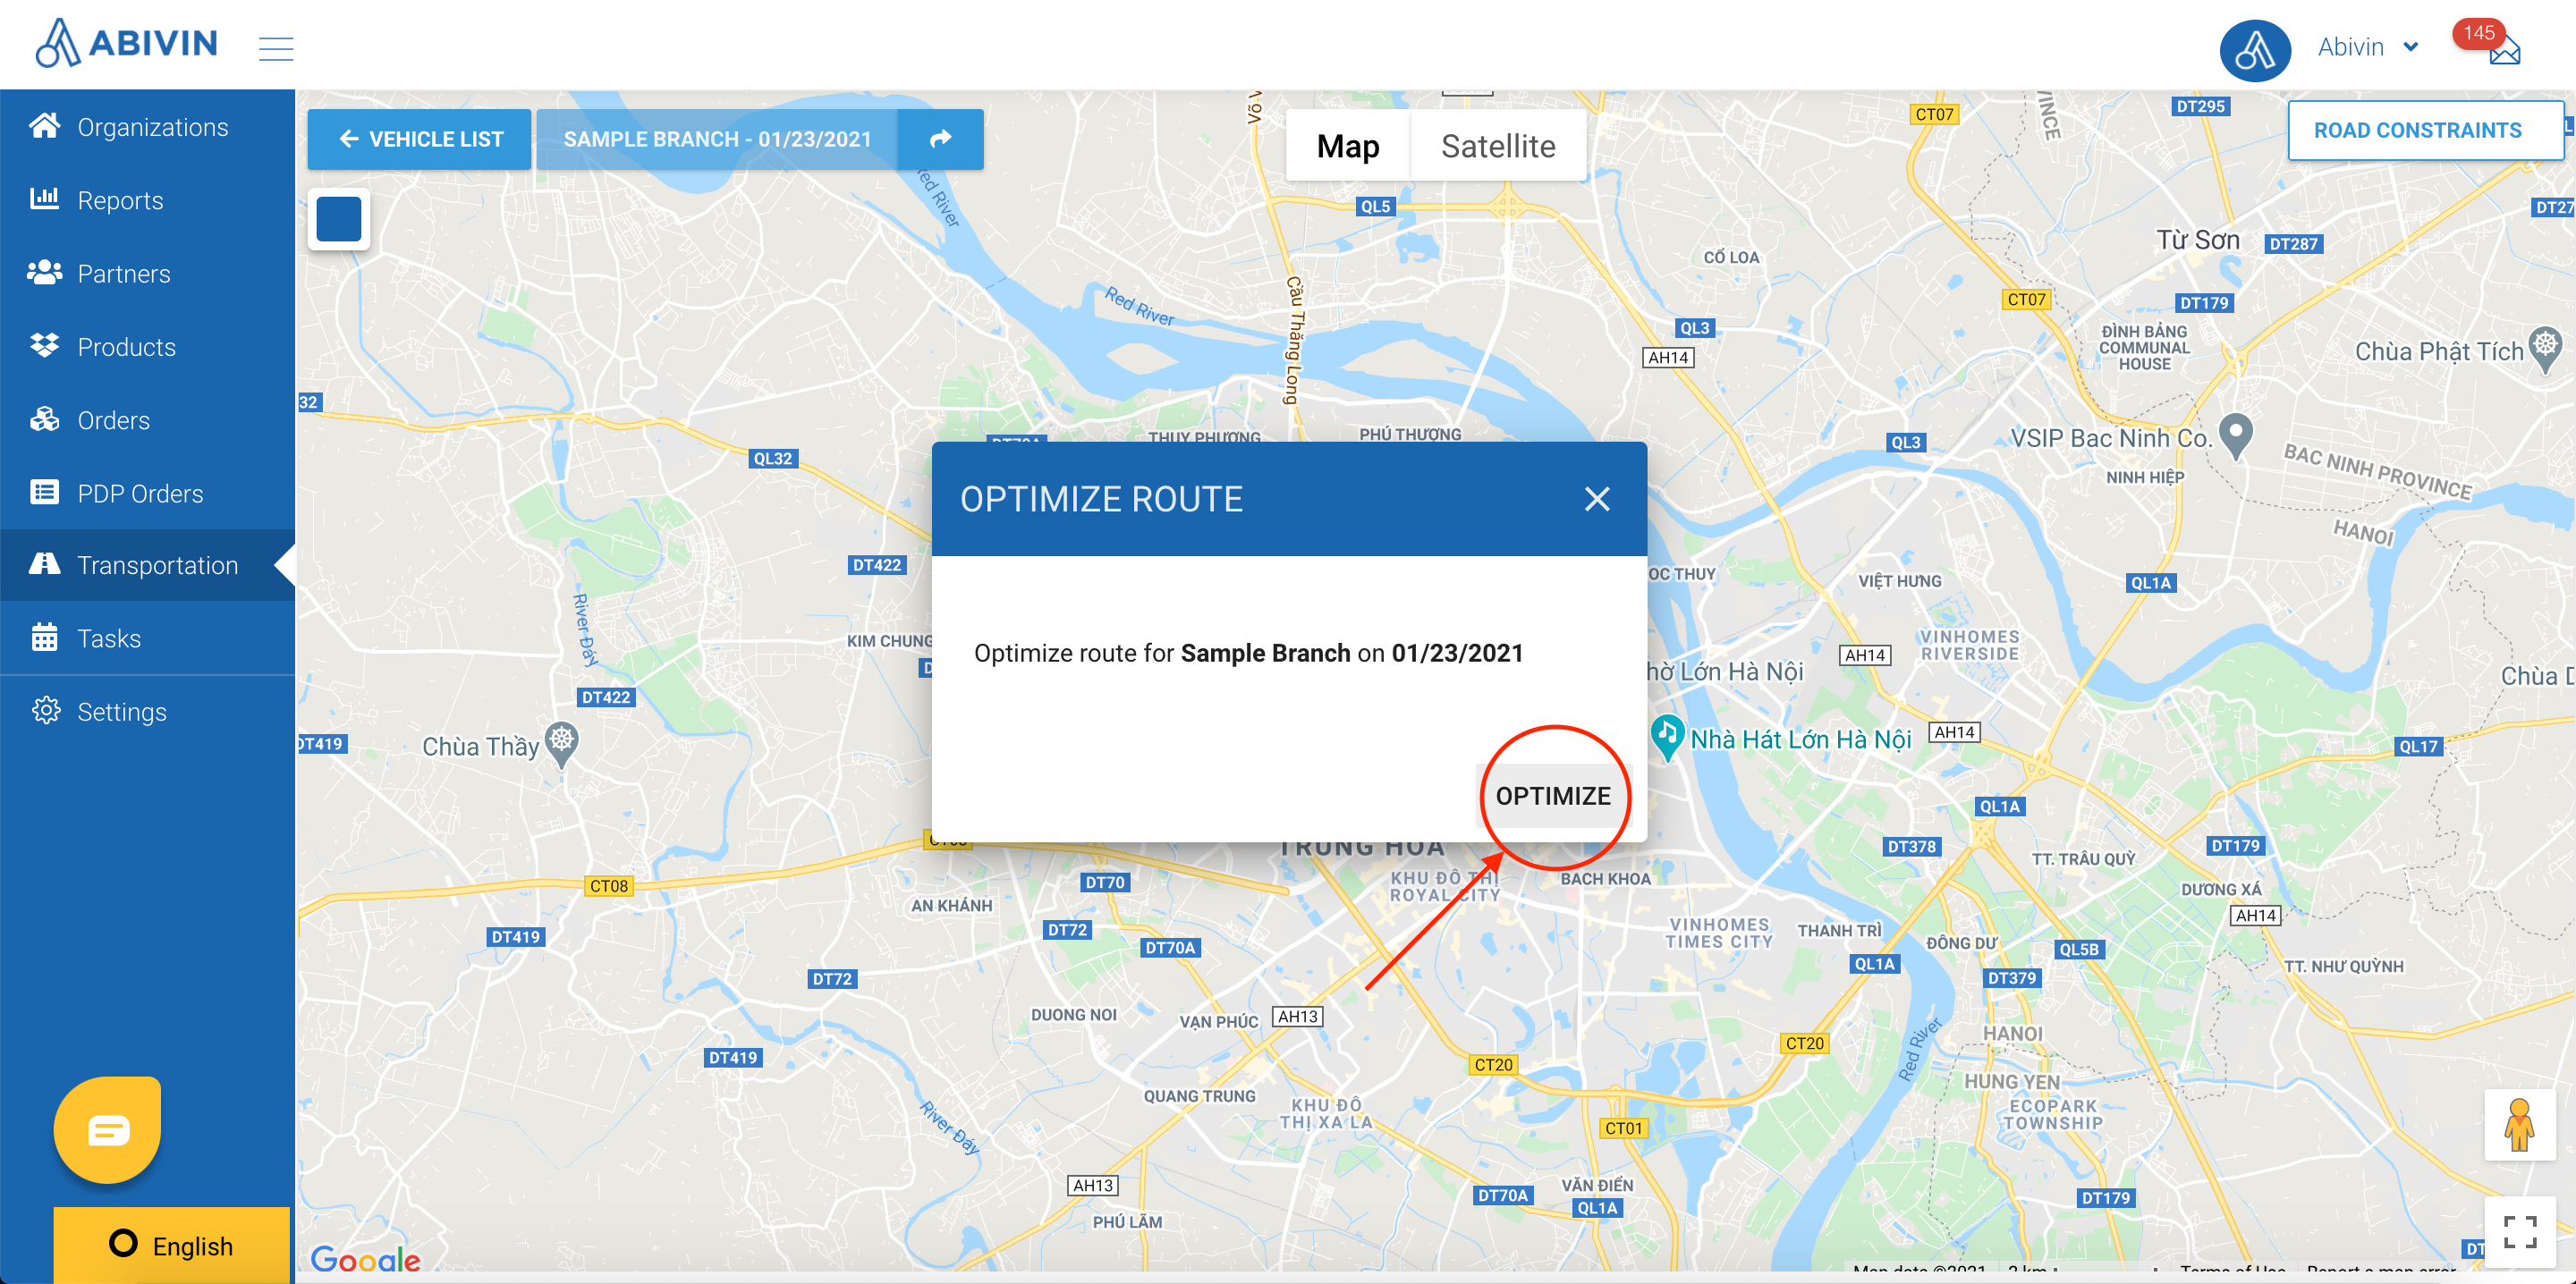
- Now you shall see the route plan optimized on the Map screen as follows (you can click the icon at the bottom left corner of the screen to highlight the route):
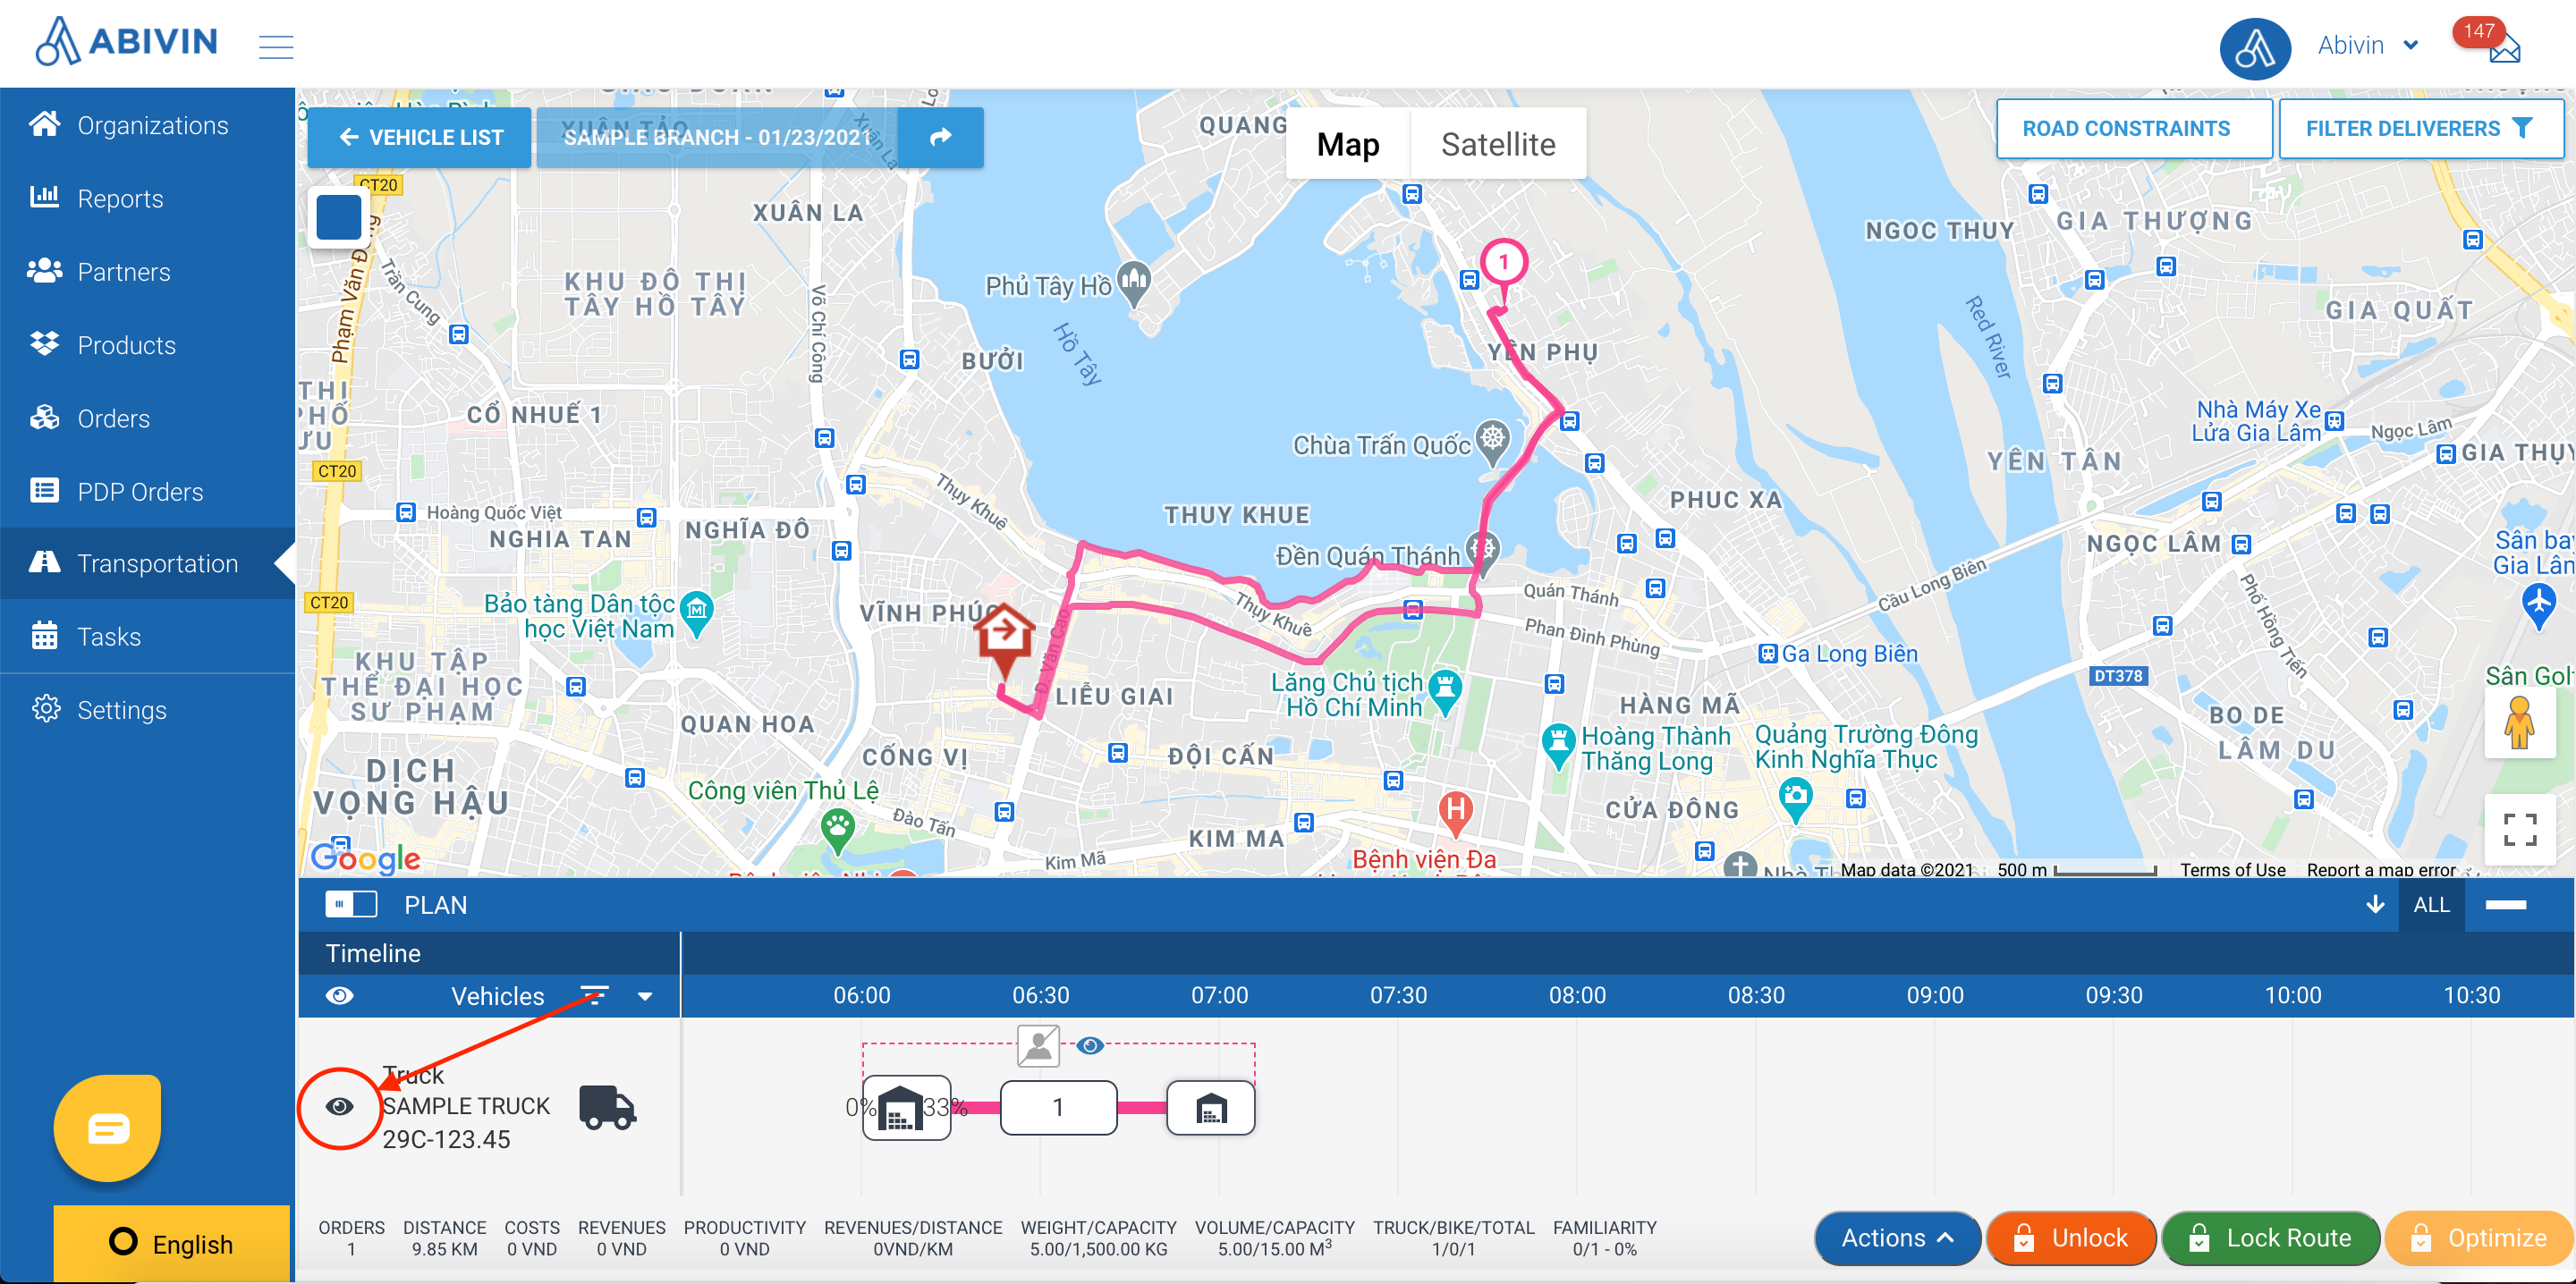
- There you have it! You have been guided through the simple steps to performing a route plan optimization using Abivin Vroute. Hope you will succeed!
Updated 29 days ago
