Driver (Deliverer)
- This article will guide you - the driver - on how to perform your delivery tasks on the Mobile app
- Firstly, you are recommended to read the Delivery App - General Instruction article to become familiar with the general functions of the Mobile app
Sign In To Your Mobile App
- When you first sign in to the Mobile app, you will be greeted with a screen that shows the Vehicle Code of the Vehicle that you are assigned to operate. Tap Let's Go on that screen to kickstart your day!
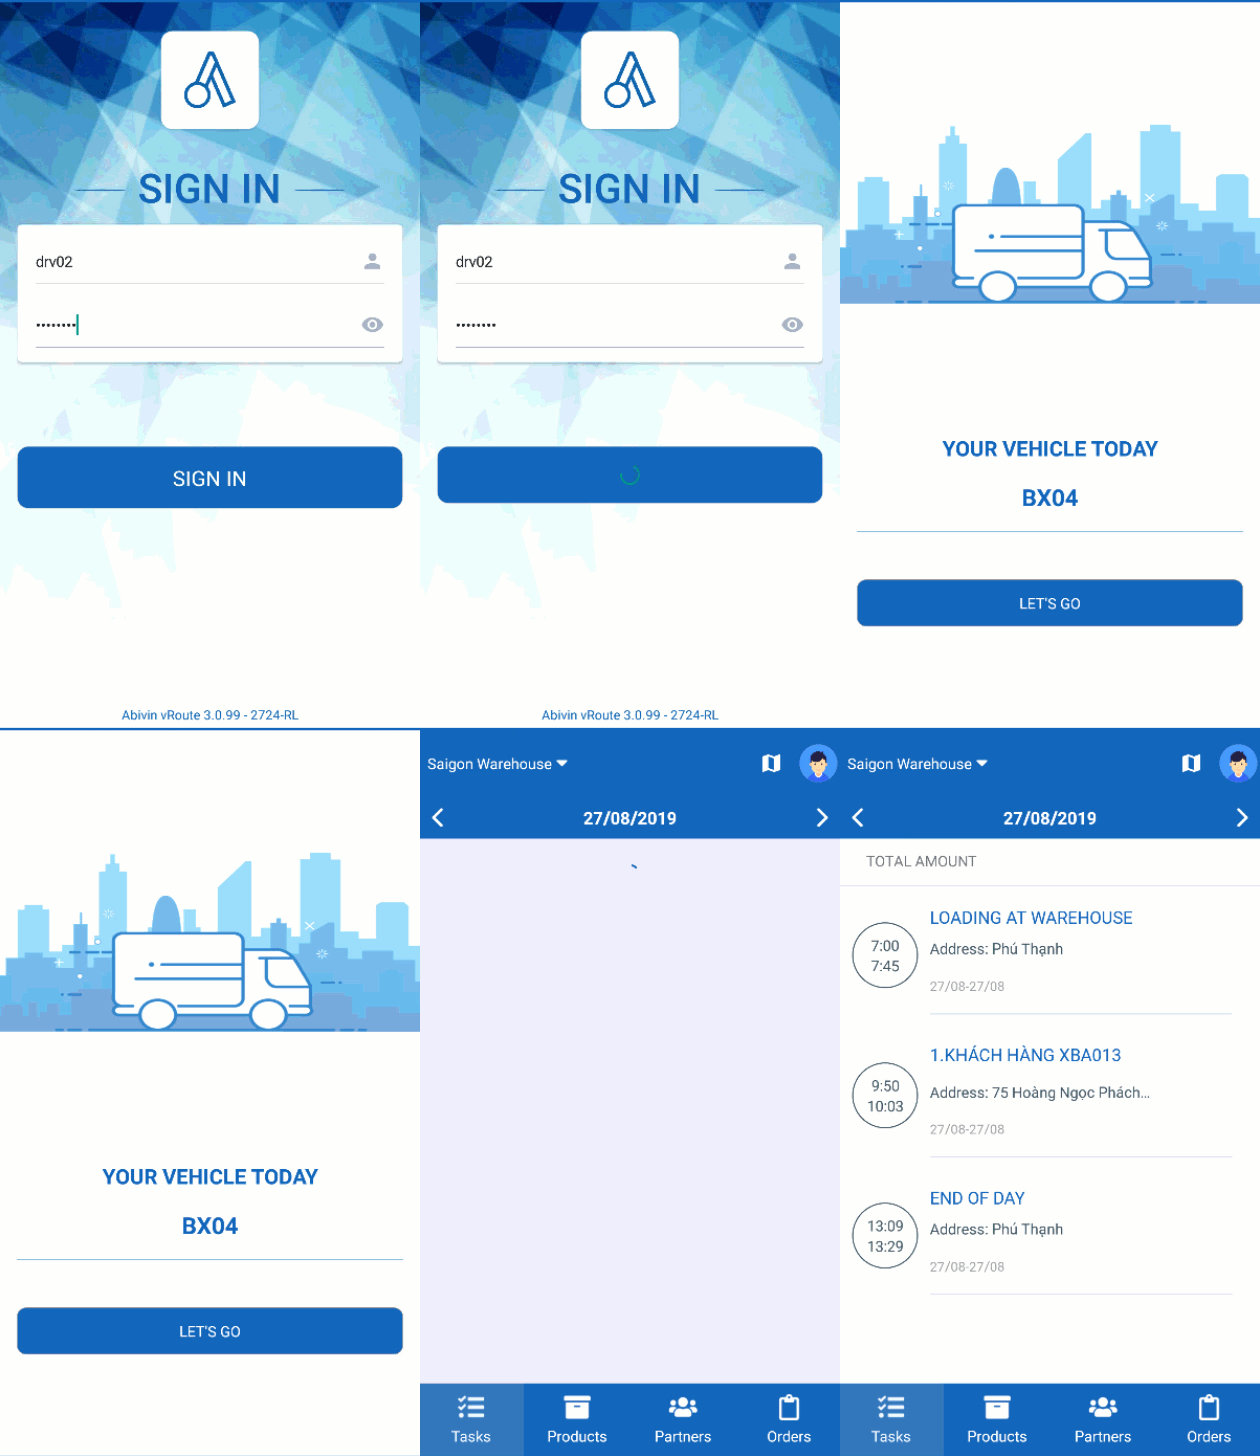
Illustration (English)
Mobile App Interface
- After signing in, you will see the main screen of the Mobile app. Typically, there will be four tabs: Tasks, Products, Partners; Orders (There might be fewer tabs depending on how your account is set up)
- The Tasks tab is the default tab that you will see. This tab shows the list of all delivery tasks that you will need to perform. You will spend most of your time on this tab
- The Products tab shows the Products inside your Depot/Warehouse
- The Partners tab shows the Customers of your Depot/Warehouse
- The Orders tab shows the list of Orders that you will need to deliver
- Note: The number of tabs might vary according to how your account is set up
Delivery Task Overview
- Similar to your actual delivery activities, on the Mobile app, there will be three main tasks for each Delivery Trip:
- 1 - Product Loading: You will load Products of the Order onto your Vehicle at the start of your Delivery Trip
- 2 - Product Delivery: You will travel to the Customers' receiving locations, hand over the Products, and receive payment
- 3 - End Delivery Trip: You will travel back to the Depot after completing all the delivery tasks of the Delivery Trip. Upon your arrival back to the Depot, you will hand over the received payment and the returned Products, if any, to the Depot manager. After that, you can end your Delivery Trip
- Apart from the main delivery tasks, you might also be allowed to create the Extra Tasks. The Extra tasks enable you to record unexpected activities during your delivery process, such as flat tires, out of gas, traffic jam, etc.
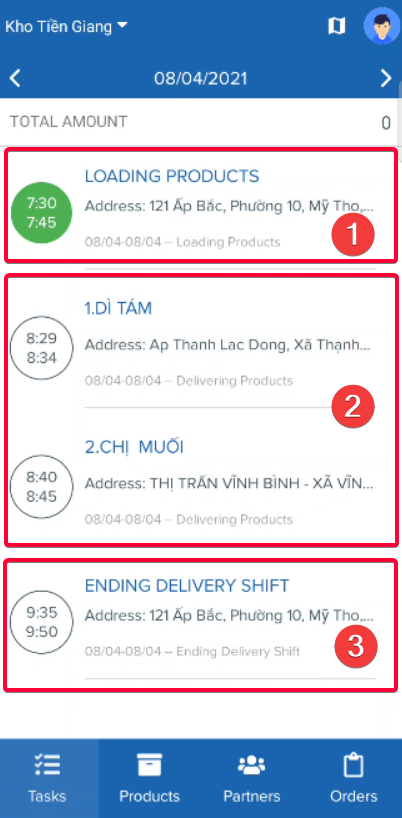
Illustration (English)
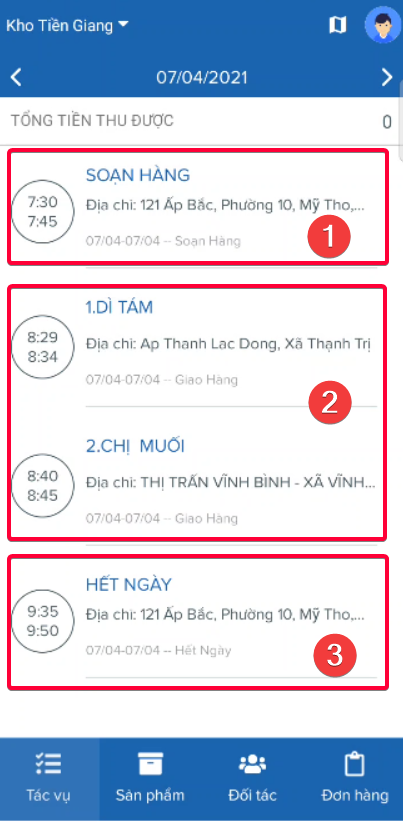
Illustration (Vietnamese)
- To view the tasks on different dates, tap on the left and right chevron icons and . You can also tap directly on the date and choose the appropriate date from the pop-up calendar
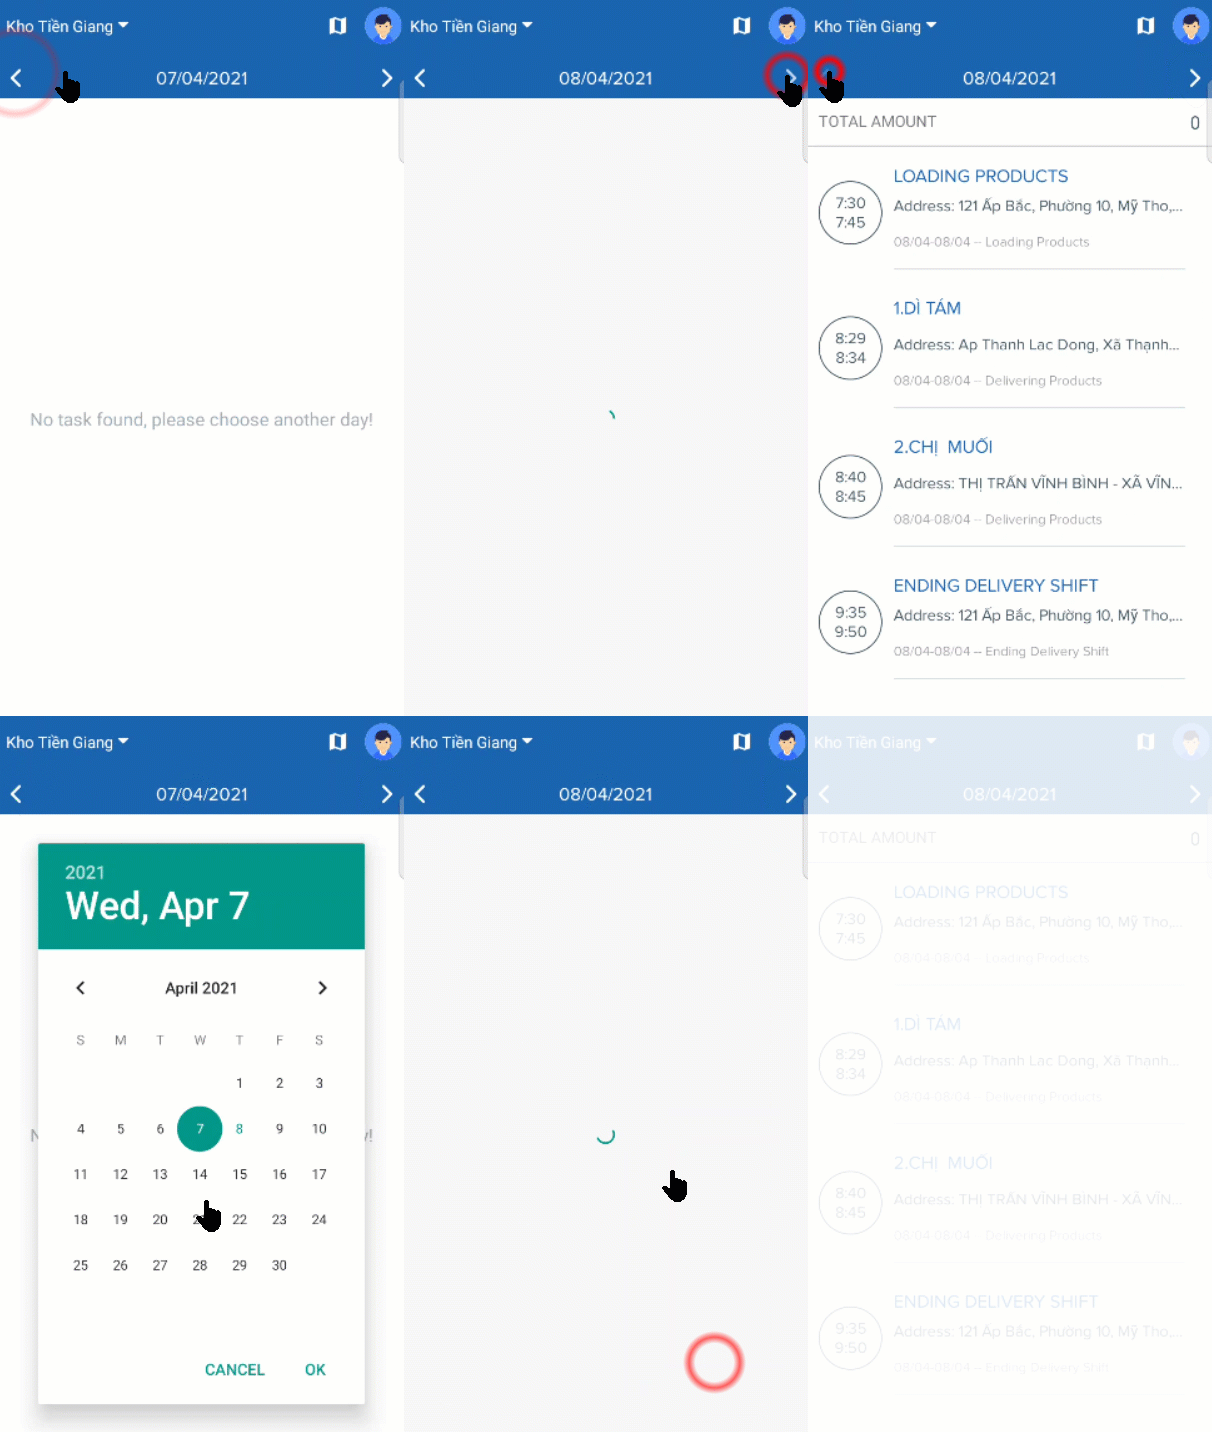
Illustration (English)
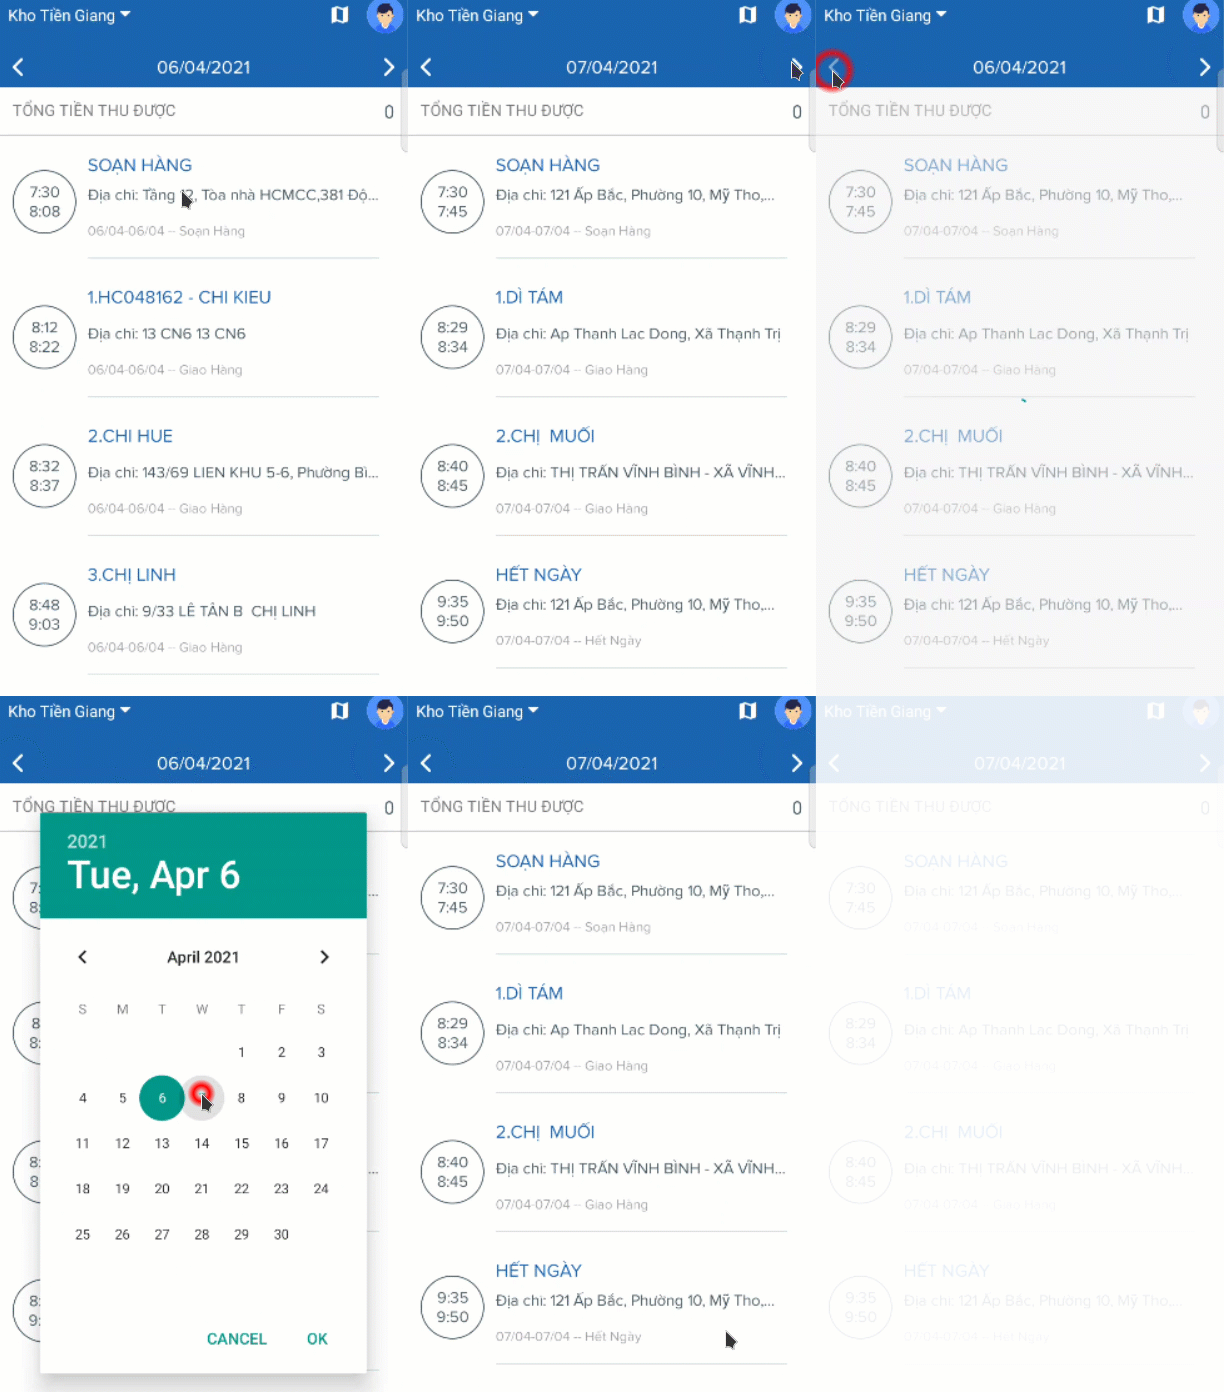
Illustration (Vietnamese)
- To view the Delivery Stops on your assigned Delivery Shift, tap the Map icon located to the left of the User account icon . Upon tapping, you will be navigated to the Map screen
- Within the Map screen, you can zoom in or out. To zoom in, touch two of your fingers on the screen then spread them apart. To zoom out, do the opposite gesture
- To move around the map, touch one finger on the screen then move your finger around
- You can tap on the numerical map marker icons to view the address information of the Delivery Stops
- To go back to the task list, tap the Task list icon located at the same location as the Map icon
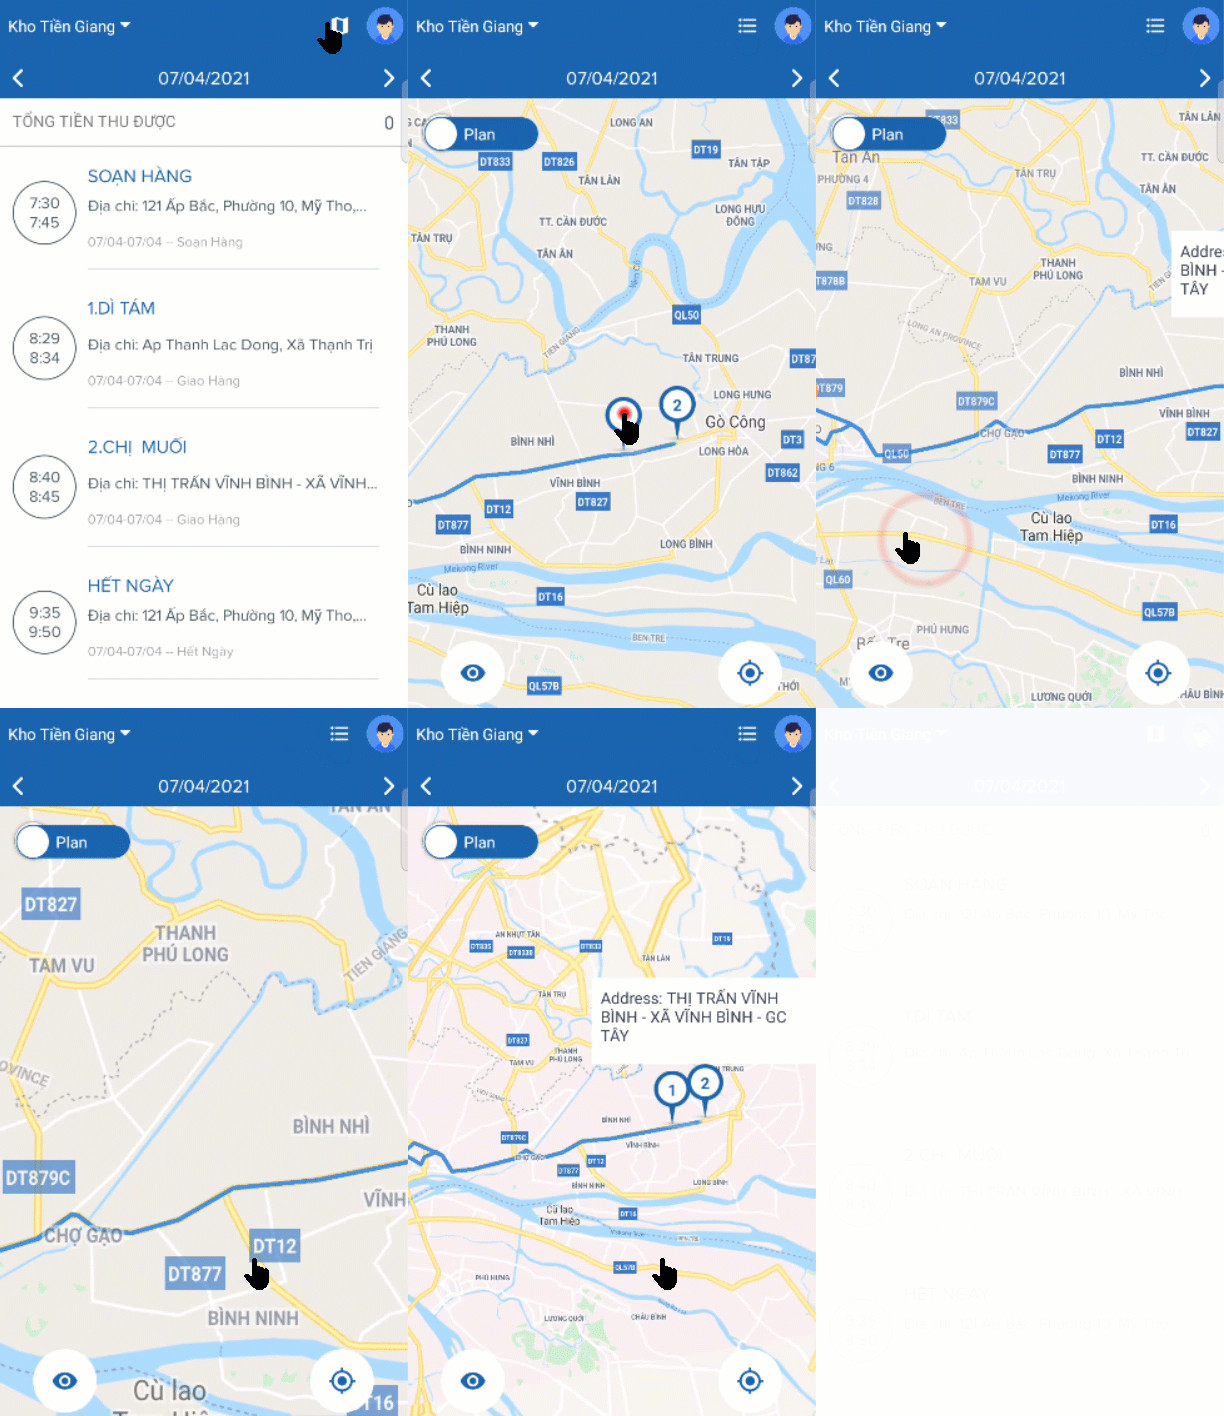
Illustration
- On the task list, to view the detail of a task, tap on that task name
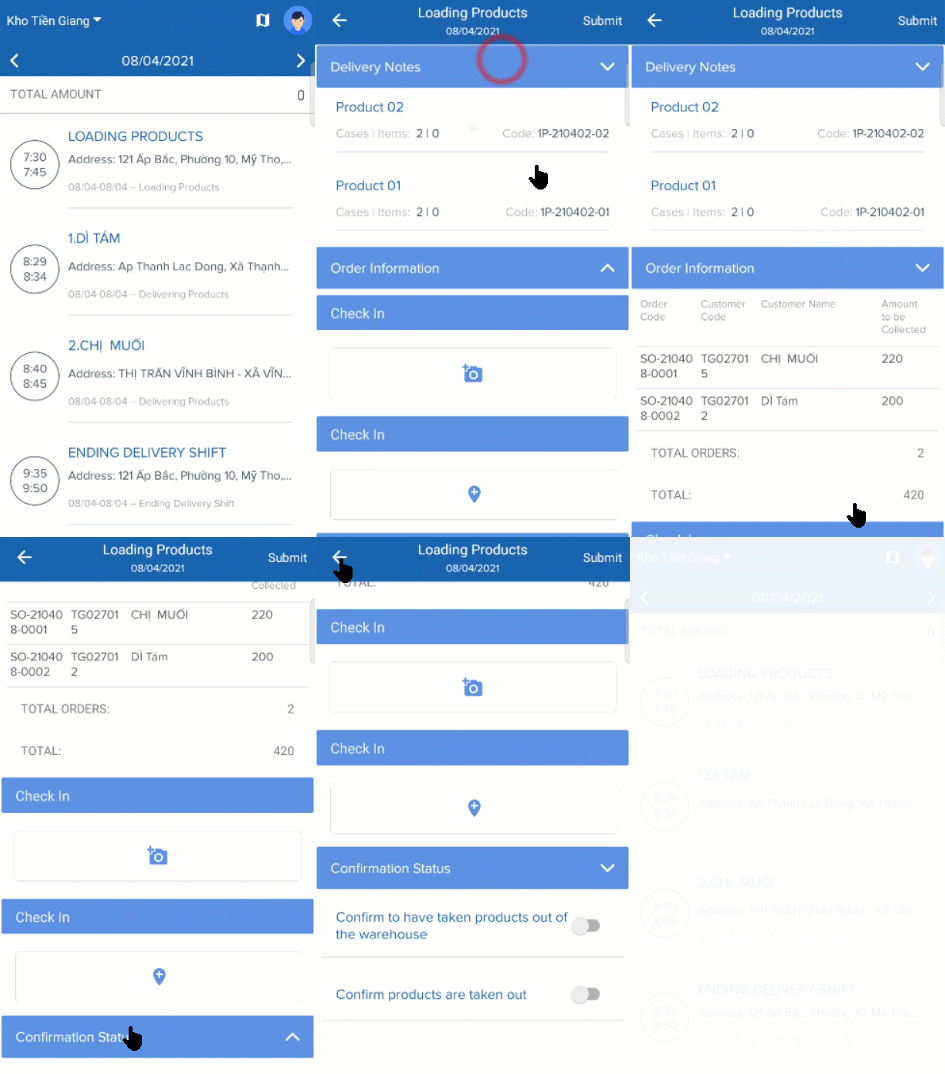
Illustration (English)
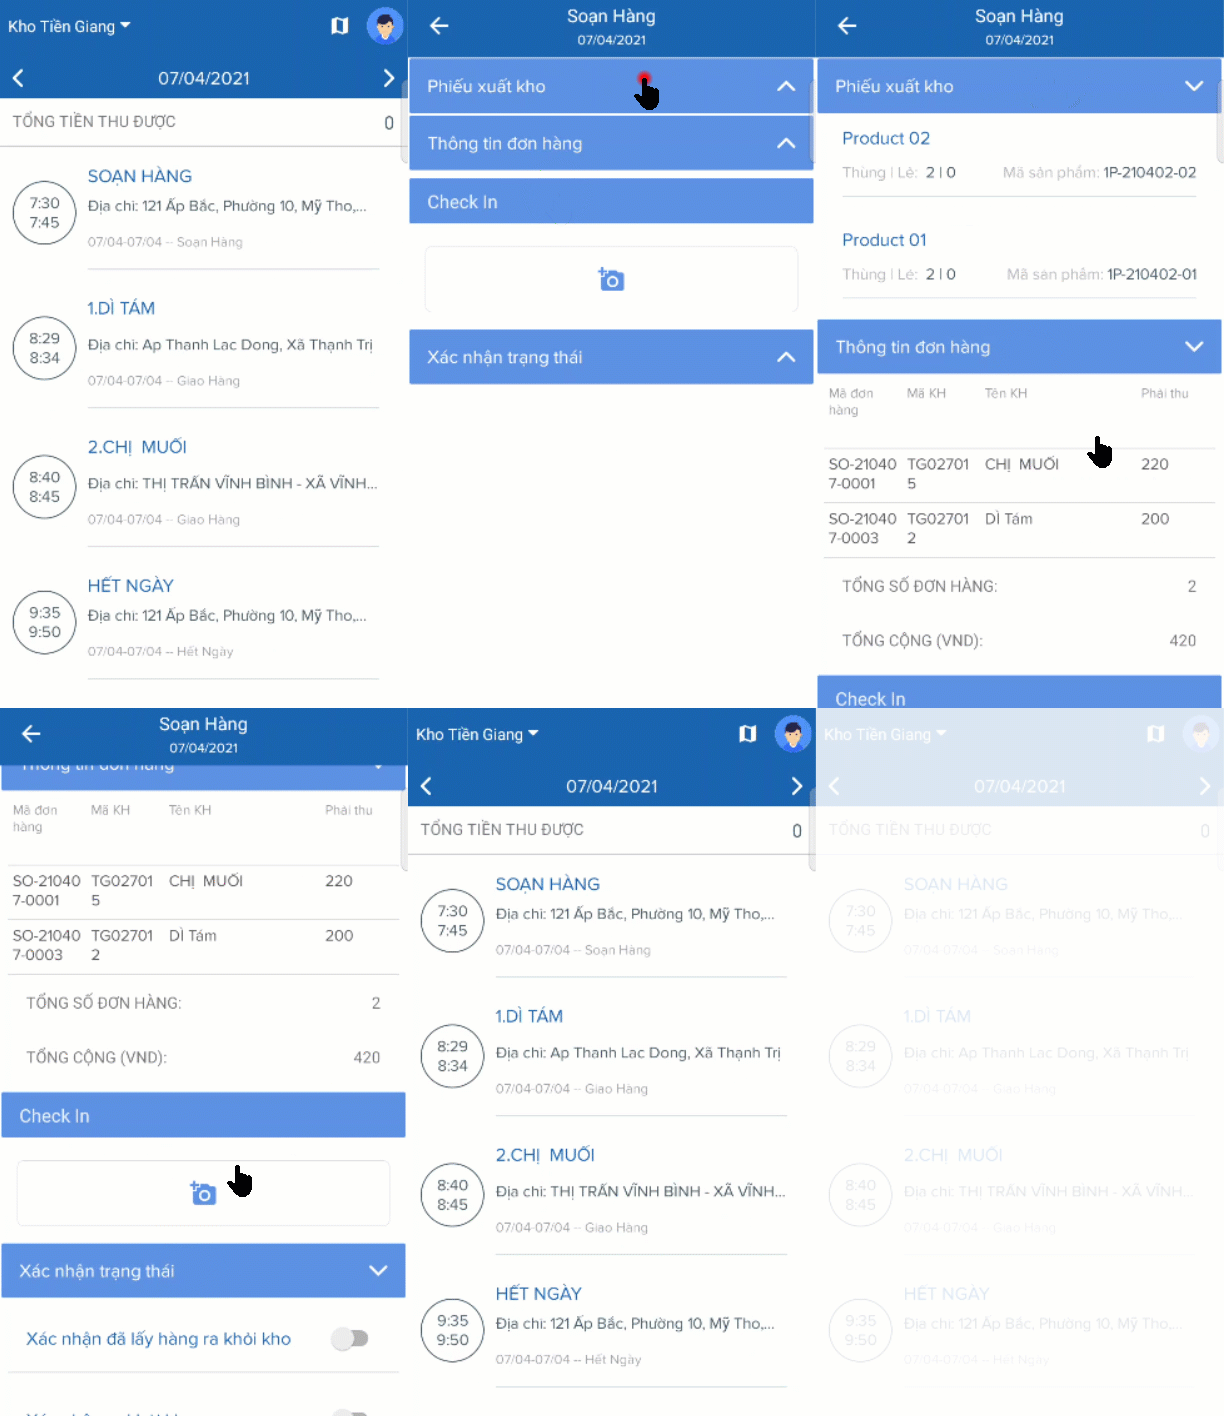
Illustration (Vietnamese)
- Within a task detail screen, to get back to the task list screen, tap the left arrow icon
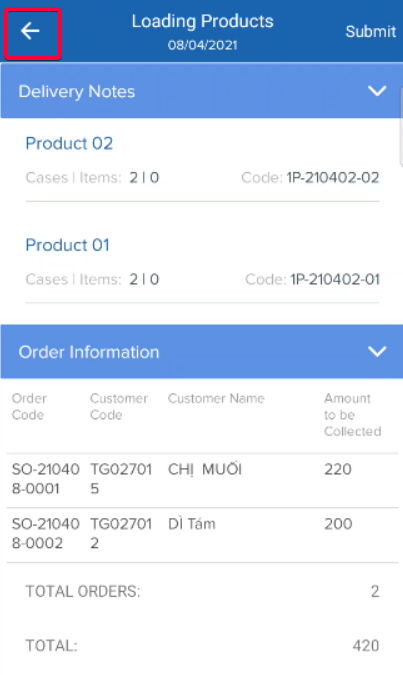
Illustration (English)
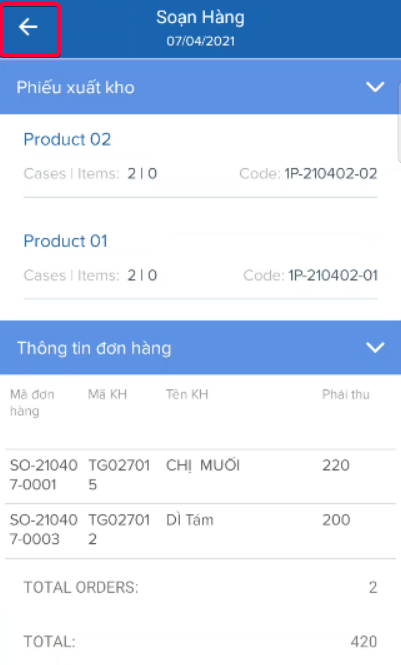
Illustration (Vietnamese)
Perform Product Loading Task
- In this task, you will need to perform the following activities:
- 1 - Check in to mark the timestamp of your arrival at the Depot
- 2 - Confirm that you have finished loading the Products onto the Vehicle and is about to depart from the Depot
- On the Task tab, tap on the Load Product task. It is always at the top of each Delivery Trip's task list. You will then be navigated to the task information screen
- You can view the information of the Orders of the Delivery Trip by tapping on the caret up icon on the Order Information bar
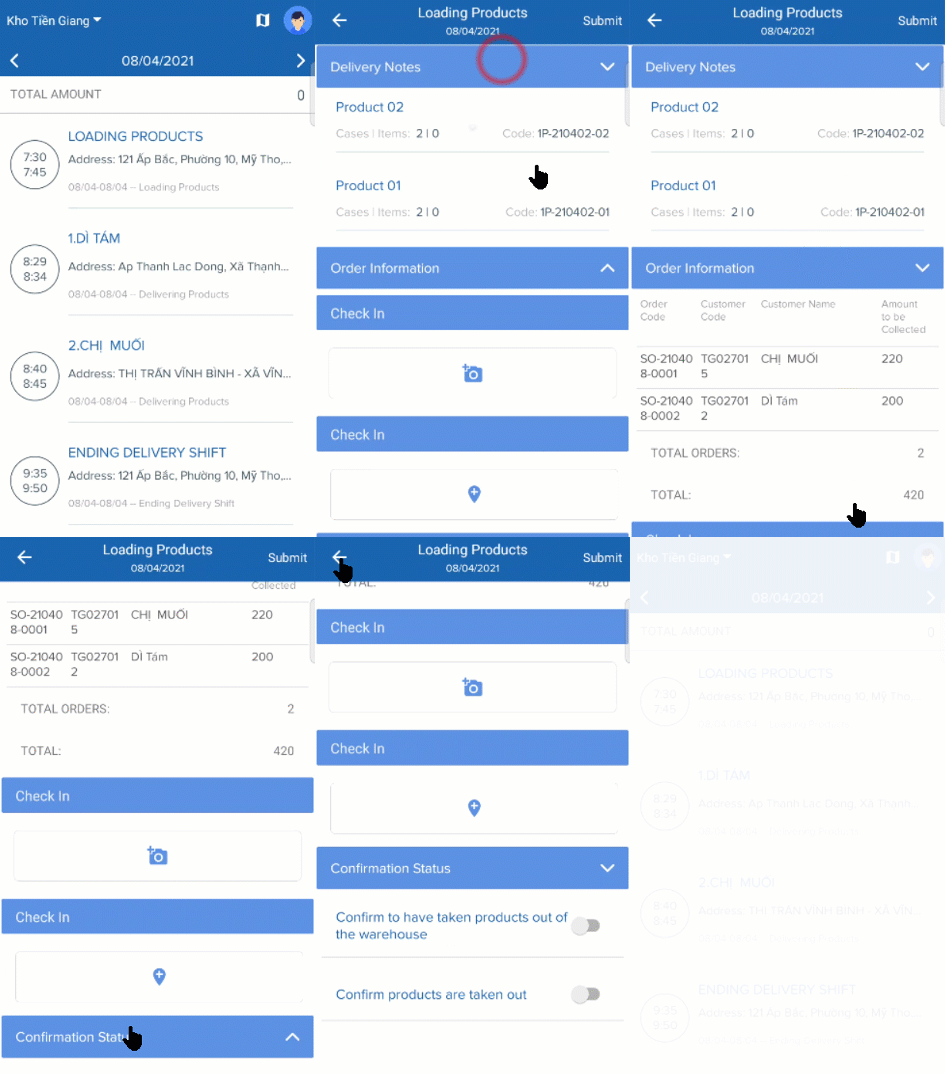
Illustration (English)
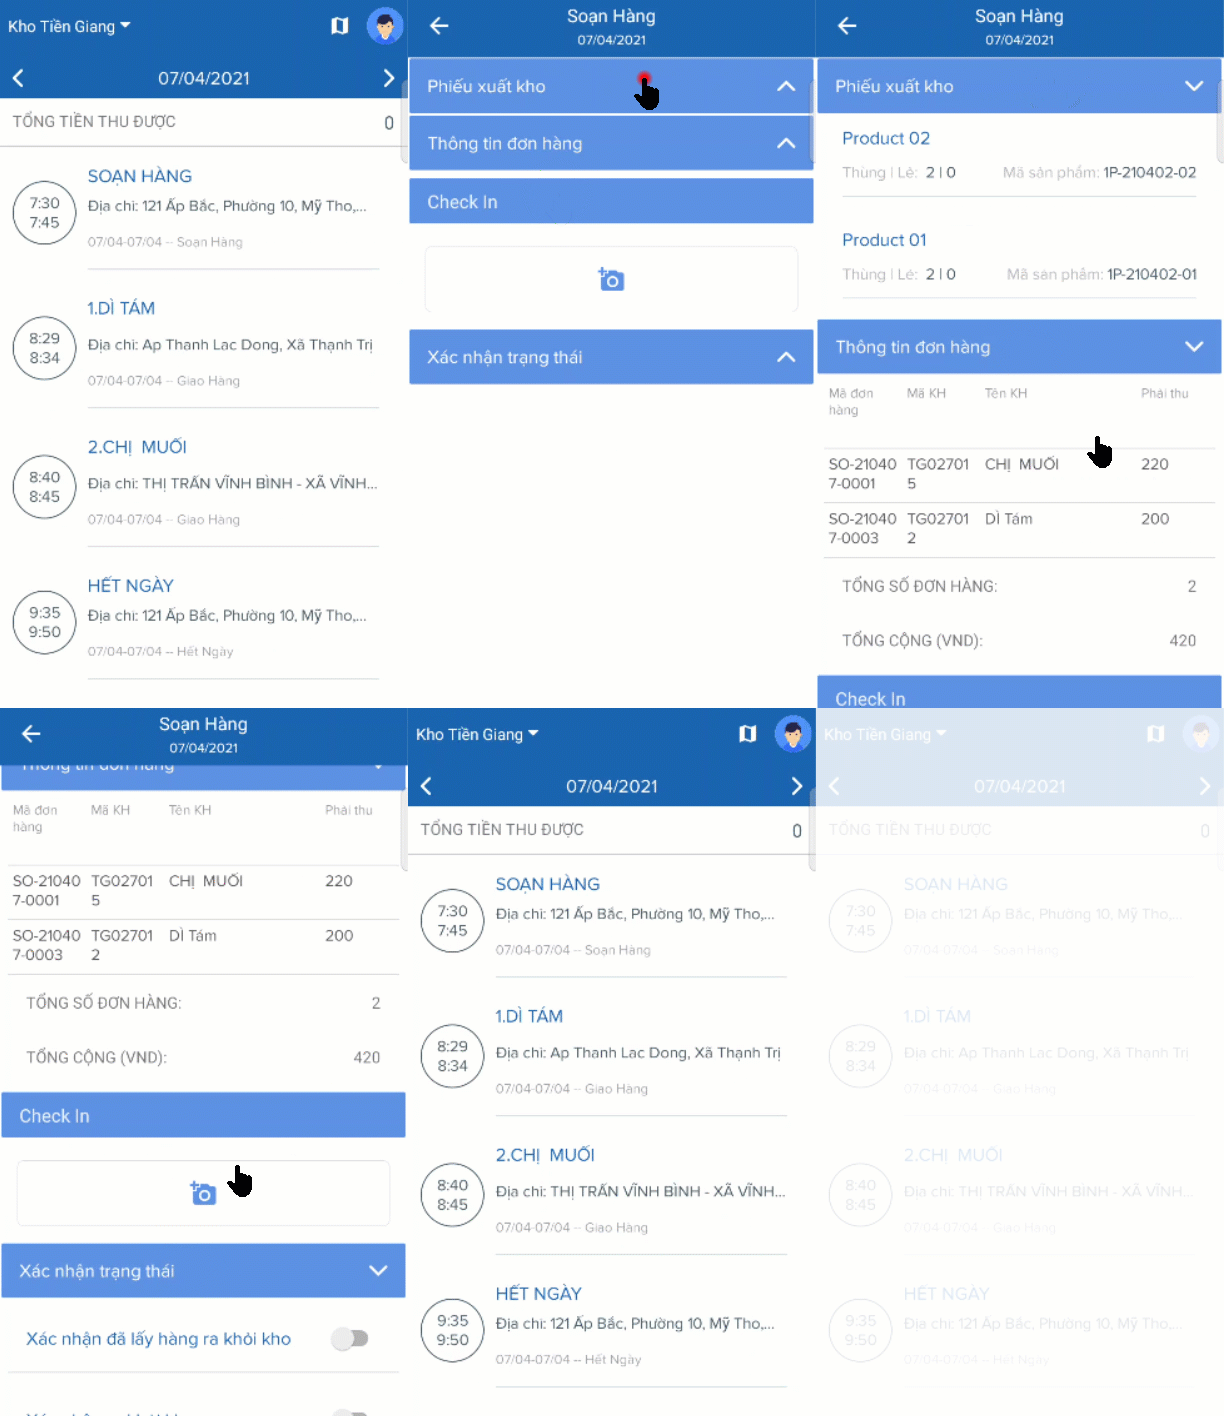
Illustration (Vietnamese)
Check in Upon Depot Arrival
- Within this task, you must first perform the Check-In activity, proving that you have arrived at the Depot. You ought to perform this right when you arrive at the Depot to accurately mark the timestamp of your arrival
- Depending on how the dispatcher setups your account, you might need to perform one of the following two Check-In options, or both if your account is set up so:
- Option 1. Check in By Taking A Picture At The Depot
- Option 2. Check in By Submitting The Coordinate Information Of Your Standing Location
Option 1. Check in By Taking A Picture At The Depot
- If you see a camera icon , you will need to take a picture at the Depot
- Tap on that icon, then take a picture using your phone
- The Mobile app will record the moment you tap the camera icon and marks that as the arrival time
- If the dispatcher uses the geofencing feature, you might face a warning if your standing location is a certain distance away from the Depot location
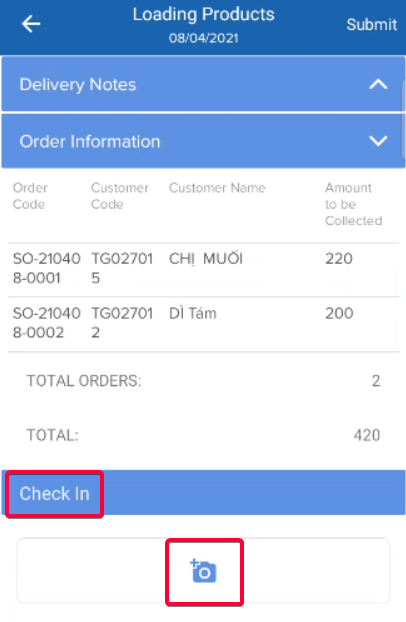
Illustration (English)
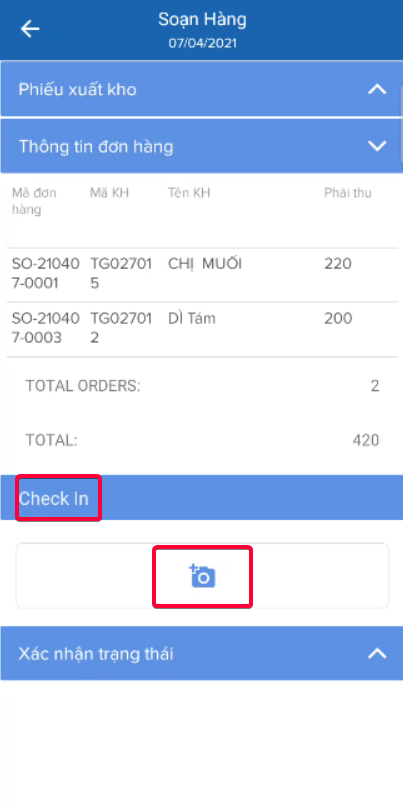
Illustration (Vietnamese)
Option 2. Check in By Submitting The Coordinate Information Of Your Standing Location
- If you see a location marker icon , you will need to submit the coordinate information of your standing location
- Tap on that icon. The Mobile app will gather the coordinate information of the location where you are currently standing
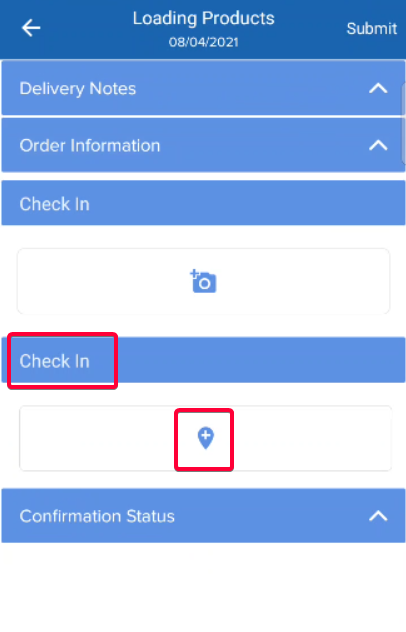
Illustration (English)
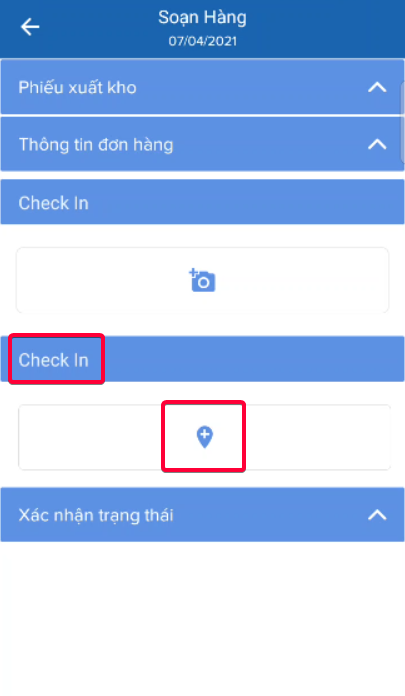
Illustration (Vietnamese)
Confirmation Before Leaving The Depot
- After you have finished loading the Products onto the Vehicle and are about to leave the Depot, you need to confirm some statuses. The most common statuses are have taken products out of the warehouse and have left the warehouse. The number of confirmation statuses might vary according to your Organization's regulations
- To confirm a status, tap on that status's corresponding toggle-off icon . When the toggle-off icon change to toggle-on icon , the status has been confirmed. Repeat this for the remaining statuses
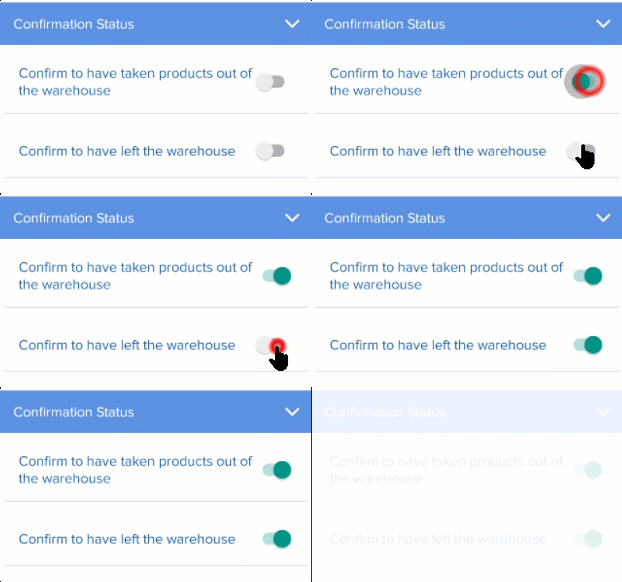
Illustration (English)
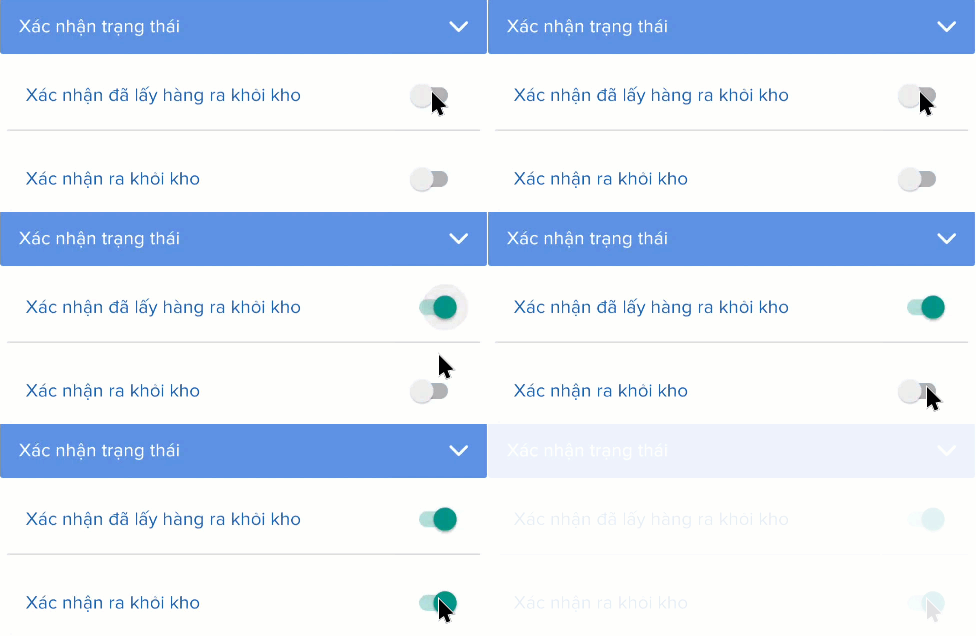
Illustration (Vietnamese)
- After you have completed the required activities of this task, tap the Submit text at the top right corner of the task screen to submit the task
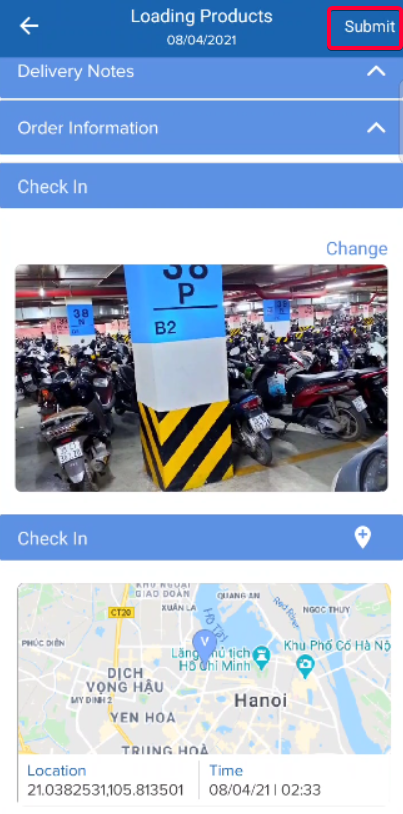
Illustration (English)
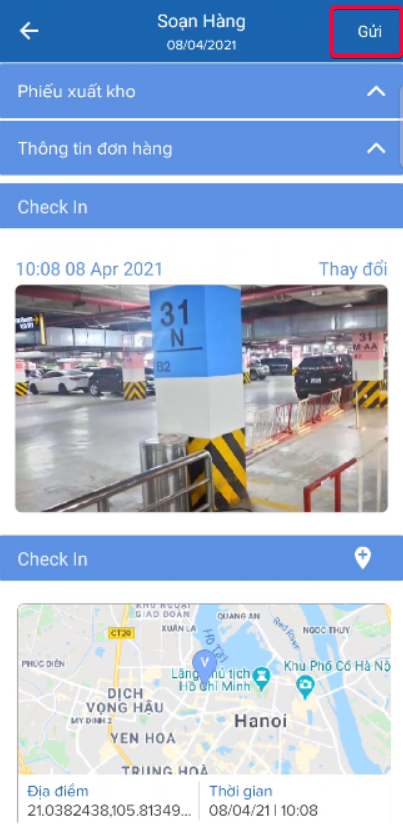
Illustration (Vietnamese)
- The moment the task is successfully submitted will be counted as the timestamp that you leave the Depot
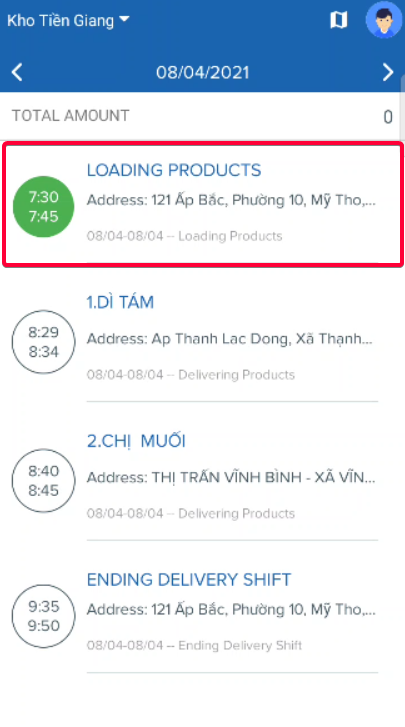
Illustration (English)
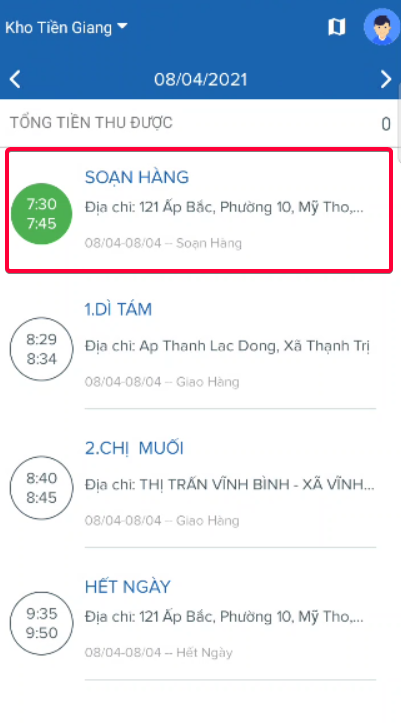
Illustration (Vietnamese)
Perform Product Delivery Task
- In this task, you will need to perform the following activities:
- 1 - Check in at the Customers' receiving locations to mark the timestamp of your arrivals
- 2 - Select the delivery result and update the product quantity actually delivered
- 3 (Optionally) You might also need to perform additional activities such as taking pictures of the delivery invoices, taking the Customers' signatures digitally
- Here is the common user interface of this task screen:
- On top of the task screen is the Customer information section
- To make sure that the Customer is available when you arrive, you can call them in advance. To do that, tap the phone icon on the Phone number row
- To view the receiving location of the Customer on the Google map, you can tap the signpost icon on the Address row
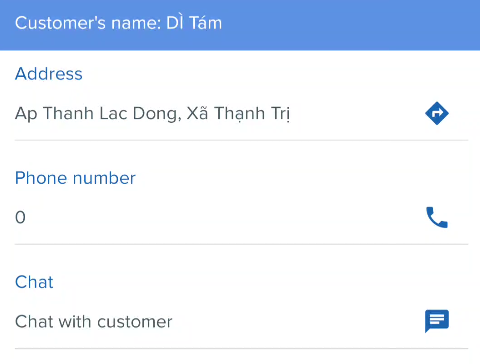
Illustration (English)
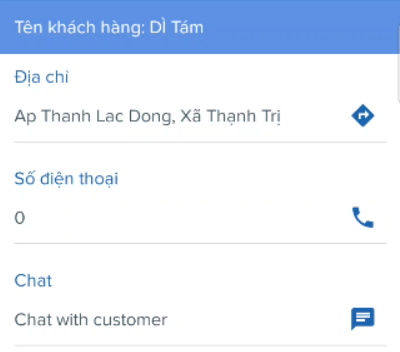
Illustration (Vietnamese)
- Below the Customer information section is the Check-In section, which you will perform when you arrive at the Customer's receiving location

- Next is the Order section, which lists the Orders that the Customer places. You will specify the delivery result for each Order here
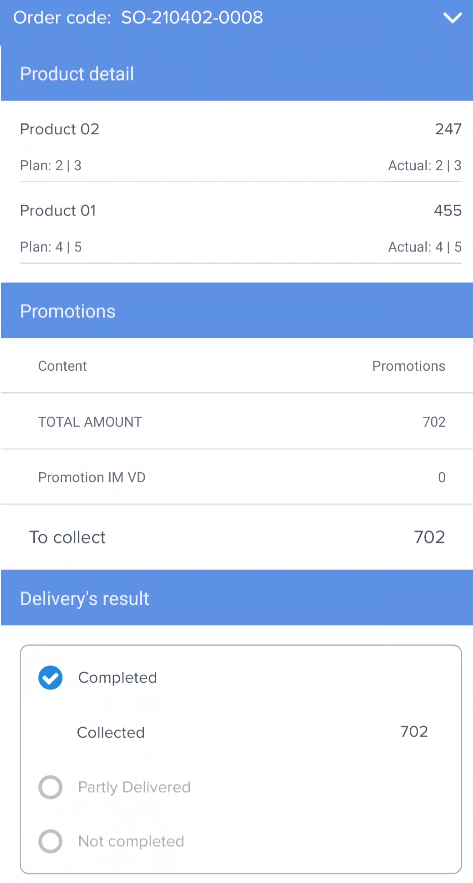
Illustration (English)
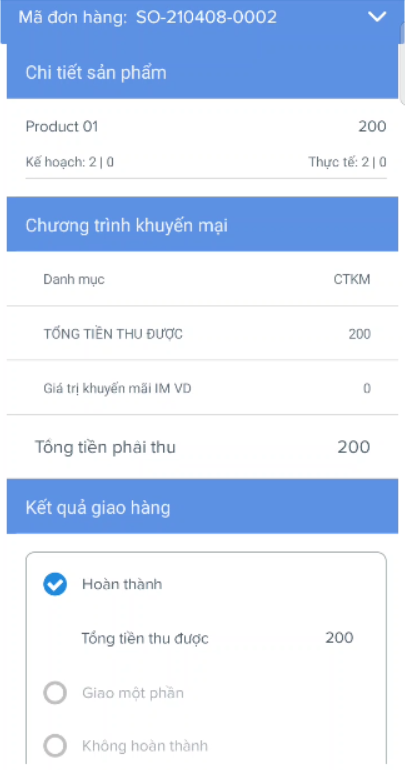
Illustration (Vietnamese)
Check-in At The Customer's Receiving Location
- Like when you arrive at the Depot, right upon your arrival at the Customer's receiving location, you need to perform the Check-In activity. There might also be two Check-In options which are described above. The most commonly used option is to take a picture of the Customer's receiving location
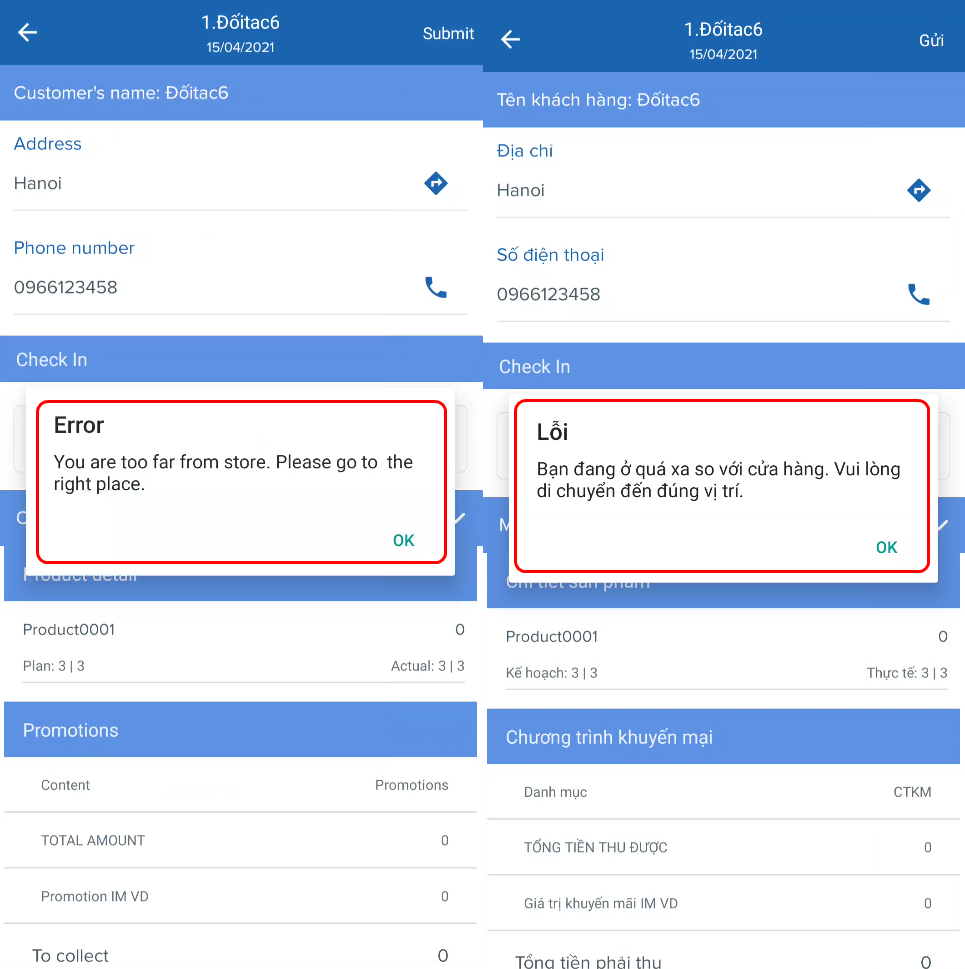
- Note: If you are required to Check-in by taking a photo at the current standing location, if the dispatcher sets up the geographical constraint, you might encounter the following error message if the distance between your current standing location when tapping on the camera icon and the Customer's actual receiving location exceeds a value. For example, the dispatcher sets up the maximum distance that the dispatchers allow is 10 meters but you stand 20 meters away from the Customer's receiving location
Select Delivery Result
- If the Customer has more than one Order, the Order information will be collapsed to show only the Order Codes. To expand an Order, tap on its Order Code. You can collapse the Order information by tapping its Order Code again
- When you expand the information of an Order, there will be several sub-sections:
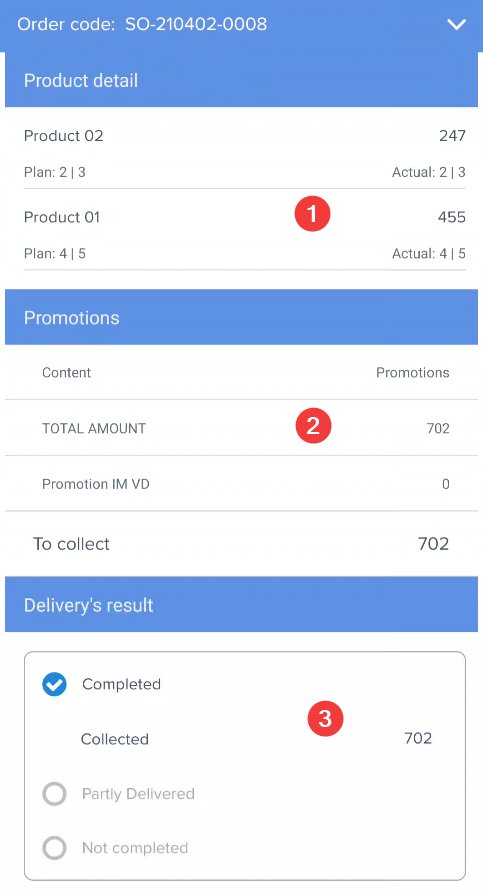
Illustration (English)
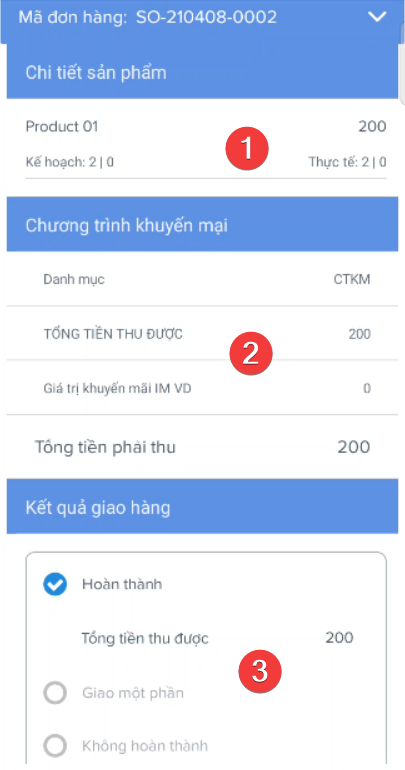
Illustration (Vietnamese)
- Sub-section 1: Product Detail. This sub-section shows the list of Products of the Order
- The number in parallel with a Product Name is the planned total price of that Product
- Below each Product is the planned whole case/single item quantity area, which is located to the left of the screen, and the actual whole case/single item quantity area, which is located to the right of the screen

Illustration (English)

Illustration (Vietnamese)
- Within each quantity area, there will be two numbers, separated by a vertical line. The number on the left of the vertical line is the whole case quantity, while the number on the right of the vertical line is the single item quantity
- You will interact with the actual whole case/single item quantity area if you select the Partly Delivered delivery result. This will be described below
- Sub-section 2: Promotions. This sub-section shows the promotion campaigns which are currently applied to the Products of the Order
- Sub-section 3: Delivery Result. You will select the delivery result of the Order in this sub-section
- When you hand over the Products of an Order to the Customer, there are three possible delivery results:
- Result 1: Completed: You deliver ALL Products of the Order to the Customer
- Result 2: Partly Delivered: You deliver PARTLY, not all, Products of the Order to the Customer
- Result 3: Not Completed: You deliver NO Product of the Order to the Customer
Select Result 1 - Completed
- When you select this delivery result, the Collected field below this delivery result will show the planned amount of payment to be collected. This amount is automatically calculated by the system. If the actual amount is different than this, you can tap on the number and change it to a different value using the pop-out numeric keypad
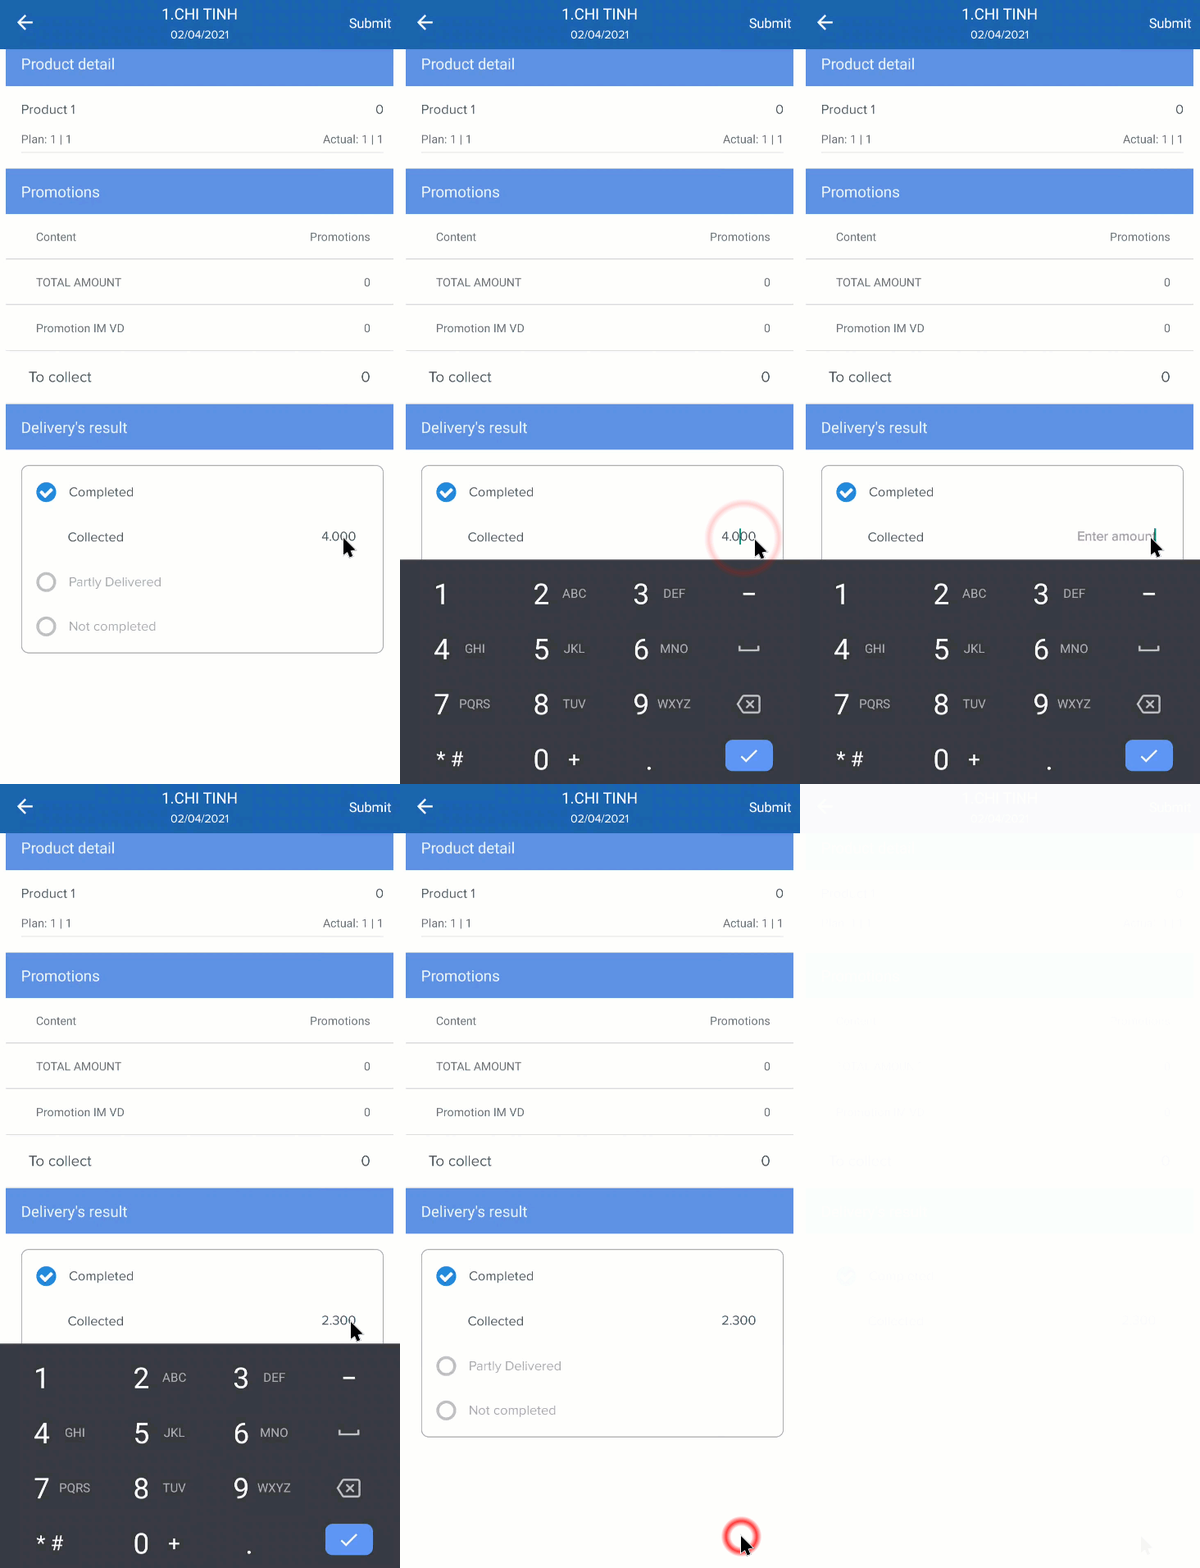
Illustration (English)
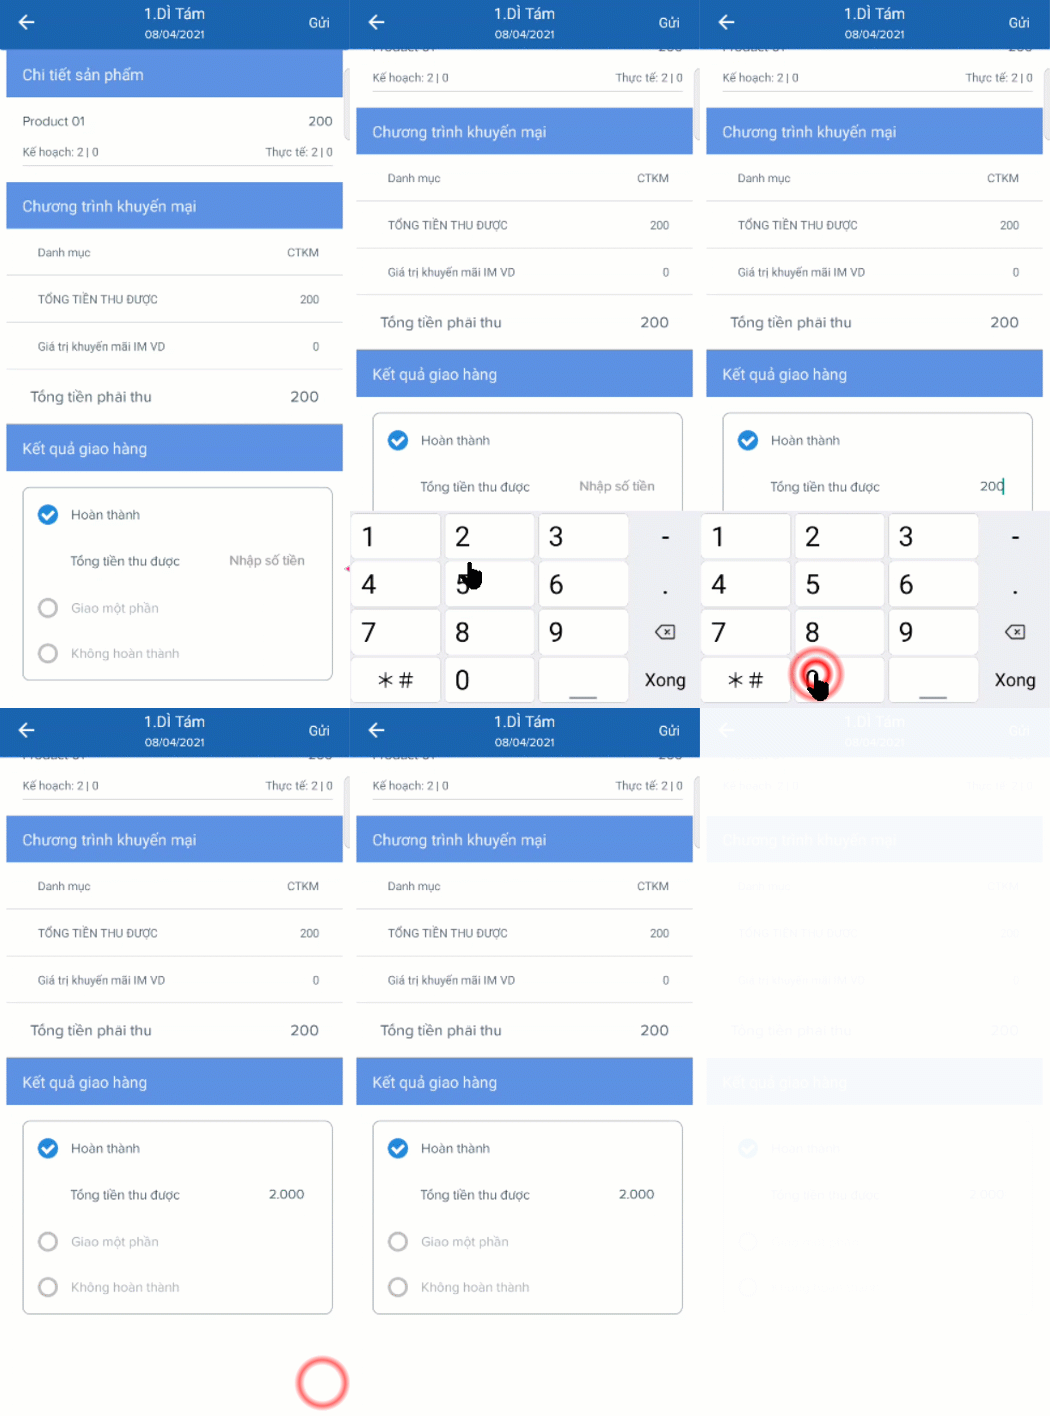
Illustration (Vietnamese)
Select Result 2 - Partly Delivered
- When you select this delivery result, you will need to 1. Specify the quantity of Product whole cases and/or single items that you have delivered to the Customer; and 2. Specify the amount of payment that you actually receive from the Customer
- To specify the amount of payment that you actually receive from the Customer, follow the instruction described in Result 1 - Completed
- To specify the actually-delivered quantity of Product whole cases and/or single items, follow the steps below:
- Step 1: Swipe up the task screen until you see the product quantity section of the Order. Notice that the actual quantity section of each Product changes to a light orange shade to draw your attention
- Step 2: Tap on the actual quantity section of the Product that you want to specify. A form will appear at the bottom of the screen. This form lets you specify the number of whole cases/single items of that product that you actually deliver. On the form, the column on the left is the whole case quantity column; the column on the right is the single item quantity column
- Step 3: To specify the actually delivered quantity of the Product whole case, swipe the column up or down to select the appropriate number. Next, do the same thing with the right column to specify the actually delivered quantity of the Product single item. Finally, tap the Confirm text to confirm these quantities
- Repeat these above steps for the other Products of the Order
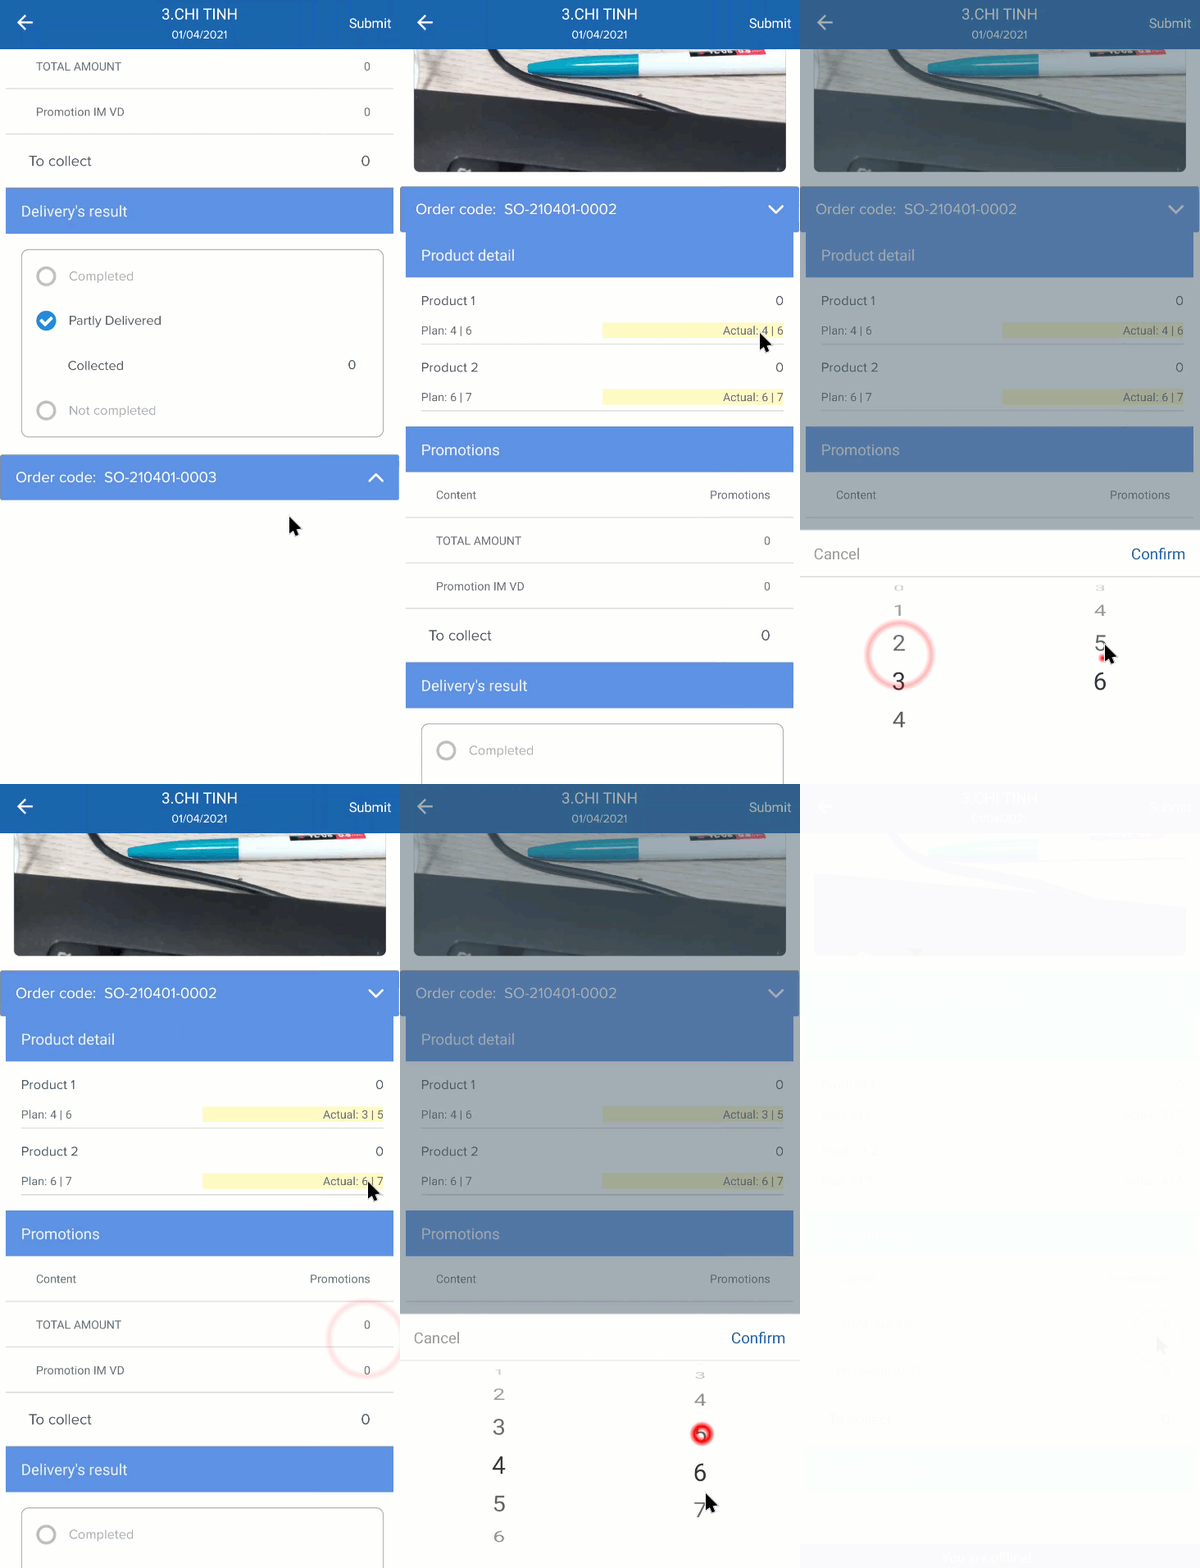
Illustration (English)
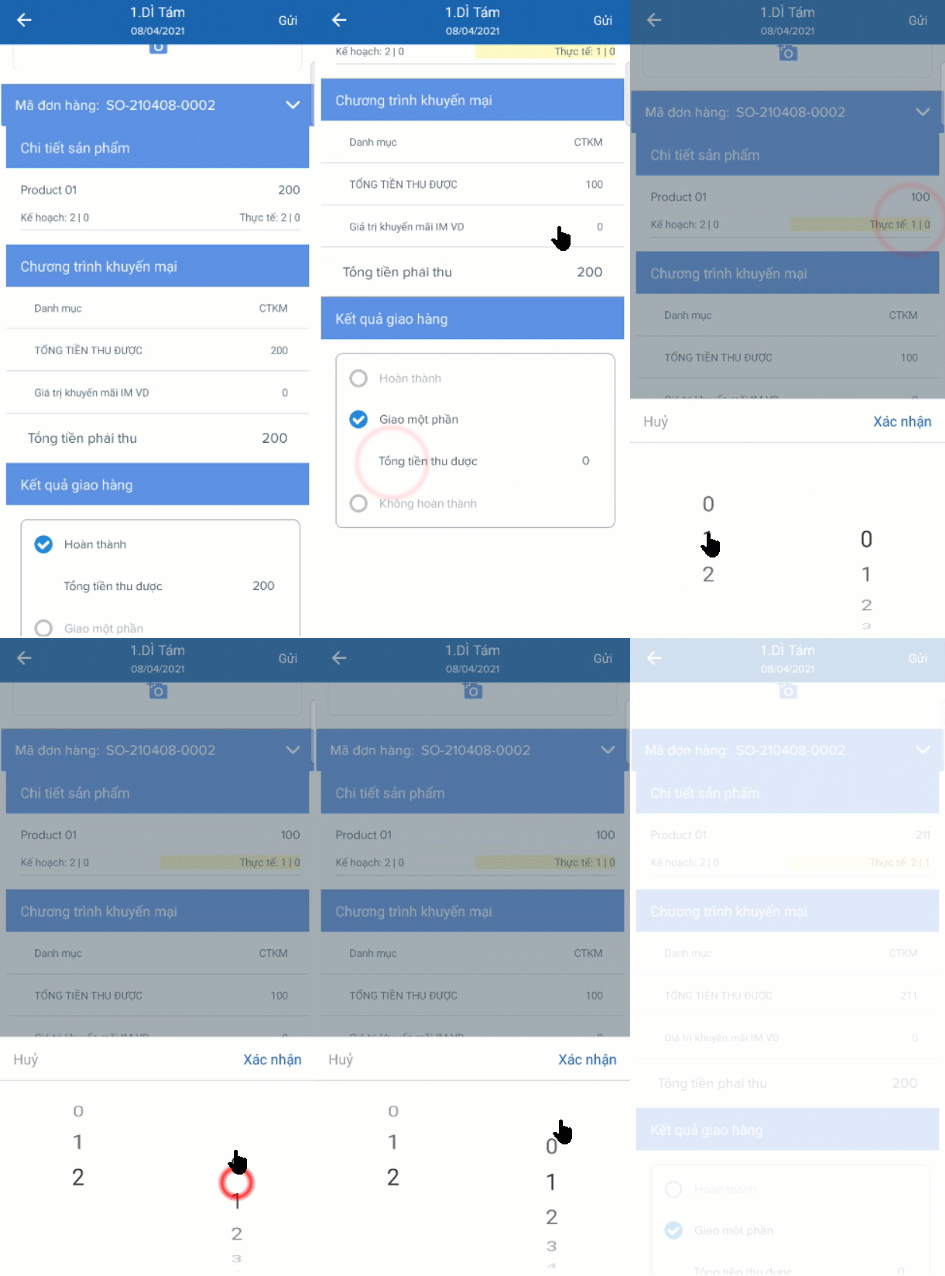
Illustration (Vietnamese)
Select Result 3 - Not Completed
- When you select this delivery result, you will need to specify the reason why you could not deliver the Products. To do this, follow the steps below:
- Step 1: Tap the Select Reason field right below the Not Completed result. You will be navigated to the Reason list screen. This screen shows the Not Completed reasons that were predefined by the dispatcher on the Web app. If you cannot find the appropriate reasons on this list, contact the dispatcher to add the missing reasons
- Step 2: Swipe the Reason list up and down and tap the appropriate reason to select it. After you have selected the reason, you will be navigated back to the task information screen
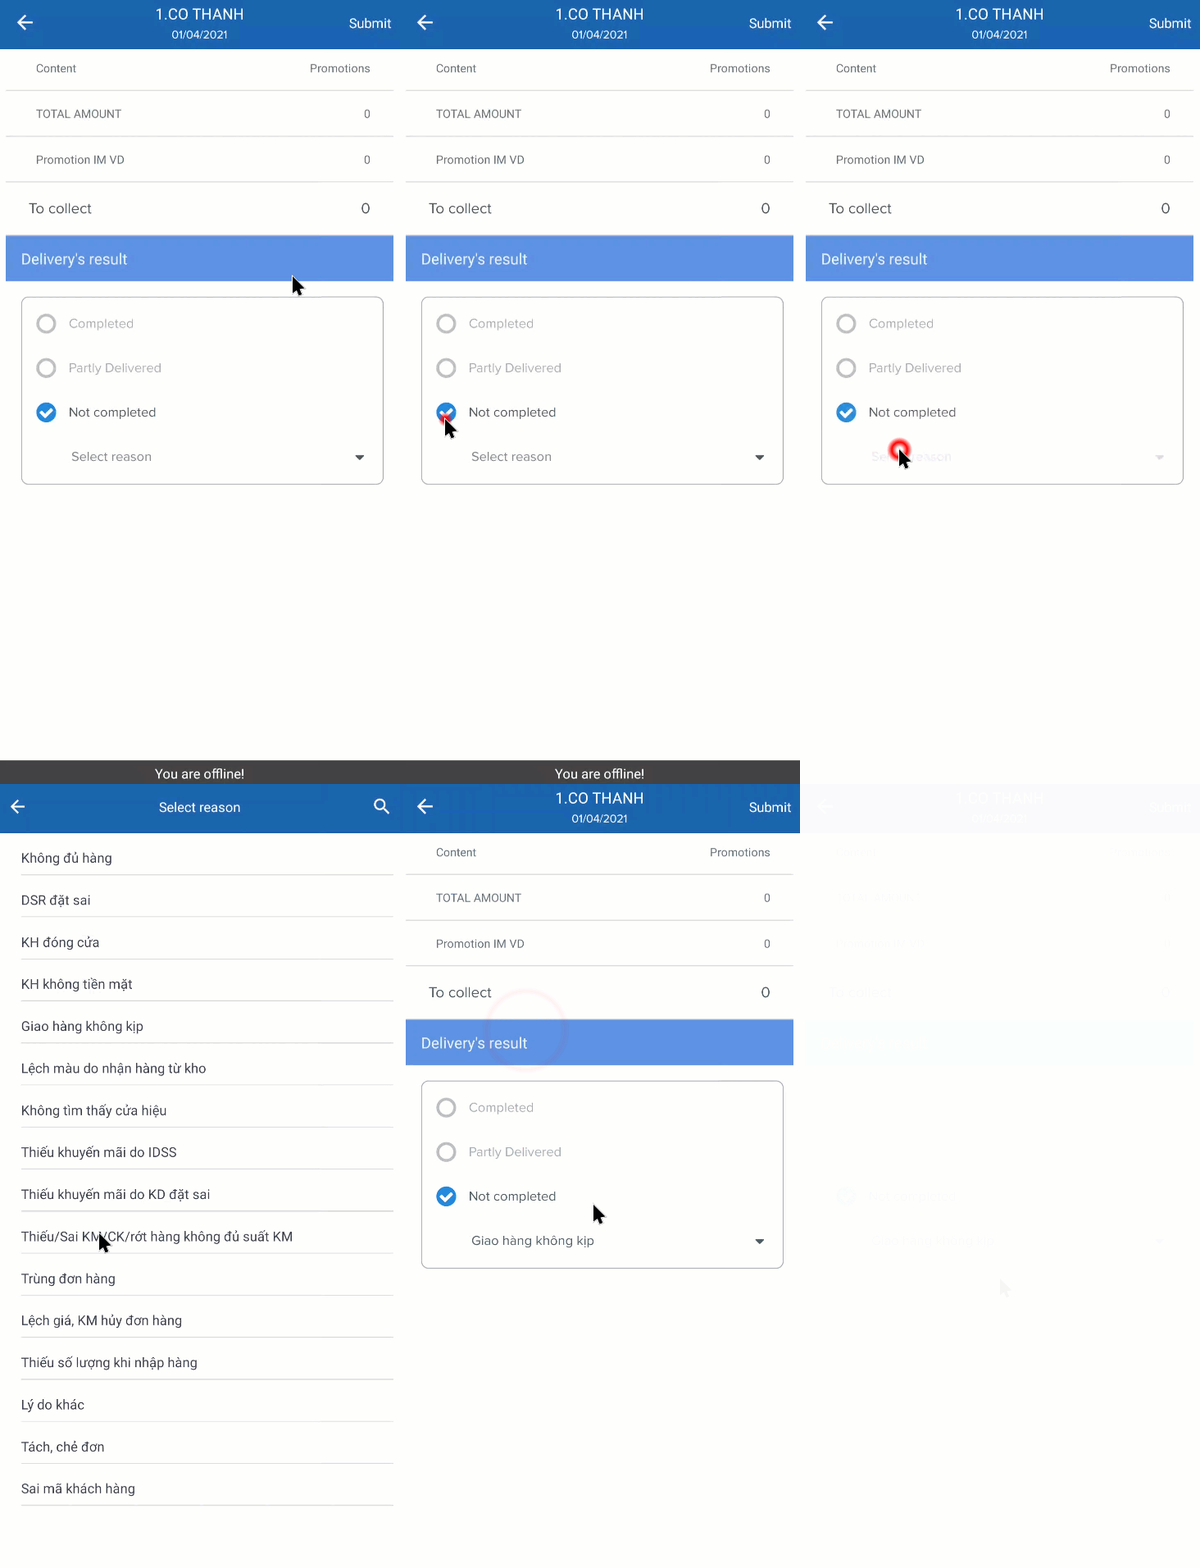
Illustration Image (English)
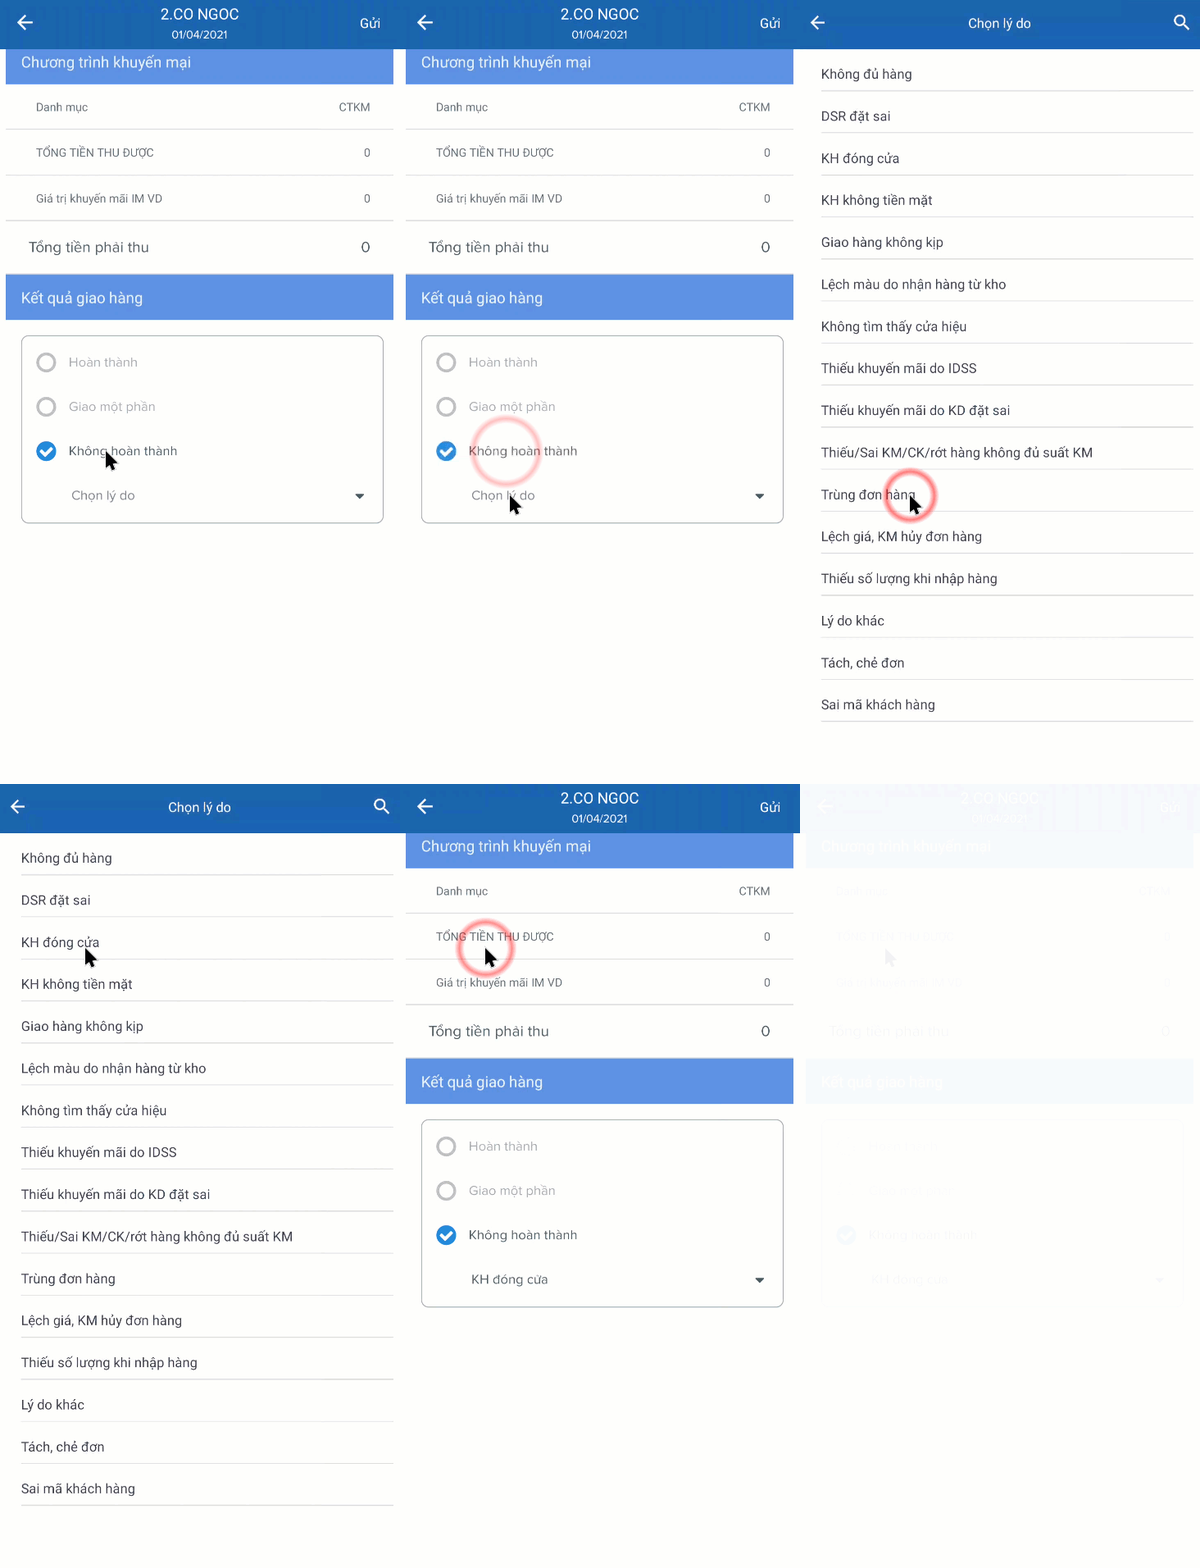
Illustration Image (Vietnamese)
- Repeat the same procedure for the remaining Orders
- After you have selected the delivery results for all Orders, you can tap Submit to submit the task. The moment the task is successfully submitted will be counted as the timestamp that you leave the Customer's receiving location
- After submitting this task, you will be navigated back to the task list screen. The icon color of the task will change from white to green
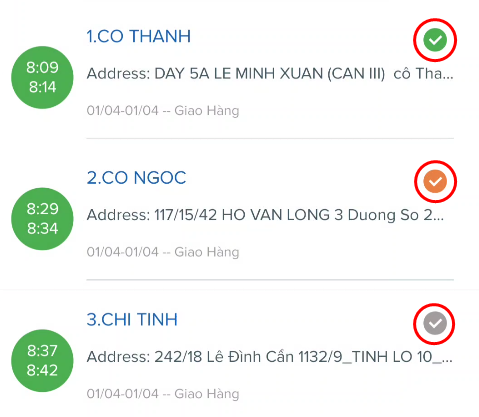
- Notice that there will be a checkmark icon appear at the end of each completed delivery task. The color of this icon represents the overall delivery result for that Customer:
- Green color: All Orders of that Customers are Completed, which means all Products placed by that Customer are successfully delivered
- Orange color: At least one of the Orders of that Customer is Partially Delivered or Not Completed, and the remaining Orders are Completed, which means partly, not all, Products placed by that Customer are successfully delivered
- Gray color: All the Orders of that Customer are Not Completed, which means no Product placed by that Customer is delivered
- Note: In the middle of performing this delivery task, if you have taken the Check-in photo but have yet to submit the task, you can save the current state of the task and go back to the task list screen by tapping the left arrow icon on the top left corner of the task information screen. The app will show a confirmation dialog. Tap OK to confirm saving the current state of the task. On the task list screen, the icon color of the task will change from white to orange. The task is now regarded as pending
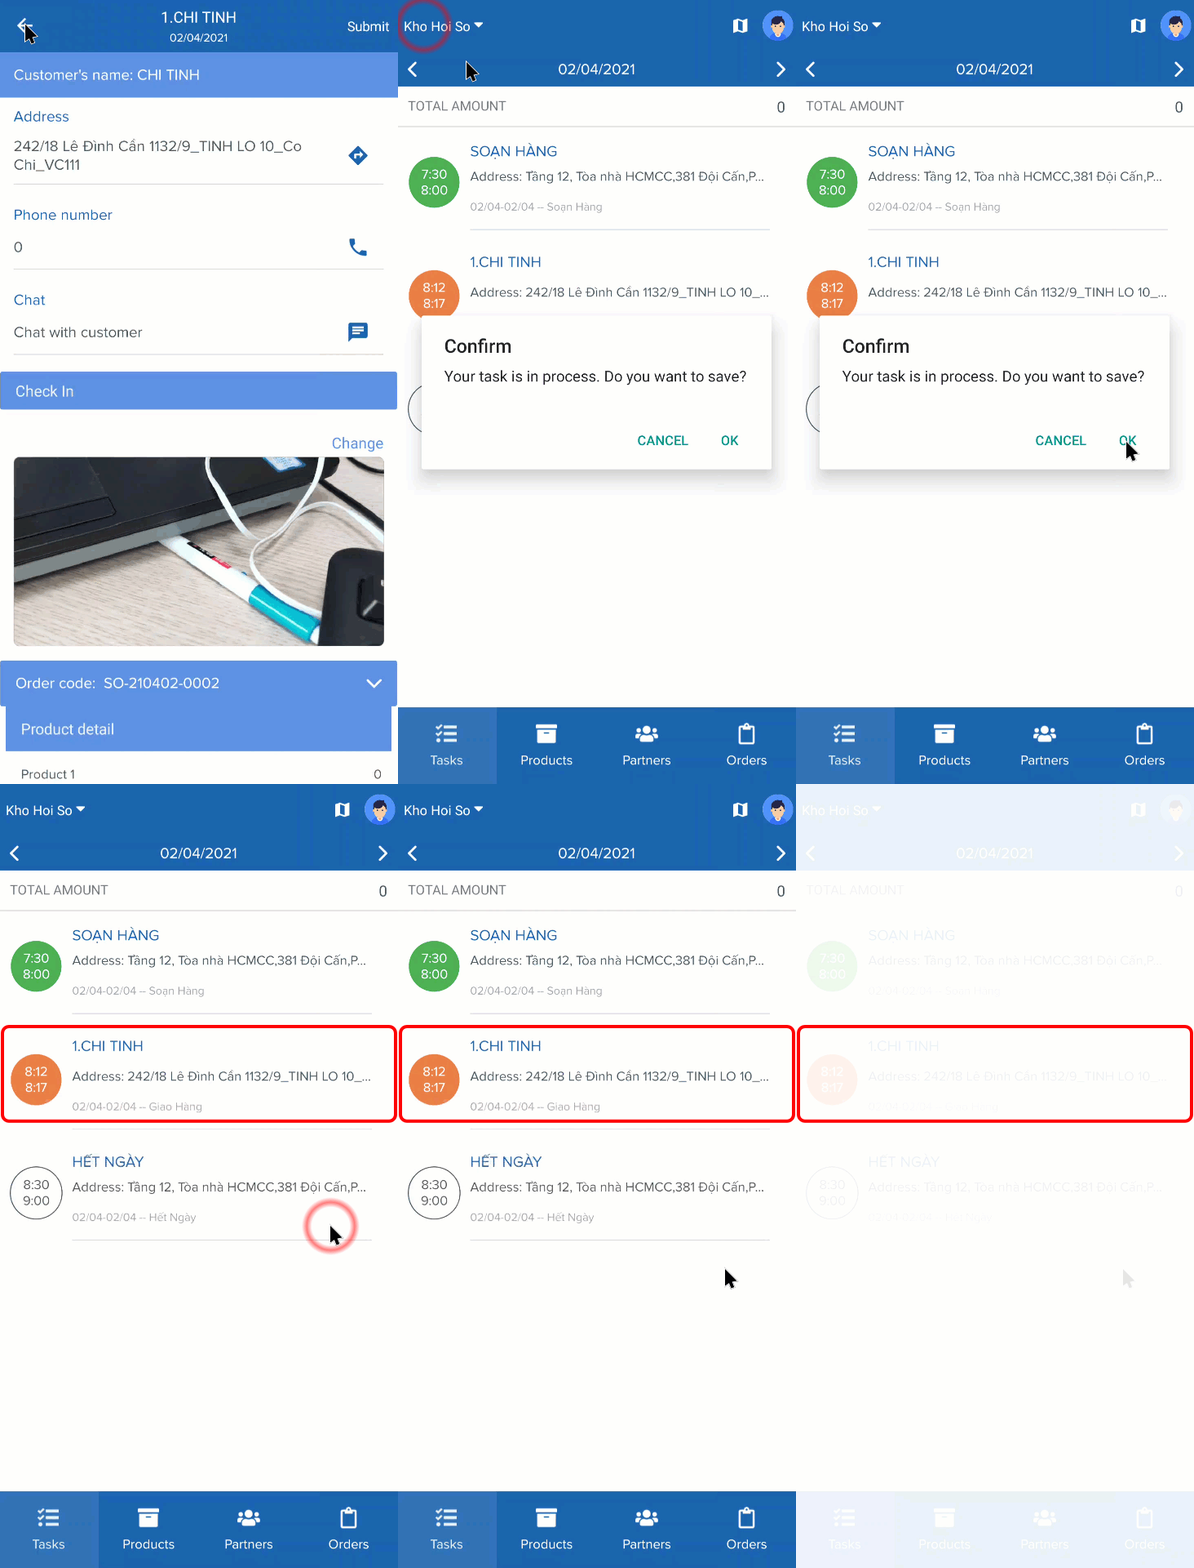
Illustration (English)
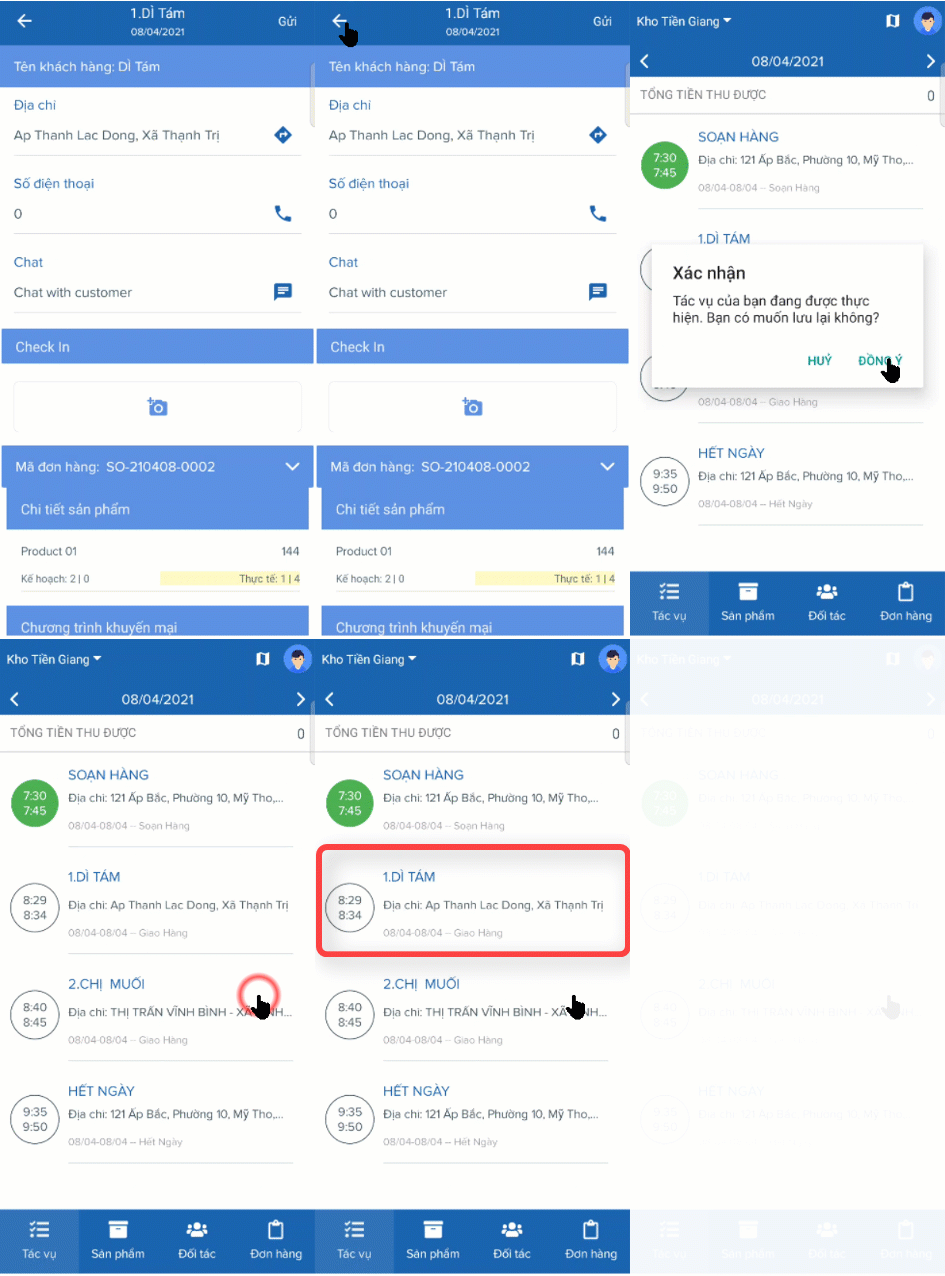
Illustration (Vietnamese)
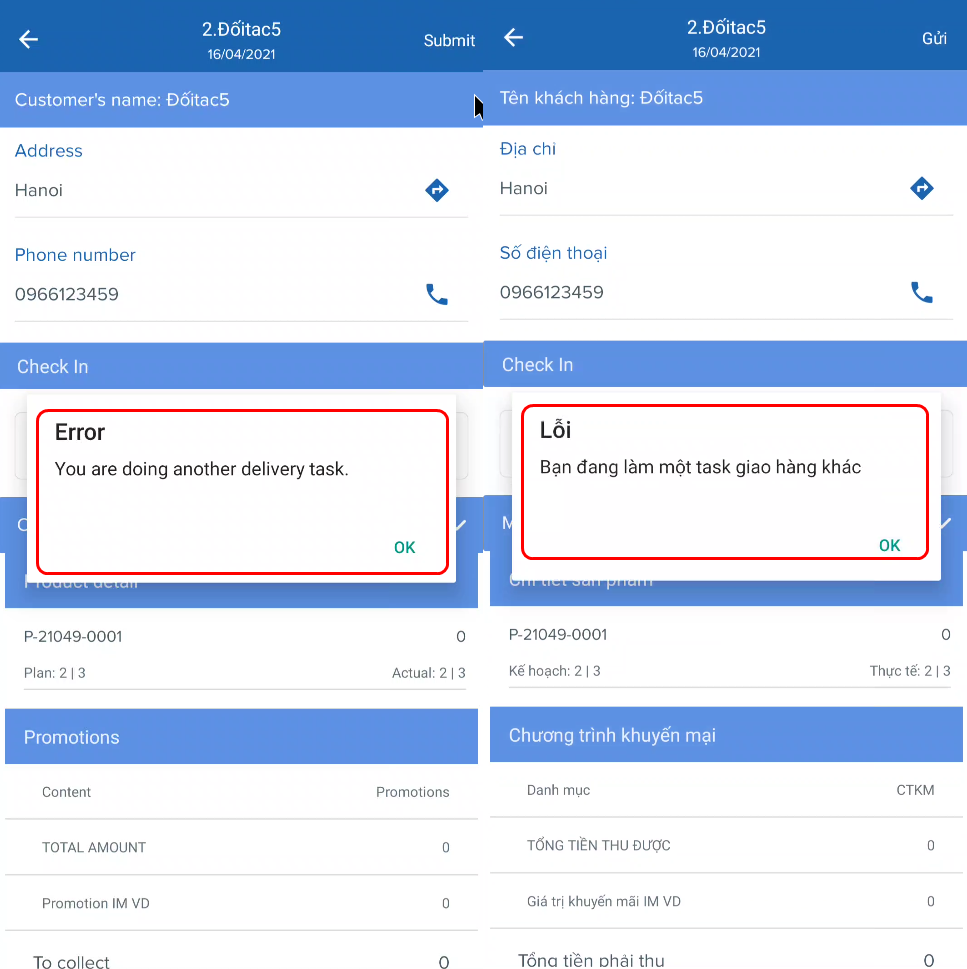
- IMPORTANT If there is a pending delivery task, you have to submit that task before being able to perform the next tasks. The app will return this error message when you try to perform the Check-in action of other tasks
Perform End Delivery Trip Task
- In this task, you will perform the following activities:
- 1 - Check in to mark the timestamp of your returning at the Depot
- 2 - Confirm that you have handed over the received payment as well as the undelivered/returned products to the Depot manager
- This task is similar to the Product Loading task
Optional Functions And Features
- Apart from the main tasks and functions described above, there are
Get Update Notifications
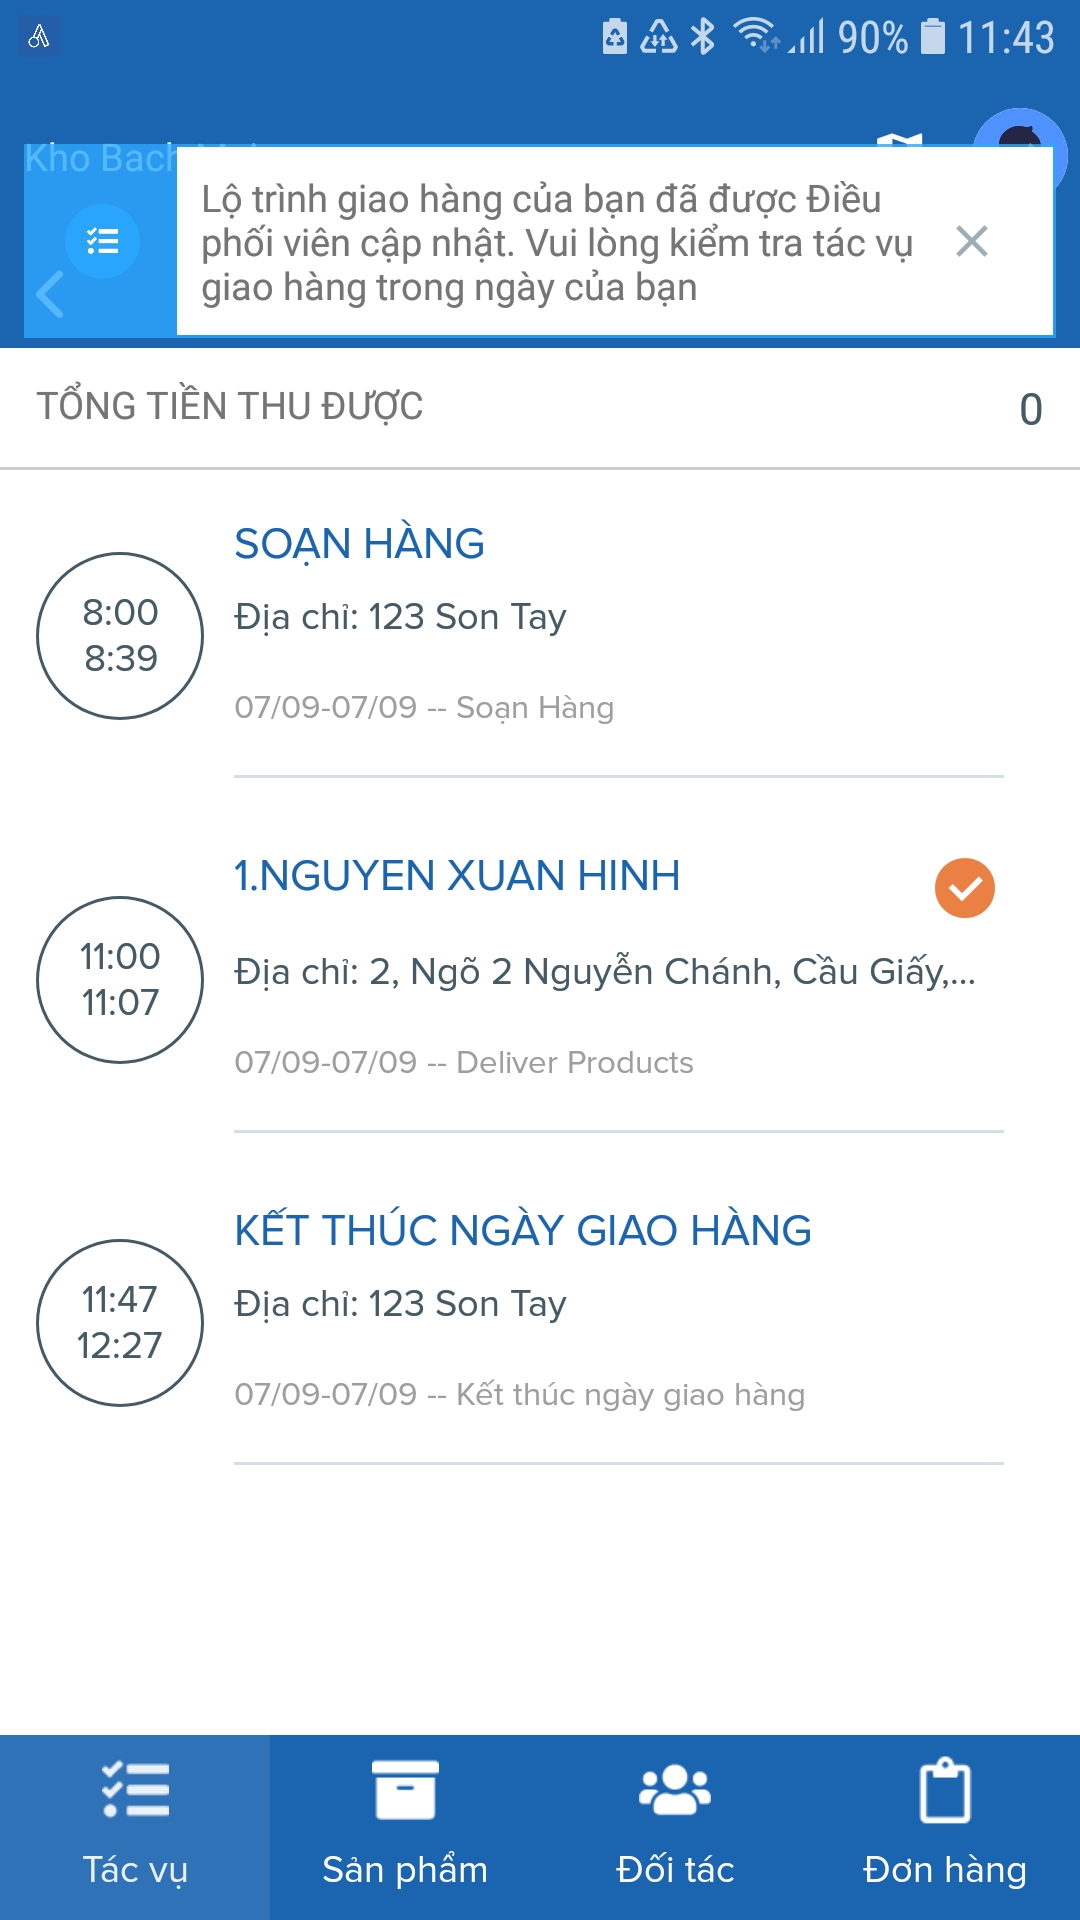
- In the scenario where the route dispatcher makes some changes to your delivery route, you will be notified on the Mobile app. If you don't see any notification, please contact the Web dispatcher to enable this feature for your account
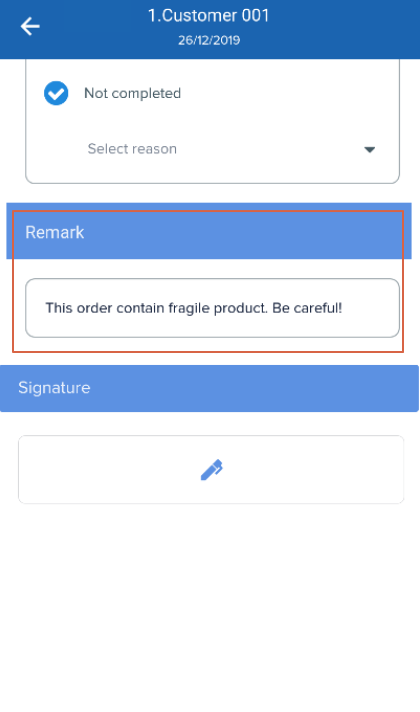
View Order Note (Remark)
- If the dispatcher inputs a short note for the order you are fulfilling, you can view the note of that order in the Remark section of the Delivery products task
Perform Extra Tasks
- During the delivery process, you might encounter unexpected events such as flat tires, out of gas etc.. The Extra Tasks is a neat feature that will help you record these events
Compulsory ConfigurationIn order to have this feature on the Mobile app, you need to inform the dispatcher to enable the following configuration at the Branch: Allow Driver Create Extra Task and also create the Action Code EXTRA_TASK. You'll need to logout then login your account for the feature to take effect
- Tap on the orange circle plus icon , then tap on the New Task icon . You will be navigated to the Extra Driver Task screen
- Tap on the camera icon to take photos as proof of the event
- Then, sequentially input the task description, select the task type and specify task cost. After that, tap Submit to submit the task
- You can create and submit as many extra tasks as you want
Rearrange Stop Sequence
- This function allows you to actively change the sequence of the receiving locations (also known as Delivery Stops) on your Delivery Trip
Compulsory Configuration
- In order to be able to use this function, you need to contact the Web App Administrator to enable the Move Order/Stop permission for the Driver User Group in which your account belongs
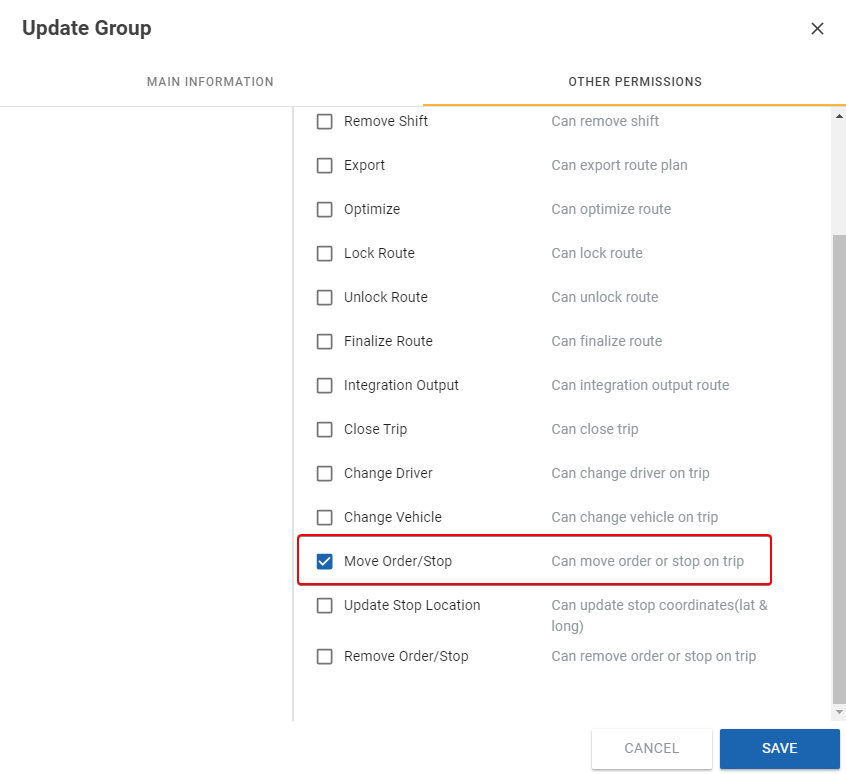
- After the Move Order/Stop right has been enabled, log out and log in to your account on the Mobile App in order for the permission to take effect
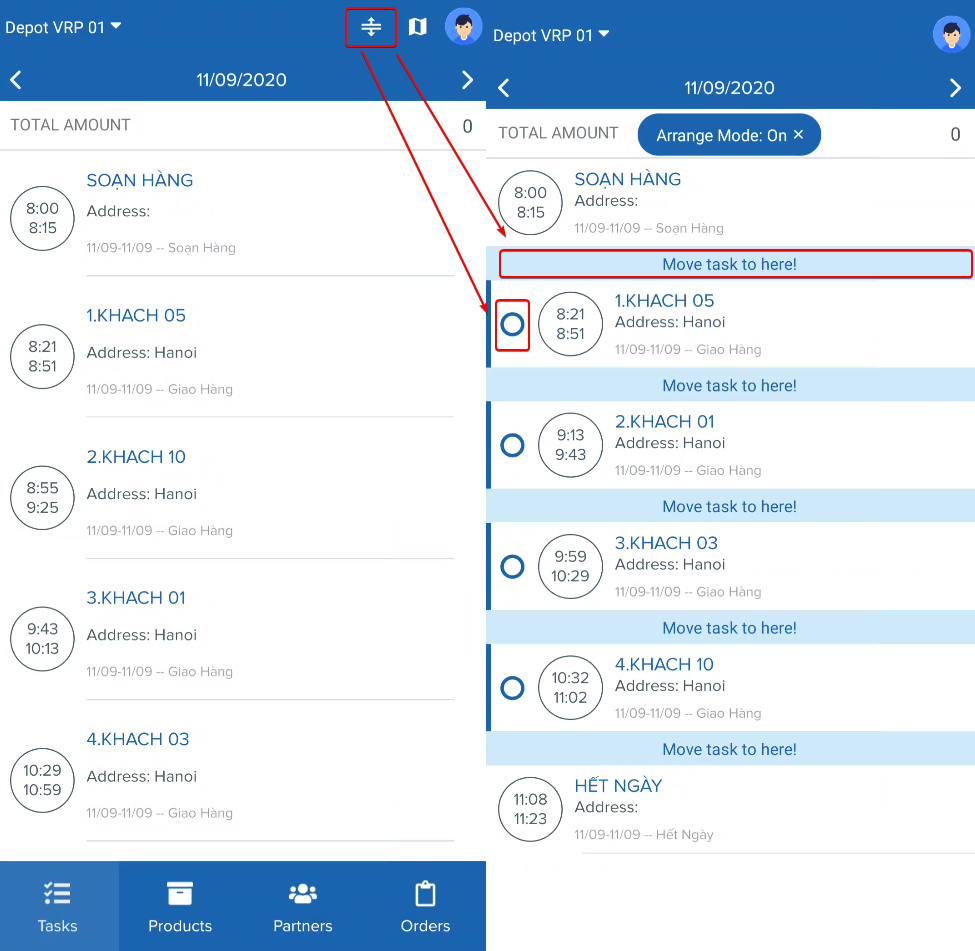
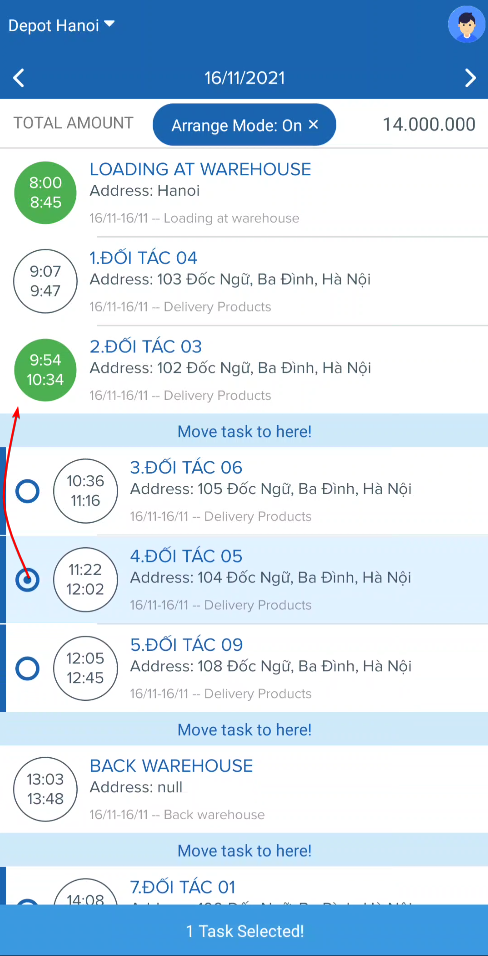
- On the Tasks tab, tap on the Arrange icon to the left of the Map View icon. After that, the circle checkbox icons will appear to the left of each Stop. Above each Stop will also appear the Move task to here! text
- To select the Stop(s) which you want to move, tap on them. After you have selected the Stops, move them to a new position by tapping on the new position's Move task to here! text, then tap the Apply text at the bottom right of the screen. The Mobile App will automatically refresh and rearrange the Stop sequence as you intend. If you no longer want to move the Stops, tap on the Cancel text at the bottom left of the screen instead
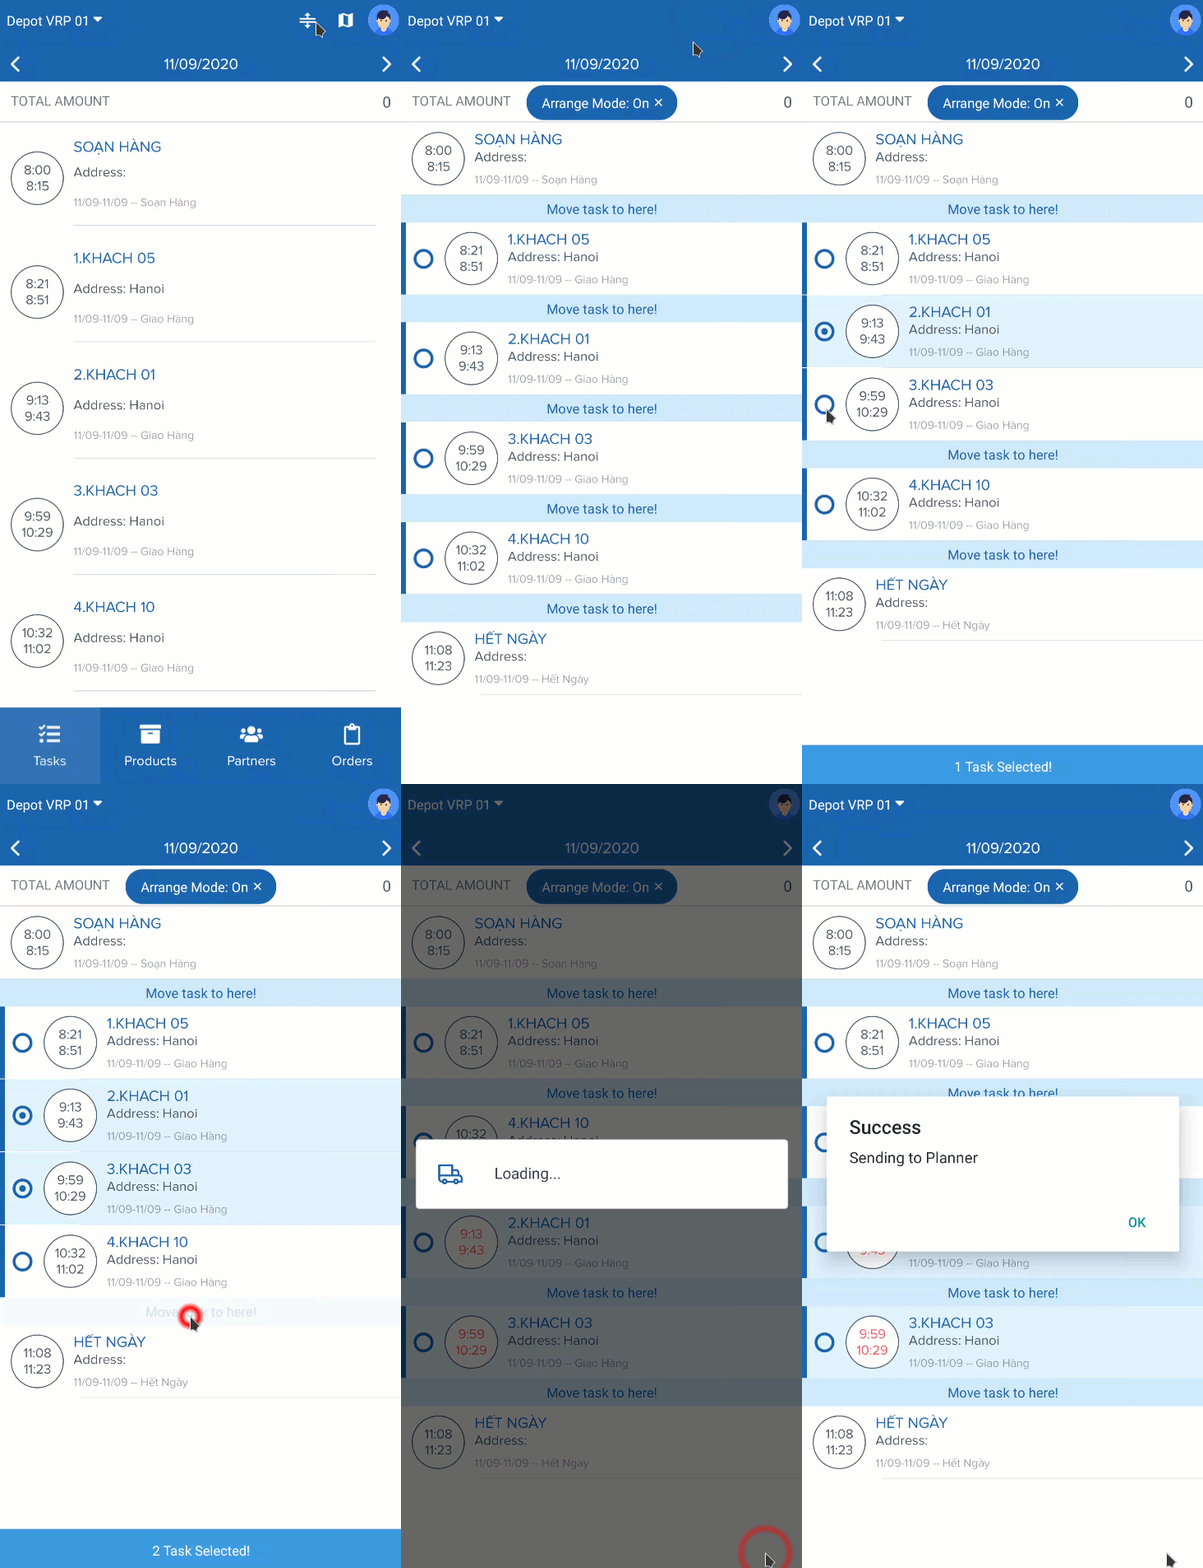
- Note: You cannot move In-progress and Completed tasks as well as any task before these tasks, even if they have not been executed. Furthermore, you cannot move any task to before the In-progress and Completed tasks
- If you are assigned multiple Delivery Trips, you can move all Stops within a Delivery Trip to the Delivery Trips that precede or follow that Delivery Trip. After doing so, the Mobile App will add the Stops of that Delivery Trip will to the Stop list of the destination Delivery Trip, reducing the total number of Delivery Trips on the task list
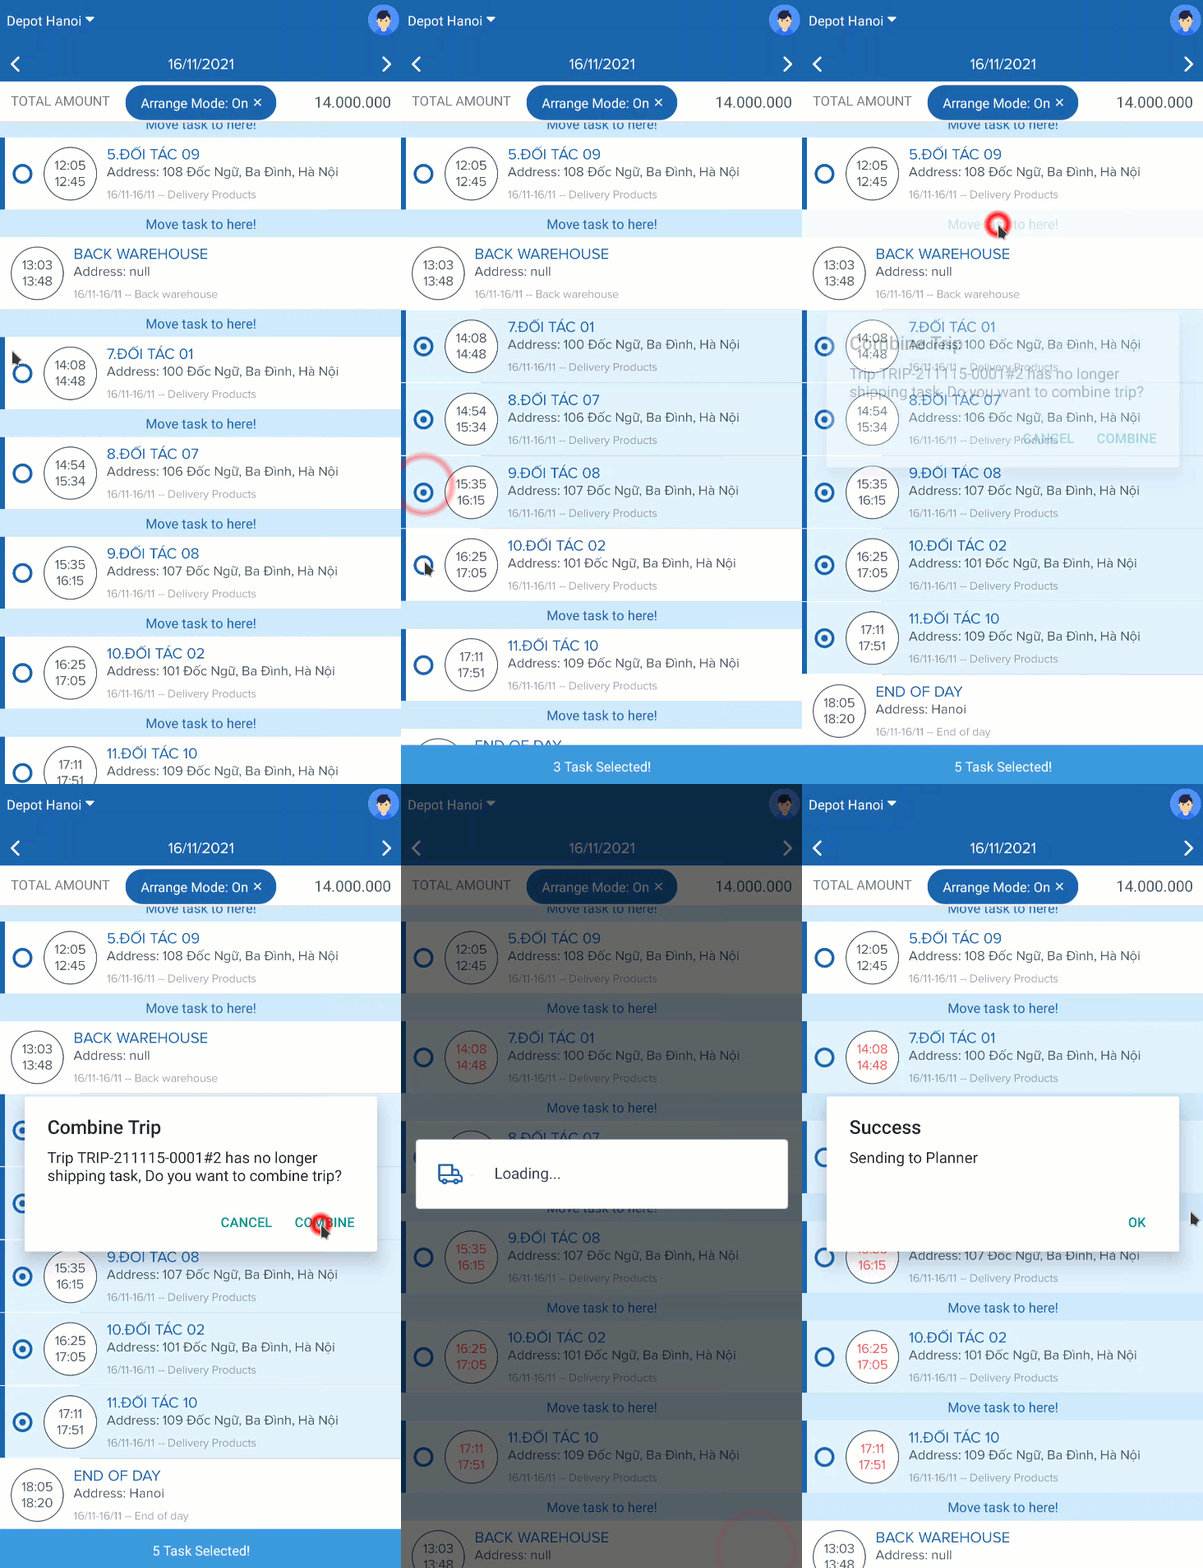
- After you have adjusted the Delivery Stop sequence, your dispatchers will be notified on the Web App. The detailed information is presented in the following article Route Plan Adjustments (Map View)
Updated about 1 month ago
